Smart curtains do it yourself
One day, after a hard day’s work, I came home and realized that I wanted to rest, not walk and close the curtains. I want to see them closed in the evening and open in the morning, while not making dances in front of the window. Googling different decisions, it was decided to do everything myself.
Due to numerous requests, I spread all my work on the transformation of conventional roller blinds into automated ones with remote control. Be careful, lots of pictures!
For a start about roller blinds:
')
It is a little about tasks:
It is necessary to add remote control to the usual roller blinds from the hardware store and connect them to the smart home on the openSource Home Assistant platform. And still need to keep the usual management for the rope.

Motor selection:
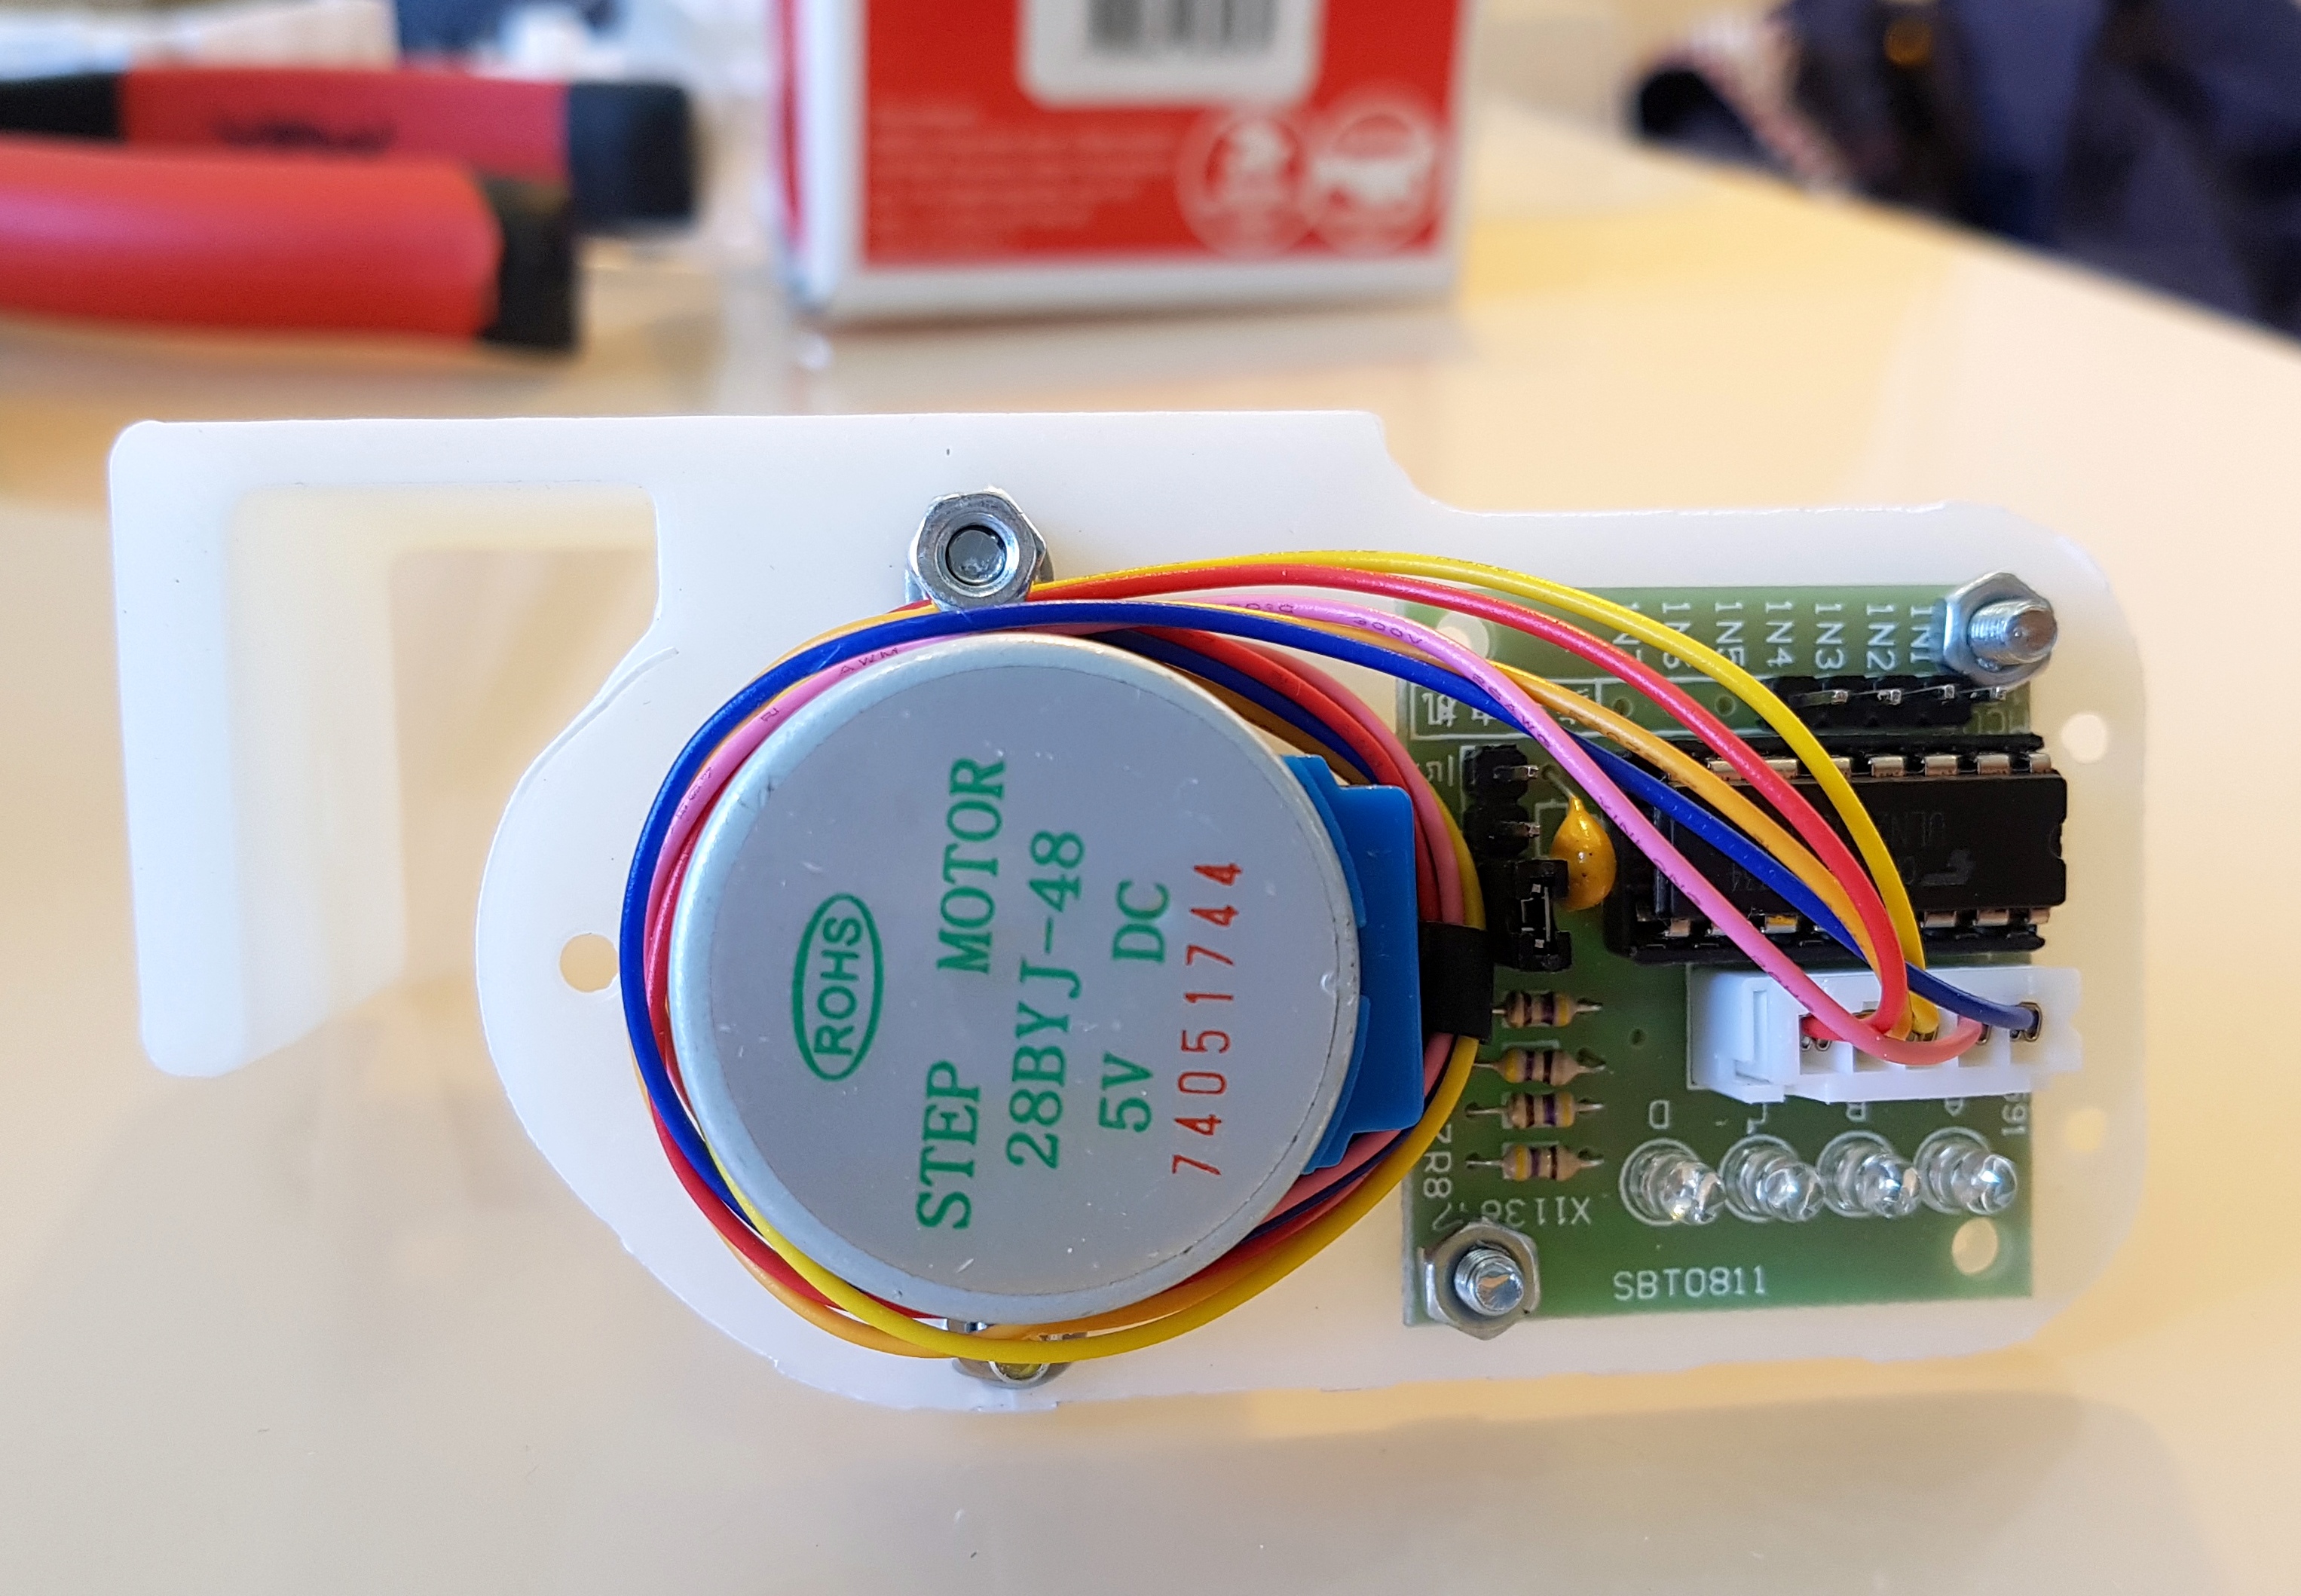
If everything is automated, then speed does not matter, so you can use engines with a gearbox. Collector engines are cheap, but not the most reliable thing for everyday use. Servos also have collector engines and plus not stable with constant rotation. A great option to look stepper motors. Silent, you can control the situation, cost a penny. As a result, a set of 5 28BYJ-48 engines with a ULN2003 driver cost me $ 10
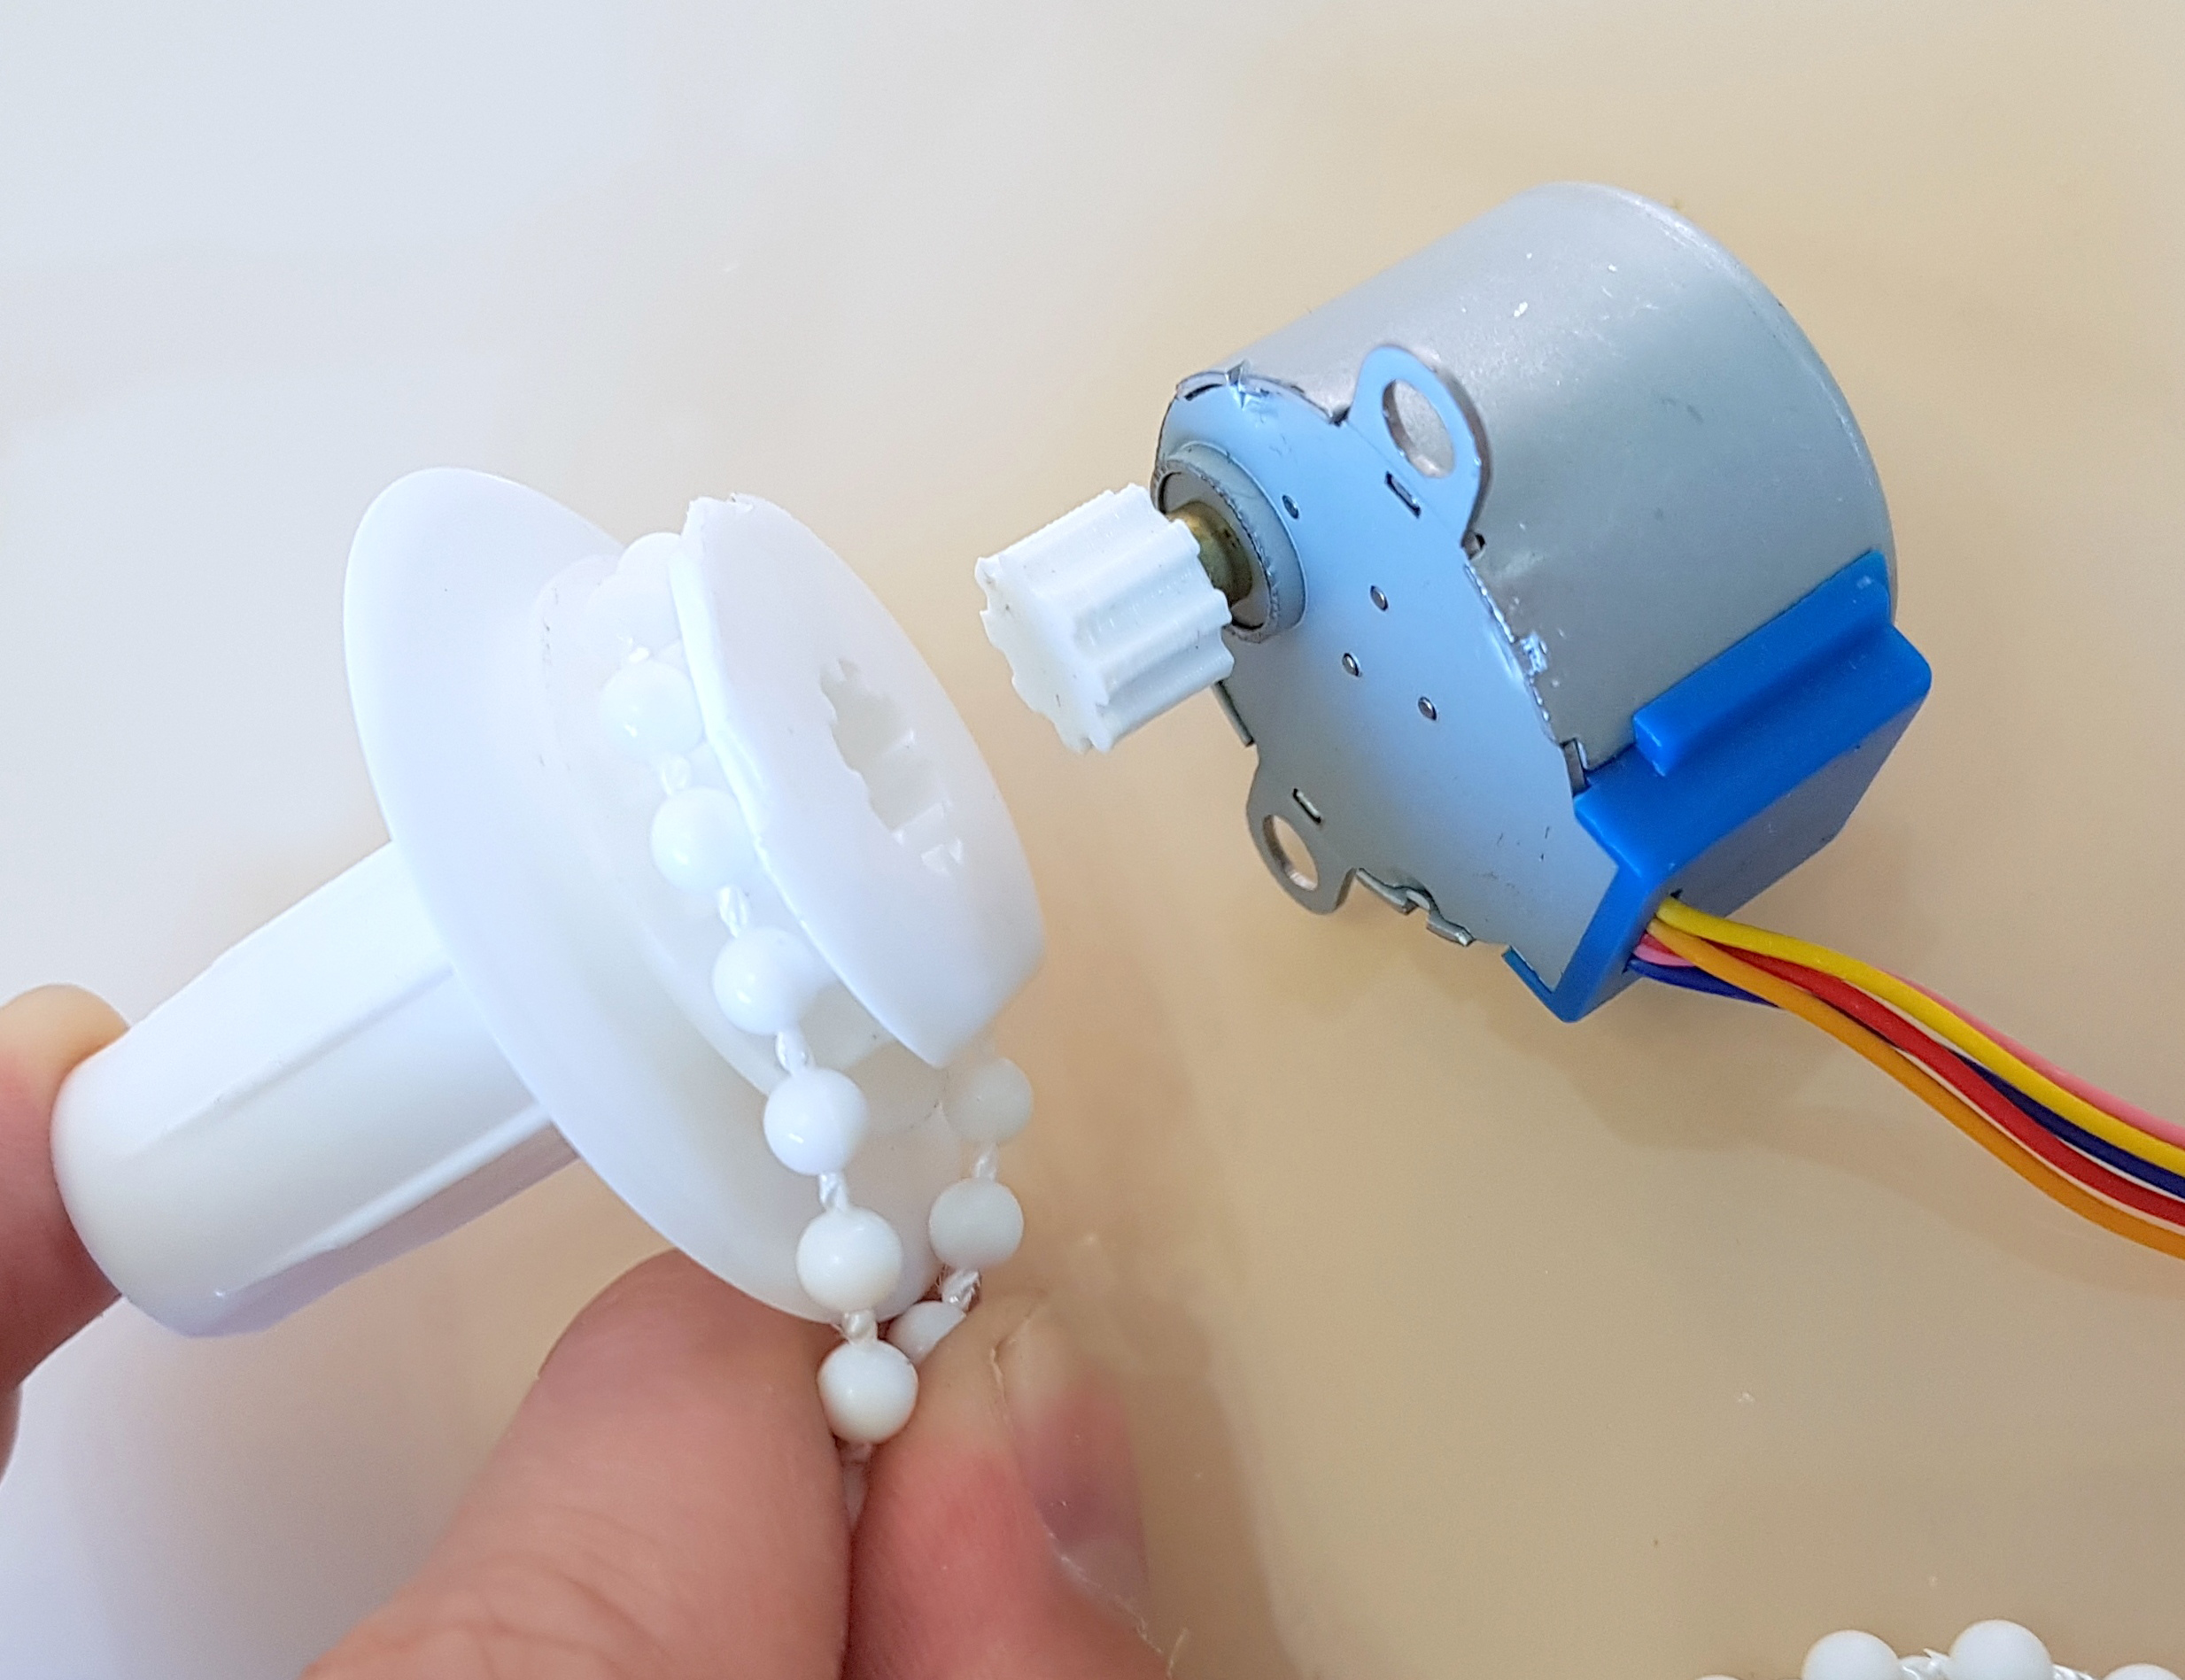
About the engine 28BYJ-48:
You can read more about it here .
There were questions about the power of this engine. Fears that he would be weak did not materialize. Rather, if you use the full-step mode, the engine is very frail; if you use half-step, then the shaft cannot be stopped with bare hands. To whom there will be little power, there are many articles on the Internet on how to raise the voltage, turn it into bipolar and other improvements.
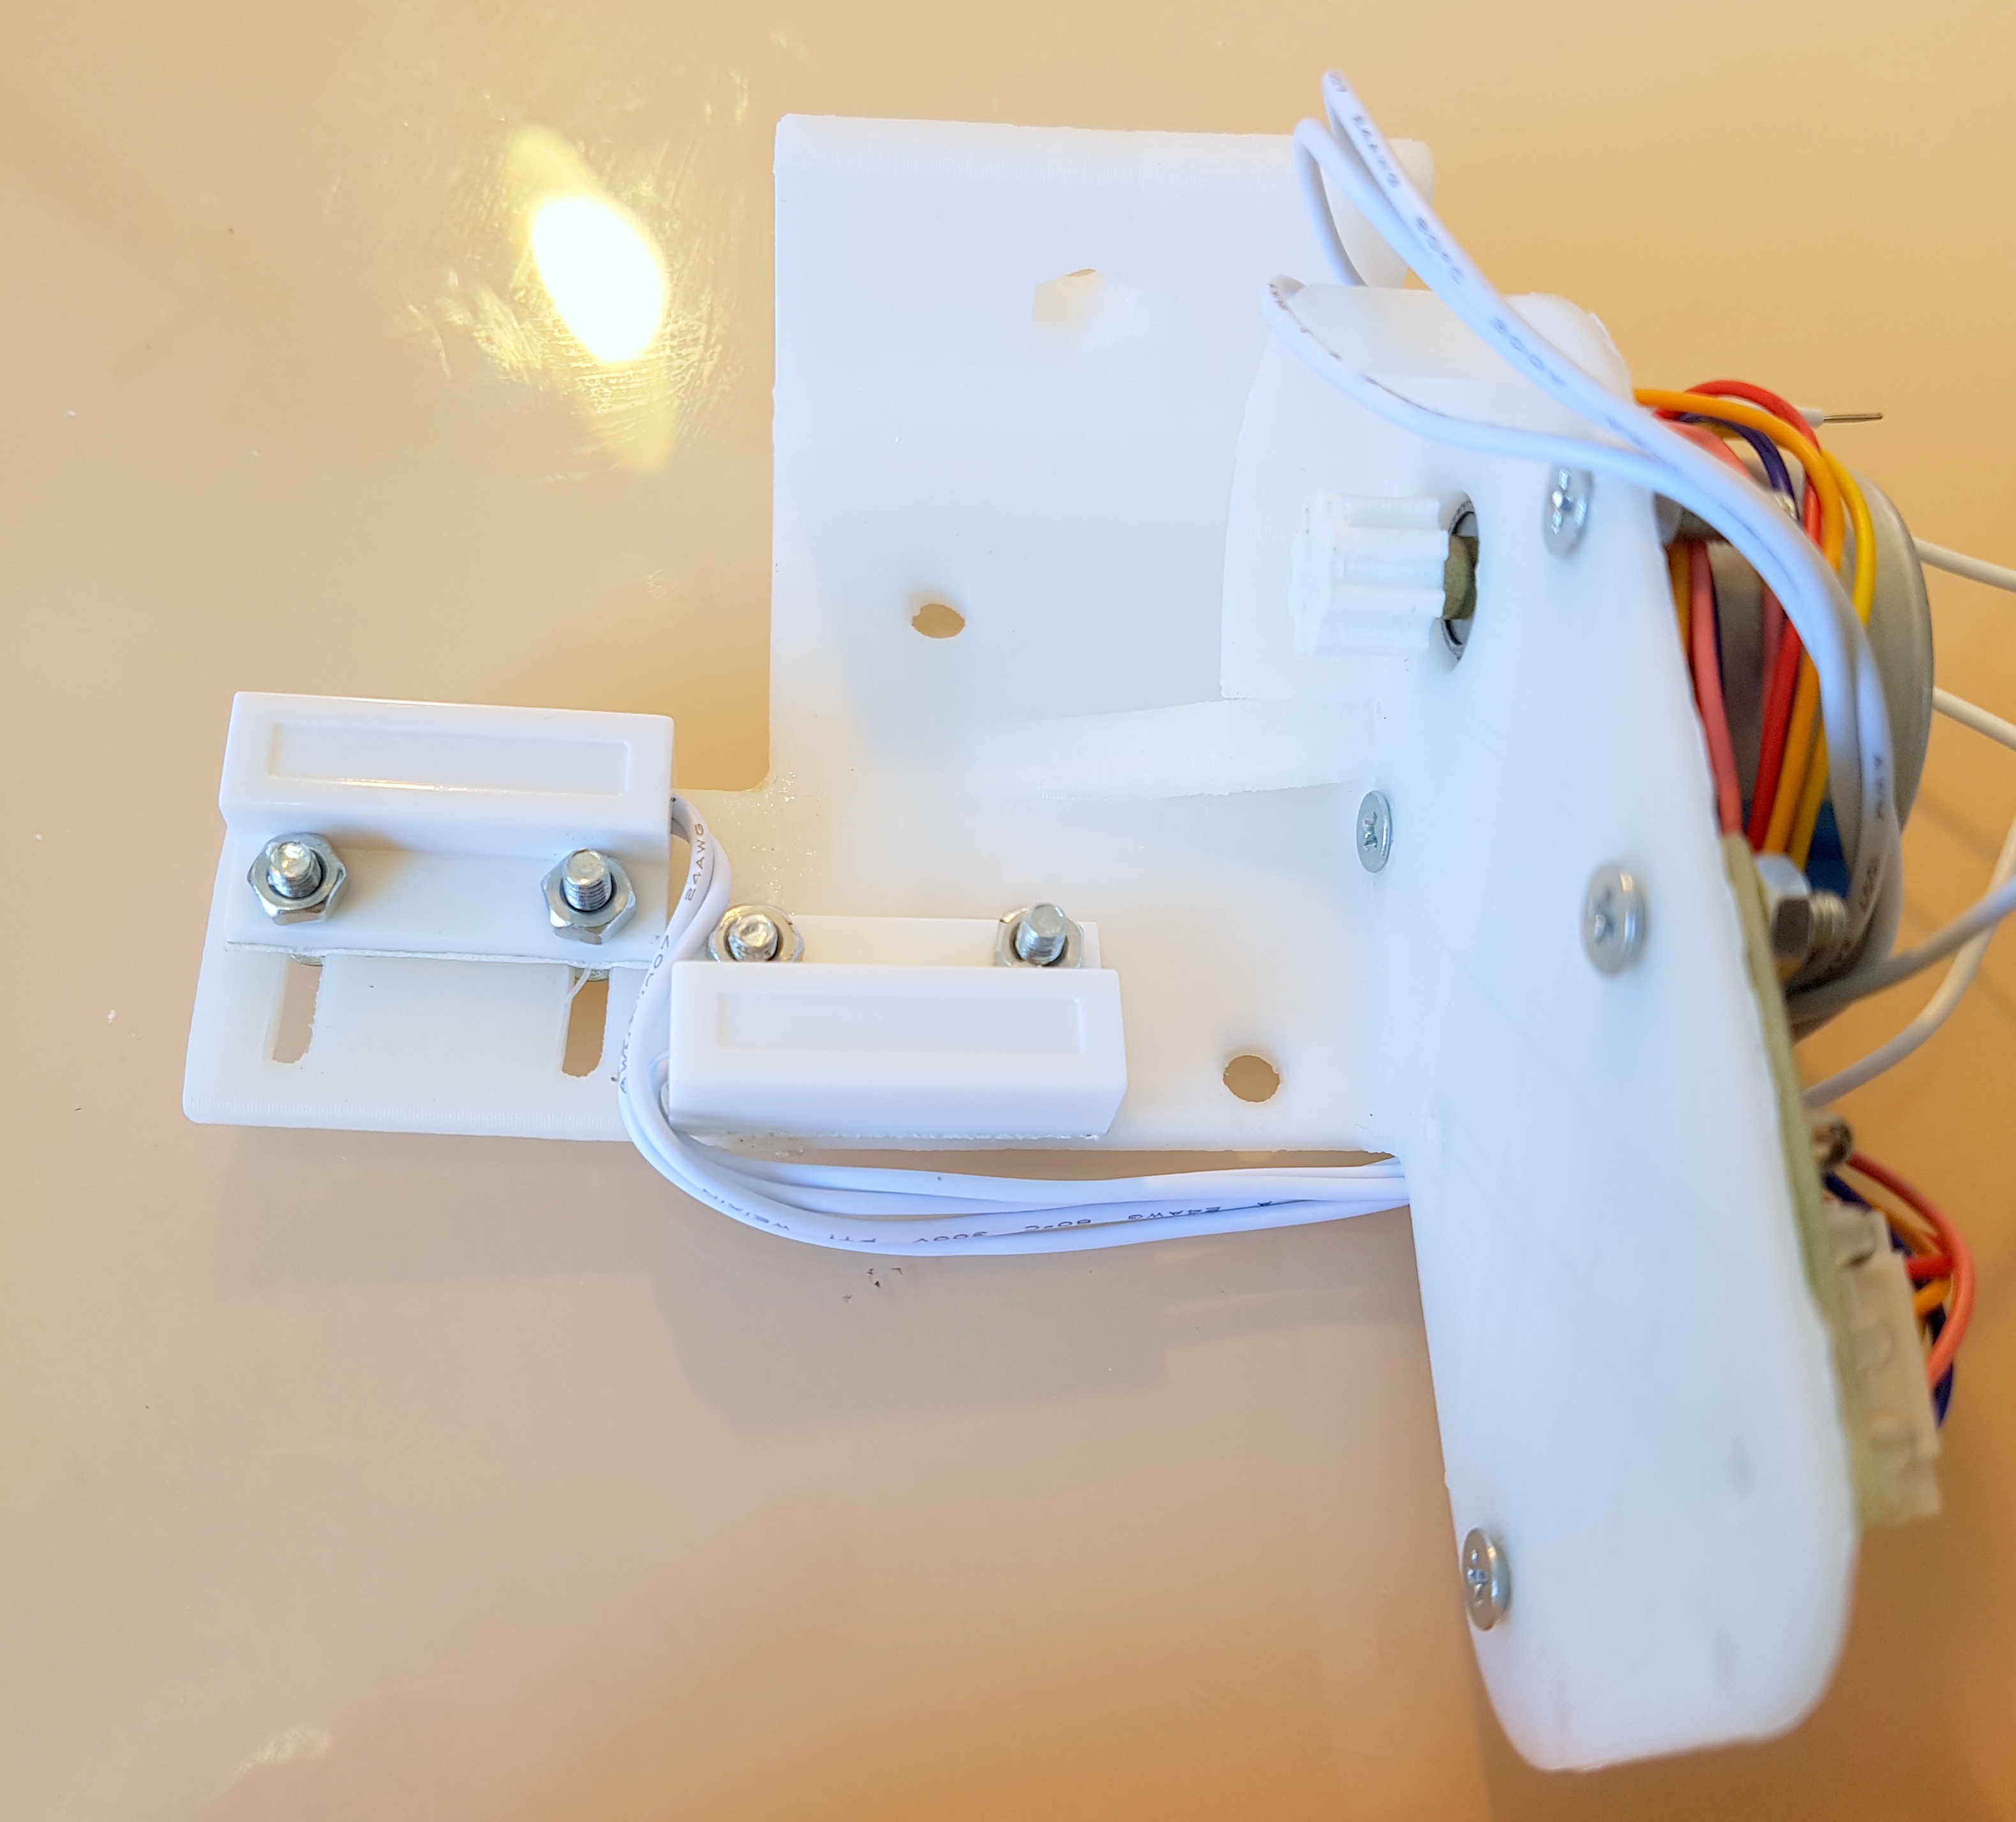
About sensors:
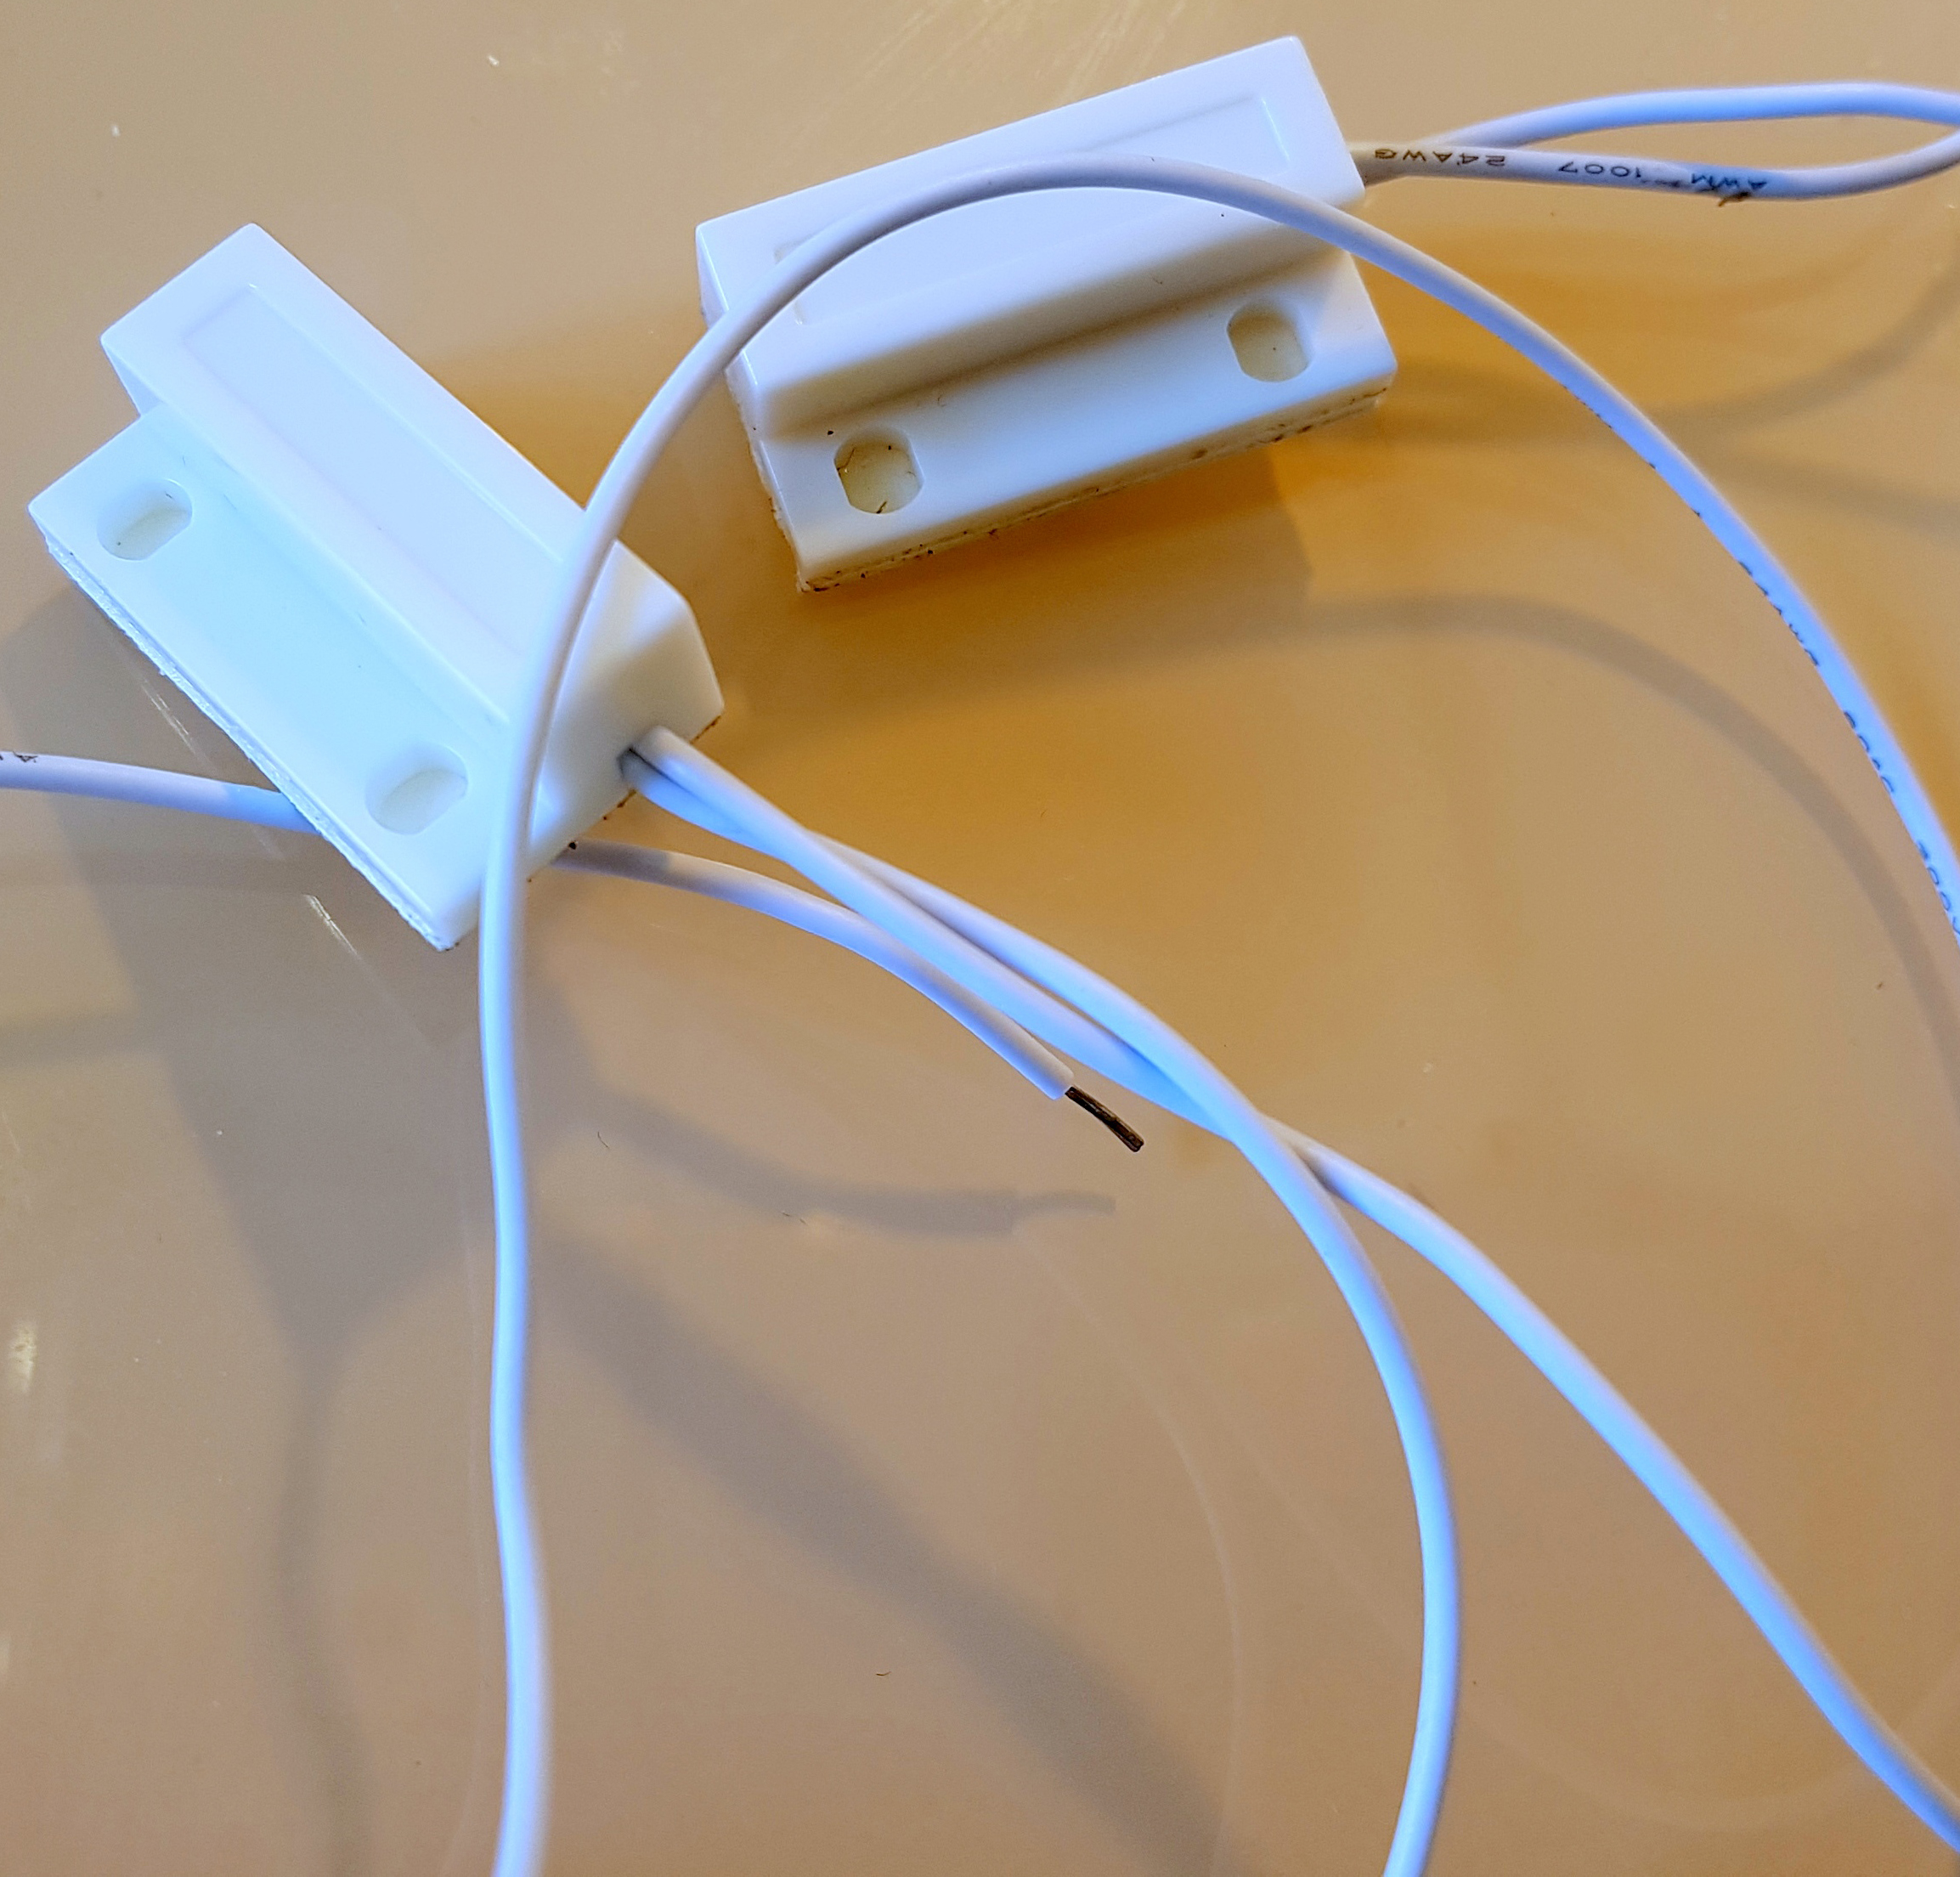
Since we still have manual control, and we don’t want to drive the engine for nothing, curtain position sensors are needed. At least one sensor is required at one end, but two are preferable. You can use any end, optical, etc., but I personally chose reed, because To glue a neodymium magnet on the other hand is very simple and it should work stably and durably. I chose the reed switches for aesthetics already in the case. Plus provided for setting the distance from the shaft. Height can be adjusted by spacers.
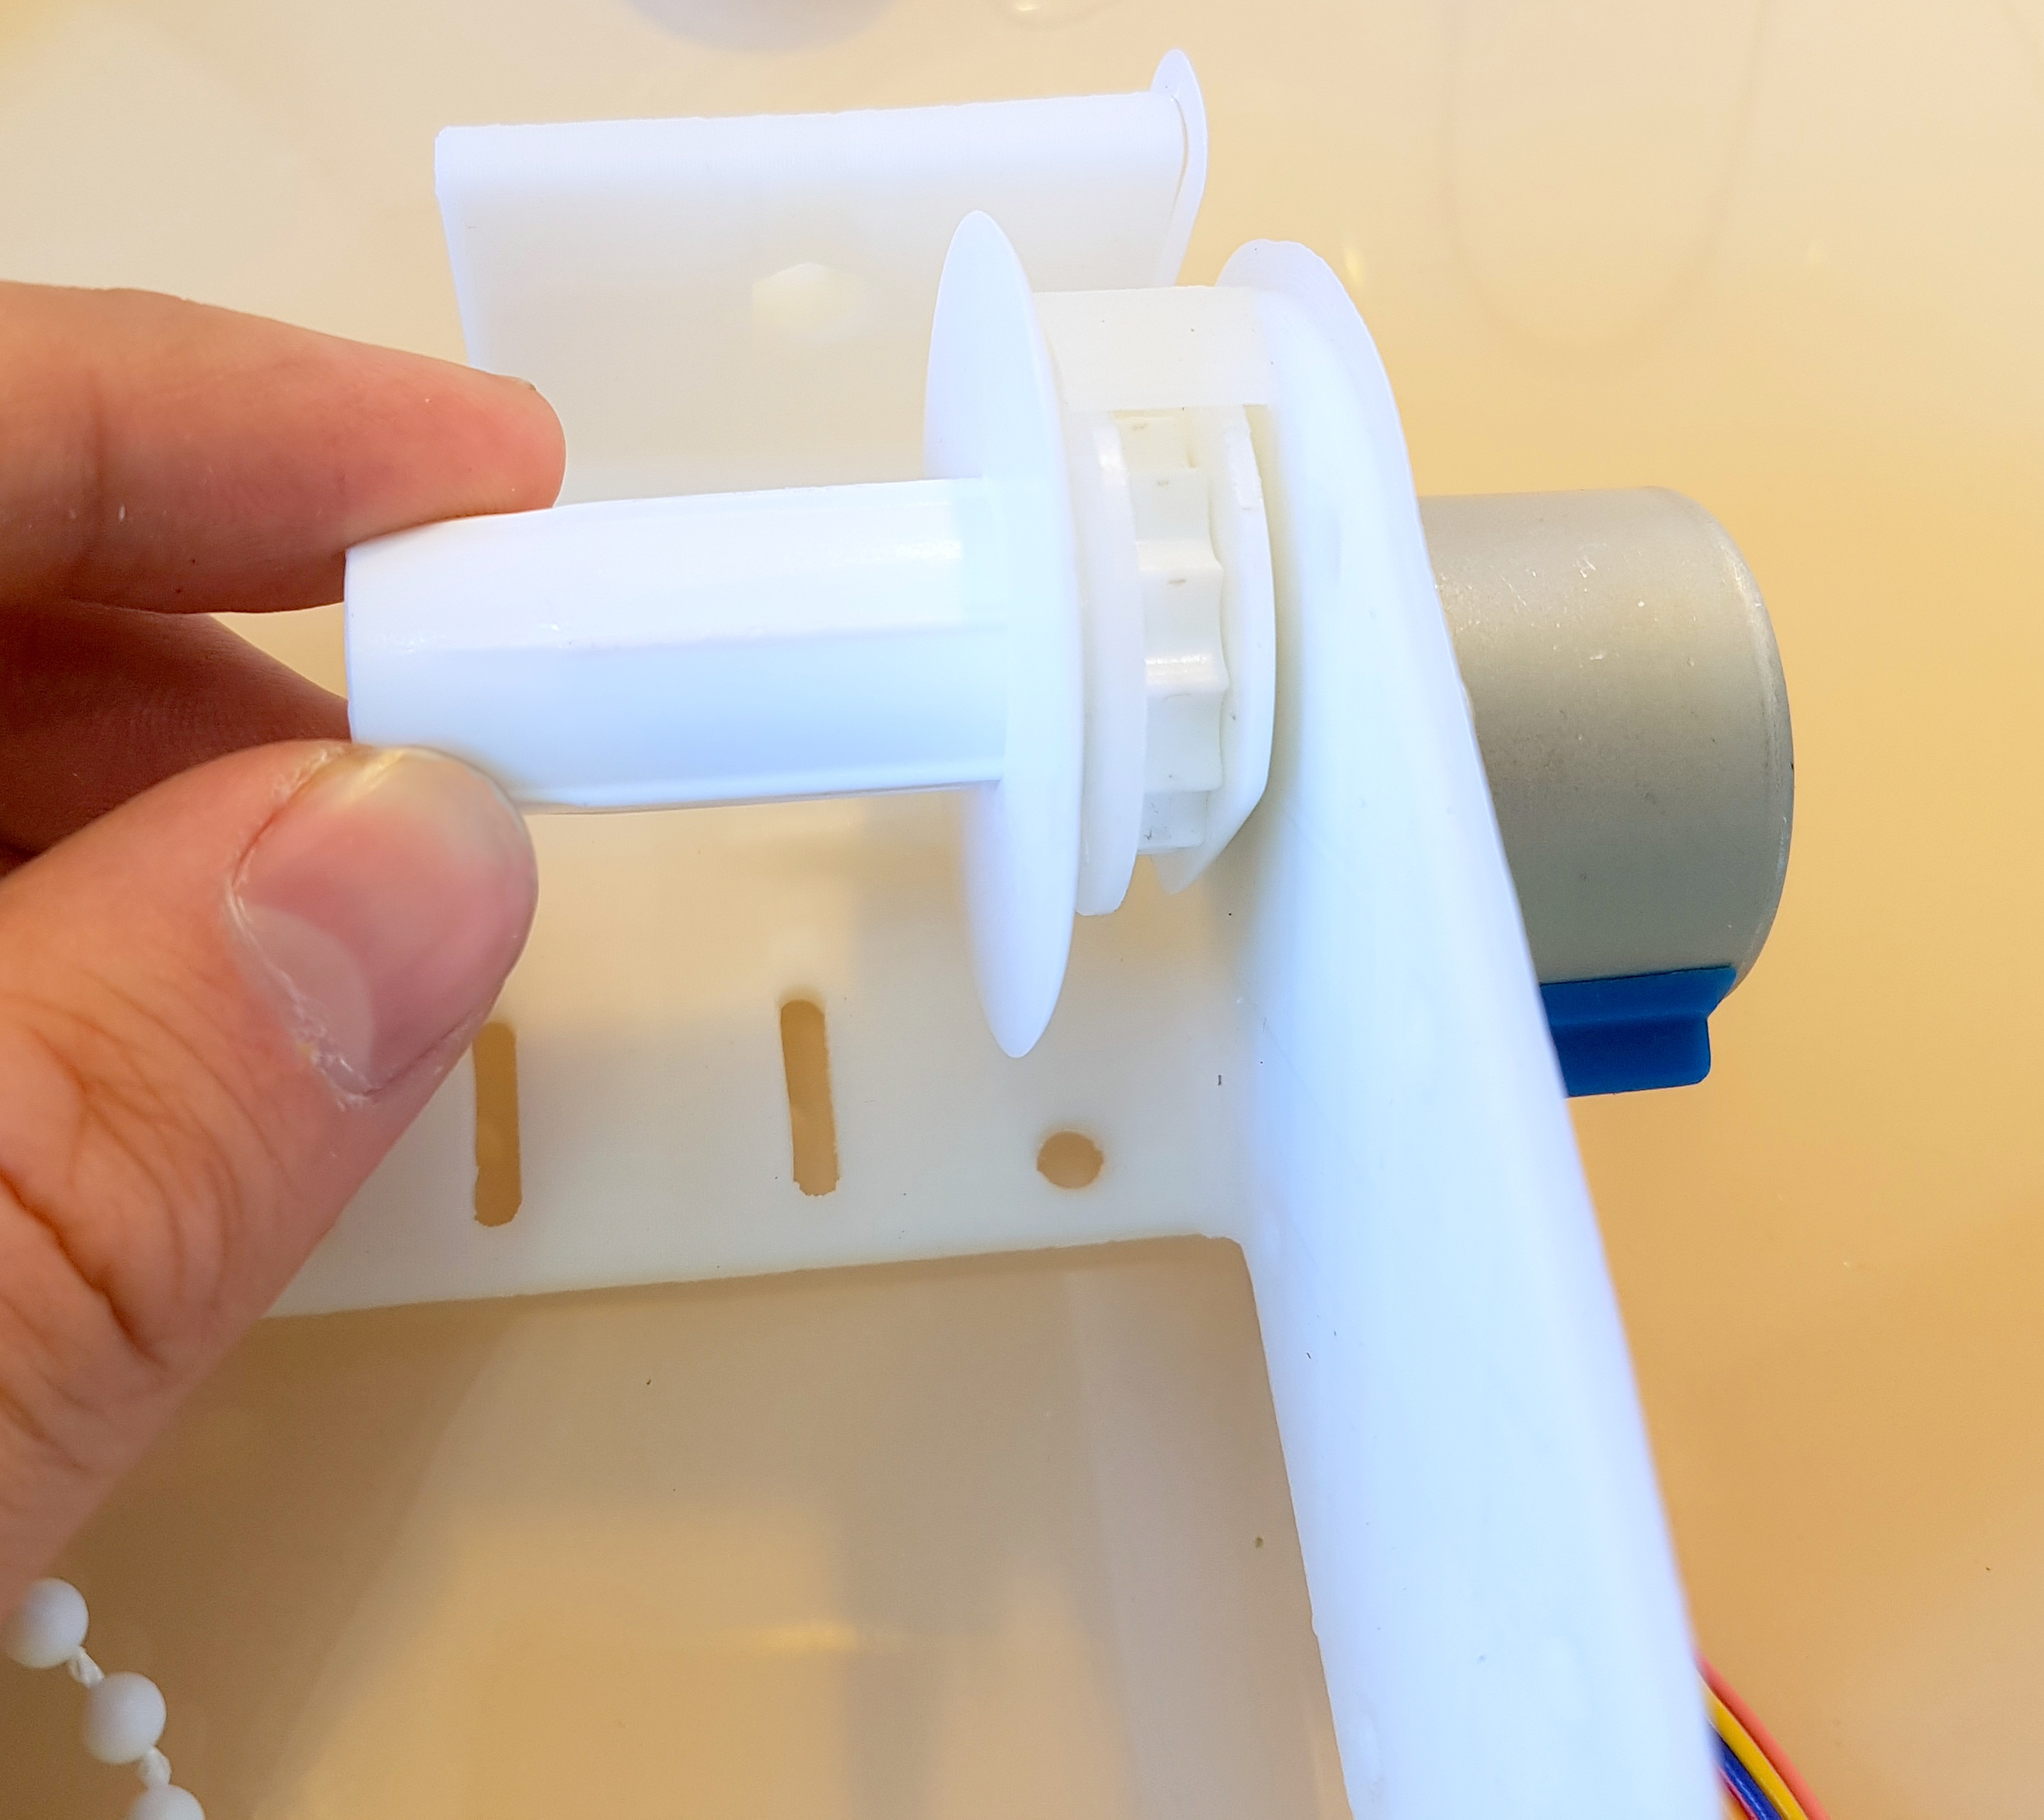
About mounting structure:
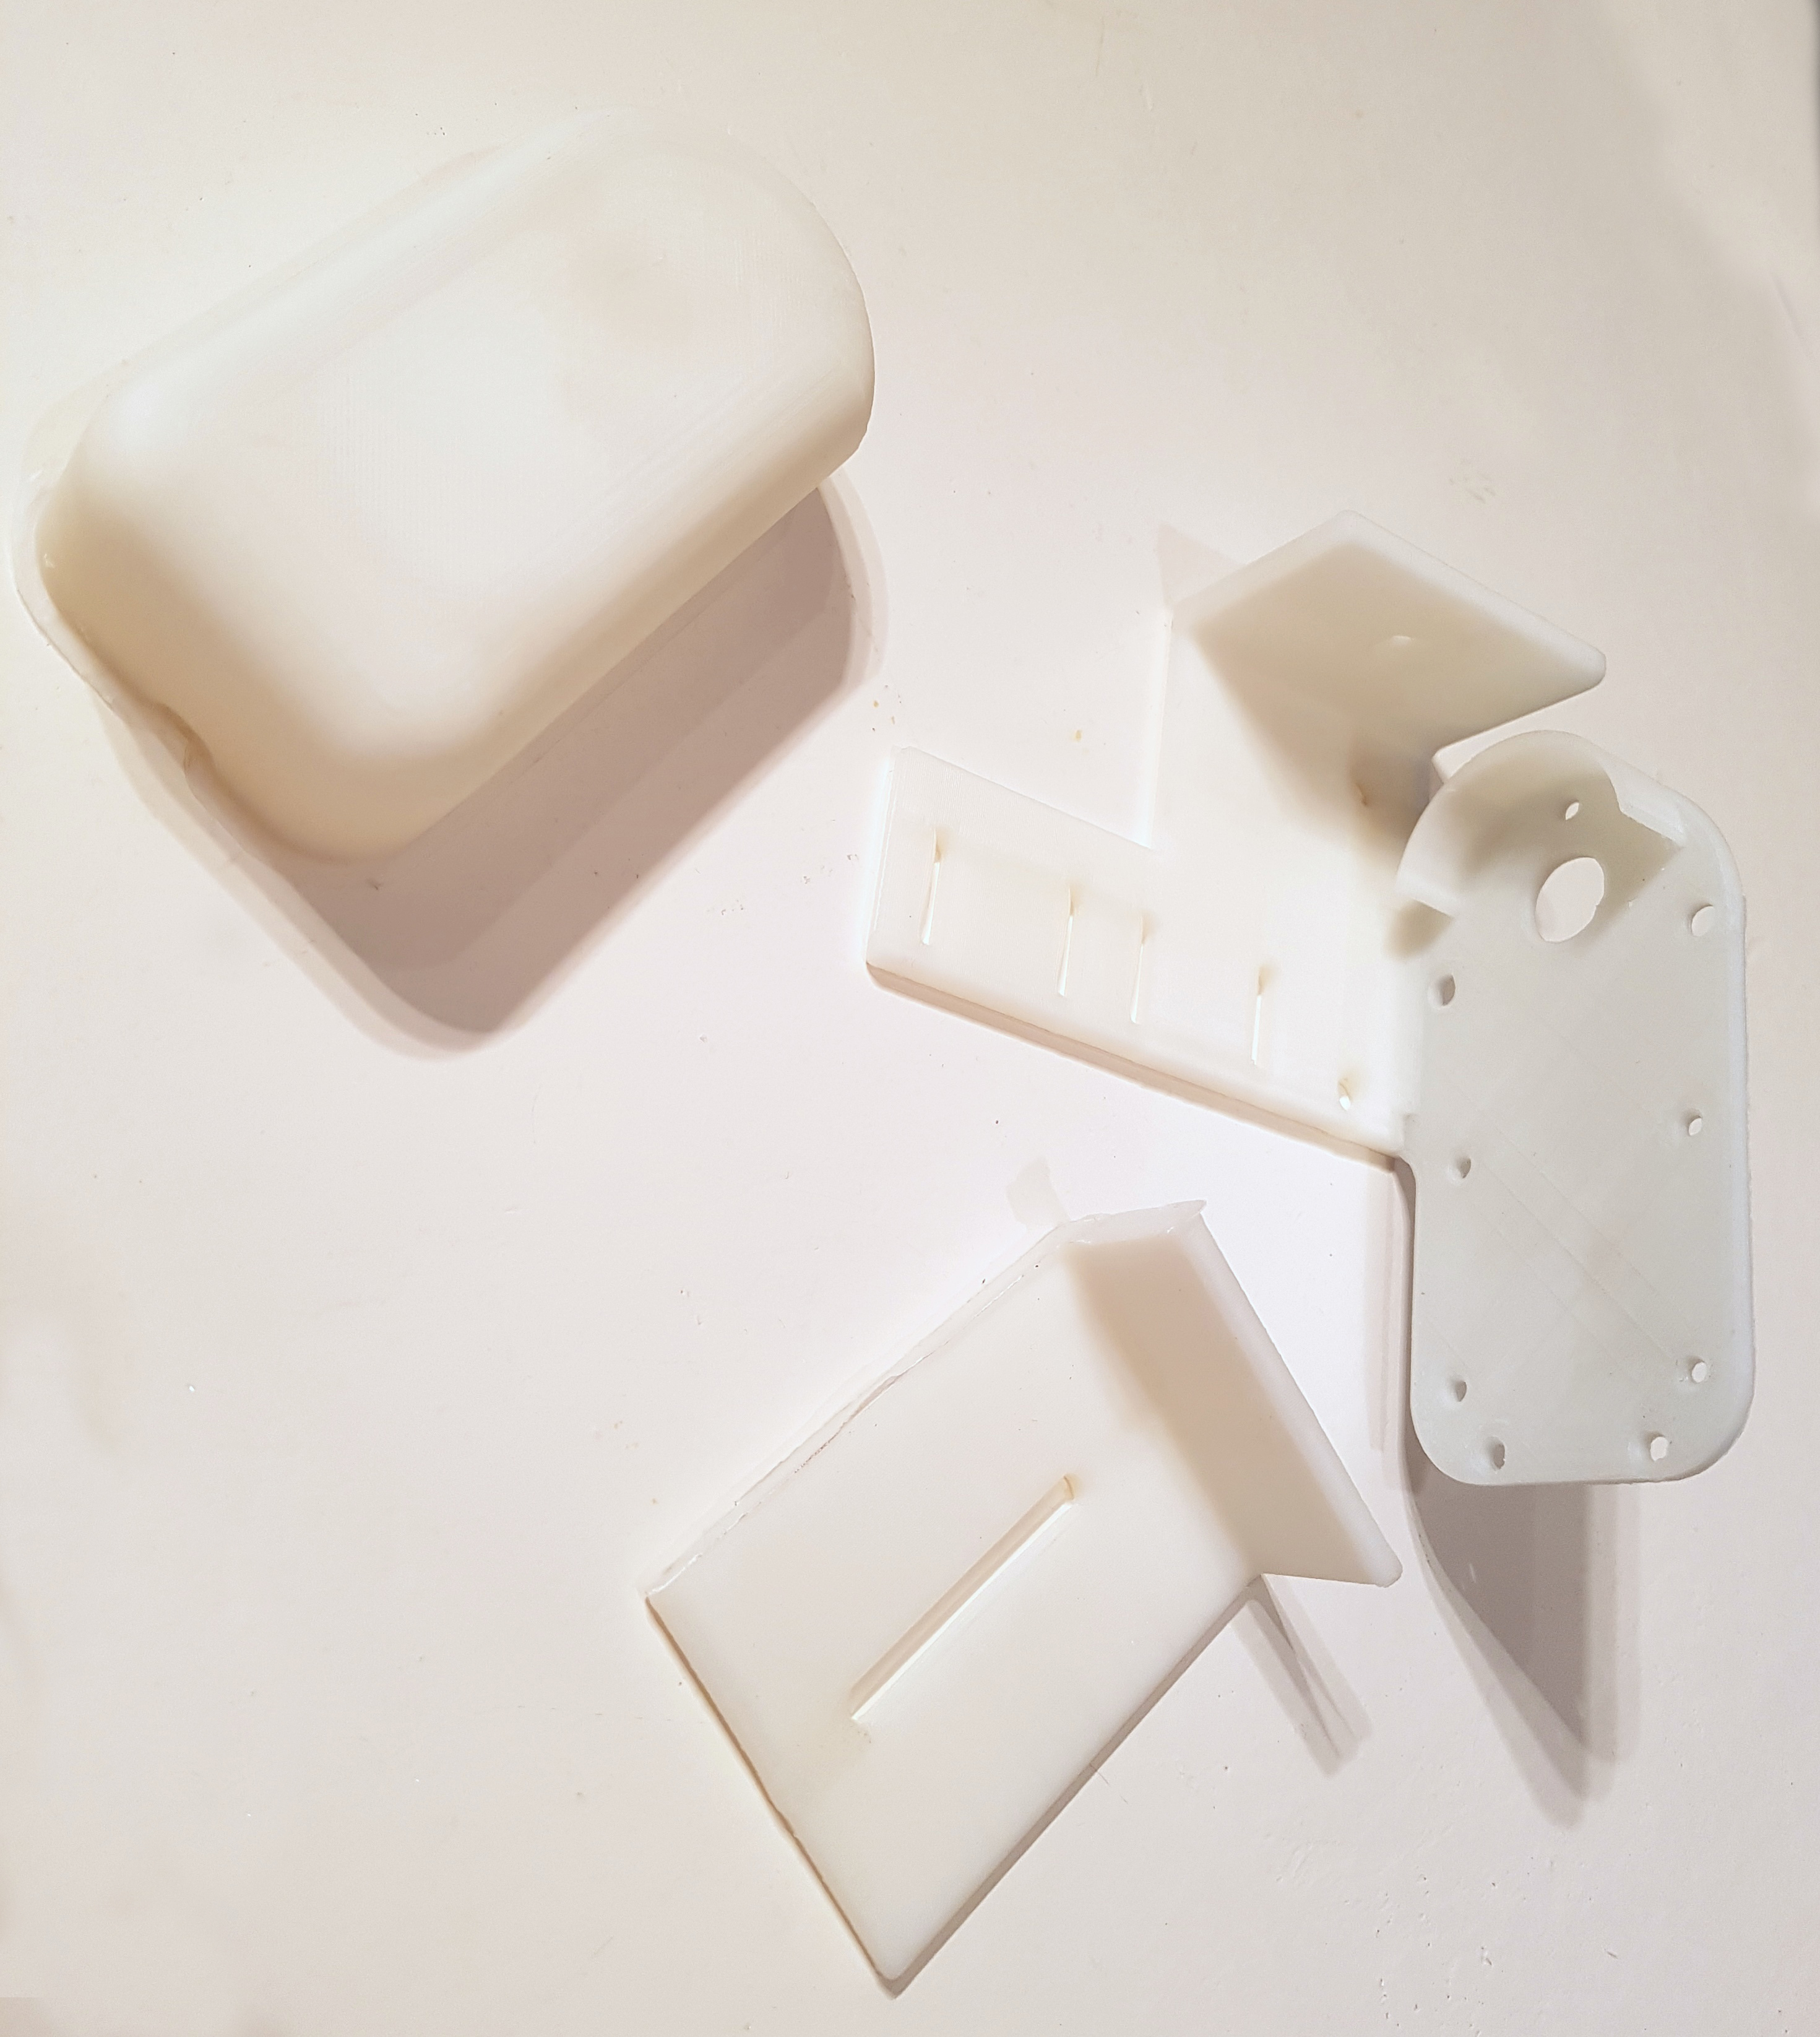
The task was to design the case as simple as possible for manufacturing on a 3D printer with minimal modifications. Simulated in Fusion 360. A complete mount clings to the top of the window, but such a design on an FDM printer will be difficult to do with the necessary strength requirements, so a single screw design for adjustment was invented.
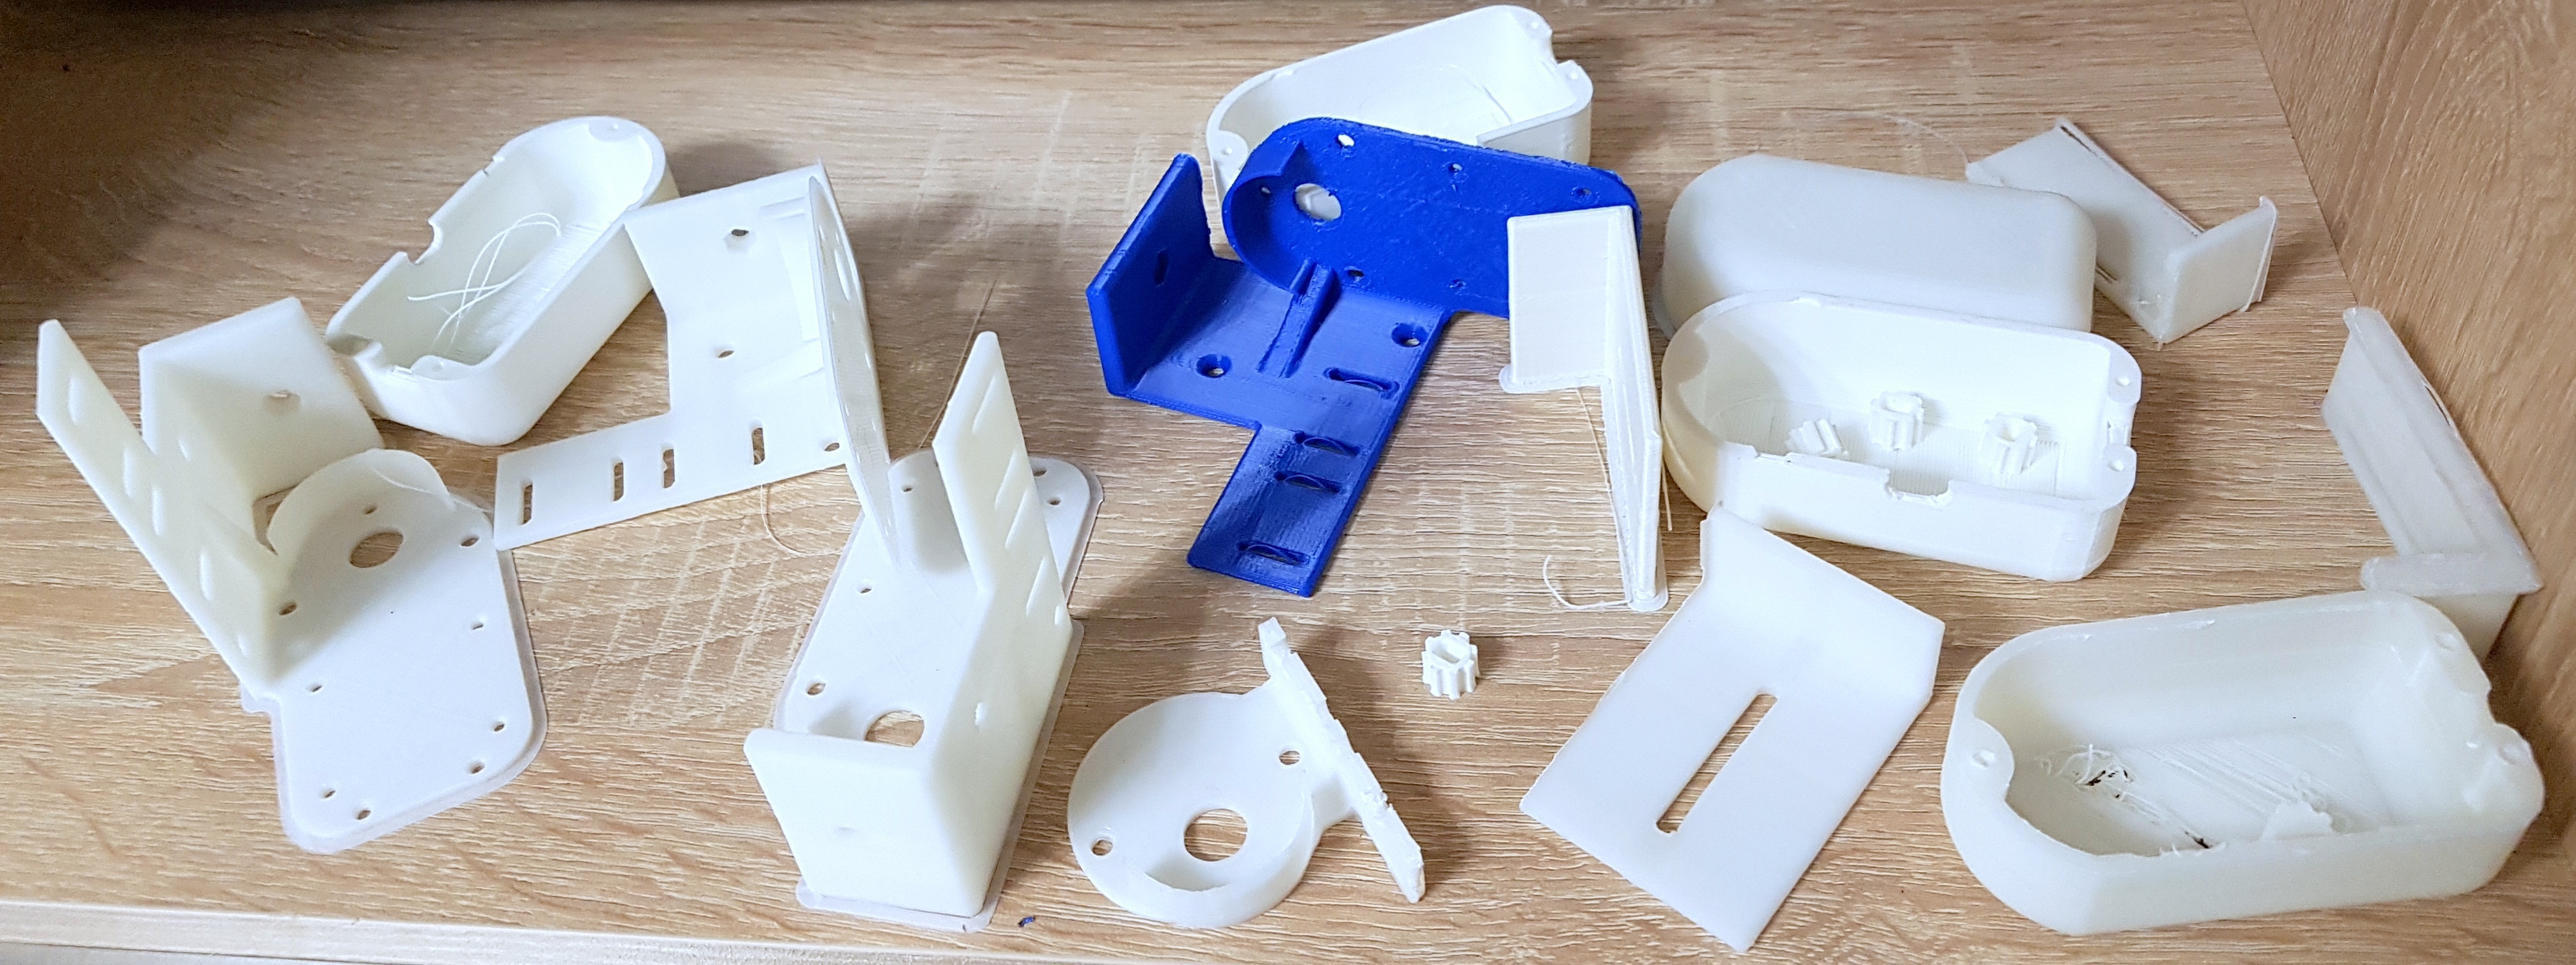
Total got three parts for 3D printing. Link to download 3d models .
The main part for the engine, the control board on the ULM2003, the mounting of reed switches, engines, fishing lines to stabilize the curtains, and the adjusting screw.
Cover to close all this disgrace. Clamp or different hook.
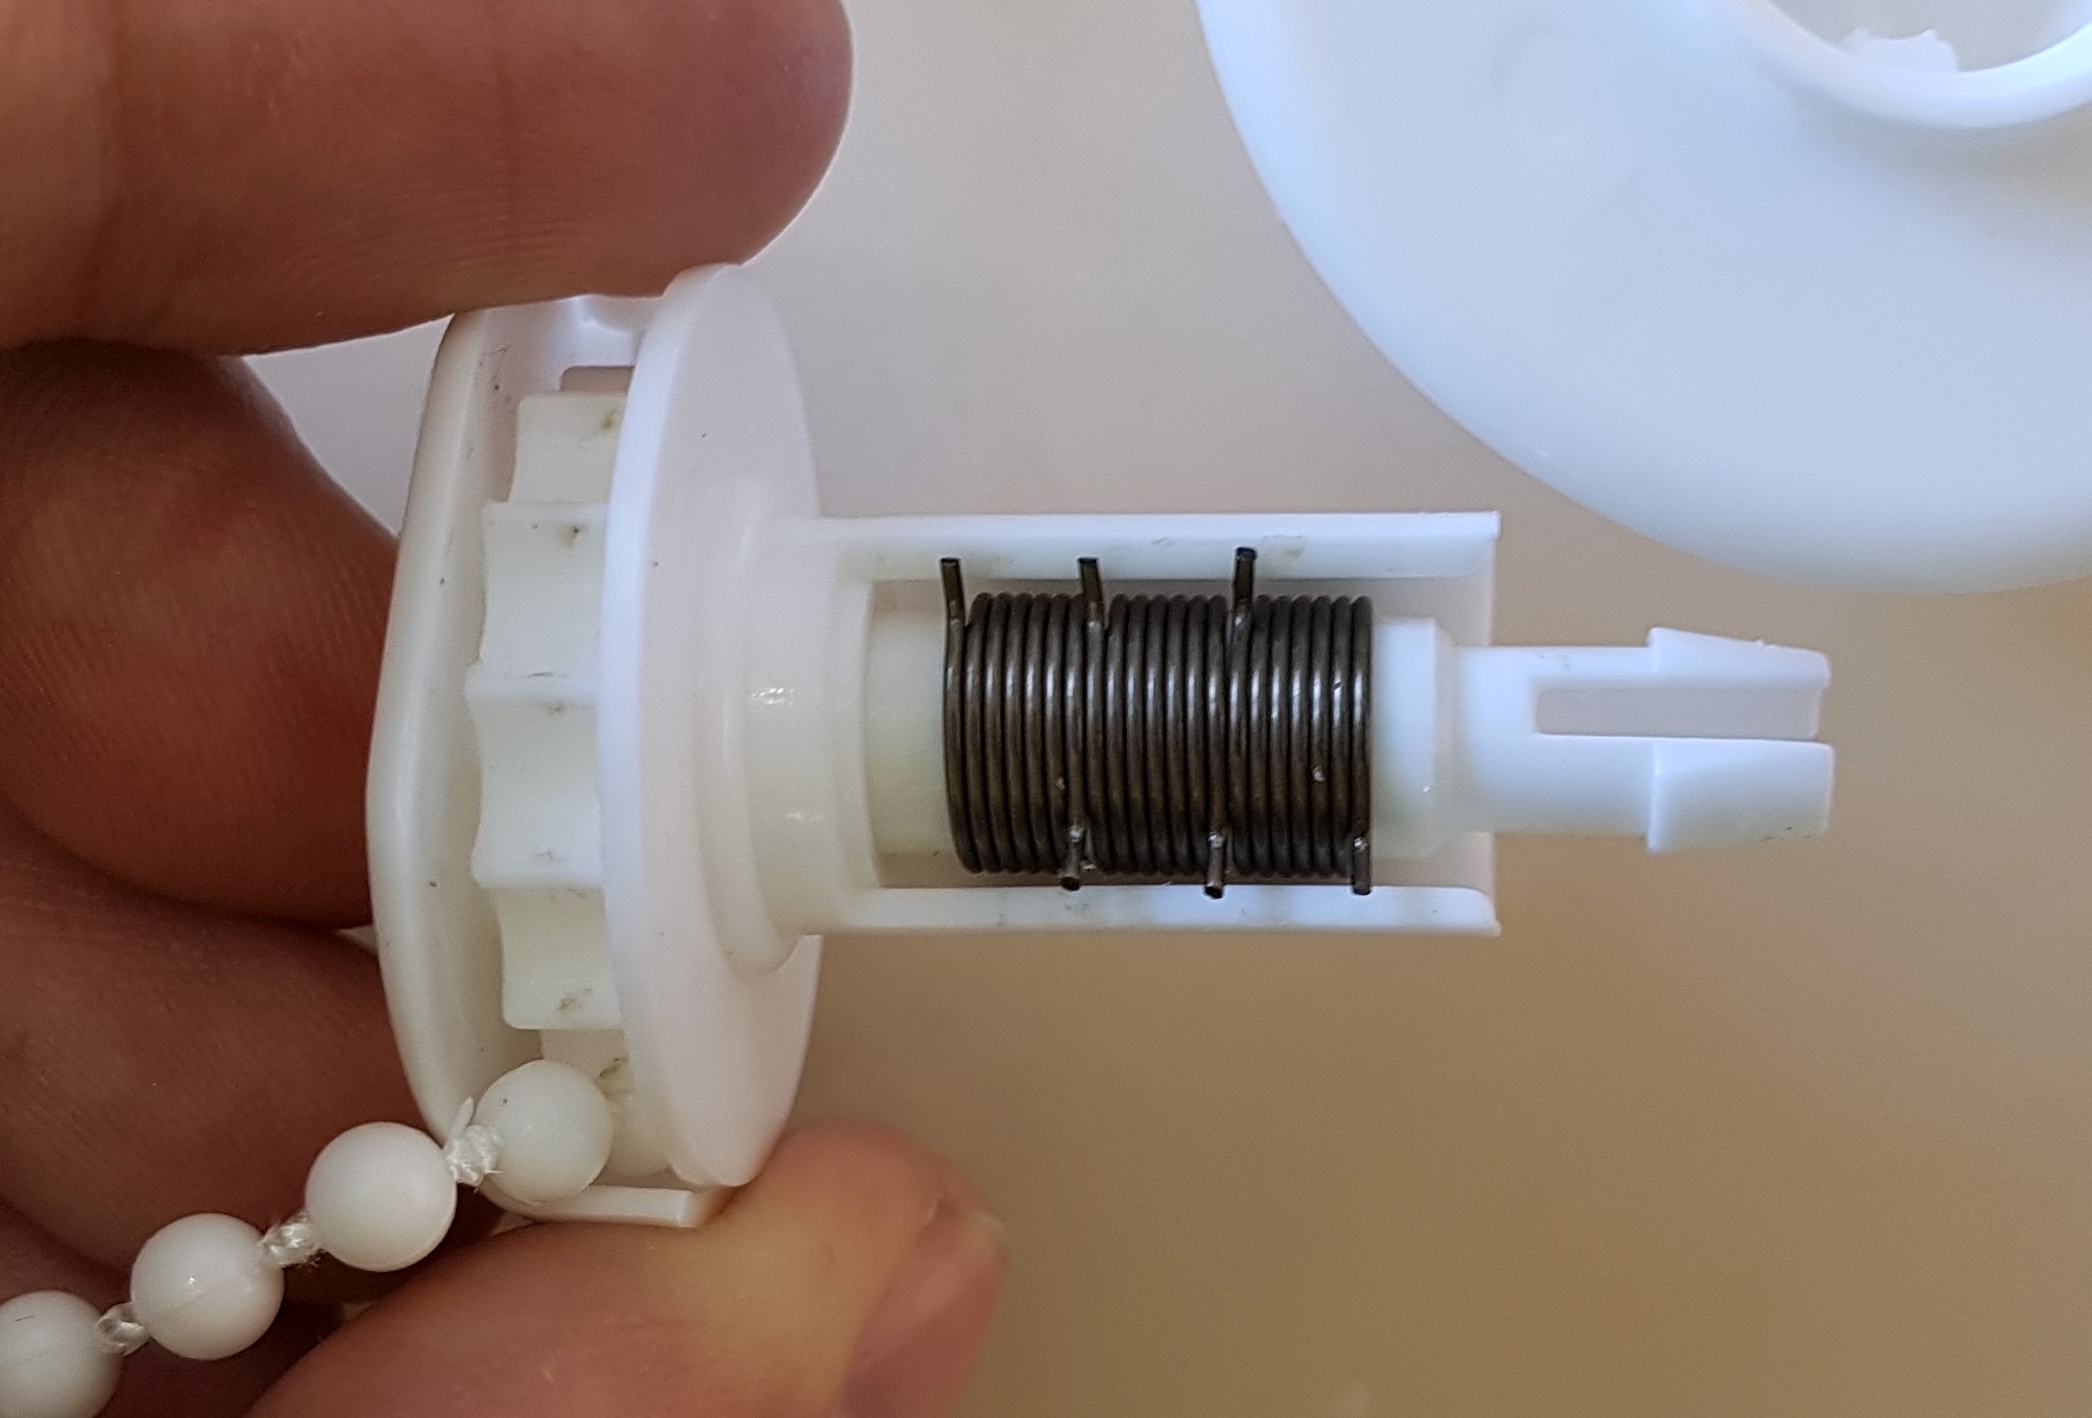
The design of the curtains itself contains several springs, which work like a brake if you pull the curtains (the spring tightens) or lets go if you twist the rope.
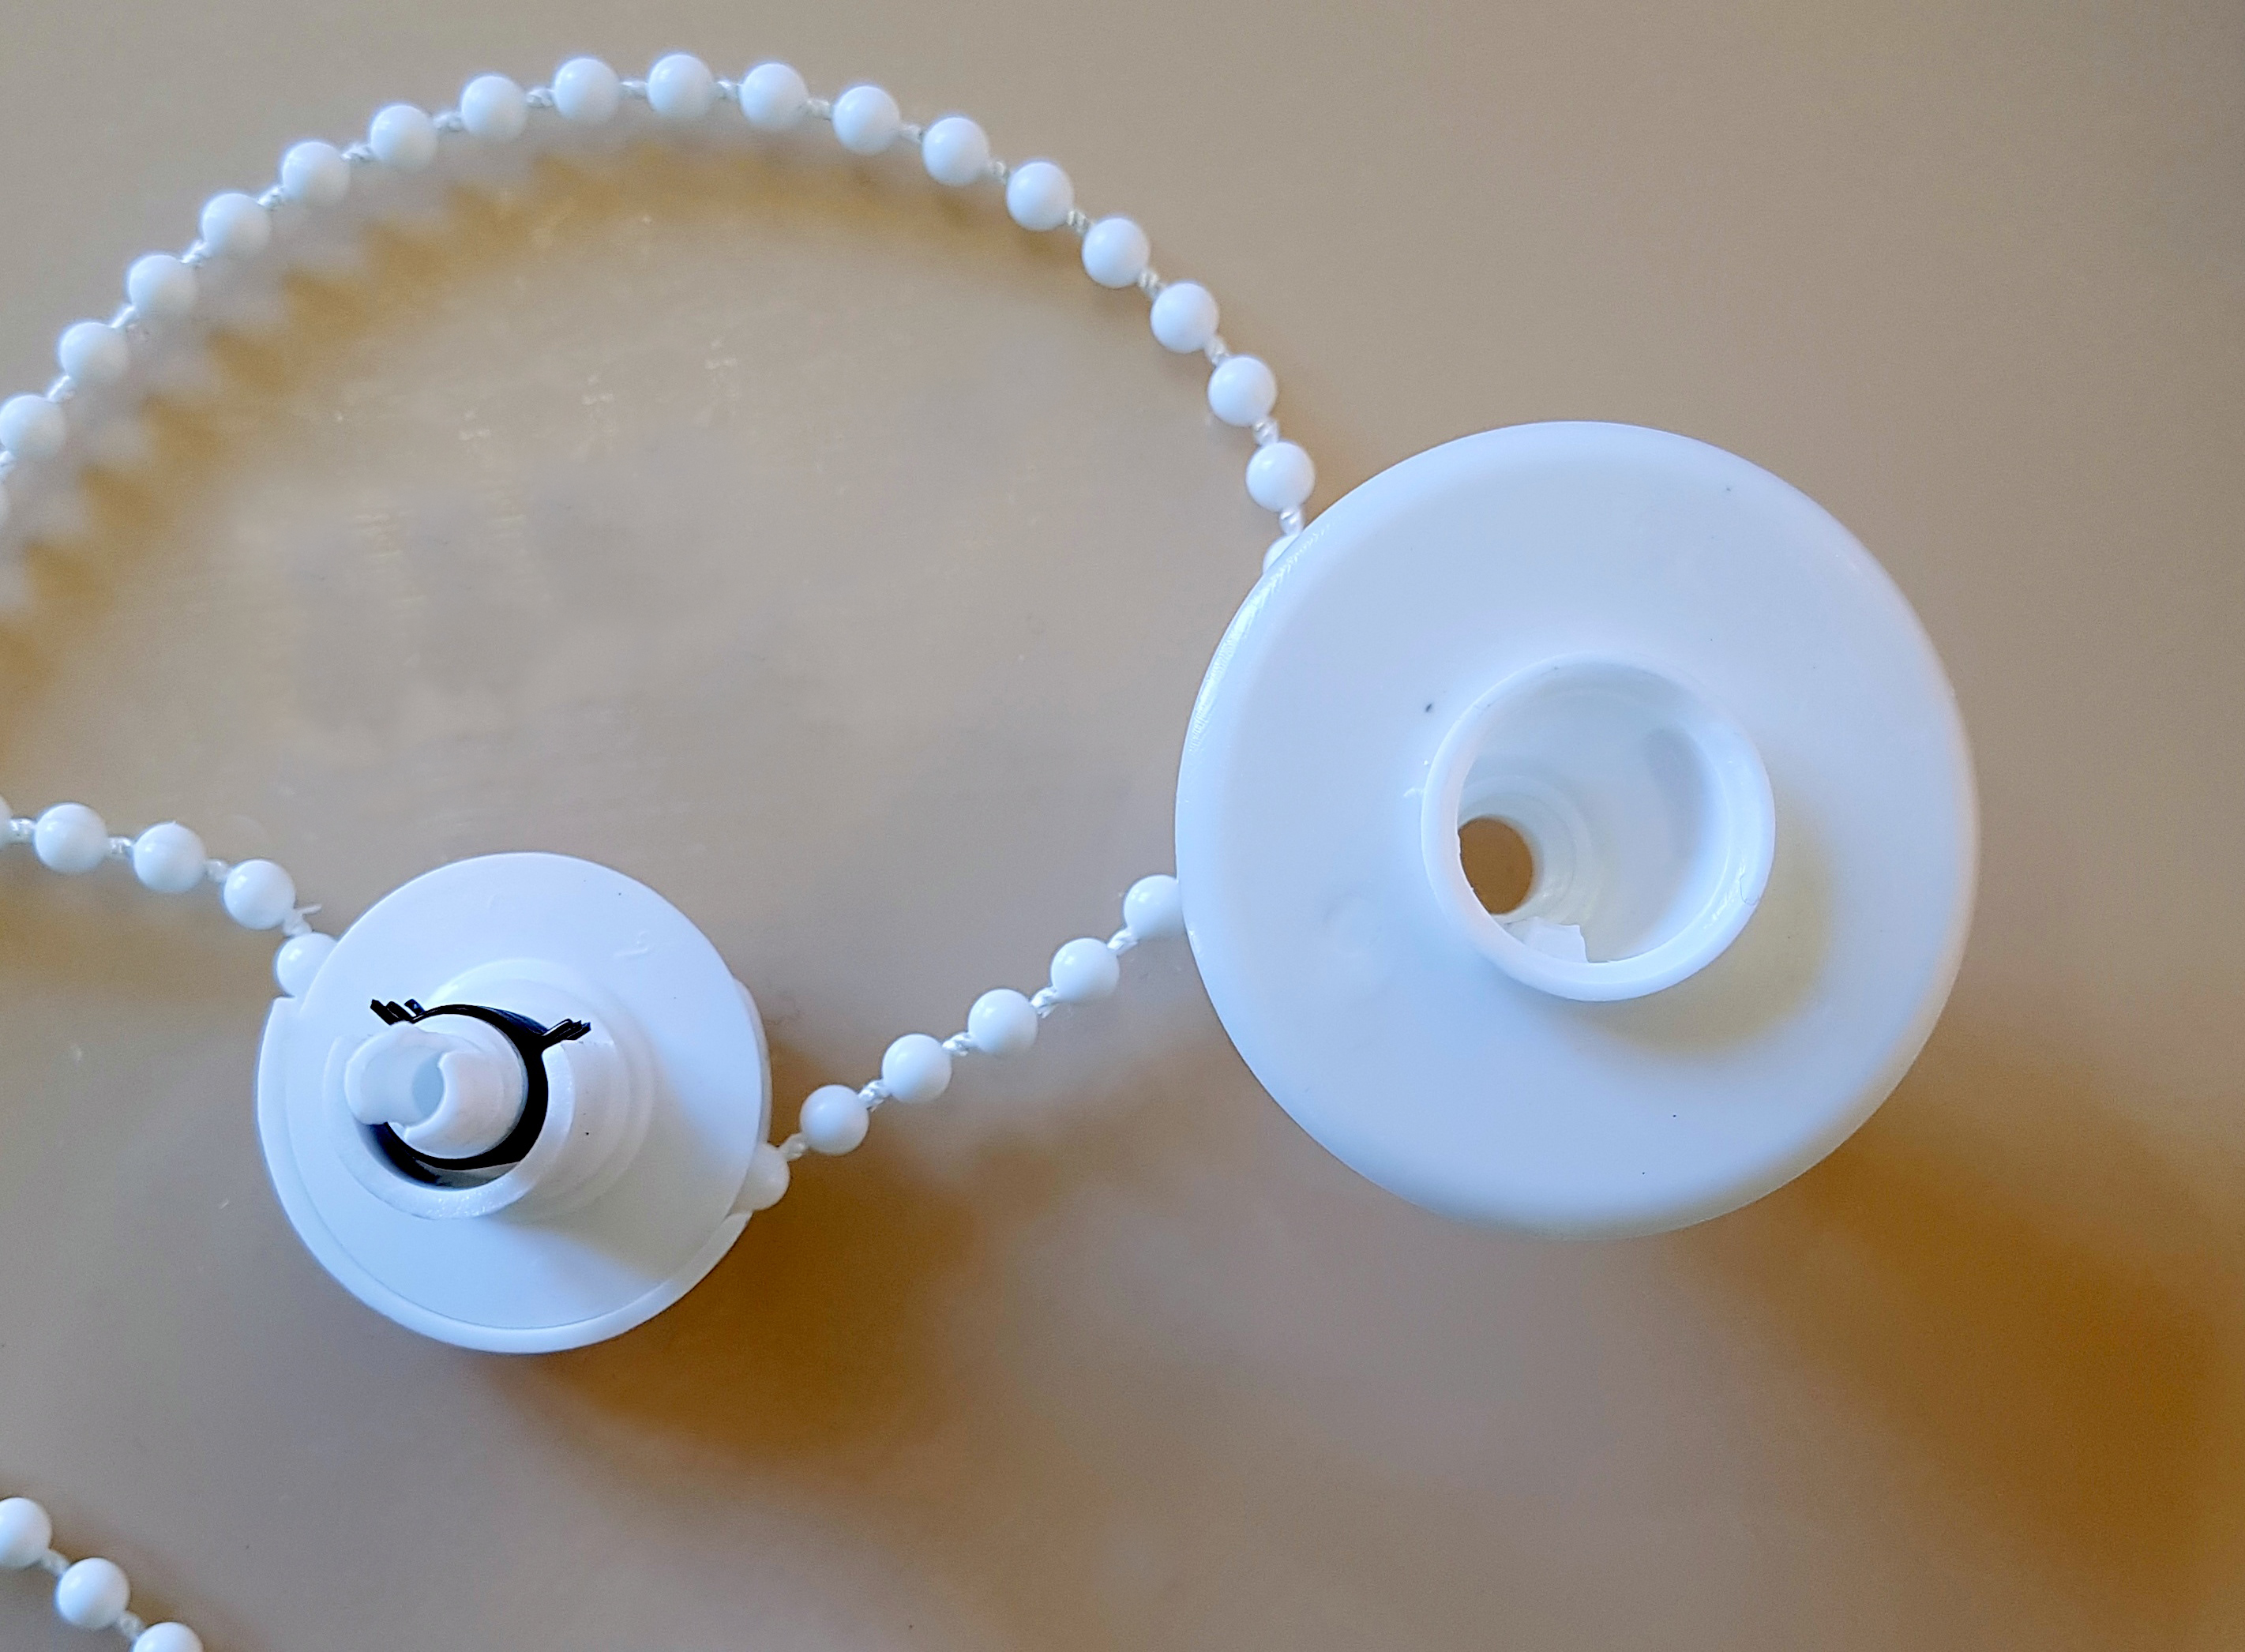
When assembling, you need to make one rework: break the bezel with pliers, which covers the rope, because Now we have our fixed bezel, which does not allow the rope to fall out.
Control:
The NodeMCU on the ESP8266 will drive the stepper motor. It is chosen because of its cheapness, the availability of a wi-fi backup channel and it is easy enough to write the necessary scripts. If you need more than two curtains or additional sensors, then the legs of the microcontroller will not be enough, you can look in the direction of ESP32. (esp32 is not shown in the photo, because it is in a junction box)
Software part:
Development environment can be any. ESP32 can be programmed through the Arduino IDE. But I chose Visual Studio Code for myself because of its speed, modularity and gratuity. In this environment, you can develop almost any platform (not only iron). You can even connect IAR ARM. (But that's another topic)
The task of the program is simple:
Connect via Wi-fi
Connect to MQTT broker
Subscribe to topic
Control the speed of two motors
Monitor the status of end sensors
Send broker current steps
Sources can be taken from here . (Carefully this is the very first bydlokod for testing curtains). In the code, you must specify your username and password from wi-fi. As well as the parameters of the MQTT broker .
Fill the program and try to send the first data through the MQTTBox. Everything is working! How to add curtains to the home assistant system, I will write a separate article if it will be interesting to everyone.
A short video of how this was done:
Plus, the performance at what stage is my smart home.
I wish everyone to relax at home!
Due to numerous requests, I spread all my work on the transformation of conventional roller blinds into automated ones with remote control. Be careful, lots of pictures!
For a start about roller blinds:
')
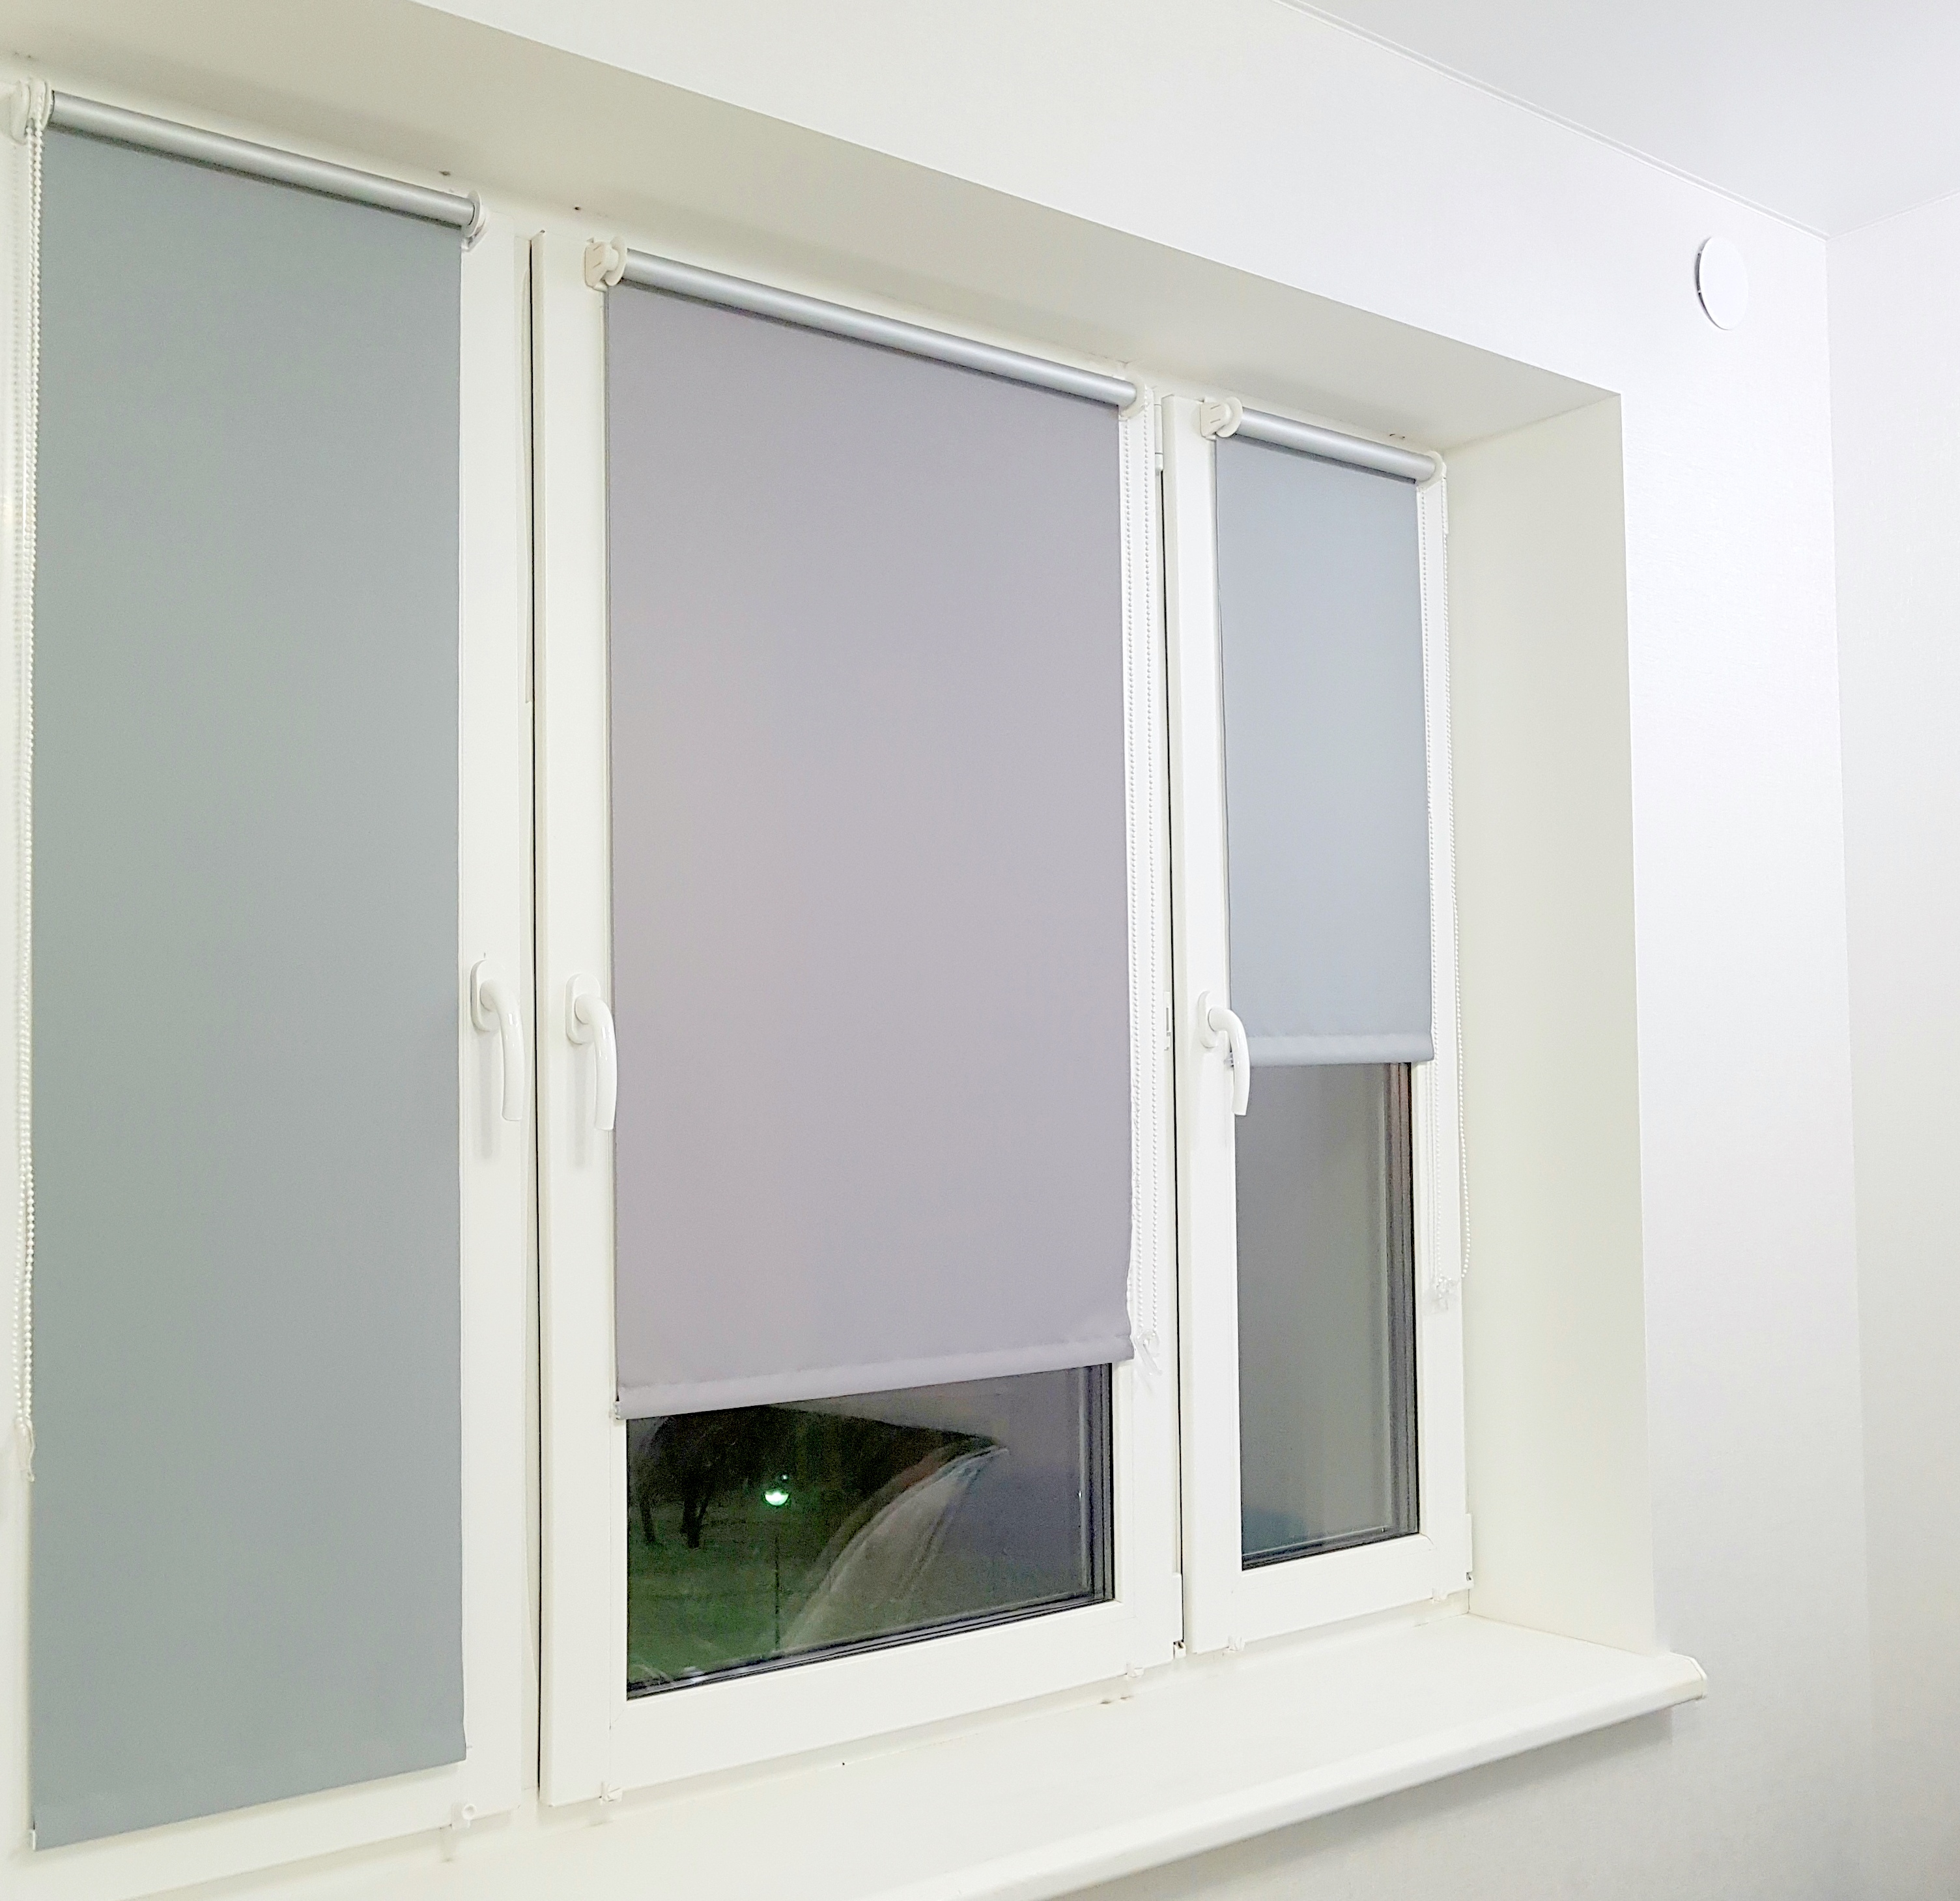
- Pros: roller blinds visually expand the space, beautiful and inexpensive. Very easy installation. You can manage each window separately. Released space on the window sill.
- Difficulties: manually opening 5 windows already takes a long time. Open the fully angular window prevents the mechanism itself (example: the mechanism at the top of the balcony door rests against the wall and does not allow to open the passage completely). Because of this, it is necessary to hang the curtains on the outside of the window. The price even for Chinese motorized curtains starts from 2000 rubles, multiplied by 5 and immediately think of how to make everything with improvised means.
It is a little about tasks:
It is necessary to add remote control to the usual roller blinds from the hardware store and connect them to the smart home on the openSource Home Assistant platform. And still need to keep the usual management for the rope.
Motor selection:
If everything is automated, then speed does not matter, so you can use engines with a gearbox. Collector engines are cheap, but not the most reliable thing for everyday use. Servos also have collector engines and plus not stable with constant rotation. A great option to look stepper motors. Silent, you can control the situation, cost a penny. As a result, a set of 5 28BYJ-48 engines with a ULN2003 driver cost me $ 10
About the engine 28BYJ-48:
You can read more about it here .
There were questions about the power of this engine. Fears that he would be weak did not materialize. Rather, if you use the full-step mode, the engine is very frail; if you use half-step, then the shaft cannot be stopped with bare hands. To whom there will be little power, there are many articles on the Internet on how to raise the voltage, turn it into bipolar and other improvements.
About sensors:
Since we still have manual control, and we don’t want to drive the engine for nothing, curtain position sensors are needed. At least one sensor is required at one end, but two are preferable. You can use any end, optical, etc., but I personally chose reed, because To glue a neodymium magnet on the other hand is very simple and it should work stably and durably. I chose the reed switches for aesthetics already in the case. Plus provided for setting the distance from the shaft. Height can be adjusted by spacers.
About mounting structure:
The task was to design the case as simple as possible for manufacturing on a 3D printer with minimal modifications. Simulated in Fusion 360. A complete mount clings to the top of the window, but such a design on an FDM printer will be difficult to do with the necessary strength requirements, so a single screw design for adjustment was invented.
Total got three parts for 3D printing. Link to download 3d models .
The main part for the engine, the control board on the ULM2003, the mounting of reed switches, engines, fishing lines to stabilize the curtains, and the adjusting screw.
Cover to close all this disgrace. Clamp or different hook.
The design of the curtains itself contains several springs, which work like a brake if you pull the curtains (the spring tightens) or lets go if you twist the rope.
When assembling, you need to make one rework: break the bezel with pliers, which covers the rope, because Now we have our fixed bezel, which does not allow the rope to fall out.
Control:
The NodeMCU on the ESP8266 will drive the stepper motor. It is chosen because of its cheapness, the availability of a wi-fi backup channel and it is easy enough to write the necessary scripts. If you need more than two curtains or additional sensors, then the legs of the microcontroller will not be enough, you can look in the direction of ESP32. (esp32 is not shown in the photo, because it is in a junction box)
Software part:
Development environment can be any. ESP32 can be programmed through the Arduino IDE. But I chose Visual Studio Code for myself because of its speed, modularity and gratuity. In this environment, you can develop almost any platform (not only iron). You can even connect IAR ARM. (But that's another topic)
The task of the program is simple:
Connect via Wi-fi
Connect to MQTT broker
Subscribe to topic
Control the speed of two motors
Monitor the status of end sensors
Send broker current steps
Sources can be taken from here . (Carefully this is the very first bydlokod for testing curtains). In the code, you must specify your username and password from wi-fi. As well as the parameters of the MQTT broker .
Fill the program and try to send the first data through the MQTTBox. Everything is working! How to add curtains to the home assistant system, I will write a separate article if it will be interesting to everyone.
A short video of how this was done:
Plus, the performance at what stage is my smart home.
I wish everyone to relax at home!
Source: https://habr.com/ru/post/374285/
All Articles