Glove - input devices. Bend sensor
Foreword
In this article we will look at how to make a hand-keyboard, as well as a home-made bending sensor (bending). On one hand, as a rule, there are 5 fingers - this makes it possible to make 32 (2 ^ 5) combinations. But in Russian it will not pull (33-32 characters), but in English it’s just that, there will still be room for space / backspace / enter, etc.
Some ideas: if you think about it, then this is an interesting joystick; if you connect the second hand, it is 1024 combinations, and this is probably a musical instrument; introduce a gyroscope / accelerometer and improve to the mouse.
Training
We will need:
- Arduino - there is no particular difference what to use, 5 analog inputs will be required, 3.3V, 5V
- Bluetooth module - connection in one direction, so there is no difference, I had hc-06
- 5 photoresistors (3 mm.), 5 LEDs (3 mm.)
- Thermoshrinkage, dropper tube, wires
- Resistors: 1 kΩ (x5)
- Meals - Crown
Bend sensor
Before opening the IDE you need to assemble at least one bend sensor and make sure that it works. Why not buy it? Since I did not find him in my city, but in China it costs $ 20 / piece, besides, I found a maximum of 8 centimeters long, they only win with a form (thin).
I didn’t deal with photoresistors before, so for a start I just looked at the principle of operation, picked up resistance, estimated the range, and also found out that out of 10 purchased 1 did not work, it was not for nothing that I checked.
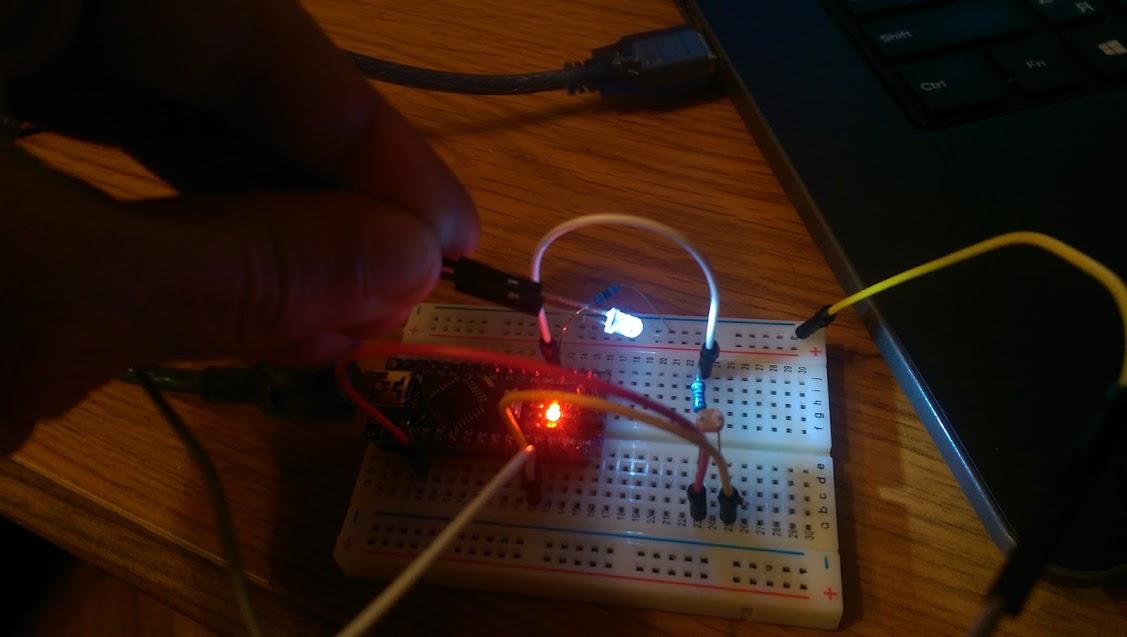
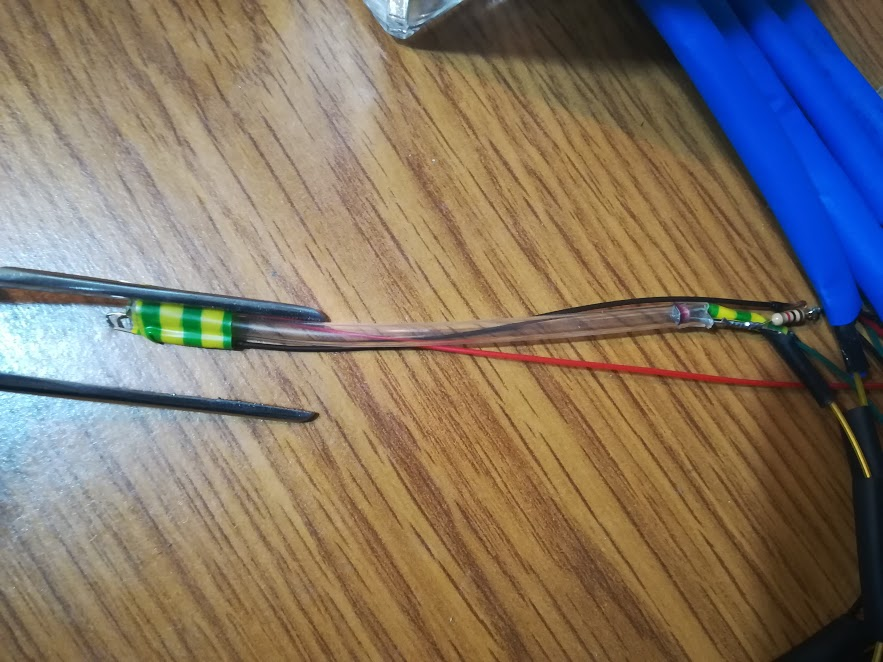
After collecting the actual sensor itself. The figure shows a diagram of the sensor, I think it is clear what needs to be done.
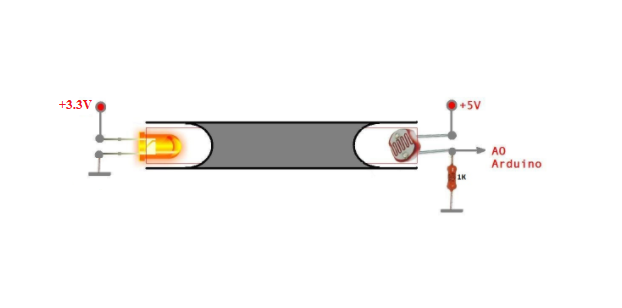
I advise you to try to find the photoresistors exactly 3 mm., Otherwise it is very problematic to insert them into the tube. Here's what happened:

I did not have such thin wires, but the optical fiber was delivered already ... In general, the telephone wire is just right.


Now you can stretch the heat shrinkage and make sure of the work.

You can check the operation with the following code:
const int pinPhoto = A0; void setup() { pinMode( pinPhoto, INPUT ); } void loop() { Serial.println( analogRead( pinPhoto ) ); delay(100); } Output should be a value from 0 to 1024, I have this:
Bend the sensor:


Sketch and code on PC
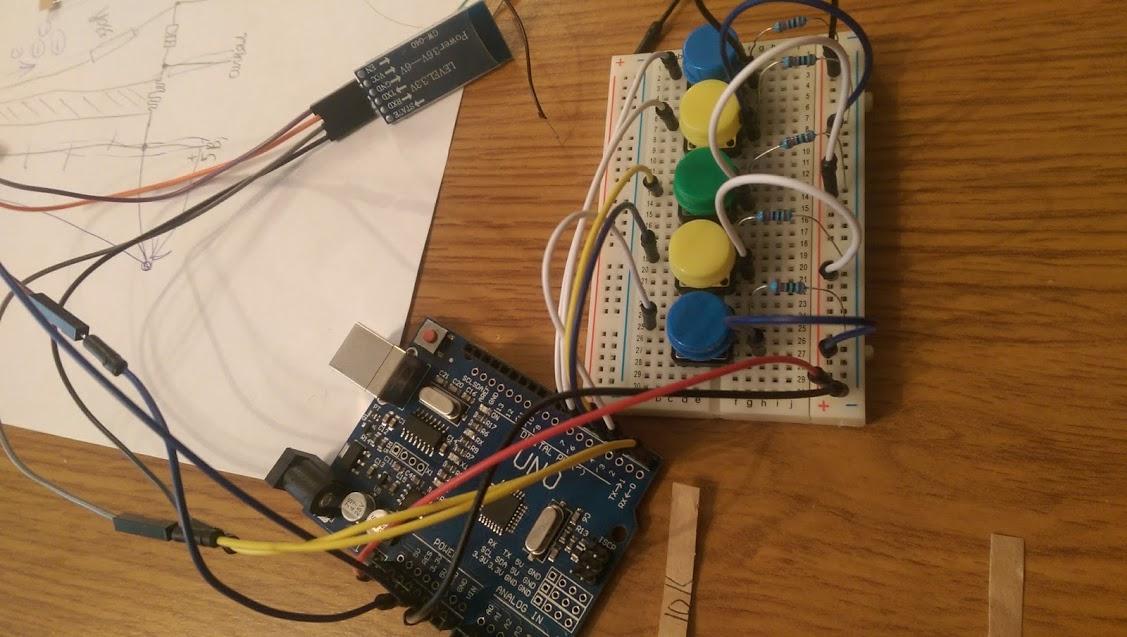
There will be two programs: a sketch on the board and a program on the PC. Since only one sensor is ready, and I really want to know if it is really possible to emulate a keyboard through an Arduino, we will turn on the PC. For now, let's “replace” the bend sensors with buttons:
')
PC program
What do we need? Get data from the bluetooth module, correlate with the desired symbol, use the key in the desired window. Code by reference .
Algorithm:
- Will join on bluetooth
- Using ReadCOM (), we read the byte sent by the microcontroller, send the value to the SendKey method, and the handle of the current window is sent there so that the method knows where to write the character
- We check what has come to us, if this value corresponds to space, backspace, enter, then the necessary click will work, if none of the above, then the desired character will be taken from the array
Why an array if you could put in order all the characters? Yes, it was possible, and it was at some stage, but some combinations for fingers are easier than others, and there is also a certain frequency of using certain letters in the alphabet:
It may seem that everything has already been done for us, but it was not there, as I did not google “the complexity of the combinations with the fingers”, etc., I did not find anything suitable. I had to independently and subjectively assess the complexity of the combinations, for each I advise you to fill in this table yourself and rewrite the array. In short: the easiest combination is the most common letter.

one | 00001 | g |
2 | 00010 | t |
3 | 00011 | n |
four | 00100 | space |
five | 00101 | z |
6 | 00110 | s |
7 | 00111 | h |
eight | 01000 | e |
9 | 01001 | q |
ten | 01010 | r |
eleven | 01011 | d |
12 | 01100 | l |
13 | 01101 | u |
14 | 01110 | o |
15 | 01111 | backspace |
sixteen | 10,000 | a |
17 | 10001 | c |
18 | 10010 | m |
nineteen | 10011 | w |
20 | 10,100 | f |
21 | 10101 | y |
22 | 10110 | p |
23 | 10111 | b |
24 | 11,000 | i |
25 | 11001 | v |
26 | 11010 | k |
27 | 11011 | x |
28 | 11,100 | j |
29 | 11101 | |
thirty | 11110 | |
31 | 11111 | enter |
Sketch for Arduino
For a start: there is practically no difference between the code for the button version and the version with sensors, with the exception of a couple of lines for reading data. There are many ways to read data, but the best algorithm seemed to me like this:
- Receive one of the signals
- Write it to the sendValue variable.
- Wait for the 00000 combination (opened the fingers), or if the signal came more than sendValue, then we write the new signal to sendValue
- If the combination of 00000 and sendValue is not equal to 0, then send data
How is the number obtained from the sensors? The usual transfer from the binary system to the decimal, each subsequent signal + 2n.
Why such a mechanism? We cannot simultaneously press the necessary buttons, or, what is even more difficult, bend the right fingers in an instant, so we need not send the data right away, but wait “ is this the last combination? ”, We will understand this with the help of the initial combination (00000), it will be like a“ stop beat ”, after which the program will understand that you should send a number, unless there of course“ stop beat ”itself lies.
Why do we need to compare sendValue and new signal? After a person has bent, for example, 01011 and begins to unbend fingers for the initial combination (00000), he will already make another combination, since we will not unclamp fingers either immediately, after the user unlocks any of the fingers, the combination immediately becomes numerical value less than it was in the “peak”, that is why it remembers the “greatest” combination.
The constants presented on the screen (600, 350, 300, 300, 480) were selected in a practical way, each sensor separately output, bend the finger to a comfortable “bend” and record the current value.

Device assembly
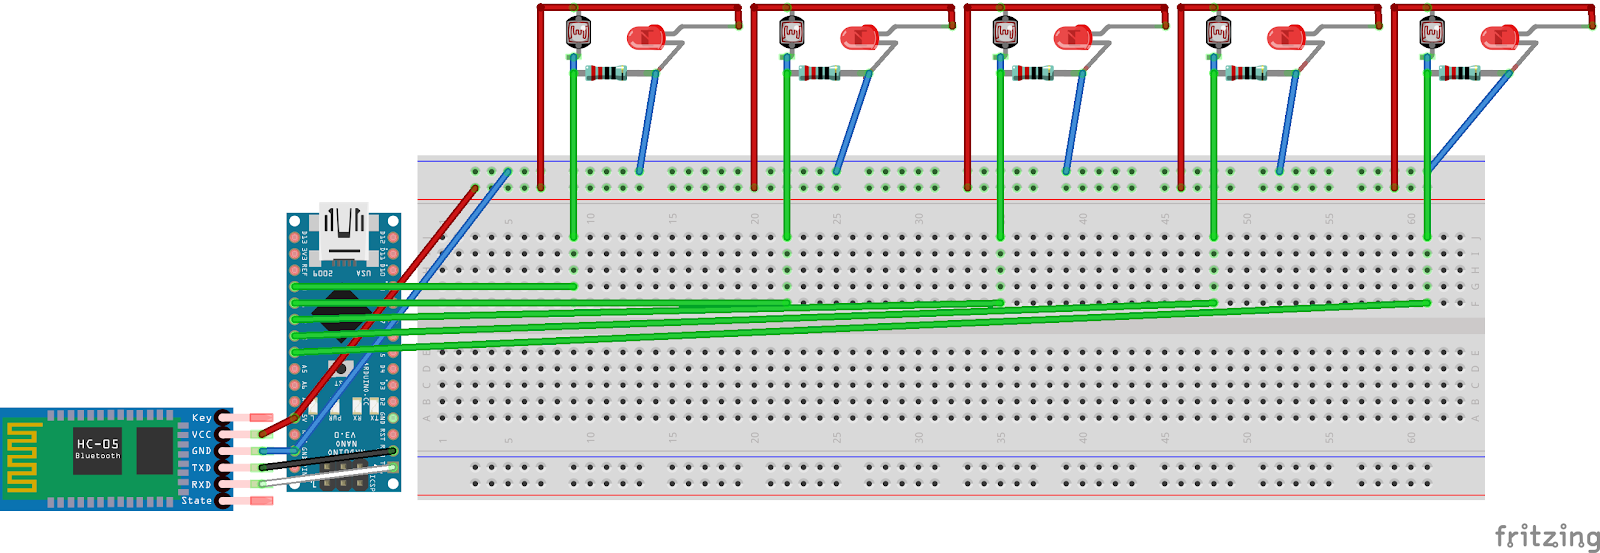
The general scheme is shown in the figure below. In fact, the most difficult, as it turned out, is to take into account the size, some wires hang freely and interfere, while others stretch and sometimes break. In addition, the sensors came out more than necessary for the fingers, I took it with a margin) And the glove itself, I took the construction one, which is not very attractive. Also, if you immediately glue the glove directly, then with the bending, the sensors will go to the side, so it was decided to put them on the velcro and in case of which they can be removed.


Second version
After I assembled the “device”, it was decided to make “everything new”, several improvements:
- Remove the resistors for the LEDs, since the 5 Arduino LEDs from the output of 3.3 volts take out well and without resistors
- Remove the resistors and soldering from the dropper tube, since the convenience of bending with your fingers is lost, as well as this soldering breaks down and putting resistors in there was a very bad idea
- Put the board on the shield, since there are a lot of wires and it looks not very nice
The scheme has not changed much:
Several photos of the new version:


Result
The hand-keyboard is not a new project, but making yourself and editing as much as you like is much more pleasant than the finished one, especially since we get not only a keyboard, but a universal device that can be connected both with the phone and with other devices (to control, for example, “a mechanical hand "). Also note to someone such sensors, suddenly come in handy)
Cost of
1kΩ resistors (5x) + LEDs (5x) | ~ 0.5 $ |
Arduino nano | ~ 2 $ |
Shield Arduino Nano | ~ 2.5 $ |
Thermoshrinkage, dropper, velcro, glove, glue | ~ 2 $ |
HC-06 | ~ 3 $ |
Total: | $ 10 |
Source: https://habr.com/ru/post/374099/
All Articles