Arduino! What's next? We make a bike computer
How it was
My father was fond of electronics. Home was a soldering iron, wires, a bunch of radio components. He easily repaired TVs, refrigerators - as a hobby. I was always there.
When I was 10 years old, they gave me a radio designer, I think many had one.
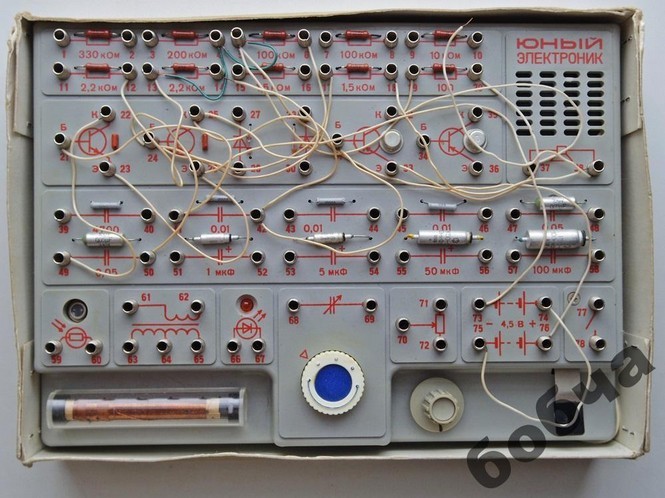
I collected all the schemes on it, I liked how they worked. I studied all the major radio components. Then they bought a radio constructor - "radio in the case." It was necessary to solder already, he, too, was soon ready and worked perfectly. I continued to make small schemes. Boards - varnish and glass tubes. But then I got into programming. I mastered C, then C ++. At the end of the university, he began working as a programmer, which is what he is doing to this day.
Arduino
When my son grew up, I decided to teach him electronics too. He took his old dusty designer and ... his son "threw out." What is this trash, why do I need to squeak in different tones. Some not interesting schemes. I thought, and began to look, than it is possible to replace it. Connoisseurs and other designers, were in general similar. And here I stumbled upon the Arduino. Here is what you need. Electronics and programming in one bottle.
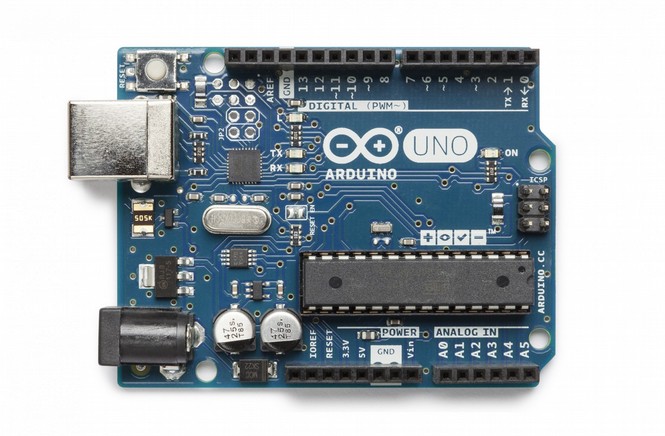
We bought a board and started programming, and studying electronics. Having done various tasks, having bought a bunch of sensors, the question arose of what to do next. The son asked - and what can be really done on the Arduino? We brainstormed and made a list of interesting, useful devices that would be interesting to do. Began to think how we will do them. The first was our bike computer. We just had bikes for the whole family, so they had to be equipped with a powerful computing center on the microcontroller. We sketched the program in Arduino, the sensors - the buttons, everything worked fine. It remains the case for small - to collect everything in a box and use.
I wanted to teach my son how to solder, and to show that if you want, you can make a beautiful compact modern device yourself, and not buy it. I had to remember the old skills. How has everything changed ...
My familiar output resistors have been replaced with SMD components. Very complex boards could be made at home with a laser printer. Schemes can be tested in simulators. There is a lot of information on the Internet, schemes, courses on programming. I began to understand all this.
Select the components for the bike computer scheme
Everything should be inexpensive. If it burns, then it's not a pity. This is the first device. We looked at what is sold on the market. As a rule, all cycling computers are mounted on the steering wheel, have a screen, are protected from rain, have one or two sensors (on the wheel and on the pedals). They can calculate mileage, show current speed, cadence (number of revolutions of the pedals), travel time, calories burned and other indicators.
Screen decided to exclude. As a rule, they are either expensive (in the form of ready-made boards) or difficult to solder (for example, a cellular screen), and it complicates the program a lot. We already had the practice of communicating with the bluetooth module. He decided to take and replace the screen.

The screen, as a result, will be a smartphone, but we will rarely look there, the device is autonomous, and the screen will be needed mainly to view the trip results or intermediate data. The Bluetooth module allows you to program the instrument on the go, start metering, organize a competition - all this is easy.
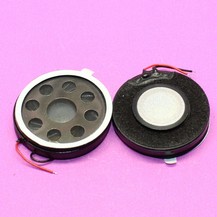
We decided to add a sound - a squeaker, so you can signal different events. I really liked the idea that the cadence should be at least 80, and that's what we will squeak about. As a tweeter - a speaker from a cell phone:
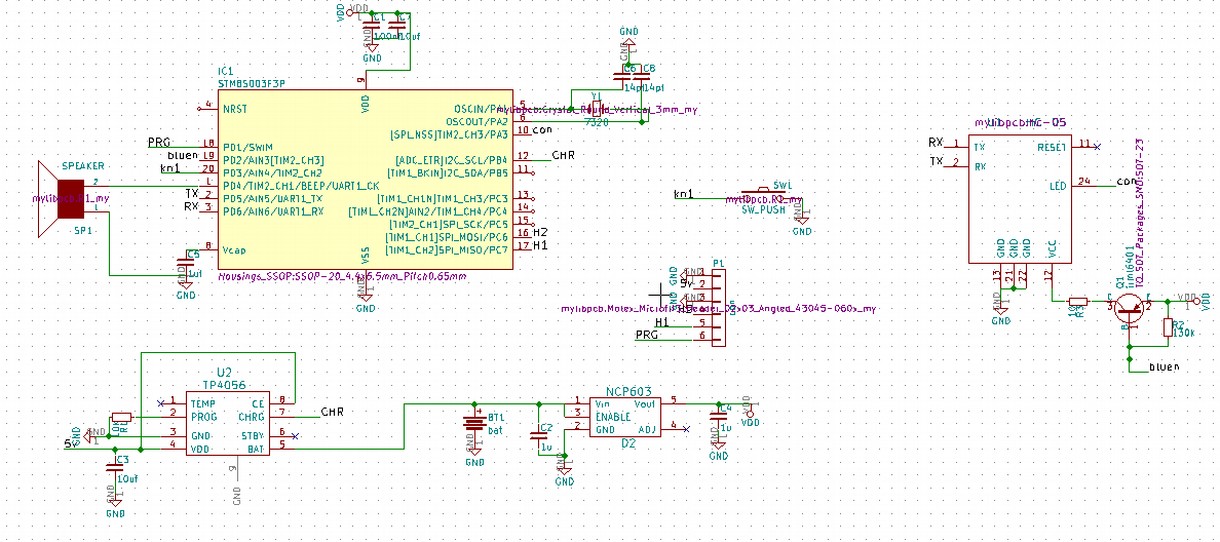
The batteries are pretty tired, we decided to master the batteries. We had a small battery from a children's helicopter - and we take it, then it turned out? that such a hard to buy, changed to LIR2450.

Choose a case. Like this one from the company Gainta.
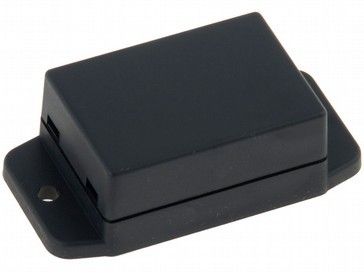
They have a very wide range of enclosures. True, there is a minimum amount of purchase, bought immediately in advance, and other devices, too.
The microcontroller is of course ATMEGA, as on the Arduino. How much does it cost - more than 100 rubles in Moscow. Strange, in China ready Arduino only 200r. I decided to choose a replacement - Attiny, but she did not really like it. I began to dig, and accidentally stumbled upon a series of stm8, stm8s003f3p only 20 rubles, despite the fact that there is a whole periphery. Fine! We will do on it. True Wednesday is different, but there is C, who I knew. Also, the advantage was the presence of a normal debugger, which is what the Arduino lacked!
We select charging circuits li-ion. Pretty quickly, I went to the chip TP4056 - 10p, although in China - we order a dozen - they will come in handy. The overdischarge protection board is built into the battery - so it is not needed. But in principle, the STM8 has a 3c switching threshold, so protection boards are not particularly needed.
All - the scheme is ready, the components are selected. I need a ST-link programmer, I bought it ready in Moscow, as it turned out later, it's expensive, but oh well. Our first scheme:
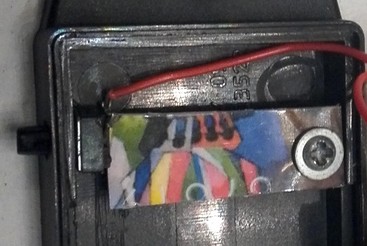
We make the board and everything is soldered, the device is ready
Made a fee. LUT method did not work. Found a new method - by cold transfer of toner, using acetone. It turned out a great fee, though of course with small jambs, the method was then brought to the ideal. We use so far. The fee is ready. We are waiting for chips from China (TP4056 is not realistic to buy from us). Everything has arrived. We begin to solder and see that when wiring the charging chip, we chose the wrong case, the names of SO8, MSOP8 are very similar! But the board is ready, redoing laziness, in the second version we take into account! We remove the charging function and do it on a separate board. Wiring all closes as necessary.

')
Putting it all in the case - both mounting holes are not there. All right it does not matter, we fasten upside down, and we beat with foam rubber. Fasten the button - not attached. Fill with hot melt - falls off. As a result, we do this:
For the future - it was better to make a button on the board right away! We fasten the squeaker - a bunch of wires, everything gets in the way, but it works.

Go to the programming
To facilitate the work of the son, I had to hold a small lecture that instead of one function, you need to write another:
- digitalWrite = GPIO_WriteHigh
- digitalRead = GPIO_ReadInputPin
- pinMode = GPIO_Init
- Delay - write yourself
- millis () - not needed, switched to a millisecond timer and interrupt, very convenient.
Began to write a program. Timers, buttons, all through interrupts. We wrote a test program and started testing. The first line of code - turn on the bluetooth module. And here we get the crisis of the "brain." How much time is killed to solve the problem. Turn on the bluetooth module and ... MK is overloaded. What's wrong, everything works, the capacitors are in place, the module consumes 30 mA, but does not work. After 2 weeks of painful checks, tests and various tips on the forums - the reason is found. There are capacitors on the bluetooth module board, when the module is quickly turned on, they are charged, the power supply of the MK sags sharply and it overloads. As a result, we limit the power line of the module through a resistor of 10 ohms (picked up by experience) - everything works fine. It was more correct to feed the module from a separate LDO.
The first test mini program is ready - food, we count the speed and give it to the phone. Turn on - squeak barely audible. It turned out the food is not 5v and therefore quiet. Add on a separate mini shawl - trazistor - excellent - audible loud.
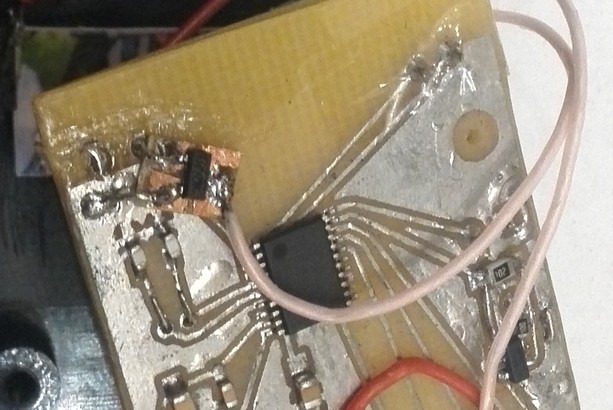
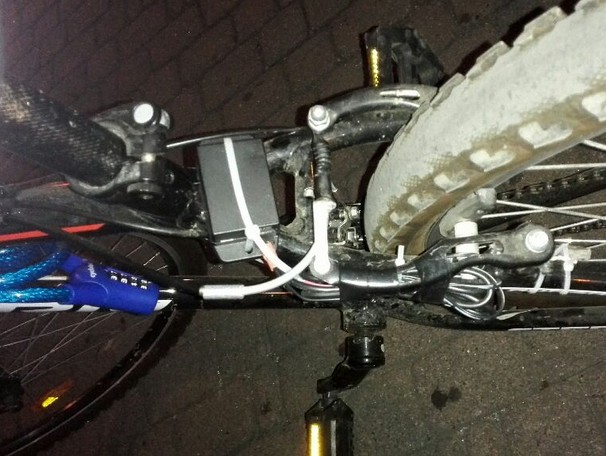
We fasten to the bike, we plan to mount it on the steering wheel, solder long wires, make two sensors from the handle, fill it with hot melt. We tried, and it turned out that it is easier to mount on the rear fork. Wires collected and tied - not needed. As a magnet - children's designer.
So let's go. Instead of one turn - thousands. What kind of nonsense. We understand, yeah, the bounce of contacts, set delays - it works fine. Checking the speed is the same as the GPS on the phone. We start to engage in energy savings. The device must sleep for a very long time and work economically.
Energy saving.
The main goal, on one charge, the device should work for a very long time. There is no switch, we will use sleep mode. The device should turn itself on, external interrupts from the reed switch, turn itself off, if there is no movement for 2 minutes, then we turn off. And most importantly, he must himself collect statistics on trips and keep it in memory. Long thought how to determine what is one trip? And they decided that if there was no movement for 3 hours, then the trip was over, and the bike was at home. In order not to work for 3 hours in full mode, it was decided to use the sleep mode, with the auto-wake-up timer. The timer can be started for a maximum of 30 seconds, so we wake up every 30 seconds, reduce the counter, and so on until 3 hours have passed. How did it go - the trip is finished fix the data. Debugging this algorithm was not easy, the compiler tried every time to prevent code optimization. But in the end, everything turned out.
According to the theoretical calculation, the device should sleep for more than a year, the MK in sleep mode is 4mk, if everything is turned off, fine. We program sleep mode - we check. Sleeps 3 weeks and the battery sits down. Instead of 4, from where we have more than 200. Again we check everything, and we see that LDO consumes 200 microns in the passive mode. !!! Found Need to change the scheme! While testing further.
Additional functions
Unlike the bike computers on the market, they decided to add functionality. Our device should be able to:
- keep statistics for the last 4 trips, and store it all in non-volatile memory
- count calories only when pedaling
- count the active travel time when the speed was more than 4 km / h
- be able to control the speed and cadence, and in case of violation of the selected mode, notify with sound
- programmed via bluetooth: clearing memory, displaying information about past trips, setting parameters - weight, wheel diameter, speed control parameters
- take into account not the average speed, but the speed at which they traveled most of the time. This is necessary, for example, for the case when you drive an hour, then rest for 30 minutes, then drive again, stand again for 5 minutes. There has always been a different speed. 5 minutes drove up the hill, 10 seconds from the mountain. As a result, the average speed will not be indicative at all. But the speed with which we drove the most time - what we need
We add all these functions. The task is not simple, but interesting - working with arrays, conditions. At the next new function, we receive a message - the program memory is over. MK has only 8 KB. Pity what can be done? We start to analyze the log, where everything went, and we see that in the standard library there is a debugging mode and it is turned on, turn off - we get an additional 2kb of memory. Now enough. As a result, all the functions got in, and a little bit more remained.
We should also talk about the STM8 microcontroller itself. All this time he showed himself just fine. What just did not do with him, by mistake. And the food was fed plus to the minus - alive, and the legs were fed HIGH, when short-circuited to the ground, also alive. In general, a fairly reliable microcontroller. I liked working in the debugger. Almost like a computer. The simulator helped to debug complex functions, is also convenient. In general, at this price, the microcontroller is just great. And there is also a version with 32k flash on board, for 60 rubles, generally super.
Final version
The son is very pleased, the device works as they wanted! We arrange races, we ride with him all summer, it turned out that in one walk we drove more than 14 km, we had not thought about it before. In terms of its functions, the device turned out to be better than the purchased one, it's a pity that the screen is missing! But literally after a month of use you forget about the screen, occasionally you look at the statistics, the device itself notifies the rest. The Cadence Control function works fine, it helps to select the desired speed mode.
For the rest of the family, we are making a new scheme and reworking the fee. We take into account the errors:
- replace the squeaker with a louder HC0903A
- remove LDO with MK, leave it for bluetooth, for pairing a simple divider on the resistors
- Add usb connector - it's more convenient to charge
- Add a corner button immediately to the board - there are no extra wires
- One reed switch was removed in the case, and the second, for the pedals left on the wire, the connector was removed - almost complete absence of wires.
We skated all summer, for 3 months the battery never had to be charged.
The project is very satisfied. It turned out from the layout on the Arduino, to the final product - how to swim across the ocean, even on such a simple device. So many many minor flaws no one expected to meet. But in practice they checked that it was not so difficult to switch to another class of microcontrollers, they turned out to be very similar to each other. It is a pity that smt8 is not so common. But, if you write a simple program, then the standard library from ST is enough, all the drivers are there - UART, I2C, SPI, ADC, EEPROM.
Let's sum up. The real device is ready, it benefits, it still works. The new version is completely satisfied. The son showed him to all his friends - he is just great. What and you want! If you are still testing what your Arduino is capable of, then think about which device you need to buy, and make it yourself! You will get a lot of pleasure and experience.
If you are interested in making the same bike computer, then all the project information is on github . The only thing I highly recommend is to write the firmware yourself in order to earn experience! By making this device, you will learn:
- Dilute Boards in Kicad
- Make boards at home
- Solder smd components
- Program microcontrollers
Source: https://habr.com/ru/post/373913/
All Articles