Computer mouse as an accurate sensor
Task: quickly make a linear displacement sensor from a computer mouse.
In conventional mice, a highly sensitive optical sensor is hidden. It has its own little “camera” and a processing processor that tracks the movement of the smallest points on the surface. In top mice resolution is only 3 microns!
')
What armpit stones we encountered, plus the technical part, we will tell you further!
The following customer gave the TK: do it as soon as possible, with any mouse (possibly wireless), output to the 7th segment indicator, reset the button, the computer does not fit, you need a resolution of 0.01 mm, maximum distance 1000 mm.
To begin with, how it all was done:
Plan:
As a result, Malina pi 3 lay under the surgeon's knife. Four 64-bit A-53 cores at 1GHz, 512 MB of RAM and many other tsiferok for this task.

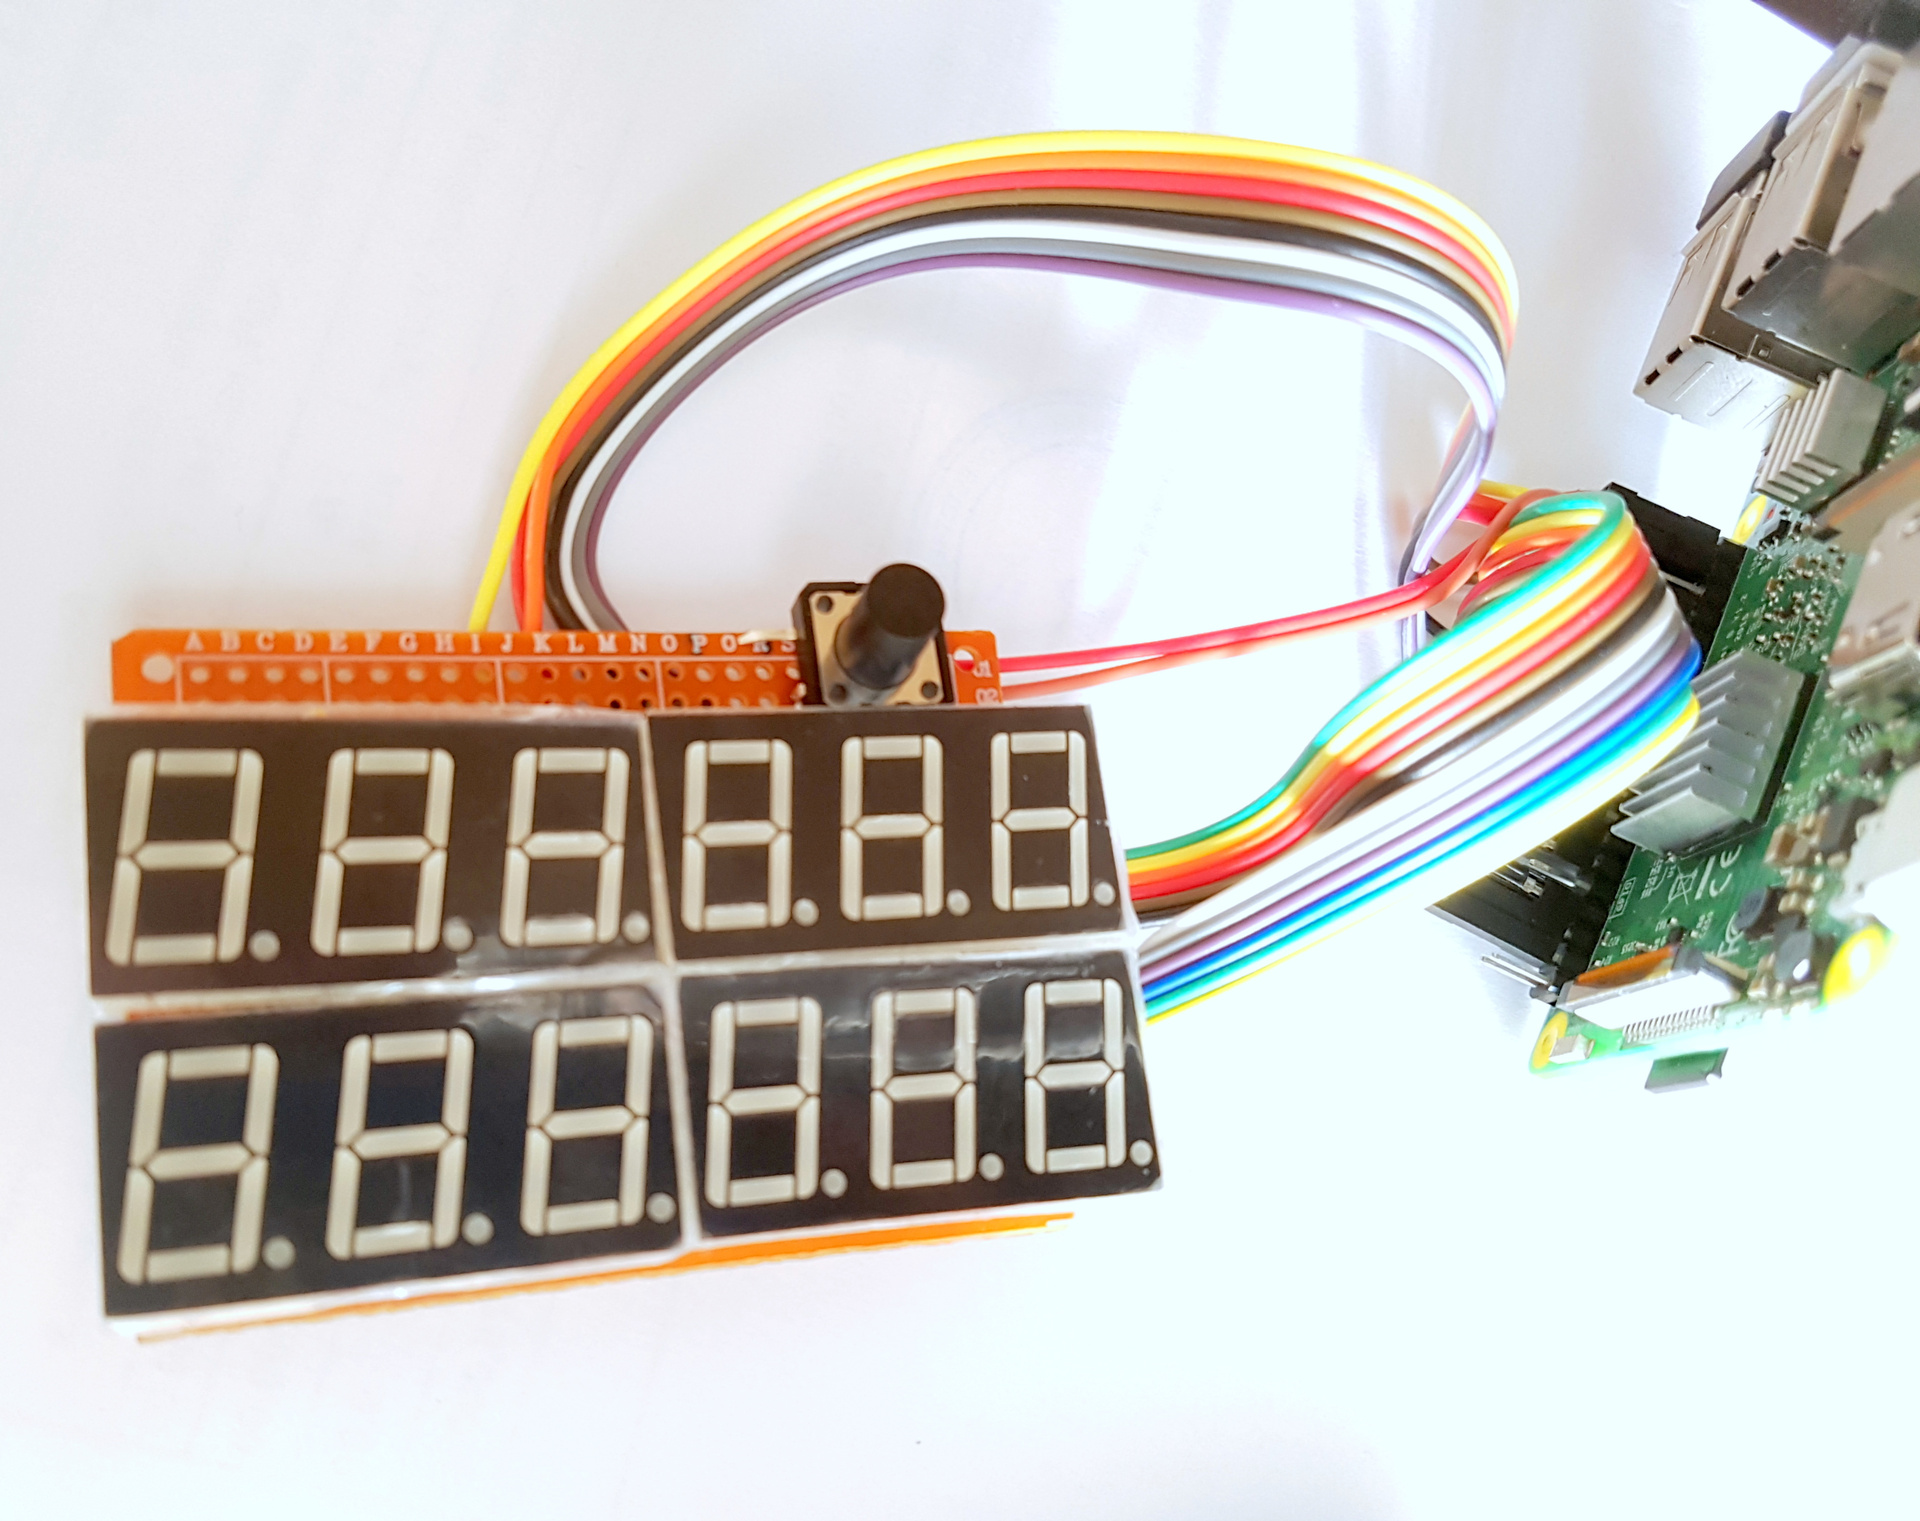
Task: Indication should be on the issued 7-segment indicators. It turns out we need 6 digits per coordinate, for a total of 12 indicators. Each indicator has 7 legs per digit + leg per LED point (dp), we do not consider the common wire. Total after simple calculations we get that we have to manage 96 conductors plus we need a button. 96 resistors did not really want to spend.
To control such an array of legs at once is not possible. There is an exit! And even a few!
1) Use additional microcircuits of the type max7219, or shift registers, multiplexers, etc.
+ It is possible to increase the number of indicators almost infinitely
- Max7219 was with an operating voltage of 5 V
- There was nothing suitable at hand.
2) You can make a dynamic display. At the same time, light only one LED. If the indicators switch very quickly, the human eye will not notice the bases.
+ You only need 8 wires and resistors for one indicator and 12 for switching indicators. Plus do not forget the button. Total: only 21 legs against 96. We take it!
- Since we are trying to control the whole indicator through a single pin, the maximum current is limited to 50 mA. Always take stock, and take 35 mA for all 8 LEDs (which is not very fast). To this we add a fast switching of indicators. As a result, each of us shines 12 times less than it should be. You can modify 12 transistors, but I left it for later, because brightness ultimately enough.

Now the software starts:
On piberri pi need to put linux. I set the minimum distribution
RASPBIAN JESSIE LITE .
Further, through the putty program I connected to Malinki IP, and then everything through the command line.
To make it easier to work with GPIO (input and output ports) there is a wonderful library WiringPi .
How to install it and manage ports, you can find a lot of information on the network, so I will not stop at this in detail.
Next you need to create a daddy of our project:
Next, open the editor and paste the code from the gita. IMPORTANT! I wrote the code very quickly!
To exit the editor, press Alt + x and save the file with the name blinker.c. Further it is necessary to compile with wiring pi:
Everything! Now connect the mouse, insert the wires and run!
Autostart at boot:
Working with this program is very simple. by pressing the mouse button or just the buttons on the board is reset. With a long press of a button, we switch to the DPI adjustment mode. This is an important parameter that is set by the mouse and shows how many samples we will get when moving one inch. Accordingly, digging on the board and on the mouse adds and decreases DPI. Long press, our value is recorded in the file and securely stored until the next system boot. For the purity of the experiment in the program, the display, information from the mouse and the button are processed in parallel processes.
Further the most interesting! Testing and results!
What are the nuances of working with a mouse:
1. The X and Y axes on my mouse were not parallel to the side faces, it was necessary to use “Pythagorean pants” to calculate the real distance.
2. Resolution is not equal to the error!
In simple language - the resolution really shows the minimum movement that the mouse sees, (the readings in the computer must be discrete with the minimum resolution). But that the mouse does not miss anything, is not guaranteed. You can reduce this value using good surfaces (so that the optical sensor can track movements), use low speeds. But there will always be gaps! For the user, this means continuous zero care and unpredictable measurement error.
3. USB HID on which the mouse works does not guarantee the delivery of information to the computer! That is, it is not known whether the computer missed any information from the mouse or not. The probability of missing information is small, but still there.
4. Sensitivity (resolution) settings are sometimes not stored in the mouse, but in the mouse program.
5. Here I am very angry! The fact is that I took the mouse the coolest from the range of Logitech, this is the most advanced was on that day model logitech performance mx. But what was my surprise when the mouse gave different errors when moving back and forth. WHAT IS IT LIKE? I will explain to the user. If you constantly move the mouse back and forth, then the cursor is noticeably so everything is reduced and reduced. It is on any platforms. You have to periodically raise the mouse and put it on a new place. After I noticed this, my life turned into a nightmare! #Logitech logitech explain the significant difference in measurement errors back and forth!
Video demonstrations of work:
The result: the disadvantages outweighed all the advantages of the mouse as a measuring device. Therefore, the project is closed and spread for my dear readers on GeekTimes.
In conventional mice, a highly sensitive optical sensor is hidden. It has its own little “camera” and a processing processor that tracks the movement of the smallest points on the surface. In top mice resolution is only 3 microns!
')
What armpit stones we encountered, plus the technical part, we will tell you further!
The following customer gave the TK: do it as soon as possible, with any mouse (possibly wireless), output to the 7th segment indicator, reset the button, the computer does not fit, you need a resolution of 0.01 mm, maximum distance 1000 mm.
To begin with, how it all was done:
Plan:
  Reading xy coordinates from mouse:
        There are several ways to implement data reading:
              a) Directly from the optical sensor chip
                 + You can do with a simple controller
                 - You can forget about universality completely
              b) Connect the mouse via USB to simple controllers (for example, to Arduino)
                 + Simplicity and cheapness
                 - Need to solder
                 - At hand was only arduino, and you can connect mice compatible with
                   PS / 2, and they are usually very inaccurate.  It could have been on stm32, but debug boards
                   much more expensive, most did not have time to solder.  (but if interested, then
                   a few years ago there was such a similar project exactly on stm32f4discovery)
               c) Take some simple one paid computer.  At hand was just Raspberri pi.
                   + Suitable for any USB mice.
                   + Good performance
                   - Expensive, but may need excess power later
As a result, Malina pi 3 lay under the surgeon's knife. Four 64-bit A-53 cores at 1GHz, 512 MB of RAM and many other tsiferok for this task.
Task: Indication should be on the issued 7-segment indicators. It turns out we need 6 digits per coordinate, for a total of 12 indicators. Each indicator has 7 legs per digit + leg per LED point (dp), we do not consider the common wire. Total after simple calculations we get that we have to manage 96 conductors plus we need a button. 96 resistors did not really want to spend.
Listen up
After all, if the LED is lit - it means - does it need one resistor?
To control such an array of legs at once is not possible. There is an exit! And even a few!
1) Use additional microcircuits of the type max7219, or shift registers, multiplexers, etc.
+ It is possible to increase the number of indicators almost infinitely
- Max7219 was with an operating voltage of 5 V
- There was nothing suitable at hand.
2) You can make a dynamic display. At the same time, light only one LED. If the indicators switch very quickly, the human eye will not notice the bases.
+ You only need 8 wires and resistors for one indicator and 12 for switching indicators. Plus do not forget the button. Total: only 21 legs against 96. We take it!
- Since we are trying to control the whole indicator through a single pin, the maximum current is limited to 50 mA. Always take stock, and take 35 mA for all 8 LEDs (which is not very fast). To this we add a fast switching of indicators. As a result, each of us shines 12 times less than it should be. You can modify 12 transistors, but I left it for later, because brightness ultimately enough.
Now the software starts:
On piberri pi need to put linux. I set the minimum distribution
RASPBIAN JESSIE LITE .
Further, through the putty program I connected to Malinki IP, and then everything through the command line.
To make it easier to work with GPIO (input and output ports) there is a wonderful library WiringPi .
How to install it and manage ports, you can find a lot of information on the network, so I will not stop at this in detail.
Next you need to create a daddy of our project:
cd /home/pi sudo mkdir mouse cd /home/pi/mouse Next, open the editor and paste the code from the gita. IMPORTANT! I wrote the code very quickly!
sudo nano To exit the editor, press Alt + x and save the file with the name blinker.c. Further it is necessary to compile with wiring pi:
gcc -o mouse mouse.c -l wiringPi Everything! Now connect the mouse, insert the wires and run!
Wire connection
// pin number declarations. We're using the Broadcom chip pin numbers.
const int p21pin = 2;
const int p22pin = 3;
const int p23pin = 4;
const int p24pin = 17;
const int p25pin = 27;
const int p26pin = 22;
const int p11pin = 10;
const int p12pin = 9;
const int p13pin = 11;
const int p14pin = 5;
const int p15pin = 6;
const int p16pin = 13;
const int papin = 8;
const int pbpin = 23;
const int pcpin = 12;
const int pdpin = 20;
const int pepin = 21;
const int pfpin = 24;
const int pgpin = 18;
const int pdppin = 16;
const int butpin = 26;
sudo ./mouse Autostart at boot:
sudo nano /etc/rc.local exit 0 cd /home/pi/mouse sudo ./mouse & Working with this program is very simple. by pressing the mouse button or just the buttons on the board is reset. With a long press of a button, we switch to the DPI adjustment mode. This is an important parameter that is set by the mouse and shows how many samples we will get when moving one inch. Accordingly, digging on the board and on the mouse adds and decreases DPI. Long press, our value is recorded in the file and securely stored until the next system boot. For the purity of the experiment in the program, the display, information from the mouse and the button are processed in parallel processes.
Further the most interesting! Testing and results!
What are the nuances of working with a mouse:
1. The X and Y axes on my mouse were not parallel to the side faces, it was necessary to use “Pythagorean pants” to calculate the real distance.
2. Resolution is not equal to the error!
In simple language - the resolution really shows the minimum movement that the mouse sees, (the readings in the computer must be discrete with the minimum resolution). But that the mouse does not miss anything, is not guaranteed. You can reduce this value using good surfaces (so that the optical sensor can track movements), use low speeds. But there will always be gaps! For the user, this means continuous zero care and unpredictable measurement error.
3. USB HID on which the mouse works does not guarantee the delivery of information to the computer! That is, it is not known whether the computer missed any information from the mouse or not. The probability of missing information is small, but still there.
4. Sensitivity (resolution) settings are sometimes not stored in the mouse, but in the mouse program.
5. Here I am very angry! The fact is that I took the mouse the coolest from the range of Logitech, this is the most advanced was on that day model logitech performance mx. But what was my surprise when the mouse gave different errors when moving back and forth. WHAT IS IT LIKE? I will explain to the user. If you constantly move the mouse back and forth, then the cursor is noticeably so everything is reduced and reduced. It is on any platforms. You have to periodically raise the mouse and put it on a new place. After I noticed this, my life turned into a nightmare! #Logitech logitech explain the significant difference in measurement errors back and forth!
Video demonstrations of work:
The result: the disadvantages outweighed all the advantages of the mouse as a measuring device. Therefore, the project is closed and spread for my dear readers on GeekTimes.
Source: https://habr.com/ru/post/373591/
All Articles