Ilyich lamp - retro print armature on a 3D printer with a filament LED lamp
A small note about how I applied my commonly used 3D printer experiments for peaceful purposes.
Very simple article - do not wait for revelations. I want to tell you how I made a vintage-minimalist lamp in the style of a Soviet village of the 50s. With the use of 3D printing, unconventional application of the Blender program (Production of a model using boolean operations, like on a turning-milling machine, almost without operations with mesh-mesh), a warm trim line and of course, a kapton tape.

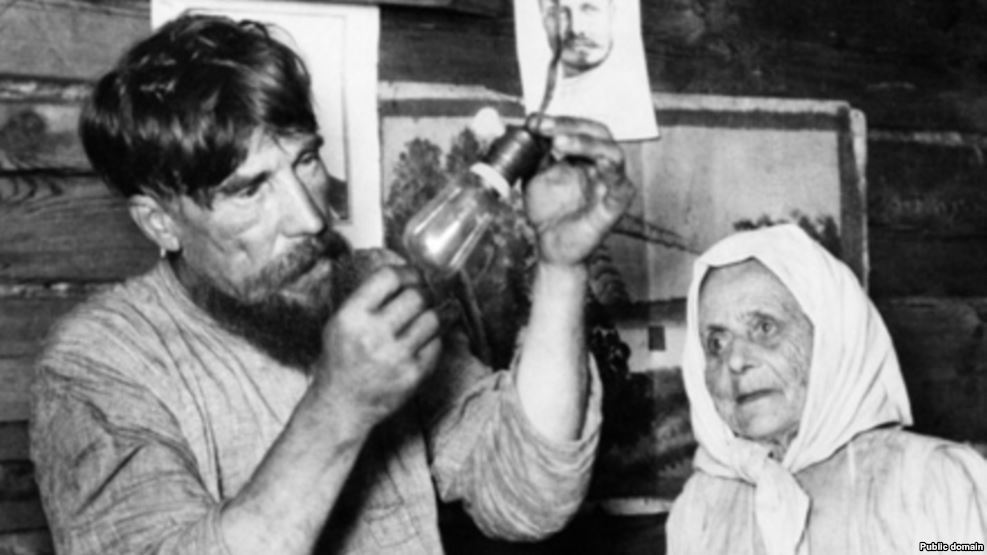
I have a daughter of 9 years. We are very friendly and I often tell her about the history of our family, how we lived and what my impressions were. At one point, when I talked about the lonely light bulb hanging from the ceiling in my grandmother's hut and twisted wires running along the wall on porcelain insulators, and how comfortable it was, I saw that it made a big impression on her. Here in the store, to my amazement, I saw a terribly similar wire in a silk braid (conditionally silk, they used to be similar to cotton).
')

And of course, there were filament LED-lamps with a good discount. I had old porcelain cartridges - I plugged it in, turned it on and showed it. My daughter was terribly happy and asked to do the same in her room. Well, I, accordingly, bought her an even more old lamp - naturally from a famous photo: Ilyich light bulb.
Only LED and filament.

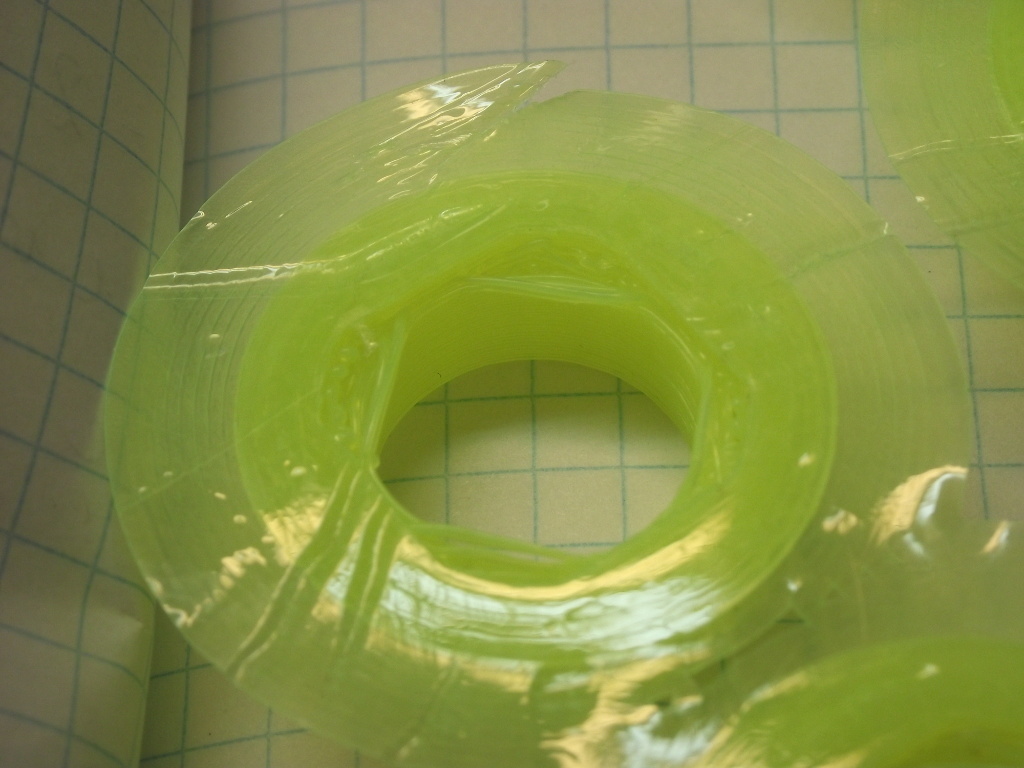
There were no porcelain stand insulators, so I decided to print their likeness. Moreover, according to the results of the next series of experiments, the head worked very well. On trimmer line, pleasant yellow-green color.
I have been sitting in Linux for a long time. So for 3D modeling I use Blender. This is not considered the most convenient tool, but I have adapted. Since I have a lathe and a drilling machine, I think in categories - cut / add. Boolean operations are very intuitive here. Combine the details, subtract from one another, leave only what intersects. Besides, I started 3d modeling with the OpenSCAD program. There, Boolean operations are fully involved. At the beginning of my attempts to use these operations, I was faced with the fact that in many cases they refused to perform, some terrible defects appeared in the mesh grids. Nightmare. Searches on the Internet gave the most relevant advice at that time - do not use / not / indecently to use Boolean operations in Blender.
However, it was difficult and inconvenient for me to work with the mesh grid as an adult 3D modeler. I adapted, understood the logic and now I use the same Boolean operations when I need to do something exactly. This is not related to statues, vases, etc. I'm a techie. However, the mesh grid is not bad, but it is somehow easier for me to think in terms of machine tool categories.
Similarly, made the cord holder, for attachment to the ceiling. And all printed. Please note - porcelain cartridge (ceramics) - it has good thermal conductivity, for LED-bulbs this is true.


Printed on the written article for the final check of the results of the calculations of the parameters. It is quite satisfied. Especially the way the product began to hold even on a stretched and worn Kapton.

Here is the skirt details - bottom view. Visible dents and a lot. It is on the kapton wrinkles, resulting from stretching the tape with multiple removal of printed parts.
True, I also adapted to shoot the details using a bank card 8)). Stuck comfortable. This is not an advertisement! I Dremel sharpened one corner. Only on the one hand, on the other plane. Originally planned to adapt this to open a smartphone and a Chinese tablet. It turned out well with them. Well and adapted as for separation of parts from a trim line / polyamide / nylon. And even in the hot, not cooling the table. The fact is that, unlike ABS, the polyamide part does not rebound so well from the Kapton when the table is cooled.
And here is the result:
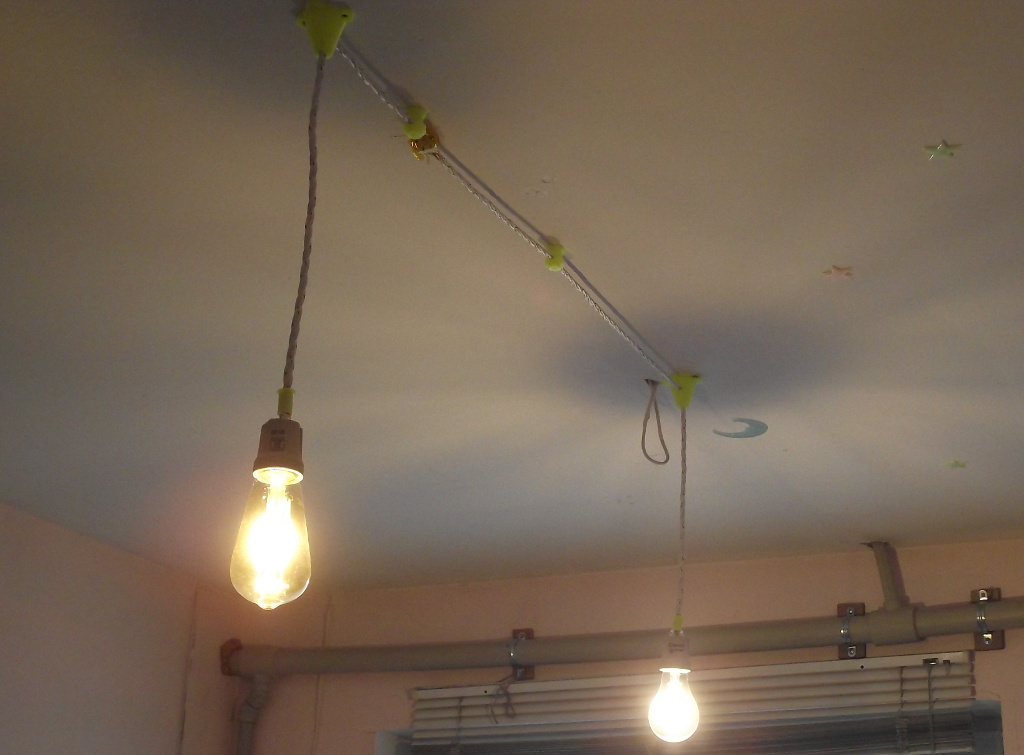
One light bulb - retro, for comfort, another, brighter - for light. Explanation. Pipes under the ceiling - do not worry, the house is not finished in construction and decoration, and this is part of the heating system with free circulation of water. The whole house was planning for the possibility of living in the absence of electricity. So when electricity is lost, everything is working properly in our boiler and sewage treatment plant (they are without an air pump). Water, too, its own - there is a well.
Very simple article - do not wait for revelations. I want to tell you how I made a vintage-minimalist lamp in the style of a Soviet village of the 50s. With the use of 3D printing, unconventional application of the Blender program (Production of a model using boolean operations, like on a turning-milling machine, almost without operations with mesh-mesh), a warm trim line and of course, a kapton tape.
I have a daughter of 9 years. We are very friendly and I often tell her about the history of our family, how we lived and what my impressions were. At one point, when I talked about the lonely light bulb hanging from the ceiling in my grandmother's hut and twisted wires running along the wall on porcelain insulators, and how comfortable it was, I saw that it made a big impression on her. Here in the store, to my amazement, I saw a terribly similar wire in a silk braid (conditionally silk, they used to be similar to cotton).
')
And of course, there were filament LED-lamps with a good discount. I had old porcelain cartridges - I plugged it in, turned it on and showed it. My daughter was terribly happy and asked to do the same in her room. Well, I, accordingly, bought her an even more old lamp - naturally from a famous photo: Ilyich light bulb.
Only LED and filament.
There were no porcelain stand insulators, so I decided to print their likeness. Moreover, according to the results of the next series of experiments, the head worked very well. On trimmer line, pleasant yellow-green color.
I have been sitting in Linux for a long time. So for 3D modeling I use Blender. This is not considered the most convenient tool, but I have adapted. Since I have a lathe and a drilling machine, I think in categories - cut / add. Boolean operations are very intuitive here. Combine the details, subtract from one another, leave only what intersects. Besides, I started 3d modeling with the OpenSCAD program. There, Boolean operations are fully involved. At the beginning of my attempts to use these operations, I was faced with the fact that in many cases they refused to perform, some terrible defects appeared in the mesh grids. Nightmare. Searches on the Internet gave the most relevant advice at that time - do not use / not / indecently to use Boolean operations in Blender.
However, it was difficult and inconvenient for me to work with the mesh grid as an adult 3D modeler. I adapted, understood the logic and now I use the same Boolean operations when I need to do something exactly. This is not related to statues, vases, etc. I'm a techie. However, the mesh grid is not bad, but it is somehow easier for me to think in terms of machine tool categories.
If interested, then more, as I created a 3D model
So I drew a 2D drawing. Clearly, I did not build the transition lines, I see the detail well already, I had to calculate the dimensions.

In Blender, he created a cylinder Ø22mm, height 21mm, 64 segments placed it along the axes XYZ: 0; 0; 10,5. Made a torus. The segments in the large ring are also 64, in the small one. The main radius is 13.67 mm / non-main 5.67. Placed on 0; 0; 10. For the cylinder made a Boolean operation "difference."
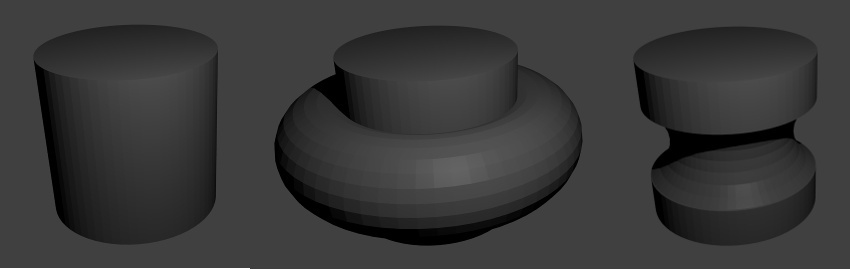
Made cylinder Ø12, length 20, segments 64. Placed 0; 0; 14. Thus, its bottom ends 4 mm above the bottom of the part. Made a "difference" of parts and cylinder. It turned out drilling to a depth of 17 mm.
Made cylinder Ø14, length 20, segments 64. Placed 0; 0; 23. I didn’t mark the depth of drilling Ø14 in the drawing, I apologize, but I don’t redo it. Made a "difference":

According to the drawing, we are a little short of the height of the cylindrical part. So did to avoid collisions in the manufacture of the protrusion below. Add cylinder Ø22mm, height 1mm, 32 segments placed it: 0; 0; 21.5. We drill with the same cylinder on Ø14.
We drill a through hole for the screw with a Ø4 cylinder, length 20. 0; 0; 0. Now we make a transverse through-hole with a cylinder Ø8.4 30 mm long, segments 64. Place 0; 0; 0, rotate along the X axis 90º. We change the height along the Z axis from 0 to 16. We make the "difference".

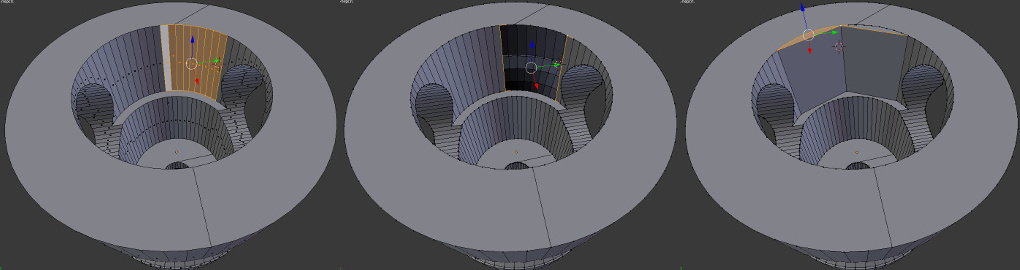
Turning to edit mode details, delete the faces on the part of the circle, as shown in the figure. I select 4 points at the edges of the empty space, fill it with the command “F”. In the other direction - the same. It turns out an elegant bend in which the wire will be clamped with a cork.
It now remains to prepare a spherical strap for the upper part. Add a sphere with a radius of 17,12mm. Its center needs to be placed 8.88 mm above the sole of the part - this is also not marked on the drawing - alas! UV-polysphere, segments 64, rings 64, size 17,12. Location 0; 0; 8,88.
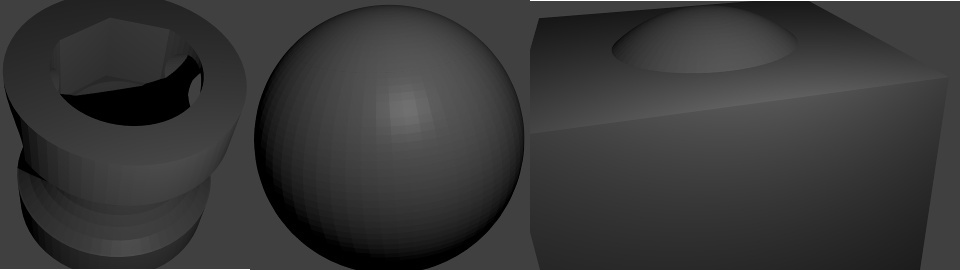
Cut it from above - according to the drawing at a height of 24.5 mm and at the top of our second cylinder 22mm. We cut the cube with a radius of 20 mm. Well, yes, this is how it is set. Place it 0; 0; 2. Subtract it from the sphere. Now position the cube 0; 0; 44,5. Subtract it from the sphere. We'll have to drill a hole Ø14 in it, as in the other two parts. Cylinder Ø14, length 20, segments 64. Place 0; 0; 23.

In Blender, he created a cylinder Ø22mm, height 21mm, 64 segments placed it along the axes XYZ: 0; 0; 10,5. Made a torus. The segments in the large ring are also 64, in the small one. The main radius is 13.67 mm / non-main 5.67. Placed on 0; 0; 10. For the cylinder made a Boolean operation "difference."
Made cylinder Ø12, length 20, segments 64. Placed 0; 0; 14. Thus, its bottom ends 4 mm above the bottom of the part. Made a "difference" of parts and cylinder. It turned out drilling to a depth of 17 mm.
Made cylinder Ø14, length 20, segments 64. Placed 0; 0; 23. I didn’t mark the depth of drilling Ø14 in the drawing, I apologize, but I don’t redo it. Made a "difference":
According to the drawing, we are a little short of the height of the cylindrical part. So did to avoid collisions in the manufacture of the protrusion below. Add cylinder Ø22mm, height 1mm, 32 segments placed it: 0; 0; 21.5. We drill with the same cylinder on Ø14.
We drill a through hole for the screw with a Ø4 cylinder, length 20. 0; 0; 0. Now we make a transverse through-hole with a cylinder Ø8.4 30 mm long, segments 64. Place 0; 0; 0, rotate along the X axis 90º. We change the height along the Z axis from 0 to 16. We make the "difference".
Turning to edit mode details, delete the faces on the part of the circle, as shown in the figure. I select 4 points at the edges of the empty space, fill it with the command “F”. In the other direction - the same. It turns out an elegant bend in which the wire will be clamped with a cork.
It now remains to prepare a spherical strap for the upper part. Add a sphere with a radius of 17,12mm. Its center needs to be placed 8.88 mm above the sole of the part - this is also not marked on the drawing - alas! UV-polysphere, segments 64, rings 64, size 17,12. Location 0; 0; 8,88.
Cut it from above - according to the drawing at a height of 24.5 mm and at the top of our second cylinder 22mm. We cut the cube with a radius of 20 mm. Well, yes, this is how it is set. Place it 0; 0; 2. Subtract it from the sphere. Now position the cube 0; 0; 44,5. Subtract it from the sphere. We'll have to drill a hole Ø14 in it, as in the other two parts. Cylinder Ø14, length 20, segments 64. Place 0; 0; 23.
Similarly, made the cord holder, for attachment to the ceiling. And all printed. Please note - porcelain cartridge (ceramics) - it has good thermal conductivity, for LED-bulbs this is true.
Printed on the written article for the final check of the results of the calculations of the parameters. It is quite satisfied. Especially the way the product began to hold even on a stretched and worn Kapton.
Here is the skirt details - bottom view. Visible dents and a lot. It is on the kapton wrinkles, resulting from stretching the tape with multiple removal of printed parts.
True, I also adapted to shoot the details using a bank card 8)). Stuck comfortable. This is not an advertisement! I Dremel sharpened one corner. Only on the one hand, on the other plane. Originally planned to adapt this to open a smartphone and a Chinese tablet. It turned out well with them. Well and adapted as for separation of parts from a trim line / polyamide / nylon. And even in the hot, not cooling the table. The fact is that, unlike ABS, the polyamide part does not rebound so well from the Kapton when the table is cooled.
And here is the result:
One light bulb - retro, for comfort, another, brighter - for light. Explanation. Pipes under the ceiling - do not worry, the house is not finished in construction and decoration, and this is part of the heating system with free circulation of water. The whole house was planning for the possibility of living in the absence of electricity. So when electricity is lost, everything is working properly in our boiler and sewage treatment plant (they are without an air pump). Water, too, its own - there is a well.
Source: https://habr.com/ru/post/373135/
All Articles