Steampunk webcam
In the last article we wrote about how to develop a webcam. Now we have a finished prototype, and we want to share with you the story of how it was created.
The prototype of the webcam was developed by Andrey Korovov. For convenience, further narration will be conducted on his behalf.
I always liked mechanical art and antique mechanisms. In my professional activity I develop mining high-voltage equipment, simplicity and reliability are important there, and there is no place for beauty and technical delights.
I have long wanted to make a steampunk product with working mechanics, sketched various mechanisms and stopped on a webcam with a mechanical shutter. The idea arose from the fact that there are cases of hacking webcams. Therefore, a regular webcam can create discomfort and a closed lens solves this problem.
')
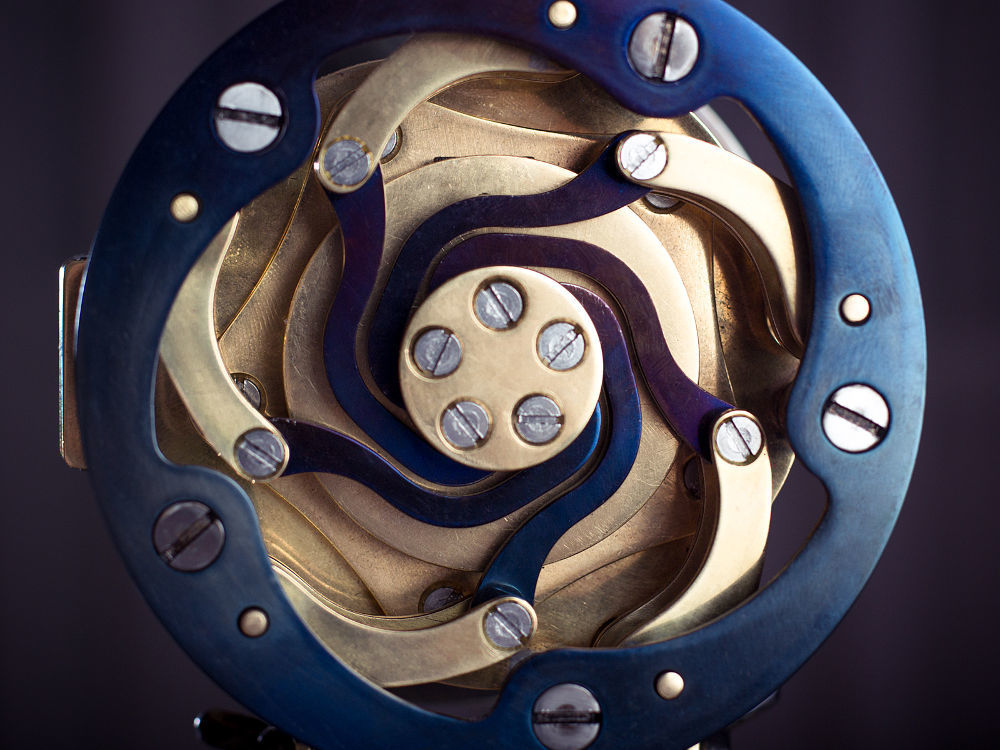
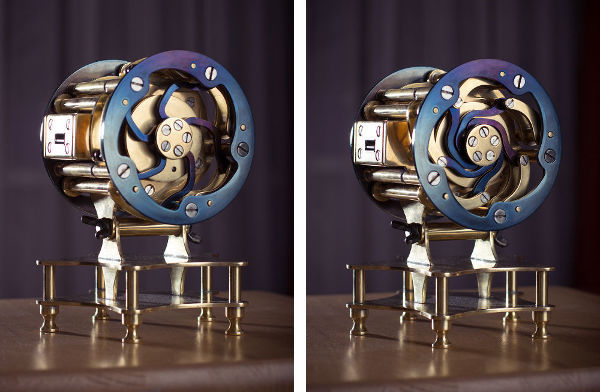
It was decided to make the shutter with rotating petals resembling a diaphragm. The optimal number of petals turned out to be 5, since they do not abut against the axis of rotation of each other and dimensions can be reduced.
Several variants of kinematics were considered.
The first version of gear with internal gearing.
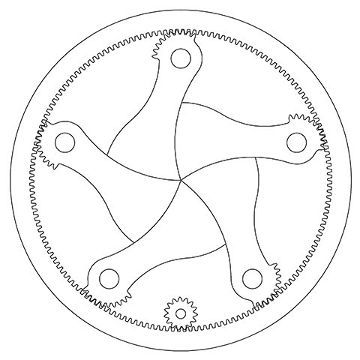
This option did not fit, as it is not sure that the mechanism is working with the accuracy available to me.
The second option with thrust to the swivel ring.
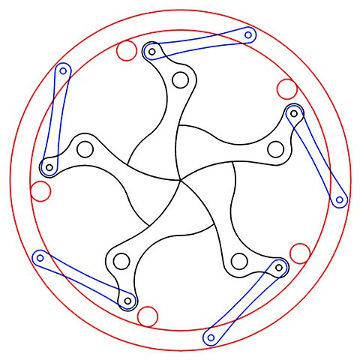
It was difficult to ensure the reliability of the movement of the ring.
There was even a variant with a chain, but it was not possible to find a chain with small links.
As a result, a variant with a lever mechanism operating between dead spots was selected, which allowed for the necessary accuracy of movement with low precision of the driving link.
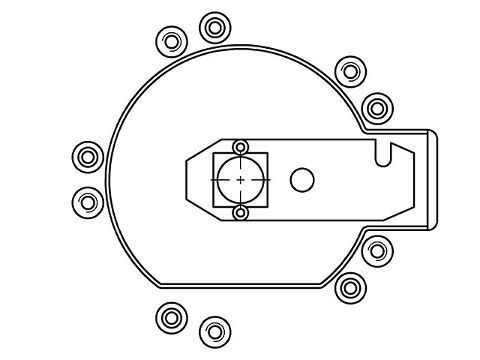
When choosing a webcam for the work was taken logitech c270 due to its high quality and reliability. More advanced models, for example, the c910, were also considered, but its board, extended in both directions, would significantly increase the size of the case. The dimensions of the c270 camera also caused difficulties due to the non-symmetrical placement of the lens. Therefore, such a design was invented. In the future, we plan to use the logitech c310 camera, which in some parameters is better than the c270, although not by much, but even in appearance with a higher-quality lens.
Initially, it was decided to make the automatic opening and closing of the camera when switching on / off the broadcast / recording. A transistor was connected to the camera's LED, which switched the relay controlling the motor. With the help of reed switches and magnet, the circuit is opened when the disk with rods reaches the desired position.
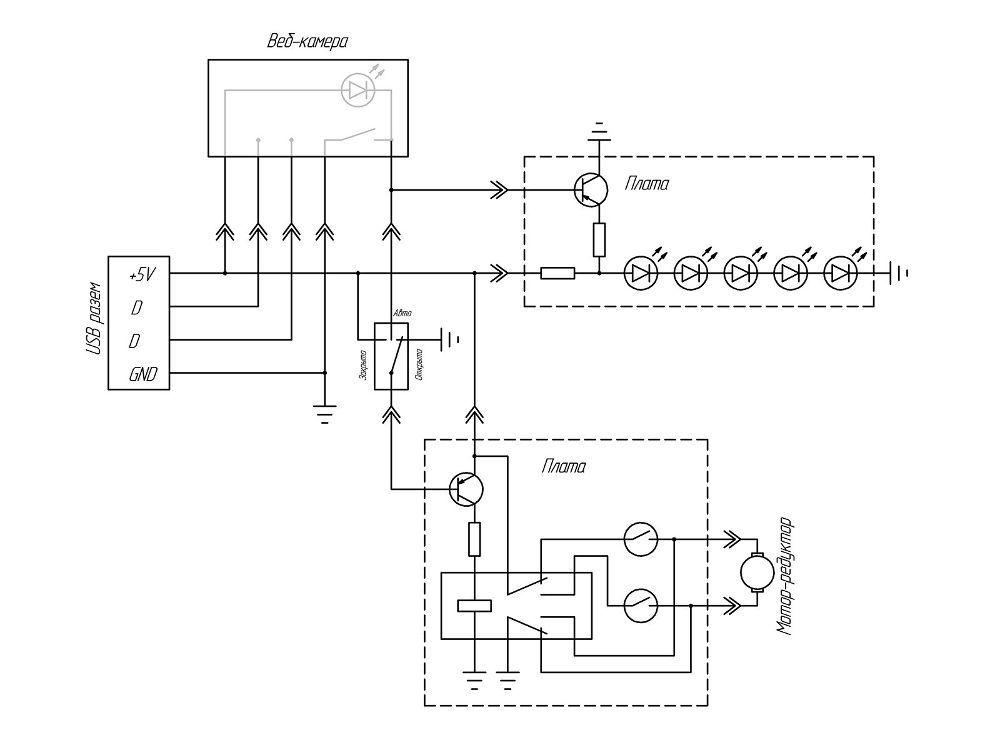
In the future, we want to add a shutter switch to open / close / automatically, as shown in the diagram above. And also add a separate transistor for the LEDs, which will not always light when the shutter is open, but only if recording from the camera is turned on. Even as an addition, we consider the installation of an ionistor so that the shutter can close when the camera is disconnected from the usb connector. So far, they have not figured out how to implement it, perhaps, someone will tell us in the comments how it can be done beautifully and safely.
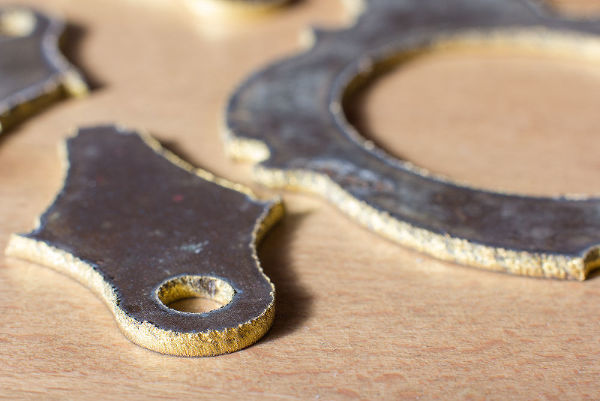
The blanks for the camera of sheet brass and steel were made by laser cutting. With details of fine brass and steel problems have arisen. And the edges of brass 2.5 mm thick turned out to be foamed. Therefore, for the production of the party we plan to use hydro-abrasive cutting.
When we ordered the turning of rollers, racks and legs, few people wanted to do this. We thought about purchasing a lathe, looking for options, found out that only Chinese models are currently sold from desktop lathes. With used machines, too, not everything is good, the old models of TV-16, TV-4 are already worn out and it is difficult to find a good option. And we thought about making our own machine. So maybe in the future we will write an article about it.
Further there was a manual processing of all details. The required holes were unwrapped for greater accuracy. The grooves were made grooves for countersunk and slotted screws. All parts were polished with fine sandpaper and GOI paste.
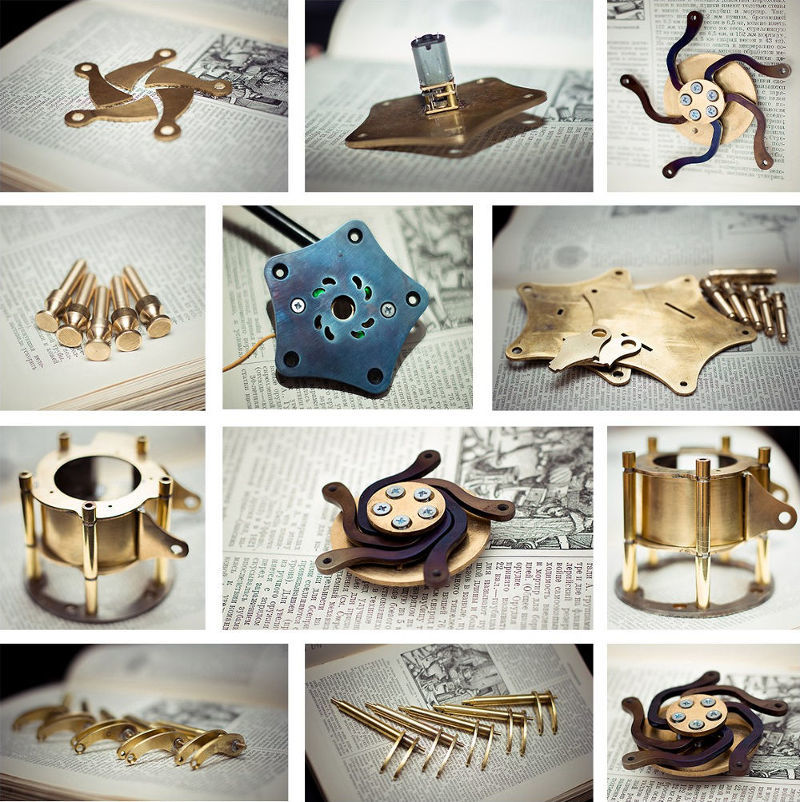
Soldering was carried out using a gas stove, a burner on the balloon, solder paste and solder. The difficulty was the soldering of additional elements while not soldering the already soldered ones. For this, a wet cloth was used.
The petals were initially soldered with a gap, after which the gap was measured, the roller was set in a vice, so that the petal was with the necessary gap up to the stop. After that, the petal was heated and turned all the way. In the series, we will use levers with adjustment.
In the series, instead of the USB connector will be microUSB and it will be located on the bottom of the protrusion.
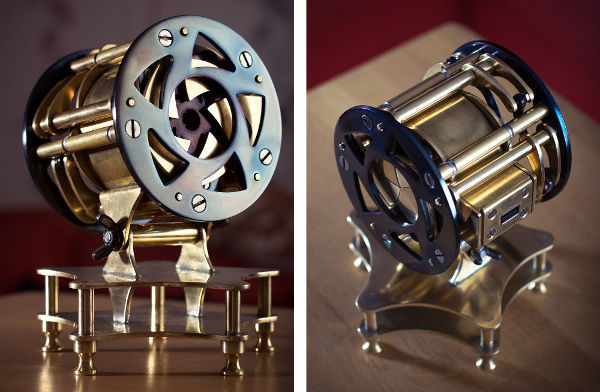
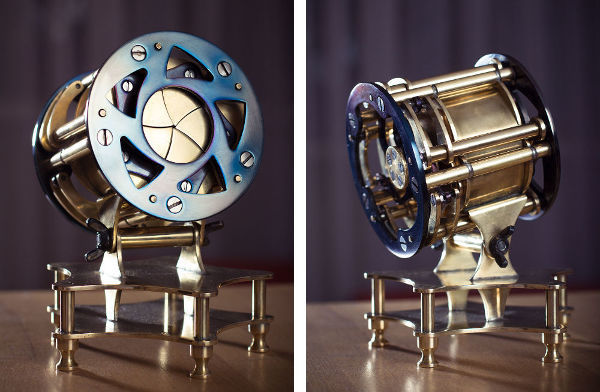
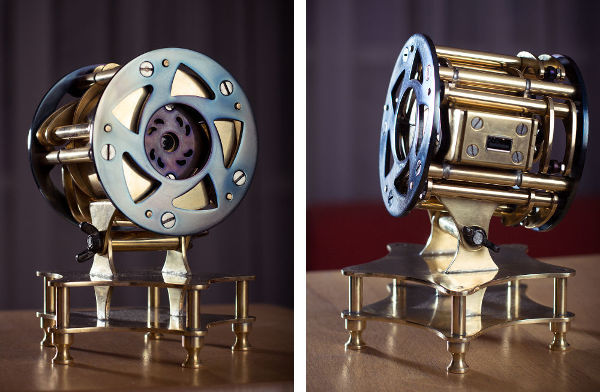
What we got in the end you can see on the video and photo below.
Now we are raising funds for the production of limited edition webcams on boomstarter.
The prototype of the webcam was developed by Andrey Korovov. For convenience, further narration will be conducted on his behalf.
I always liked mechanical art and antique mechanisms. In my professional activity I develop mining high-voltage equipment, simplicity and reliability are important there, and there is no place for beauty and technical delights.
I have long wanted to make a steampunk product with working mechanics, sketched various mechanisms and stopped on a webcam with a mechanical shutter. The idea arose from the fact that there are cases of hacking webcams. Therefore, a regular webcam can create discomfort and a closed lens solves this problem.
')
It was decided to make the shutter with rotating petals resembling a diaphragm. The optimal number of petals turned out to be 5, since they do not abut against the axis of rotation of each other and dimensions can be reduced.
Several variants of kinematics were considered.
The first version of gear with internal gearing.
This option did not fit, as it is not sure that the mechanism is working with the accuracy available to me.
The second option with thrust to the swivel ring.
It was difficult to ensure the reliability of the movement of the ring.
There was even a variant with a chain, but it was not possible to find a chain with small links.
As a result, a variant with a lever mechanism operating between dead spots was selected, which allowed for the necessary accuracy of movement with low precision of the driving link.
When choosing a webcam for the work was taken logitech c270 due to its high quality and reliability. More advanced models, for example, the c910, were also considered, but its board, extended in both directions, would significantly increase the size of the case. The dimensions of the c270 camera also caused difficulties due to the non-symmetrical placement of the lens. Therefore, such a design was invented. In the future, we plan to use the logitech c310 camera, which in some parameters is better than the c270, although not by much, but even in appearance with a higher-quality lens.
Initially, it was decided to make the automatic opening and closing of the camera when switching on / off the broadcast / recording. A transistor was connected to the camera's LED, which switched the relay controlling the motor. With the help of reed switches and magnet, the circuit is opened when the disk with rods reaches the desired position.
In the future, we want to add a shutter switch to open / close / automatically, as shown in the diagram above. And also add a separate transistor for the LEDs, which will not always light when the shutter is open, but only if recording from the camera is turned on. Even as an addition, we consider the installation of an ionistor so that the shutter can close when the camera is disconnected from the usb connector. So far, they have not figured out how to implement it, perhaps, someone will tell us in the comments how it can be done beautifully and safely.
The blanks for the camera of sheet brass and steel were made by laser cutting. With details of fine brass and steel problems have arisen. And the edges of brass 2.5 mm thick turned out to be foamed. Therefore, for the production of the party we plan to use hydro-abrasive cutting.
When we ordered the turning of rollers, racks and legs, few people wanted to do this. We thought about purchasing a lathe, looking for options, found out that only Chinese models are currently sold from desktop lathes. With used machines, too, not everything is good, the old models of TV-16, TV-4 are already worn out and it is difficult to find a good option. And we thought about making our own machine. So maybe in the future we will write an article about it.
Further there was a manual processing of all details. The required holes were unwrapped for greater accuracy. The grooves were made grooves for countersunk and slotted screws. All parts were polished with fine sandpaper and GOI paste.
Soldering was carried out using a gas stove, a burner on the balloon, solder paste and solder. The difficulty was the soldering of additional elements while not soldering the already soldered ones. For this, a wet cloth was used.
The petals were initially soldered with a gap, after which the gap was measured, the roller was set in a vice, so that the petal was with the necessary gap up to the stop. After that, the petal was heated and turned all the way. In the series, we will use levers with adjustment.
In the series, instead of the USB connector will be microUSB and it will be located on the bottom of the protrusion.
What we got in the end you can see on the video and photo below.
Now we are raising funds for the production of limited edition webcams on boomstarter.
Source: https://habr.com/ru/post/373033/
All Articles