The use of 3D technology in dentistry

There are main areas of application of 3D printers in dentistry : orthodontics, surgery, prosthetics.
Ready solutions for orthodontics

As you know, orthodontics is the correction of the bite by any means. Previously, these were records, then braces appeared, and now transparent for Russia new for Russia, which are only gaining momentum, have appeared.
')
What is interesting with the aligners?

The first plus - does not spoil the enamel. The element of the bracket system is not glued to the tooth, and after a course of treatment it is not dismantled. There is no load on the enamel, it is simply missing.
Secondly, and most importantly, it is the correct movement of the teeth. Because the teeth move inside the jaw, and a new bone tissue is formed around them. When braces are put on the patient - they put gum, constantly tighten, and there is always a movement of the jaws relative to each other; once the patient wore braces.
Transparent aligners are a technology that allows teeth to move in all directions, i.e. and forward, and back, and up, and down - it all depends on what clinical case.

The next important factor and plus of this technology is that, by applying transparent aligners, the doctor, having given the kit to the patient, can forget about it. After a month or three, the patient will come, make a check - if everything is in order, the treatment will continue. There is no need to tighten or regularly visit the dentist.
And finally, an important factor - transparent aligners do not interfere with personal life: they are not visible, food does not get stuck, etc., i.e. you are able to do whatever you want. From the meter, transparent aligners are practically unmentioned, unlike braces.
There are two world-famous service centers that provide services to dentists for the production of caps for transparent aligners.

It seems to be all beautiful, but that in truth: for a doctor, whose duties include only to take a cast or make a teeth scan, this set of cap costs about $ 1,500. For a client, this price is $ 3,000.
How were the aligners made before?
Filmed plaster model of the initial position of the teeth. It was cut and with the help of wax they created several blanks that mimic the step-by-step movement of the patient's teeth.
Further, these cut plaster models (the process is absolutely identical to casting in silicone) will be replicated. And according to them, polyurethane models were made for these forms for the final vacuum molding.
Sending to customers. Colored polyurethane forms are sent along with the Elyner only to mark each stage of the course of treatment.
Production time about 10 days. A lot of manual labor: cut the plaster model, manually move it. There is no virtual modeling, nothing is there, it all happens manually - accordingly, about 10 days are spent on one clinical case in the laboratory. Manual labor - many errors creep in.
How is this done today?

The first and most important step is the scan of the cast. This can be either a plaster cast, or a cast made through two component silicone.
After the blind scan has been received, the file is “driven” into the software, in which virtual modeling of the movement of the dentition “from” and “to” occurs, i.e. from the original crooked position of the teeth to a perfect smile.
Then the simulated treatment course is sent to the printer, printed. Vacuum molding of caps on printed modified models is done, and a cap is issued to the client through a doctor.
Why it is worth using 3D printing for the manufacture of aligners?
First, high profitability. The real cost of producing the same kit in my office is a maximum of 30,000 rubles. That is, at least about 60,000 rubles of profit remains with the business owner, because his orthodontist will model the matrices in the program directly.
Secondly, treatment can begin as early as the day after the scans are removed. This means that you do not need to wait until the parcel arrives, until the 30th set of caps is printed and while it is pressed out. You can print one first start cap, give it to the patient, and he will be happy tomorrow for a course of treatment.
And another important factor. In the course of treatment, something can always go wrong, and in the case of working with service centers, we will have to send them a corrective scan, and they will start the treatment again from that moment on. Yes, for the doctor it is free, but it is a waste of time: for 2 weeks, at least, the patient’s treatment process is inhibited, which can negatively affect the entire course of treatment with transparent alliners.
Software for the manufacture of aligners

" 3Shape ". Excellent and the most advanced CAD CAM system today, except that after the acquisition you pay annually for the renewal of the license.

" Maestro 3d Ortho Studio " - Italian software. The price for the package is initially almost 2 times more expensive, but you get the software completely open and you will always receive the stl file at the output, one license is purchased for life. If there are any new modules, you can purchase them separately. But the new modules do not affect the old functions, i.e. there is just some new functionality that you can buy if you wish.

And the third program is software from the Russian company Avantis . The license is inexpensive - 15,000 rubles, but at the output you do not receive any file. At the output, all files are sent directly to Avantis 3d and they print them on their equipment.
In this case, it is possible to purchase a module for .STL output at home, but this option is available for an additional fee.
3D-technology in the application of bracket systems

Why all the same braces? They have not left the market, they are, they are popular. And the advantages that you will hear in the direction of braces:
First, it is the widest distribution in the world at the moment. This tool really works, i.e. there have been cases where many difficult clinical situations have been corrected. It works. Yes, it spoils the enamel. But the teeth become equal.
Another plus is the predicted result. If you constantly observe, go once a week to the dental office, then, in principle, you can predict the result.
The following plus for the doctor: braces cannot be removed to the patient. A lot of orthodontists will say cons in the direction of transparent aligners on the side that the doctor cannot control what the patient is guaranteed to wear, and then the claims will be presented to the doctor. The patient took off, forgot to put on transparent alyiners. With braces this will not work: if the doctor puts, then the patient is already hopelessly obliged to wear them.
And, finally, the main advantage that still prevails in the Russian market today is the bracket systems of various price categories, for absolutely any budget. That is, you can put the budget brackets - metal, in the region of 50,000 rubles, and you can put ceramics worth from half a million and above. It all depends on the means of orientation.
But where to use a 3D printer? In order to have a predictable result. Braces can be put, roughly speaking, by the eye, and you can put on a template-conductor. For this there is a special software: the previously mentioned ones are able to do this.
The tray is printed - a positioning spoon, where it is then placed, the bracket system itself. All elements of braces will be positioned and glued directly to the places where it will be required, where it will be necessary, without errors and predictably accurately. But, unfortunately, nobody uses this system, because everyone does it by eye.
Ready solutions for implantology: production of surgical patterns

The next line of treatment is implantology. Accordingly, when the situation and the picture is critical, when the tooth is completely destroyed and nothing can be done with it, but it’s necessary to chew something, the crown is simply not set, then an implant comes to the rescue.
Surgical templates. What are they needed for!? Pros for using templates

A 3D printer is needed for the manufacture of a surgical pattern - this is a kind of jig through which it will be quickly and accurately drilled at the right angle without any negative consequences.
What is important is planning an operation in advance. These are two visits to the dentist: the first is for a snapshot of an impression and a referral to a CT scan, the second is directly for implantation.
Returning to the pros, we repeat that the operation is planned in advance, there will be no unplanned situations and the correct positioning is guaranteed when drilling.
Surgical templates. Main problems

- Drilling to a greater or lesser depth
- Drilling at the wrong angle
- Inaccurate positioning
The price of the error is an expectation from 2 months to a year for the restoration of bone tissue.
Here you see the pin hit the nerve. What made it happen? Due to the fact that there was a deep drilling, uncontrollable. The doctor did not check at the time of drilling with CT scans. He may not even have a living 3D model to evaluate it.
This happens, unfortunately, very often, and such situations will cause very, very much trouble later. Accordingly, the cost of error, if the implant gets into the nerve or does not come from that angle - from 2 months to almost a year of recovery. Because the implant is removed, the patient is sent for follow-up care, roughly speaking, but in fact he is just overgrowing bone tissue - that which this unfortunate surgeon has done.
Wrong angle when drilling, implant out of bone.

Here, a snapshot collected from CT slices, in which you can see (the implant pin is shown in red), which just went through the bone while drilling, and also drilled from the side. Accordingly, what is the threat? The patient doesn’t seem to complain, there is no pain and perhaps the implant has caught on, but if he starts to bite nuts or just bites off something solid, then in a flash he can just simply break this jaw piece off, and then facial surgeons. Rehabilitation will be very expensive and painful.
Implant Implantation in the Sinuses

Implants are in the maxillary sinuses. Accordingly, all the treatment also stops, and for six months the patient will walk, roughly speaking, with a false jaw, and in the evening put it in a cup. It is obvious that people do not come to implantologists for this, and then to get high-quality teeth and not have problems with dentistry.
Template requirements

The basic requirements for the template are that:
- It must be a transparent solid material.
- The material must undergo sterilization, withstand high temperatures.
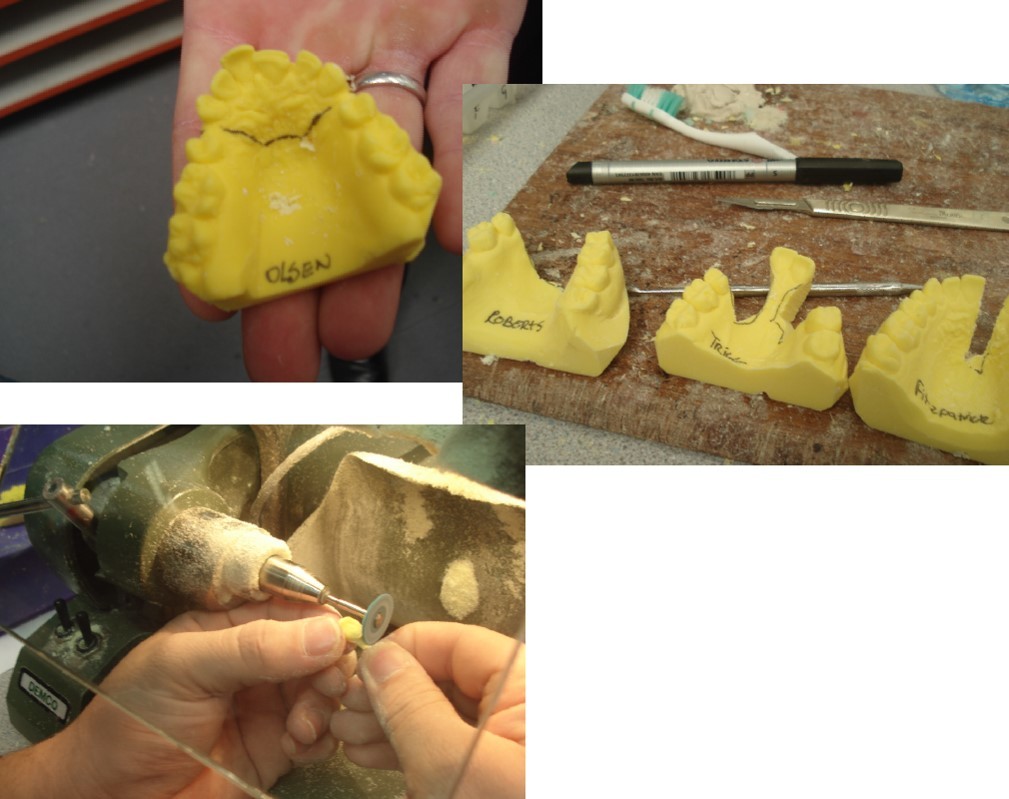
- Accordingly, surgical templates, in live photos.
Surgical templates. Implant assistant

Software. There are a lot of programs on the market. Dentists, they are supporters of a particular system. Accordingly, the software of very many systems is sharpened only for work with certain implants.
An interesting program is the Implant Assistant . The program has a low price, the buyer receives Russian support: on-line help via Skype for almost 24 hours.
Dental models

In general, any work of a dentist does not do without a real fitting on the model.
At present, 99% of dentists make dental models using the traditional method - plaster from molds, which is long, dirty, and again manual labor is required. But with the development of applications of 3D scanners, the logical question is, why not print them? They took, printed according to the results of the intraoral scanner and immediately you have a ready-made impression.
Here are great cheap 3d printers capable of growing such models:

» Formlabs Form 2 3D printer . Price: 419 900 rubles

» Russian DLP 3D printer . 343 900 rubles
Direct production. Production of dental products from KHS and Titan

Direct production. Benefits

How does this happen and why, in fact, is it necessary to print?
Traditionally receive the following methods:
- The first is casting, which is already outdated.
- The second method is milling.
- And a completely new method is printing.
Russia is such a unique market where we skip over certain stages of world development. Casting was all known for a long time. Then milling began to appear. Laboratories that could afford a mill for 10 million and who wanted to keep up with the times acquired it. And now, literally in 5-7 years, a completely new topic appears - this is 3D printing.
Those clinics that could not afford to purchase a milling cutter at that moment, they earned money, were already ready to acquire something new - a seal entered the market.
Accordingly, what advantages do we get from printing? First is the speed. Secondly, it is the production of complex and precise designs. In the photo, here you can see the denture prostheses, and today they can only be obtained in two ways: the first method is casting, the second method is printing. To mill such fine details is impossible. Plus, at the time of casting, we can not shed some elements, they will be less elastic and do not meet the requirements that dentists have for them.
Direct production. Material

Printing takes place in layers. Of what? Raw material is a fine spherical powder with a fraction of 10-40 microns.
Waste is not more than 15%. That is, in the process of printing, in the process of laser melting of the metal, you will necessarily have a conglomerate of fused particles, and in the process of screening out, this rejection does not exceed 15-20%.
Printed parts, monolithic and homogeneous, which is very important. There is no pore. This is always important because if there are pores in the crown, then ceramics will rebound in this place. In a year, in two, maybe in a month, but she will definitely rebound.
Direct production. Manufacturing process

First, it is the creation of a digital model in a CAD program. There are many of them. The most popular is “Dental CAD”. What does she allow? It allows you to generate a crown, a bridge, and even a clasp prosthesis on the basis of the scan. Place support on it and position it on the print table.
Also a very important point. To work with metal printers, despite the fact that these are industrial systems, you must first cut the model into layers. The main dental programs are all slicers, i.e., ultimately, after forming the model, after generating the supports, you cut them in the same program.

Here in the picture, pillars of support, below the platform and many, many units printed from cobalt-chrome.
Any printing on metal printers takes place in a protective environment. It can be nitrogen or argon. In case it is nitrogen, then it is possible to fill the chambers through a nitrogen generator. If it is argon, then, accordingly, cylinders are needed, which will be fed and connected to the machine.
The average dental printer platform holds about 80 units. A little further we compare with traditional methods and show how effective it is.

Everything is clear with the printing process, there are no questions. Printed, removed the platform. After printing, it is necessary to perform annealing in order to stabilize the microstructure, internal stress is removed and to avoid subsequent cracking of ceramics. Because the application of ceramics and its fixation occurs at a temperature of about 800 degrees.

After the item has been burned, released in the oven, it is necessary to cut off all the dental units from the building platform and remove the supports.
Usually, they are cut off from the platform with a band saw or circular saw, which very often already exists in the dental laboratory.
Under the crown are the pillars of support, and at the end they are pointed. It is made specifically for easy removal. Almost all 3D printers print this way, so that there is less post-processing.

Manual processing of the part, where the Dremel or its analog produces a smoothing of the surface, removal of residues from the support.
The ceramics will never stick to the smooth, glossy detail. The part must be prepared, the part must be matte. Therefore, in the necessary order sandblasting or shot.
Accordingly, from the router it is absolutely the same process - all this is subjected to sand blasting.
Direct production. Production evaluation
Milling center
Number of units: 40 units; Time - 13 hours
Number of units: 80 units: Time - 26 hours
3D Printer (Concept Laser Mlab)
Number of units: 40 units; Time - 6 hours
Number of units: 80 units; Time - 11.5 hours
1 kg of KHS powder - 550 units
1 kg KHS disk - 46 units
Unit weight ~ 1.5 g
Summary of frezer. We don’t say anything about casting here, and casting is omitted as an archaic process, long, dirty, non-ecological, outdated.
Upstairs is a disk for a dental mill, cobalt-chrome material. Accordingly, on the left in the plate you see, the number of units that are placed on this disk is only 24 units. And the number of units that are placed on a similar platform is already 80 units.
What does this give? 1 kg of cobalt-chromium powder, we get about 550 units. From the kilogram of cobalt-chromium disk, we get only 46 units of crowns. In my opinion, here is the superiority of print on the face.
The difference between 1 kg of powder and a kilogram disk is about 4 times in total in favor of a disk. That is all the same mathematics in favor of a 3D printer. Plus speed. Look at the speed shown in the table - to mill for longer. And it is, and it is true. Plus you will have wear, cutting tools.
Suitable for direct production machines:

» Realizer 50 . 185 000 €

» Realizer 125 . € 250,000

» Concept Laser Mlab . 220 000 €

» EOS M100 . € 240,000

SLM 125 200 000 €

» Sisma MySint 100 . € 250,000

» 3D Systems Prox 100 Dental .200 000 €
Want more interesting news from the world of 3D technology? Subscribe to us in the social. networks:


Source: https://habr.com/ru/post/372885/
All Articles