Perfect Mini Hakintosh
When Apple switched to the Intel platform in 2005, enthusiasts from all over the world set out to install MAC OS X on regular PCs (Hakintosh). There were four reasons for the realization of this undertaking. 2 physical and 2 legal. The fact is that to start the computer MAC is not using the usual BIOS, but its own EFI bootloader. The second reason is the SMC chip that is installed in every Mac. It generates keys for running all system applications of Mac OS X. Thanks to our compatriot under the nickname Netkas, we managed to get around these two limitations by creating an EFI bootloader emulator (Chameleon, Chemera, Clover) and an SMC chip emulator (FakeSMC.kext). These two software solutions are enough to install MAC OS on a PC.
The legal reasons for the impossibility of such an installation are in the license agreement that the user must accept when setting up the MAC OS. The first reason prohibits the installation of the operating system on computers made NOT by Apple. The second prohibits users from any modification of the system files of the operating system. Here it is worth noting that the modern methods of installing Hakintosh, leave the system files pristine clean. By this, this warning can be neglected. If all of the above doesn’t bother you, let's check how easy it is to install MAC OS X on a modern PC.
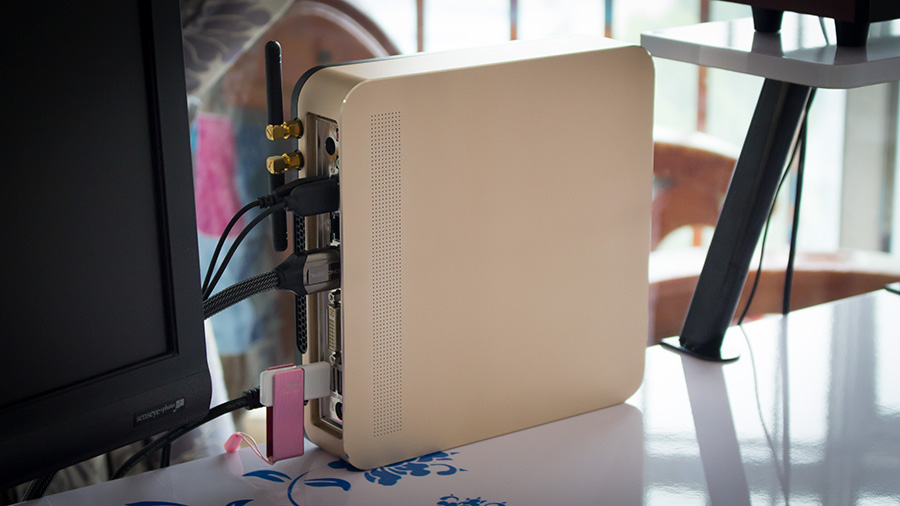
In my case, I chose the following configuration:
- Asus H81T R2 Motherboard
- Intel Core i3-4170 processor (3M 3.7Ghz)
- 2 x 4Gb DDR3L 1600Mhz RAM
- 128Gb mSATA SSD SanDisk
- 500Gb SSHD Seagate
- WI-FI Broadcom (BCM94322HM8L)

')
Preparing to install
To create an installation flash drive, we need:
- Any MAC computer with MAC OS X installed
- Apple ID account
- Internet access
- USB flash drive 16Gb (preferably USB 3.0)
Our client for installation will be the latest version of Apple's Mac OS X, namely El Capitan. During the installation process, we will use the guys’s own development from Tonymacx86.com “UniBeast”, based on the EFI emulator “Clover”. In my opinion, this is the easiest way to create an installation flash drive. They also offer a great tool for post-installation of an EFI emulator and drivers for “MultiBeast” compatible hardware. During the installation, we never run the command line and do not modify any system files. By the way, if after installation we connect the disk with the installed system to the Apple computer, then it will start fine on it and will not swear at anything.
Step number 1. Creating a bootable flash drive
On a MAC computer, go to the AppleStore and download the MAC OS X El Capitan distribution:
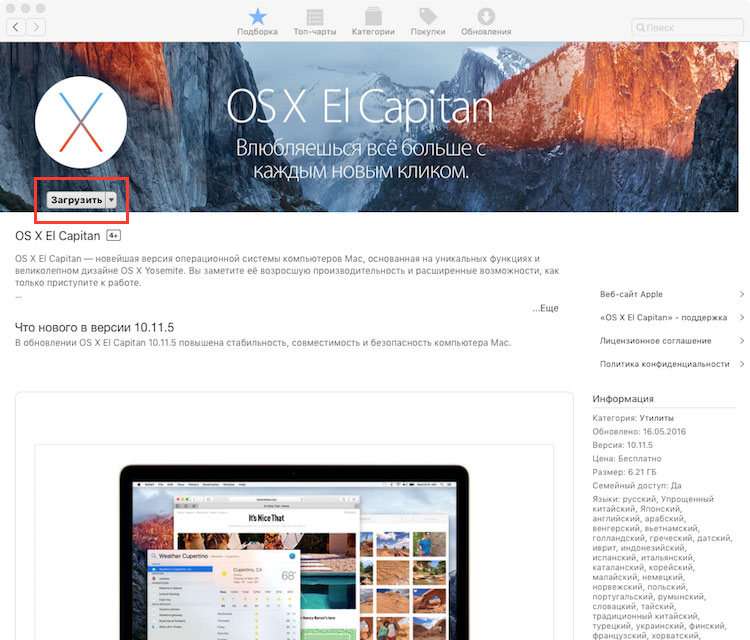
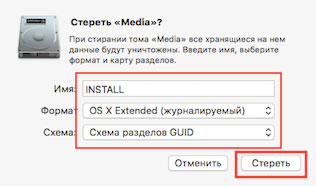
The distribution kit weighs about 6Gb and its download will take some time. For this now is the time to do the preparation of the installation flash drive. To do this, start the Disk Utility, select the installation USB flash drive and click erase:

Let's call it “INSTALL”, so that there would be no further confusion:
Now we need to download the application “UniBeast”, which will upload the downloaded El Capitan distribution kit to the USB flash drive, and prepare it for successful installation of MAC OS X on the PC. Also, after installation, we need the post-installer “MultiBeast - El Capitan”, which installs the EFI emulator and the necessary drivers on the system disk. The latest version of UniBeast and MultiBeast - El Capitan can be downloaded from this link . After downloading, drag them to the desktop.
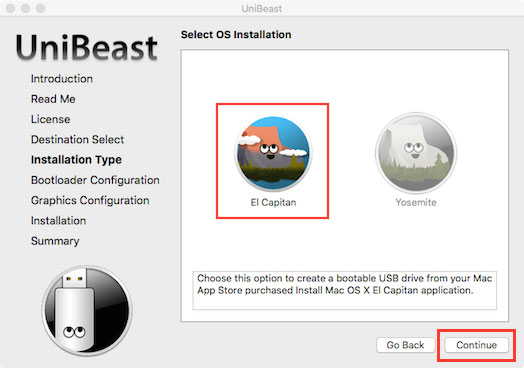
After the El Capitan distribution has downloaded from AppleStore, you need to run “UniBeast” and select the installation USB flash drive:

Select an operating system for future installation:
Select download method - UEFI:
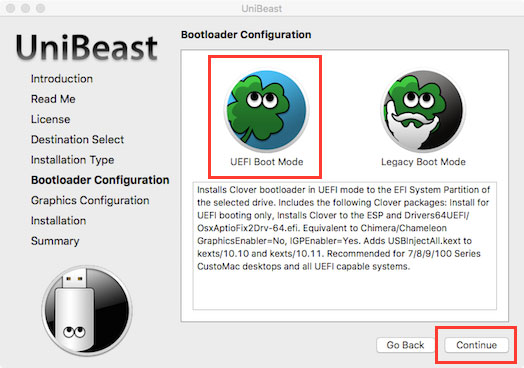
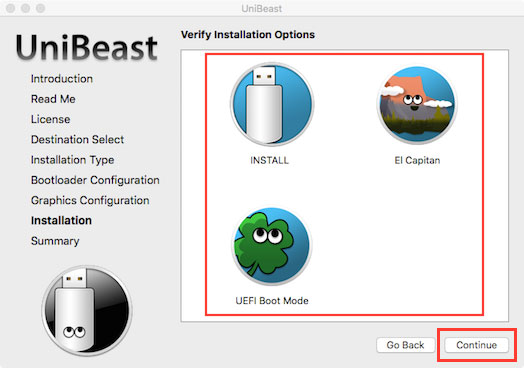
Make sure that the selected parameters are correct and click Continue:
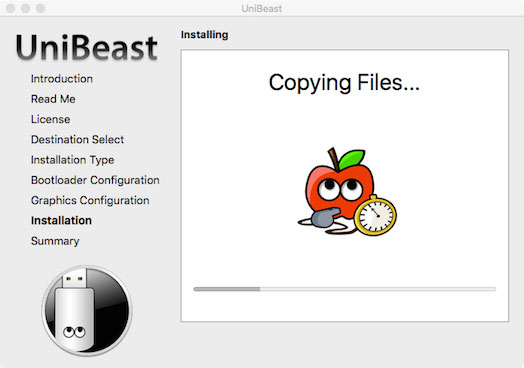
The process of transferring the distribution to the USB flash drive will begin:

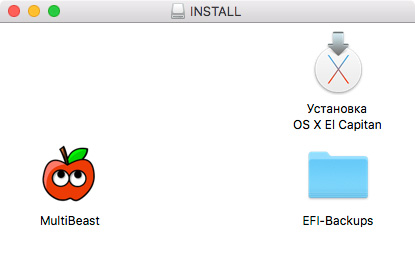
After successfully creating a bootable flash drive, you need to copy the previously downloaded “MultiBeast” to it:
Bootable flash drive ready. Extract it from the MAC computer and go to our PC.
Step number 2. Installing MAC OS X on a PC
To install MAC OS X in the motherboard BIOS, you need to change some parameters (depending on the motherboard, its manufacturer and type of BIOS). In our case, with an Asus H81T R2 motherboard, for a successful installation, you only need to change one. To start the BIOS, while the computer is booting, press and hold DEL:
- Boot / Secure Boot Menu / OS Type - Other OS
This option allows you to load non-Microsoft Windows operating systems in UEFI mode. But from the experience of using these motherboards, I would like to add some optimizations. Firstly, this is advanced processor power management. This will significantly reduce heat generation, and therefore the noise level at maximum loads, which is quite important in compact systems. For our ward Core i3-4170, the optimal settings are:
- Ai Tweaker / CPU Core Voltage / Offset Mode - 0.12v
- Monitor / CPU Fan Control / CPU Fan Profile - Manual
- CPU Upper Temp - 75
- CPU Fan Max Duty Cycle - 60
After this adjustment, the processor's heat dissipation decreases and the cooling fan operation becomes much quieter. And at maximum loads, saving electricity from the outlet will be about 15W. Also, you can disable unnecessary features:
- Advanced / System Agent Configuration / Graphics Configuration / IGP Flat Panel - Disabled
- For F1 If Error - Disabled
After saving the BIOS settings, it's time to connect the bootable USB flash drive to the USB.3 port and boot from it. To do this, while the computer is booting, you need to press and hold F8 . In the menu that appears, select “UEFI: USB USB Hard Drive (14900MB)” and press Enter. Starting to boot from the flash drive. After selecting the language of the operating system, you need to select Utilities - Disk Utility in the upper left corner and prepare the installation disk:
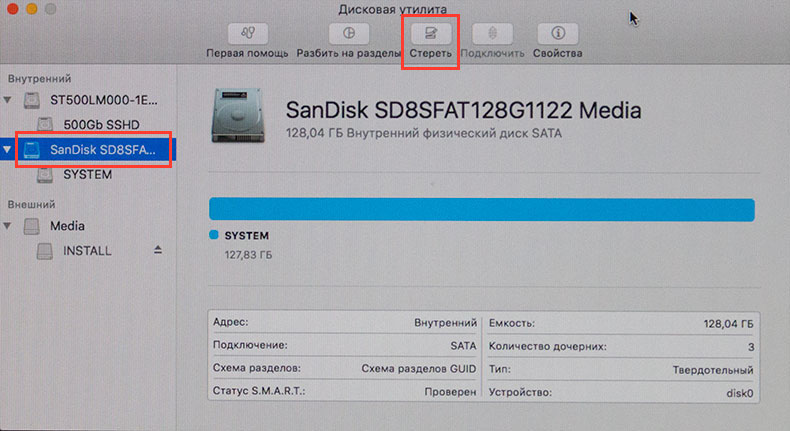
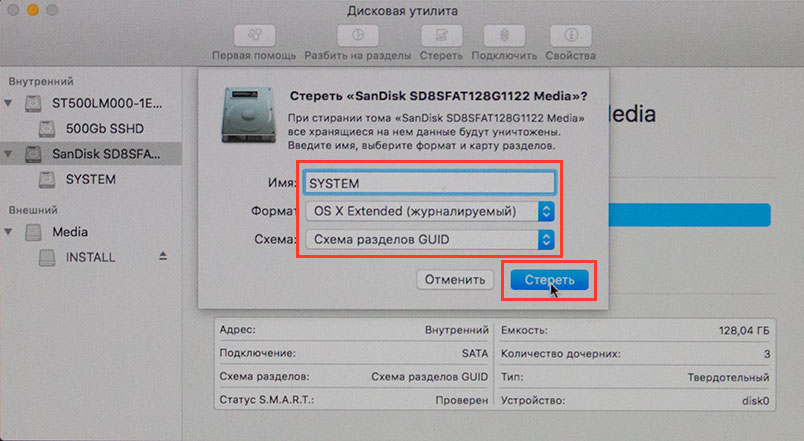
Let's call it “SYSTEM”, so that there would be no further confusion:
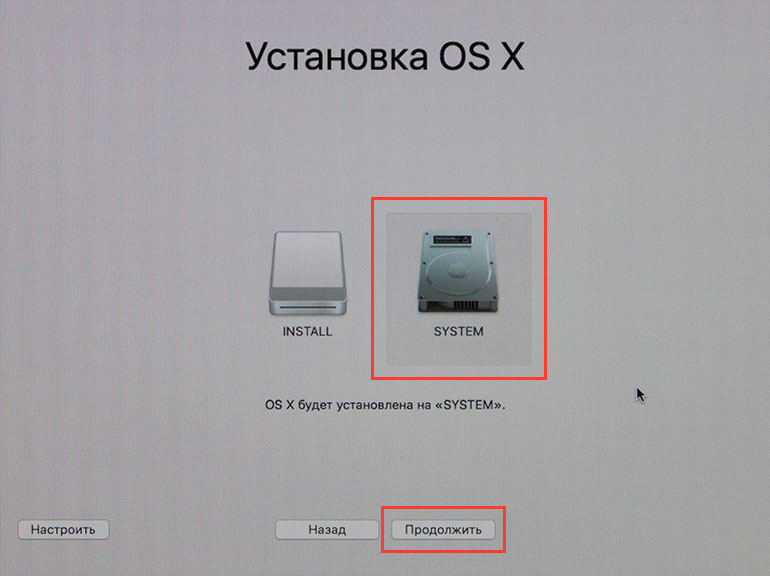
Further installation of MAC OS X is no different from installation on MAC computers:
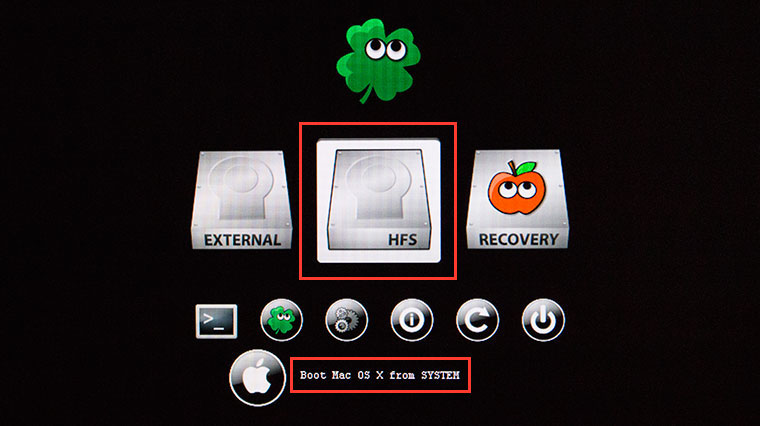
After installation, the system will restart the computer. And there is one important point. Since the EFI and SMC emulators are not installed on the system disk, after reboot, we must boot from the flash drive again. To do this, while the computer is booting, press and hold F8 . In the menu that appears, select “UEFI: USB USB Hard Drive (14900MB)” and press Enter. Now we can see already 2 download options. From the “SYSTEM” system disk, or from the “INSTALL” flash drive. We need "SYSTEM":
After booting the MAC OS from the system disk, we get to the El Capitan desktop:

Step number 3. Post installation
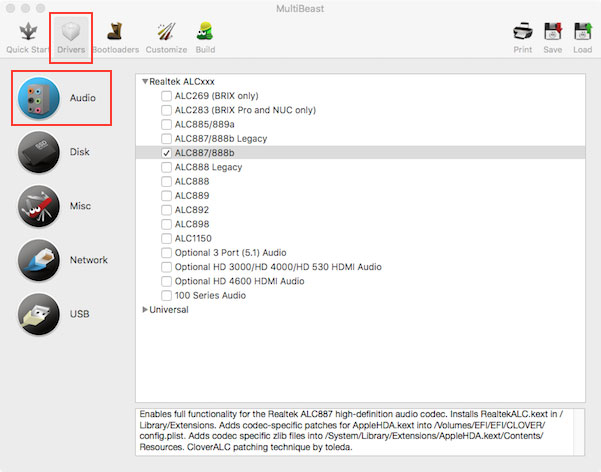
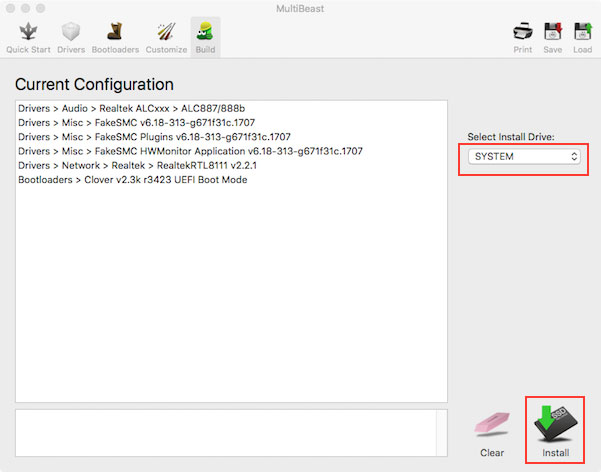
Now you need to install the EFI bootloader emulator, SMC chip, and the sound and network card driver. To do this, you need to run the post-installer “MultiBeast” from the flash drive and select the audio driver:
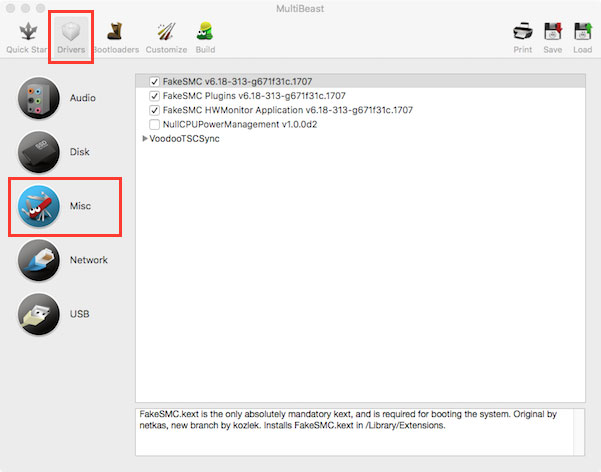
SMC chip emulator (required) and system monitoring program and its plugs (optional):
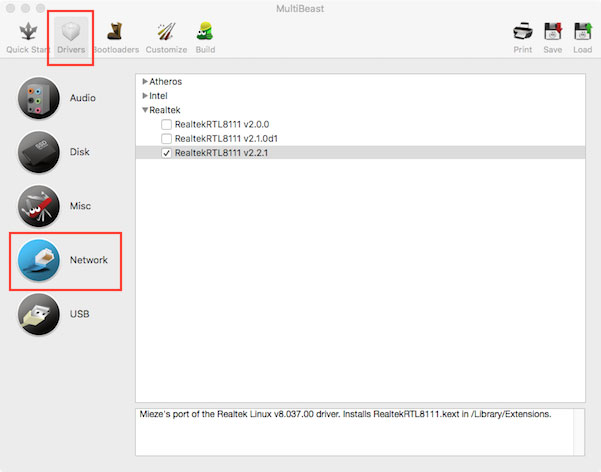
Network card driver:
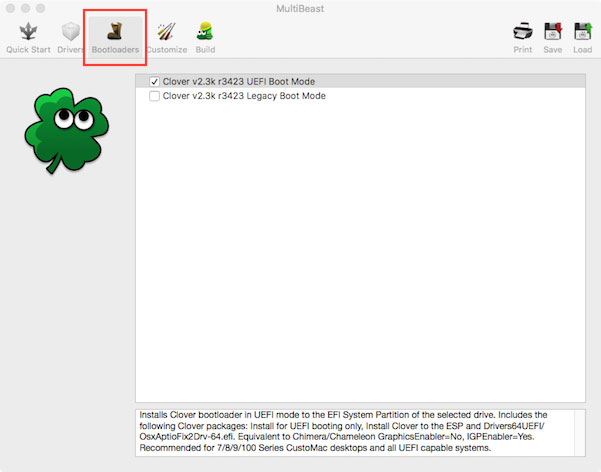
EFI Clover UEFI emulator downloader:
Select the installation path “SYSTEM” drive and click Install:

After successful installation of the boot loader and drivers, you can remove the USB flash drive and restart the computer from the system disk. If your system has a processor with an Intel HD 4600 graphics core, then no further manipulations are needed. This core works out of the box. But I specifically chose a processor with a graphic core HD 4400 to show how easy it is to run similar to the hardware in Apple computers in Hackintosh. This concerns not only Intel graphics, but also WI-Fi adapters and Nvidia / AMD graphics cards. For this we need the program “Clover Configurator”. You can download its latest version here .
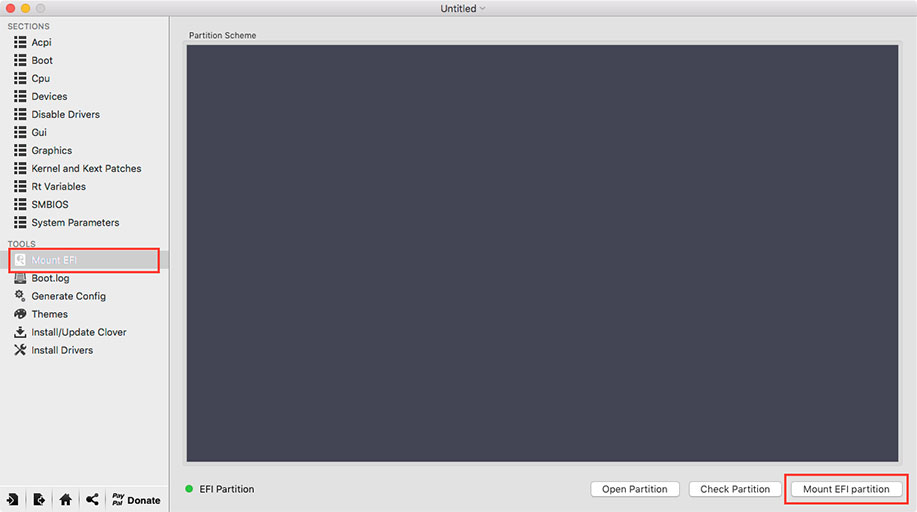
All you need to do to run hardware acceleration on the IGP HD 4400 is to make the system aware that a driver that is designed for Intel graphics adapters can work with it. To do this, run “Clover Configurator” and open the hidden EFI partition on the system disk:
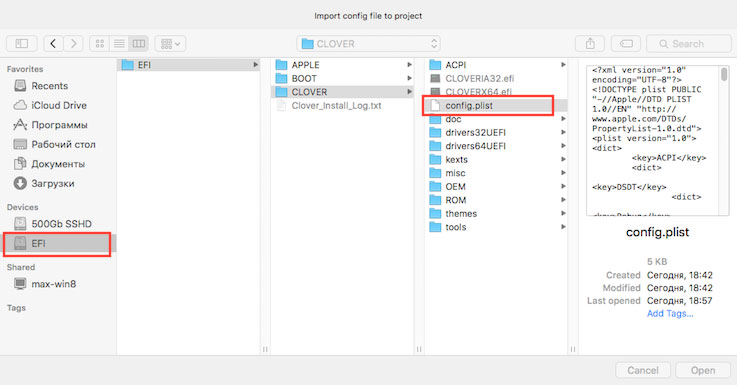
Then in the “Clover Configurator” we open the configuration file of the system “Config.plist”:
In the two necessary sections we make the parameters as in the pictures:
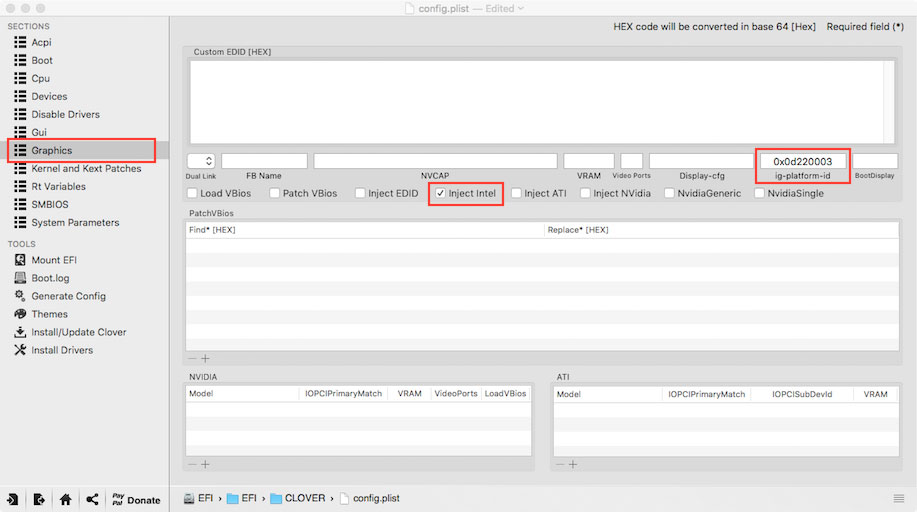
Intel Graphics / Inject: true
Graphics / ig-platform-id: 0x0d220003

Devices / FakeID / IntelGFX: 0x04128086
Then you need to download and copy the files:
FakePCIID.kext FakePCIID_Intel_HD_Graphics.kext
in EFI / CLOVER / kexts / 10.11
Reboot
As you can see, the modern method of installing MAC OS X on compatible hardware takes time and effort, often less than installing Windows, its drivers and updates. Also, no deep knowledge of command line management is required, as it was several years ago. With the installation method discussed, no need to modify the system files. The system is completely safe to upgrade to the next versions as part of cumulative updates.
As a result, we got a fast and stable system for very reasonable money. It got almost everything. Sound and network card, WI-FI, native power / processor frequency control, sleep / deep sleep mode, AirDrop, wake-up via WI-FI, USB 2.0 and 3.0, DVI and HDMI outputs. The system works quite comfortably with DSLR FULL HD Video in Final Cut Pro, Adobe Premiere Pro, as well as with RAW images in Adobe Photoshop and Lightroom graphic editors.
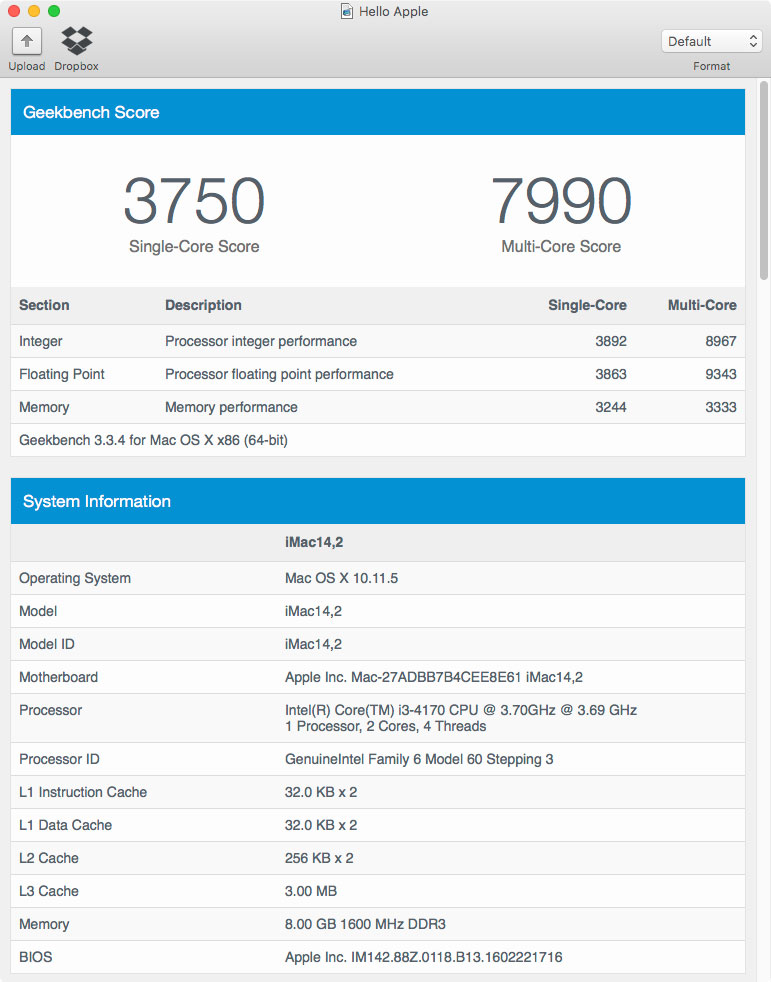
In terms of speed, we slightly outpaced the fastest Mac Mini with an Intel Core i7-4578U processor, and in the case of installing the Core i5-4590S processor, you can assemble a small and evil monster that successfully strikes with the latest iMac models.
Step number 4 (Optional). Improvers
Trim commands for your SSD
By default, in Mac OS X, support for Trim commands is enabled only for Apple's own SSDs. But fortunately, they left the possibility of including this functionality for third-party disks. To do this, enter the following command in the terminal: “ sudo trimforce enable ” Enter the administrator password and press “ Y ” twice. After that, the computer will automatically restart.
If you have other ideas for improvements, I’m happy to add them to the manual.
Join our group VKontakte and go to the page on Facebook .
I will be glad to answer any questions on our website in the form of feedback.
Sincerely, Alexander.
Source: https://habr.com/ru/post/372481/
All Articles