Making a laptop on Raspberry Pi
RasPSION Laptop
For four years since the release of the Raspberry Pi, they just did not make this small single-board computer out of it - small video recorders, game consoles, car navigators, music players and much more. But the most obvious thought is to supplement the Raspberry Pi with a screen, keyboard and battery to make an ultra-portable laptop (you can call it a netbook or even a pocket computer).
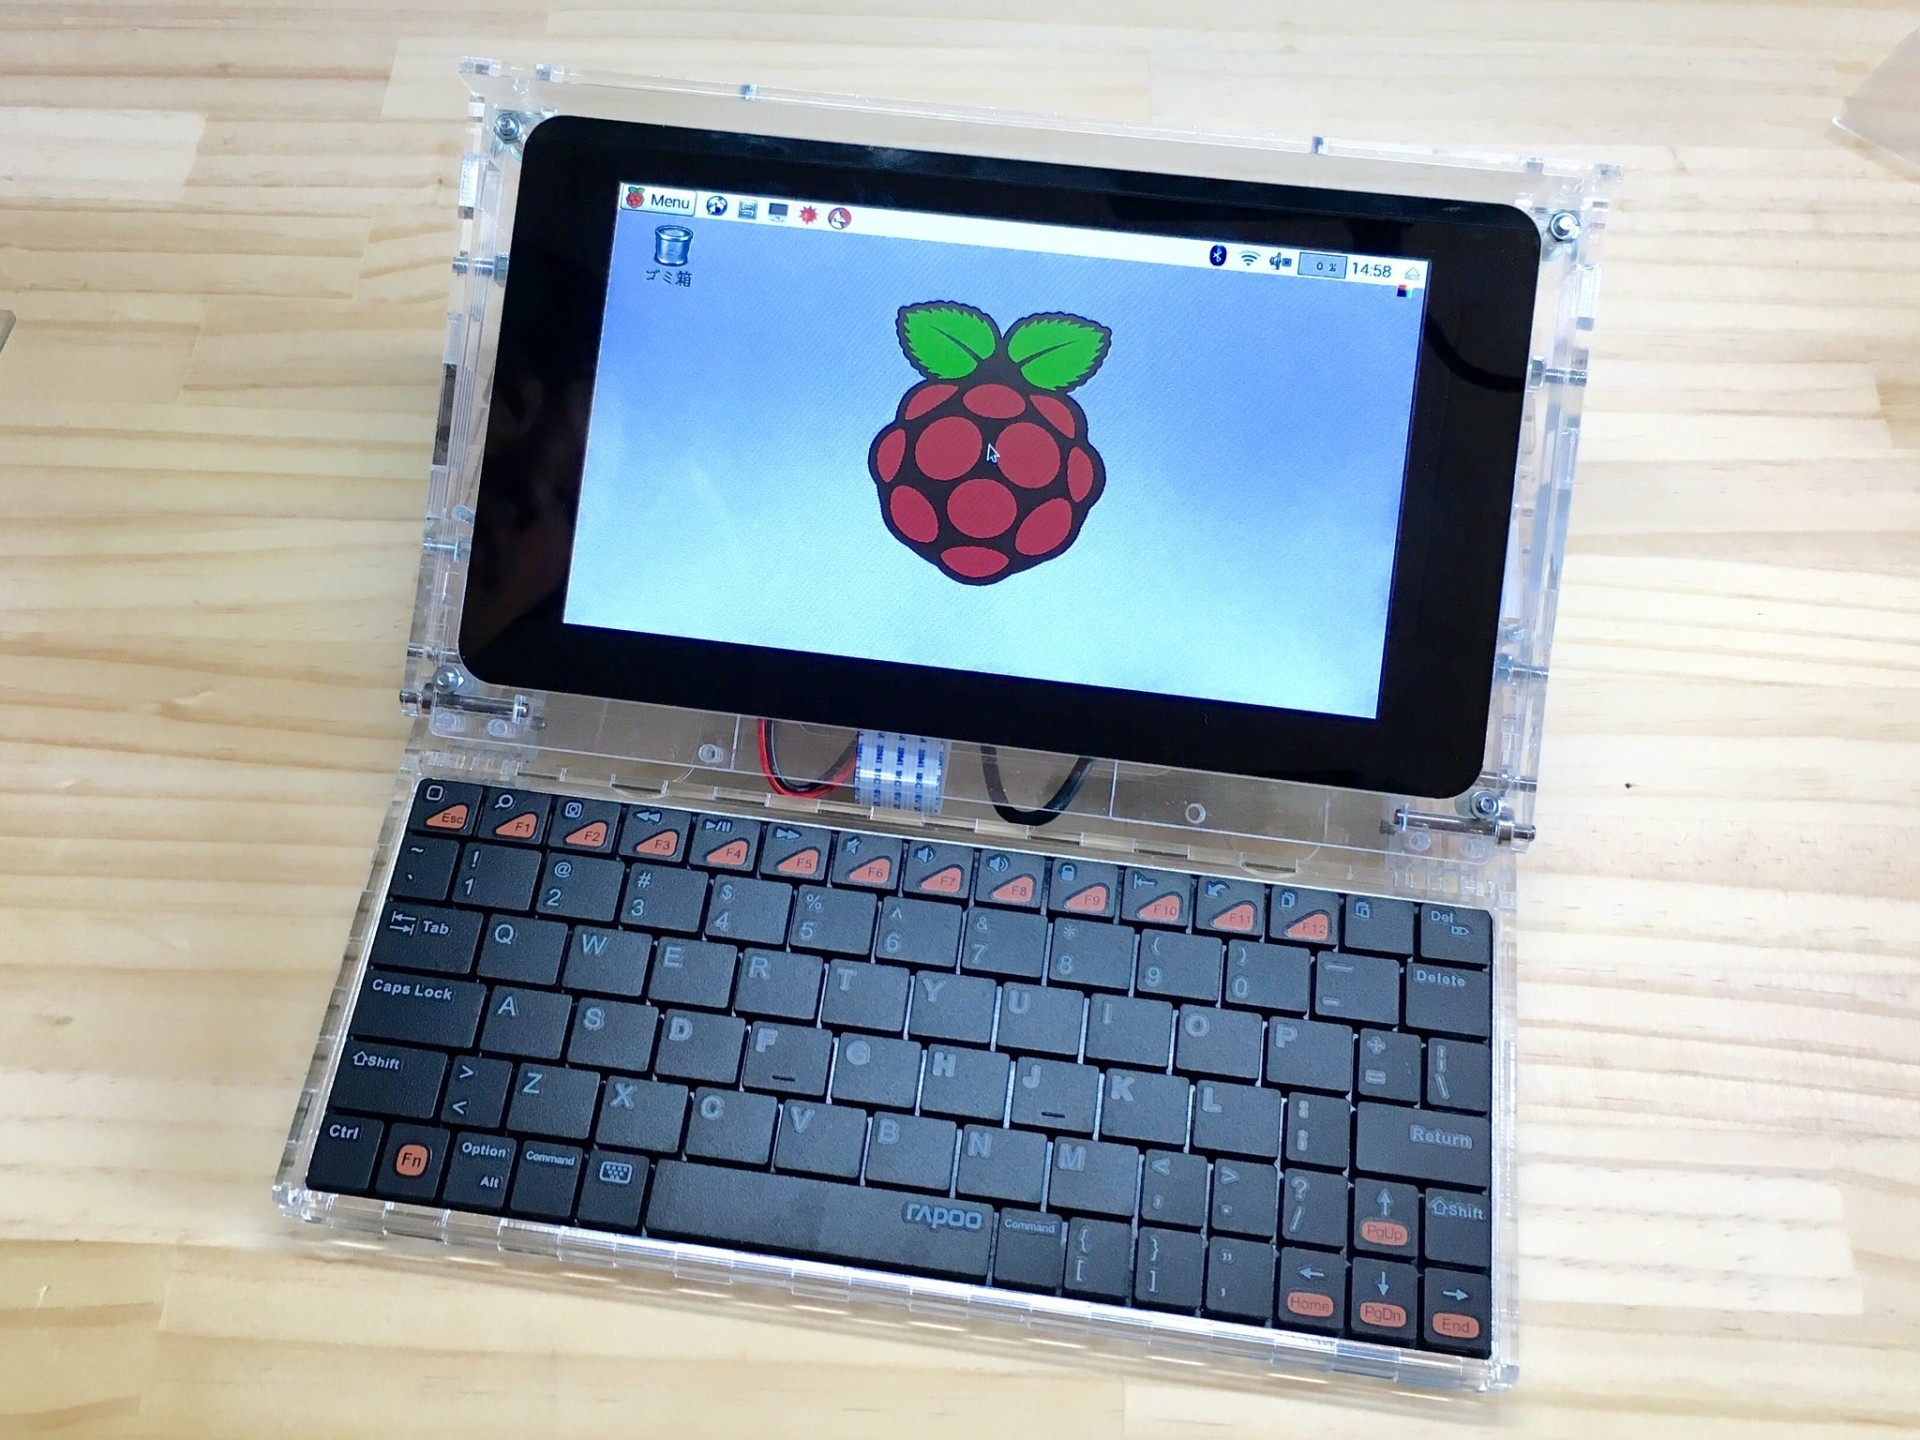
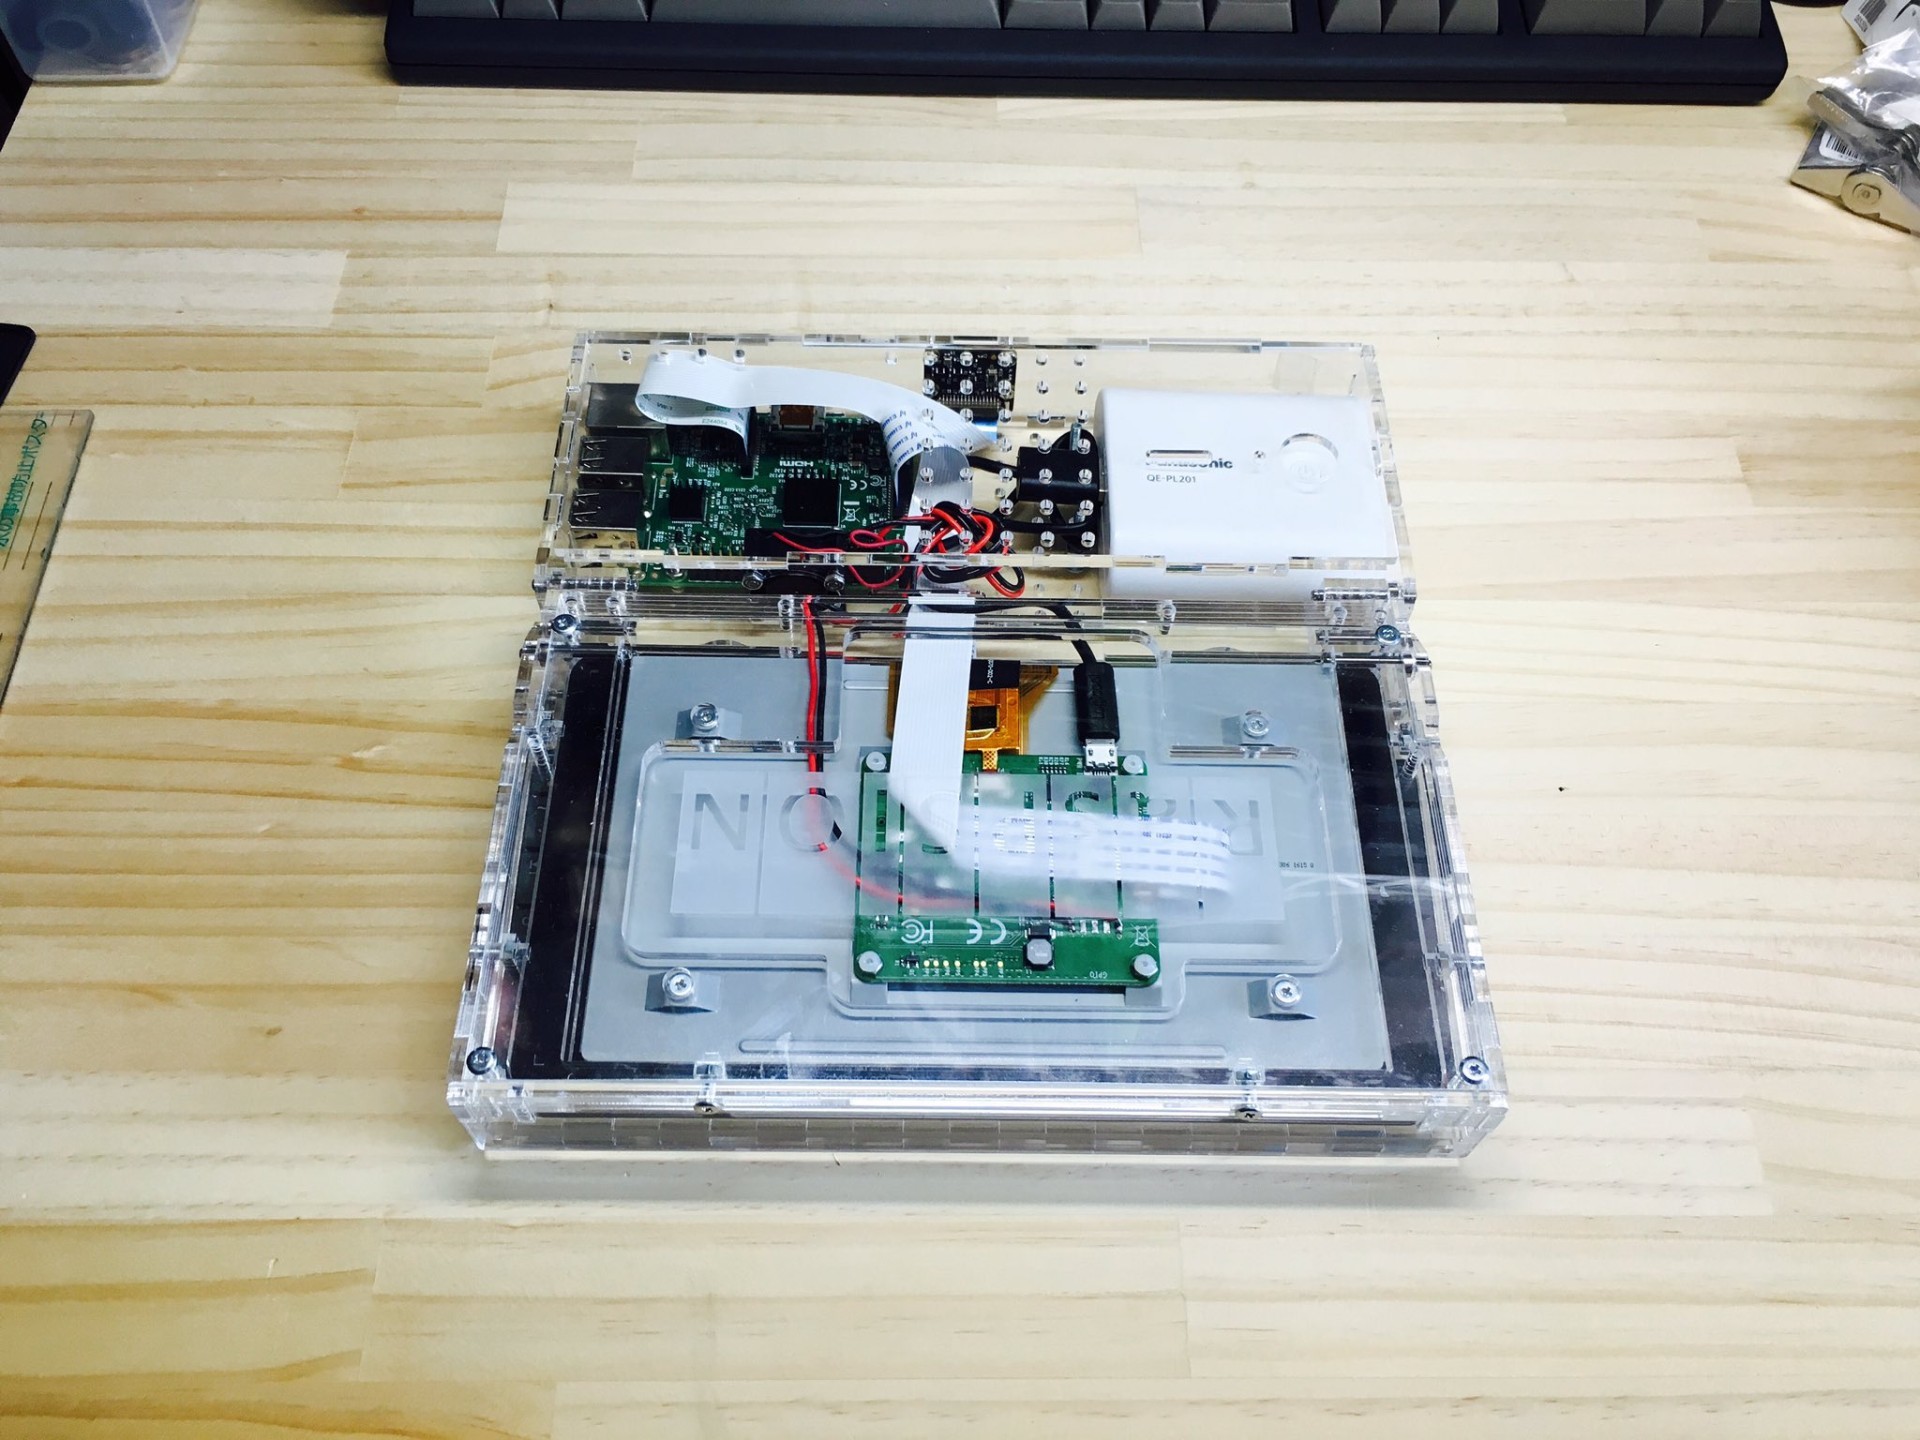
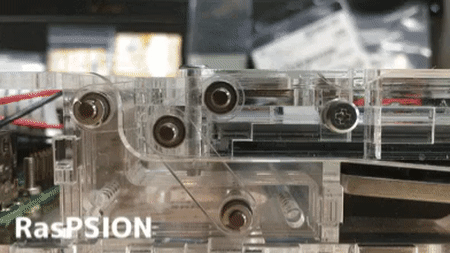
For example, one copy of the Raspberry Pi fell into the hands of the Japanese modder nokton35mm , who made the RasPSION mini-computer in the style of Psion laptops from the late 90s.
The package includes a 7-inch screen, a Bluetooth keyboard, a 5-volt battery and a Pi camera, a fairly standard mini-notebook set on the Raspberry Pi.
')
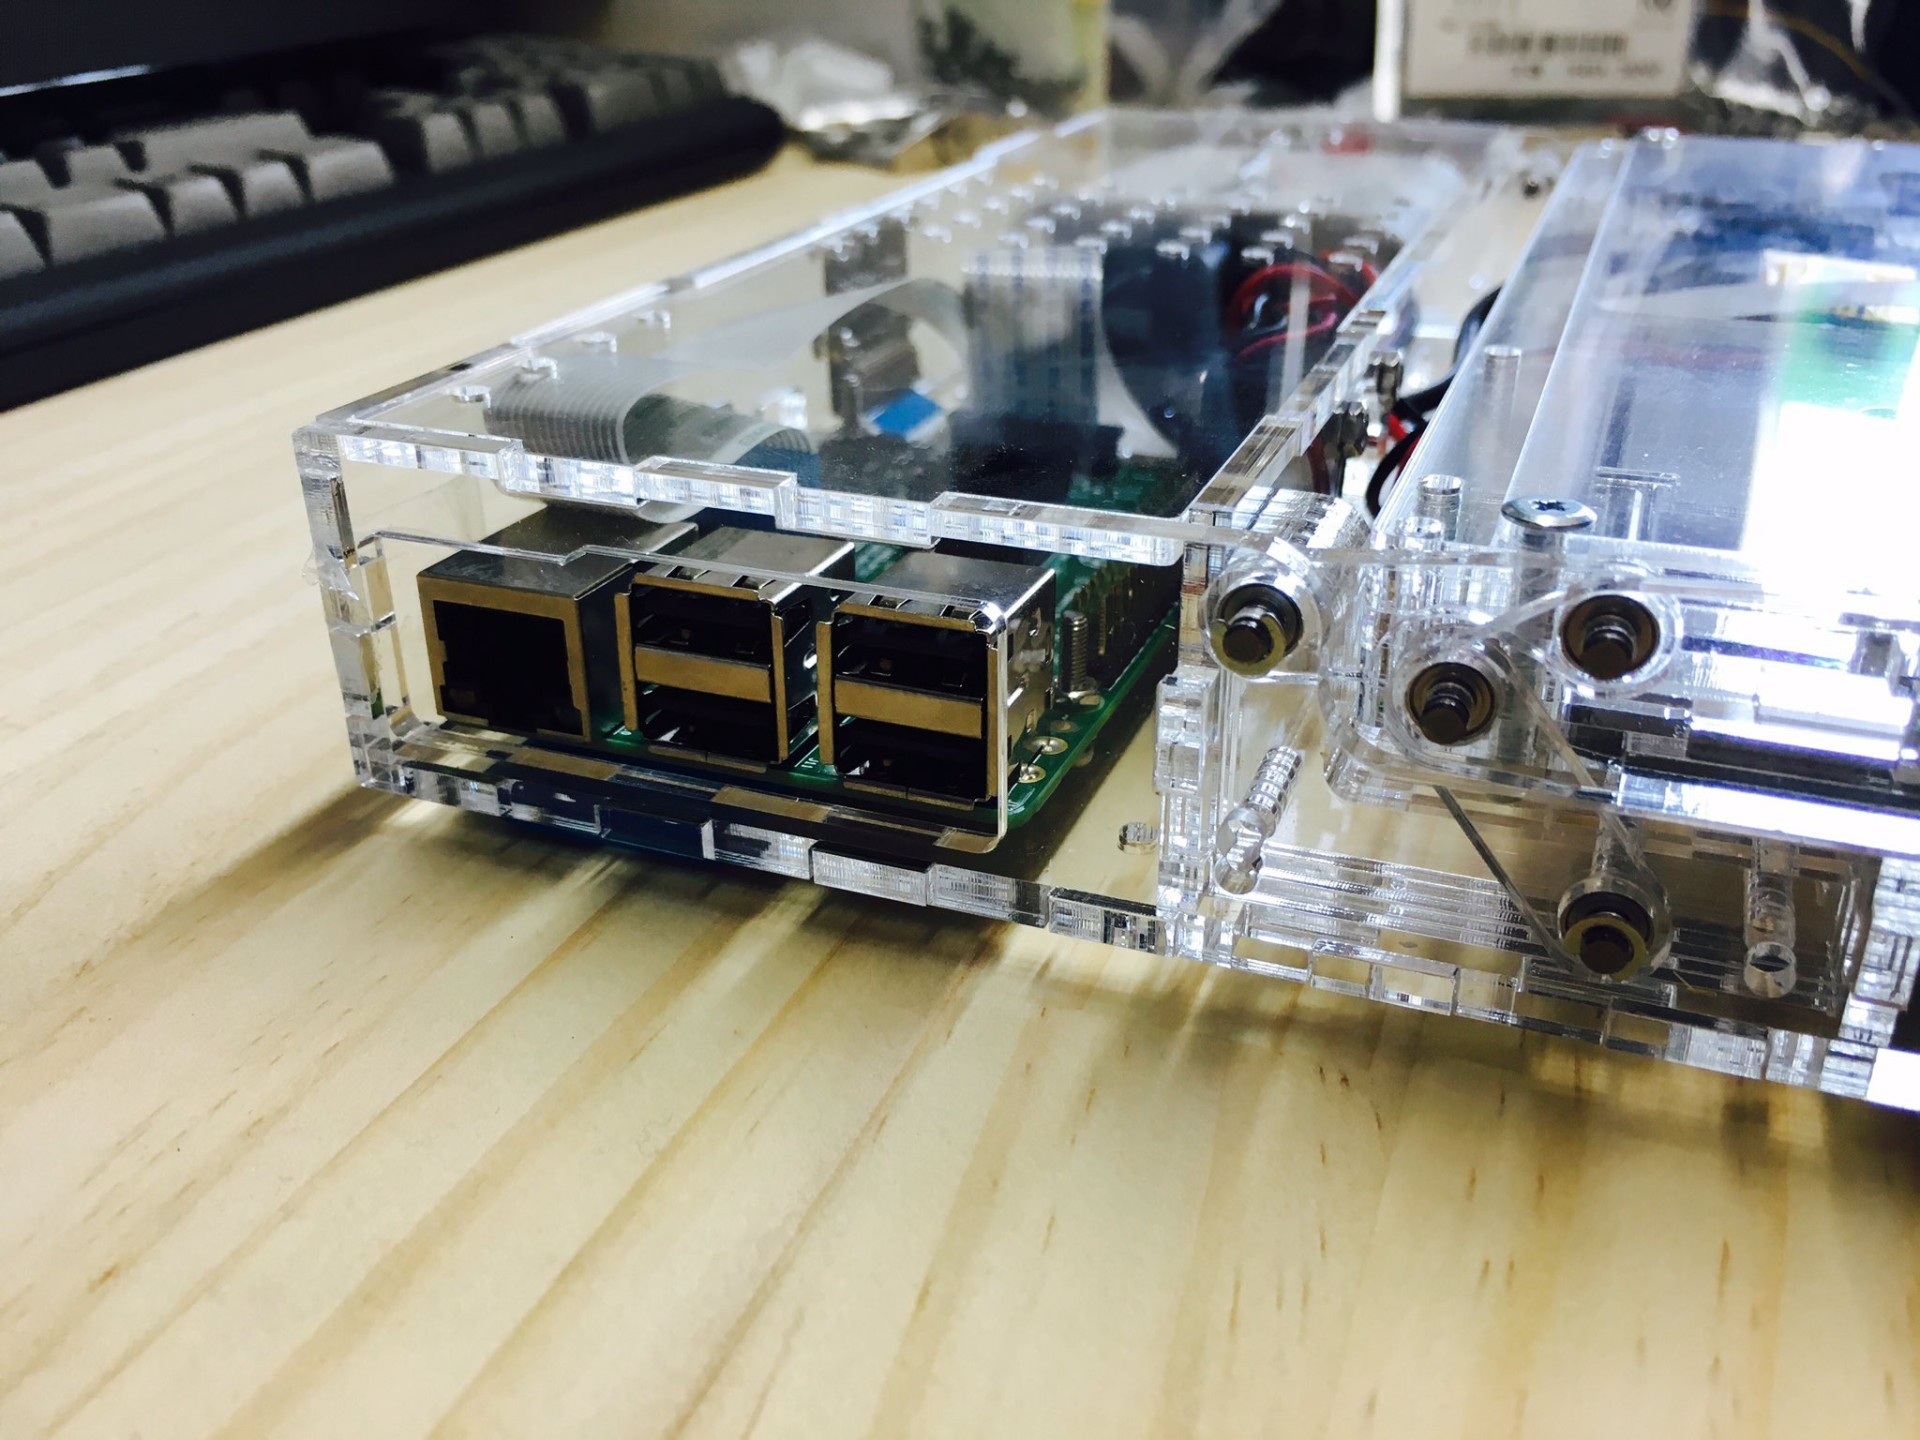
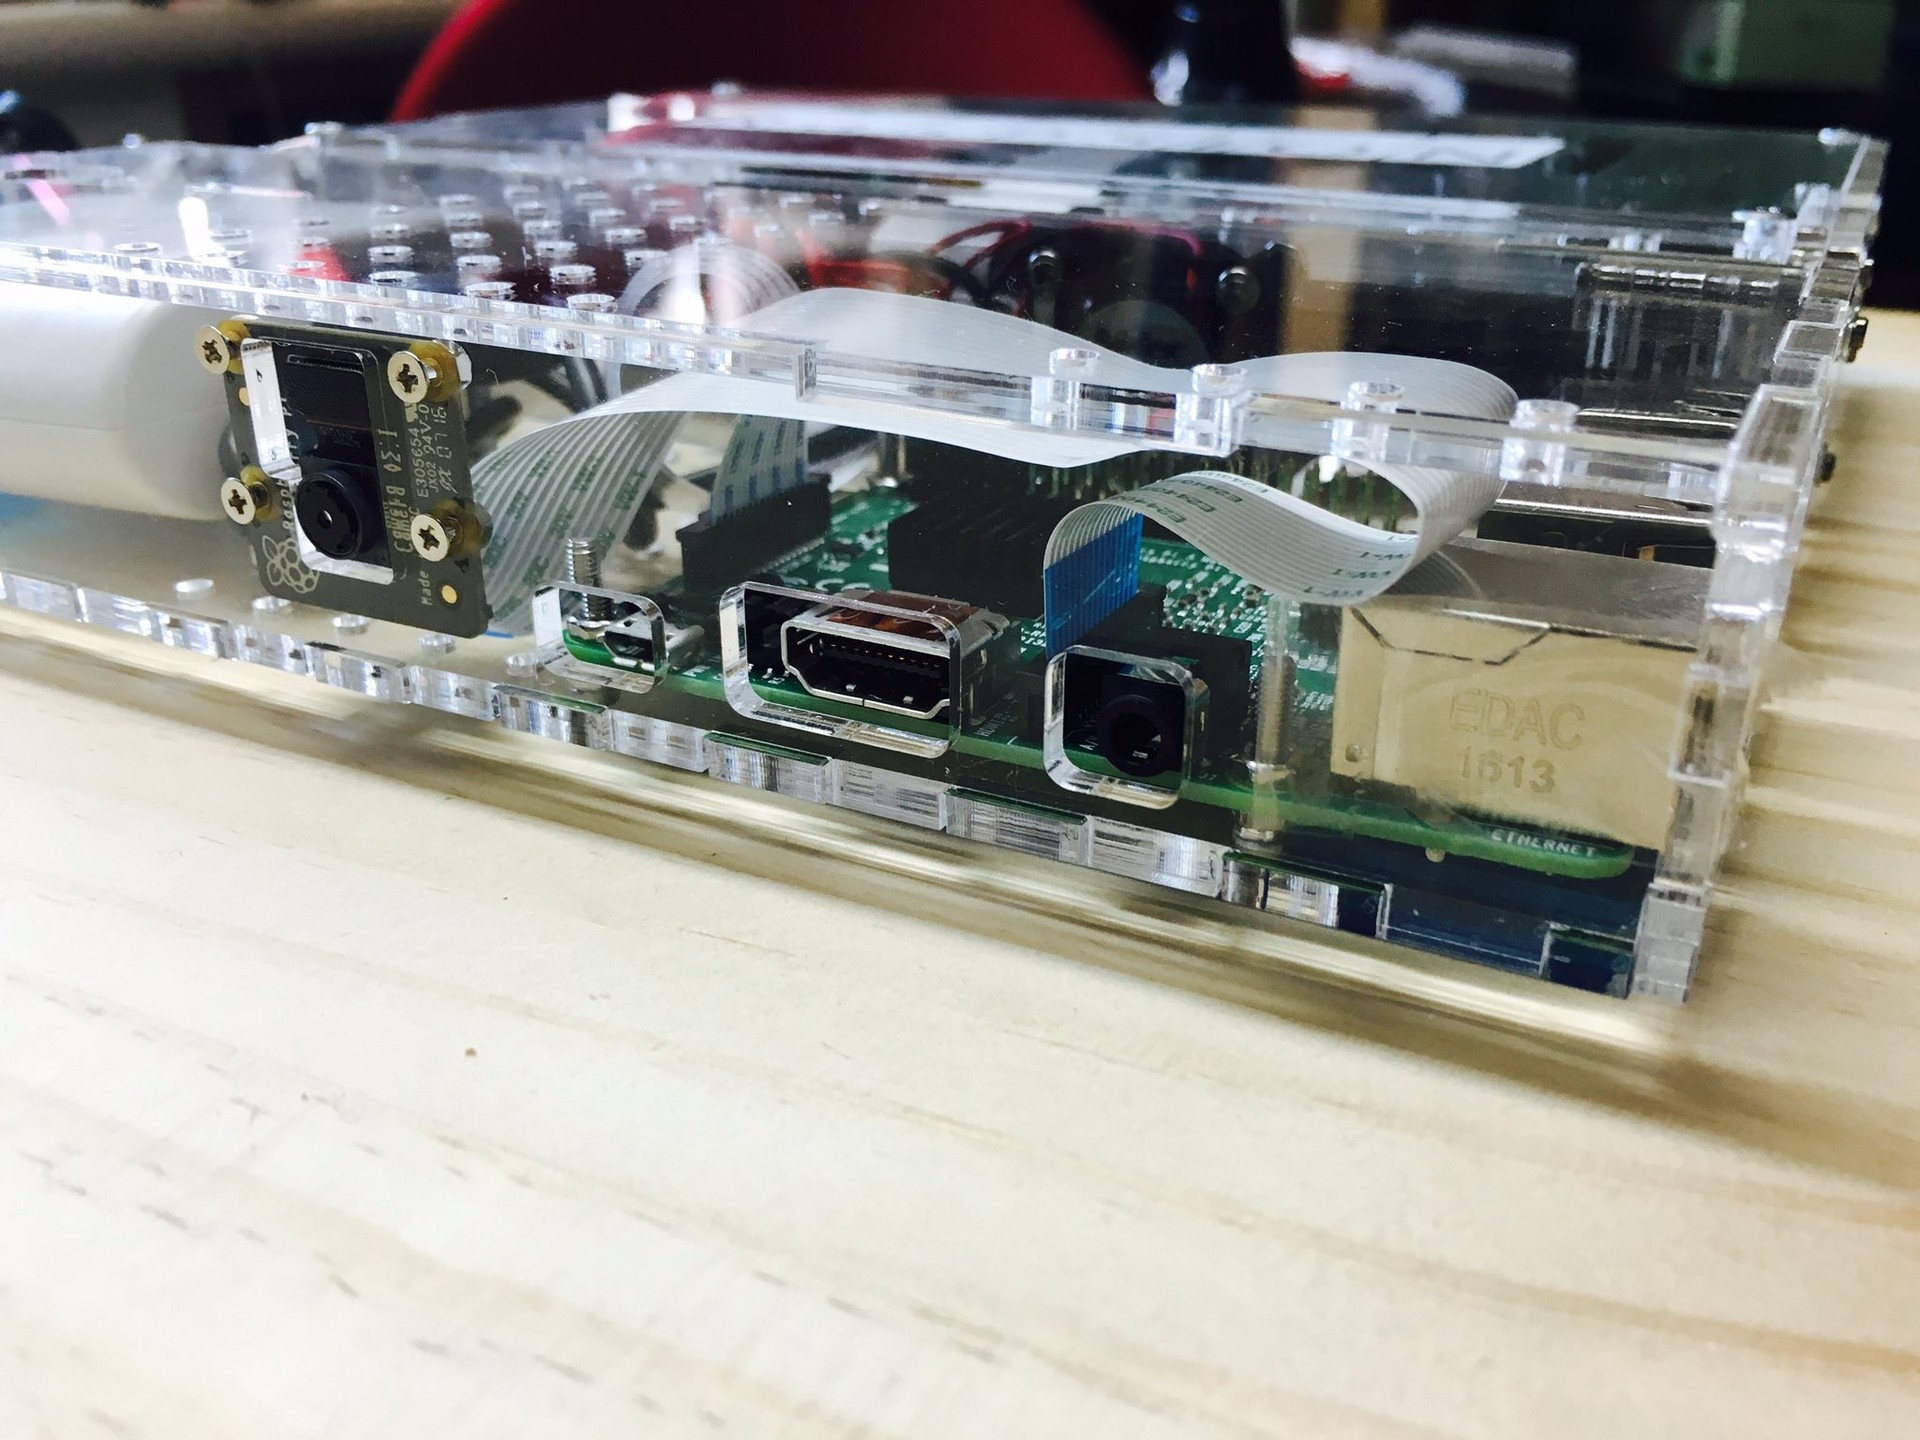
What makes RasPSION so special is the beautiful body made of translucent plastic, cut out by a laser to exactly the right size.
Here the main part is the swivel mechanism on the hinges. It works on the same principle as the old Psion handhelds.
The author says that the laptop runs on battery for about two hours. Not a lot, given the lack of the usual power management system for commercial laptops.
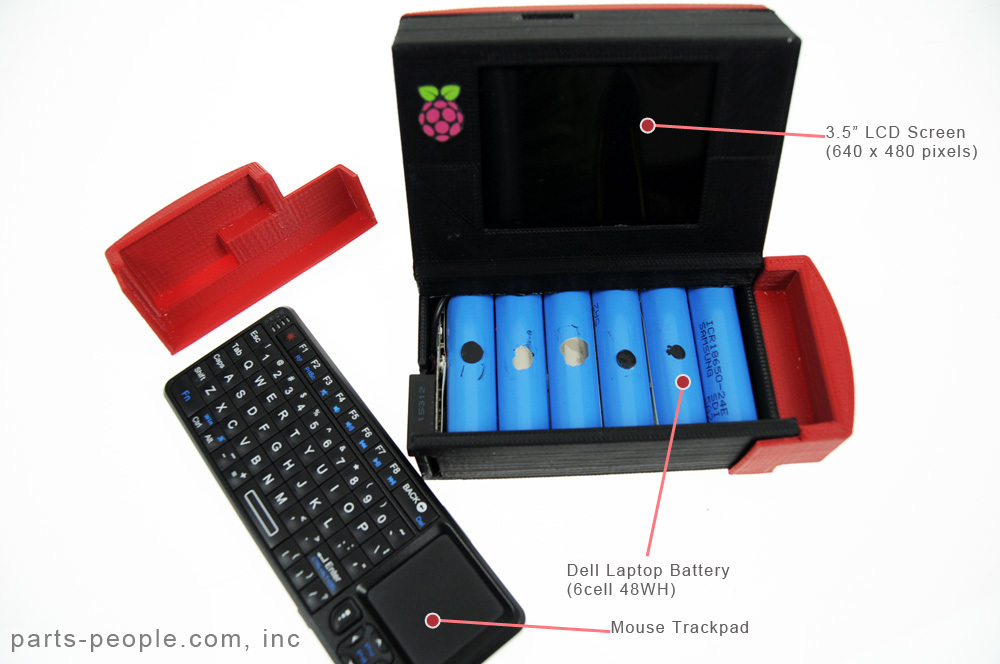
In the past, enthusiasts have already shown different versions of ultra-portable laptops and handheld computers based on the Raspberry Pi. For example, here is the instruction and the assembly scheme of the simplest PDA. Unlike the advanced Japanese model, here the author used cheap components that were on hand. Poor 3.5-inch LCD screen with a 4: 3 aspect ratio - from the car video system. Battery - from the old laptop Dell Latitude D600.

To fit the battery cells into the case, I had to remove the plastic case from them.
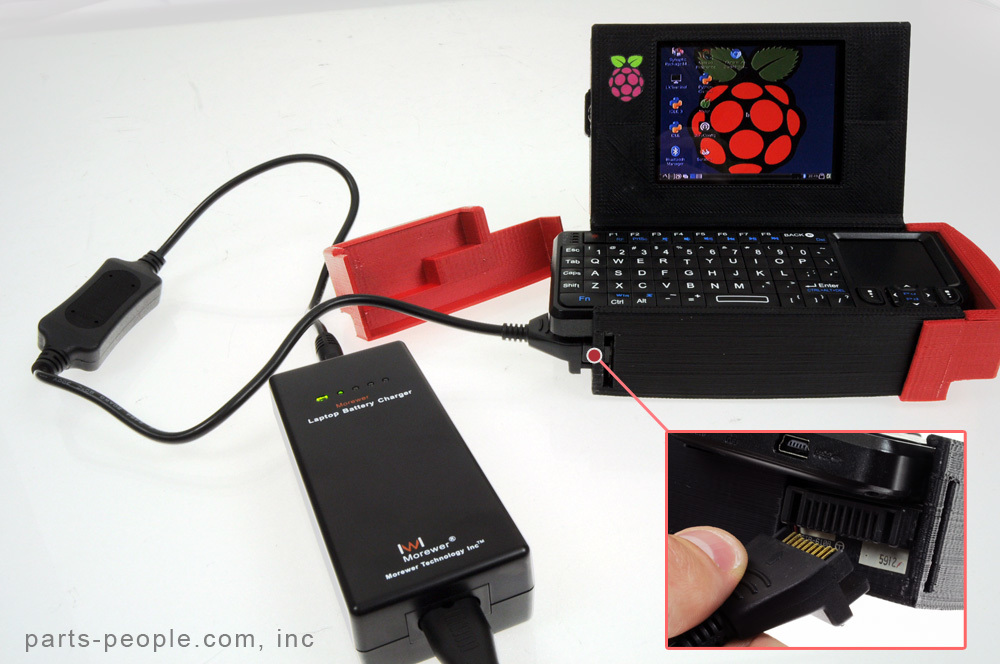
The author shows which contacts need to be connected on a 9-pin Dell board.

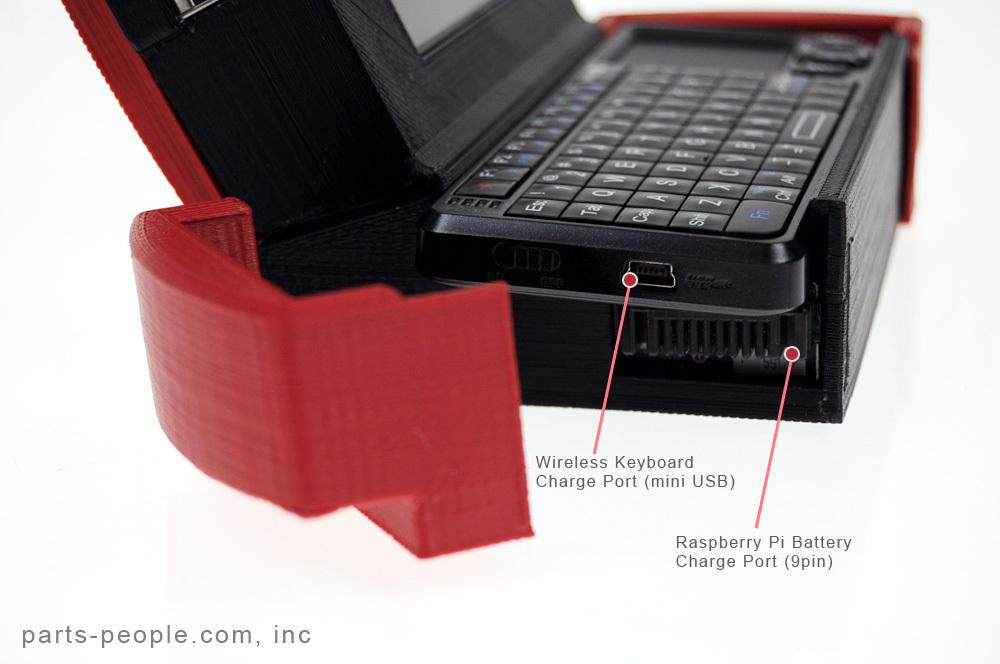
Charging batteries in a homemade laptop through a standard charger.
To distribute power from the batteries to the WiFi-module, Bluetooth-module, SSD-drive, wireless keyboard / mouse transmitter, as well as the Raspberry Pi itself, the modder used a little trick. All the electronics listed are powered by a 5-volt USB hub, and 11.1 volts of power from the battery goes to the LCD screen. But it is known that some components of the screen require a power of 5 volts. That is, it is enough to find the built-in voltage regulator on the LCD screen and find the contacts at 5 volts, and from there power the USB hub.
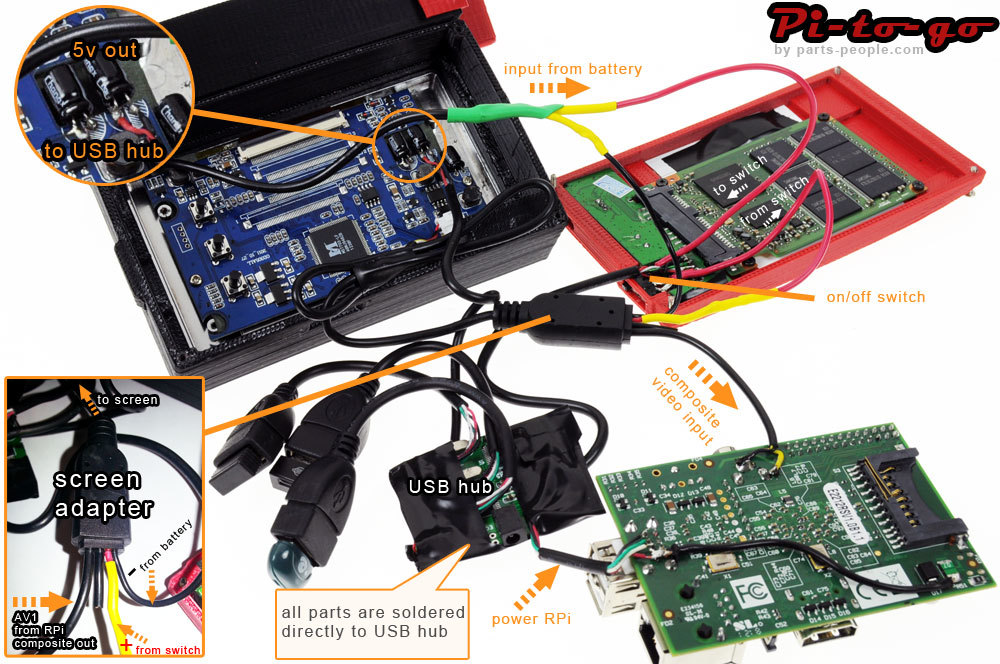
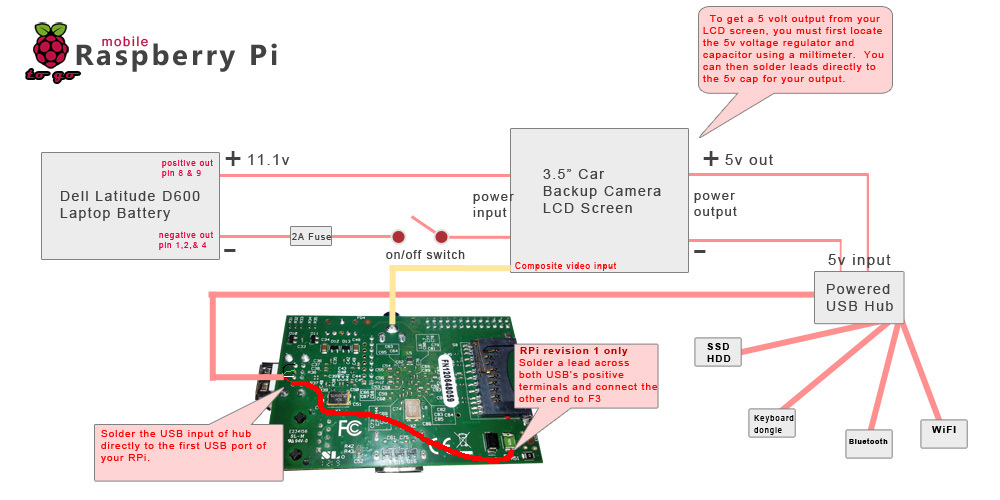
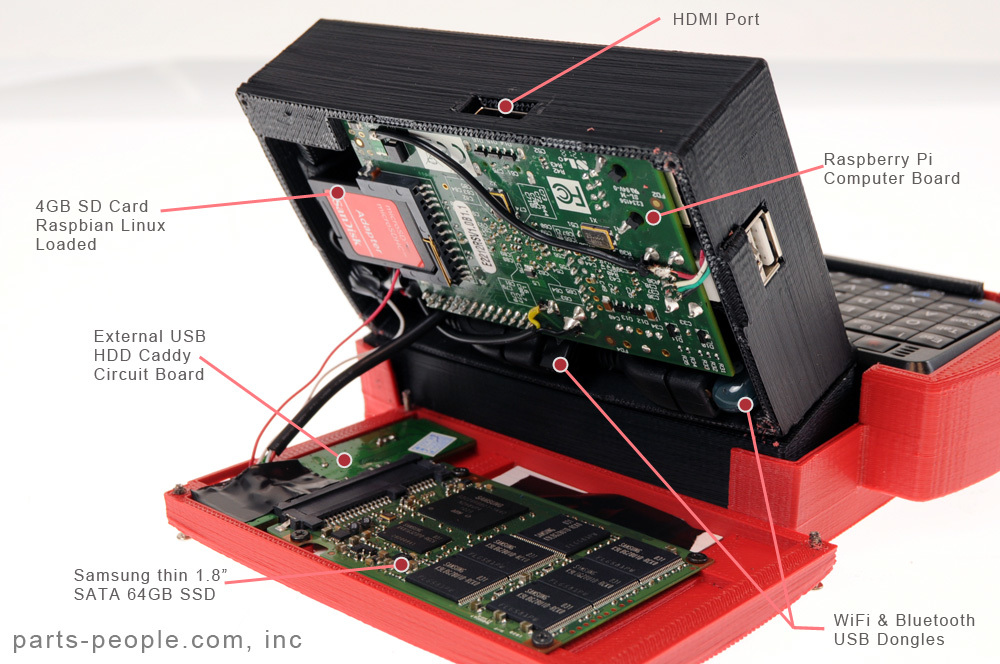
The SSD-drive for the Raspbery Pi will also not be a superfluous addition, because SD-cards work slowly and have a low limit on the number of write / read cycles. Yes, and just increase the available disk space is also nice.
Additionally, a wireless USB keyboard with a touchpad was purchased. In this case, it would be better, of course, to use a wired connection, but it was the Bluetooth model that turned out to be the right size and price.
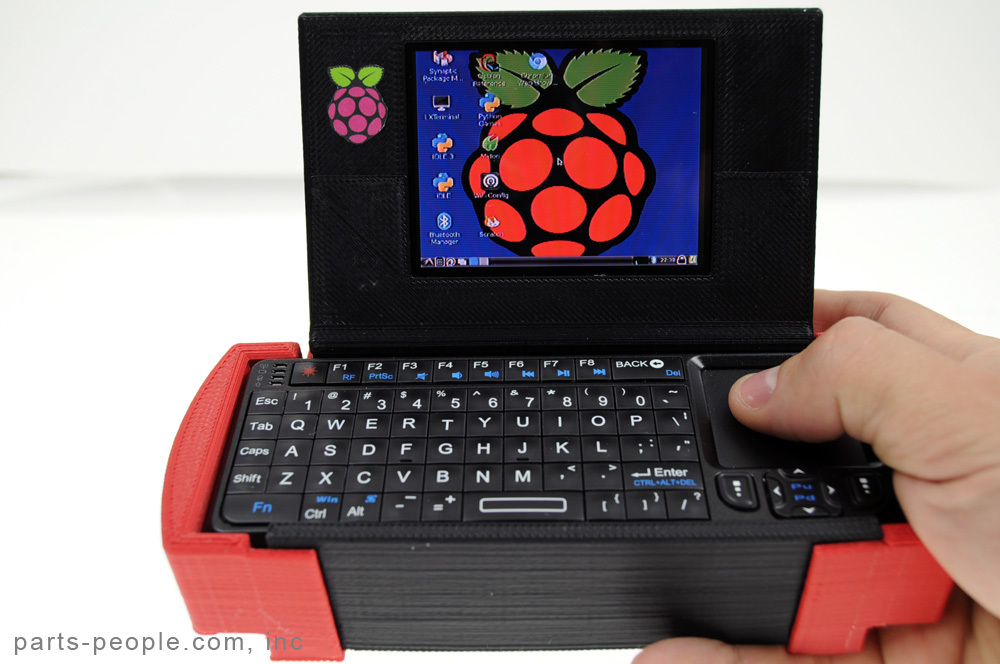
And on the Raspberry Pi Model B board (rev. 1) we got such a pocket computer.
The brick weighs about 750 grams, but it is a full-fledged machine with Linux and an SSD-drive, keyboard and touchpad.
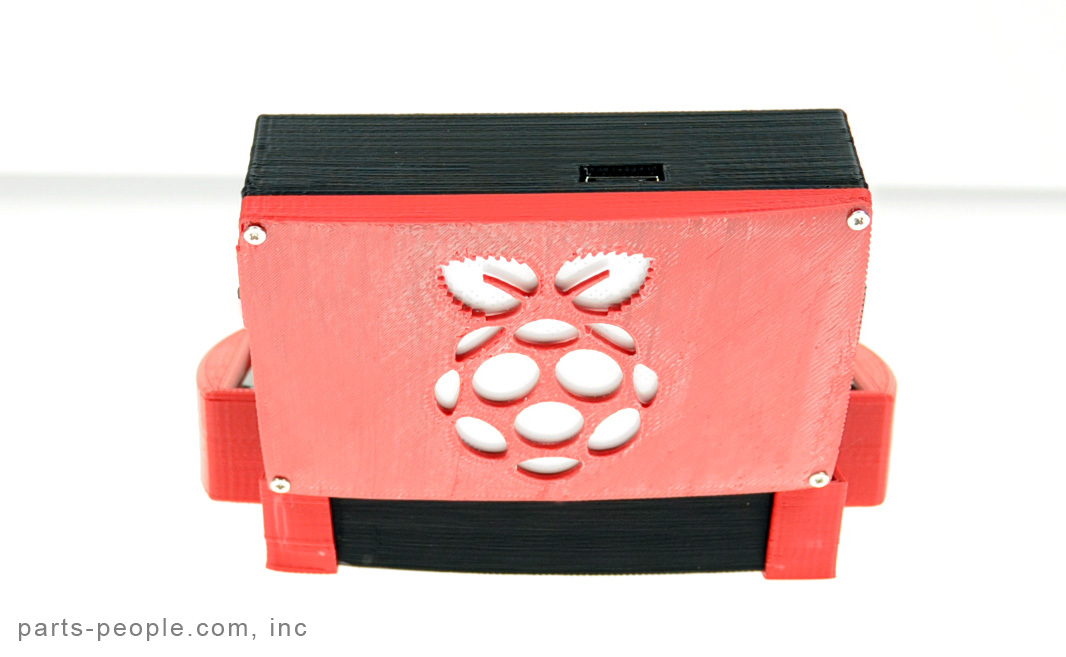
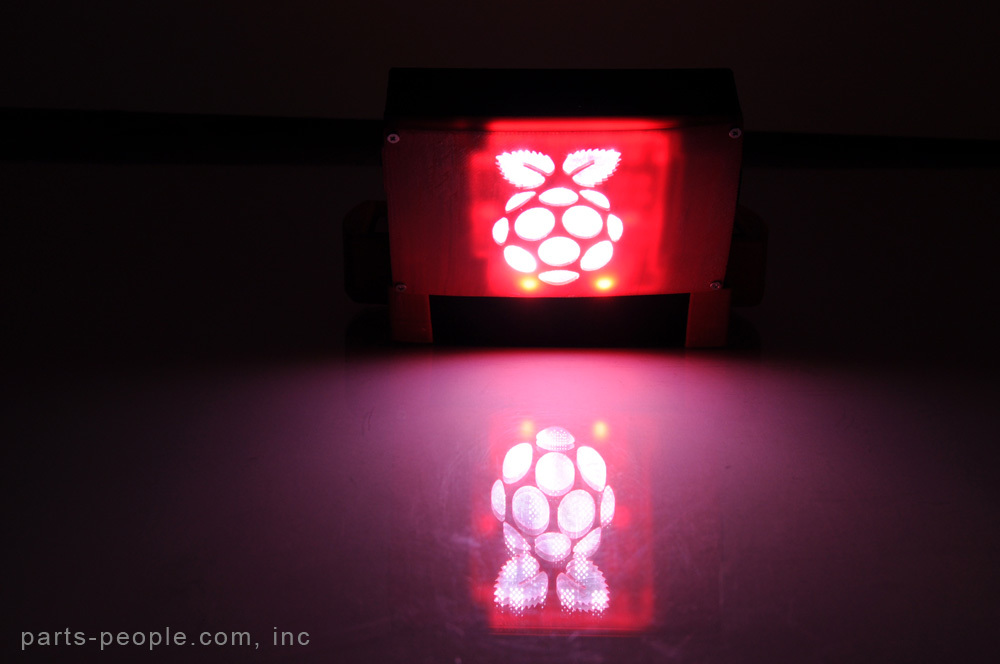
The author posted the details of the case for printing on a 3D printer in the form of STL files . On the back of the case for beauty, he suggests placing the Raspberry Pi logo, which is highlighted when the power is turned on. To do this, he took the LED strip from the backlight of the keyboard, cut out the desired shape from it, and connected it to a 5-volt USB hub output.
More photos
Now in the Chinese stores there are already a lot of components to build a laptop on the Raspberry Pi do it yourself, there would be time and desire. It is not necessary to print the case yourself on a 3D printer. For example, another craftsman named Joe Totten (Joe Totten) used for this the finished "shell» Motorola Lapdock . Motorola Lapdock is such a “docking station” for an Android smartphone, you can find them at about $ 100 or cheaper on eBay.
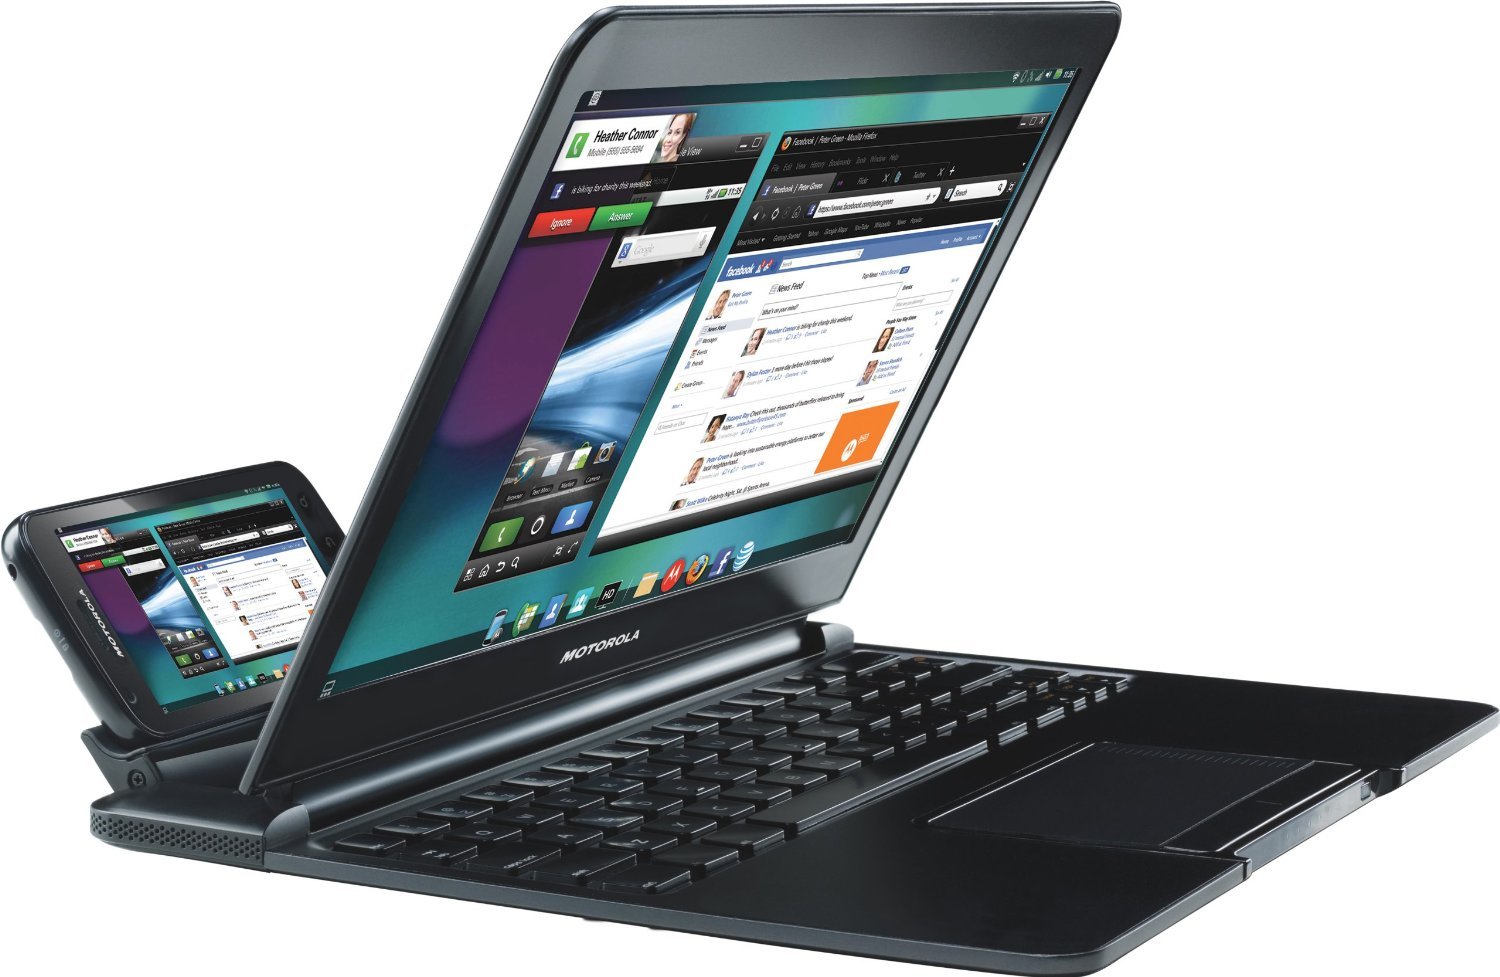
Motorola Lapdock docking station for Motorola ATRIX 4G
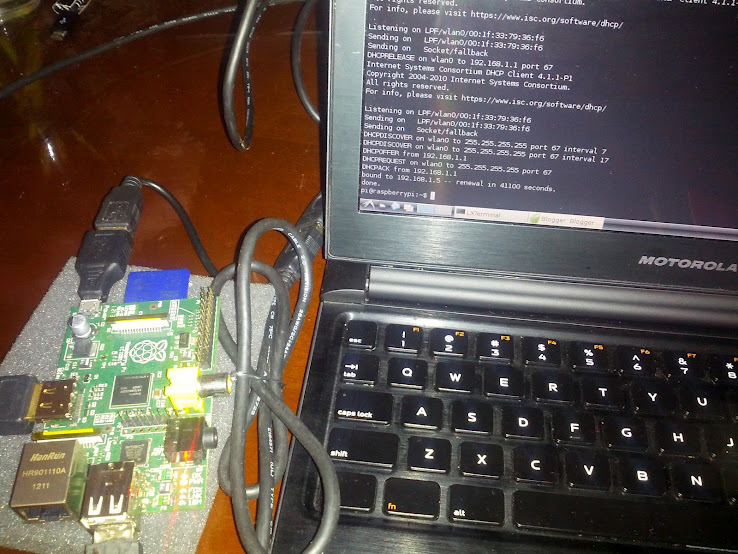
You insert the smartphone into the docking station - and immediately you get a practically full-fledged laptop, with a screen of 1366 x 768 pixels and a keyboard. Only in our case it is required to insert there not a smartphone, but the Raspberry Pi, which Joe Totten did.
To connect the Raspberry Pi and Lapdock, you will need a set of cables and cables.
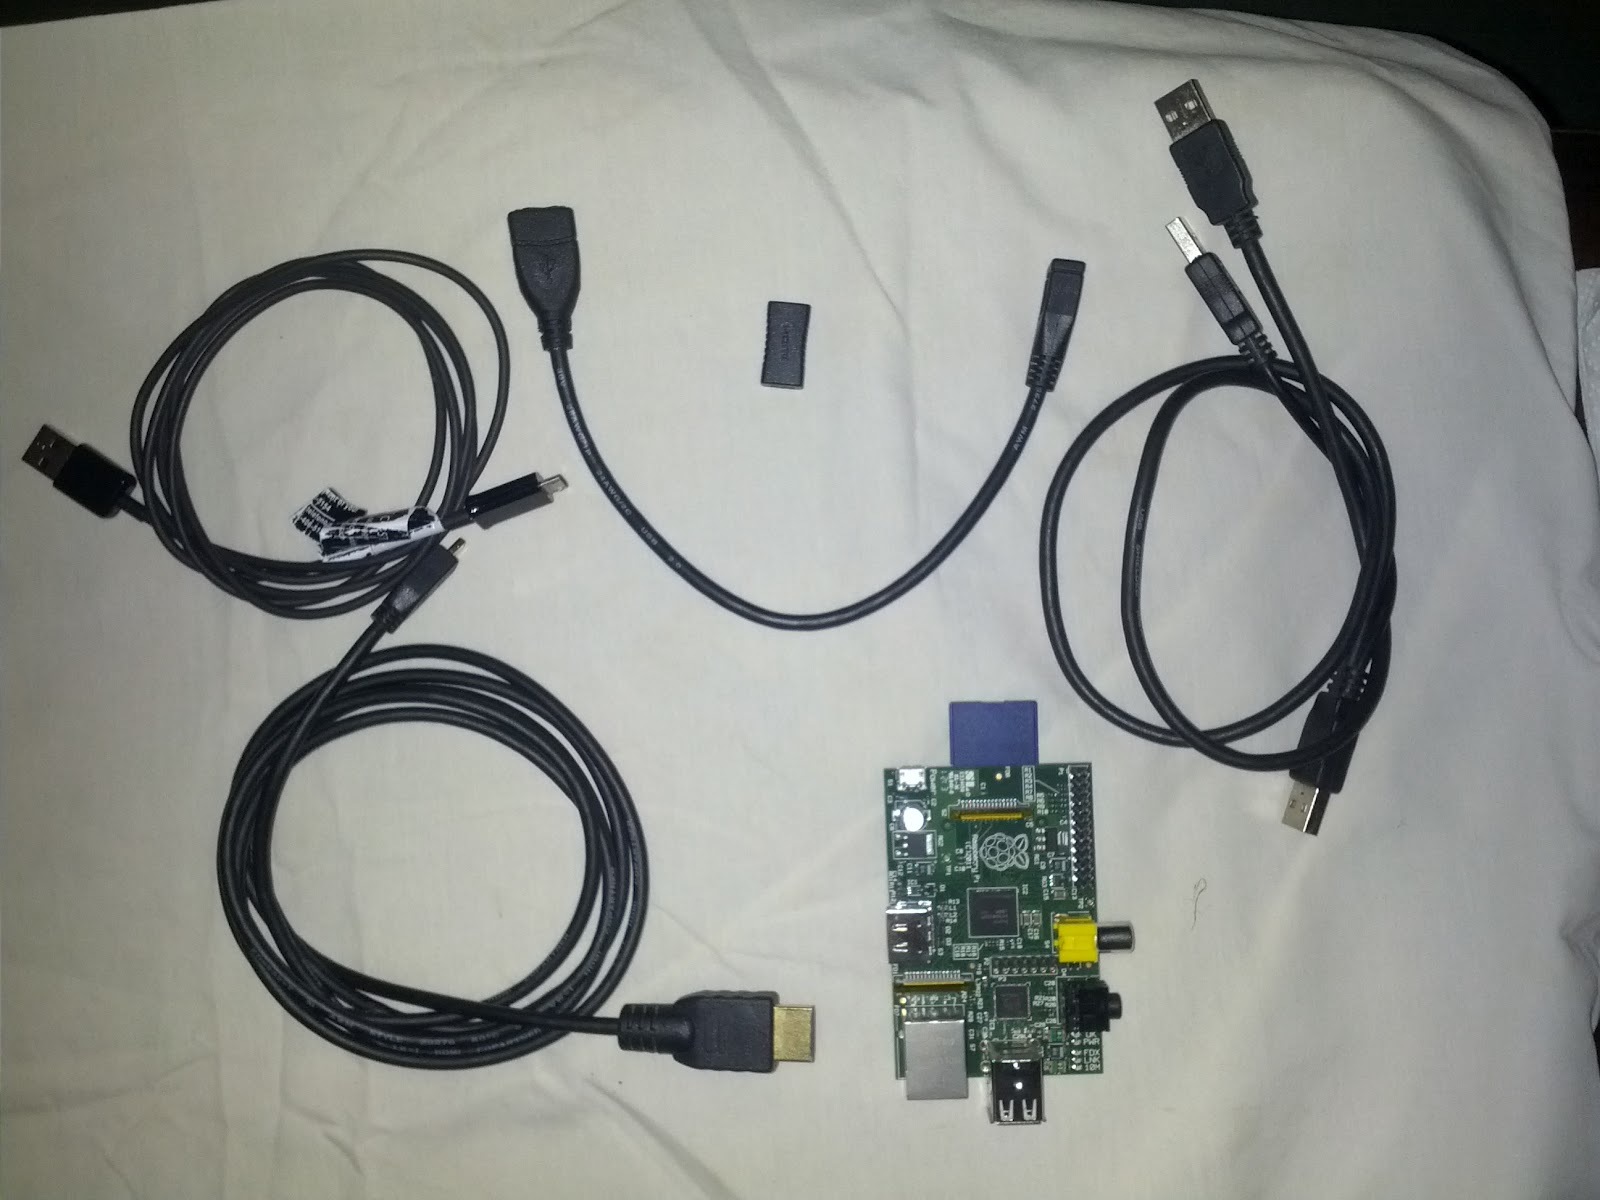
Here is a list of necessary:
- Raspberry pi
- Motorola Lapdock (Atrix works)
- 1 USB Male to Micro USB Male cable (normal cable from phone)
- 1 USB 2.0 A female to Micro USB B female cable
- 1 Micro HDMI Type D cable Female to Micro HDMI Type D
- 1 USB Male to USB Male cable (you’ll have to open and cut the red 5-volt cable)
- 1 MICRO HDMI to HDMI cable
Then you need to properly connect all cables, following the instructions .
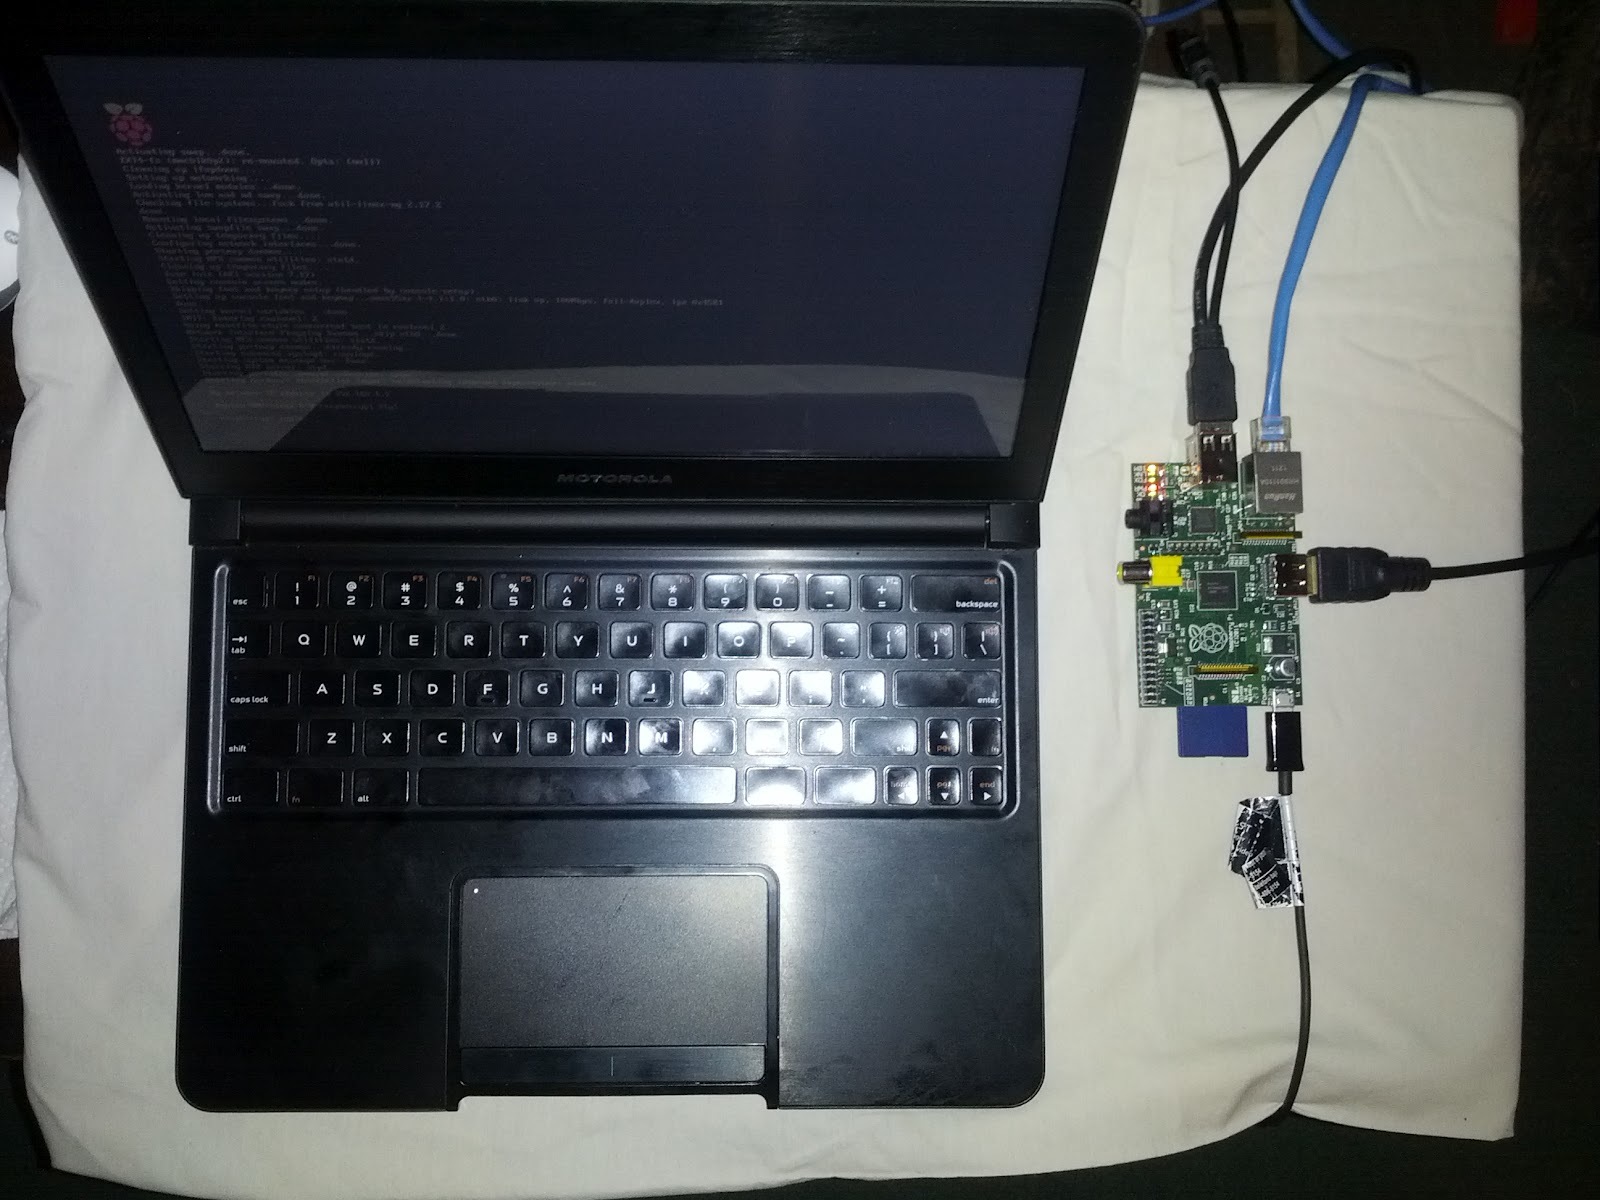

We’ll get not the most powerful machine, and it’s not very convenient to carry along a bunch of cables and a single board computer. But this is the cheapest and most practical way to turn the Raspberry Pi into a full-featured laptop.
Source: https://habr.com/ru/post/372467/
All Articles