Using Intel Edison Platform to Create a Video Rover
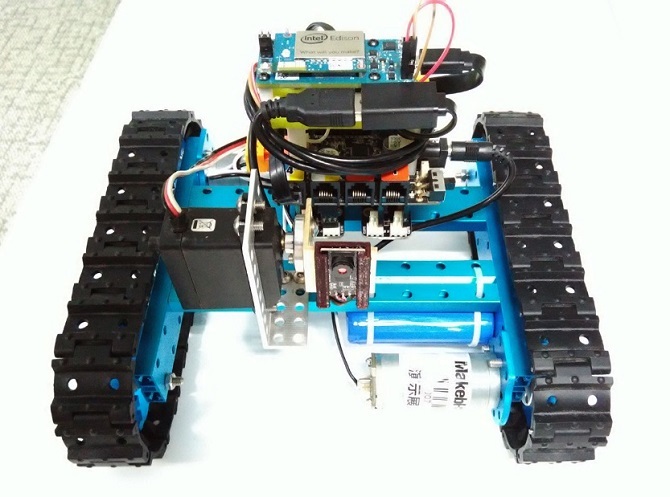
Intel Edison is a smart computing platform that is used to create various devices, including wearables. The movement of makers is gaining popularity in the world, the number of products and solutions that can be built using the Intel Edison platform is increasing. In this article, you will be shown how to build a video rover (all-terrain vehicle with a camera) using the Intel Edison platform and the Makeblock designer.
Since this is a video rover, it should have a camera. We can watch the video that it produces on a computer, mobile phone or tablet. Additionally, we will be able to use these devices to control the all-terrain vehicle and camera itself.
Cooking
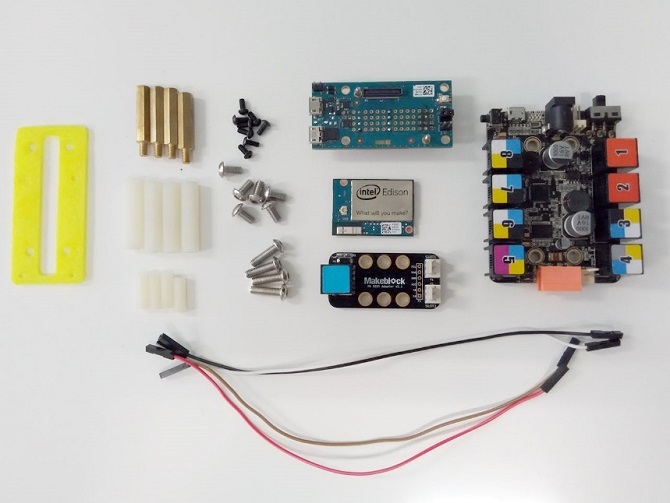
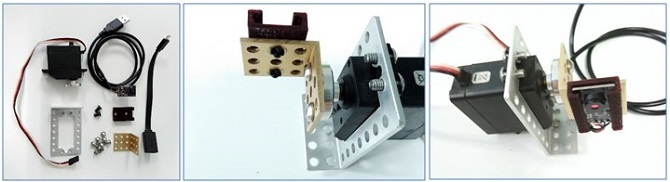
Here's what we need to build a video rover:
- Intel Edison board.
- Makeblock main board.
- Makeblock Starter Kit .
- M4 screws, M4 nylon studs.
- Screws M2.5, nylon studs M2.5.
- Makeblock Me RJ25 Adapter.
- Servos and corners for them.
- USB camera with MJPEG and UVC support.
- Wires (DuPont).
- The battery is 7.4 V.
- Printed on a 3D printer frame.
- Usb cable
Installation of mechanical and electronic modules
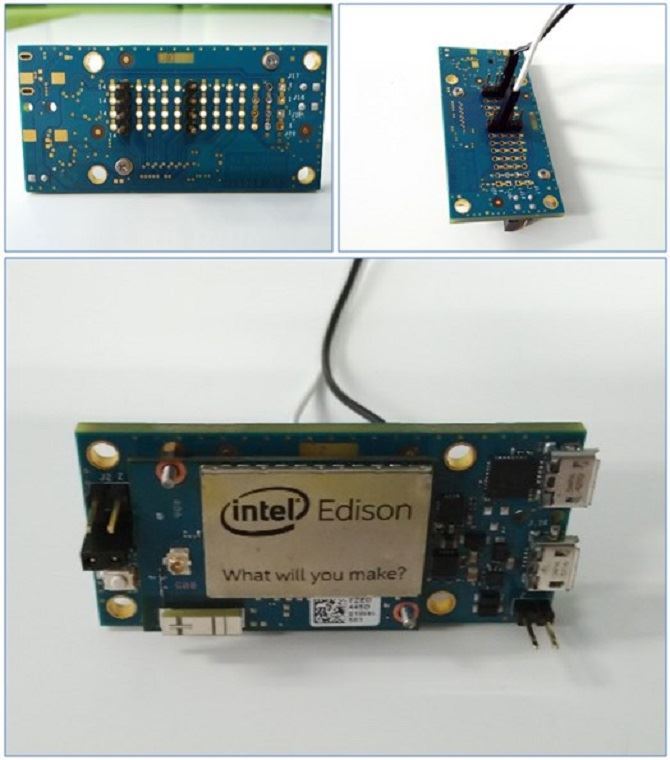
1. Connect the serial port of the Intel Edison board to the main Makeblock board using wires.
')
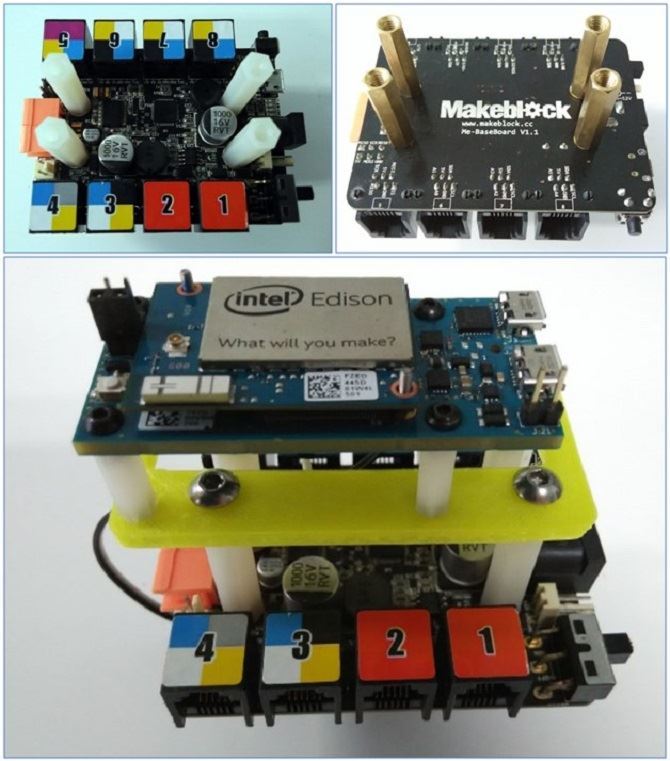
2. Connect the Intel Edison and Makeblock board using the studs and the frame printed on the 3D printer.
3. Connect the camera and servo.
4. Install the main board and servo drive on the chassis of the Makeblock Starter Kit - Track car.
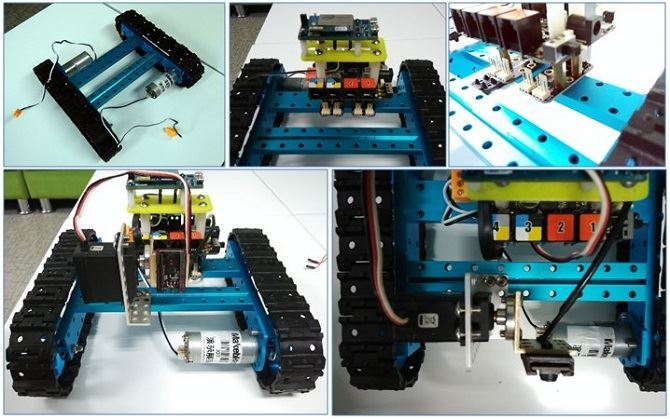
5. The power supply to be used with the Makeblock board must provide at least 7 V. Connect the serial port on the Intel Edison board and the servo through the Me RJ25 adapter. (You need to connect the Makeblock Me RJ25 adapter through ports 4 and 5 of the Makeblock board, and connect port 6 to the servomotor).
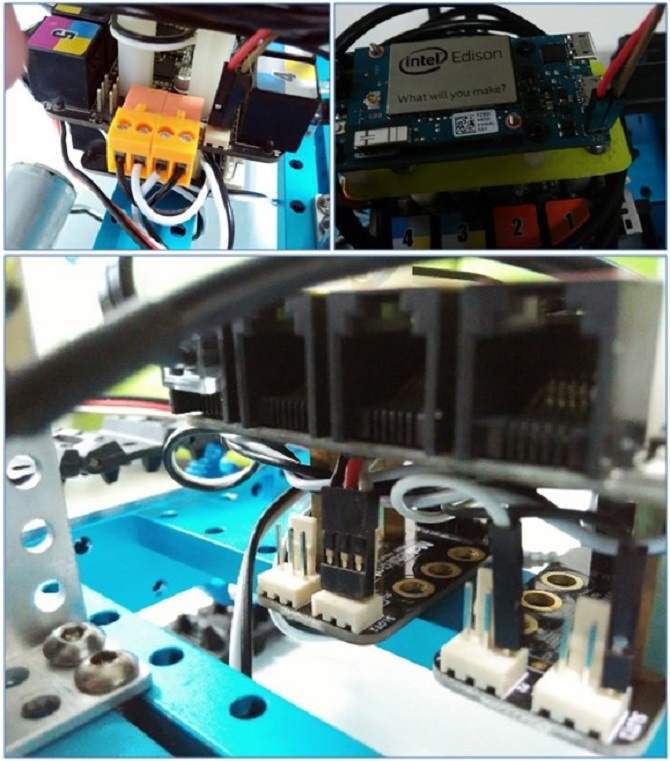
6. Connect the camera to the USB host port on the Intel Edison board and then connect the power supply (7.4 V) to the Makeblock board.
Software installation
Step 1. To prepare the system for the Intel Edison board, follow the instructions .
Step 2. Connect edi-cam github.com/xeecos/edi-cam for streaming video.
1. Connect the Intel Edison board via a serial port or via Wi-Fi. Make sure the board and your computer are on the same local network. Enter:
$ ssh root@myedison.local root@myedison.local's password:root@myedison:~# Replace myedison with the name of your Intel Edison board. When the password is requested, use the one you specified when configuring the card.
2. To configure the repository, add the following lines to the
/etc/opkg/base-feeds.conf file: src/gz all http://repo.opkg.net/edison/repo/allsrc/gz edison http://repo.opkg.net/edison/repo/edison src/gz core2-32 http://repo.opkg.net/edison/repo/core2-32 3. To update opkg, enter:
opkg update 4. To install Git, enter:
opkg install git 5. UVC driver:
Make sure you have the latest version of the Yocto image, which already includes the UVC drivers. The old version of Yocto does not contain them.
6. To install ffmpeg, go to the bin folder. To run the script, enter:
./install_ffmpeg.sh 7. Install the Node.js package.
Go to web / robotjs. Install the Node.js package by typing:
npm install Step 3. Run the application.
1. Update the address of the web service. Change the value of the wsUrl variable in the
web/robotjs/client/index.html file: // CHANGE THIS TO THE APPROPRIATE WS ADDRESS var wsUrl = 'ws://myedison.local:8084/'; 2. Run node.js
Go to
web/robotjs and then run the command node server.js You will see the output in the terminal:
WebSocket server listening on port 8084 HTTP server listening on port 8080 Listening for video stream on port 8082 Stream Connected: 127.0.0.1:52995 size: 640x480 Viewing the video stream 3. Open in browser
myedison.local:8080 myedison.local:8080 . You will see a video and control page.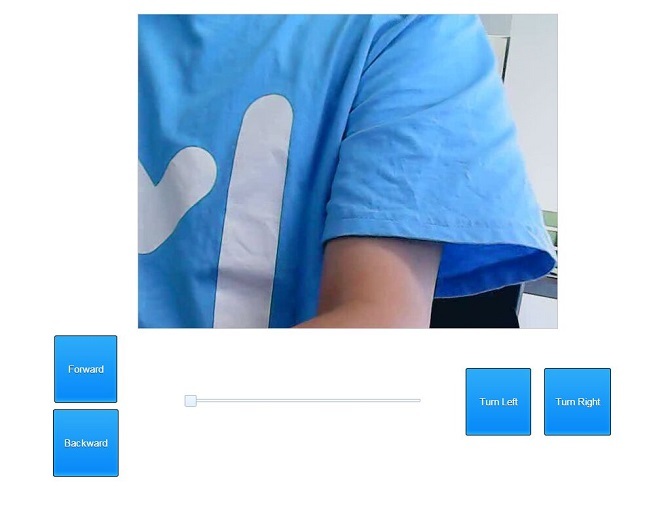
Conclusion
In this article, we showed you how to use the Intel Edison board, mechanical and electronic Makeblock modules to build a controlled video overhead. Intel Edison Board performs the role of a server and provides network support. But in fact, the power of the Intel Edison board is not fully utilized. Try using it for more complex work, creating more amazing devices.
Source: https://habr.com/ru/post/371559/
All Articles