Install OpenVPN in a few clicks
 Hi, Geektimes!
Not so long ago, the thought occurred to me that connecting to a Linux server via SSH, installing packages, running scripts is all a common type of routine for which human participation is not needed, a robot can do it. Of course, I use Ansible, but he, too, is "not for everyone."
As a result, the program "for all" was written in which there is simply one button "to do well". The program is open source and available for research and download on GitHub.
But one program is not enough to carry personal OpenVPN to the masses. Therefore, this article was written in which everything was described simply and in steps, from creating an account in a cloud service to connecting from a mobile phone.
All you need to do 4 simple steps:
- Create a server (usually just click the "Create" button)
- Install and run the SSHeller application
- Click the
Installbutton and wait for the installation to complete. - Download
ovpnfile and connect to VPN with it
Server creation
Almost any virtual (VPS, VDS) or physical server will fit (the virtual must have a tun interface). For example, below is a guide on how to use DigitalOcean, as the most stable, simple and easy-to-use cloud provider.
Training
To activate your account you need one of two things:
- paypal account
- credit card (credit card, which can go into the minus, salary / debit will not work)
If you use PayPal, you will need to deposit $ 5. With a credit card, they will block $ 1 and return it.
Register with DigitalOcean
It is best to register by referral link - then the promotional code for $ 10 will be automatically applied. And you can register by filling out the form on the main page and later enter any promotional code - it is easily searched through google. There are many different and all for $ 10.
Following the link, just enter the e-mail and come up with a password.
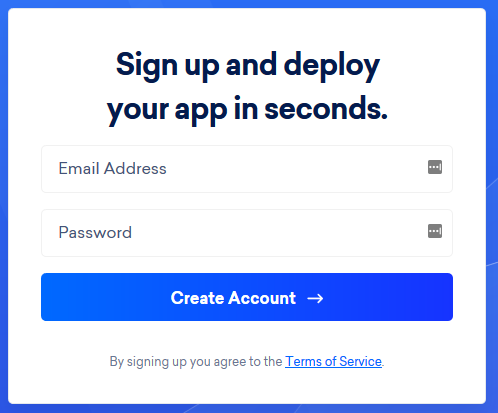
After clicking on the button, you will receive a letter with a link to confirm registration - you will need to click on it.
Next you need to enter credit card details, or PayPal. This is a mandatory requirement for account verification. Almost everyone has PayPal.

After pressing the confirmation button, the standard payment process will start. But there is an important feature that will allow you to save a little: your bank converts rubles into dollars at a more favorable rate than PayPal
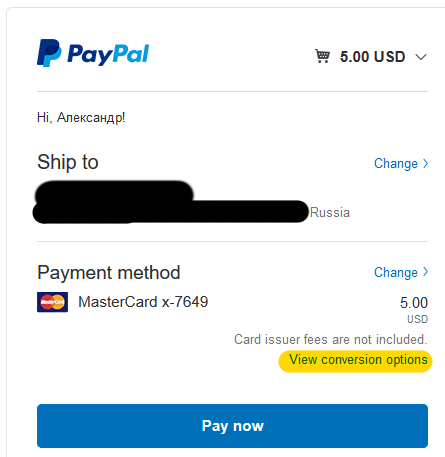
You need to click View conversion options and select Convert with card issuer

After the payment is completed, you will be taken to the Dashboard main page. You can go to Settings -> Billing to see the balance.
Here Your credit $15 is an advance payment. And Usage $0.00 is the amount you need to pay. Payment is usually made after the fact - how much you have spent in a month, how much you will be asked to pay (after exhausting the advance payment). At the bottom you can see what were charges.

Server startup
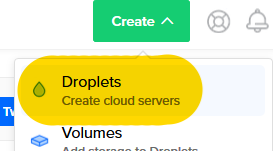
Top-right click Create -> Droplets
The server creation page will open. You need to set 3 basic parameters.
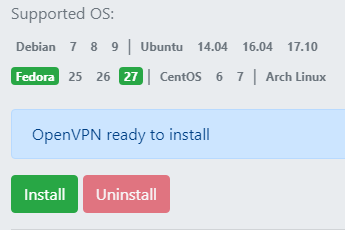
Operating system: Fedora 27 . It is the smallest, fastest and stable available. Although Debian 9 is also a good choice. Moreover, all available operating systems are supported, except FreeBSD and Debian 7 .

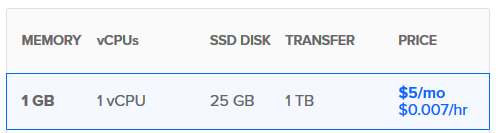
Size: the smallest $ 5 will be enough.
Region - you need to choose the one that is closer to you geographically. For the European part of Russia - this is Amsterdam .

It's enough. At the very bottom, you can change the name, but you can leave the default and click the big green Create button. The virtual machine will start to be created, and soon you will receive an e-mail with its address and password.
Install SSHeller
To install, just go to the release page , download the appropriate file and run it.
- For Windows:
SSHeller.Setup.XXXexe - For macOS:
SSHeller-XXXdmg - For Linux:
SSHeller-XXX-x86_64.AppImage- after loading to make executable and run
Now SSHeller can be run from the list of applications.
Install OpenVPN server
A letter from DigitalOcean should have arrived. From it we need 4 parameters.

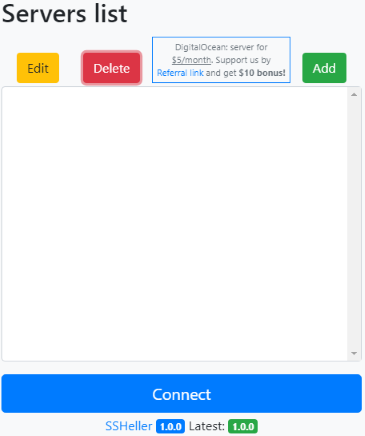
Launch SSheller and click Add

Copy the parameters from the letter:
Droplet Name->NameIP Address->HostUsername->UserPassword->Password
Pressing Save returns to the list of servers.
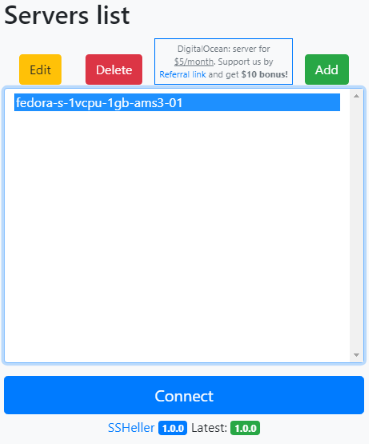
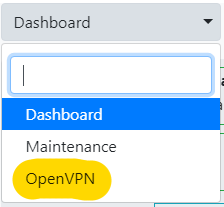
In the list, select the created server and click Connect . The first connection takes a little longer as DigitalOcean creates expired virtual machines and the application will need to update it. After connecting, the server status (Dashboard) will be displayed. From the top left, open the menu and select OpenVPN .
On the OpenVPN screen, just press the green Install button and wait.
How long to wait is impossible to predict. Sometimes it can be 3 minutes, and sometimes - up to half an hour. It depends on the server on which your virtual machine is running. The smaller the server has a pool of entropy - the longer it takes to wait. If in simple words: the computer very slowly creates new random numbers, but it does it constantly and saves them. And to create encryption keys you need a lot of random numbers. If someone has already used them, you will have to wait.

At the end a report will be displayed. If interested, you can watch it.
The default profile and the corresponding configuration file - client.ovpn will be created client.ovpn . You can download it, or you can create another one, or several, by entering the name of the new profile and clicking the Add button.
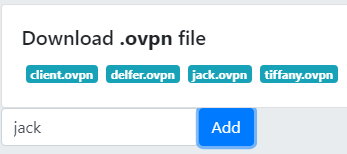
To download just click on the appropriate profile file.
Connection
- For
WindowsandLinuxyou need to installOpenVPN - For
macOS-Tunnelblick - For
AndroidandiOS-OpenVPN Connectfrom the app store
Windows
- Download
openvpn-install-XXX-I601.exefrom the official site and install - The saved
client.ovpnfileclient.ovpnto be copied to theC:\Program Files\OpenVPN\configfolder - confirmation of Administrator rights will be required - In the Start menu, select
OpenVPN->OpenVPN GUI - In the tray (icons near the clock), right-click on the monitor icon with the lock and select
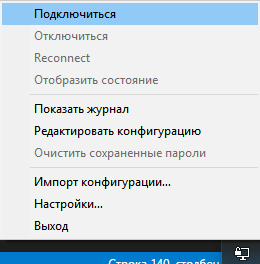
If there are several files in the config folder, a submenu for each file will appear.
macOS
- Download
Tunnelblick_XXX.dmgfrom the official site (Stable) and launch - In the window that opens, double-click on the icon with the signature
Tunnelblick - A warning will appear that this program is downloaded from the Internet - click
- In the welcome window, click
- Next, you will need to enter the Administrator password
- To answer the question about the configuration file:
, and in the next window clickOK - Through the Finder, find the
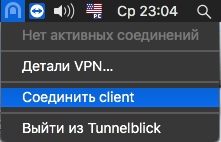
client.ovpnfile and open it; indicate whether you want to use it or allow other computer users - In the tray (icons near the clock), left-click on the gate icon and choose to
client - The message "Unrecognized option or missing parameter or extra parameter (s)" can be displayed - it does not affect the performance
Linux
- Install the OpenVPN package by the package manager. For example, in Debian and Ubuntu, just run:
sudo apt-get install -y openvpn - Connection is established by the
sudo openvpn --config client.ovpncommandsudo openvpn --config client.ovpn
iOS
- Install
OpenVPN Connectfrom App Strore - Send the file to your mobile device. For example, you can send an email to yourself from your computer
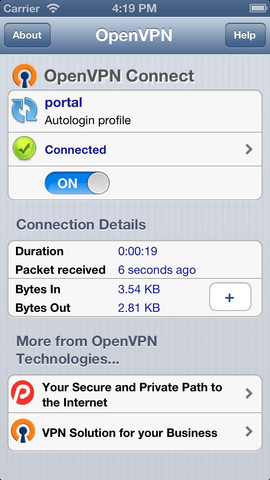
- Launch the
OpenVPN Connectapplication, selectImport you Private Tunnel Profile - Select the saved
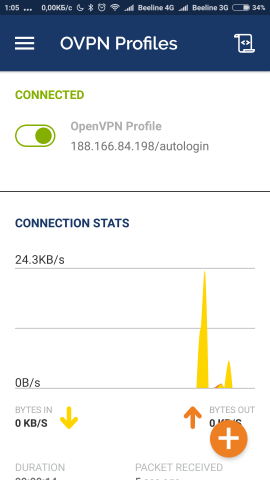
client.ovpnfile - Move the switch that appears to the
Onposition.
Android
- Install
OpenVPN Connectfrom Google Play - Send the file to your mobile device. For example, you can send an email to yourself from your computer
- Launch the
OpenVPN Connectapplication, selectOVPN Profile - Select the saved
client.ovpnfile (usually it is saved in theDownloadsfolder) and clickIMPORT - Enter the display name of the profile or leave it unchanged, click
ADD - Move the switch that appears to the
Onposition.
How to save money
In DigitalOcean hourly pay
Those. you can only pay for the time that you really use. And here are two important points:
- The available traffic is proportional to the server uptime. If the server worked only 1/10 of a month (3 days), then only 1/10 of the traffic (100GB) will be available. Excess will have to pay extra (1 cent for each GB)
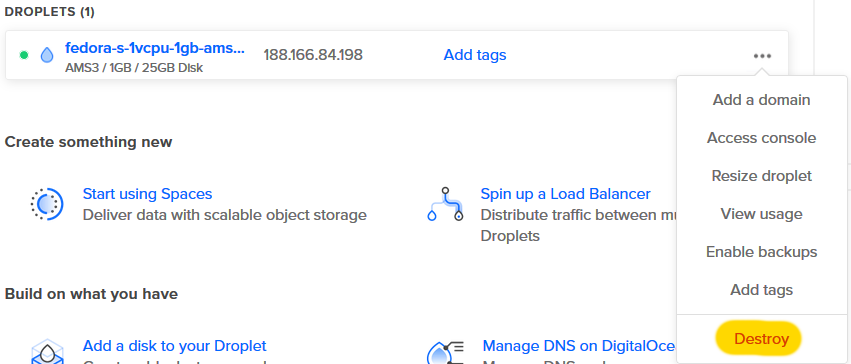
- To stop money being written off for the server, it is necessary not just to stop it, but to completely destroy it by clicking on the menu near the server and then
Destroy, and on the server page that appears, clickDestroyagain. The next time you need to re-repeat the entire setup, create newovpnfiles and send them to the devices.
Share with family and friends
Technically, you can create a variety of profiles, both for different devices and for different people. Together the price for each will already be $ 2.5, five of them - $ 1.
It is important that for each profile there can be only one simultaneous connection. So, at a minimum, you need to create separate profiles for different devices.
UPD
On May 1, 2018, comments began to appear that some Russian providers were blocking Digital Ocean. There is a great alternative - Linode ( comparison ).
- We are registered on the main page .
- After entering the e-mail, login and password (you need to think), you will receive a letter with a link to confirm, go through it
- An extended registration form opens, you need to enter the last name, first name, address, promotional code and card details
- $ 10 or $ 20 promotional code is easily searched on google, 05/01/2018
PodcastInIt2018worked on $ 20 - Any card is suitable, there are no special requirements like DigitalOcean
- at the bottom, select the initial replenishment, at least $ 5
- $ 10 or $ 20 promotional code is easily searched on google, 05/01/2018
- After sending the form, we immediately get to the server creation page, at the very bottom we select Linode 1024 (costs the same $ 5 per month), below we select the location, Frankfurt, DE is the closest to the European part of Russia
- After creating the server, select it from the list and click Deploy an Image
- choose a distribution kit, for example, Fedora 27 or Debian 9
- invent, remember and enter the server password
- click Deploy
- Click the Boot button to start the server
- Switch to the Remote Access tab, copy the very first Public IP , for example
172.104.130.238 - Start SSHeller, click Add
- invent and enter the Name
- paste the copied IP into Host
- enter
root - enter the password in the Password invented in step 5
- The server does not load instantly, if you quickly enter the server access parameters, you will have to wait 30 seconds
Further, all the basic instructions.
')
Source: https://habr.com/ru/post/371475/
All Articles