Why are there no stars in space photos?
One of the questions constantly appearing in the Reddit theme “ Cosmos ” is: “Why are there no stars in the photo?” Usually these are photos from the Apollo missions to the Moon or from Earth satellites, but sometimes these are pictures of Jupiter or the Moon. Recently there have been a lot of photos of the Falcon Heavy Starman.
I kept telling myself that I should write an explanation for non-professionals, but I never had enough time. And then, finally, I was brought - one comment with a question asked a million times, finally convinced me to do it. And now, when someone asks about it, I can just give him a link here.
')
So, here it is. The explanation of why stars cannot be seen in many space photos is from the point of view of the photographer.
Basics: cameras and exposure numbers
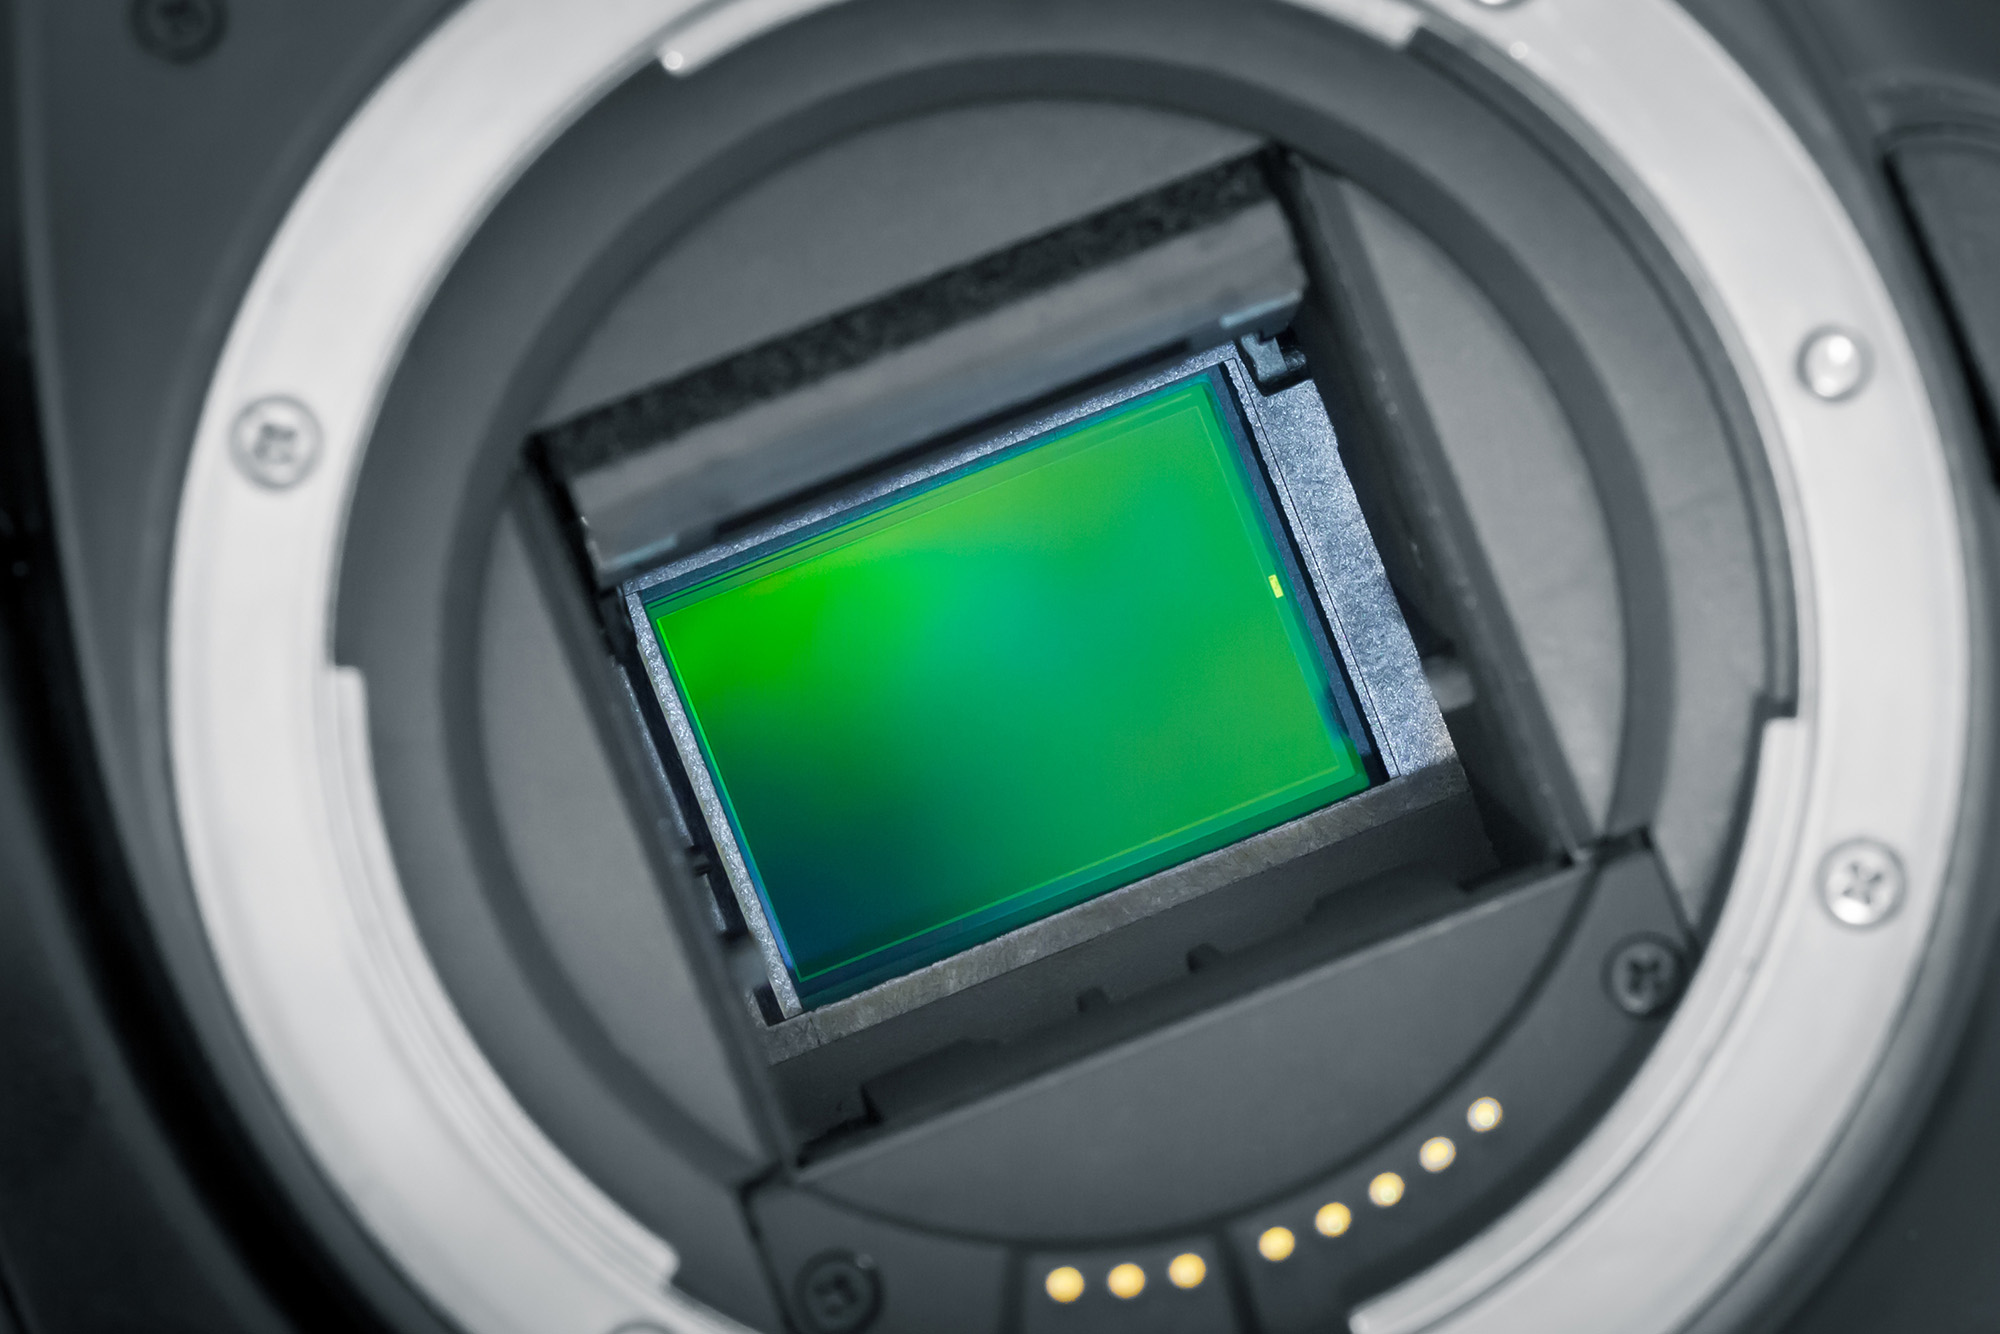
In the camera, the light passes through the lenses and hits the sensor, or, in ancient times, the film. On the sensor are millions of small solar cells that collect particles of light, photons. If to simplify everything a little, then each of the photocells corresponds to a pixel in the final image, and the brightness of this pixel is determined by the number of collected photons. On the final photo, dark areas correspond to those places where fewer photons collided with the sensor, and light areas where those were more photons. You can imagine them as a pile of buckets collecting photons - a bucket that has collected more photons will have a lighter shade on the final image.
The amount of light reaching the sensor is measured in exposure numbers , each of which doubles or halves the amount of light. Intuitively, this can be imagined as an excerpt. Leaving the shutter open for a period of twice as long, you will collect twice as much light in each bucket. The following image shows what this means. Each step is approximately equal to one additional exposition number. Exposure is listed below.
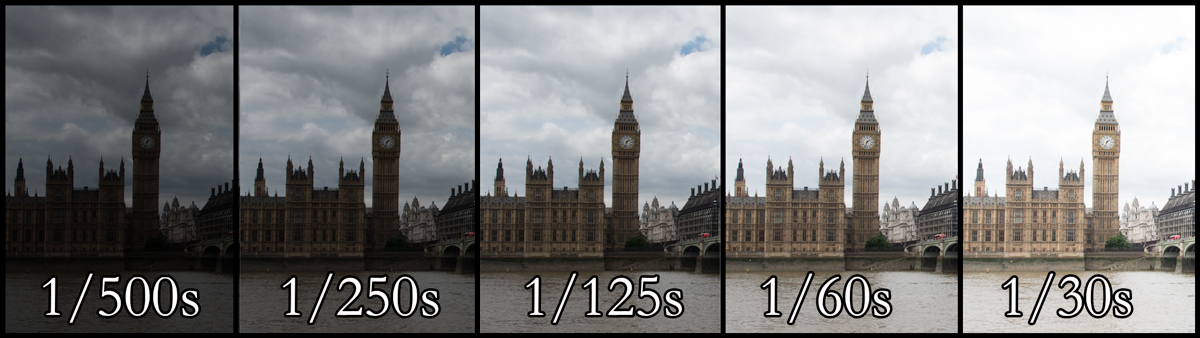
Doubling the opening time of the shutter changes it from 1/500 to 1/250 second. Another doubling gives 1/125 seconds. This is an exponential squared. Exposure in 1/125 is two steps from 1/500, but collects four times more light. Another doubling, before exposure to 1/60 (these are approximate figures) means three steps, but eight times more light. It turns out that on the image from left to right, an increase in the light hit is equal to four exposure steps - that is, the right photo received 2 4 , that is, 16 times more light than the left one.
In addition to exposure, the camera has two more ways to change the amount of light falling on the photomatrix - change the lens aperture or ISO. Aperture - the size of the hole through which the light passes.
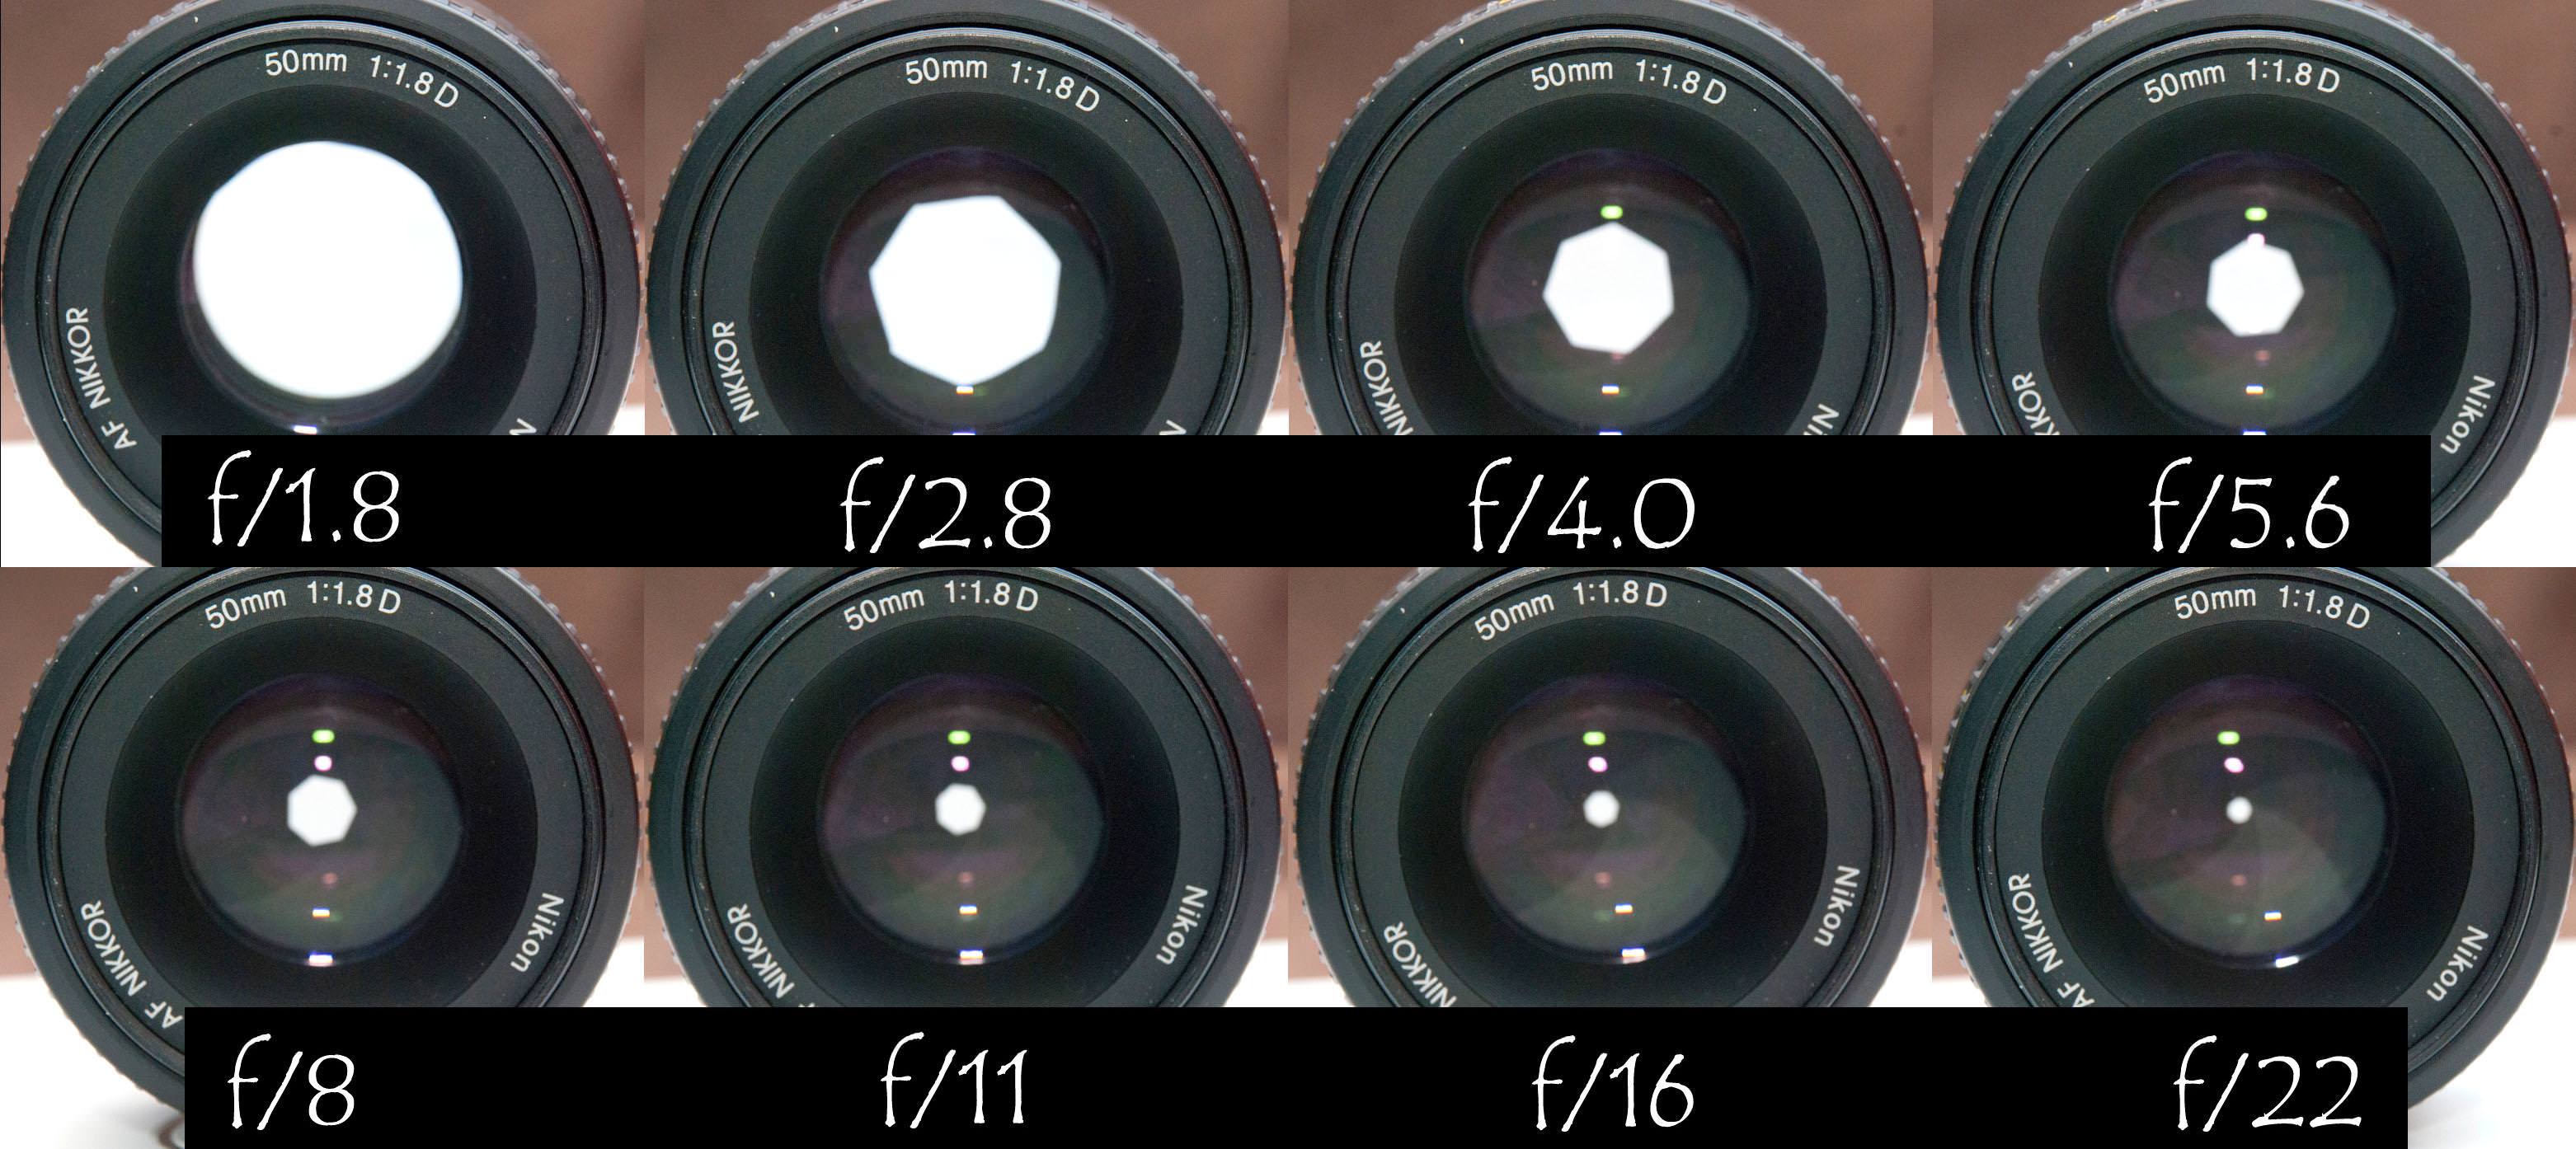
Do not pay attention to numbers, just keep in mind that the larger the aperture, the more light passes through it. ISO measures the sensitivity of a camera to light, and acts in much the same way as exposure numbers - ISO 200 is two times more sensitive than ISO 100, and ISO 400 is two times more sensitive than ISO 200.
Dynamic range
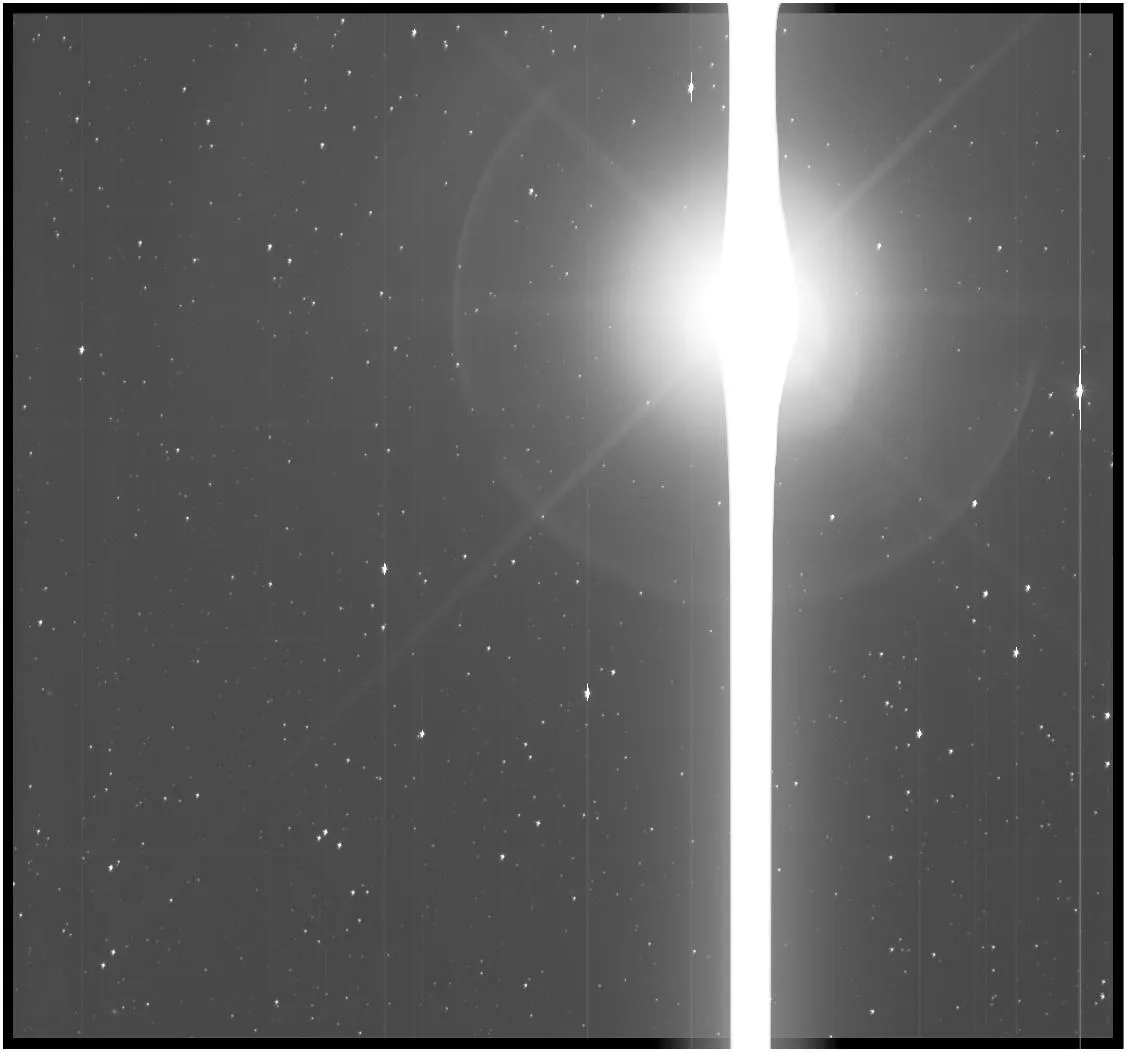
In the image showing different exposures, the rightmost photograph shows that in bright areas - the sky and clouds - it is almost impossible to distinguish the details, they look just like a white spot. The amount of brightness that the camera's sensors can perceive is limited, and the highest brightness in the photo looks like white. As soon as the photocell reaches this level of exposure, an increase in the number of photons arriving in it will not give an increase in brightness. If we imagine photocells in the form of buckets, then when the bucket is filled, an attempt to add additional photons to it will not make it more complete. When the brightness of the scene takes the photocells beyond this limit, the result is a large white light without any details - this is exactly what is shown in the photo above.
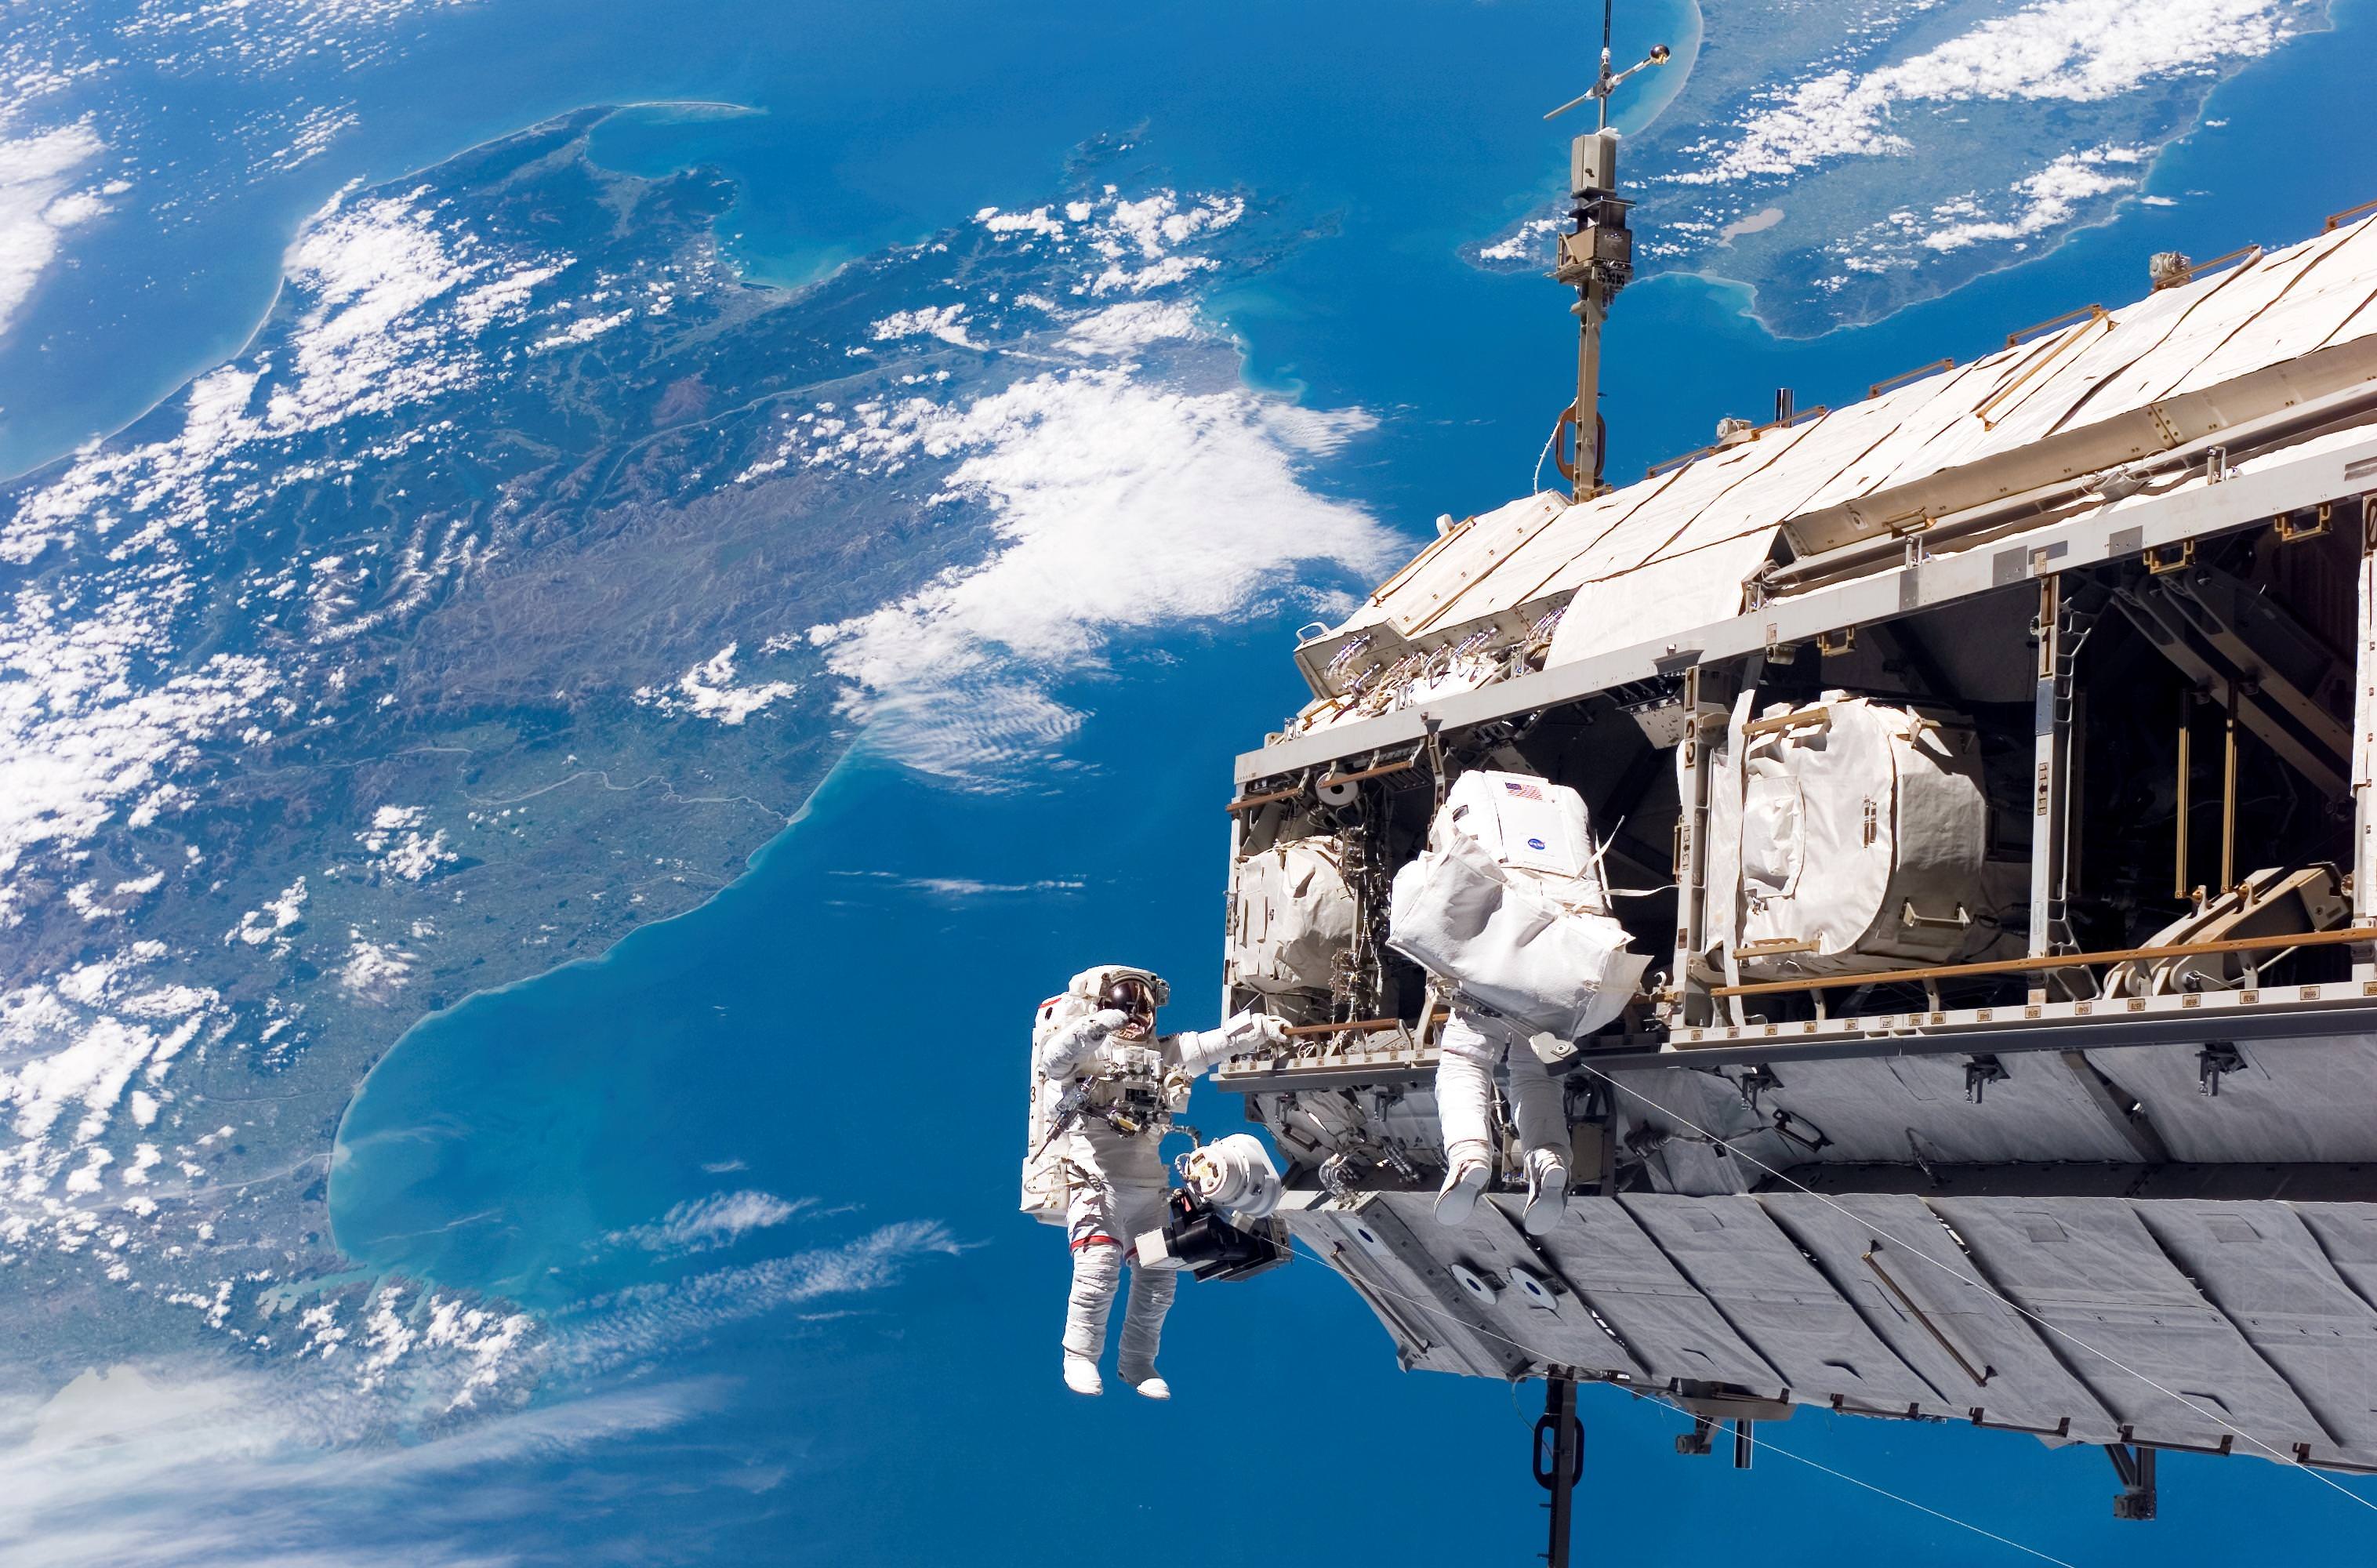
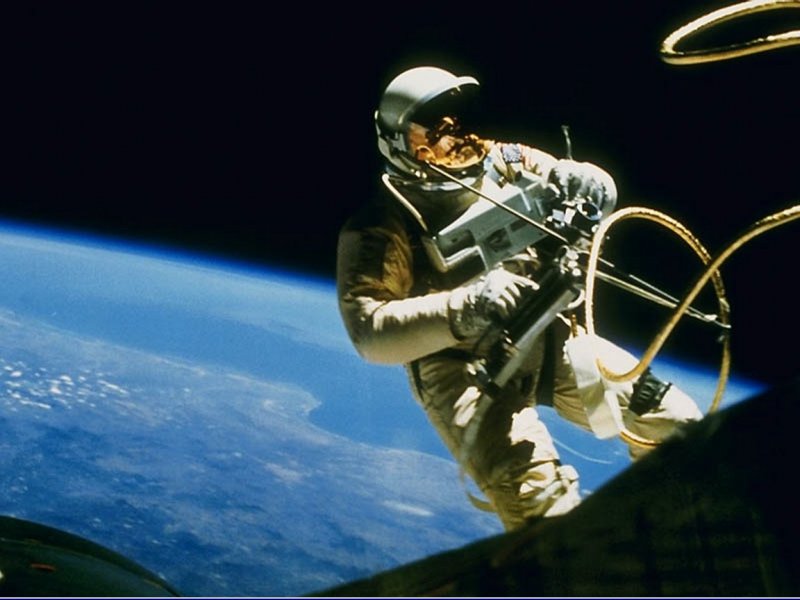
In this photo, the astronauts working on the ISS can see the lights. The spacesuit and the instrument box of the astronaut turned back to the camera have large areas of pure white, and they can also be seen on the brightest parts of the ISS at the top of the photo.
On the other hand, photocells have a lower limit for the recognition of light. Photo cells that do not catch a sufficient number of photons will be represented in the photo by black pixels. Reducing the amount of light to values below this limit will not make the pixel darker, it is already as dark as possible. You cannot get a more empty bucket than an absolutely empty one.
Areas of the image that appear darker than this limit will appear as black spots without details.
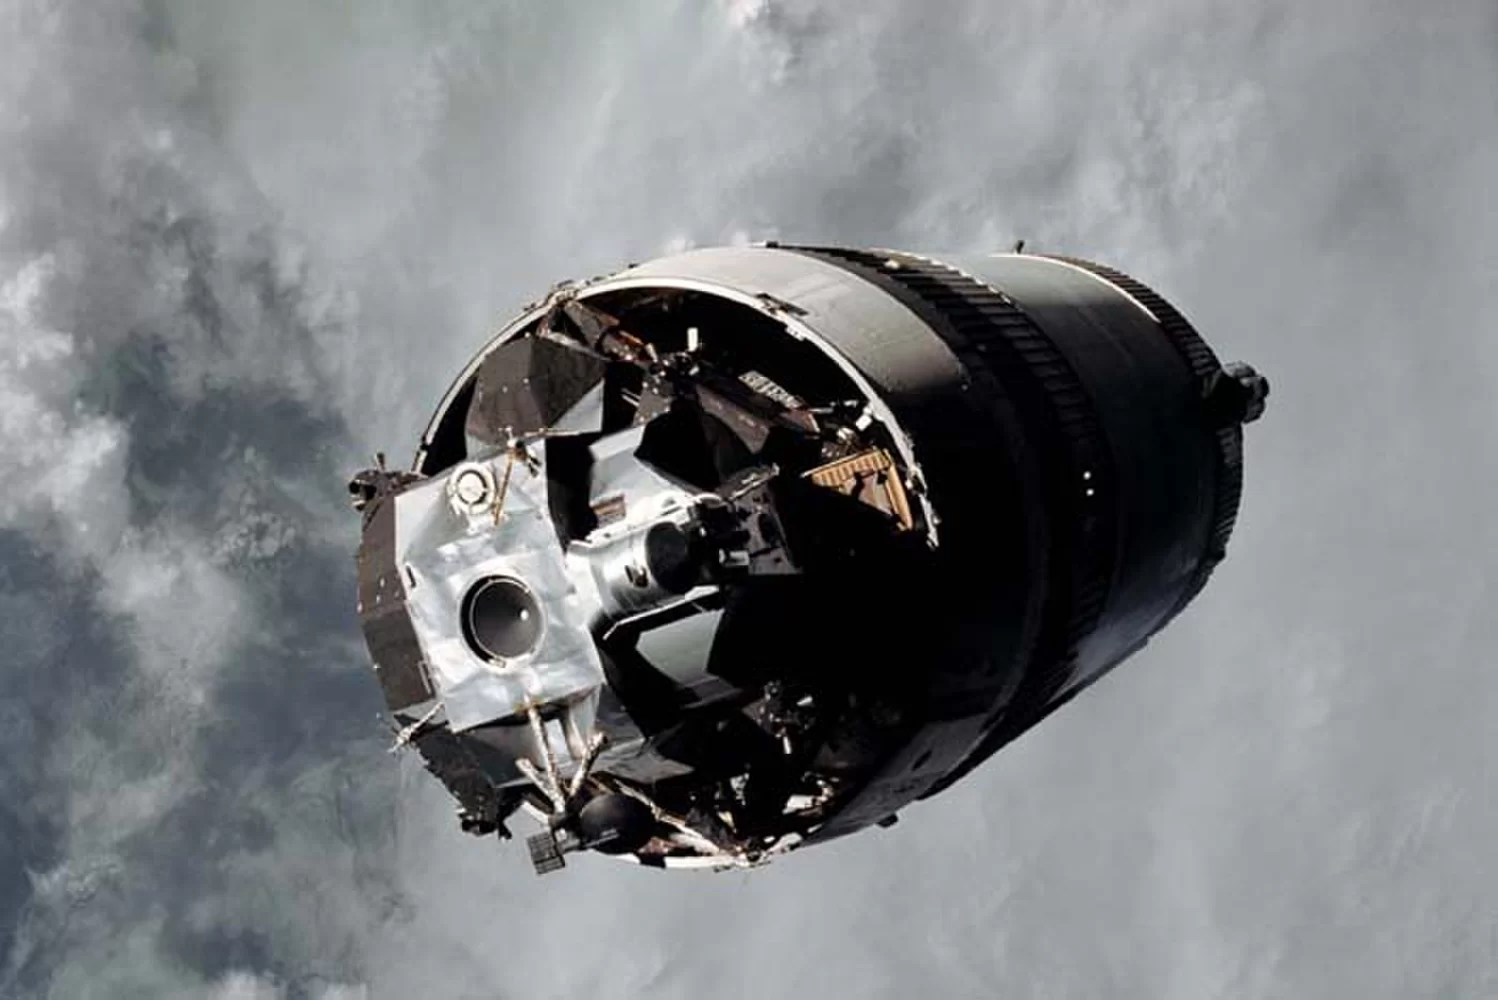
In this photo of the third stage and the lunar module "Saturn-5" you can see a lot of shadow areas.
The luminance distance between the darkest black and the brightest white is called the dynamic range. It indicates the range of brightness in which the camera can capture the details of the image. Everything that is below this range will be black in the photo, and everything above it will be white.
In modern digital cameras, dynamic range is measured in 10-15 exposure steps. You can find a list of dynamic ranges of the highest quality digital cameras. Exposure steps are designated in the list as Evs [exposure value]. The film has approximately the same dynamic range.
Since the dynamic range varies as a power of two, the difference in light intensity between the black and white pixels of a camera with 15 exposure steps will be 2 15 , or 32 768. Another way to designate this dynamic range is 32 768: 1, which means that the upper The limit for capturing parts before exposure is 32,768 times the lower limit at which the photocell does not work.
Photos in the daylight
One important thing to understand about photos of the moon and planets, including Earth, is that they are illuminated with daylight and show the day side of the object. In other words, the object is illuminated by sunlight.

This photo of the Earth shows the daytime side of the Earth turned towards the sun.
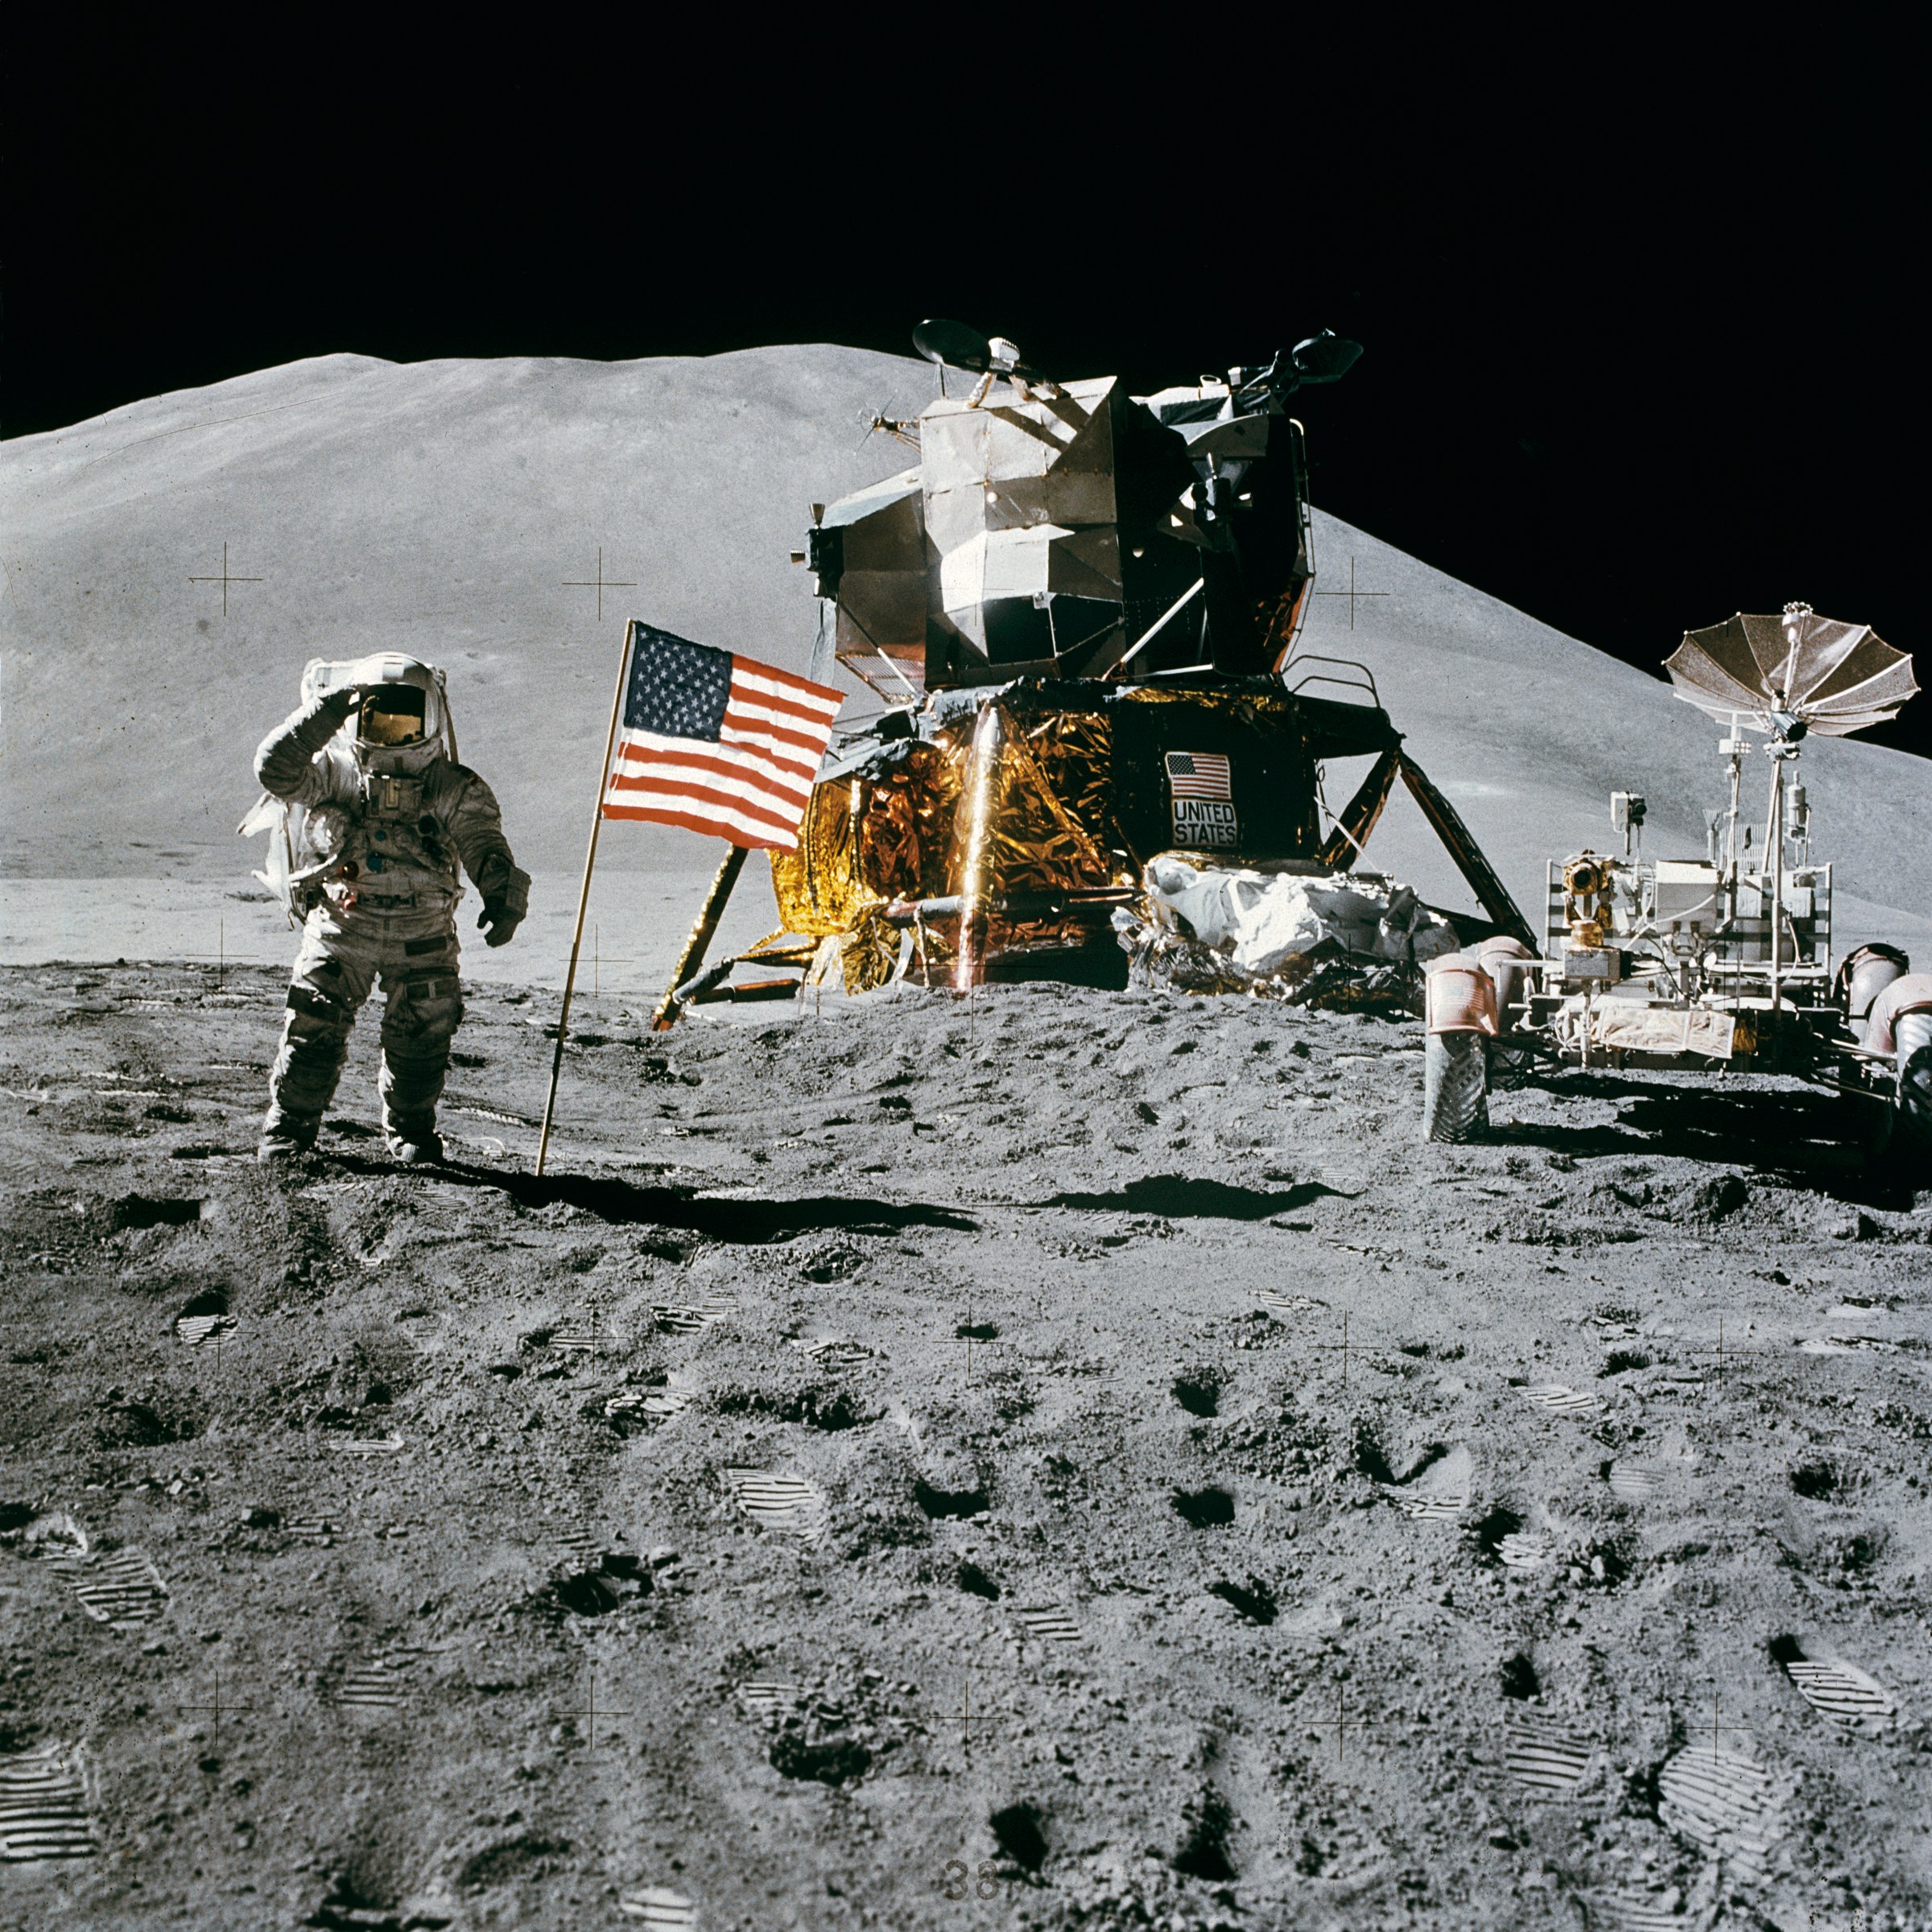
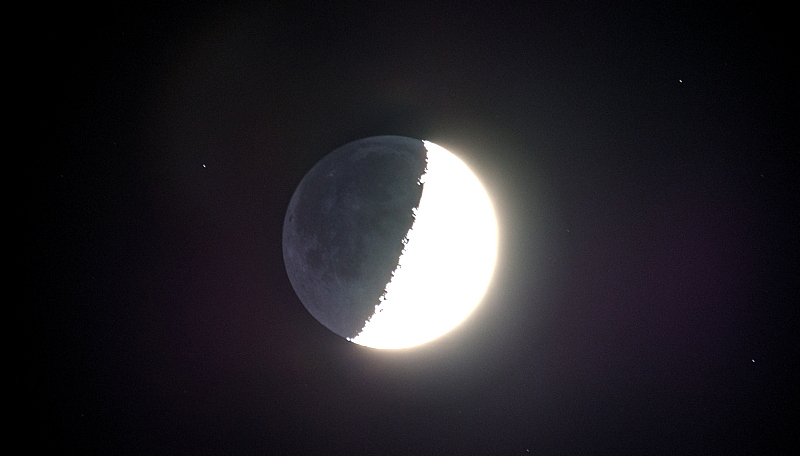
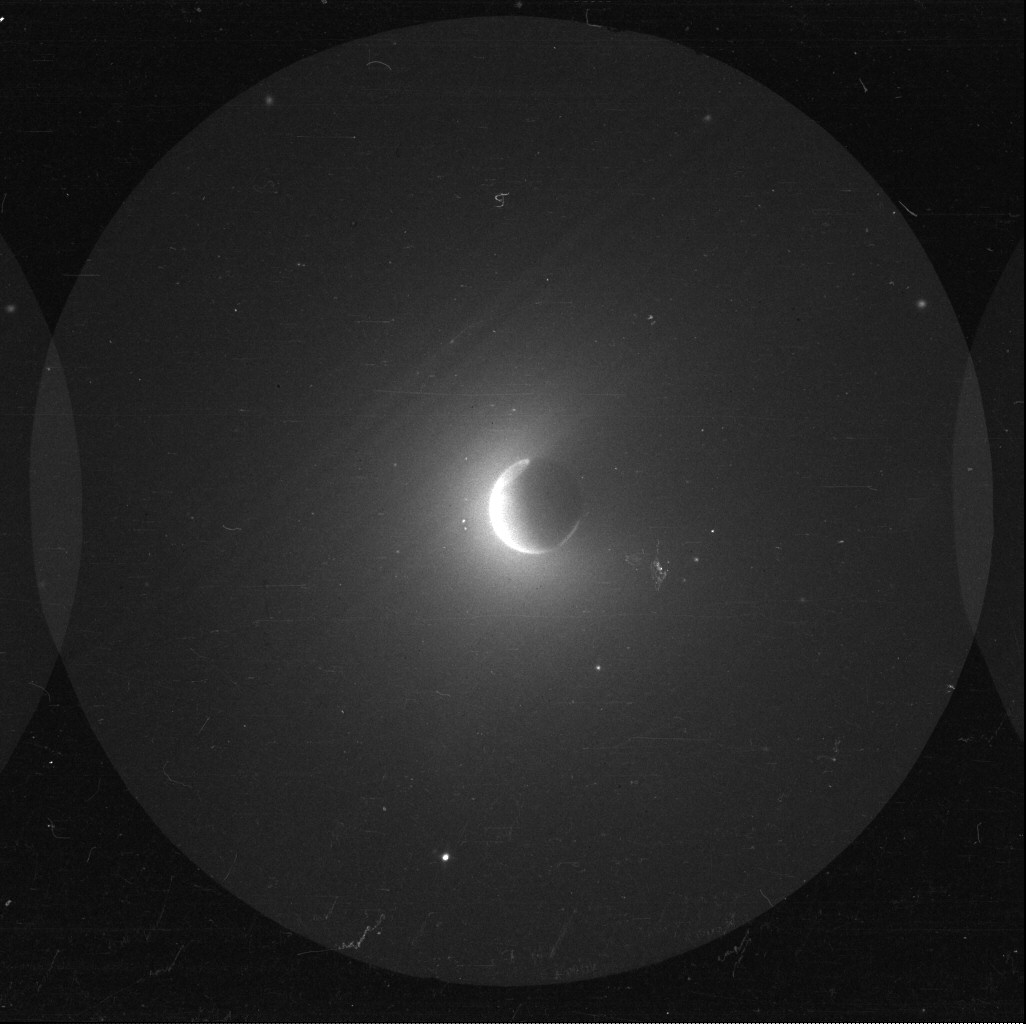
This is a photo from the Apollo-15 landing site - a daily photo. You could decide that this is a night photo, because the sky is dark, and this is the Moon, which is visible at night - but the photo was taken on the side of the Moon facing the sun, and the brightness there is the same as on Earth during the day.
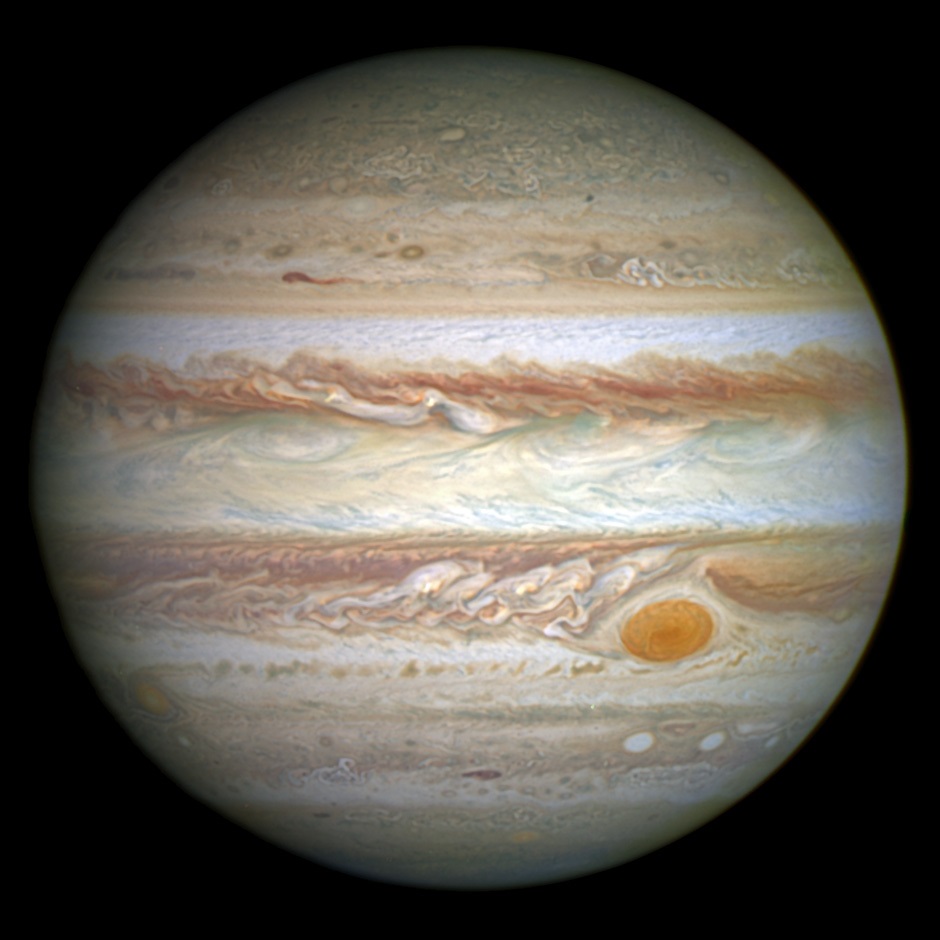
This is a daytime photo of Jupiter. She is not night. The sky is dark, and Jupiter can be seen in the night sky, but this photo shows the day side of the planet, turned to the Sun. The same is true for the recent launch of SpaceX Tesla - the car was lit by the sun.
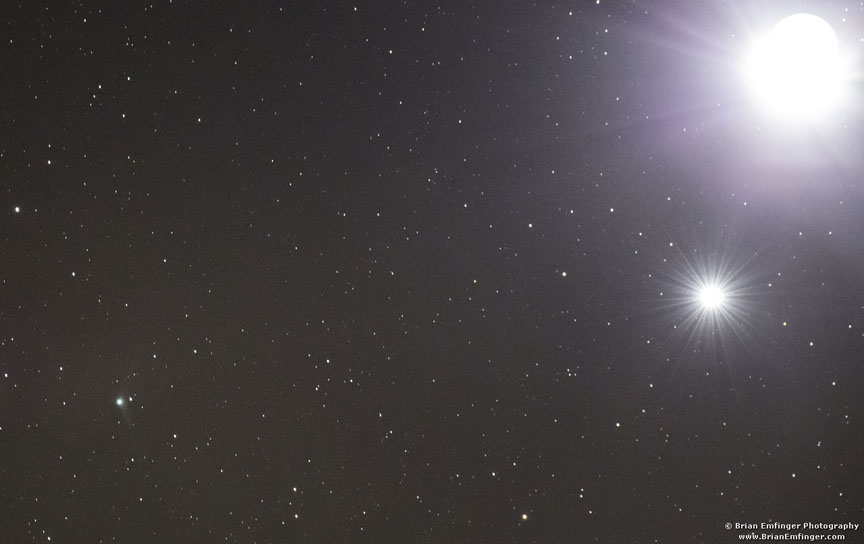
Comparison of daytime photos and starlight photos
Now that we have all the necessary knowledge, we will begin to understand how to compare photos of the Earth and the Moon in daylight with photos of stars at night. First, let's see what settings were used during the Apollo missions and other photos of astronomical objects in daylight and ground-based photographs. Then we take a look at the settings used when shooting stars. Finally, we will enter various settings into the calculator, and see how many exposure steps are between the photos of the stars with the correct exposure and the photos from Apollo and other daytime photos of astronomical objects.
If we find that the difference in exposure levels exceeds 15, it will mean that cameras shooting such things in space as the day side of the moon, Earth or other planets, or objects in daylight like Tesla will not be able to make images of stars . Also, remember that 15 is the maximum difference between the brightest and darkest shades in the camera, so the functional number of exposure steps between the object and the darkest parts will be less, because usually the exposure is chosen for the subject with average brightness rather than maximum. In the photo of Earth above the planet is not at the upper end of the brightness scale, so the distance between the brightness of the Earth and the lower edge of the dynamic range will not be equal to 15 degrees, but something like 7, because the Earth is somewhere in the middle of the dynamic range of the photo.
But in order to simplify the calculations, we will simply use 15 steps as a reference figure - if the correct exposure for stars stays more than 15 steps away from the correctly selected exposure for Earth in daylight, or the Moon, or any other planet, then we we can be sure that no stars will appear on these daytime shots.
Looking for real exposure settings - starlight
As examples of images of stars, I chose three images from our subreddit. For each of them, the photographer indicated exposure settings.
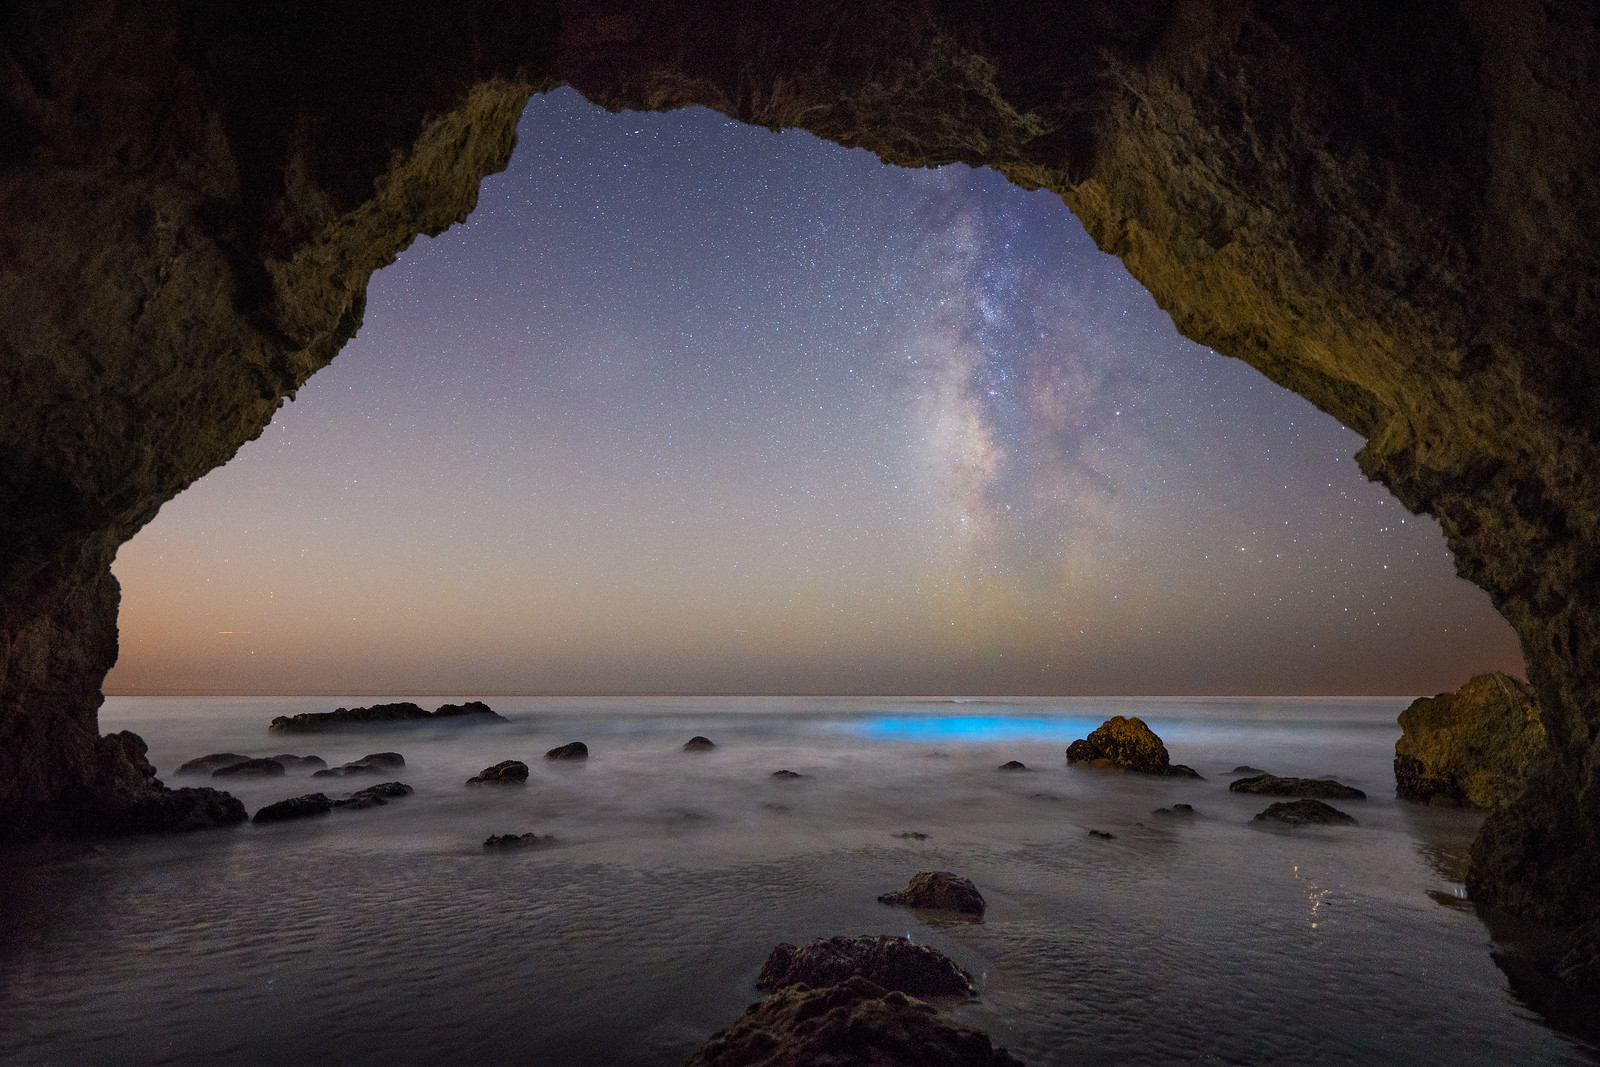
Bioluminescence in Malibu and the Milky Way; shutter speed: 13 seconds, aperture: f / 1.8, ISO: 4000

The Milky Way before the dawn over the Atlantic; shutter speed: 25 seconds, aperture: f / 3.5, ISO: 2500
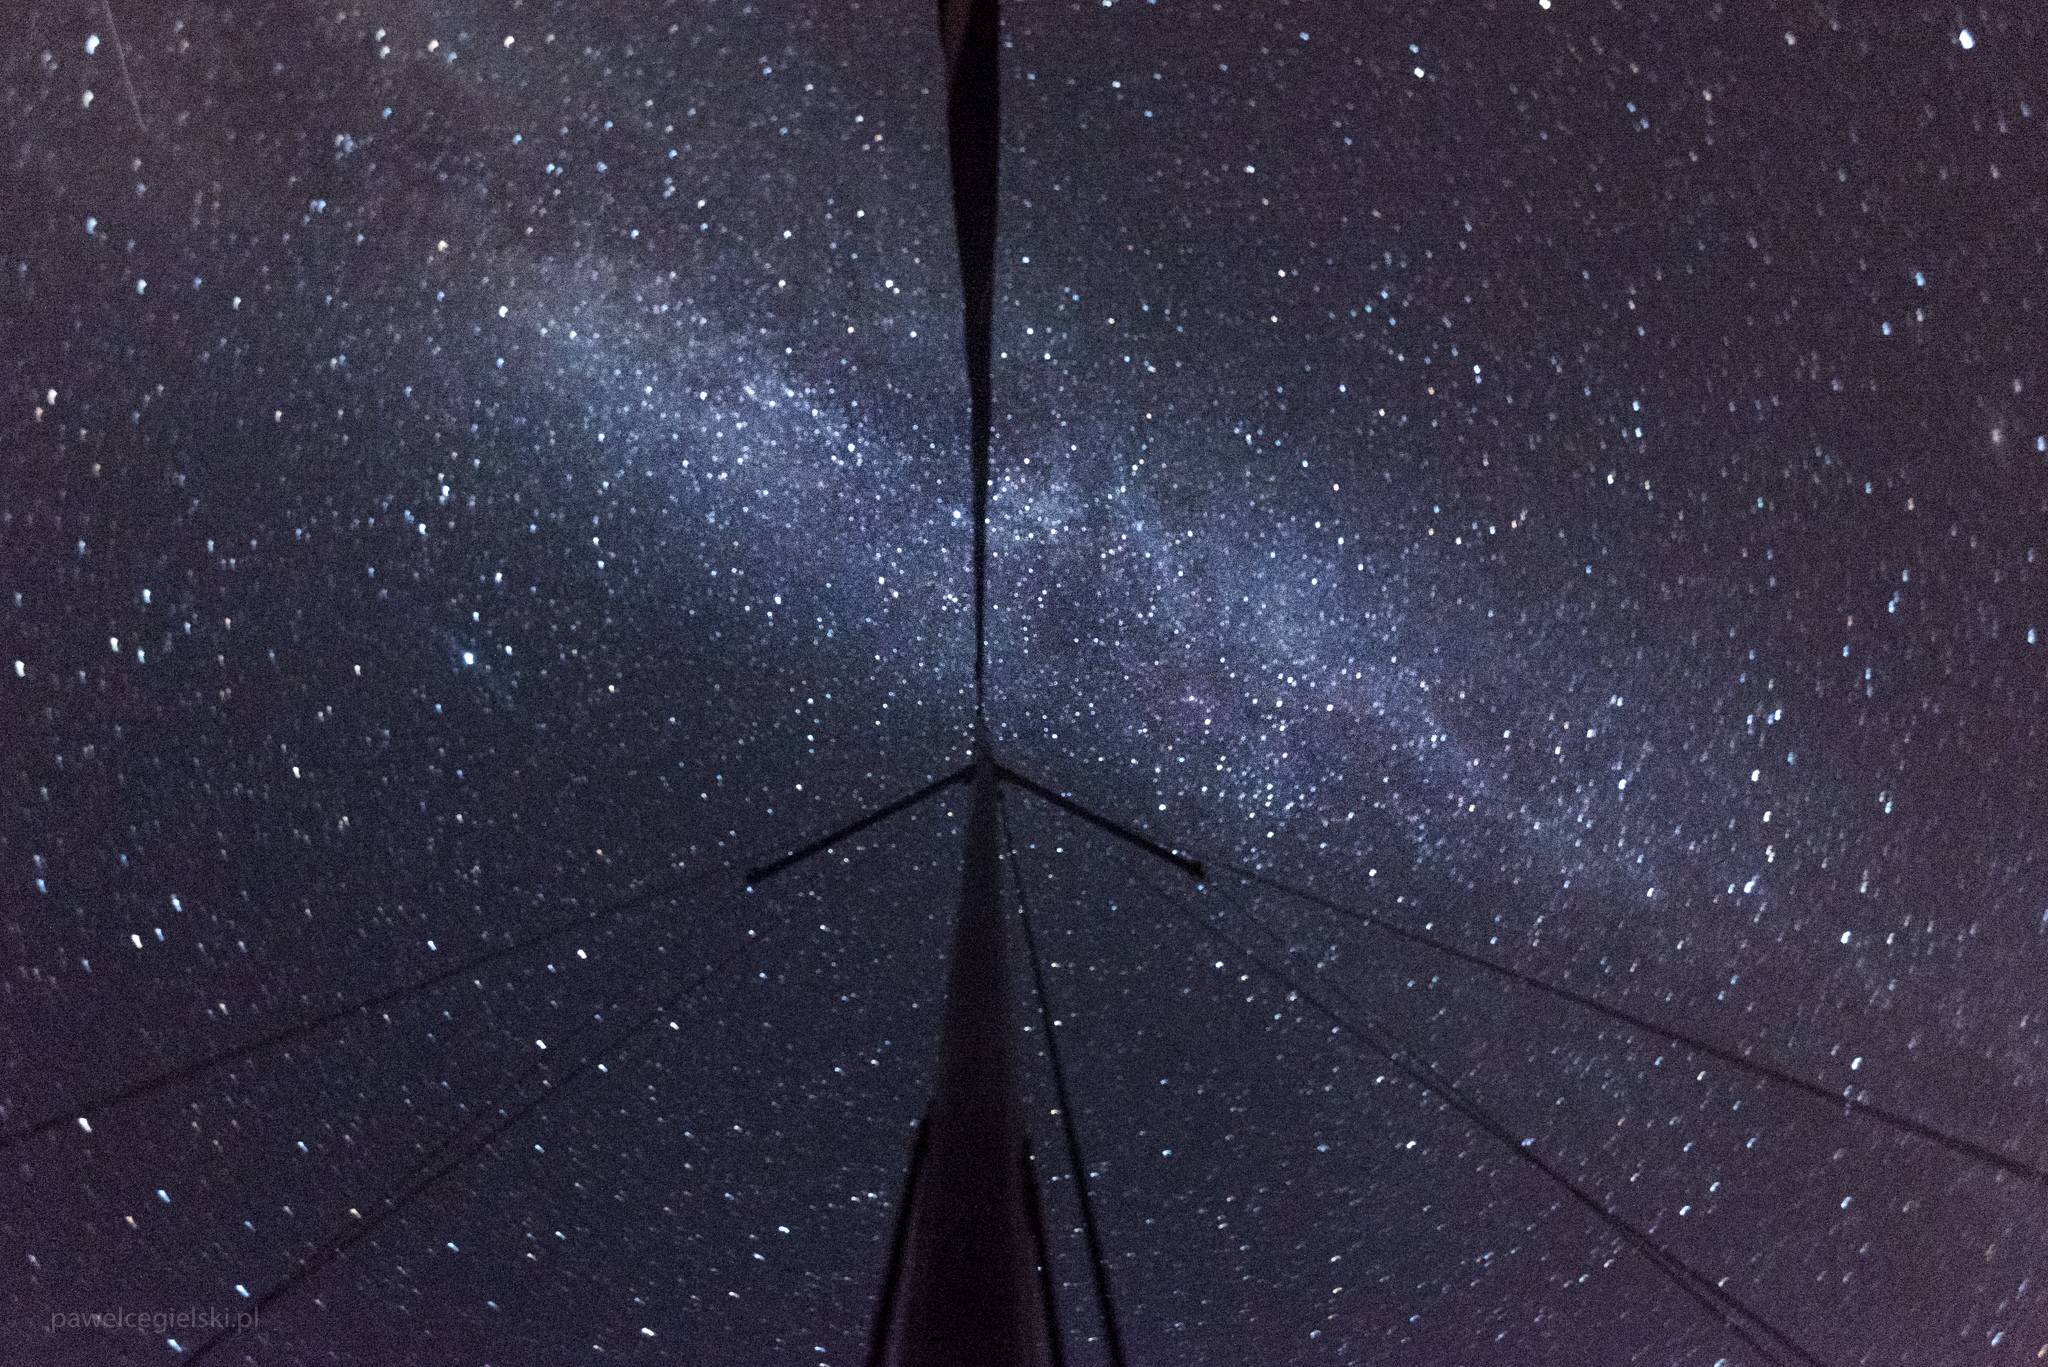
Milky Way over the yacht; shutter speed: 13 seconds, aperture: f / 4.0, ISO: 6400
We are looking for real exposure settings - daylight
In photography there is a rule of thumb called “Sunny 16” ( rule F / 16 ), stating that in order to choose the right exposure for a photo in sunlight, you need to set the aperture at f / 16, and the shutter speed to the opposite of ISO; a photo taken with ISO 100 should use a shutter speed of 1/100 second. We will take this rule as the first reference point for suitable settings for daytime photos: ISO 100, f / 16 and 1/100 shutter speed.
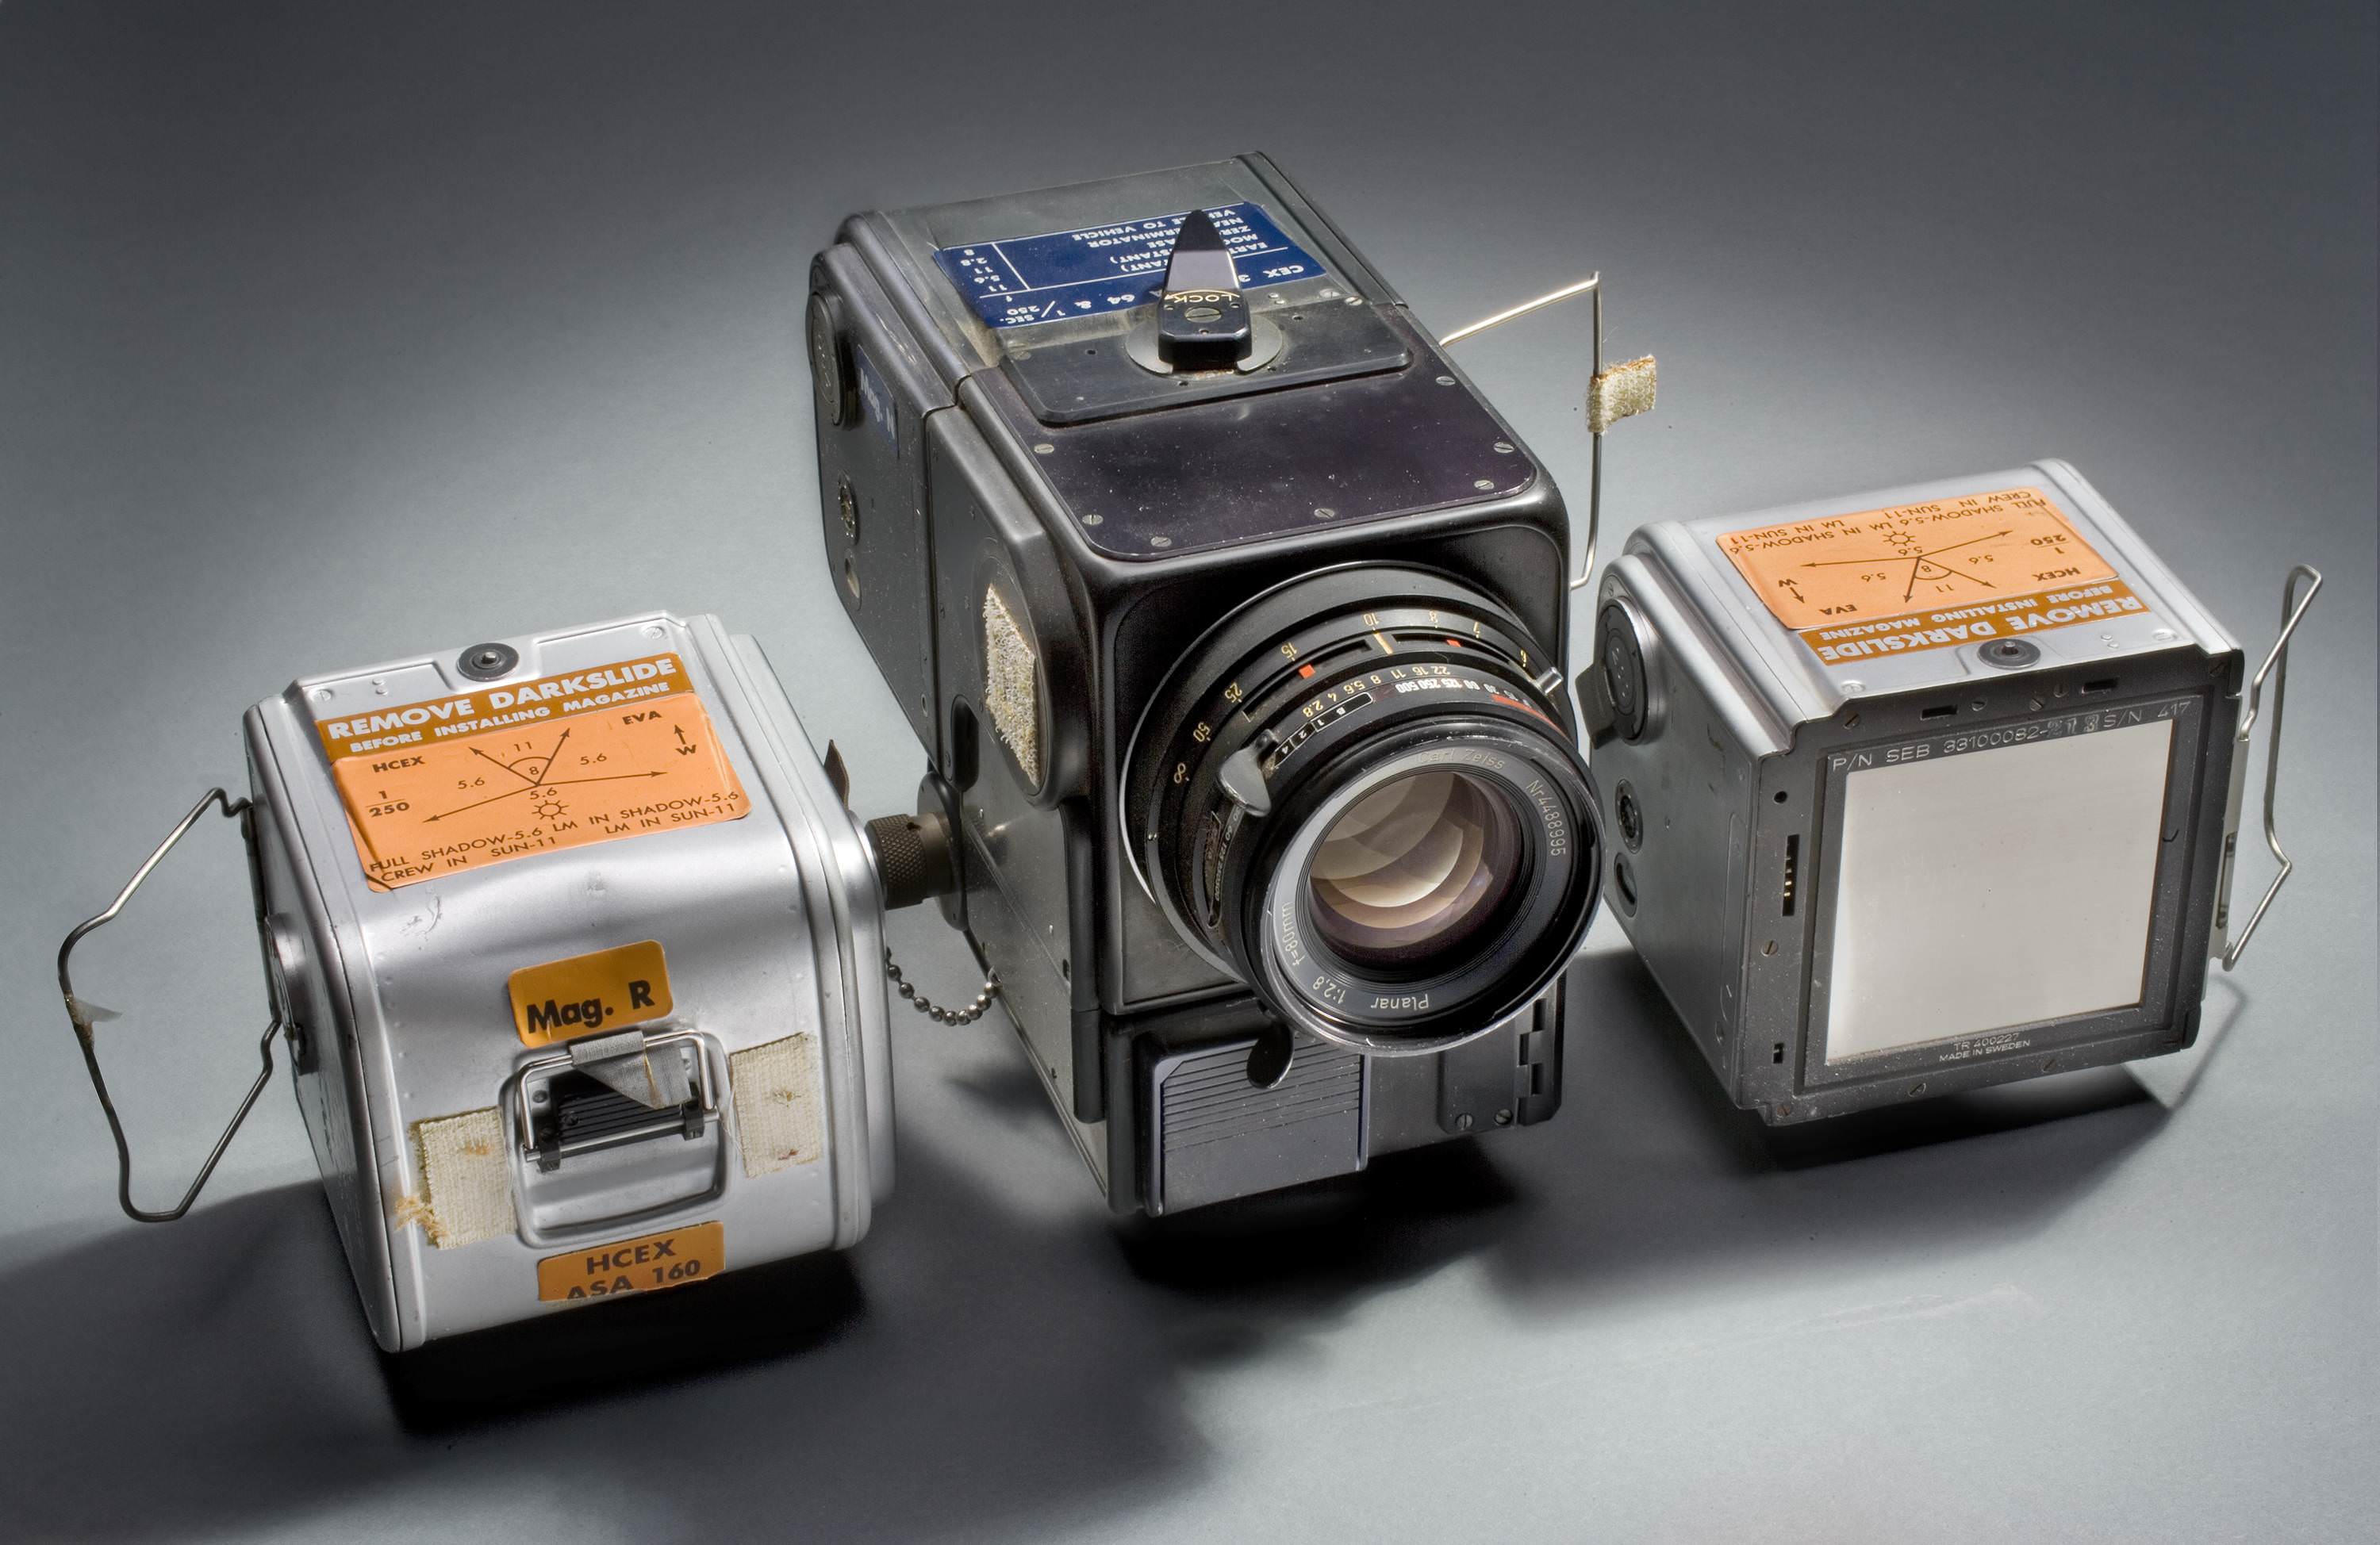
The second reference point will be the Apollo moon snapshots. The photograph of some photographic equipment shows the actual settings used for photographs taken on the surface of the moon. Take a look at the reel of the film on the left. ASA is the film equivalent of ISO, so we have ISO 160. Exposure is set at 1/250 s. The instruction prescribes shooting with an aperture from f / 5.6 to f / 11. Since the average value is f / 8, we use it as a reference. The difference between f / 5.6 and f / 11 is only two steps, so this is not so important.

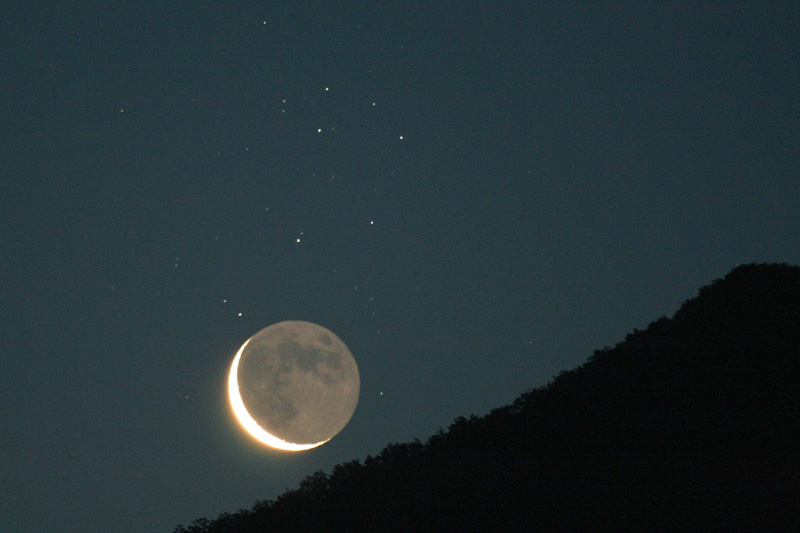
The final standard will be this picture of the moon, made by astronaut Paolo Nespoli. Camera settings are listed on the original page : ISO 400, f / 6.3 and 1/500.
| A photo | Exposure | Aperture | ISO |
|---|---|---|---|
| Sunny 16 | 1/100 | f / 16 | 100 |
| "Apollo" | 1/250 | f / 8 | 160 |
| Paolo Nespoli | 1/500 | f / 6.3 | 400 |
We bring it all together
So how many steps between daytime shots and star photos? There are several online calculators that count exposure, but I used this one . To make calculations, we enter the settings of two photos, and he gives the difference in exposure in the steps. Here is a table of the difference between day and star photos. Remember: the magic number is 15. All that is greater than 15 clearly indicates that the dynamic range is too large, and any attempt to obtain an image of both objects will result in either illumination or shading.
| The difference between the pictures in the steps | Sunny 16 | Apollo | Paolo Nespoli |
|---|---|---|---|
| Milky Way and Malibu | 22 | 20.67 | 19.67 |
| Milky Way over the Atlantic | 20.33 | nineteen | 18 |
| Stars above the yacht | 20.33 | nineteen | 18 |
Here is the answer: the difference in brightness between the photographs of the daytime objects, for example, the surface of the Moon, the view of the Earth and other planets, and the photographs of the stars is too large to be captured in one image. The dynamic range of 20 exposure stages is beyond the capabilities of our cameras, so in photos of objects illuminated by daylight in space stars are not visible. There are photographs of dim stars and objects illuminated by daylight, such as the Earth or the daytime side of the moon. The result was very dark. Here are some examples:
Source: https://habr.com/ru/post/371453/
All Articles