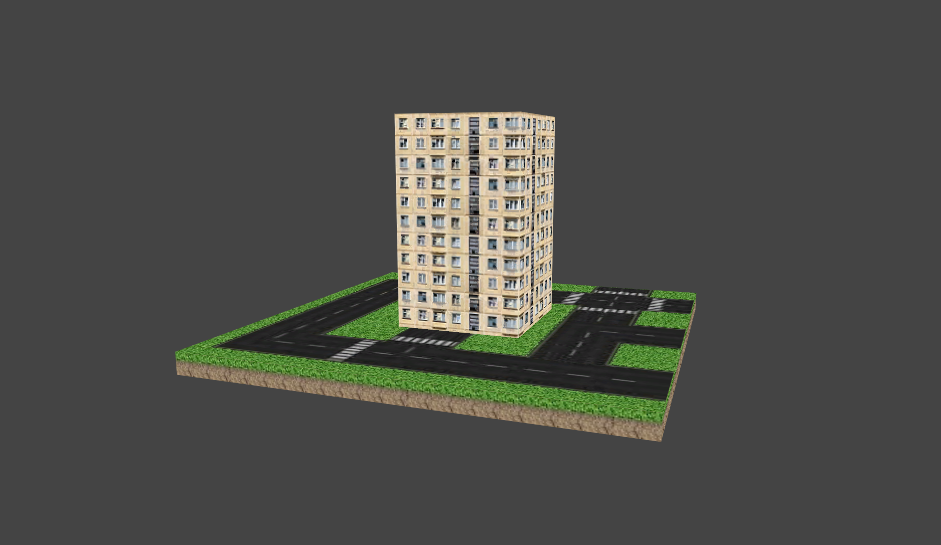
Virtual 3D model management via JavaScript microcontroller
Good afternoon, I want to present my next piece of man-made work, my fake " 3D-Quarter-the-Espruino " and tell about the problems that I encountered in the process of manufacturing the device.
Attention.
I have ESP-07 sealed instead of the original ESP-12E (they differ in the number of pins)
The first difficulty I encountered was completely unobvious, I did not even think that Espruino had only one analog pin (input), since my device would require at least two such pins, but I didn’t lose my head and came up with a crutch.
')

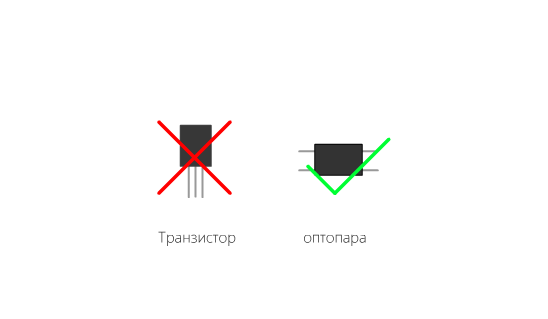
I decided that I could solve this problem by successively switching between variable resistors by using transistors.
But no matter how wrong, the transistors did not cope with this task (for they need a galvanic isolation ), and as it turned out I had almost no left for experiments.
An optocoupler came to the rescue. I had never used it before; it turned out to be a very practical component.
Now the scheme looks like this.

Now a little JavaScript code, alas Espruino does not support ES6.
This function collects information from a single analog pin into an array into an array, after 3 positions in the array are filled, it is formed into the object and transferred to the callback.
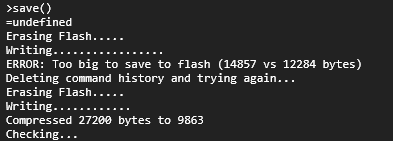
The next problem I encountered was more trivial than the limited memory of the microcontroller.
Initially, I wanted to store part of the code on the PC and run the server on Node.JS to host the page, and on Esp only to hook the web sockets. The page is loaded with GitHub, but even this “optimization” is not enough to write all the code into memory, let alone minify javascript code itself. therefore, the device can work only after loading the code into it and until it is disabled.
Code ready to write:
Minified code can be found on GitHub .
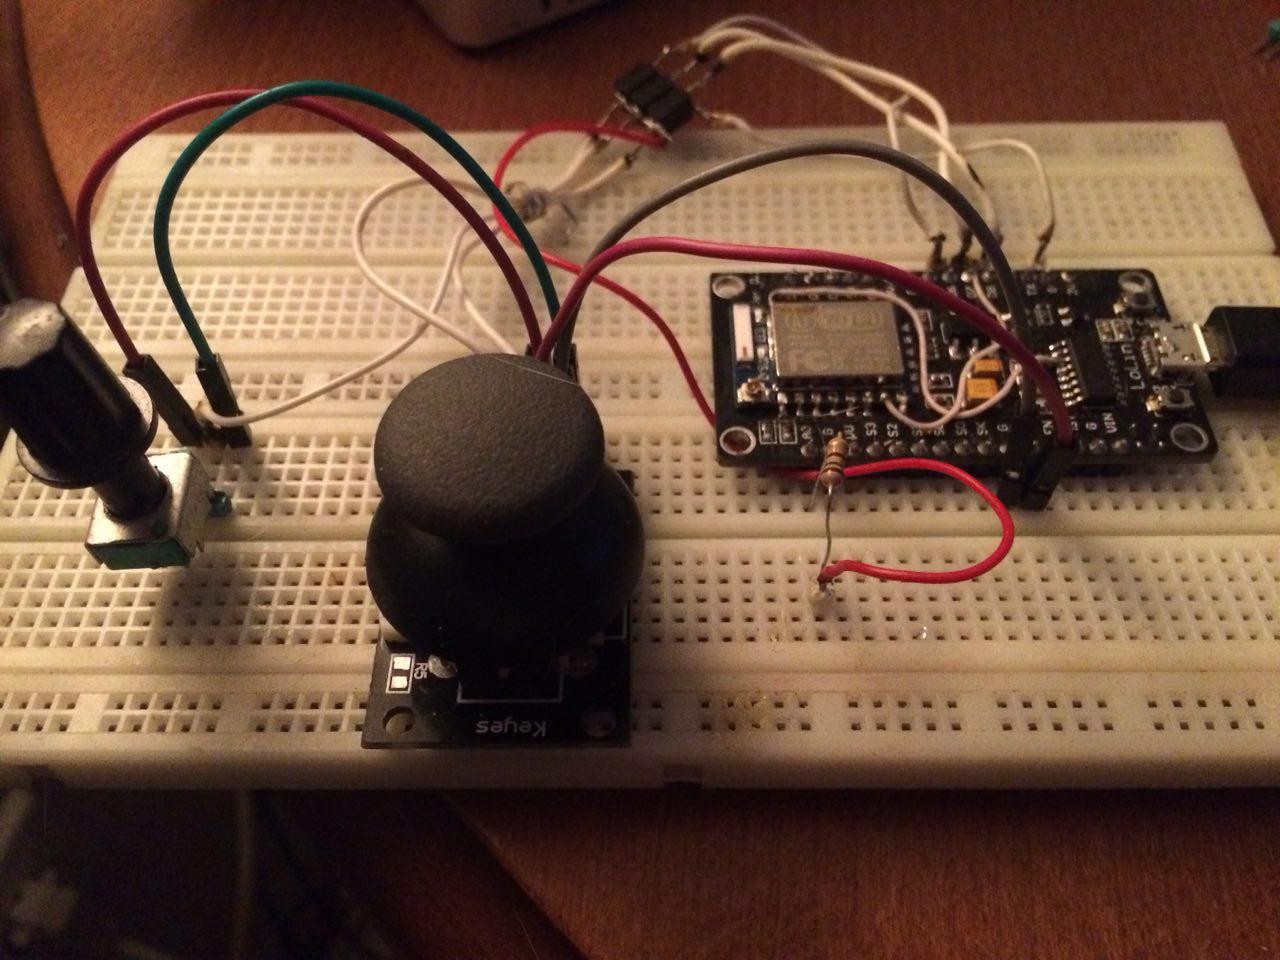
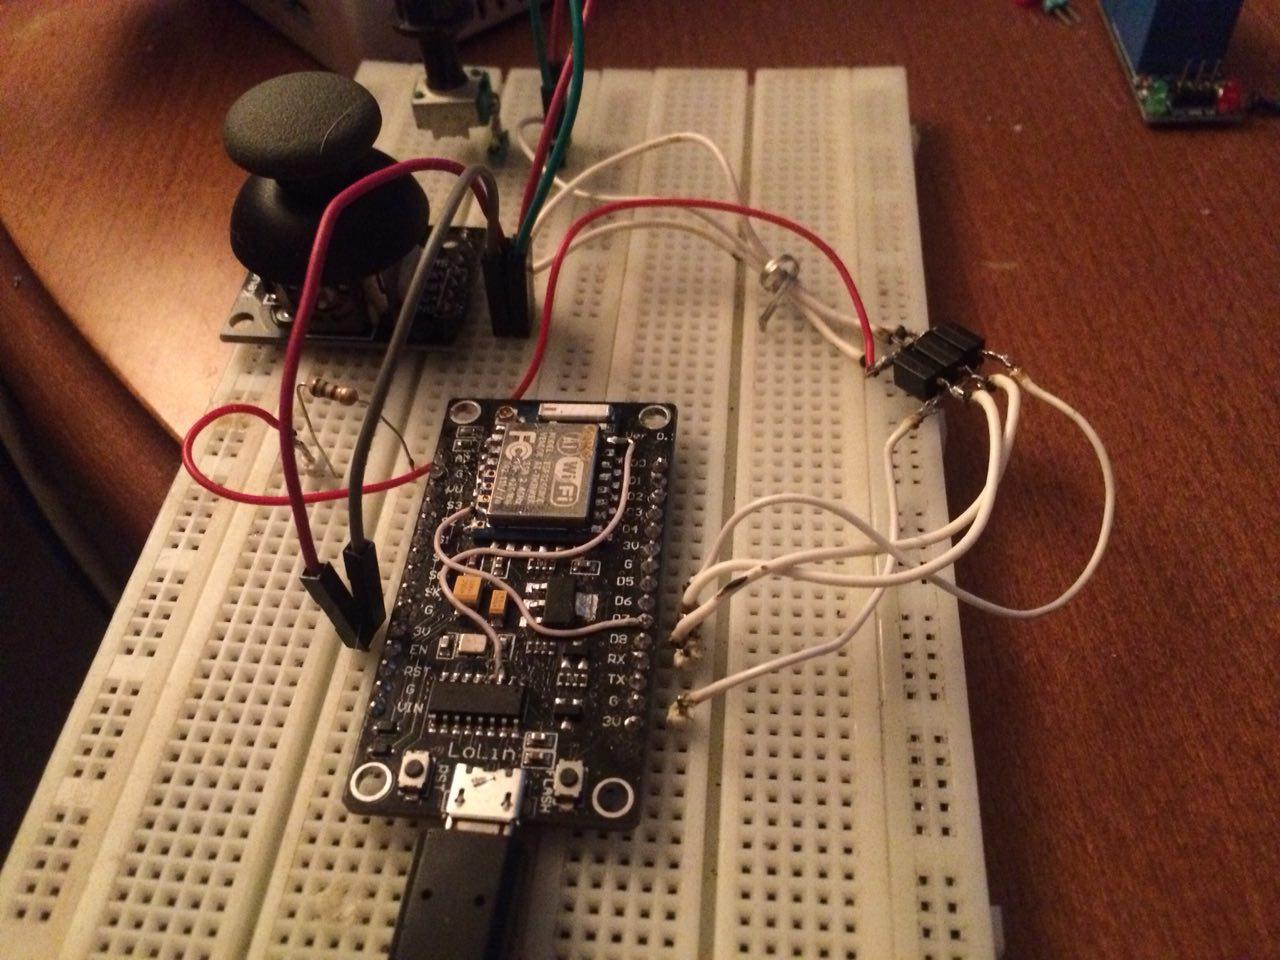
Here is the scheme of the finished device.

Result.
And a couple more photos.
I collected from those components that I had, and I generally had to search for an opto-op for a long time. And they are not the most optimal for this device, so I will not indicate the exact names of the components, it will be very easy to find them.
Pokey smack
3D-Quarter-the-Espruino by JSus

Attention.
I have ESP-07 sealed instead of the original ESP-12E (they differ in the number of pins)
Video
The first difficulty I encountered was completely unobvious, I did not even think that Espruino had only one analog pin (input), since my device would require at least two such pins, but I didn’t lose my head and came up with a crutch.
')
I decided that I could solve this problem by successively switching between variable resistors by using transistors.
But no matter how wrong, the transistors did not cope with this task (for they need a galvanic isolation ), and as it turned out I had almost no left for experiments.
An optocoupler came to the rescue. I had never used it before; it turned out to be a very practical component.
Now the scheme looks like this.
Now a little JavaScript code, alas Espruino does not support ES6.
This function collects information from a single analog pin into an array into an array, after 3 positions in the array are filled, it is formed into the object and transferred to the callback.
function Listener(obj, callback) { var indexPin = 0, dataPins = []; setInterval(function () { if (indexPin == 1) { digitalWrite(obj.pin3, 0); // digitalWrite(obj.pin1, 1); // } if (indexPin == 2) { digitalWrite(obj.pin1, 0); digitalWrite(obj.pin2, 1); } if (indexPin == 3) { digitalWrite(obj.pin2, 0); digitalWrite(obj.pin3, 1); } if (indexPin > 2) { indexPin = 0; } indexPin++; dataPins.push(analogRead(0).toFixed(3)); // 3 // ( ) if (dataPins.length > 2) { callback({ y: dataPins[0], x: dataPins[1], z: dataPins[2] }); dataPins = []; } }, obj.speed); // } The next problem I encountered was more trivial than the limited memory of the microcontroller.
Code ready to write:
function Listener(obj, callback) { var indexPin = 0, dataPins = []; setInterval(function () { if (indexPin == 1) { digitalWrite(obj.pin3, 0); digitalWrite(obj.pin1, 1); } if (indexPin == 2) { digitalWrite(obj.pin1, 0); digitalWrite(obj.pin2, 1); } if (indexPin == 3) { digitalWrite(obj.pin2, 0); digitalWrite(obj.pin3, 1); } if (indexPin > 2) { indexPin = 0; } indexPin++; dataPins.push(analogRead(0).toFixed(3)); if (dataPins.length > 2) { callback({ y: dataPins[0], x: dataPins[1], z: dataPins[2] }); dataPins = []; } }, obj.speed); } function Connect(obj, callback) { const wifi = require("Wifi"); wifi.connect(obj.ssid, { password: obj.password },function(err) { if(err){return;} wifi.getIP(function(res) { console.log(res.ip); callback(); }); }); } function Server(port, callback) { const Http = require("http"); Http.createServer(callback).listen(port); } function WebSocket(port, callback) { const WS = require("ws"); const server = WS.createServer(); server.listen(port); server.on("websocket", callback); } function HTML_Page(config, req, res) { const pos = config.correction_position; const HTML = "<div class='body'></div><script src='https://clck.ru/D8D4S'></script><script>start({x:"+pos.x+",y:"+pos.y+",z:"+pos.z+"},"+config.socket_port+")</script>"; res.writeHead(200, {'Content-type':'text/html'}); res.end(HTML); } function init (config) { Connect(config.wifi, function () { digitalWrite(2,0); console.log("Connect wifi: "+config.wifi.ssid); Server(config.server_port, function (req, res) { HTML_Page(config, req, res); }); Listener(config.listen_pin, function (data) { Data = data; }); WebSocket(config.socket_port,function (Ws) { Ws.on('message', function () { Ws.send(JSON.stringify(Data)); }); }); }); } /* * * */ init({ wifi: { ssid: " ", password: " " }, socket_port: 8000, server_port: 80, listen_pin: { pin1: 13, pin2: 12, pin3: 15, speed: 30 }, correction_position: { x: 0.3, y: 0.025, z: -0.03 } // }); Minified code can be found on GitHub .
Here is the scheme of the finished device.
Result.
And a couple more photos.
I collected from those components that I had, and I generally had to search for an opto-op for a long time. And they are not the most optimal for this device, so I will not indicate the exact names of the components, it will be very easy to find them.
Pokey smack
3D-Quarter-the-Espruino by JSus
Source: https://habr.com/ru/post/371413/
All Articles