New Year Lights with DeviceHive

Authors: Evgeny Dubovik, Senior Android Developer, Nikolay Khabarov, Embedded Expert
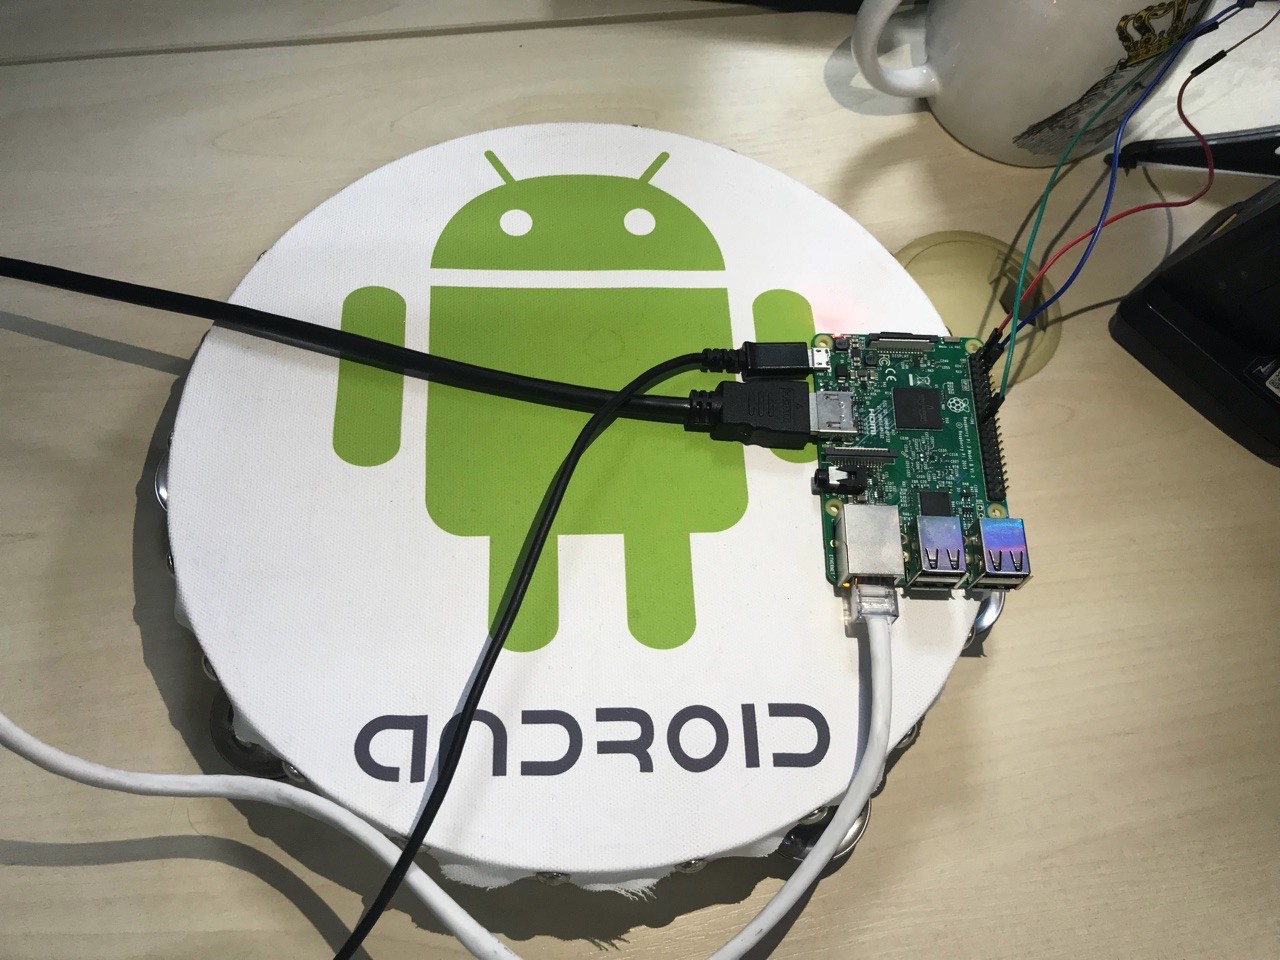
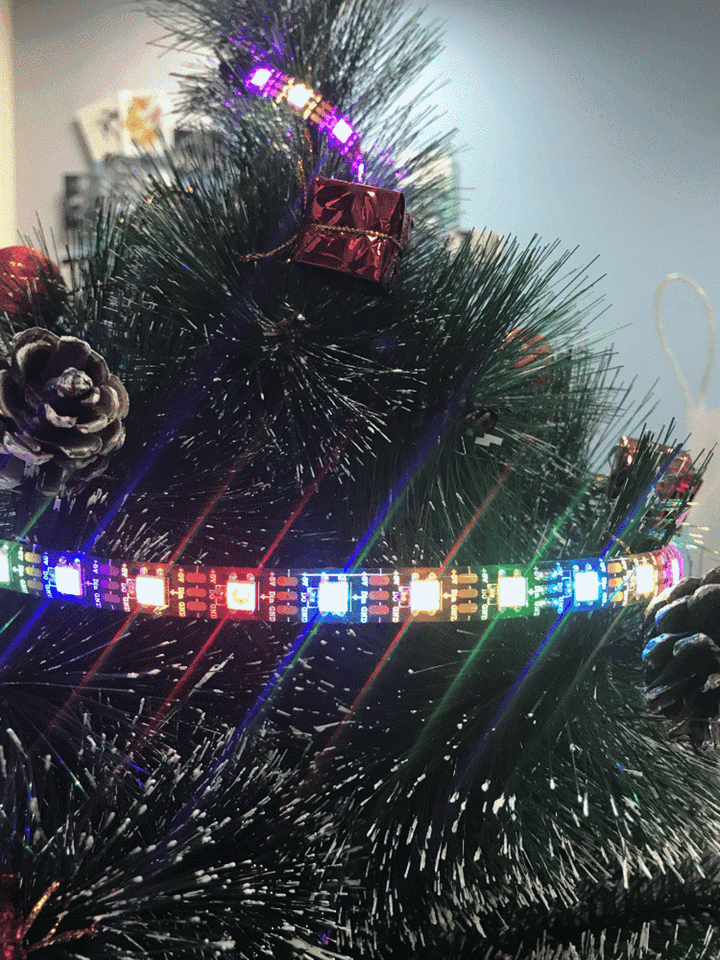
On the eve of the new year, we decided to create a garland using Android Things, an Android-based smartphone and DeviceHive IoT platform. As the lights themselves, we used LED strip WS2812B. For Android Things, we will use the Raspberry Pi 3, although any other board equipped with a SPI interface and supporting Android Things would fit here. LEDs are controlled from a mobile device that records the sounds on the basis of which the patterns of lights are generated.
')
Android Things
Android Things is a modern, well-designed operating system developed by Google that allows you to use the Android API and third-party Java and Android libraries. Raspberry Pi 3 will send colors to the LED strip via the SPI (Serial Peripheral Interface) bus.
SPI is a serial synchronous data interface that provides communication between devices using a master-slave structure. In the API of the Android Things platform, the PeripheralManager service is responsible for working with the SPI bus.
According to the official documentation , the tape data transfer protocol WS2812B uses the unipolar NZR code . After resetting, the DIN port receives data from the controller, the first LED receives the first 24 bits of data (GRB, not RGB — one byte per color), and then sends them to the next LEDs in the tape. So the data is transmitted along the chain, using the DO-port of the LEDs. It turns out that after each of them the data length is reduced by 24 bits. Each transmission must contain data for all LEDs of the tape.
The operation scheme of the device data transfer protocol is quite simple: the transfer of the digital value “1” and “0” of one bit is shown in the illustration below.

The scheme of the official documentation, where T0H lasts 220ns ~ 380 ns, T0L - 580ns ~ 1600 ns, T1H - 580 ns ~ 1600 ns, T1L - 220 ns ~ 420 ns
We will emulate this protocol by working with the SPI bus. In our case, Raspberry Pi 3 acts as a master (master), and WS2812 - as a slave (slave).
To emulate the SPI protocol, we use blocks of 4 bits in the SPI transmission to generate one protocol bit for WS2818B. The speed for the SPI bus should be selected according to the time intervals for the WS2818B. We use the value of 3809523 Hz, and the transfer of each block of 4 bits (or one bit of WS2818B) takes 1.05 ms, which is clearly illustrated in the figure below:

Iron
To create Christmas lights, we need the following components:
- Raspberry Pi3;
- 8GB microSD memory card;
- Power supply 5V (power depends on the total length of the tape);
- LED Strip WS2812B;
- Cables
Below you can see the connection scheme of RPi3 and LED strip:

| WS2812B pin | Raspberry Pi 3 pin |
|---|---|
| + 5V | 5V |
| GND | GND |
Instructions for installing Android Things can be found in the official documentation .
We can say that we have finished with the “iron” part! Make sure that the power supply has enough power to ensure the operation of the LED strip and the board itself. For proper functioning, 5B long tapes must be connected directly to the power supply, bypassing the Raspberry Pi3 board.
IoT platform
To connect a device running Android Things OS to the board and the mobile device, we need an appropriate platform. The DeviceHive platform is well suited for this.
Thanks to the DeviceHive platform, any device can be connected to a cloud service, i.e. become an IoT device. The platform includes a scalable server, multiplatform libraries for communication and device management. DeviceHive can be used to solve problems in intellectual energy, home automation, remote measurements, telemetry, remote control, software monitoring and much more.
DeviceHive platform setup
The DeviceHive platform provides users with libraries. You can use the DeviceHive Java Client library to develop client applications. This is a Java-based open source project that can be used to create Java or Android applications. This library fully supports Android Things. Add this library is very simple:
- Add the JitPack repository to the build.gradle project file and set the dependency to the build.gradle module file.
- Call the method getInstance (). Init (String url, String refreshToken) of the DeviceHive object and pass two parameters: a link to the REST interface of the server and a JWT Refresh-token.
- Call the getDevice (String id) method to get an existing device or create a new one.
It's all! Now we have everything we need to use DeviceHive in our project. After setting up the support library in DeviceHive, we will create a project that consists of two parts: Android Things and a mobile application.
Android Things application
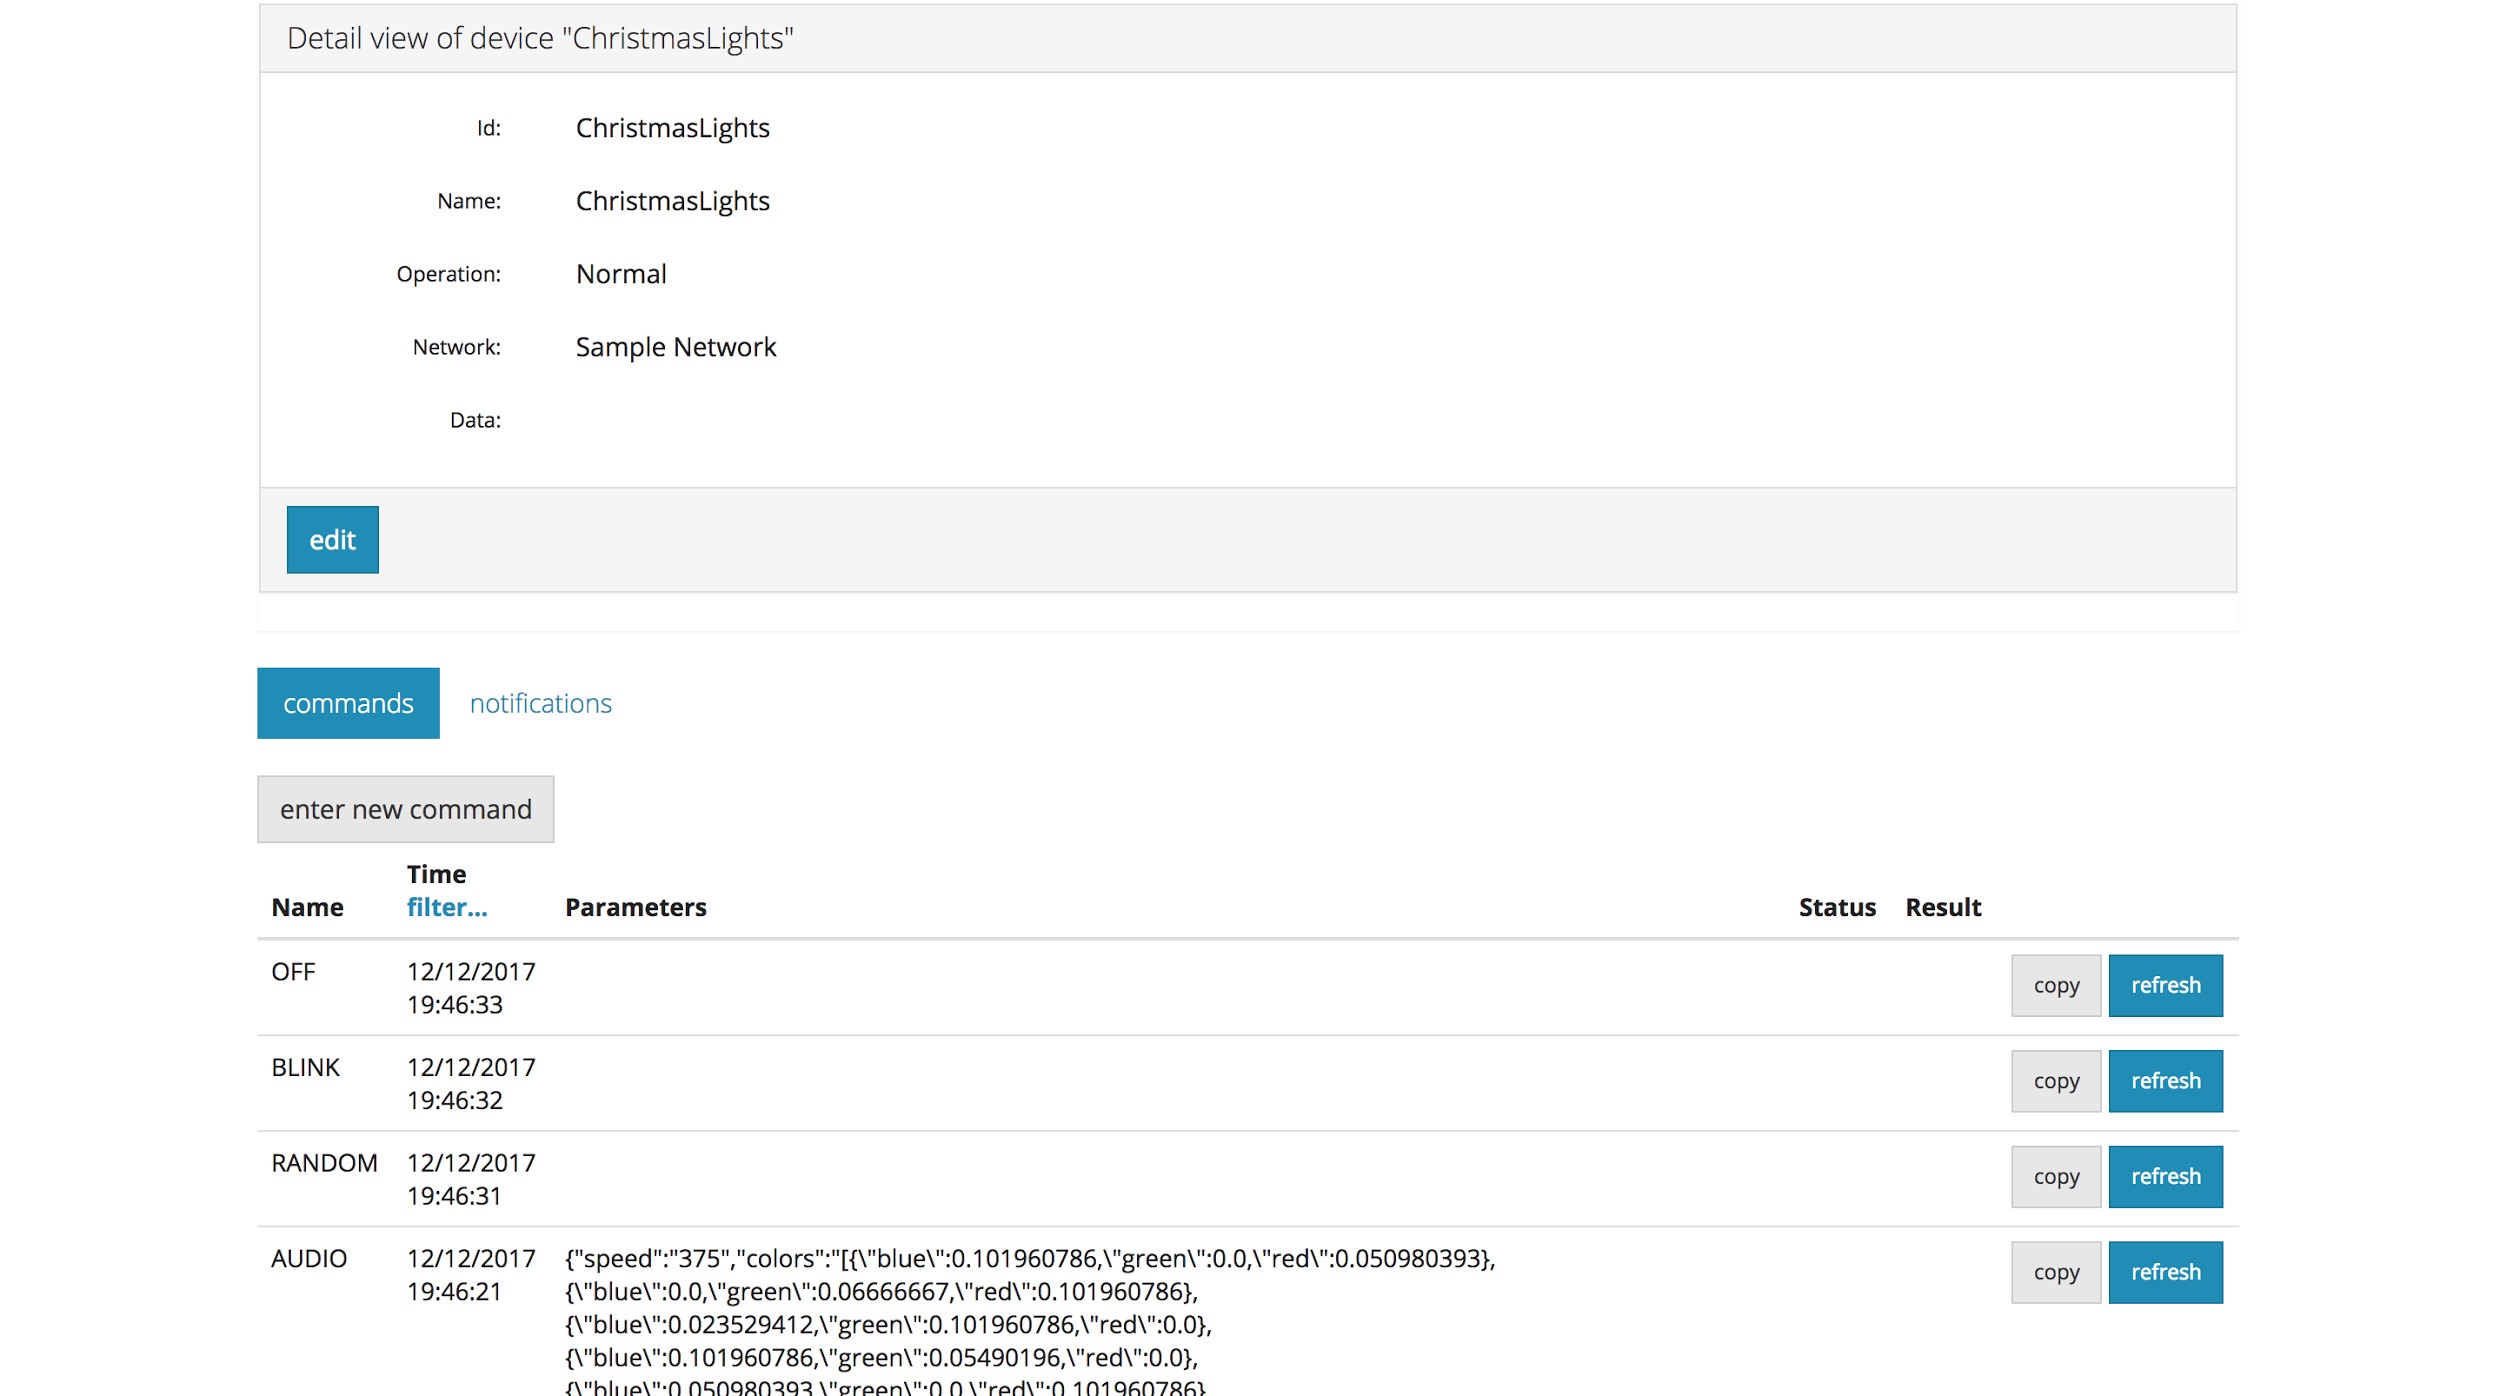
This application simply listens to incoming commands from a WebSocket connection established with a DeviceHive server, and executes them. List of commands:
- BLINK: after receiving the command, the controller includes two Santa Claus colors in the ribbon, red and white. The lights run from the center to the ends of the tape and back.
- RANDOM: after receiving the command, the controller generates random colors.
- AUDIO: the controller receives a command with two data objects inside: a list of generated colors and the rate of change of colors. Below is an example of command parameters for data objects in JSON format:
{ "speed": "500", "colors": [ { "blue": 0.101960786, "green": 0.0, "red": 0.039215688 }, ... ] } - OFF: simply turns off the LED strip.
And this is how the commands look in the DeviceHive admin console:
The finished application is available in this repository . The only caveat, before building and installing the application on the board, you must specify the server credentials in the source code .
Mobile app
The mobile application sends commands to the Raspberry Pi 3. It has a fairly simple UI, which includes two screens: the login screen (Login) and the main screen (Main). On the login screen, we need to fill in three fields with values such as a link to the REST interface of the server, the JWT Refresh token and the device ID. On the main screen there are 4 buttons for the execution of commands.

After pressing the button that starts the execution of the AUDIO command, the smartphone starts recording sound through the device’s microphone. Then the sound recording passes through the fast Fourier transform (FFT) and is considered the main clock frequency. We use this algorithm to create a unique behavior pattern for the lights based on the recording spectrum, which thus represent a specific audio recording on the LED strip. After preprocessing, the mobile application generates HSV colors based on this data. We use the HSV color model, which allows you to use the values of H (tone), S (saturation) and V (brightness) only with the first one to produce bright colors. As a result, the application sends information on the colors and speed, calculated on the basis of the number of clocks per second.
After sending the command, it is processed by the application on the Android Things side.
The mobile application is also available in the project repository .
Conclusion
Of course, this is an entertainment project that allows you to spend time before the holidays with pleasure and to decorate your house a little. But since the project is fully open, similar solutions can be used to create more practical solutions.
Using Android Things and DeviceHive, you can implement more complex logic, connect to other services, or create a cluster of cards managed using one service. We hope that this project will help you beautifully decorate the house and create more advanced systems. Holiday greetings!
Source: https://habr.com/ru/post/371139/
All Articles