Hugin - an excellent free program for creating panoramas
Today I will tell you about a wonderful program - Hugin. With its help, you can effortlessly build even the coolest and most complex panoramas.
Hugin - is the most popular program for building panoramas and in addition has a completely free license and its use is absolutely free.
The program considers your photos EXIF and automatically aligns them with respect to the focal length and viewing angle of your lens, places them in the right order and glues shadows, wires, fences, people and other objects of your panorama without problems.
Finally, the whole construction of the panorama, instead of a complicated and dreary job, will be reduced to the game; find 5 differences of similarities, or even to the press of just three buttons.
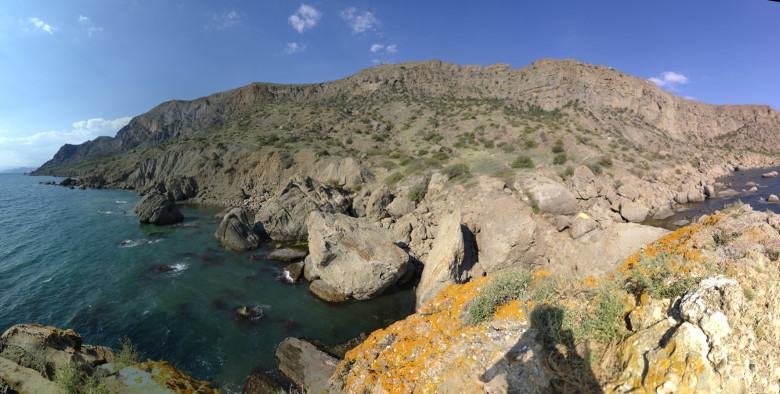
Panorama collected from 56 pictures
I am sure many of you have already tried to make friends with her and abandoned this business, because Hugin has not the most intuitive interface. Today we fix this situation.
How to shoot a panorama?
A few words about how to get good pictures for your future panorama. Everything is simple here:
Block exposure changes - this is a basic requirement.
Switch your camera to manual mode and set the static parameters of aperture, shutter speed and ISO. It is necessary that these parameters be the same in each photo from the panorama. The requirement is not mandatory, but highly desirable. Thereby you will save yourself from possible problems during assembly and highlights in the final result.- Shoot alternately - from left to right and top to bottom.
Not important for small panoramas, but when the photos become more than 10 ... It will be easier for you to disassemble them later.
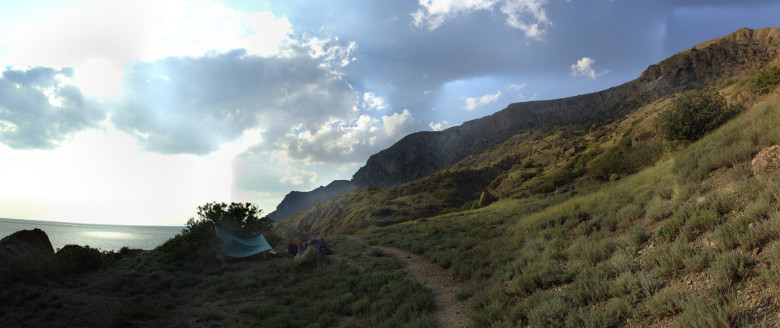
The result of an incorrectly taken panorama
Interface
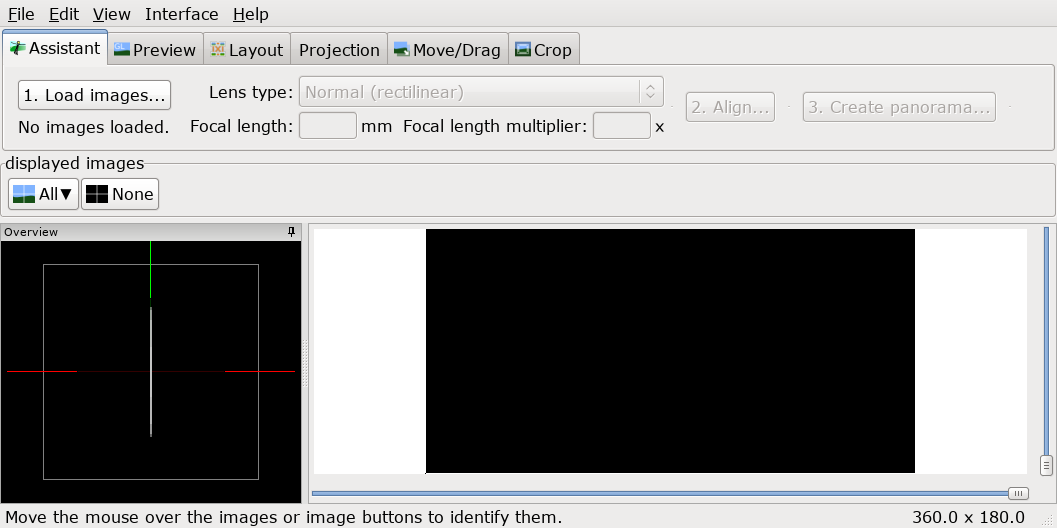
So we downloaded and installed Hugin, let's run it:
Immediately analyze the value and functions of each individual tab:
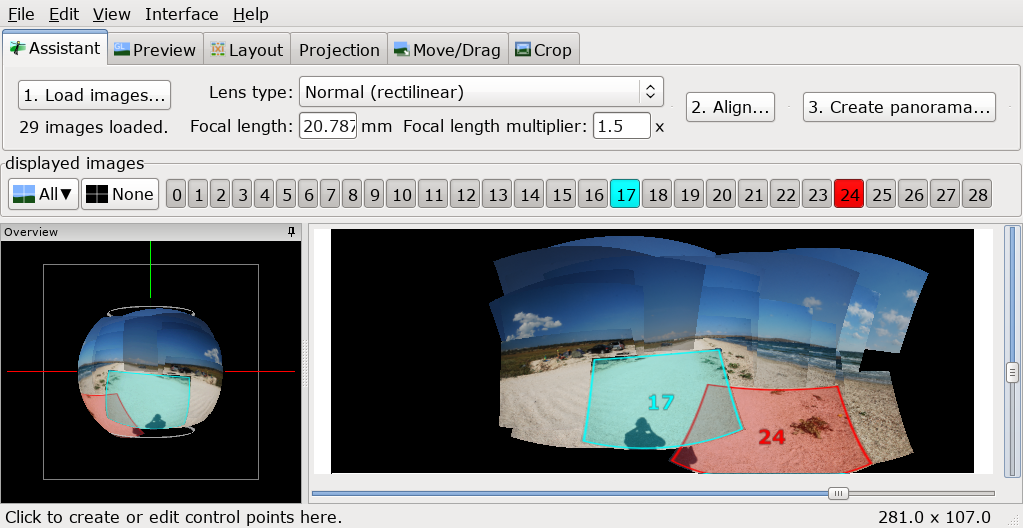
- Assistant - This is the default view, here are three main buttons and a preview window for your panorama.
- Preview (Preview) - Here you can enable and disable the display of certain photos, as well as go to the photo menu for masking.
- Layout (Placement) - Here we can see all the links between photos and quickly move on to their creation and editing.
- Projection (Projection) - Here you can change the parameters of the projection of your panorama.
- Move / Drag - Use this tab to move photos and place them in the desired order.
- Crop (Trimming) - Here we can select the final area that will fall on your panorama.
Alternate interface
In addition, Hugin has another alternative interface, " Panorama editor ", which is called through the menu bar "View (View)", or if you switch to the advanced interface, but more on that later.

Fast start
So, if you have a properly captured panorama and if you are lucky, then all your actions will be reduced to pressing only three buttons:
1. Upload pictures ...
Click on " 1. Load images ... (1. Load images ...)" Select our photos for the panorama, they will be loaded into the project.

Uploaded photos to the project
2. Align ...
Click on " 2. Align ... (2. Align ...)" After a certain period of time, Hugin will calculate the connections and connect your photos to each other. If you're lucky...

Automatically built panorama
If this did not happen, and instead of the intended panorama you see something incomprehensible, you should cancel and go on to create a panorama in semi-automatic mode.
If you wish, you can go to the “ Move / Drag ” tab to align the horizon and to “ Crop ” to select the final panorama area.
3. Create a panorama ...
Click on " 3. Create panorama ... (3. Create a panorama ...). And save our finished panorama.
Panorama save options
Usually, these three simple steps are enough, but what if we have a large enough and complex panorama that does not want to assemble in a fully automatic mode? - let's see!
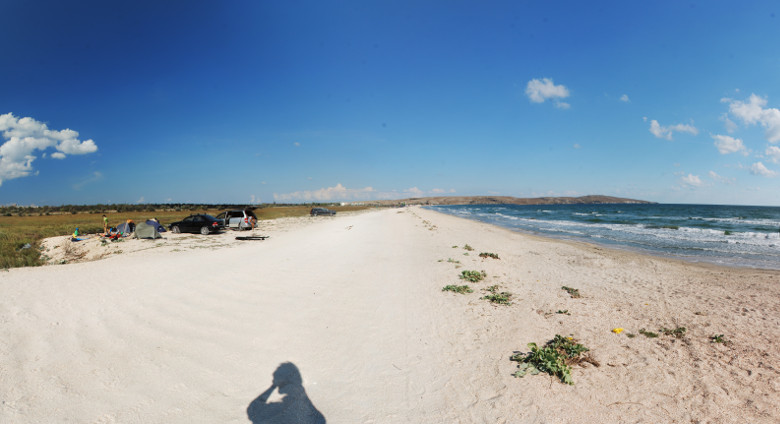
The resulting panorama
Theory
First we need to understand how Hugin works.
Among your photos uploaded to the project, when you click the " 2. Align ... (2. Align ...)" button, Hugin searches for certain control points between your photos using a certain algorithm and shifts them according to them. Control points are nothing but the same places in the two photos.
Two photos that have control points between themselves are considered to be related.
It turns out that each photo must have a connection with one or several other photos in the project. Control points can also be set manually.
Photos linked by control points form a group, and behave as a separate photo. Initially, the number of groups is equal to the number of unrelated photos, your task is to reduce the number of such groups to one.
The next step, Hugin begins to reduce the panorama and the more control points in your photos - the better.
Assembling the panorama
So let's try to assemble the panorama in semi-automatic mode.
Projection
First of all, upload photos to the project and go to the Projection tab and adjust the field of view.
The field of view is a black window in which you see all your photos. It represents with itself nothing but the viewing angle of your panorama. It is measured in degrees and and as a rule more than 360 ° in width and 180 ° in height it cannot be.
That is why photos that are approaching the poles are so cool.
You can change the field of view at any time from any mode with half-lines on the right and bottom of the Hugin interface.
Arrangement of photos
Go to the tab " Move / Drag (Shift / Shift)", and begin to shift the photos in the desired order.
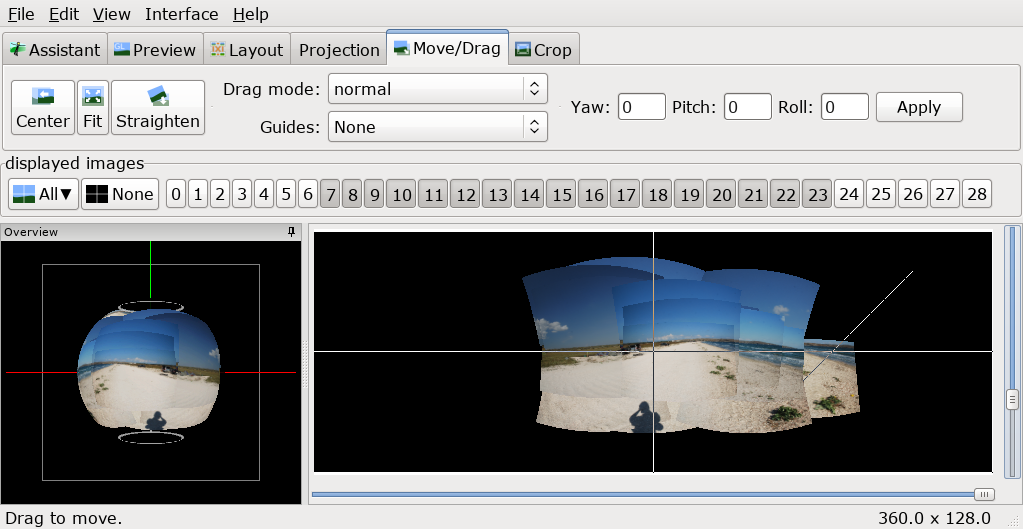
The process of placing images in the right order
It is worth noting that you do not need to try to get a pixel in a pixel when connecting photos. Your task is to combine the photos so that Hugin “understands” which picture has which link with which, it’s enough for them to simply touch each other.
You can check the connections by switching to the " Layout (Location)" tab.
There are two modes of movement:
- normal (Normal) - you can move groups of photos by dragging it.
- normal, individual (normal, customizable) - in this mode, you can select individual photos and work directly with them.
If you need to rotate a photo, you can do it in the second mode by selecting the desired photo and pulling the empty space away from it.
Assembly
After you have built your photos in the correct order, you can try the automatic mode again:
Switch to the " Preview " tab and press " 2. Align ... (2. Align ...)", thereby initiating the process of automatic search of control points.
Result
Thus, you may form one or several groups of related images.
The photographs connected by control points in the first mode can only be moved in an all-en masse, where, as in the second, one can still be moved separately.
If you have more than one group of images, the program will warn you about it:
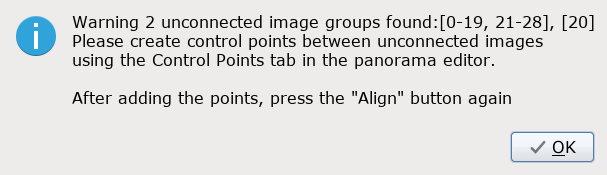
Align them with each other and proceed to the next item.
If the photos are connected incorrectly and form an incomprehensible something, cancel the automatic alignment and proceed to putting the control points manually.
- If everything went well, just go to the stage of creating a panorama.
Manually creating control points
So, after the last steps, we received several groups of images that were not connected with each other. Now we learn to bind them.
Connections

Links between photos
Go to the Layout tab (Placement) and here we see all the links between your photos.
Gray lines indicate the supposed connections - these are the very connections that must exist, based on the location of the photos on the Move / Drag tab, but do not yet have their control points.
We also have to allow them: we choose one such connection, after which you will have a window with two photos.
Now we need to find several identical places in the photos and put checkpoints on them. 2-3 points will be quite enough for each pair of photos. Inoda can do without one.
Creating points
The algorithm is simple:
Select a point in the left image, select a point in the right image. Click Add . You can use the function Fine-tune (Correctly adjust).
Add 2-3 points, close, go to the next link.

The process of creating control points
After all the photos are connected with control points, go to the Assistant tab and click " 2. Align ... (2. Align ...)"
As practice shows, it is not always necessary to process absolutely all connections, sometimes it is enough to connect only a few, the rest of hugin will be completed by itself.
Result
- If everything went well, go to the panorama creation stage.
- If not, add additional control points and try to repeat the alignment.
Additional features and amenities
The list of functions of Hugin does not end there, there are some more useful and convenient additions, I will tell you about some of them.
Ctrl key
Ctrl key highlighting
When you hold down the Ctrl key, you can hover over the photo and instantly see its number and its contents. If you click on it, you will enter the editing mode of a specific photo.
Masks
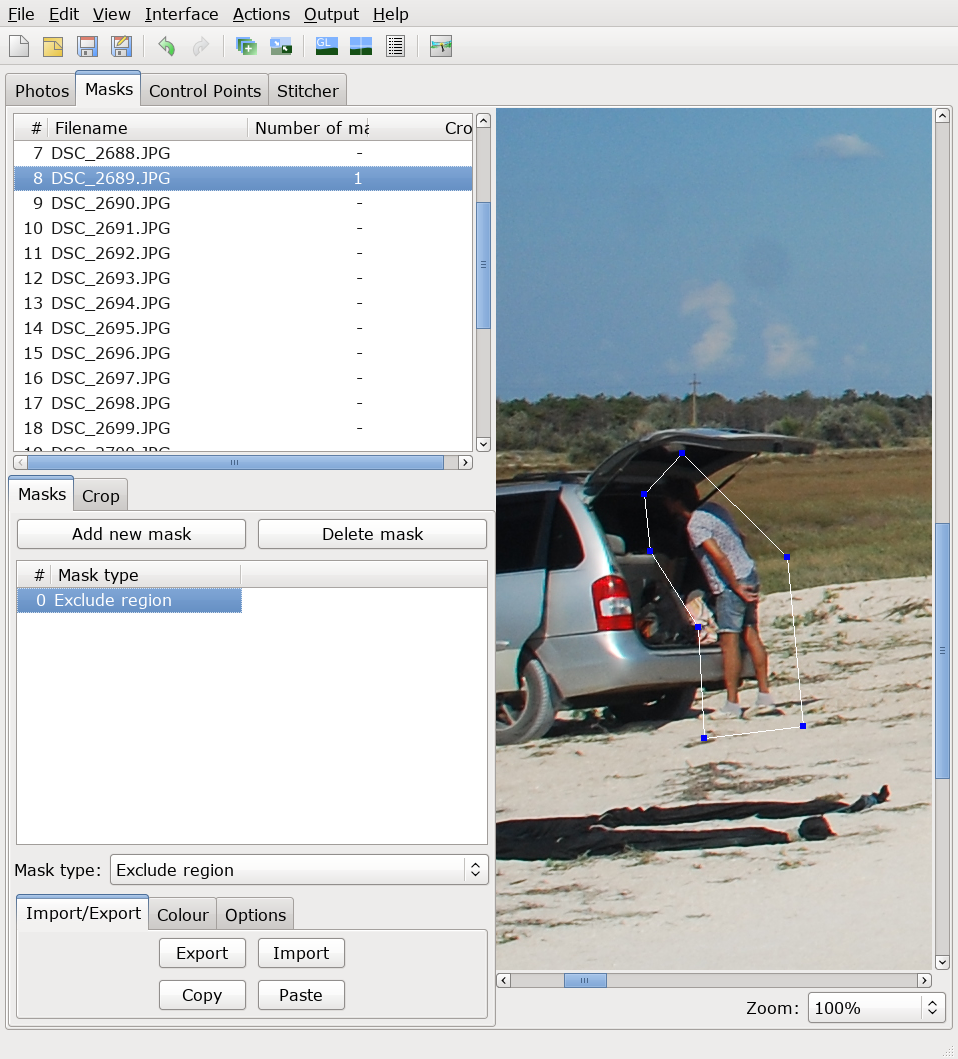
Mask mapping
You can use masks if you want to exclude or necessarily include some areas from your photos. To do this, go to the alternative interface , on the tab " Masks ". Select the desired photo, click on " Add new mask ", then select the desired area, and select the mask type:
- Exclude region
- Include Region
- Exclude region from stack
- Include Region from stack
- Exclude region from all images of this lens
Cropping photos
You can customize the cropping of the edges of your photos, to do this, go to the alternative interface , on the " Masks " tab and in the lower window select " Crop ", these parameters can be applied to several photos at once if you select them in top window.
Different types of panorama projections
On the " Projection " tab, you can choose different types of panorama projections, for example, you can choose something exotic that will allow it to look quite unusual.
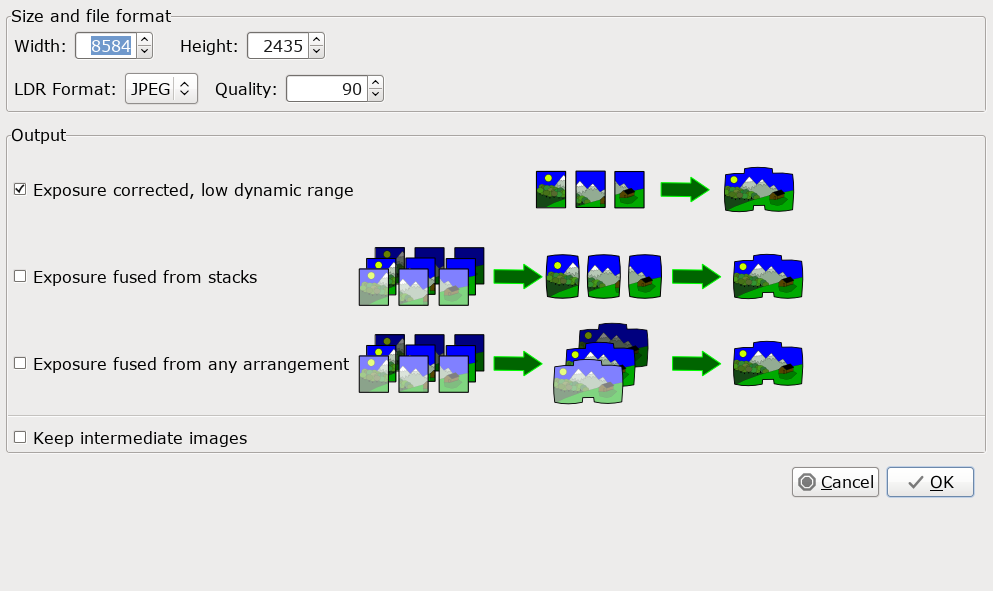
Panorama Output Modes
- Exposure corrected, low dynamic range (Exposure correction, narrow dynamic range)
- Exposure fused from stacks (First, reducing the exposure, then the union)
- Exposure fused from any arrangement (First merge, then flattening exposure)
As practice has shown, the first mode works better than the other two. Unfortunately, it is not always available from the " Assistant " tab, but you can still call it through an alternate interface , on the " Stitcher " tab
Output formats
- Tiff
- Jpeg
- PNG
The default is always TIFF, but it is quite "heavy", so you can change it to JPEG.
Conclusion
We have just reviewed a professional tool for building panoramas and disassembled its functions. Thus, using this sequence of actions, even the largest and most difficult panorama will be collected. Now you know how to do it right and you will no longer be afraid to shoot panoramas. Thank you for your attention and share the results :)
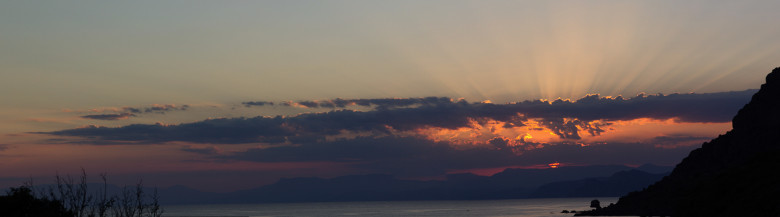
The result of the last panorama from the screenshots
Links
')
Source: https://habr.com/ru/post/369995/
All Articles