Import substitution snowmen, or preparing for the New Year with a 3D-printer "3D-Start" from Dadzhet
Long ago, at the very beginning of the 90s, when I lived in a small provincial town, the children made their own Christmas decorations and toys.
Someone made snowmen out of papier mache, someone cut out snowflakes from notebooks. The schemes of handicrafts were taken in the magazines “Model Designer”, “Young Technician” or they invented their own designs, making sketches on a piece of paper in a cage.
In those days there was not a single child who was cut off from creativity or would not be able to make toys with his own hands. And all because almost every second adult city dweller worked in production. Someone mom and dad were engineers, others - worked as technicians or mechanics at the factory.
')
This feature and laid in the upbringing of children craving. In the young head spinning pictures of machines with my father's work. On which the skillful hands of the workers deftly gave birth to new, brilliant machine parts. Naturally, the child also wanted to create new things with seemingly rusty and worthless pieces of metal.
But the happy and happy childhood interrupted the 90s. A stream of cheap “phenolic” toys from the sky poured into the country, children began to play with what adults buy, because adults themselves had less and less time to work with children - the new reality dictated new conditions for survival.
And so, the children grew up, many of them finally lost touch with creativity, went into other more monetary areas. Receiving money - has become the main purpose of life of the majority. Most of those who in childhood wanted to be a creator.
But the desire to create cannot be so easily replaced by other things, sooner or later it will still find a place for itself in the life of anyone, even the most busy person.
After all, what is modern home 3D printing? This is the realization of the childhood dream of creativity, which has passed through the prism of everyday employment and has found a niche for itself in the form of the realization of a desktop mini plant. Now everyone can afford to be a creator.
Someone will say that all my reasoning is only water that is irrelevant, but I wanted to immerse the reader in at least a little in the atmosphere that surrounded me and pushed me towards creativity. Well, since nostalgia for the Soviet-Russian childhood and the Chinese 3D printer are not quite compatible things, we’ll take a review of the product of our domestic developers: the 3D Start 3D printer from Dadzhet.
The company is positioning its set - as a designer of a 3D printer for a quick and easy start for 3D printing by beginners. All the mechanics of this designer, according to the company - was invented, designed and assembled in blocks - in Russia.
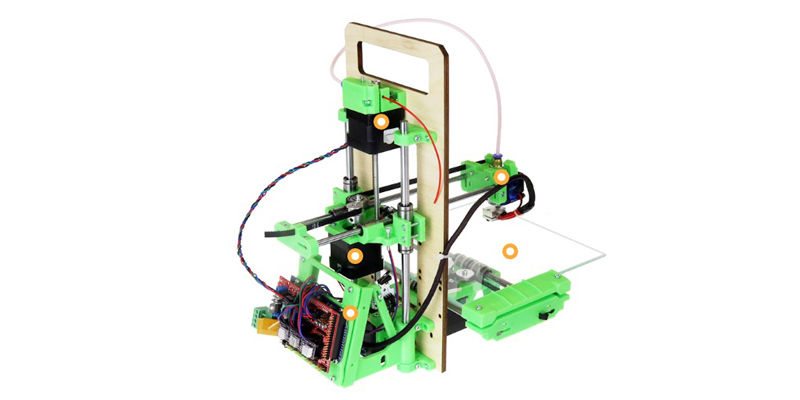
Photo printer from the company website.
A 3D printer, unlike its Chinese counterparts, comes in the form of a set of complete subassemblies, which should be put together before use, in theory this should make it much easier to start printing for an ordinary buyer. Judging by the advertising texts from the company's website before using it, it is enough to take four simple steps: unpack - assemble - connect - install software. All this should take us no more than 45 minutes and ideally do not require any additional tools. Let's try, is it really and estimate the threshold of entry for a person who understands the technique and decided to try 3D printing for the first time? Along the way, we will measure the time required at each stage, not that this is particularly important, it’s just interesting how honest marketers are.
I don’t know about you, but I like to disassemble boxes with newly acquired things slowly and measuredly. Therefore, at this stage, comparing the time spent on unpacking the box by me with the time indicated on the website is not entirely correct. I will say this, if you really hurry to quickly start printing - then this stage will take you about two minutes. What corresponds to the manufacturer's statement.
Everything was packaged well enough, the plastic polyethylene was put in no pity, all the details were intact, the completeness was consistent with the description.
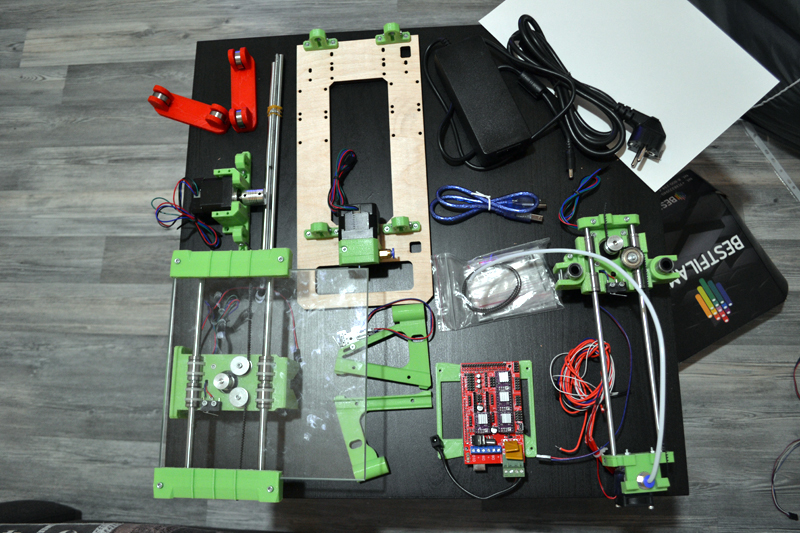
We act strictly according to the instructions. We fasten the carriages of the X and Y axes to the frame, slide the guides for the Z axis into the resulting base and only after that we finally twist all the fixing bolts. In my set hexagons of three different sizes were inserted, so an additional tool was not required.
In fact, the assembly process is so elementary that even a schoolboy can handle it. Problems can arise only with the insertion of the Z-axis guides into the bearings. The fact is that if you start in a hurry, you can squeeze the balls out of the bearings, but they are very small and roll quite well across the table and floor. So be careful, do not repeat my mistakes!
In this step, there is also nothing complicated, one nuance - stepper motors have a direction of rotation and if you connect the contacts with the other side - the engine will move the carriage in the opposite expected direction. Therefore, if you have any of the axes moving in the wrong direction - just flip the pins of the connector of the corresponding motor. Having blown the extruder is connected to permanent 12 V., next to the power connector on the board there is a corresponding connector consisting of two pins. No other pitfalls were noticed.
Since the opening of the box - 50 minutes have passed. Almost met, I think after a small workout it would have been possible to reach this point in 20-25 minutes, but I had nowhere to hurry.
Here begins the most interesting and most difficult part. In order for the printer to start printing - you need:
1) Install the driver for the Arduino MEGA board (the printer controller is assembled on it) - this driver is installed automatically when the Arduino IDE is installed. Of course, I do not need this IDE, so I began to look for the driver separately. But under Win7 I didn’t find anything normal, I had to download the whole Arduin all the same.
2) Install the Repeter-Host program. It controls printing directly, along with it a slicer is installed (this is a program for cutting the original model into layers, for later printing).
3) Load slicer settings that are optimal for this type of printer.
4) Load the model for printing, set its location on the printing table.
5) Cut the model into layers using slicer settings loaded in p3.
6) Press the print button and go to drink tea, because the printing process is far from fast.
I managed to do 2 steps from this sequence, after which the plug has occurred.
On the page with downloads on the website of the company there were no configuration files. After half an hour of searching, the necessary files were found on a third-party resource and uploaded to the program. But since there was no detailed instruction on setting up and calibrating the printer, I had to think it all out myself.
By the way, the feedback from the company works quite well and they promised me that in the near future they would prepare a good instruction on the initial setup and place the actual slicer settings files on their website.
But while working with what we have. The most important thing is to set the printing table as smooth as possible and set the triggering of the limit switch along the Z axis.
3 hours have passed since the opening of the box. All the necessary software was finally downloaded and installed, the configuration files were loaded, the printer was calibrated and ready for printing. There probably still should throw a stone in the direction of marketers, before the first start it took 3.5 more time than the record on the site.
To test the printer, a 10x10x10mm die was selected, the slicer and printer settings from the Dadget site, we start printing.
After another 20 minutes of waiting, we get the first results:

It seems to be quite good, considering that the print was launched with little or no preparation. That is, without special knowledge and skills, it was possible to get a materialized result. This is good news. But we must move on, not for the sake of the cubes, we took it for a test.
Let's try to print something more complicated. For example, "Minion" from the gallery of ready-made models. Since the model is quite large, and the time is nearing one in the morning, we reduce it by 2 times before slicing using the Repetier-Host software. We launch the slicer, the layer is also 0.2mm, the estimated time of printing the figure with a height of 4 cm with a filling of 20% - 1 hour 30 minutes. Do nothing, we will wait.
Closer to two o'clock at night, when the figure has grown to eye level - there was a separation of the parts from the table, I had to stop printing. Apparently it was a sign and it's time to go to sleep ...
The next evening, after work, it was decided to continue mastering the printer. But at startup, he simply refused to print. That is, the seal went, the head moved, but there was no plastic feed. After cooling the extruder to 120-140 degrees - a bar with a very interesting finish was extracted from it.
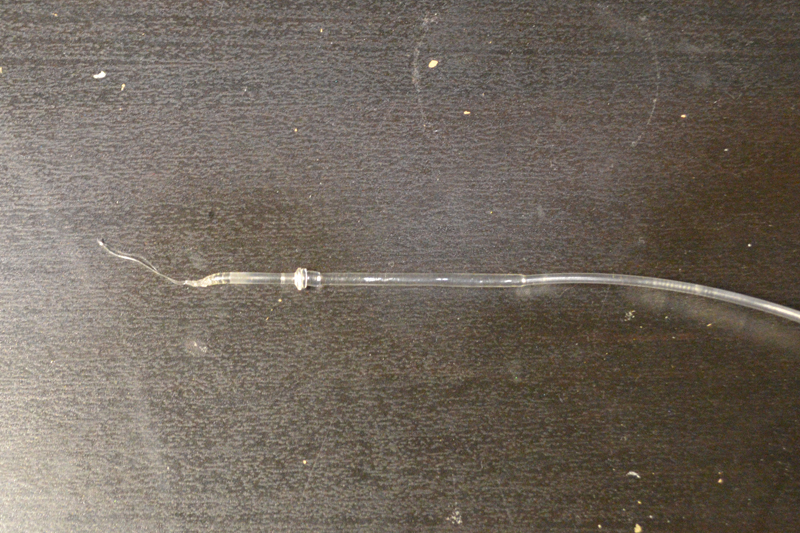
By the type of extraction - it became clear, somewhere in the extruder there are extensions, a cork of molten plastic is formed in them, therefore the incoming bar cannot create the necessary pressure.
The whole evening went to the removal, analysis and complete cleaning of the entire extruder. As well as on its bulkhead and cutting a new Teflon tube insert, instead of the one that was in the thermal barrier. Because it is because of the short length of this tube that a traffic jam occurred.
I advise anyone who purchases a 3D printer with an E3D V6 extruder to sort through it immediately, even before the first start, so at least it will not be necessary to clean the stuck plastic.
I tried to print after the bulkhead, on the move it turned out to print a simple cooling of the extruder and parts.
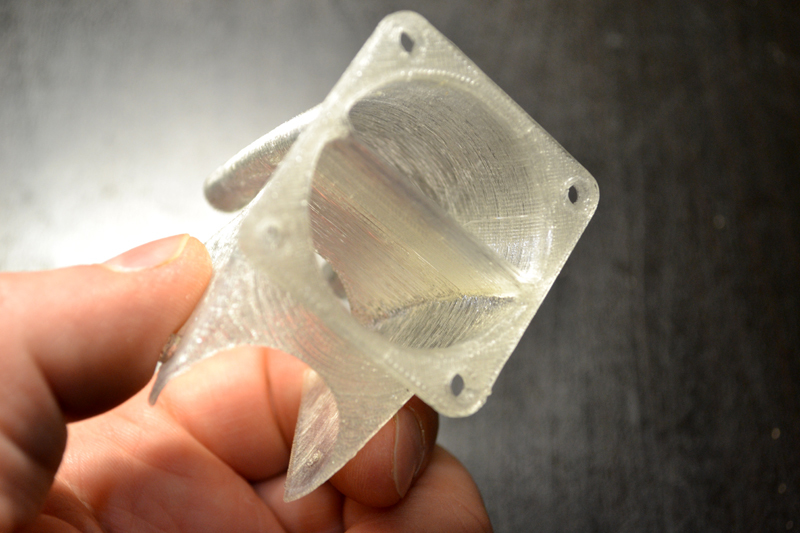
Printed without filling, only the walls in 4 layers, it turned out pretty good. The part printed out quickly, but I wasn’t satisfied with the work, as the design itself was not thought out and blows the print area always, although most of the time it’s not worth blowing the detail. I tried to print a large enough part with this airflow. On the tenth layer - the air flow cooled the nozzle below 195 degrees and the flow of plastic stopped.
We needed another blow so that the extruder radiator was always blown, and the nozzle was only at the request of the program.
There was no time to search for a blower model, I decided to go back to the version without cooling the print area.
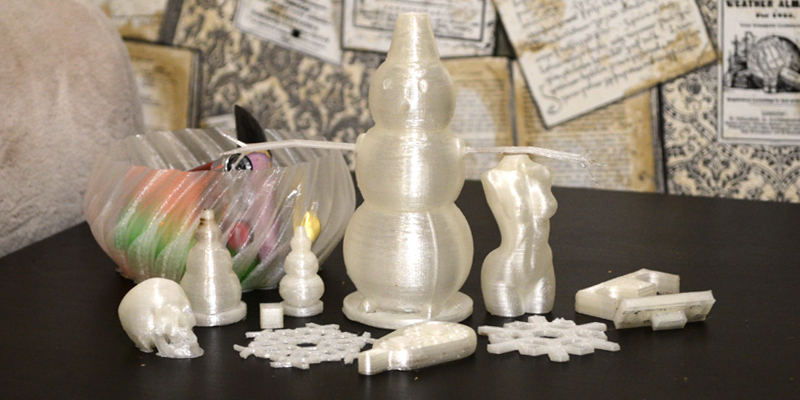
What to print next step? Ahead of the new year - so we will print snowmen.
We are preparing a model in Solid Works
Since the maximum print height on the axis Z = 80mm, and I wanted a large snowman, I had to break it up into segments, which in the final model would be assembled onto a pin with nuts.
I started typing from the bottom segment, put the printer in the kitchen, the first 2 minutes the flight is normal, I come back after 30-40 minutes to check - and there we have a weaving factory, in other words - the first bummer.
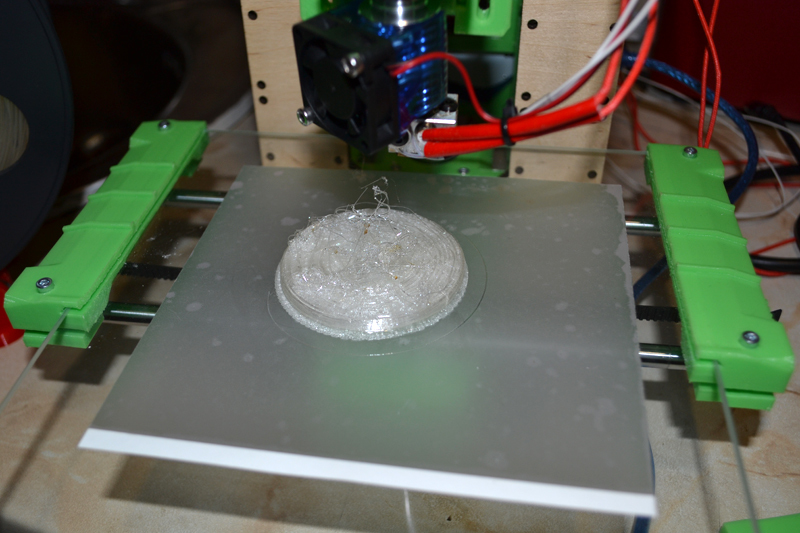
I remove the unfinished part, run again, again, bummer
No, well, the third time should be lucky? I took a specially smaller item, just in case.

Then bad thoughts start to appear in my head, because the problem always arises at the moment of printing the filling. I look at the settings of the slicer - it is. Retraction (retracting of the bar) on the filling layers is 2.5 times more than on the other layers. That is, when printing the filling, a situation arises when the return stroke of the plastic becomes larger than the feed and that is all, the extruder will shut up with molten plastic.
Corrected the value. It was 7, set 3. By this time, I had already learned how to edit the slicer configuration file manually and found there interesting values that are not in the GUI shell. But more about that some other time.
With new retraction values, printing has gone. Since the case again went off into the night - he left the printer to print the part in the kitchen, but under the supervision of the webcam, so that in case of anything, to see the development of the problem.
Video from the flight recorder. 1.5 hours of printing in 6 seconds.
The next night printed the base of a snowman. Time lapse 3.5 hours for 1 minute 20 seconds.
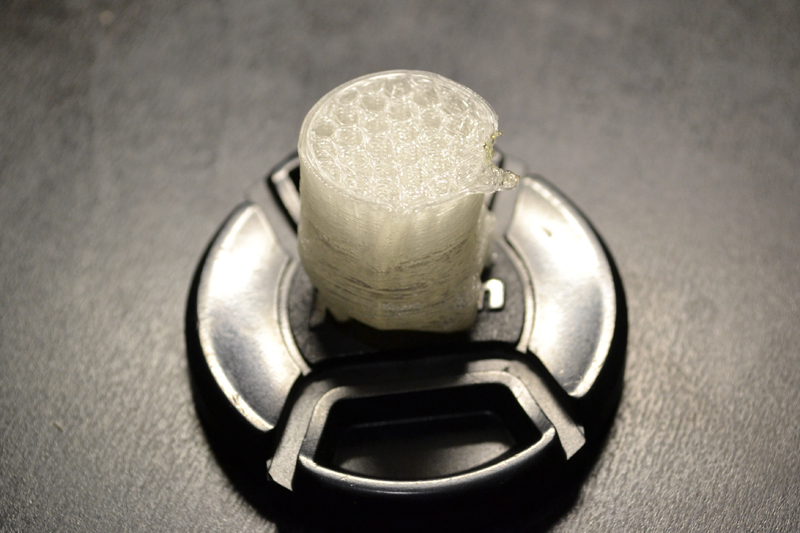
Well, the result of printing. The snowman in height turned out to be about 15 cm. In total, it took about 8 hours.
Print quality is of course lame, on the lower layers you can see the offset of the rings of the outer layer.
UPD: Later it turned out that all the same, to a greater extent my fault is here, due to ignorance of the basics of printing - I set 0.3mm on the nozzle 0.3mm layer height.
We urgently need to return to the thoughts of cooling plastic.
I found such a model (the photo is not mine, I took it from the Internet, if I’m breaking someone’s rights - please report it), but later she arranged it more than I recommend.
It would be great if the company "Dadzhet" included in the delivery of the printer this airflow as part of the design. With him the quality of the products increases many times.
The result of the installation of the blower, nozzle 0.3, layer height 0.2mm:

The skull was specially reduced to the minimum possible size so as not to delay the printing time and at the same time test the printing of small parts with active cooling. It can be seen - even the teeth were printed.
I tried to print a layer with a height of 0.1mm, the nozzle is also 0.3mm.
It turned out, I think, very well.
Then he began to do things useful for the house, for example, the holder of the sliding door printed, because the native is very thin and the door on it is loose too much.
With a 100% filling and a layer of 0.2 mm in height, it wasn’t possible to break the protruding tongue even with pliers. By hardness it came out roughly as if I had cut this part out of a piece of glass fiber textolite. You can saw off with a hacksaw, but if you start breaking it, the edges will come closer together than the piece breaks off.
At the request of his wife - tried to print candy.
The process of printing candy, a little overlooked and the slicer (Slic3r v1.31.6 prusa edition) added additional thickening on the lower layers for durability. In the photo the printer is in a modified state, it is necessary to cool the part, the wires are removed in a nylon braid. Improvements are penny, in my opinion they could be included in the delivery of the printer.
In general, this animal is already well established in my home, it takes a little space, and the pleasure from creativity is complete.
I even ordered additional plastic in silver and blue to print various small parts for the CNC machine I was assembling. There you need: limit switch holders, plugs for the ends of the axes, caps to give a more aesthetic appearance, fasteners for the control unit, holders of wires and other small things that wait with Ali for a long time, and drawing and printing is a matter of a few evenings.
If it is interesting, then I can make an entry on the creation of a CNC machine tool from scratch from inexpensive components.
Pros:
Minuses:
In general, I would advise this printer as a gift to a child, husband or friend of a techie who does not yet have a 3D printer, since it is really not difficult to start mastering printing on it.
And then the person himself will determine whether this printer will be enough for him or he will begin to assemble his own from scratch, using this printer as a plant for the production of necessary parts.
And remember, 3D printing is an easy drug! Delays Be careful!
You can buy a 3D-start 3D printer with a 10% discount using the GEEKT-3D promo code for 14 days.
The kit includes a 12 volt power supply.
I was asked to post information for authors:
The company "Dadzhet" is interested in publishing independent objective reviews of dadzhetov in various kinds of media. The company “Djadzhet” will gladly provide dadzhetov bloggers and authors who want to test them and write a review.
The device after writing a review remains with the author. The company is not trying to tell the author what to write about our product, but asks to show the article before publication. In this case, it is possible to clarify information and prevent errors. Whether to consider company comments or not is always up to the discretion of the author. Read more ...
Someone made snowmen out of papier mache, someone cut out snowflakes from notebooks. The schemes of handicrafts were taken in the magazines “Model Designer”, “Young Technician” or they invented their own designs, making sketches on a piece of paper in a cage.
In those days there was not a single child who was cut off from creativity or would not be able to make toys with his own hands. And all because almost every second adult city dweller worked in production. Someone mom and dad were engineers, others - worked as technicians or mechanics at the factory.
')
This feature and laid in the upbringing of children craving. In the young head spinning pictures of machines with my father's work. On which the skillful hands of the workers deftly gave birth to new, brilliant machine parts. Naturally, the child also wanted to create new things with seemingly rusty and worthless pieces of metal.
But the happy and happy childhood interrupted the 90s. A stream of cheap “phenolic” toys from the sky poured into the country, children began to play with what adults buy, because adults themselves had less and less time to work with children - the new reality dictated new conditions for survival.
And so, the children grew up, many of them finally lost touch with creativity, went into other more monetary areas. Receiving money - has become the main purpose of life of the majority. Most of those who in childhood wanted to be a creator.
But the desire to create cannot be so easily replaced by other things, sooner or later it will still find a place for itself in the life of anyone, even the most busy person.
After all, what is modern home 3D printing? This is the realization of the childhood dream of creativity, which has passed through the prism of everyday employment and has found a niche for itself in the form of the realization of a desktop mini plant. Now everyone can afford to be a creator.
Someone will say that all my reasoning is only water that is irrelevant, but I wanted to immerse the reader in at least a little in the atmosphere that surrounded me and pushed me towards creativity. Well, since nostalgia for the Soviet-Russian childhood and the Chinese 3D printer are not quite compatible things, we’ll take a review of the product of our domestic developers: the 3D Start 3D printer from Dadzhet.
The company is positioning its set - as a designer of a 3D printer for a quick and easy start for 3D printing by beginners. All the mechanics of this designer, according to the company - was invented, designed and assembled in blocks - in Russia.
Photo printer from the company website.
A 3D printer, unlike its Chinese counterparts, comes in the form of a set of complete subassemblies, which should be put together before use, in theory this should make it much easier to start printing for an ordinary buyer. Judging by the advertising texts from the company's website before using it, it is enough to take four simple steps: unpack - assemble - connect - install software. All this should take us no more than 45 minutes and ideally do not require any additional tools. Let's try, is it really and estimate the threshold of entry for a person who understands the technique and decided to try 3D printing for the first time? Along the way, we will measure the time required at each stage, not that this is particularly important, it’s just interesting how honest marketers are.
Unpacking
I don’t know about you, but I like to disassemble boxes with newly acquired things slowly and measuredly. Therefore, at this stage, comparing the time spent on unpacking the box by me with the time indicated on the website is not entirely correct. I will say this, if you really hurry to quickly start printing - then this stage will take you about two minutes. What corresponds to the manufacturer's statement.
Everything was packaged well enough, the plastic polyethylene was put in no pity, all the details were intact, the completeness was consistent with the description.
Assembly
We act strictly according to the instructions. We fasten the carriages of the X and Y axes to the frame, slide the guides for the Z axis into the resulting base and only after that we finally twist all the fixing bolts. In my set hexagons of three different sizes were inserted, so an additional tool was not required.
In fact, the assembly process is so elementary that even a schoolboy can handle it. Problems can arise only with the insertion of the Z-axis guides into the bearings. The fact is that if you start in a hurry, you can squeeze the balls out of the bearings, but they are very small and roll quite well across the table and floor. So be careful, do not repeat my mistakes!
Wiring electronics
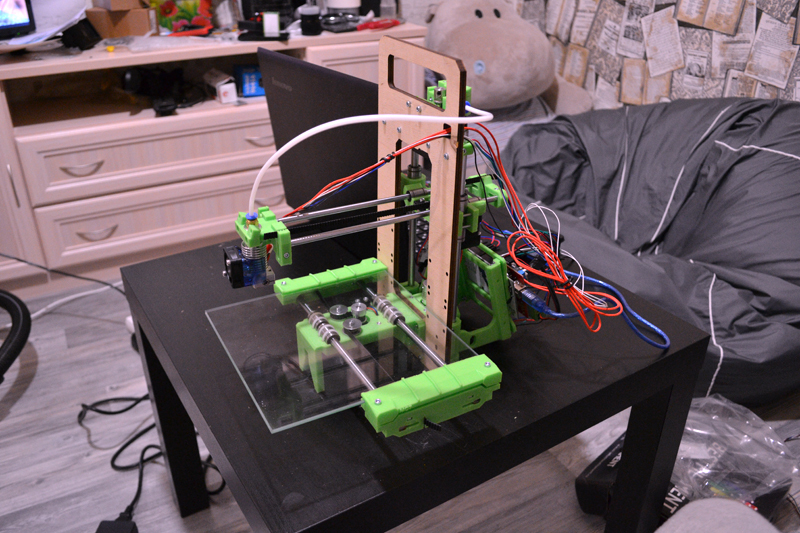
In this step, there is also nothing complicated, one nuance - stepper motors have a direction of rotation and if you connect the contacts with the other side - the engine will move the carriage in the opposite expected direction. Therefore, if you have any of the axes moving in the wrong direction - just flip the pins of the connector of the corresponding motor. Having blown the extruder is connected to permanent 12 V., next to the power connector on the board there is a corresponding connector consisting of two pins. No other pitfalls were noticed.
Since the opening of the box - 50 minutes have passed. Almost met, I think after a small workout it would have been possible to reach this point in 20-25 minutes, but I had nowhere to hurry.
Software installation / configuration
Here begins the most interesting and most difficult part. In order for the printer to start printing - you need:
1) Install the driver for the Arduino MEGA board (the printer controller is assembled on it) - this driver is installed automatically when the Arduino IDE is installed. Of course, I do not need this IDE, so I began to look for the driver separately. But under Win7 I didn’t find anything normal, I had to download the whole Arduin all the same.
2) Install the Repeter-Host program. It controls printing directly, along with it a slicer is installed (this is a program for cutting the original model into layers, for later printing).
3) Load slicer settings that are optimal for this type of printer.
4) Load the model for printing, set its location on the printing table.
5) Cut the model into layers using slicer settings loaded in p3.
6) Press the print button and go to drink tea, because the printing process is far from fast.
I managed to do 2 steps from this sequence, after which the plug has occurred.
On the page with downloads on the website of the company there were no configuration files. After half an hour of searching, the necessary files were found on a third-party resource and uploaded to the program. But since there was no detailed instruction on setting up and calibrating the printer, I had to think it all out myself.
By the way, the feedback from the company works quite well and they promised me that in the near future they would prepare a good instruction on the initial setup and place the actual slicer settings files on their website.
But while working with what we have. The most important thing is to set the printing table as smooth as possible and set the triggering of the limit switch along the Z axis.
3 hours have passed since the opening of the box. All the necessary software was finally downloaded and installed, the configuration files were loaded, the printer was calibrated and ready for printing. There probably still should throw a stone in the direction of marketers, before the first start it took 3.5 more time than the record on the site.
Test print
To test the printer, a 10x10x10mm die was selected, the slicer and printer settings from the Dadget site, we start printing.
After another 20 minutes of waiting, we get the first results:
It seems to be quite good, considering that the print was launched with little or no preparation. That is, without special knowledge and skills, it was possible to get a materialized result. This is good news. But we must move on, not for the sake of the cubes, we took it for a test.
Let's try to print something more complicated. For example, "Minion" from the gallery of ready-made models. Since the model is quite large, and the time is nearing one in the morning, we reduce it by 2 times before slicing using the Repetier-Host software. We launch the slicer, the layer is also 0.2mm, the estimated time of printing the figure with a height of 4 cm with a filling of 20% - 1 hour 30 minutes. Do nothing, we will wait.
Closer to two o'clock at night, when the figure has grown to eye level - there was a separation of the parts from the table, I had to stop printing. Apparently it was a sign and it's time to go to sleep ...
The next evening, after work, it was decided to continue mastering the printer. But at startup, he simply refused to print. That is, the seal went, the head moved, but there was no plastic feed. After cooling the extruder to 120-140 degrees - a bar with a very interesting finish was extracted from it.
By the type of extraction - it became clear, somewhere in the extruder there are extensions, a cork of molten plastic is formed in them, therefore the incoming bar cannot create the necessary pressure.
The whole evening went to the removal, analysis and complete cleaning of the entire extruder. As well as on its bulkhead and cutting a new Teflon tube insert, instead of the one that was in the thermal barrier. Because it is because of the short length of this tube that a traffic jam occurred.
I advise anyone who purchases a 3D printer with an E3D V6 extruder to sort through it immediately, even before the first start, so at least it will not be necessary to clean the stuck plastic.
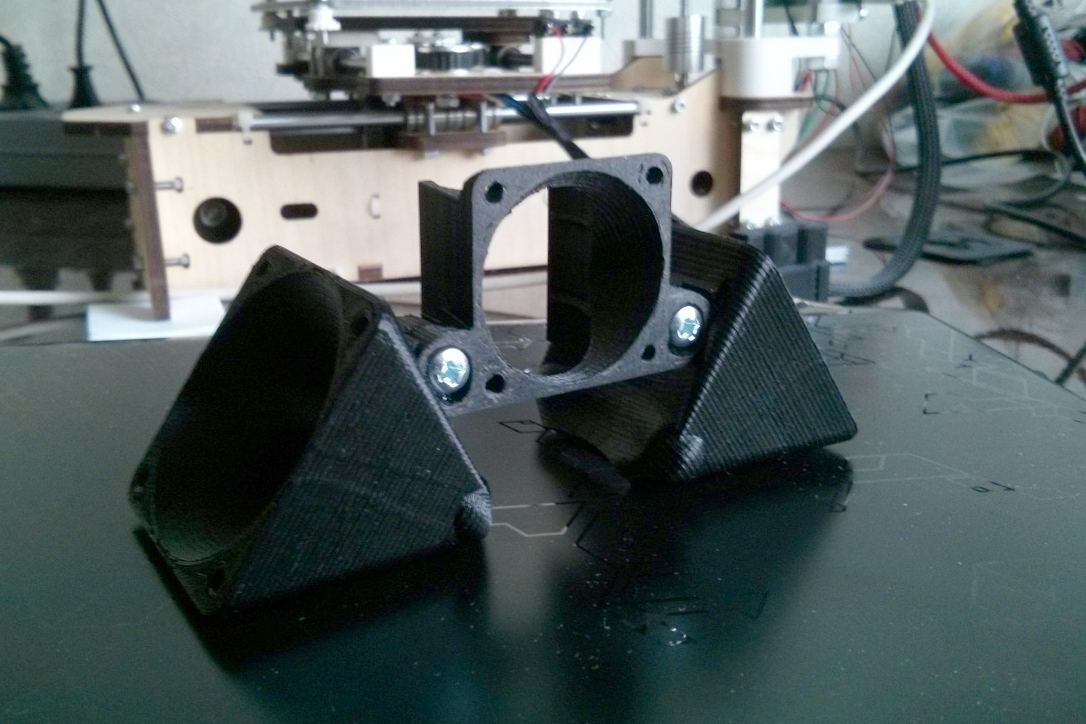
I tried to print after the bulkhead, on the move it turned out to print a simple cooling of the extruder and parts.
Printed without filling, only the walls in 4 layers, it turned out pretty good. The part printed out quickly, but I wasn’t satisfied with the work, as the design itself was not thought out and blows the print area always, although most of the time it’s not worth blowing the detail. I tried to print a large enough part with this airflow. On the tenth layer - the air flow cooled the nozzle below 195 degrees and the flow of plastic stopped.
We needed another blow so that the extruder radiator was always blown, and the nozzle was only at the request of the program.
There was no time to search for a blower model, I decided to go back to the version without cooling the print area.
What to print next step? Ahead of the new year - so we will print snowmen.
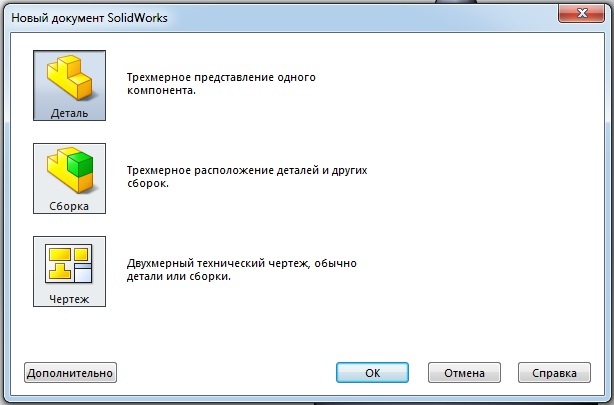
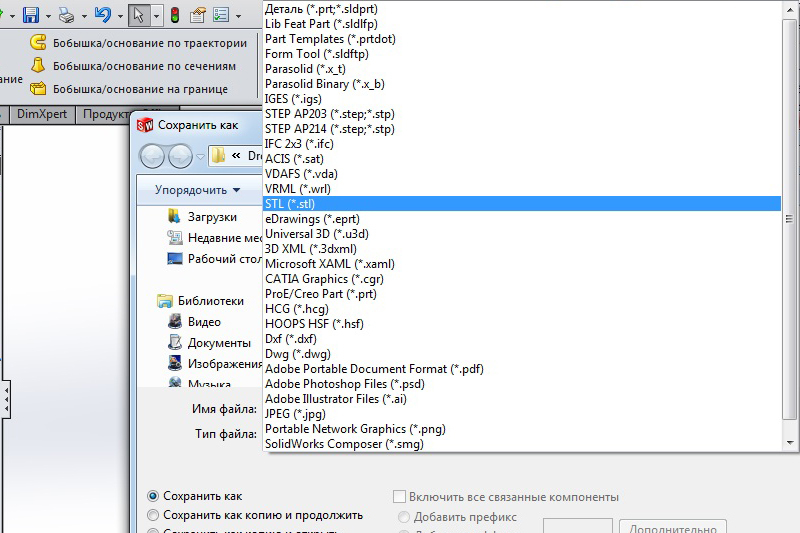
We are preparing a model in Solid Works
How to draw a snowman:
1) Create a new 3D model
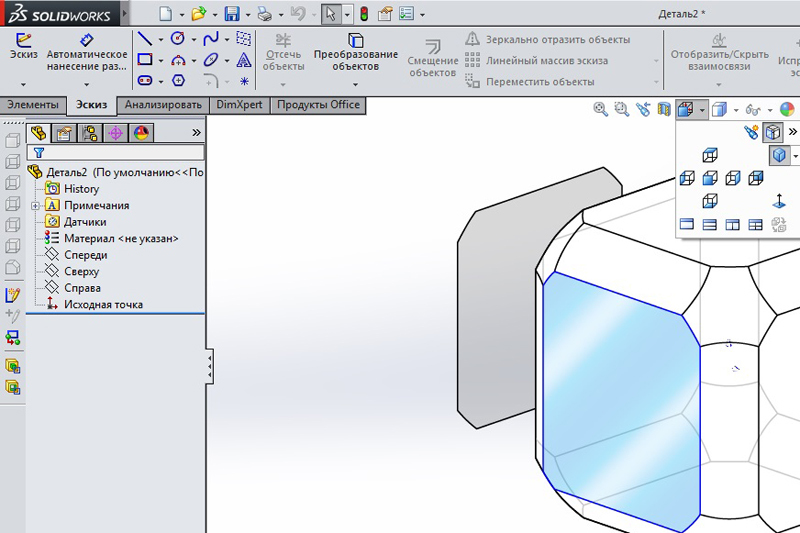
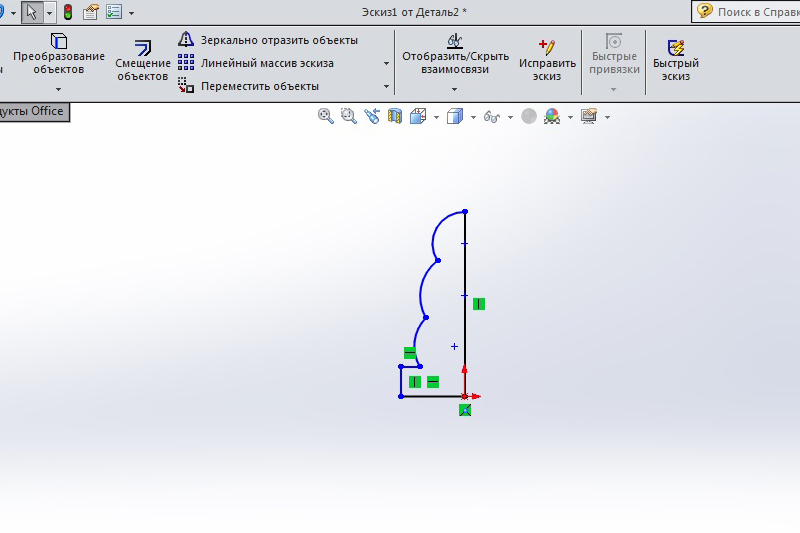
2) On the front plane we draw a sketch of the half profile of a snowman
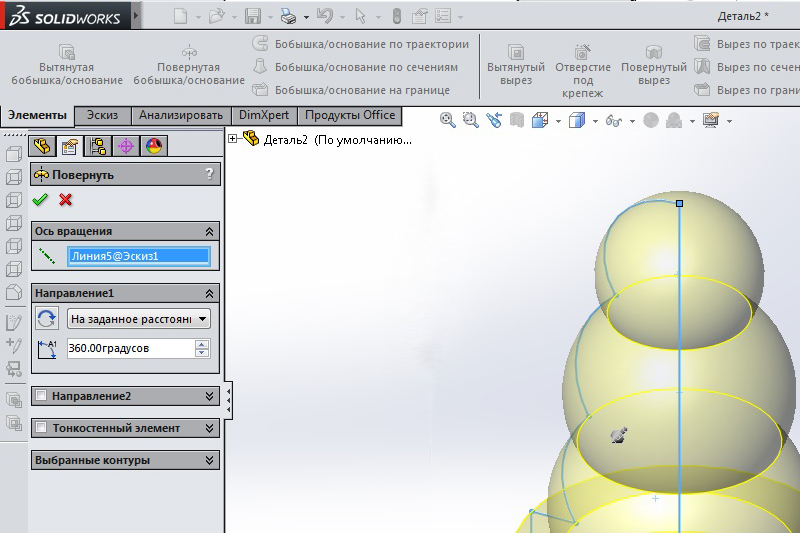
3) Through the Elements tool - the rotated boss / base we create a body of rotation around the axis of central symmetry of the snowman.
4) Save the result in STL format
2) On the front plane we draw a sketch of the half profile of a snowman
3) Through the Elements tool - the rotated boss / base we create a body of rotation around the axis of central symmetry of the snowman.
4) Save the result in STL format
Since the maximum print height on the axis Z = 80mm, and I wanted a large snowman, I had to break it up into segments, which in the final model would be assembled onto a pin with nuts.
I started typing from the bottom segment, put the printer in the kitchen, the first 2 minutes the flight is normal, I come back after 30-40 minutes to check - and there we have a weaving factory, in other words - the first bummer.
I remove the unfinished part, run again, again, bummer
No, well, the third time should be lucky? I took a specially smaller item, just in case.
Then bad thoughts start to appear in my head, because the problem always arises at the moment of printing the filling. I look at the settings of the slicer - it is. Retraction (retracting of the bar) on the filling layers is 2.5 times more than on the other layers. That is, when printing the filling, a situation arises when the return stroke of the plastic becomes larger than the feed and that is all, the extruder will shut up with molten plastic.
Corrected the value. It was 7, set 3. By this time, I had already learned how to edit the slicer configuration file manually and found there interesting values that are not in the GUI shell. But more about that some other time.
With new retraction values, printing has gone. Since the case again went off into the night - he left the printer to print the part in the kitchen, but under the supervision of the webcam, so that in case of anything, to see the development of the problem.
Video from the flight recorder. 1.5 hours of printing in 6 seconds.
The next night printed the base of a snowman. Time lapse 3.5 hours for 1 minute 20 seconds.
First print results
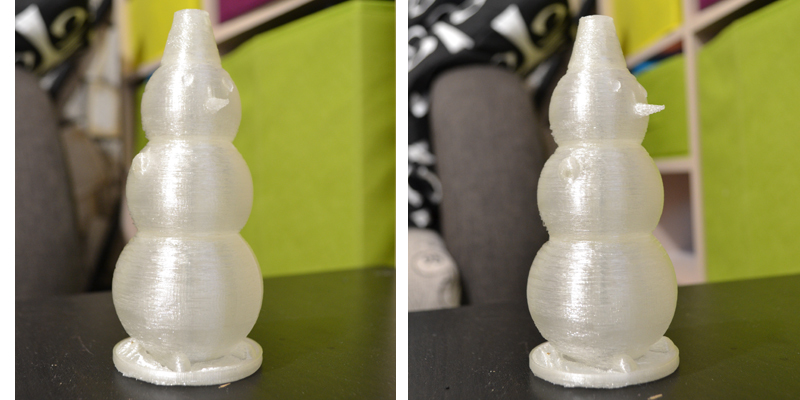
Well, the result of printing. The snowman in height turned out to be about 15 cm. In total, it took about 8 hours.
Print quality is of course lame, on the lower layers you can see the offset of the rings of the outer layer.
UPD: Later it turned out that all the same, to a greater extent my fault is here, due to ignorance of the basics of printing - I set 0.3mm on the nozzle 0.3mm layer height.
We urgently need to return to the thoughts of cooling plastic.
I found such a model (the photo is not mine, I took it from the Internet, if I’m breaking someone’s rights - please report it), but later she arranged it more than I recommend.
It would be great if the company "Dadzhet" included in the delivery of the printer this airflow as part of the design. With him the quality of the products increases many times.
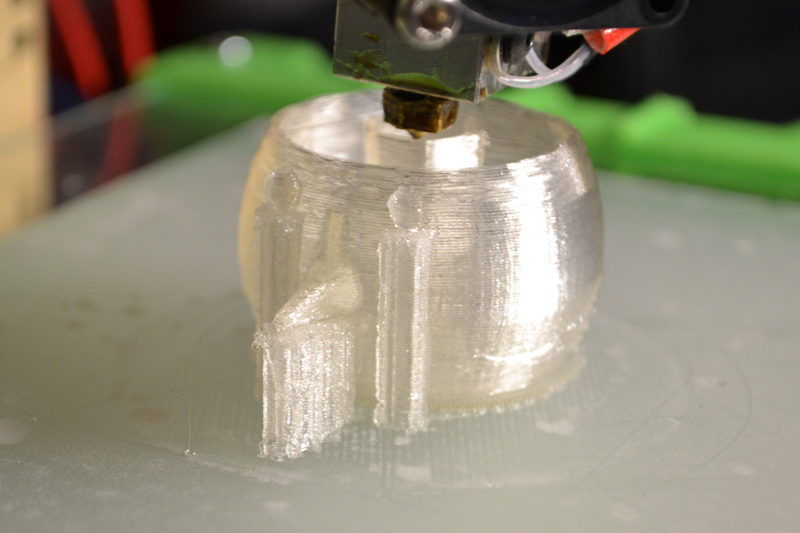
The result of the installation of the blower, nozzle 0.3, layer height 0.2mm:
The skull was specially reduced to the minimum possible size so as not to delay the printing time and at the same time test the printing of small parts with active cooling. It can be seen - even the teeth were printed.
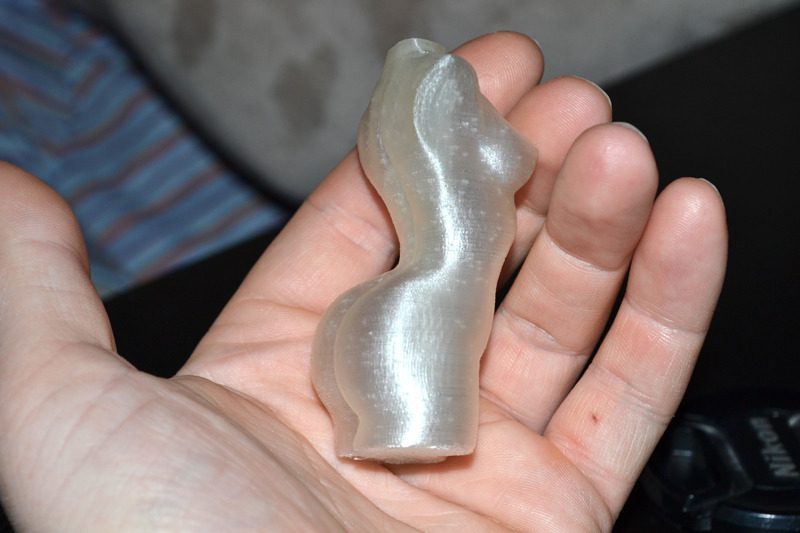
I tried to print a layer with a height of 0.1mm, the nozzle is also 0.3mm.
It turned out, I think, very well.
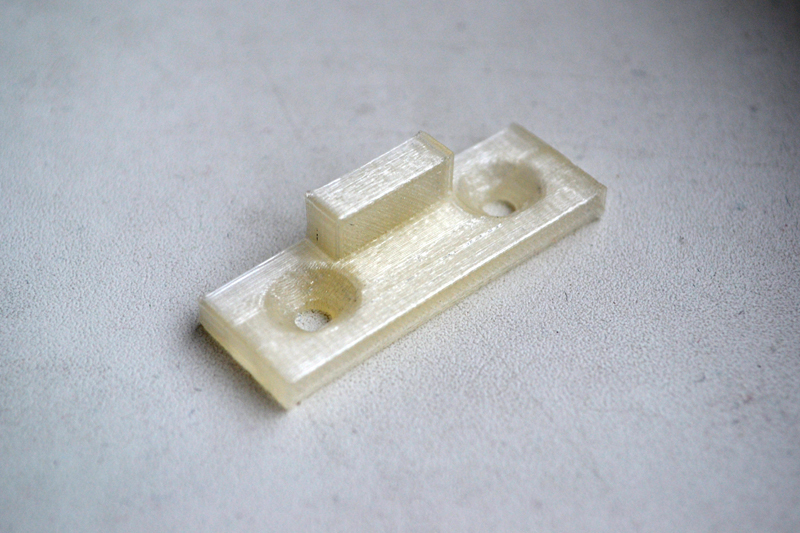
Then he began to do things useful for the house, for example, the holder of the sliding door printed, because the native is very thin and the door on it is loose too much.
With a 100% filling and a layer of 0.2 mm in height, it wasn’t possible to break the protruding tongue even with pliers. By hardness it came out roughly as if I had cut this part out of a piece of glass fiber textolite. You can saw off with a hacksaw, but if you start breaking it, the edges will come closer together than the piece breaks off.
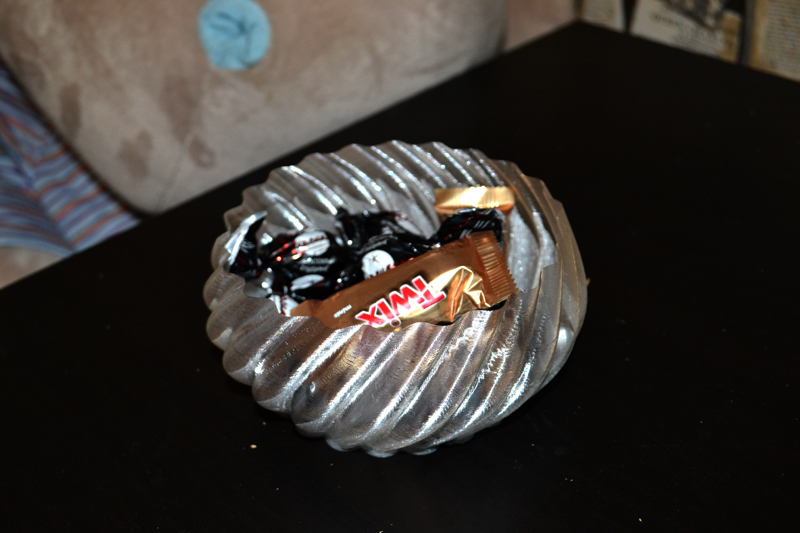
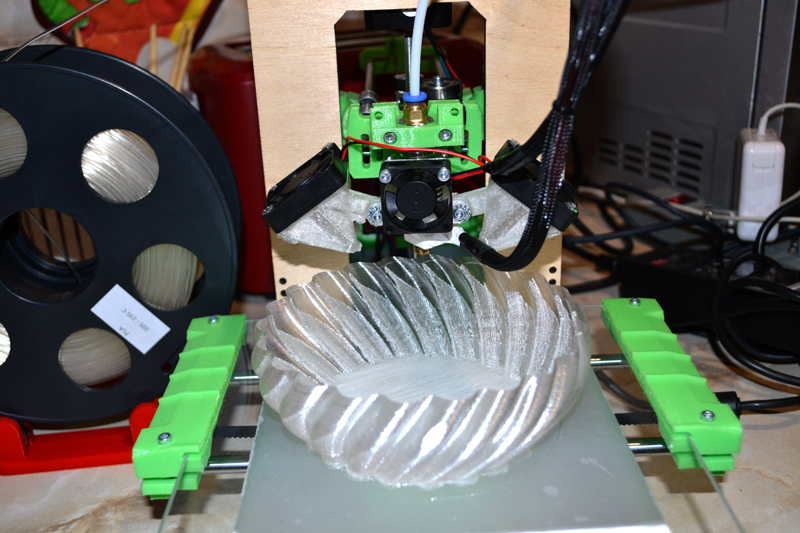
At the request of his wife - tried to print candy.
The process of printing candy, a little overlooked and the slicer (Slic3r v1.31.6 prusa edition) added additional thickening on the lower layers for durability. In the photo the printer is in a modified state, it is necessary to cool the part, the wires are removed in a nylon braid. Improvements are penny, in my opinion they could be included in the delivery of the printer.
In general, this animal is already well established in my home, it takes a little space, and the pleasure from creativity is complete.
I even ordered additional plastic in silver and blue to print various small parts for the CNC machine I was assembling. There you need: limit switch holders, plugs for the ends of the axes, caps to give a more aesthetic appearance, fasteners for the control unit, holders of wires and other small things that wait with Ali for a long time, and drawing and printing is a matter of a few evenings.
If it is interesting, then I can make an entry on the creation of a CNC machine tool from scratch from inexpensive components.
Let's sum up.
Pros:
- It prints, and you can say right out of the box, and after a little “tuning”, even with a fairly good quality. That is, if you donate such a set to a student from 10 years old, he will easily figure it out.
- Quite detailed assembly instructions included, quick assembly time.
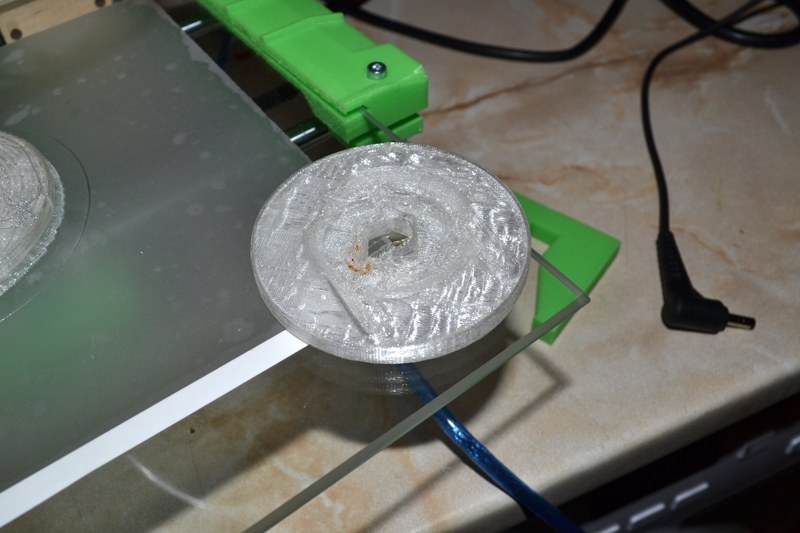
- The desktop holder for the plastic coil in a set.
- The most running nozzle 0.3mm included.
- Takes up little space on the table.
- There is a carrying handle, which is important for me, since so far I have been hauling from the room to the kitchen, depending on where the wife is not currently located.
- Operative user support.
Minuses:
- Pretty confusing setup instructions (but they seem to have promised to fix and post a new version on the site)
- Sometimes it slides on the table, there are not enough silicone legs or pads.
- The design of the nut assembly axis Z. When lowering down, you have to hold the carriage with your finger so that the nut does not get stuck and fall out.
- Green color printed parts. It’s rather my subjective opinion, but in white, gray, black or silver - it would look less toy.
- The package does not include cooling for the print part, although the print quality, if present, increases many times.
- A control unit without support for memory cards, that is, printing only from a computer via a USB cable (of course, you can separately purchase a control unit with support for memory cards, but this is a refinement)
- Noise (this item applies more to all 3D printers), I almost divorced from the fact that I printed at night, now I print only during the day. The printer is noisy like a washing machine.
In general, I would advise this printer as a gift to a child, husband or friend of a techie who does not yet have a 3D printer, since it is really not difficult to start mastering printing on it.
And then the person himself will determine whether this printer will be enough for him or he will begin to assemble his own from scratch, using this printer as a plant for the production of necessary parts.
And remember, 3D printing is an easy drug! Delays Be careful!
You can buy a 3D-start 3D printer with a 10% discount using the GEEKT-3D promo code for 14 days.
The kit includes a 12 volt power supply.
I was asked to post information for authors:
The company "Dadzhet" is interested in publishing independent objective reviews of dadzhetov in various kinds of media. The company “Djadzhet” will gladly provide dadzhetov bloggers and authors who want to test them and write a review.
The device after writing a review remains with the author. The company is not trying to tell the author what to write about our product, but asks to show the article before publication. In this case, it is possible to clarify information and prevent errors. Whether to consider company comments or not is always up to the discretion of the author. Read more ...
Source: https://habr.com/ru/post/369969/
All Articles