We print the simplest case for a homemade device
To print a suitable case for your device is probably the most popular idea when any inventor is familiar with 3D printing technology. But in practice, everything is not as easy as in advertising a 3D printer, and under the cut, I will tell you in a little more detail what conclusions I came up with in trying to compose a convenient body design.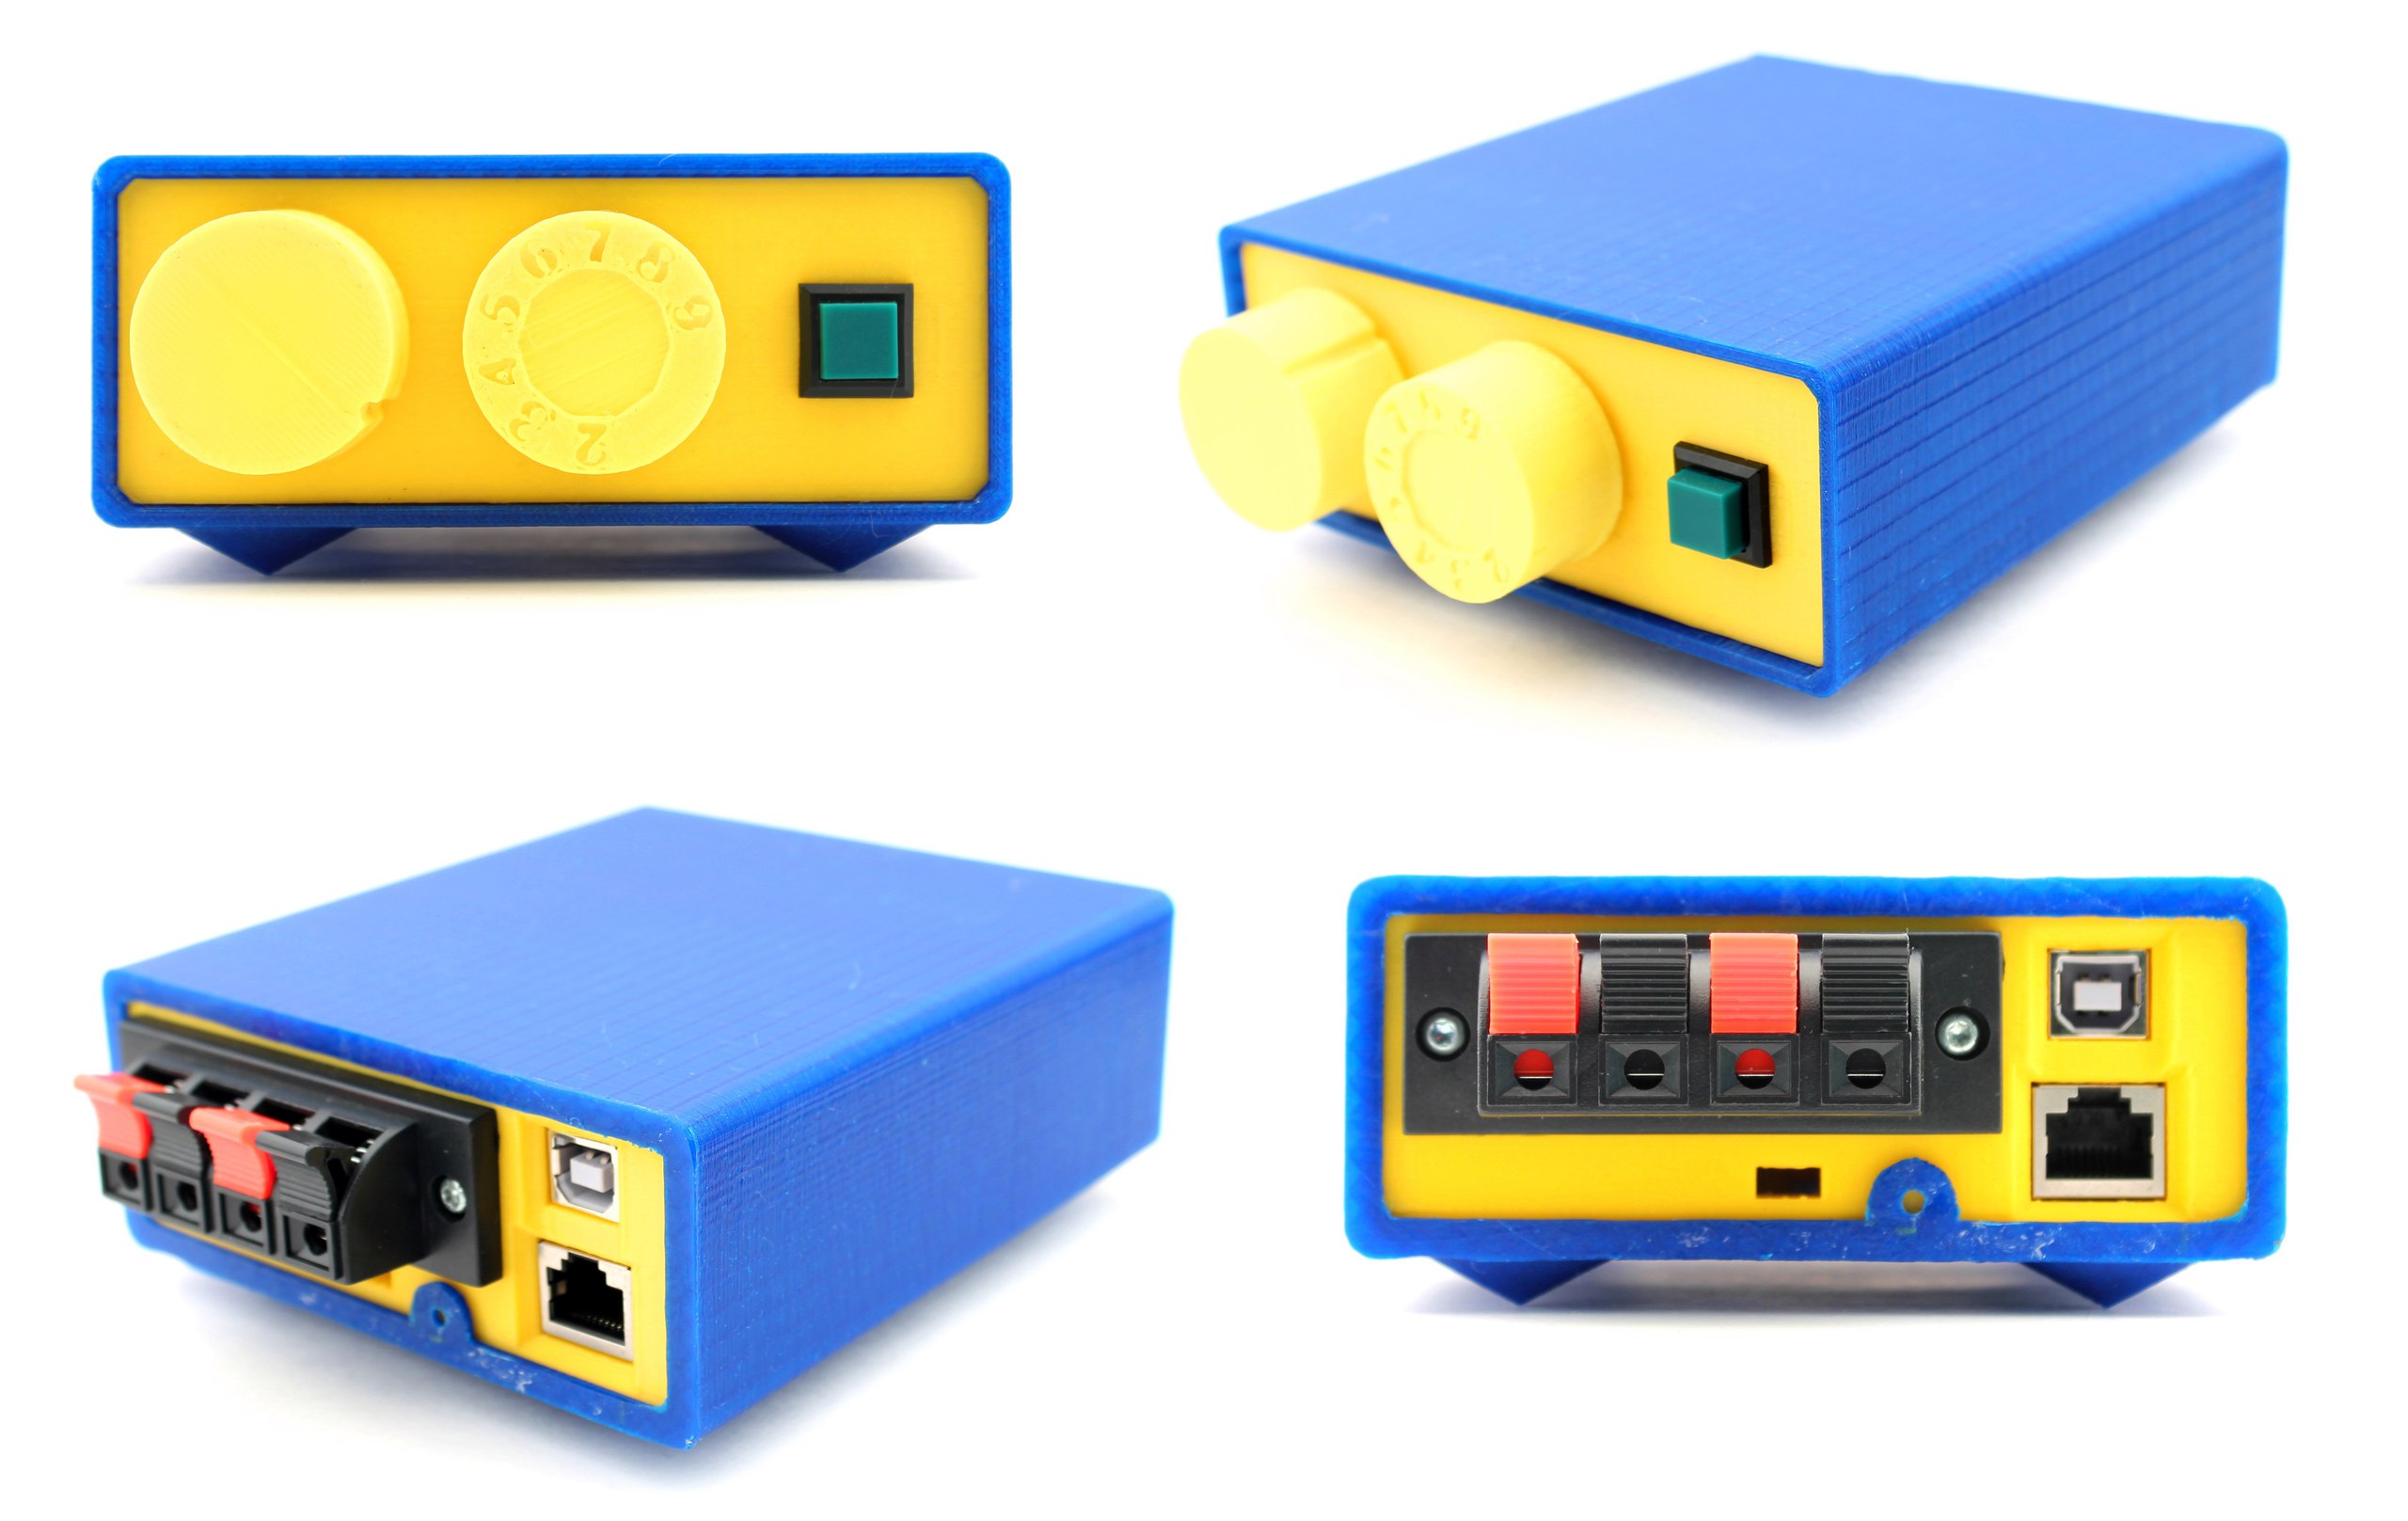
With 3D printing everything is fine - it's just a magic wand for the master, except for the fact that most of them will be able to afford only models of printers of the lower price range. And after taking a 3D printer, most, like me, will face the imperfections of 3D budget printing technology, namely FDM technology (layer-by-layer welding, using most of the available printers), regardless of whether you have assembled the printer yourself or bought it in a store. The main problems are the shrinkage of the material after cooling, which is the cause of deformations and not accurate linear dimensions of printed parts. If you come up with some of the coolest design in the likeness of serial equipment housings, then the case of your device will be generously saturated with neat beads, holes or snaps exactly in size for ease of assembly ... even being a professional in modeling and taking into account the above printing problems, you will get tired of reducing all these dimensions and invents in which position it is better to print every detail so that nothing will bend out during shrinkage, as often happens. Shrinkage is evil, it is especially frustrating and takes time when there are many sizes in your design that you need to precisely withstand for assembly and beautiful appearance. But not everything is so bad and this is not a reason to retreat).
Based on my printing experience, I came up with a simple box design for prototype devices, which will be convenient for printing on any FDM printer and suitable for many projects.

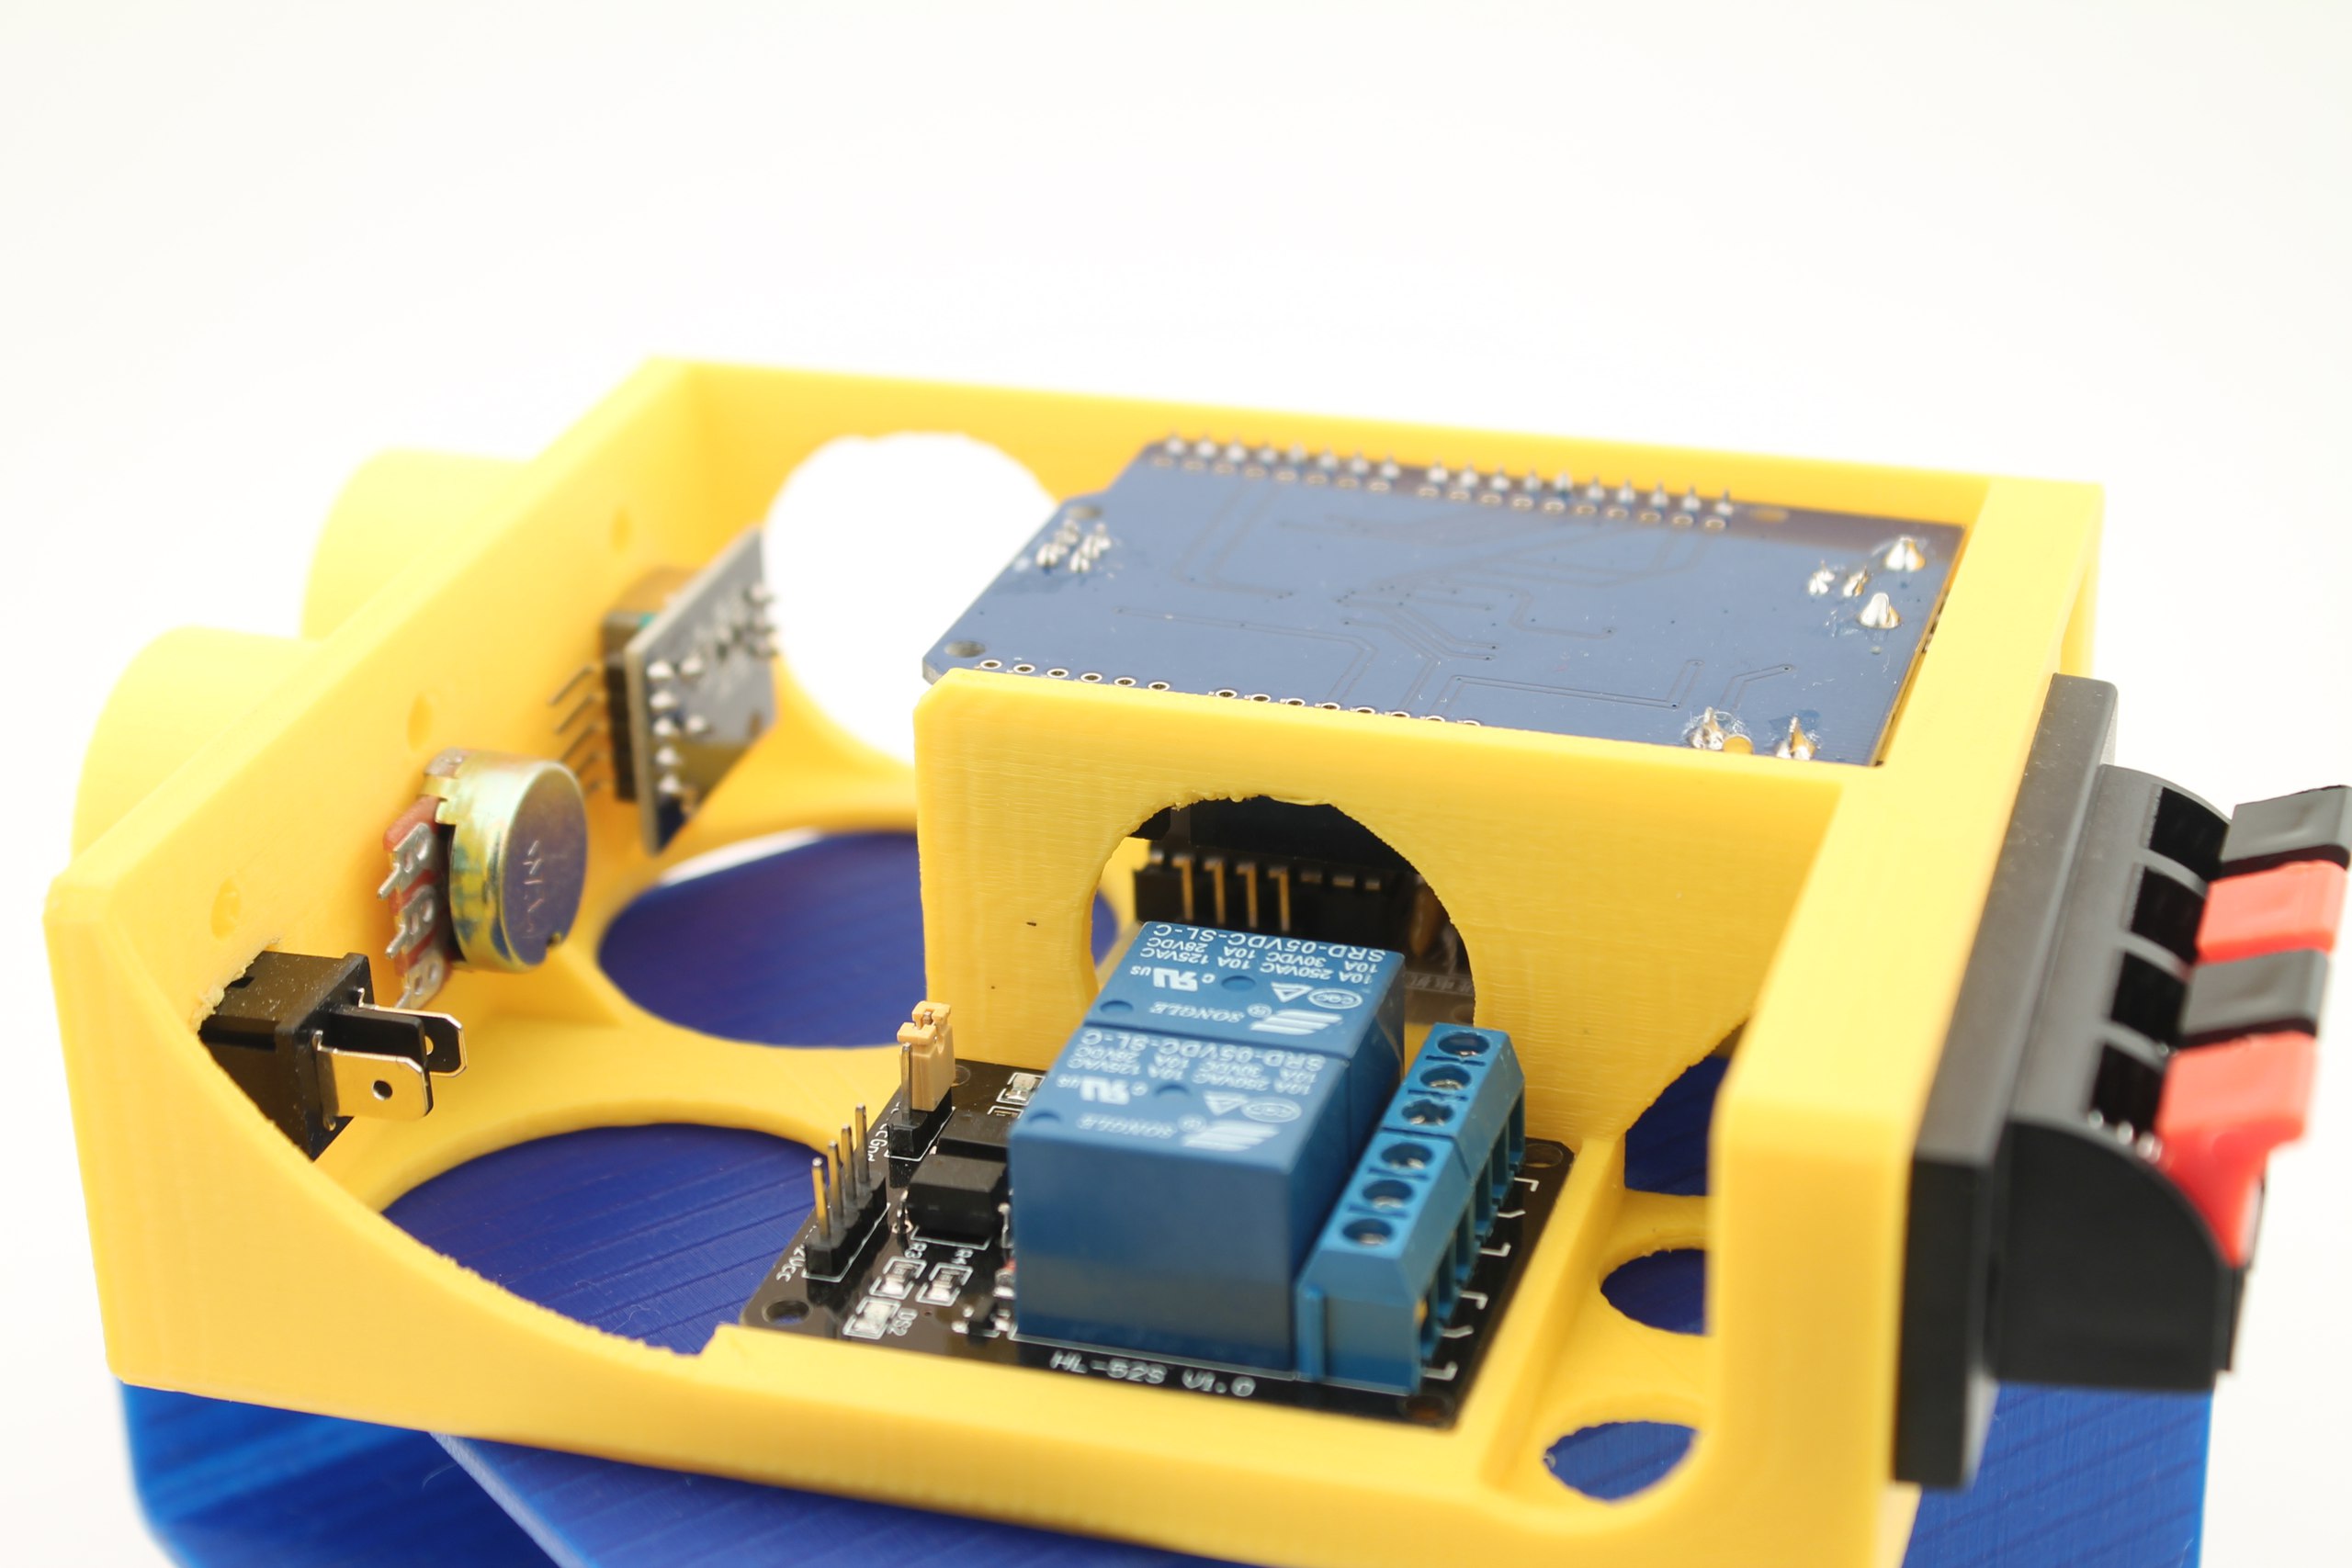
The design consists of two parts: the chassis - on which we will mount the parts, and the casing itself - which will hide all the shame that we have soldered) One easily fits into the other and for reliability is fixed with a single screw at the back of the case.

The chassis is printed in a horizontal position to easily withstand the horizontal dimensions of the seats for the installation of components. Then I simply glue them in the corners with droplets of hot glue, so it is faster and easier to disassemble then, if necessary.
')

I recommend chassis generously pry out the bottom and sides to save material, less deformation during shrinkage and simplify the tearing off from the table. Just squeezing the circles, remember what is bubling?)

And I print the casing vertically. In this position, you can make thin even walls and the texture on almost the entire visible part of the body is obtained in one direction, it looks neat. If necessary, you can finish the lugs or legs.

Even if you are not able to withstand the size exactly from the first time and you have to grind off the edges of the chassis with a file, the processing marks will not be visible from the outside of the device.
The tapered legs on the bottom of the case are printed without support, which eliminates the need for further processing and saves material / time.
If you are printing on tape or glue, the surface that sticks to the table is usually not even and requires processing. With this approach, it will be on the back side of the case (on the side of the interface connectors), which no one usually sees one FIG.

I printed this case from PLA plastic with a 0.3mm nozzle on a Russian-made MZ3D-256 printer with the following structure settings: wall thickness 0.6 mm, filling 23%, without printing the substrate.
The size of the case in my example allows you to place an arduin uno, a relay pair, a stepper motor driver, a voltage converter, various communication connectors and control / display elements inside.

Of course, you will draw a chassis of the required size for your modules, if only there is enough print area for the printer to print a solid casing. In my opinion the most simple and convenient will be just such a design.
The benefit from the case is obvious) The design does not fall apart, wires do not stick out of the device, it does not look like a bomb, no one knows that it works on Arduin and is not ashamed to be shown at an exhibition or given to programmers for writing firmware.

I hope this information turned out to be useful to someone, thank you for your attention.
PS The pictures are not an audio amplifier, but a watering controller, just audio connectors are very convenient for connecting low-current loads.
UPD. Thank you UFO for taking on board the community and all participants for a warm welcome :)
And of course the files , I save time for inventors)
Source: https://habr.com/ru/post/369771/
All Articles