Stupid watches are not so stupid
BEFORE and AFTER - feel the difference
Almost a year ago I wrote about the watches invented by me.
The article ended with such a phrase: “Now in my plans, when nothing hurries me, to make the device more technologically advanced and to solve a couple of questions that came up during the creation of the first model”. As they say - less than a year.
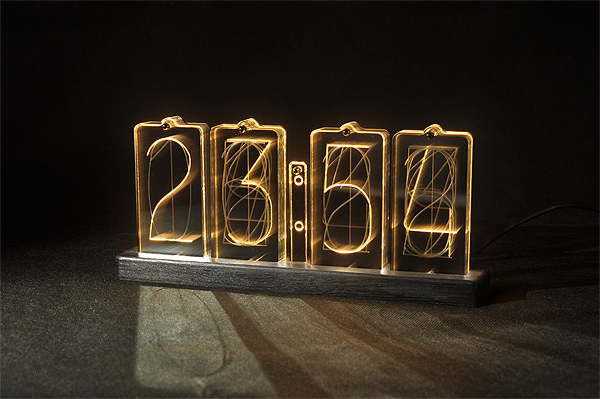
The very first hours, as a result, moved into the room of the son, since they create soft, cozy lighting and he is not afraid to sleep. And just this light interfered with me. And now in my bedroom there is a version 2.0 clock codenamed LUMO. And they are a little smarter.
')
Since I had a micro-turn from those who wanted such a watch to myself, I had to think about how to improve them, at the same time simplifying their manufacture and assembly, as well as reducing the cost price.
In the course of re-thinking, the constructions had to solve several interesting questions.
Question number 1
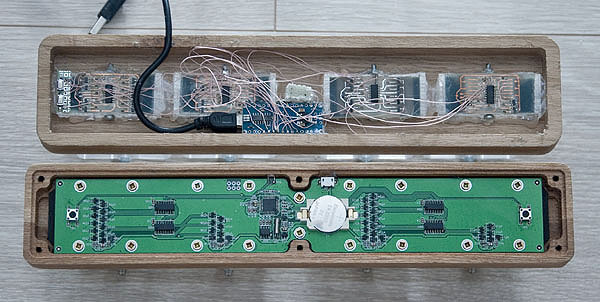
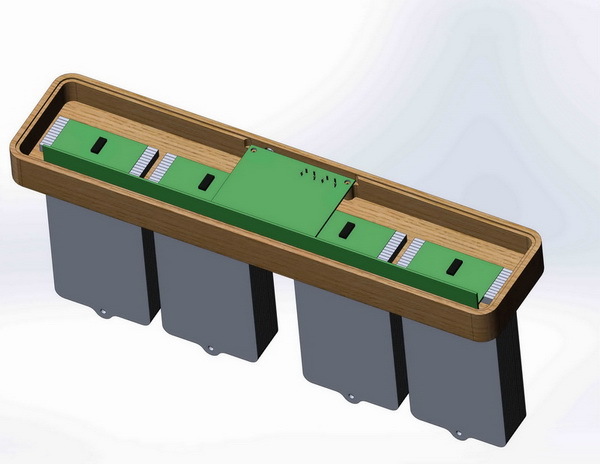
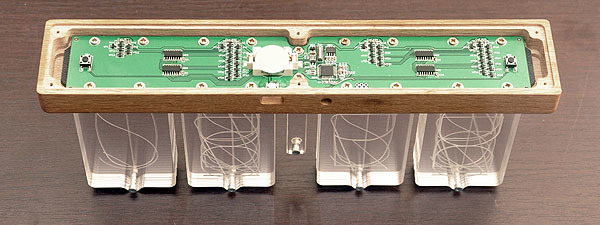
The tone of the whole structure was set by electronics, or rather its layout. First there was the idea, as in the first article, to make the numbers separate modules and somehow connect them to the mainboard. But this entailed the manufacture of 5 boards and some kind of tire, while I wanted to make the stand as small as possible in thickness and size (the same trend: thinner - cooler). Easily reachable budget connectors could not boast of compactness.
The idea evolved into 5 boards, plus a board-bus butt to others.
I was worn with this idea of a universal digital module for quite a long time, until one good and intelligent man, Alexander, pushed me out of this mental “rut”. He says to me: “One board is simpler and cheaper, and there will be, for example, another version of the clock - you will make another board”. Stumbling a bit into PCB software and realizing that I had completely forgotten, I decided to trust a professional, a good and intelligent man, Alexander. And he took up the next question.
Question number 2
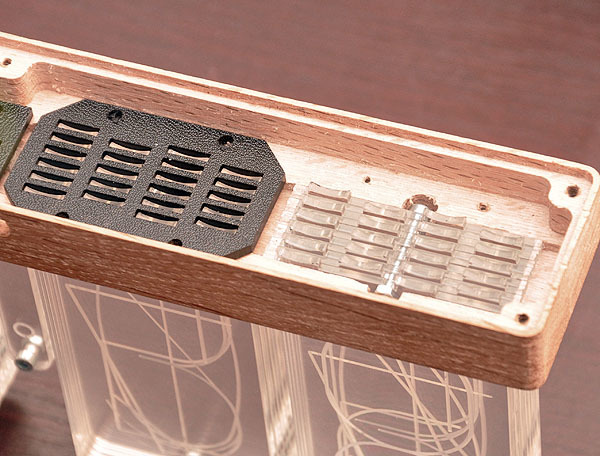
How to divide the light fluxes more elegantly than the spacers between the plates-numbers from the black package? Yes, there was a black plastic bag, then a black self-adhesive, it was all wrong. In addition to fussing with gluing, the film also added thickness at the base of the sandwich from the numbers. Then it was impossible to get these cells to the LEDs. Necessarily one of the jumpers was bent and someone shone not there. An aluminum can is the solution! And hard and light does not let through and ... also nonsense. By the way, I did not find the cans, I had to buy the cheapest beer and pour it into the toilet - creativity required sacrifices. There were many victims at all. Only unsuccessful versions of plates from plexiglass accumulated a few packages.
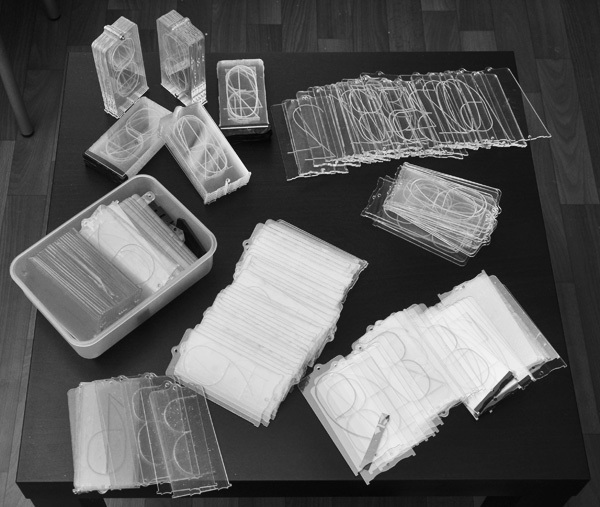
Few of the marriage
But in the end, I came up with an elegant solution. And at once the whole construction has grown together and assembled like a puzzle. It is better to see once than read a hundred times.

A board is erected on this plane and everything is screwed into the same holes.
Question number 3
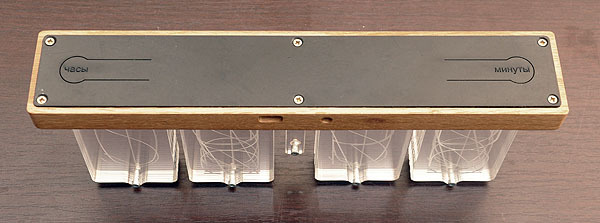
Where to put the buttons? I didn’t like the option with buttons on the back of the case because I needed to make two extra holes, except for the windows for the light sensor and the connector. Yes, and press them would not be very convenient. Here the solution was born fairly quickly: the buttons were transferred down. Even managed to gently cover them. It has become comfortable, aesthetically and technologically.
Question number 4
I want a night light - I do not want a night light.
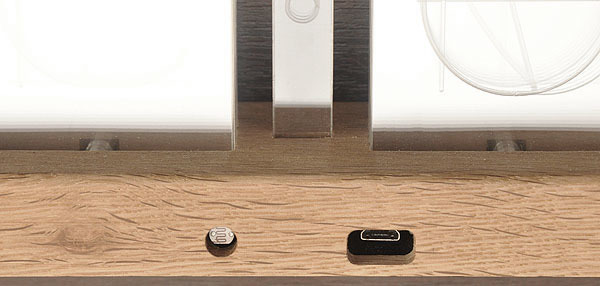
Above, I mentioned the light sensor, I added it, as I planned. The clock began to adjust its brightness depending on the ambient light.
But I wanted, if desired, they could be used as a nightlight. Here program methods have already been used. The principle of operation is as follows: the maximum brightness is constant, and the minimum (which with minimum illumination) can be adjusted. The minimum brightness is adjusted with the same buttons as the time. When the illumination is above a certain threshold - the time is adjusted; when it is below - the minimum brightness. And then it turned out to kill two birds with one stone. It was not clear at what point the light goes over this very threshold, and I was annoyed by the blinking of the second points at night. I made sure that when the illumination is below the threshold, the points do not blink, but just shine. After that, it became clear when the brightness is adjusted (the first hare), and the blinking stopped interfering with sleep (the second hare).
At the moment, the board is still a bit redone, several bugs fixed. For example, a controller power supervisor has been added, since when plugged into a power supply socket connected to the clock, the controller sometimes did not start correctly.
The connector decided to make a microUSB, because, it seems to me, this is the most common connector today. It will be possible to recharge the phone with a power supply from the watch or vice versa, connect the watch to mobile charging. Despite the power of the clock from the network, they have a battery and the time does not need to be re-set after disconnecting.
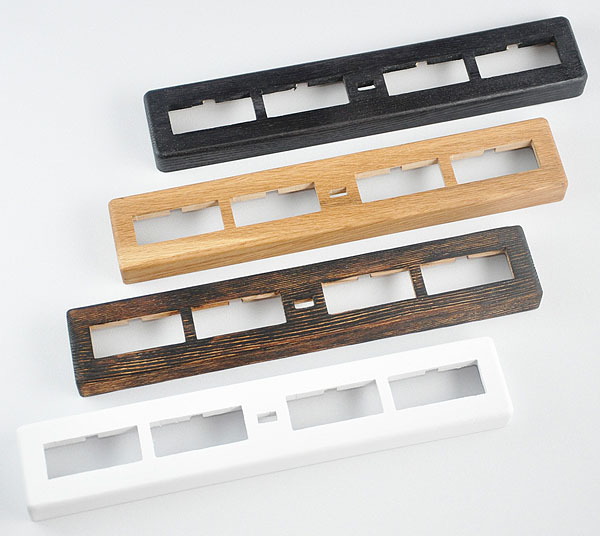
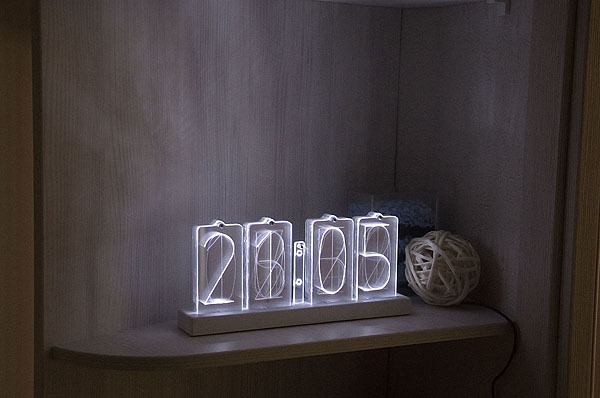
Made several options for the color of the case and tried the LEDs with warm light. I fixed a little font, but this is for my taste.
So far, the design and functionality completely suits me and, most importantly, I like them very much. And not only me.

Source: https://habr.com/ru/post/369691/
All Articles