Travel phone with built-in solar charging
The phone is not developed from scratch, this is an article about how to take a few ready-made components and assemble something new with your own modifications.
Photos for comparison with what is on the market now.
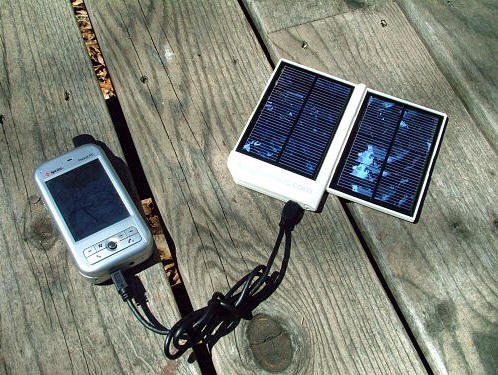
In my first “scary” article, I already talked about my ideas about this phone. At that moment I had more questions than answers.
As a result, having acquired the missing equipment, I nevertheless assembled my first working prototype. Phone in one case with a solar charger.
Who cares welcome under the cat (a lot of photos ).
I will not duplicate the parameters from the old article, the components are used all the same, who will be interested in the link .
The most important task was to assemble a finished prototype, which is not a bundle of wires wrapped with electrical tape, but a more or less finished product. First of all, the body problem arose. Earlier in my prototype phone I used wood ( Nokia 105 wooden ). In this project, I wanted to make a plastic case. It was here that the first snag arose for me, since geographically I live in a small town, and we have a problem enough to find a 3D printer nearby, I had to buy it myself. And to order in a third-party company the body of the prototype is quite expensive. Why is it expensive? Immediately describe the essence of the problem.
Developing a prototype, I cannot immediately provide a ready-made drawing, I can simply be mistaken, and each mistake is a new remake of the case. Moreover, I do not have the talent to do everything right at once. Accordingly, I would have to re-order each case, which in the end would not be convenient and at the same time expensive.
In the end, I decided to purchase a 3D printer for myself, the choice was between China and Russia, I bowed to the Russian manufacturer, in the hope that they are geographically closer and I will get it from them quickly and accurately. Here, of course, there were also many pitfalls, as a result, with modifications and other alterations, I got a more or less working machine. (Honestly, in the end, I was inclined to what was worth buying in China ...)
Now, with all the equipment, we will start to make the phone :).
That's how it looked at the very beginning, in August 2015.
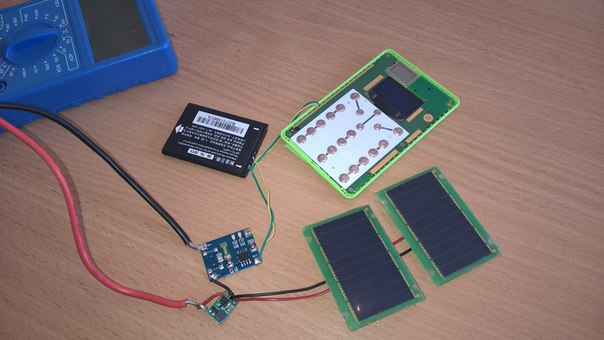
I needed to pack all the electronics and solar panels into the case. The task would seem to be primitive, but due to problems with the printer, solving it turned out to be a bit complicated.
By education I am a designer of machine-building production and from the very beginning of work in production I studied and worked in the Solid Edge program; this is quite a powerful complex for working with drawings. In it, I designed all the details of the case.

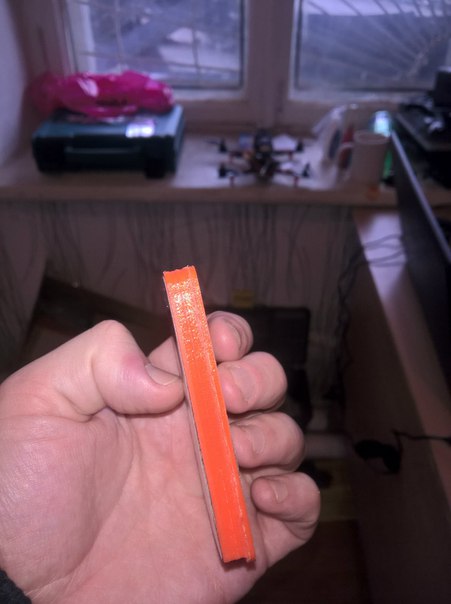
The case had to be divided into three parts, so that it eventually turned out at least somehow. In the case there are places for installing the battery and charge controller with an inverter. The bottom is completely flat, I could not get the printer to print out the entire body assembly.
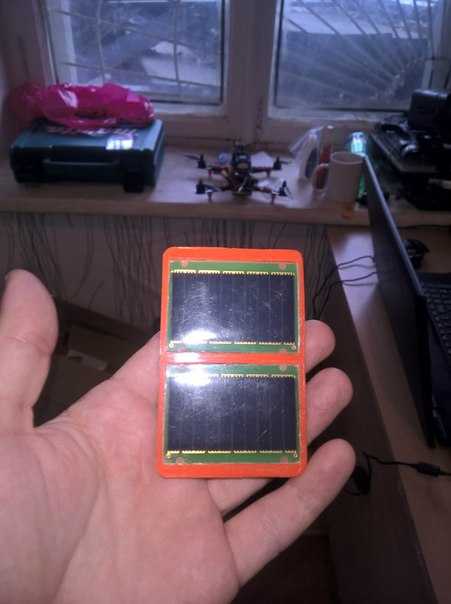
The frame for solar panels had to be done separately.
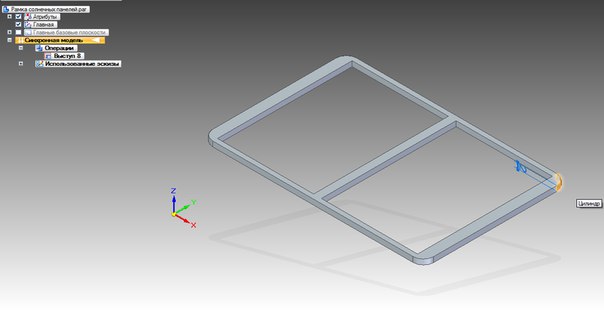
And I also had to make a separate front bar on which all the holes for usb, the switch, and the sim card are located.
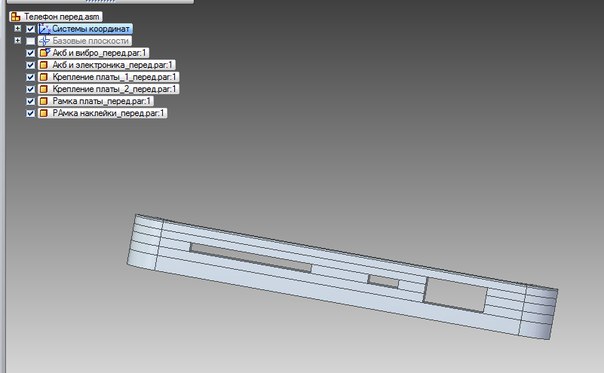
The whole structure is assembled from flat elements, and then assembled together into one common element. And sent to print.

It looks like the inside of the phone, after installing all the electronics.

After all the developments, about 4 units of cases were printed, which in the process had to be recycled and reassembled.
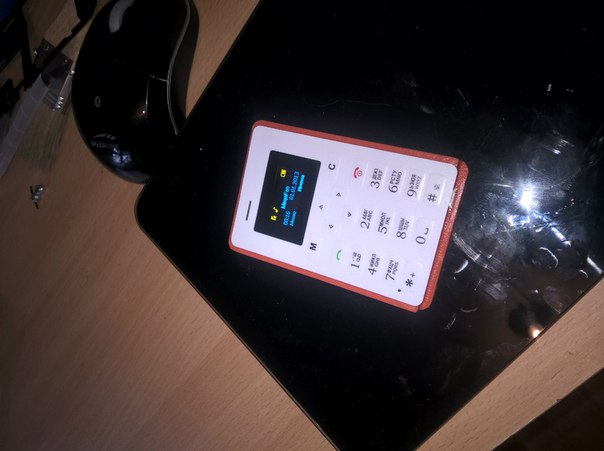
After all the adjustments and undercuts, this is how this apparatus turned out.

')
From the flaws:
1. Find a normal 3D printer and reprint everything again. This print quality is not good enough.
2. Transform charge electronics on one board, not two separate ones.
3. Solve the main problem of heating the case in the sun and heat insulation of acb.
By and large, a really working prototype was obtained, the goal was more or less fulfilled. Although I do not deny, not very optimal components were used, and not quite a logical charge scheme, but it is the most accessible in my conditions. I do not deny that this is a crazy idea to raise the pulse stabilizer to 5 volts and line up to 4.2 volts. But at least this scheme works and gives out about 50mA of charging current on a not very bright sunny day, unlike all Chinese solar charging, and a solar-powered reed bank. And in the bright sun the current can easily reach 80-90mA. What is already enough to charge the 400 mAh battery for half a day.
Thanks for attention.
Photos for comparison with what is on the market now.
In my first “scary” article, I already talked about my ideas about this phone. At that moment I had more questions than answers.
As a result, having acquired the missing equipment, I nevertheless assembled my first working prototype. Phone in one case with a solar charger.
Who cares welcome under the cat (a lot of photos ).
I will not duplicate the parameters from the old article, the components are used all the same, who will be interested in the link .
The most important task was to assemble a finished prototype, which is not a bundle of wires wrapped with electrical tape, but a more or less finished product. First of all, the body problem arose. Earlier in my prototype phone I used wood ( Nokia 105 wooden ). In this project, I wanted to make a plastic case. It was here that the first snag arose for me, since geographically I live in a small town, and we have a problem enough to find a 3D printer nearby, I had to buy it myself. And to order in a third-party company the body of the prototype is quite expensive. Why is it expensive? Immediately describe the essence of the problem.
Developing a prototype, I cannot immediately provide a ready-made drawing, I can simply be mistaken, and each mistake is a new remake of the case. Moreover, I do not have the talent to do everything right at once. Accordingly, I would have to re-order each case, which in the end would not be convenient and at the same time expensive.
In the end, I decided to purchase a 3D printer for myself, the choice was between China and Russia, I bowed to the Russian manufacturer, in the hope that they are geographically closer and I will get it from them quickly and accurately. Here, of course, there were also many pitfalls, as a result, with modifications and other alterations, I got a more or less working machine. (Honestly, in the end, I was inclined to what was worth buying in China ...)
Now, with all the equipment, we will start to make the phone :).
That's how it looked at the very beginning, in August 2015.
I needed to pack all the electronics and solar panels into the case. The task would seem to be primitive, but due to problems with the printer, solving it turned out to be a bit complicated.
By education I am a designer of machine-building production and from the very beginning of work in production I studied and worked in the Solid Edge program; this is quite a powerful complex for working with drawings. In it, I designed all the details of the case.
The case had to be divided into three parts, so that it eventually turned out at least somehow. In the case there are places for installing the battery and charge controller with an inverter. The bottom is completely flat, I could not get the printer to print out the entire body assembly.
The frame for solar panels had to be done separately.
And I also had to make a separate front bar on which all the holes for usb, the switch, and the sim card are located.
The whole structure is assembled from flat elements, and then assembled together into one common element. And sent to print.
It looks like the inside of the phone, after installing all the electronics.
After all the developments, about 4 units of cases were printed, which in the process had to be recycled and reassembled.
After all the adjustments and undercuts, this is how this apparatus turned out.
')
From the flaws:
1. Find a normal 3D printer and reprint everything again. This print quality is not good enough.
2. Transform charge electronics on one board, not two separate ones.
3. Solve the main problem of heating the case in the sun and heat insulation of acb.
By and large, a really working prototype was obtained, the goal was more or less fulfilled. Although I do not deny, not very optimal components were used, and not quite a logical charge scheme, but it is the most accessible in my conditions. I do not deny that this is a crazy idea to raise the pulse stabilizer to 5 volts and line up to 4.2 volts. But at least this scheme works and gives out about 50mA of charging current on a not very bright sunny day, unlike all Chinese solar charging, and a solar-powered reed bank. And in the bright sun the current can easily reach 80-90mA. What is already enough to charge the 400 mAh battery for half a day.
Thanks for attention.
Source: https://habr.com/ru/post/369207/
All Articles