How to make a robot (war turret)
Who is engaged in robotics, of course, wants to make a robot with his own hands. But not everyone, especially beginners, have enough knowledge to create a robot on their own. And the question immediately arises: how to make a robot, if you really want?
To create a robot, in addition to the idea, you need radio components of different complexity. Also, do not do without the chassis for the future of the robot and the various mechanical parts. Of course, everything will depend on the scope of your project. But without mechanics you can hardly do.
Perhaps someone prefers to use a ready-made designer to create various robots. For example, "Lego". This constructor has everything you need to create robots of varying complexity, but such a constructor is not cheap. Yes, and you will agree, it is much more pleasant to contemplate your creation, if it was made independently from “A” to “I”, from sketches on a sheet of paper to its full realization in the planned scales.
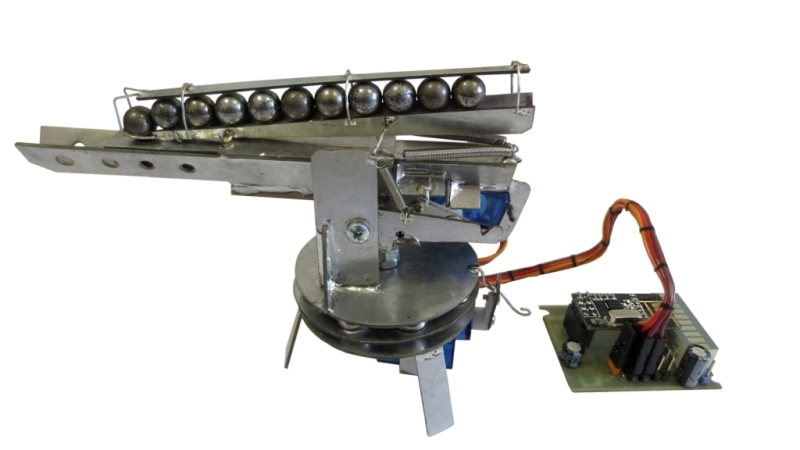
For such creative people who are not afraid to work with their own hands together with their child to make a robot, as well as for the children's radio circles, the “Turret” model was developed. Of course, this is not a robot, but on the basis of my project, you can create various fascinating robotic devices. Moreover, everything is made of budget materials.
Swivel Chassis Assembly
')

Rotary chassis for the turret is made of double-sided foil textolite, like most components for this homemade. This material is very light and easy to handle and has sufficient strength. Using metal shears, you can cut out any suitable part.
The circular rotation of the gun in this project is not required, since a small sector of shelling is needed. Accordingly, a budget SG90 servo came up for this task.
The chassis must hold the turret in place when fired and prevent it from rolling over, since when testing this model, the recoil of the gun from the shot was quite large.
For the swivel chassis, I applied a self-made thrust bearing. Thus, the chassis turned swiveling, and due to the weight of the metal balls was quite stable, although the turret does move slightly when fired. I even had to reduce a bit the power of the shot.
Assembling a gun or gun
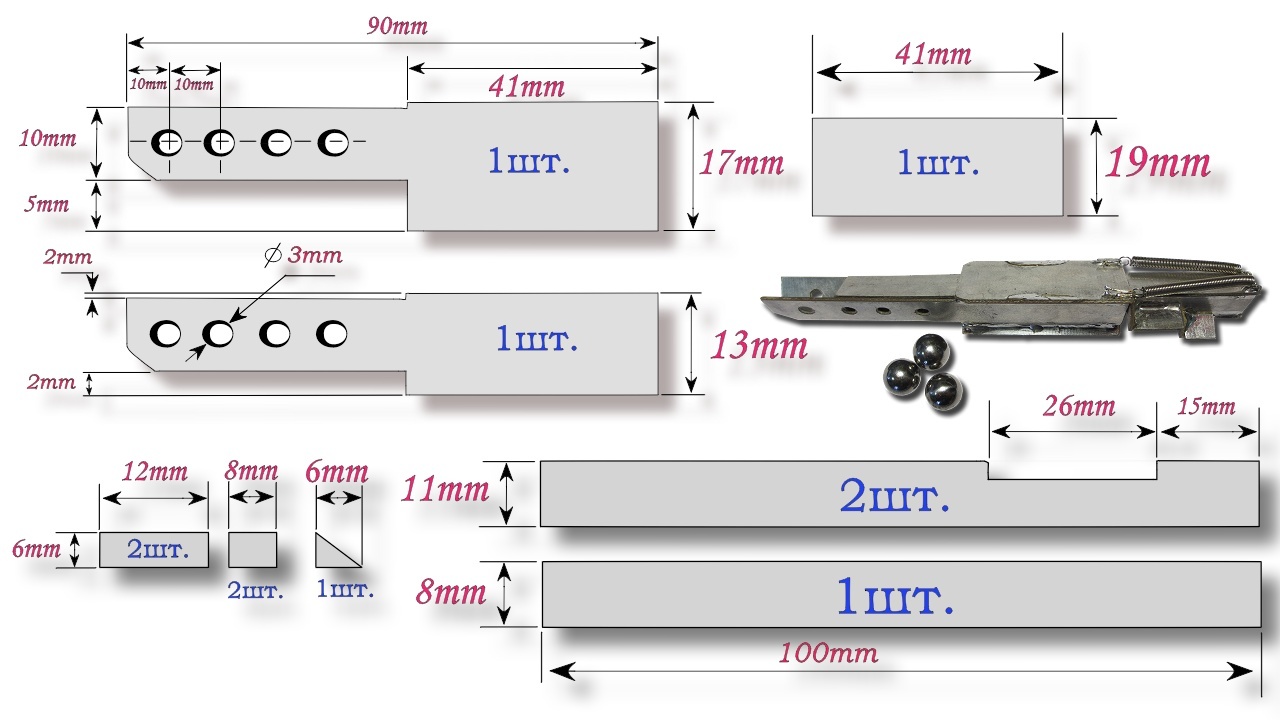
With a gun for the turret had to tinker. Of the numerous tested design options, I chose this option (Fig. 1). In this design it was easy to load metal balls with a diameter of 8 mm into the barrel, since the design of the gun was very strong. So that the ball did not roll down the trunk and its position was clearly fixed, through holes were made in the trunk.
Installation of the gun on the swivel chassis and the mechanism for cocking and lowering the gun
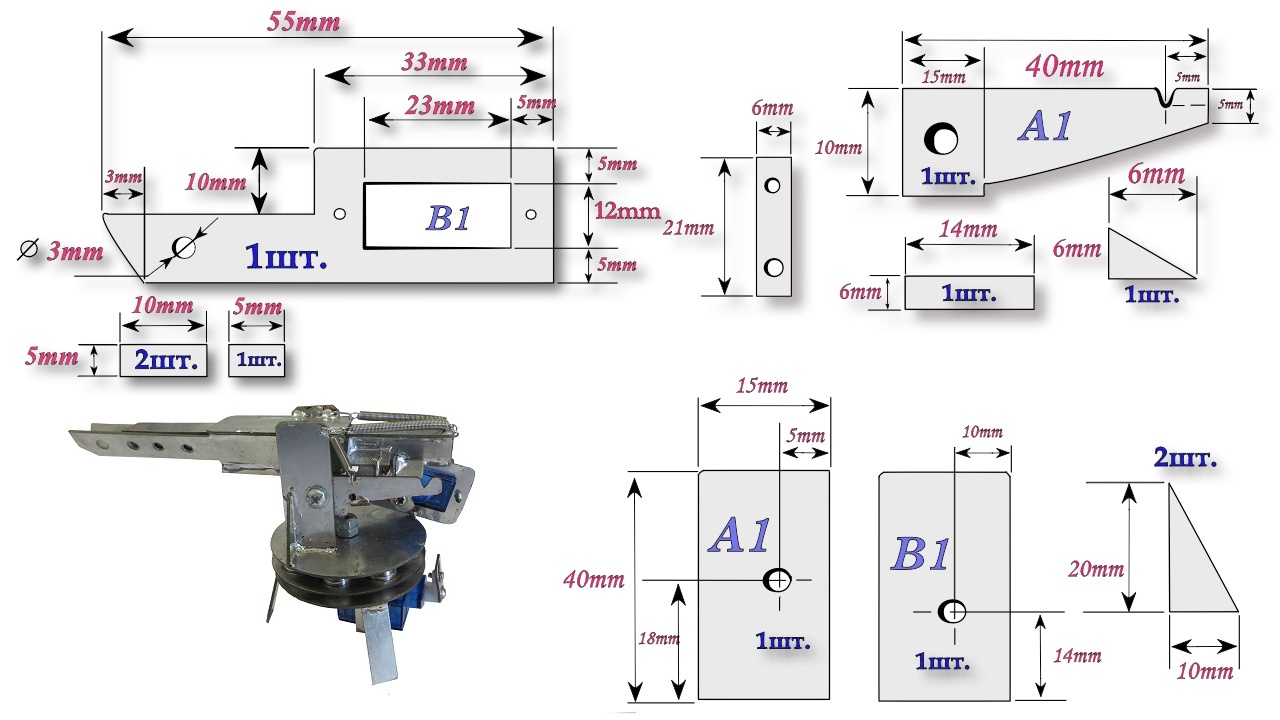
Having installed a gun on the rotary chassis, I began the process of assembling the cocking mechanism. The SG90 servo helped me accomplish this goal. Servo effort is enough to tension the springs. As soon as the strike part was in position, the latch worked, which kept the barrel in the cocked state. In this position, the servo servo lever, located at the bottom of the barrel, simply prevented the shot from firing.
To implement the shot, I applied a simple and reliable method. As soon as the latch has fixed the barrel (Fig. 1), the servo should return to its original state. At a certain point in his path, the servo actuated the trigger and simultaneously dropped the latch holding the impact part. At the same time a shot was made.
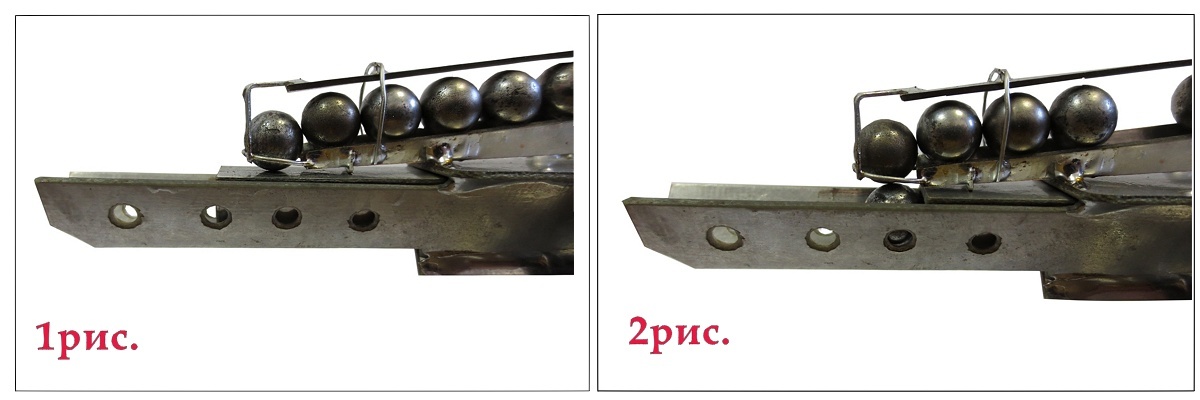
The store is designed for 12 metal balls, taken from the bearing, although you can easily shoot large beads. To simplify the supply of balls in the barrel, I placed the store at a slight angle. The loading of the barrel with balls was carried out under its own weight, they simply rolled down to where they were needed. The initial position of the hammer blocks the flow of metal balls (Fig. 1). As soon as the drummer leaves, the upper ball falls.
But there was a problem: when falling, the metal ball began to roll. To solve it, I made the side holes in the trunk. They hold the position of the ball, preventing it from moving (Fig. 2).
Used electronics
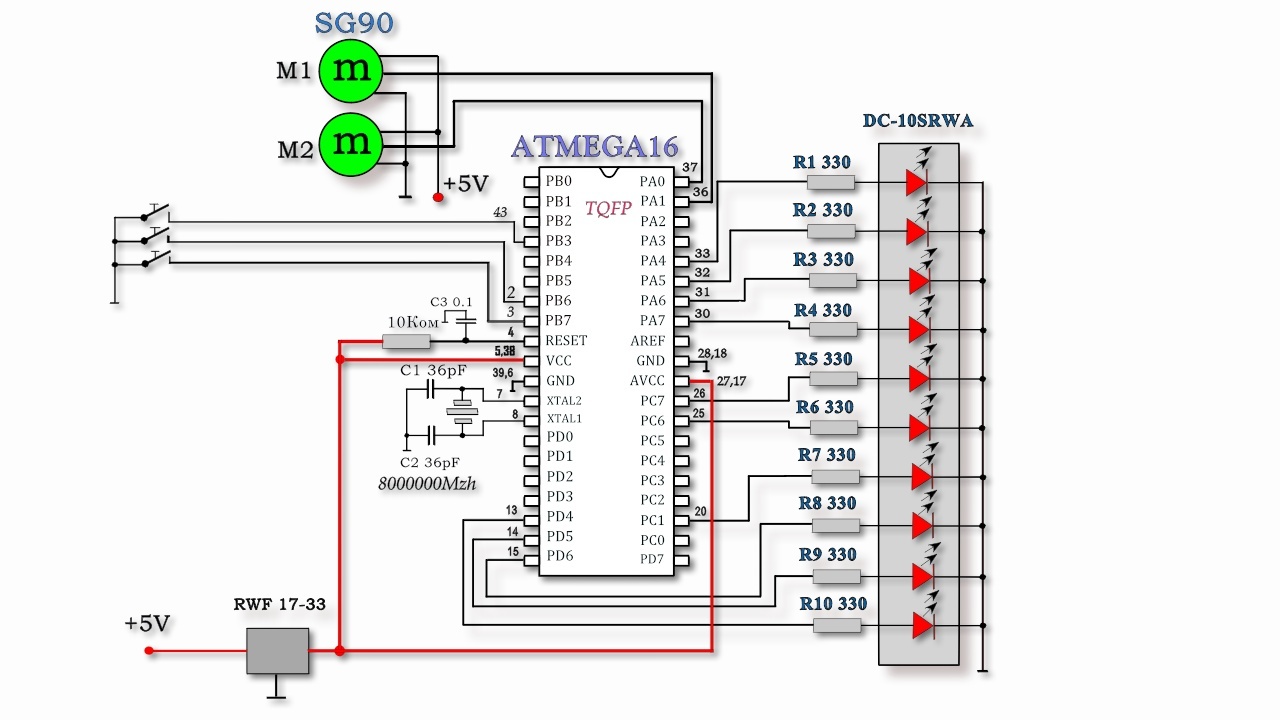
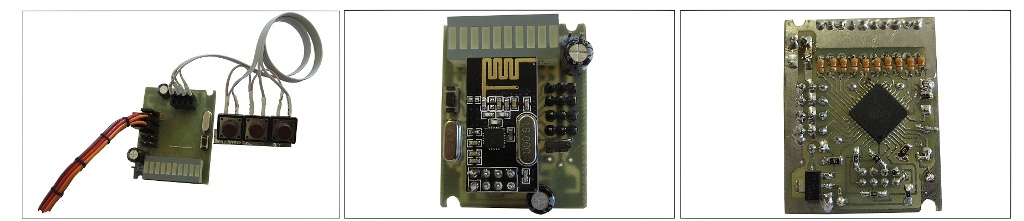
For the radio control of the robotic turret, I applied a board developed earlier for the project " Siege Catapult "
Considering that it is unlikely that someone will repeat the radio joystick that I made, since it is quite complicated, I imagine the variant is much simpler to be performed, although I left the wiring on the printed circuit board under the radio module.
As you can see from the circuit diagram, the joystick is quite simple and consists of three clock buttons connected to the microcontroller. Two clock buttons rotate the turret to the right or left. The remaining clock button gives the shot command. Those who have certain knowledge in microcontroller programming can write their own version of the program for the microcontroller.
For example, by equipping a device with a distance sensor, you can realize an automatic fire as soon as an object is detected at a specified distance. Since I designed this home-made product as a basic model for a children's radio circle, the configuration and complexity of the product can also change accordingly.
Buy servos
How to make a robot - Scheme, firmware, dimensions
Source: https://habr.com/ru/post/369205/
All Articles