3D Printer Assembly Kit Overview
Last time I was banned for links in the material and the article went into drafts, so I reincarnate it in the corporate blog DronkRU, because the material is in principle useful and causes a lot of interest.
About six months ago I bought myself a 3D printer. Since then, I have been watching how inexpensive Chinese solutions like my designer are gaining in popularity. And I think this is right, with proper skill and little skill, such designers can give odds to eminent brands, which are several times more expensive and sometimes even orders of magnitude.
In this publication, I would like to introduce Geektimes readers with such designers and show that there is nothing to fear. And in a disassembled form, getting a printer is even more pleasant, since during its assembly you can spend time very interesting + get an initial idea of how and what works.
')
Briefly about the printer - you can take after the assembly immediately prints, for those who want to know the details, please under the cat.
Carefully a lot of pictures.
I have long followed the development of household 3D-printers, and already when their price dropped to $ 1,000 (at a price of 30 per dollar), I began to observe the pricing policy even more closely. The price began to fall about a couple of years ago, or rather, it has been decreasing for a long time, but a couple of years ago, options for prices began to appear more and more interesting. And last year (in 2015), the prices reached their perigee. The Chinese kits entered the market en masse, and not only from construction studs and not understand anything, but quite with tolerable components.
I came across this set from Sunhokey right there on the giktimes in the comments to the post about the 3D-printer. From that moment I began to follow the price. Then one day the price dropped immediately to $ 15, the rate at that time was not the same as now, and I decided to order it quickly. The price at that time was 275 bucks.
Well, as usual with me. I learned the question, the printer is OK, but the delivery is not clear. In the comments to the order they wrote that someone had arrived almost in a couple of weeks. Positive feedback at the time of the order was slightly less than 300.
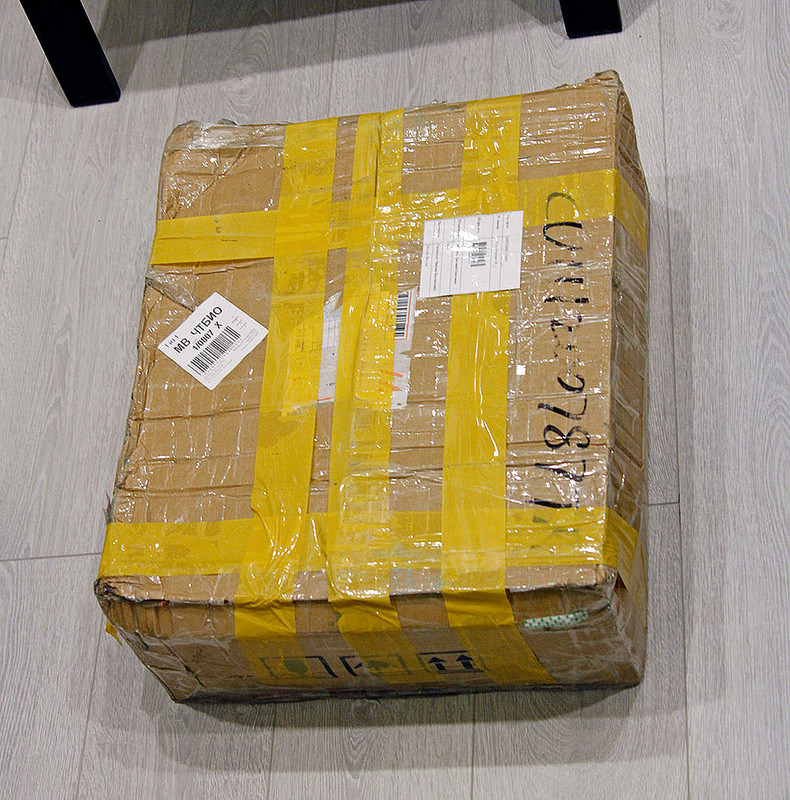
As it turned out later, the order went on delivery in a sly way. This is partly a plus, since I didn’t intersect with customs at all, or rather not me, but the package. The downside is the delivery time. Apparently, the package went by truck from Shenzhen to the border with Russia, where she somehow crossed the border, perhaps even on load mules (judging by the appearance of the package) and reaching Omsk, was sent already through the PEC from a private person with a Russian surname , again by truck. Wow ... For almost a month I was waiting for the track update when the Chinese track changes to the Russian one. And now, 24 days after payment, I receive an SMS from the PEC, that the goods left me and will arrive in another 20 days.
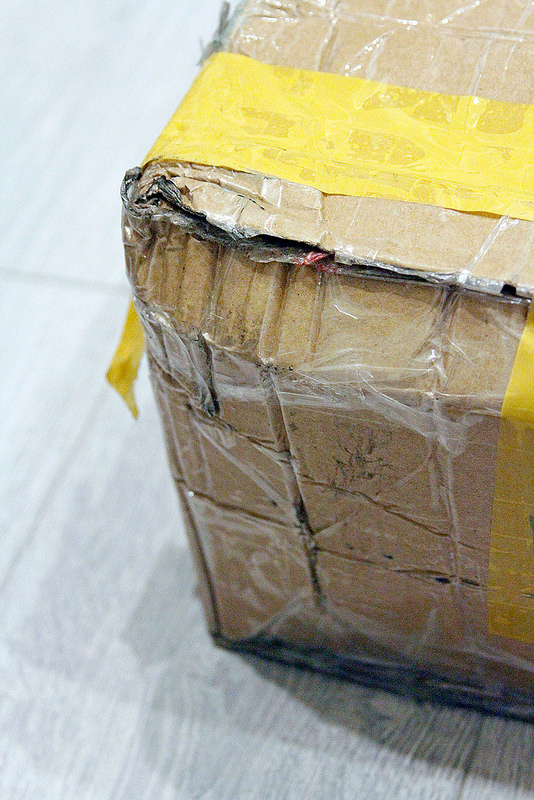
After all the time and almost 2 months of waiting, we went to pick up the package on our family beetle.
As I noted above, the package seemed to have been kicked from China itself. For which I was very worried, because inside the acrylic frame and various shafts, which, if bent, do not see quality printing. By that time I had already read that some customers received parcels with broken acrylic parts. To the credit of the seller, such shoals were quickly settled and spare parts were sent free of charge.
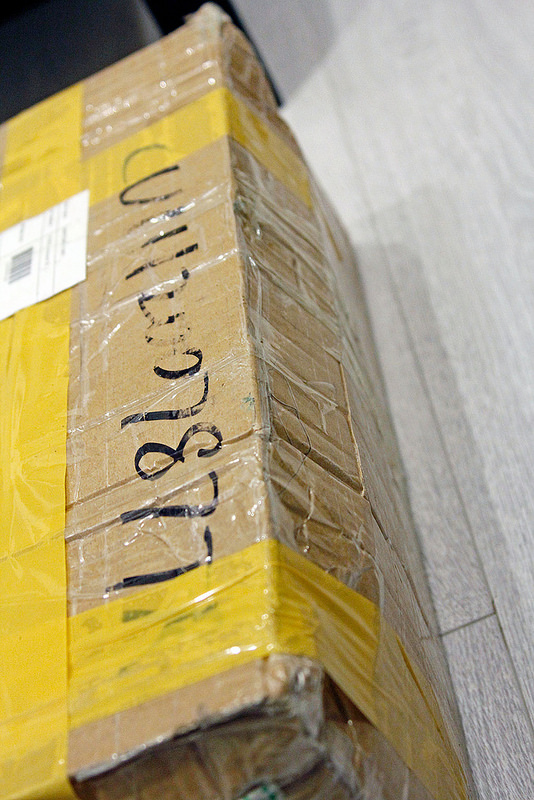
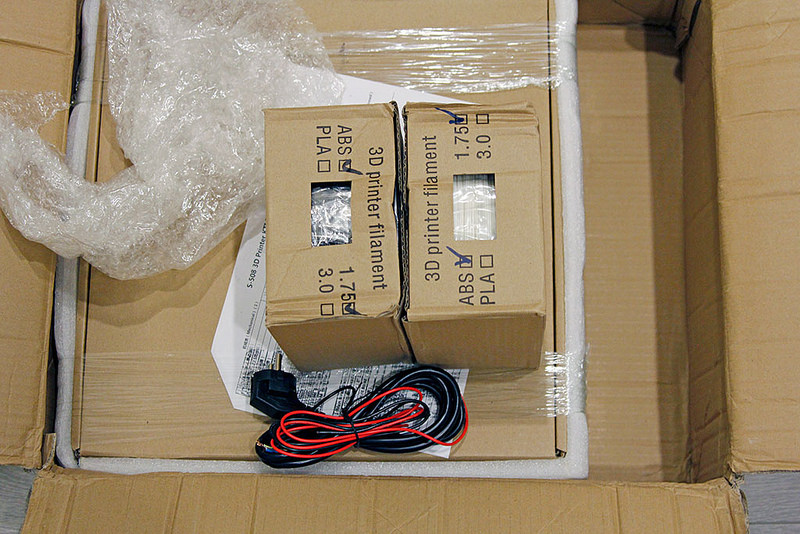
In my package was "all the way", well, almost. Affected 2 plastic coil. One cracked the rim in two places, the other has the base split in half. It seems that such shoals could also be replaced, but I did not press on the seller, but simply glued one coil with cyanocrylate and strengthened the other with adhesive tape, passing several tapes through the central hole.
Here in this photo you can see that the plastic lay without any protection at all, which is why it suffered.
In general, everything was cool with the packaging. The first batches were sent in foam plastic. I can imagine what a nightmare it was when you take such a sandwich out of the box. I had experience with similar packages (glass Chinese table).
Concerns about acrylic are not confirmed. Polypropylene foam worked at 100%.
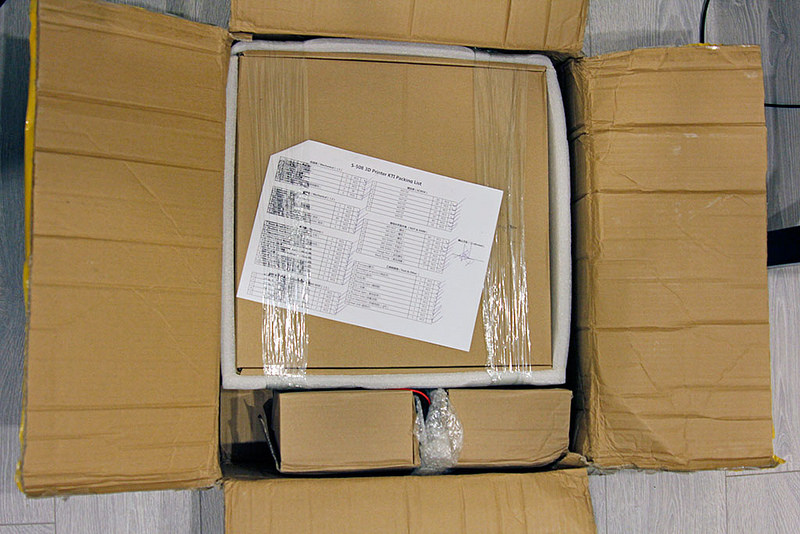
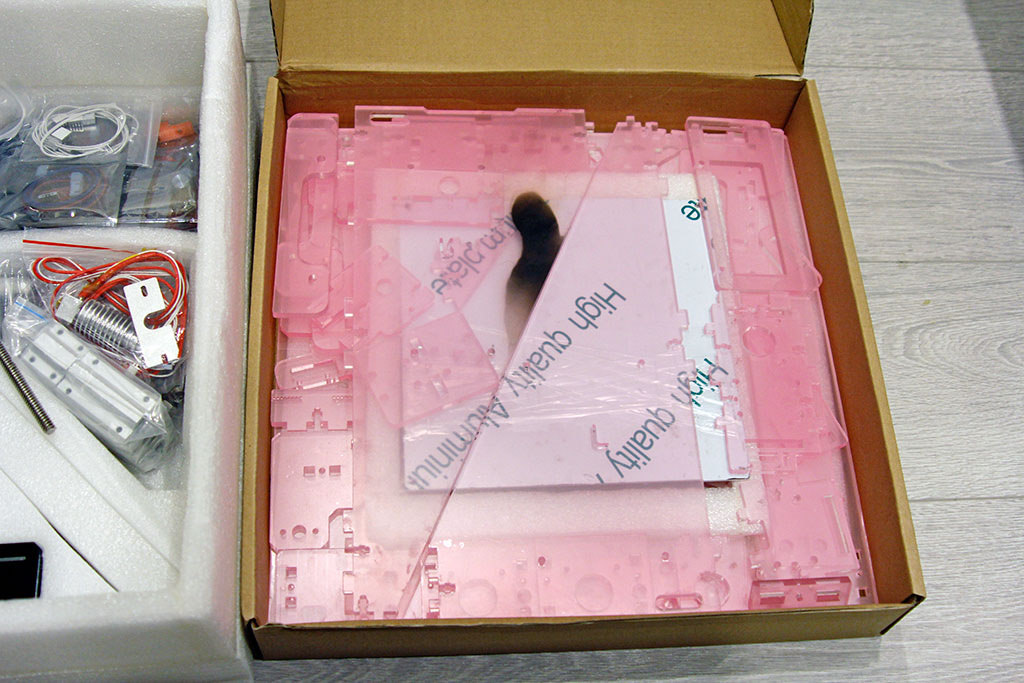
All acrylic is also in the protective film was. On the one hand, transparent, on the other pink, I suspect this is a chip specifically for laser cutting. By the way, since the acrylic is cut by a laser, there is some tension on the edge. That is the strength of Luke. Therefore, in no case do not try to wipe the frame with alcohol or something similar, otherwise it will be covered with micro cracks.
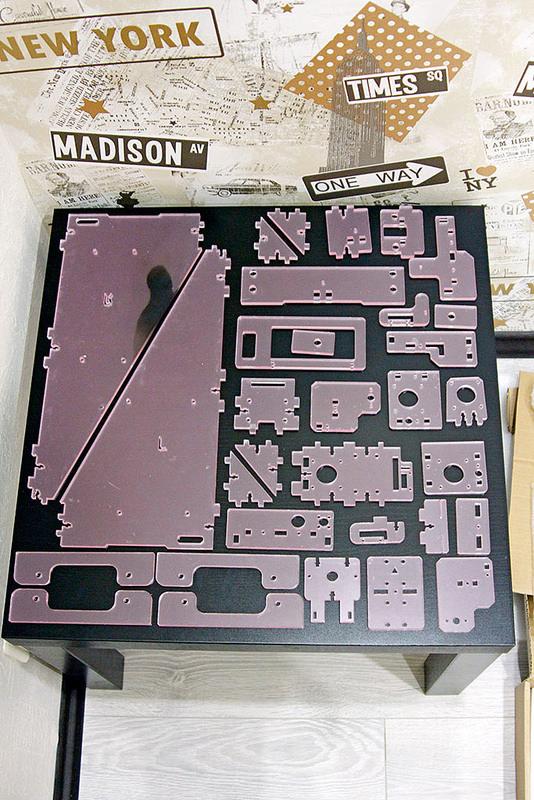
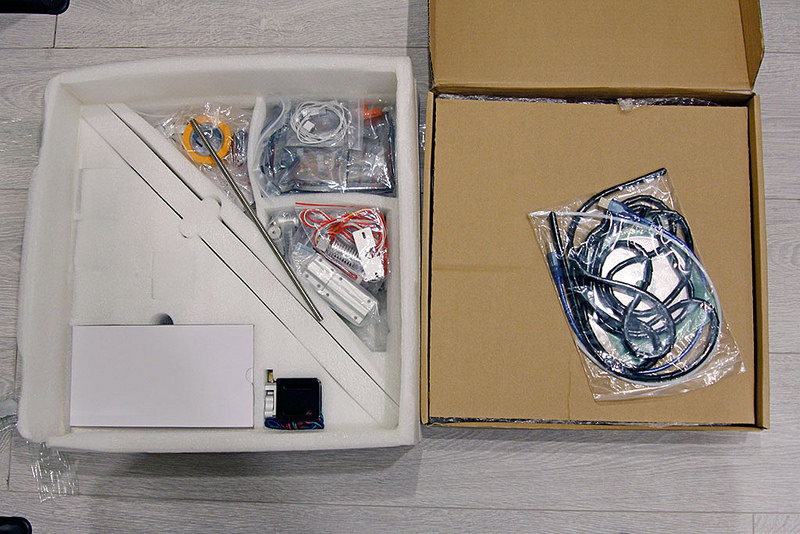
Here are all the details. What where, at first glance, figs understand. Anarchy!
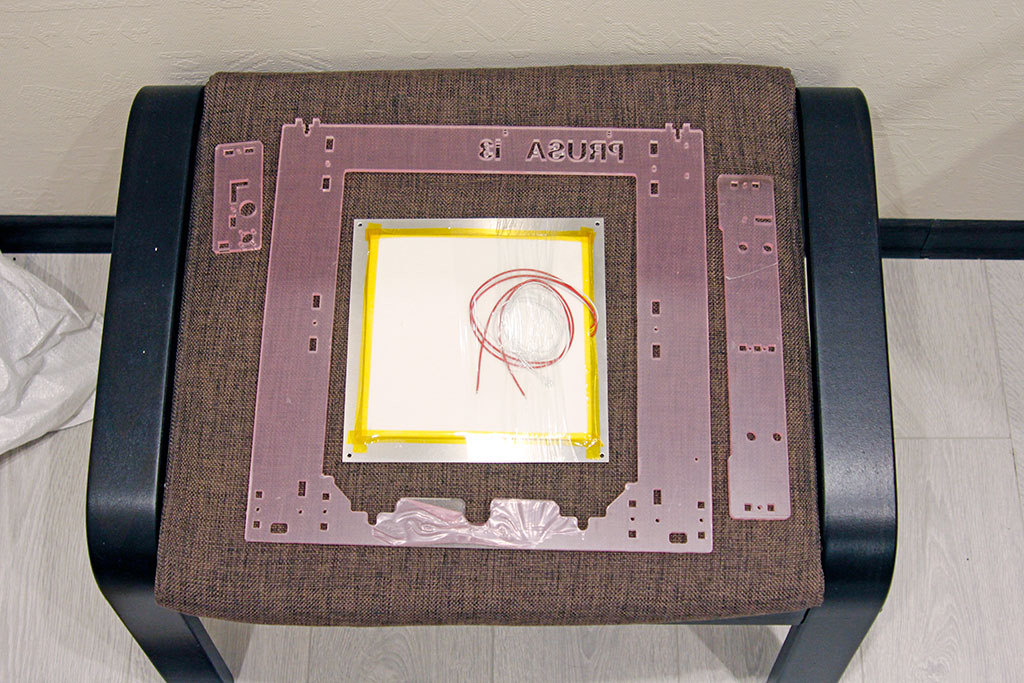
And this is the main largest part of the frame plus a heated table. But, by the way, a heated table is a big plus, you can already print ABS and other materials with high shrinkage.

The basis of the table. It is also acrylic. For six months of the flight, everything is fine with her, not broken. But still, I would not really trust her. If possible, it is generally better to replace the entire frame with a steel one (the price of the solution is approximately 4000 rubles + time for disassembly / assembly).

Well, everything. Enough to consider this disgrace, it's time for this chaos to get a finished look and show the miracle of the car to the world.

To collect everything is easy. Just repeat after the silent Chinese video of all the actions. Instructions for assembling + the necessary programs and pictures with the settings were attached to the disk by caring Chinese friends. Yes, sometimes sellers with aliexpress also provide good service.
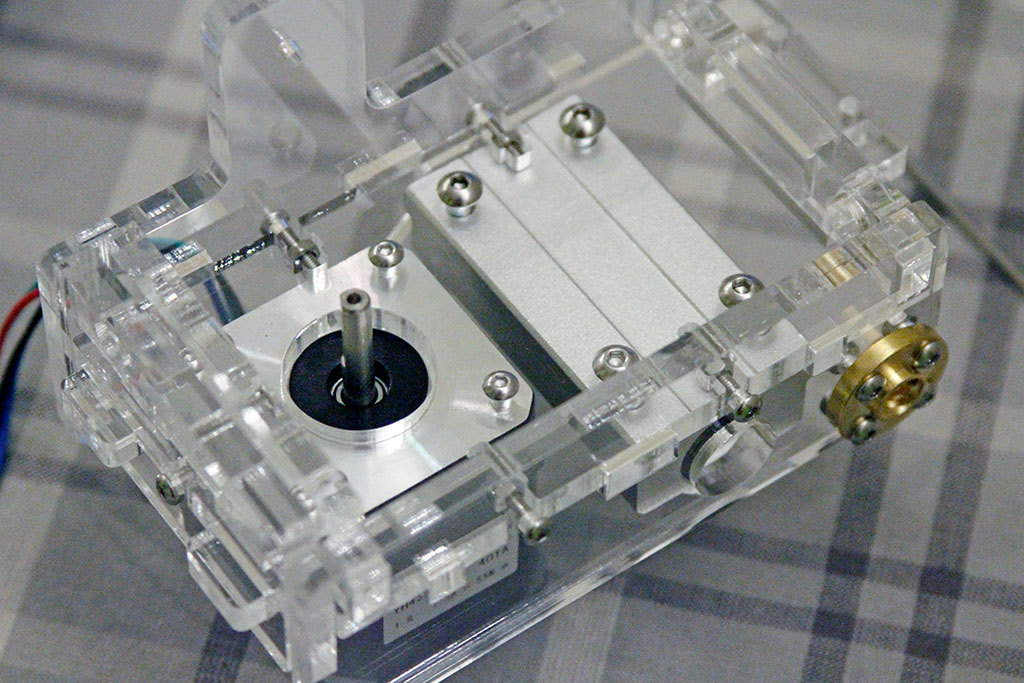
Components here are not bad. Here is a part of the carriage moving along the Z axis. Here are the normal NEMA17 stepper motors, and not the trimmed versions and the LM8LUU long bearing by 8mm and even the brass nut of the trapezoidal screw is also 8 mm. In general, with a price in rubles of about 17,000, it is surprising what the seller earned. And by the time the dollar went up, the Chinese also dropped the price and in rubles the printer still costs about 17 sput.

The second part of the carriage. Here you can see that there is a belt tensioner, and this solution is not used everywhere. Even the cheap, inexpensive Wanhao Duplicator i3 uses springs from clothes pegs as tensioners.
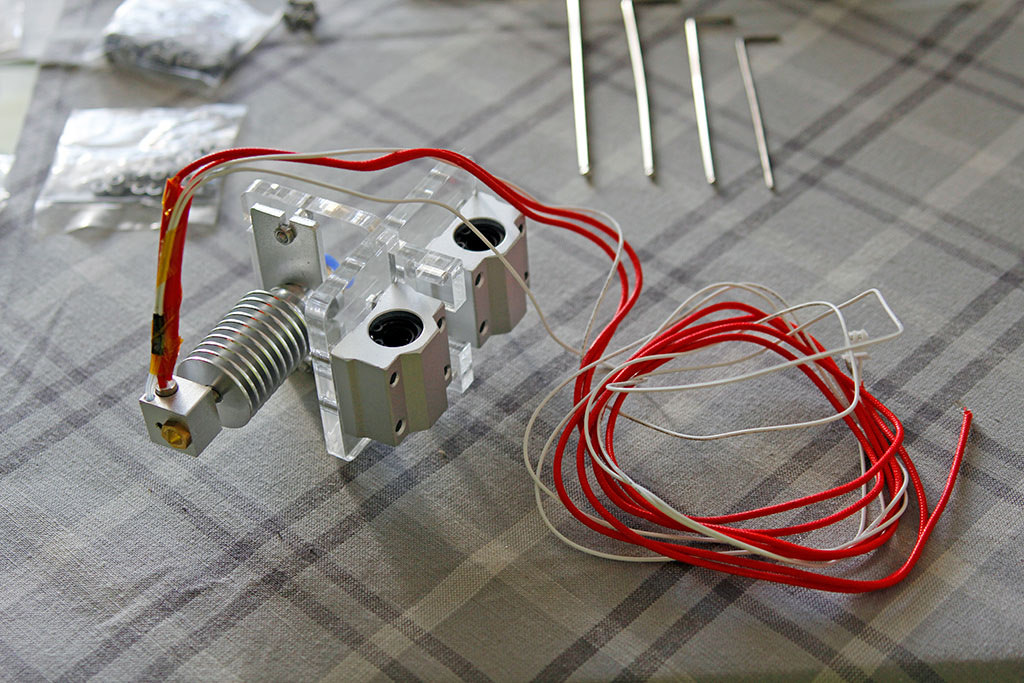
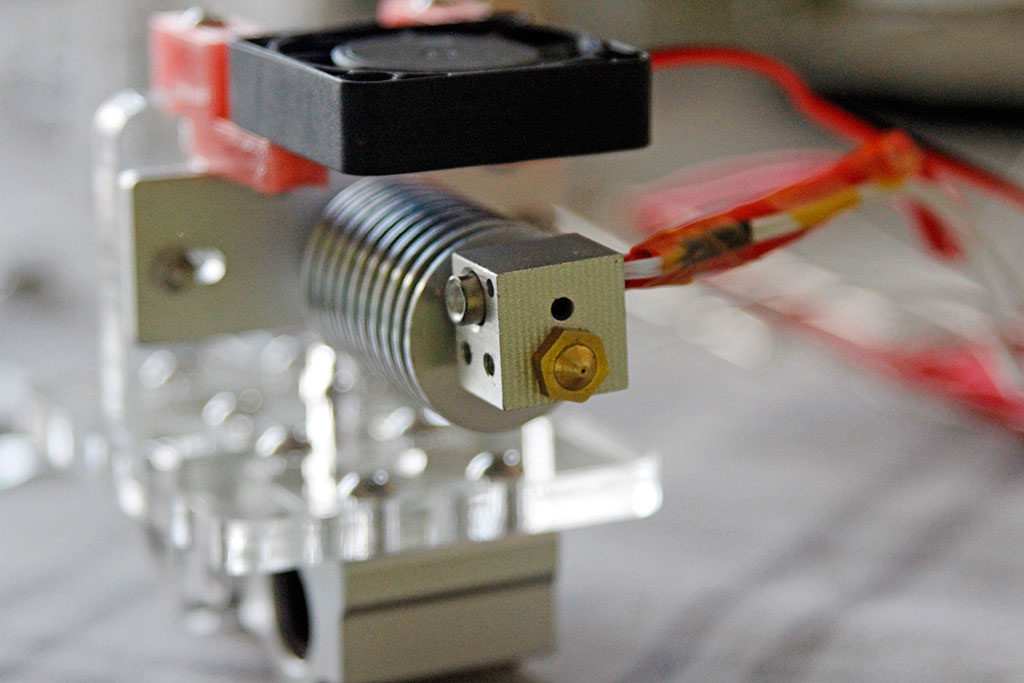
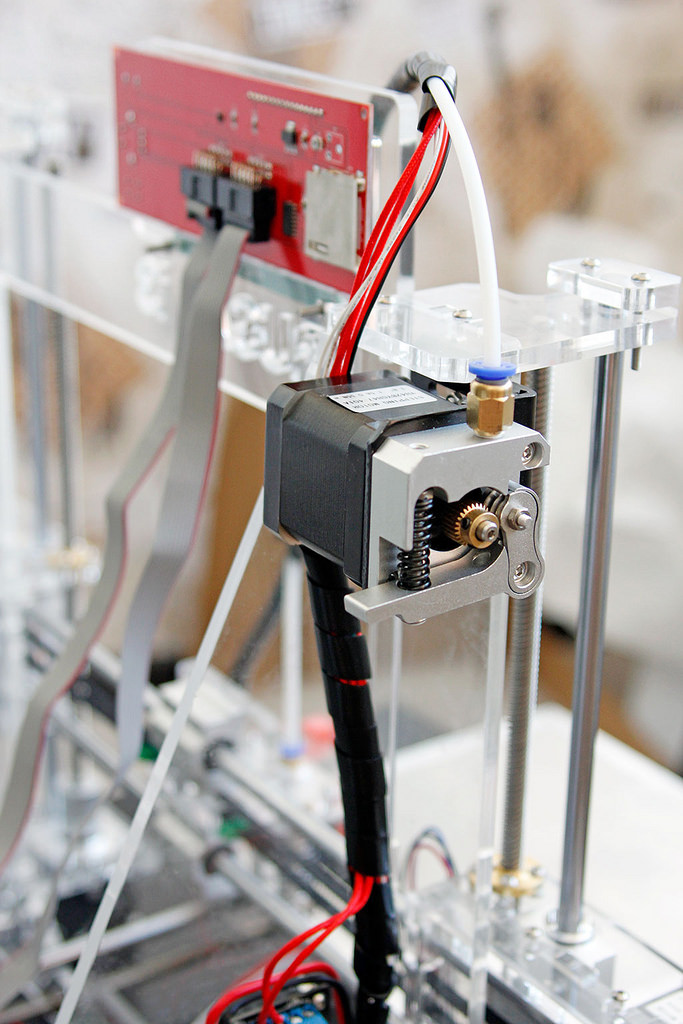
And this is the most interesting part of the printer heating element with a carriage of the X axis. The clone from E3D v5 is installed here. I can’t say anything bad about Chinese E3D clones. How many have tried them, always everything is OK. That's just v5, I do not like something and almost immediately I replaced it with a more compact V6, which I advise you.
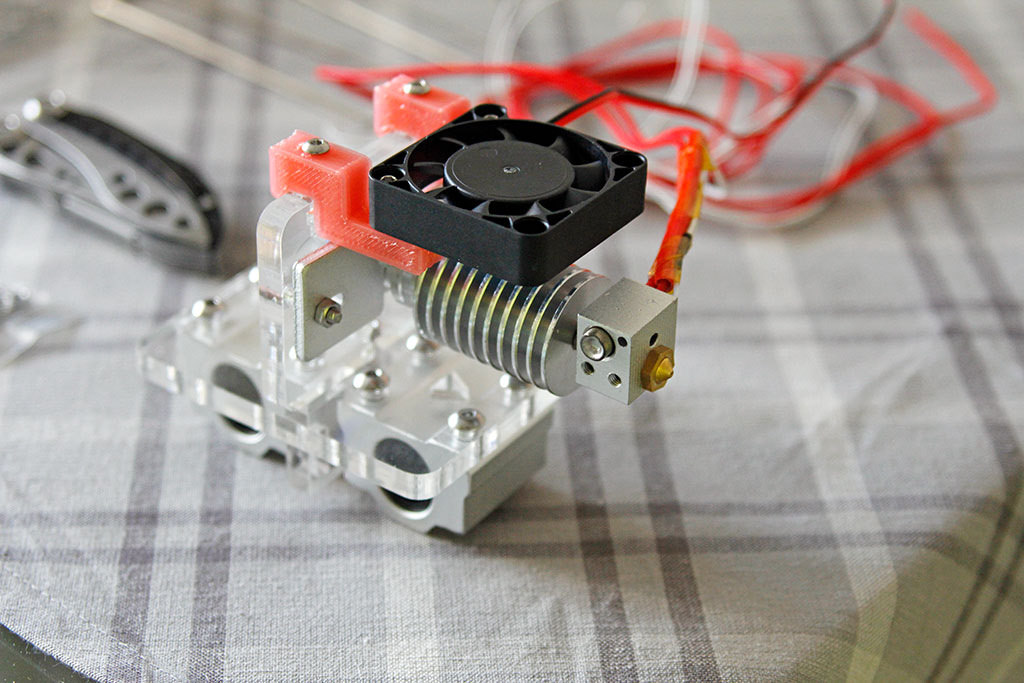
It seemed to be a very simple thing, but what can be done with its help ... There is nothing complicated about it. There is a 40W ceramic heater, a thermistor for temperature control, an aluminum cube for heat transfer to the nozzle and a steel thermal barrier enclosed in the aluminum radiator so that heating does not go above the nozzle.
In general, I repeat once again, you change this v5 to v6, you can all-metal, and you will not know the problems. The main airflow is better and another secret. I'll tell you about it later.

These are the motors of the Z axis. Here they are immediately a couple and each on a separate driver. I would honestly do it on one driver, and let out the one who was free would go to the second nozzle. Already dealing with this issue, waiting for the missing parts ...
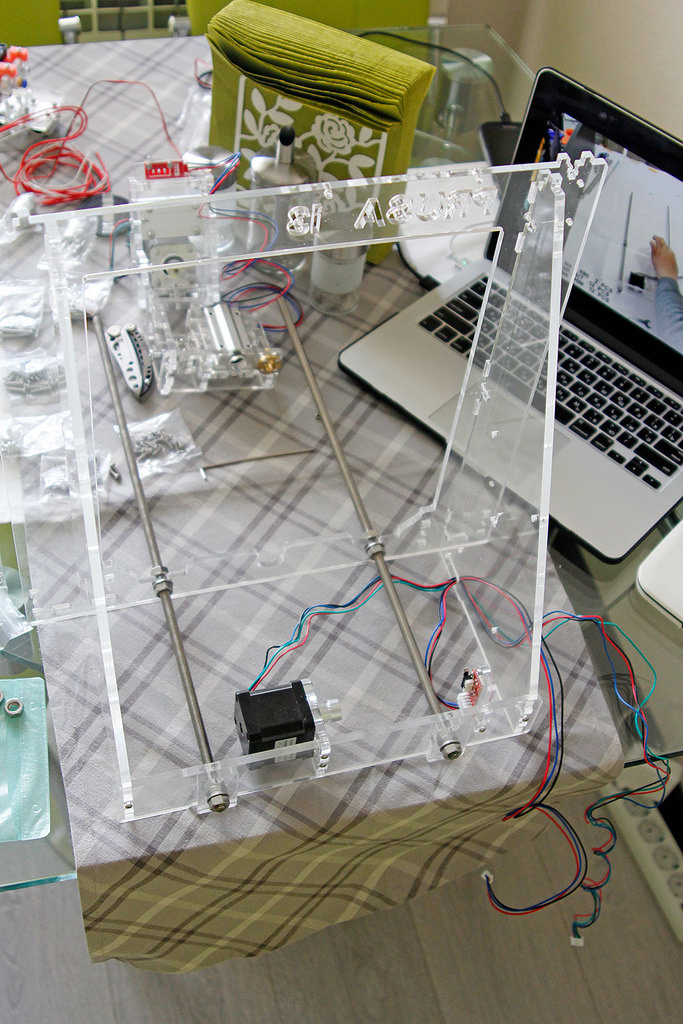
Putting the base of the table.
Another detail with a belt tensioner. Now for the axis on which the table goes, Y means it turns out.
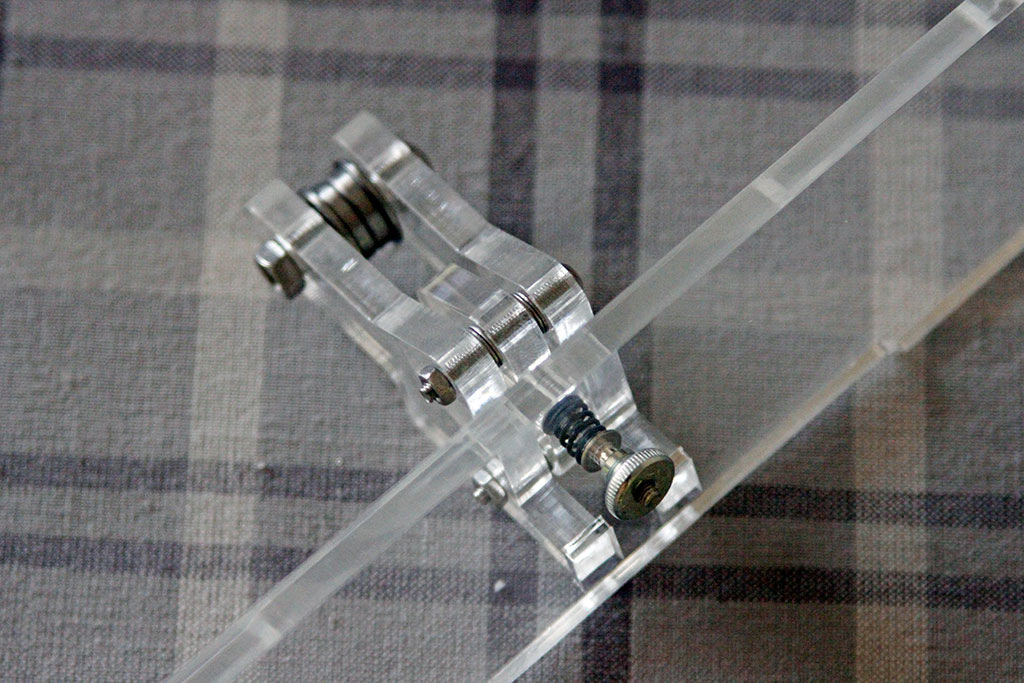
An elegant solution, I believe.
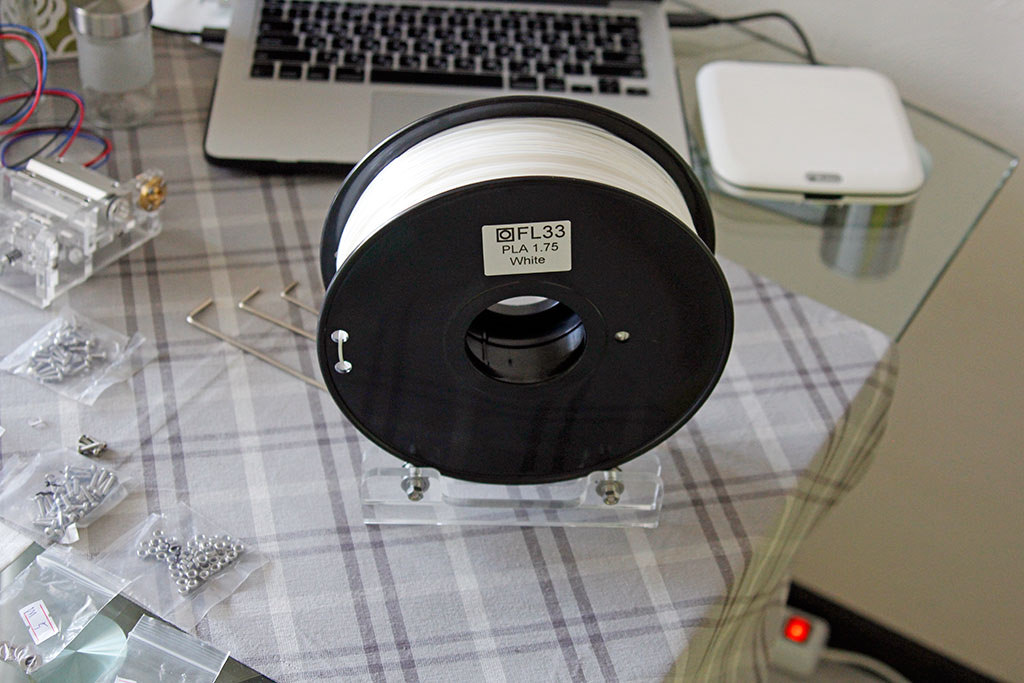
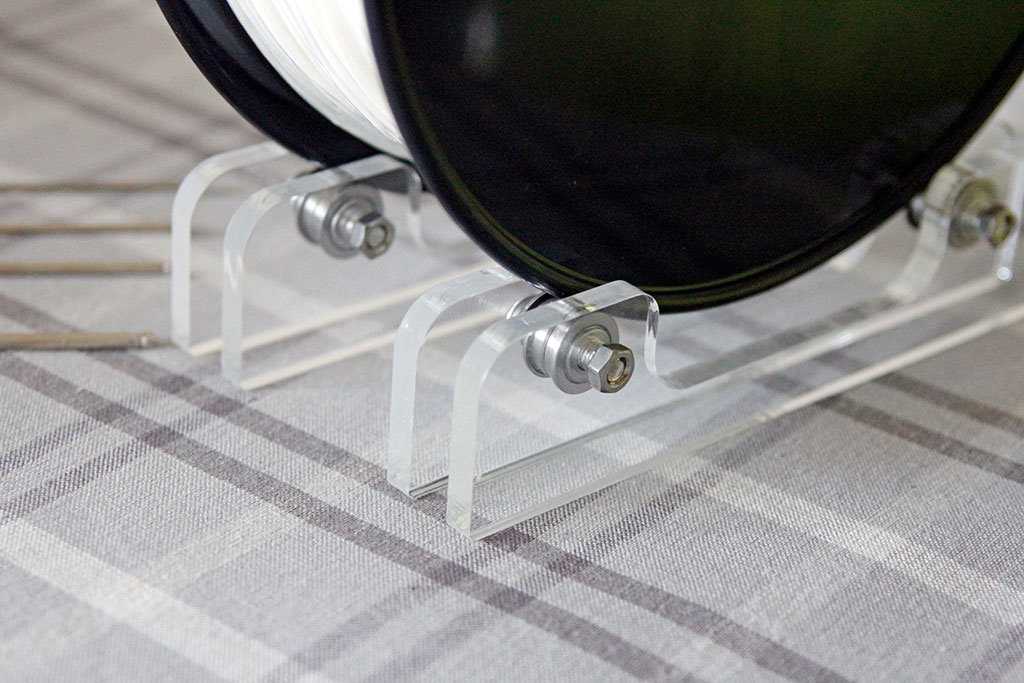
Putting up the coil stand. On the one hand, this support is compact and convenient, on the other hand it is not very. Remember, I wrote that the side of one coil broke off? So if it were not possible to glue it, then such a holder would not be used. In the photo is a sample of PLA plastic from FL-33. Good plastic, but I won it not immediately. In the beginning, he completely hammered the nozzle. What about next time.
Here you can see that the bearings are used with a side.
Go to the larger details.
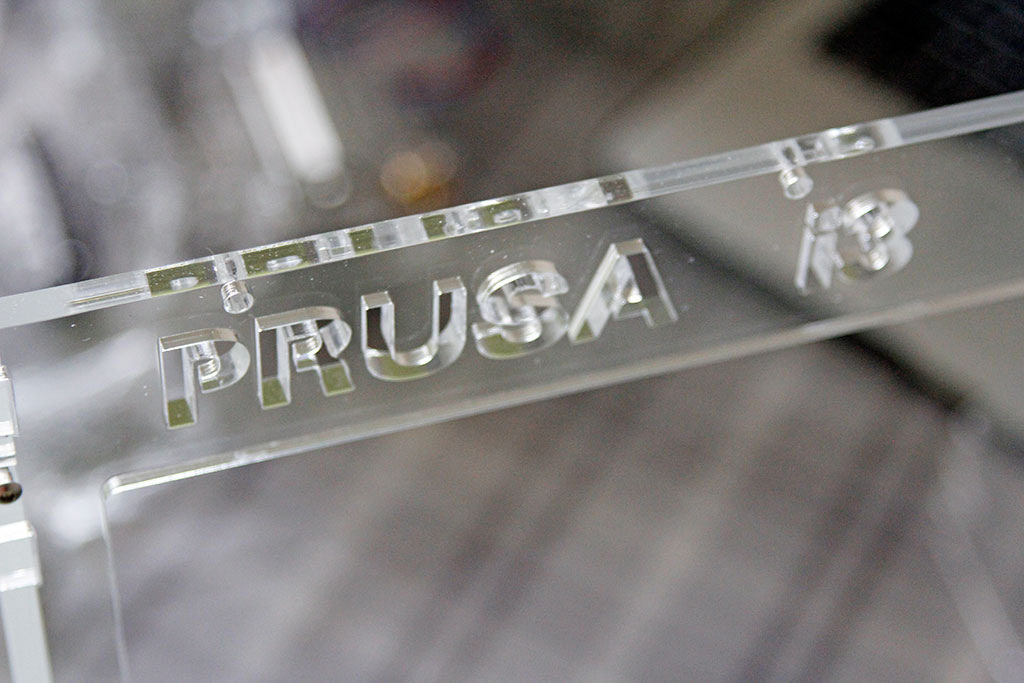
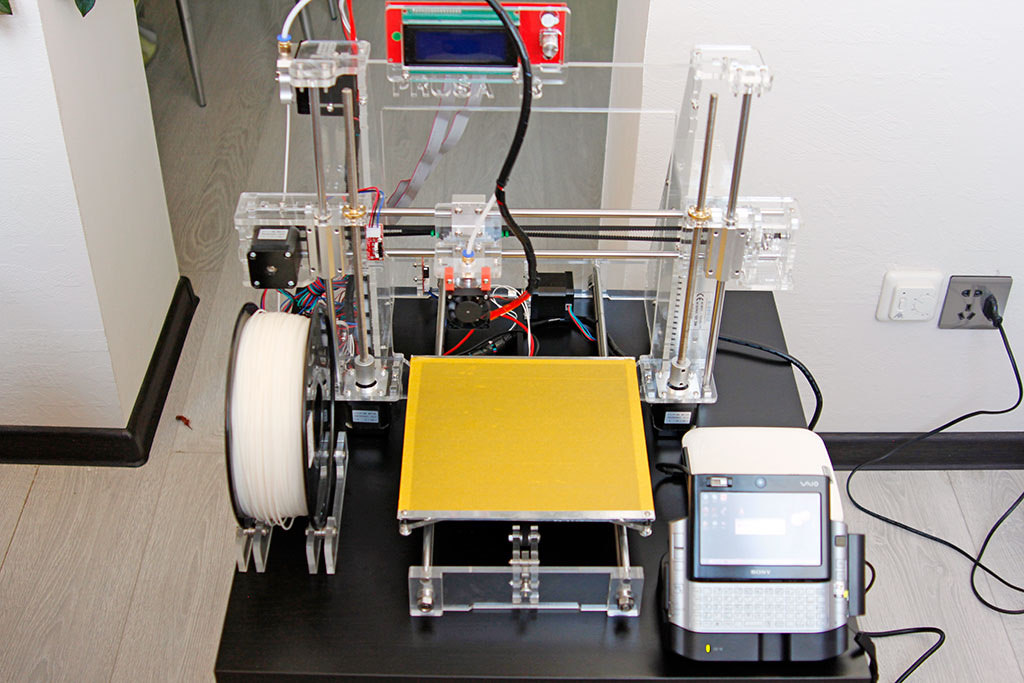
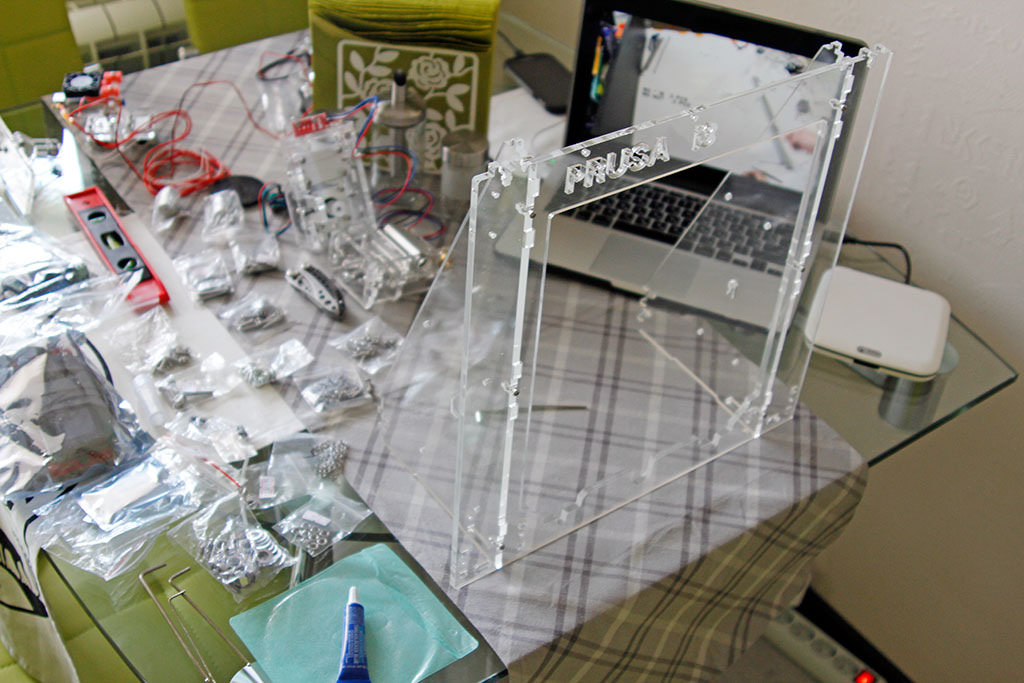
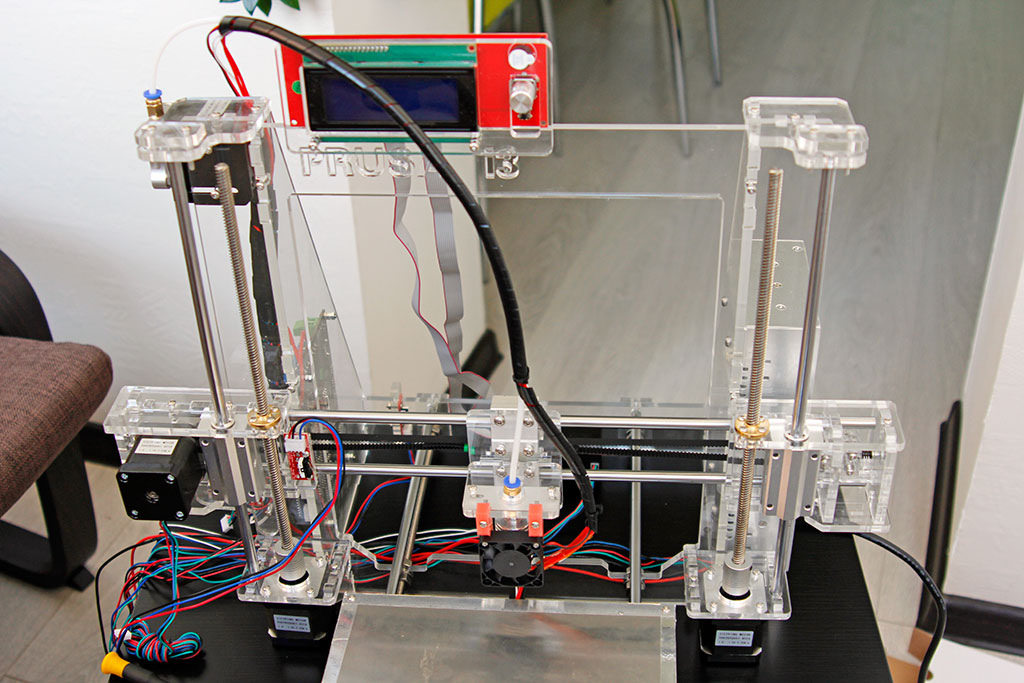
The proud name is Prusa i3.
Studs are still used here, but not simple galvanized, but normal stainless.
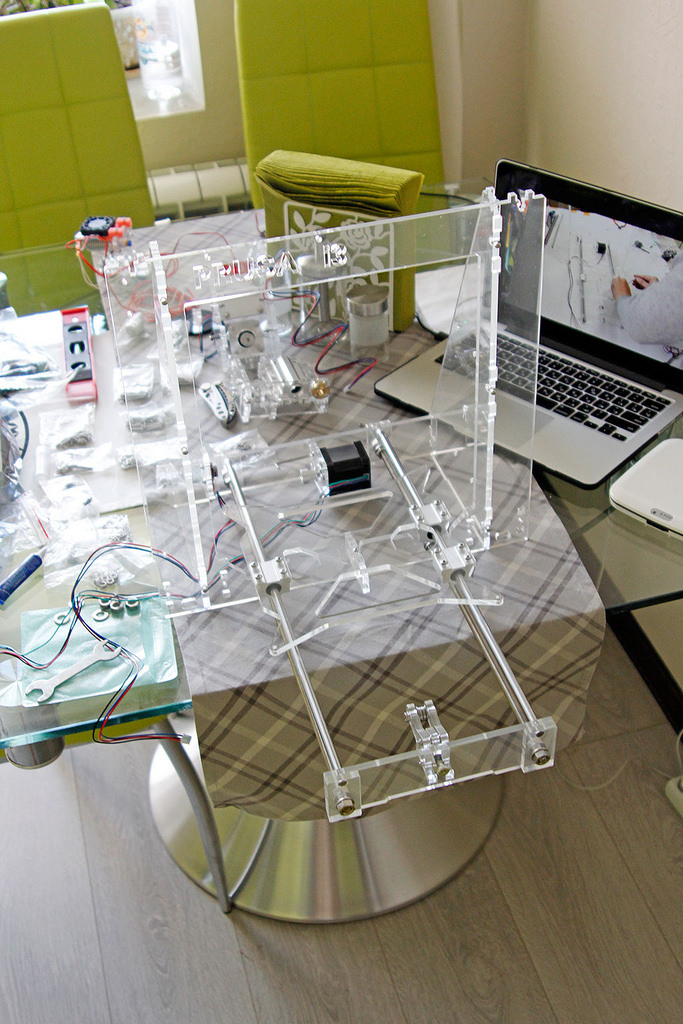
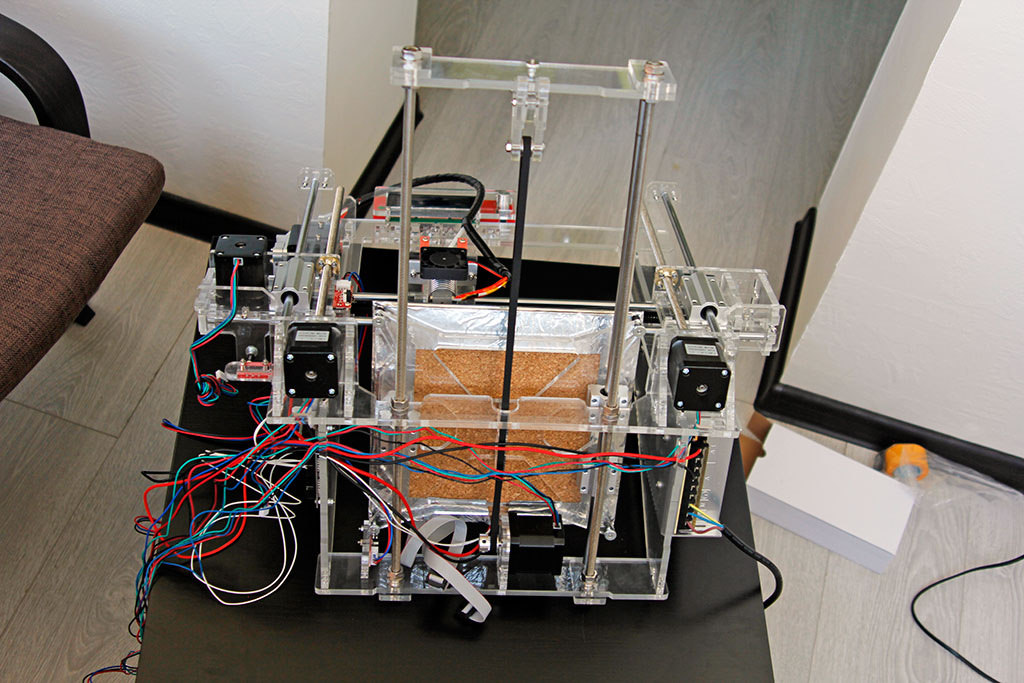
Gradually vundervaflya acquires a finished look.
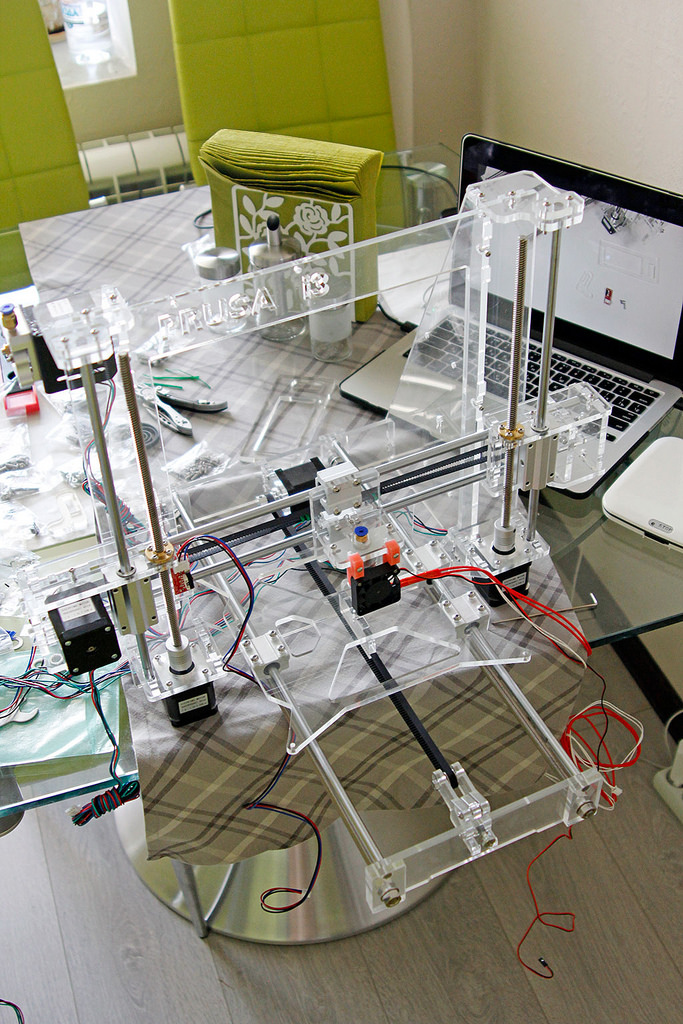
The X axis is already in place.
Table. And here I was prepared immediately. Wires at the table is better to replace the thicker. And for this you need to separate the thermal insulator holding on the Kapton adhesive tape and solder them.
No sooner said than done. At the same time and we will enclose a heat insulator better. I used a stopper from a bath mat, bought in a carousel of rubles for 60 or 80. If you did a recent repair, you will find a better insulating material. Ideal thermal insulator for underfloor heating, it may already be with adhesive base, so it will be more convenient to mount this.
Time.
Two. Is done. Aluminum tape also came in handy.

Half done. Yes, yes, only half. At this point, the assembly took about 6 hours, probably, maybe a little more. There was a break to sleep :)

We turn to the electronic electrical part. The MKS GEN v1.1 board is installed here. In principle, this is the same arduin with RAMPS, only higher quality. Plus, the fact that everything is properly diluted and there are connectors on the driver. The drivers here are removable, and not soldered like on MELZI another board often used in inexpensive 3D printers.
There is an extruder of the type Bouden with all its disadvantages and advantages. What does it mean? This means that the head is light and will not give inertial waves when the direction of movement changes abruptly, but it is better not to fill the soft materials here. FLEX just will not work.
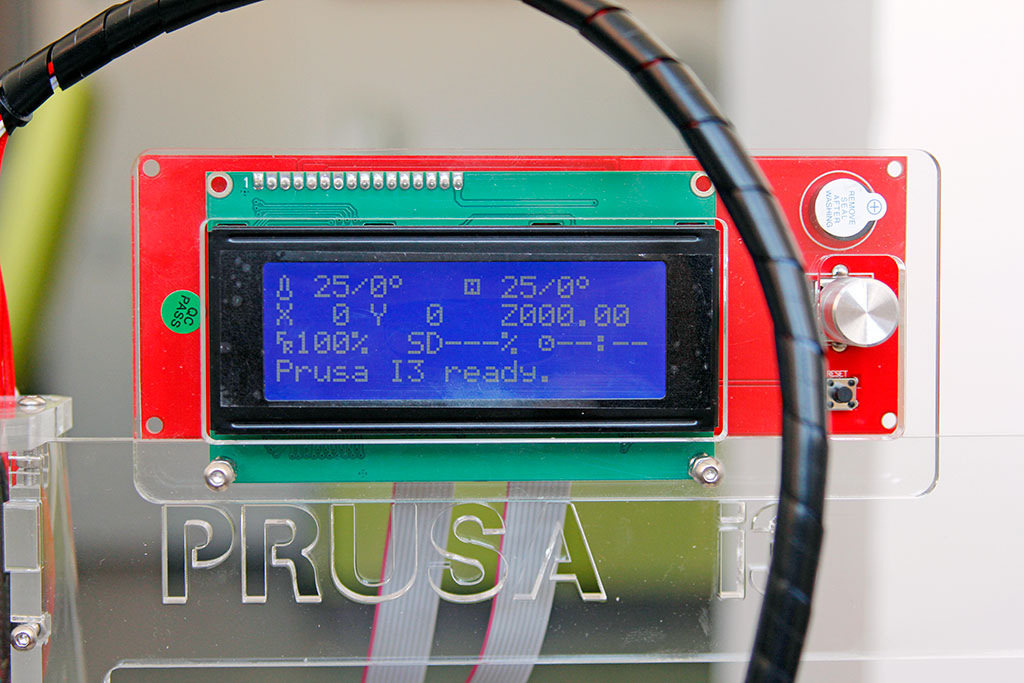
Also, this model has a remote screen with a card reader, so you can print without a computer. In the first week I did not know that the twist was also a button, and the printing started via a comp. Then he pressed harder, and new possibilities opened up.
It remains to lay the wires neatly and you can proceed to print. Damn is not enough patience, we collect them in bundles, then I will lay as it should.
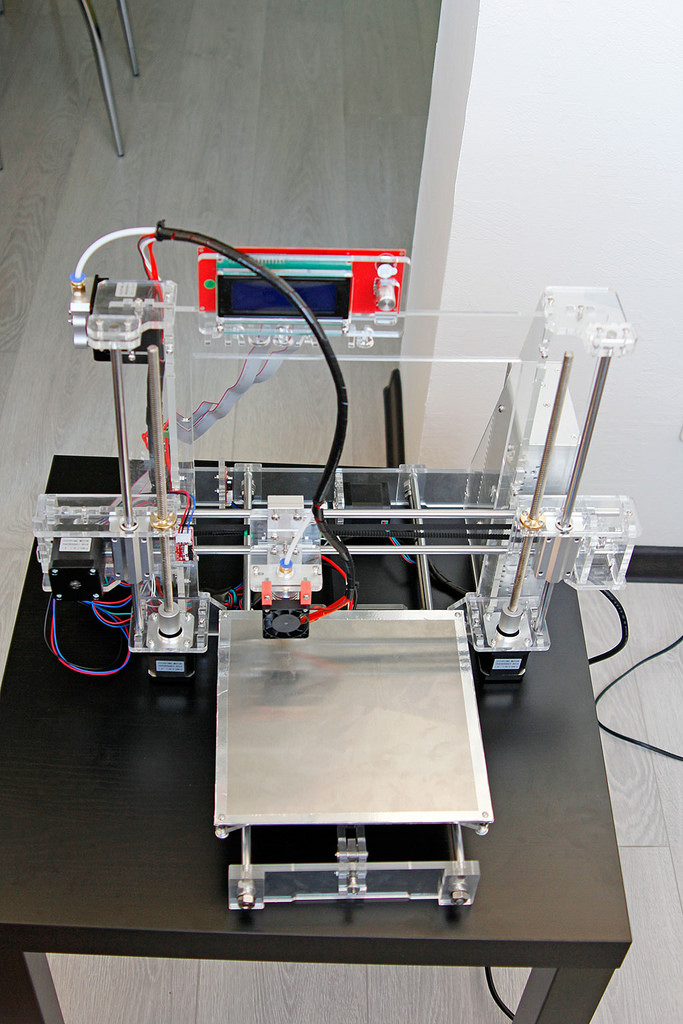
Beauty. And, you need to stick the masking tape on the platform.
Yeah, this is now quite good.
Well, at the request of comments recent print examples:
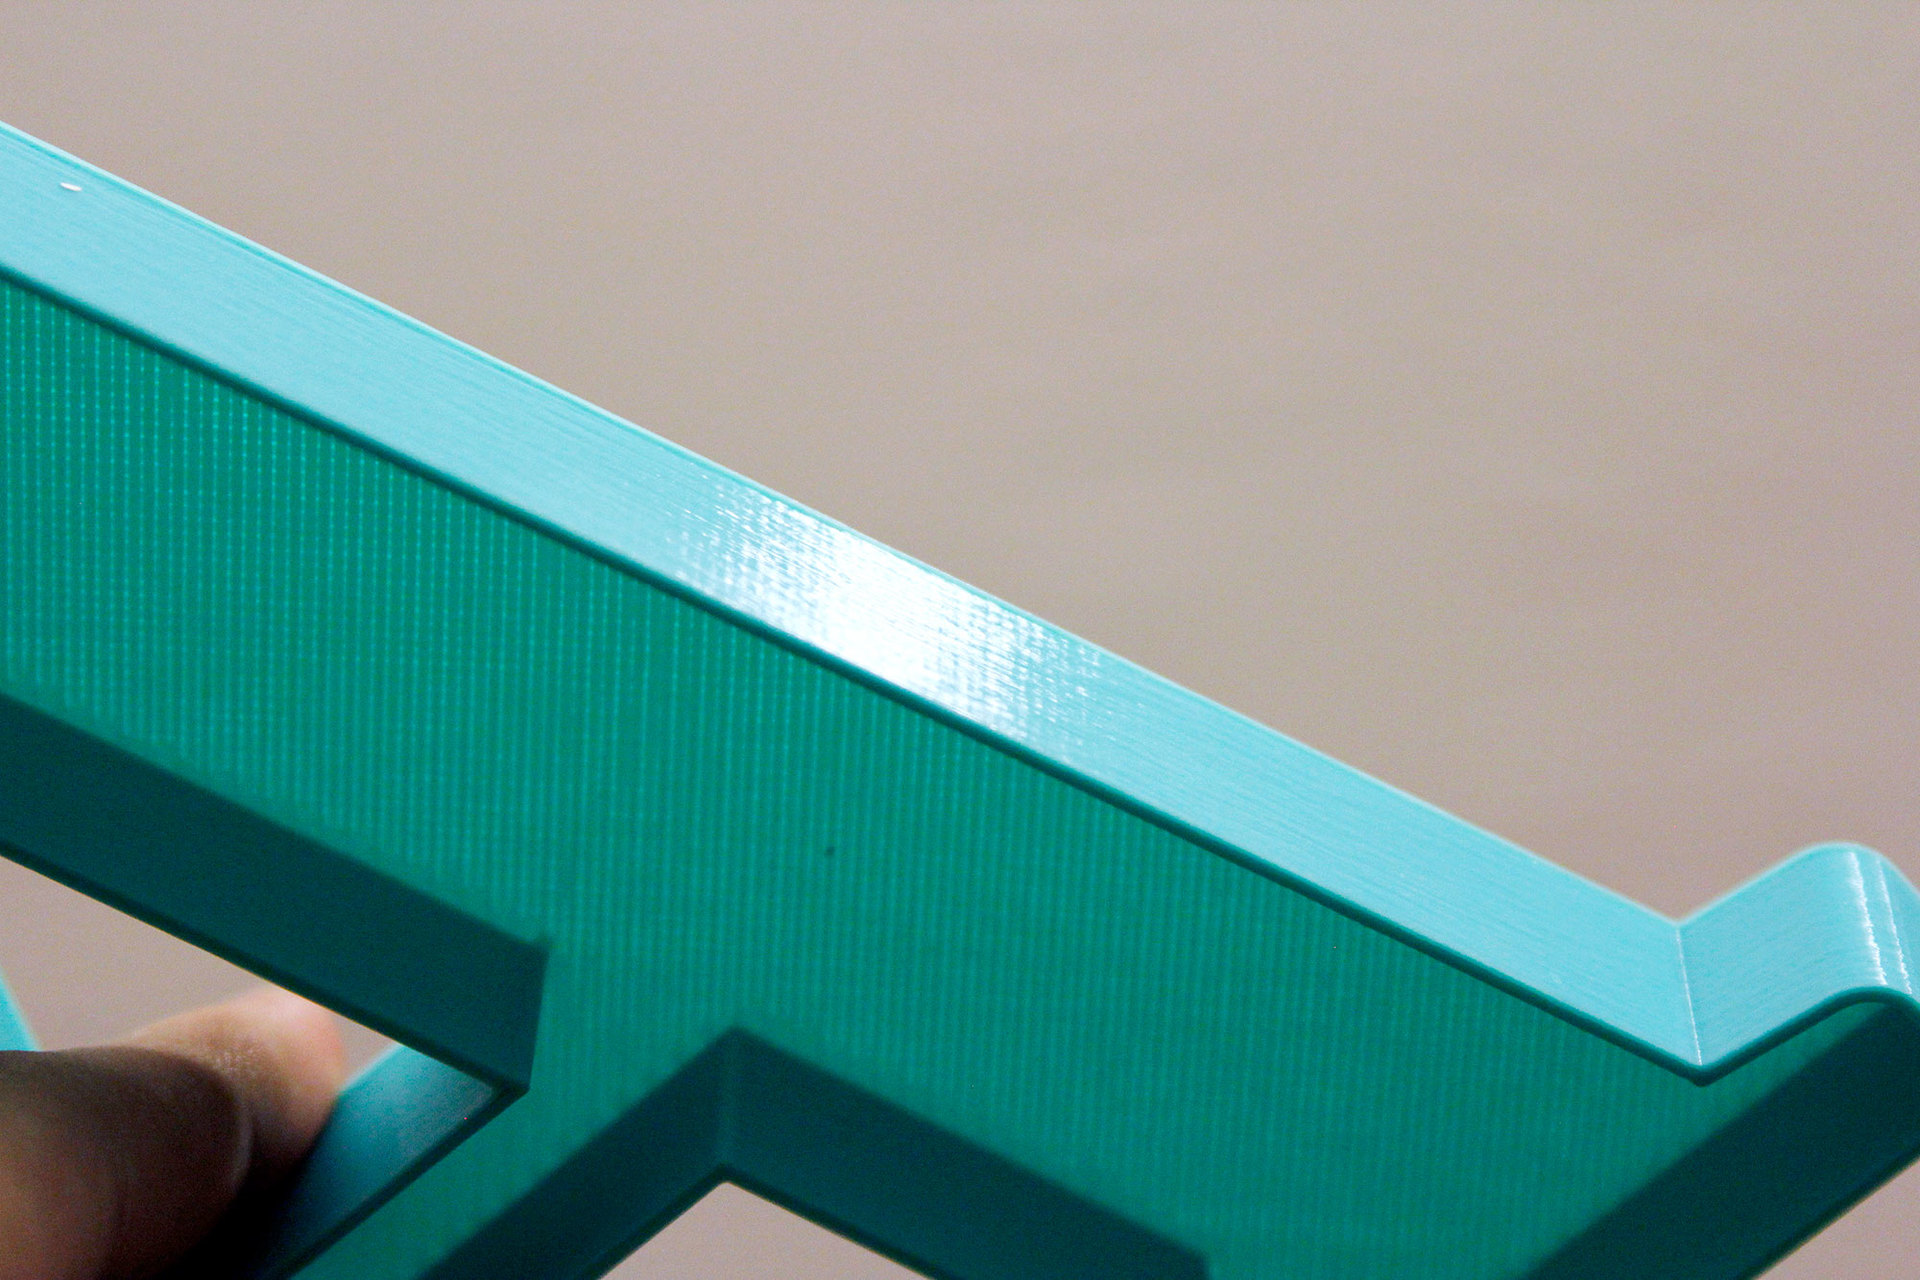
Letter size 18cm (layer 0.2mm, nozzle 0.4mm):
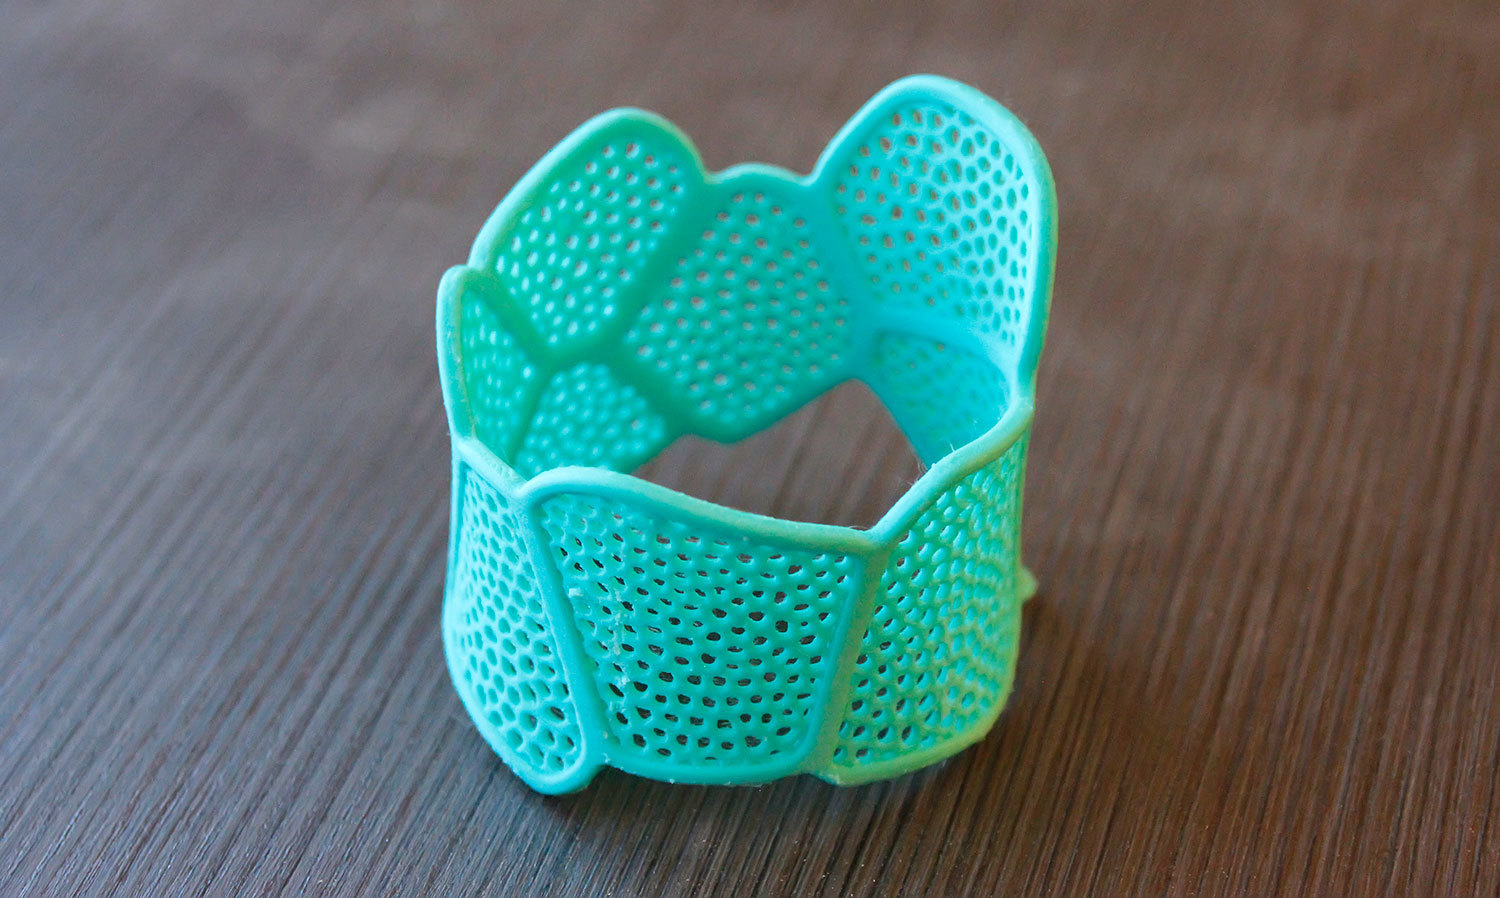
Bracelet on hand, immediately after removing the supports but still without treatment (layer 0.1 mm, nozzle 0.2 mm):
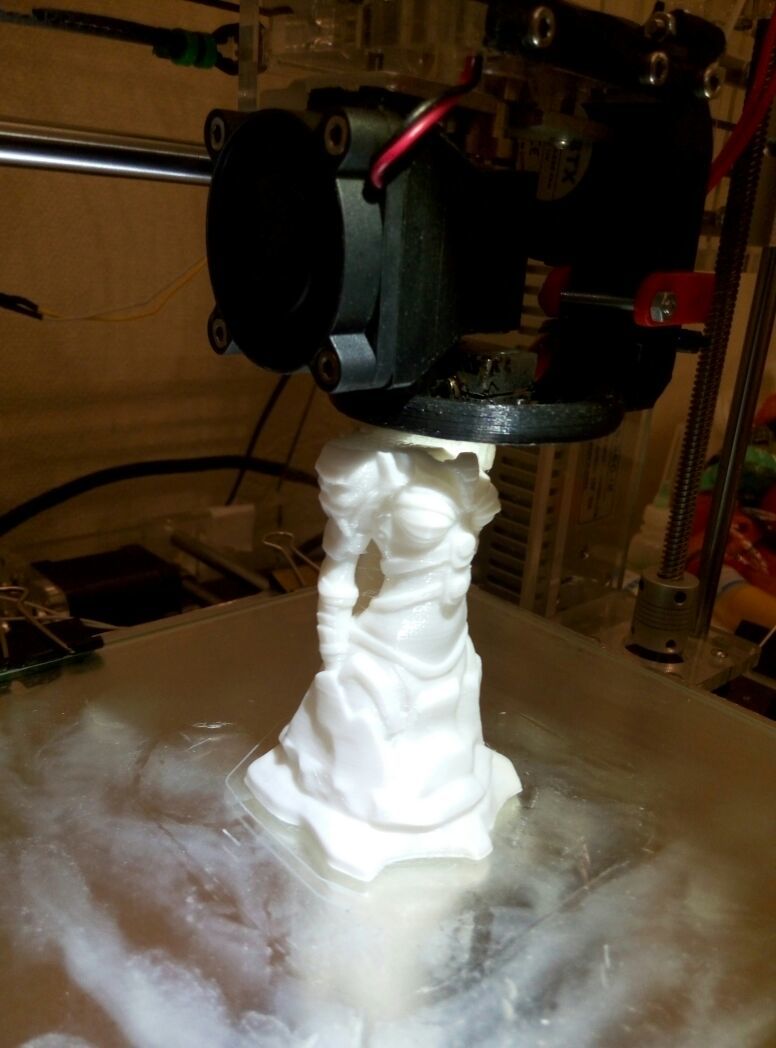
Statuette for the sample nozzle 0.2 height about 10cm.
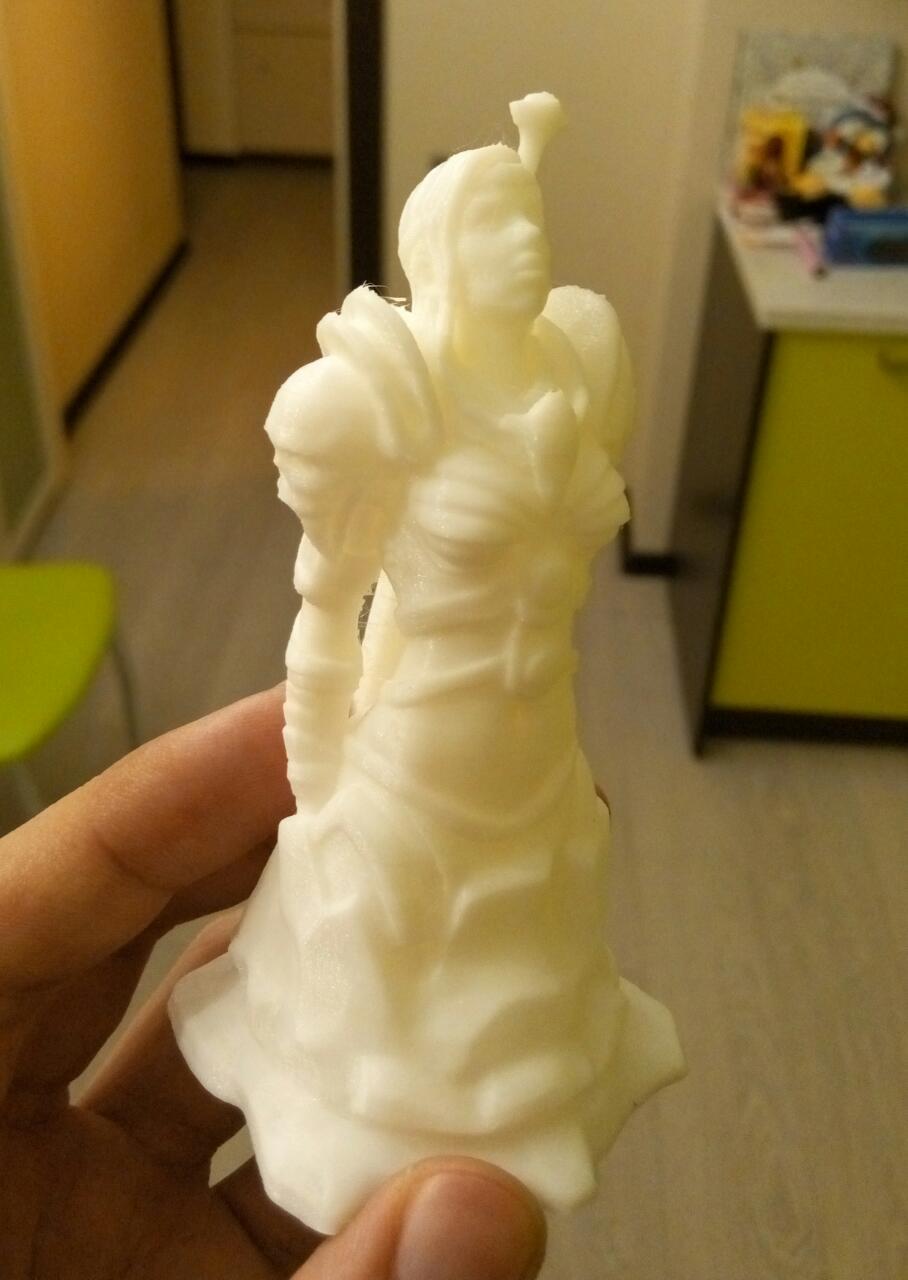
After a little processing, all the "snot" were removed.
It is in the process of printing.
Parts used in the assembly:
That's all, with you there was a simple service for choosing sophisticated Dronk.Ru equipment. Do not forget to subscribe to our blog , there will be many more interesting things.
ps * - links marked with an asterisk referral, so you can save money by returning cashback up to 4%. Read more at Dronk.ru/cashback/ or you can get 5% by purchasing them through the LetyShops cashback service. Read more about who the cashback services are in our article. We select the cashback service for the 6th anniversary of Aliexpress .
Our other publications

About six months ago I bought myself a 3D printer. Since then, I have been watching how inexpensive Chinese solutions like my designer are gaining in popularity. And I think this is right, with proper skill and little skill, such designers can give odds to eminent brands, which are several times more expensive and sometimes even orders of magnitude.
In this publication, I would like to introduce Geektimes readers with such designers and show that there is nothing to fear. And in a disassembled form, getting a printer is even more pleasant, since during its assembly you can spend time very interesting + get an initial idea of how and what works.
')
Briefly about the printer - you can take after the assembly immediately prints, for those who want to know the details, please under the cat.
Carefully a lot of pictures.
I have long followed the development of household 3D-printers, and already when their price dropped to $ 1,000 (at a price of 30 per dollar), I began to observe the pricing policy even more closely. The price began to fall about a couple of years ago, or rather, it has been decreasing for a long time, but a couple of years ago, options for prices began to appear more and more interesting. And last year (in 2015), the prices reached their perigee. The Chinese kits entered the market en masse, and not only from construction studs and not understand anything, but quite with tolerable components.
I came across this set from Sunhokey right there on the giktimes in the comments to the post about the 3D-printer. From that moment I began to follow the price. Then one day the price dropped immediately to $ 15, the rate at that time was not the same as now, and I decided to order it quickly. The price at that time was 275 bucks.
Well, as usual with me. I learned the question, the printer is OK, but the delivery is not clear. In the comments to the order they wrote that someone had arrived almost in a couple of weeks. Positive feedback at the time of the order was slightly less than 300.
As it turned out later, the order went on delivery in a sly way. This is partly a plus, since I didn’t intersect with customs at all, or rather not me, but the package. The downside is the delivery time. Apparently, the package went by truck from Shenzhen to the border with Russia, where she somehow crossed the border, perhaps even on load mules (judging by the appearance of the package) and reaching Omsk, was sent already through the PEC from a private person with a Russian surname , again by truck. Wow ... For almost a month I was waiting for the track update when the Chinese track changes to the Russian one. And now, 24 days after payment, I receive an SMS from the PEC, that the goods left me and will arrive in another 20 days.
After all the time and almost 2 months of waiting, we went to pick up the package on our family beetle.
As I noted above, the package seemed to have been kicked from China itself. For which I was very worried, because inside the acrylic frame and various shafts, which, if bent, do not see quality printing. By that time I had already read that some customers received parcels with broken acrylic parts. To the credit of the seller, such shoals were quickly settled and spare parts were sent free of charge.
In my package was "all the way", well, almost. Affected 2 plastic coil. One cracked the rim in two places, the other has the base split in half. It seems that such shoals could also be replaced, but I did not press on the seller, but simply glued one coil with cyanocrylate and strengthened the other with adhesive tape, passing several tapes through the central hole.
Here in this photo you can see that the plastic lay without any protection at all, which is why it suffered.
In general, everything was cool with the packaging. The first batches were sent in foam plastic. I can imagine what a nightmare it was when you take such a sandwich out of the box. I had experience with similar packages (glass Chinese table).
Concerns about acrylic are not confirmed. Polypropylene foam worked at 100%.
All acrylic is also in the protective film was. On the one hand, transparent, on the other pink, I suspect this is a chip specifically for laser cutting. By the way, since the acrylic is cut by a laser, there is some tension on the edge. That is the strength of Luke. Therefore, in no case do not try to wipe the frame with alcohol or something similar, otherwise it will be covered with micro cracks.
Here are all the details. What where, at first glance, figs understand. Anarchy!
And this is the main largest part of the frame plus a heated table. But, by the way, a heated table is a big plus, you can already print ABS and other materials with high shrinkage.
The basis of the table. It is also acrylic. For six months of the flight, everything is fine with her, not broken. But still, I would not really trust her. If possible, it is generally better to replace the entire frame with a steel one (the price of the solution is approximately 4000 rubles + time for disassembly / assembly).
Well, everything. Enough to consider this disgrace, it's time for this chaos to get a finished look and show the miracle of the car to the world.
To collect everything is easy. Just repeat after the silent Chinese video of all the actions. Instructions for assembling + the necessary programs and pictures with the settings were attached to the disk by caring Chinese friends. Yes, sometimes sellers with aliexpress also provide good service.
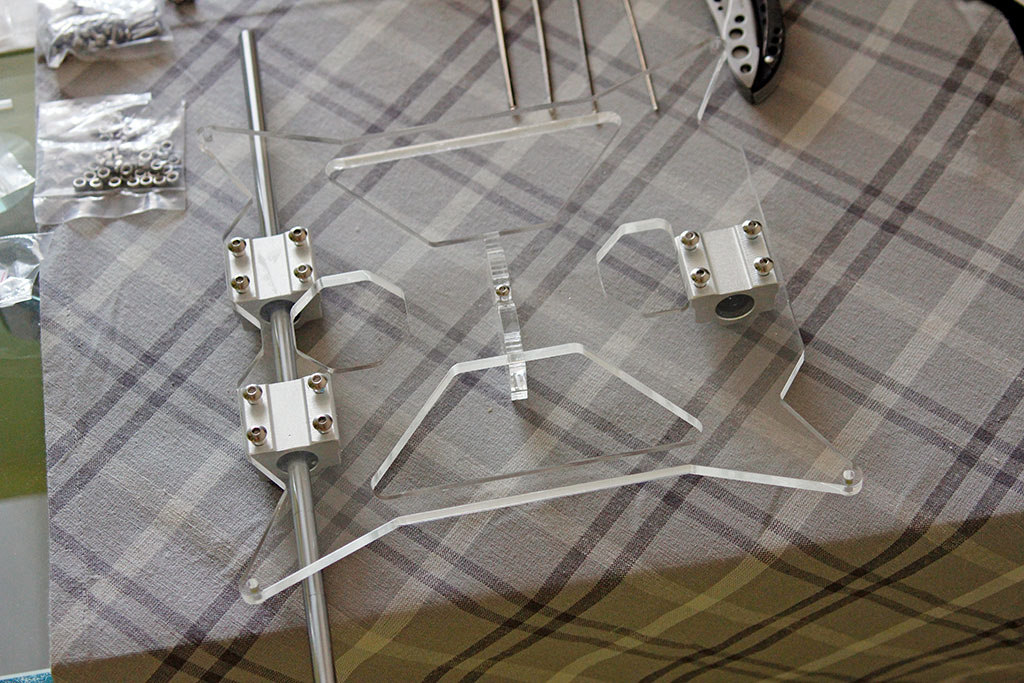
Components here are not bad. Here is a part of the carriage moving along the Z axis. Here are the normal NEMA17 stepper motors, and not the trimmed versions and the LM8LUU long bearing by 8mm and even the brass nut of the trapezoidal screw is also 8 mm. In general, with a price in rubles of about 17,000, it is surprising what the seller earned. And by the time the dollar went up, the Chinese also dropped the price and in rubles the printer still costs about 17 sput.
The second part of the carriage. Here you can see that there is a belt tensioner, and this solution is not used everywhere. Even the cheap, inexpensive Wanhao Duplicator i3 uses springs from clothes pegs as tensioners.
And this is the most interesting part of the printer heating element with a carriage of the X axis. The clone from E3D v5 is installed here. I can’t say anything bad about Chinese E3D clones. How many have tried them, always everything is OK. That's just v5, I do not like something and almost immediately I replaced it with a more compact V6, which I advise you.
It seemed to be a very simple thing, but what can be done with its help ... There is nothing complicated about it. There is a 40W ceramic heater, a thermistor for temperature control, an aluminum cube for heat transfer to the nozzle and a steel thermal barrier enclosed in the aluminum radiator so that heating does not go above the nozzle.
In general, I repeat once again, you change this v5 to v6, you can all-metal, and you will not know the problems. The main airflow is better and another secret. I'll tell you about it later.
These are the motors of the Z axis. Here they are immediately a couple and each on a separate driver. I would honestly do it on one driver, and let out the one who was free would go to the second nozzle. Already dealing with this issue, waiting for the missing parts ...
Putting the base of the table.
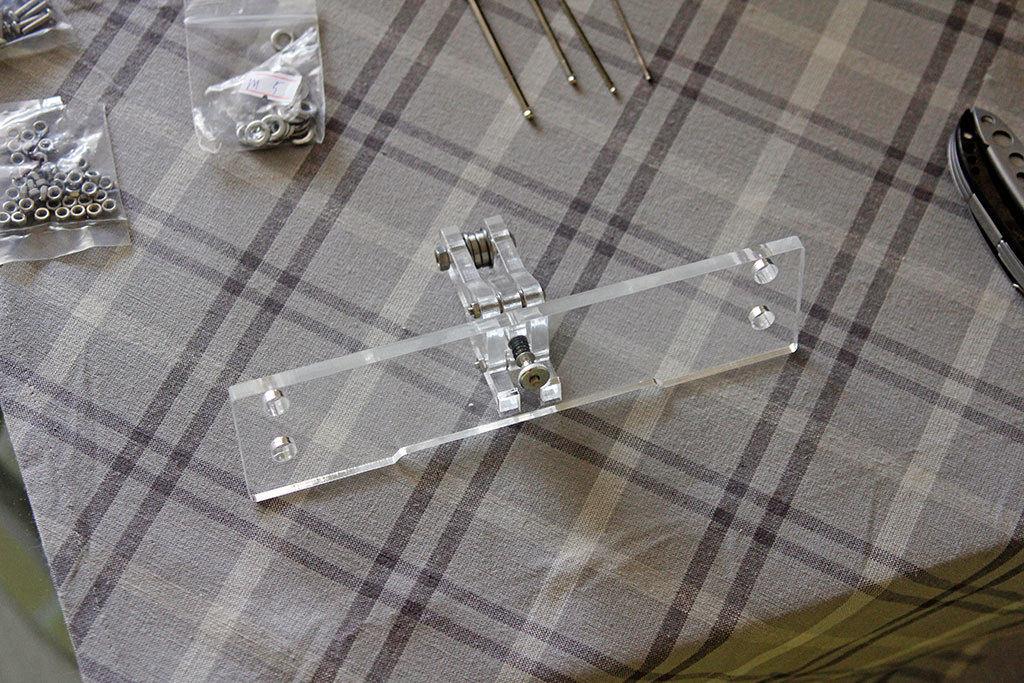
Another detail with a belt tensioner. Now for the axis on which the table goes, Y means it turns out.
An elegant solution, I believe.
Putting up the coil stand. On the one hand, this support is compact and convenient, on the other hand it is not very. Remember, I wrote that the side of one coil broke off? So if it were not possible to glue it, then such a holder would not be used. In the photo is a sample of PLA plastic from FL-33. Good plastic, but I won it not immediately. In the beginning, he completely hammered the nozzle. What about next time.
Here you can see that the bearings are used with a side.
Go to the larger details.
The proud name is Prusa i3.
Studs are still used here, but not simple galvanized, but normal stainless.
Gradually vundervaflya acquires a finished look.
The X axis is already in place.
Table. And here I was prepared immediately. Wires at the table is better to replace the thicker. And for this you need to separate the thermal insulator holding on the Kapton adhesive tape and solder them.
No sooner said than done. At the same time and we will enclose a heat insulator better. I used a stopper from a bath mat, bought in a carousel of rubles for 60 or 80. If you did a recent repair, you will find a better insulating material. Ideal thermal insulator for underfloor heating, it may already be with adhesive base, so it will be more convenient to mount this.
Time.
Two. Is done. Aluminum tape also came in handy.
Half done. Yes, yes, only half. At this point, the assembly took about 6 hours, probably, maybe a little more. There was a break to sleep :)
We turn to the electronic electrical part. The MKS GEN v1.1 board is installed here. In principle, this is the same arduin with RAMPS, only higher quality. Plus, the fact that everything is properly diluted and there are connectors on the driver. The drivers here are removable, and not soldered like on MELZI another board often used in inexpensive 3D printers.
There is an extruder of the type Bouden with all its disadvantages and advantages. What does it mean? This means that the head is light and will not give inertial waves when the direction of movement changes abruptly, but it is better not to fill the soft materials here. FLEX just will not work.
Also, this model has a remote screen with a card reader, so you can print without a computer. In the first week I did not know that the twist was also a button, and the printing started via a comp. Then he pressed harder, and new possibilities opened up.
It remains to lay the wires neatly and you can proceed to print. Damn is not enough patience, we collect them in bundles, then I will lay as it should.
Beauty. And, you need to stick the masking tape on the platform.
Yeah, this is now quite good.
Well, at the request of comments recent print examples:
Letter size 18cm (layer 0.2mm, nozzle 0.4mm):
Bracelet on hand, immediately after removing the supports but still without treatment (layer 0.1 mm, nozzle 0.2 mm):
Statuette for the sample nozzle 0.2 height about 10cm.
After a little processing, all the "snot" were removed.
It is in the process of printing.
Parts used in the assembly:
- Printer Prusa i3 Kit *
- Nozzles: Nozzles 0.3 / 0.4 / 0.5 mm *
- Head: E3D v6 head *
That's all, with you there was a simple service for choosing sophisticated Dronk.Ru equipment. Do not forget to subscribe to our blog , there will be many more interesting things.
ps * - links marked with an asterisk referral, so you can save money by returning cashback up to 4%. Read more at Dronk.ru/cashback/ or you can get 5% by purchasing them through the LetyShops cashback service. Read more about who the cashback services are in our article. We select the cashback service for the 6th anniversary of Aliexpress .
Our other publications
- Smart watch or smart bracelet? Weigh the pros and cons of the example of Xiaomi and LG
- Lively Chinese smartphones. Part 1
- Lively Chinese smartphones. Part 2
- Chinese tablets with Dual OS, for those who can not make a choice
- Choosing an ultrabook on Windows 10 for $ 200-250 from VOYO
- 10 gadgets for geeks with Gearbest at a discount in honor of the birthday of the site
- Chuwi history - from MP3 players in 2004 to tablets on Windows 10 in 2016
- Compare prices for gadgets offered by GearBest for your birthday?
Source: https://habr.com/ru/post/368627/
All Articles