Autowatering systems from drip to autolevel
At a certain moment, the number of flowers at home increases to a critical mass, and you already think, but it would be nice not to water each flower yourself, but to set up some kind of automatic watering. And if it is also time to go on vacation, and God forbid for two weeks (yes, yes, for two weeks and to the sea!), Then on return you can find not a blooming garden, but a dried herbarium. Let's consider the options of auto-drinking from the simplest drip to automated with a screen and buttons.
The easiest option for self-watering is the so-called "balls". They represent a kind of closed container with a long spout, which is inserted into the ground. Since this tank is only with one hole that is inserted into the ground, water is consumed only when the soil moisture decreases. very simple method, but for a long time you will not leave a flower with such a thing. Such balls are usually found in sets of 6 pieces each, the price of such a set is around 1000r. plus minus 200r. The volume of one ball is 250 mg. Sometimes they are also called watering cans.
')
By the way, for owners of 3D printers such a ball can be made independently, it will be much cheaper, though ... Having such a tool as a 3D printer, you can make auto-irrigation systems much more interesting.
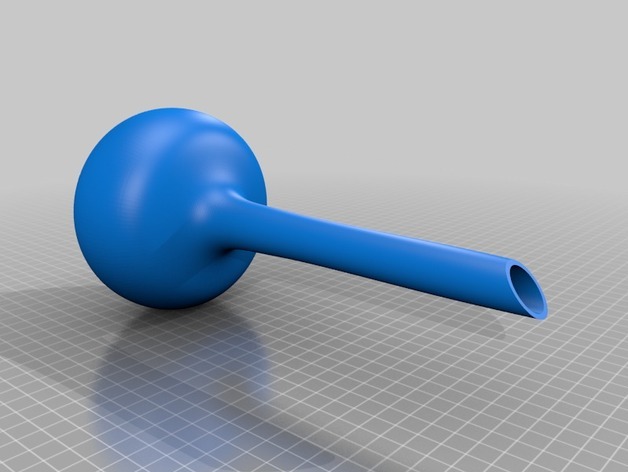
Link to the model itself for printing: Automatic Plant Water-er - Self Watering Plant Bulb
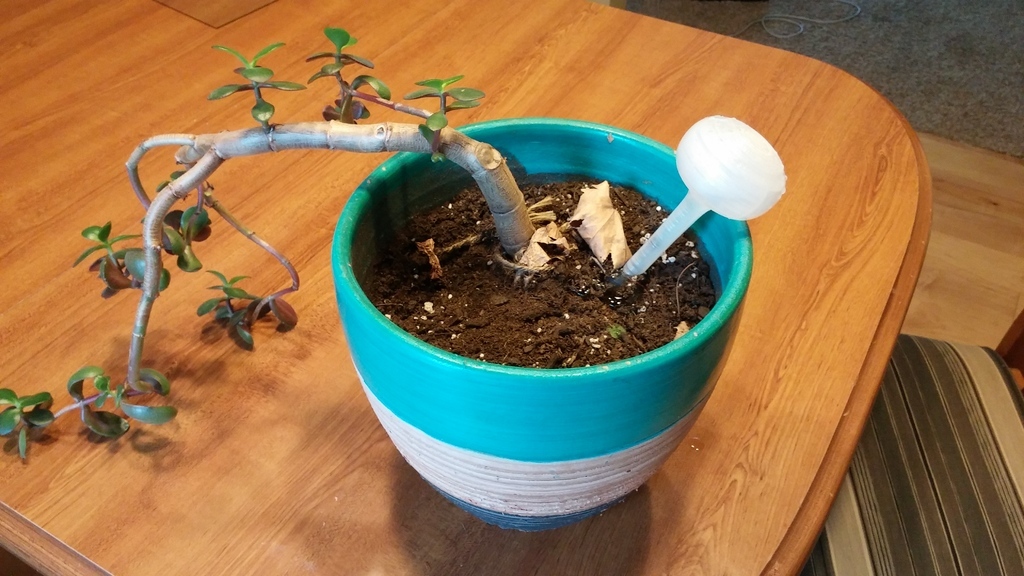
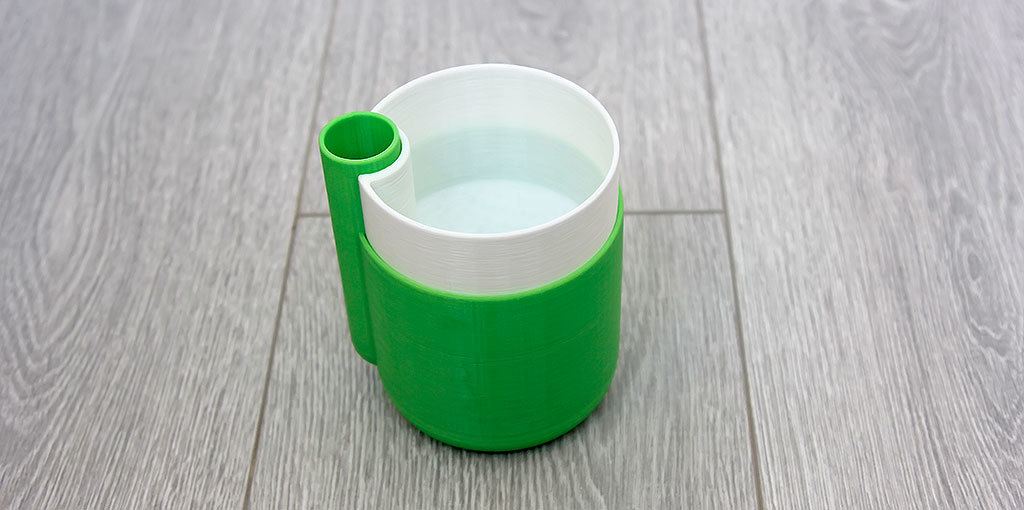
Well, since we can print such a watering can-ball, then why not make a more interesting model, with a universal thread for ordinary bottles. Although this model is already there, you just download and print: self-watering device
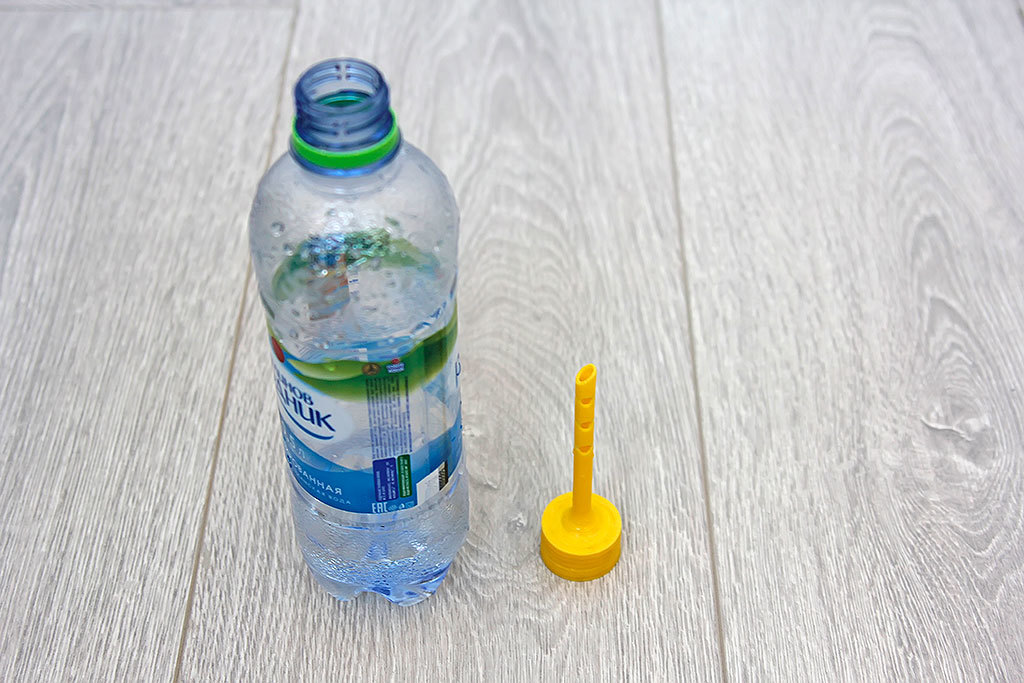
I tried it in action:
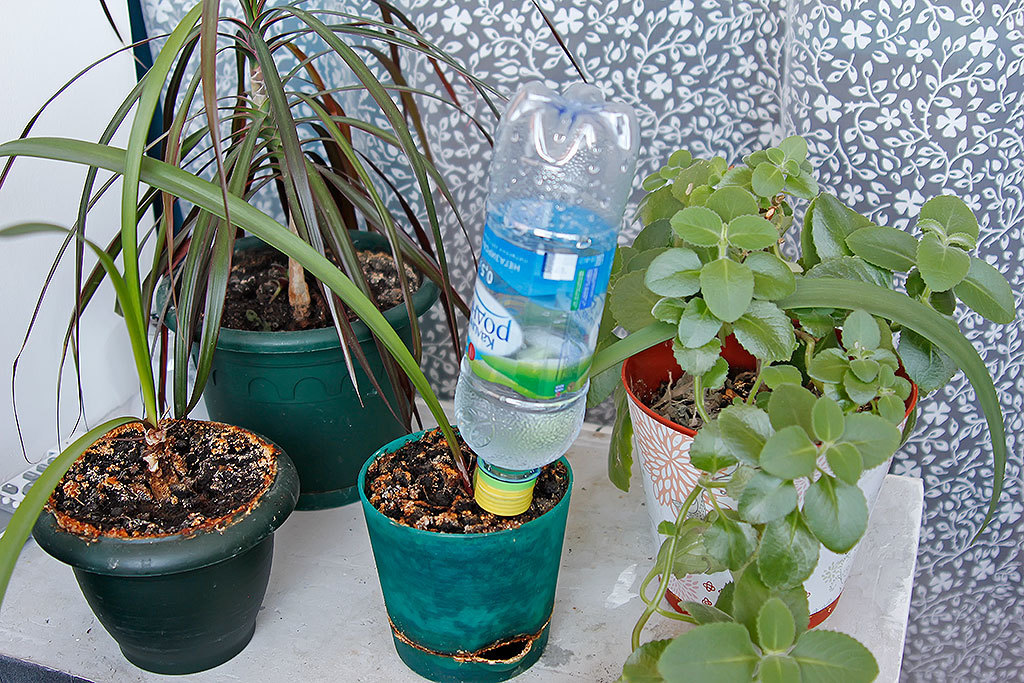
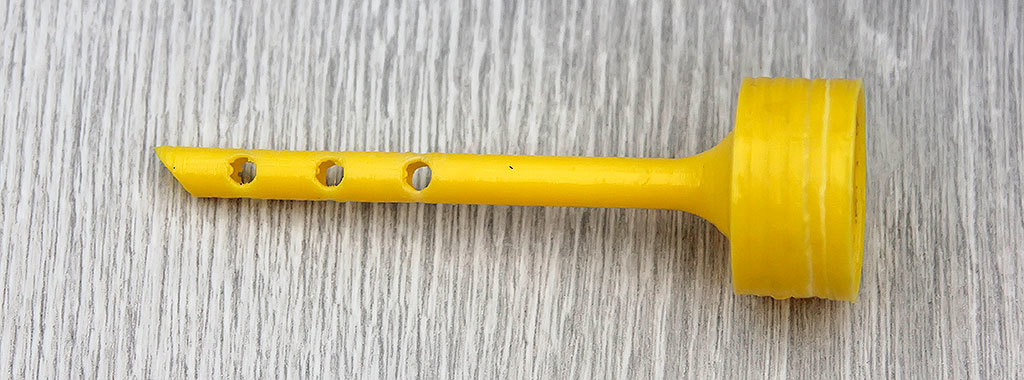
Such a thing can be made without plastic printing, it’s enough to remember how we made bryzgalki in childhood. The bottle cap and the base of the handle + a little bit of glue will come off.
The minus here is that the water pours out until it reaches the level of the top hole, in fact a few centimeters of land from the bottom will always be flooded with water, not all colors will like it, put this “watering can” aside.
Speaking about the basics of self-watering systems of plants, it should be noted, and the usual drip. What could be easier? Hung up the tank higher, set the amount of water supplied and that's it. Add some water. There are at least two difficulties here: you need to hang a container somewhere, but this is not always possible, and such a design will not look very good. Plus, you must either calculate, or empirically determine the number of drops, and it will take some time. For the price, I do not understand how much a dropper costs at a pharmacy, I spotted this method in discussing other auto-irrigation systems and simply share information.
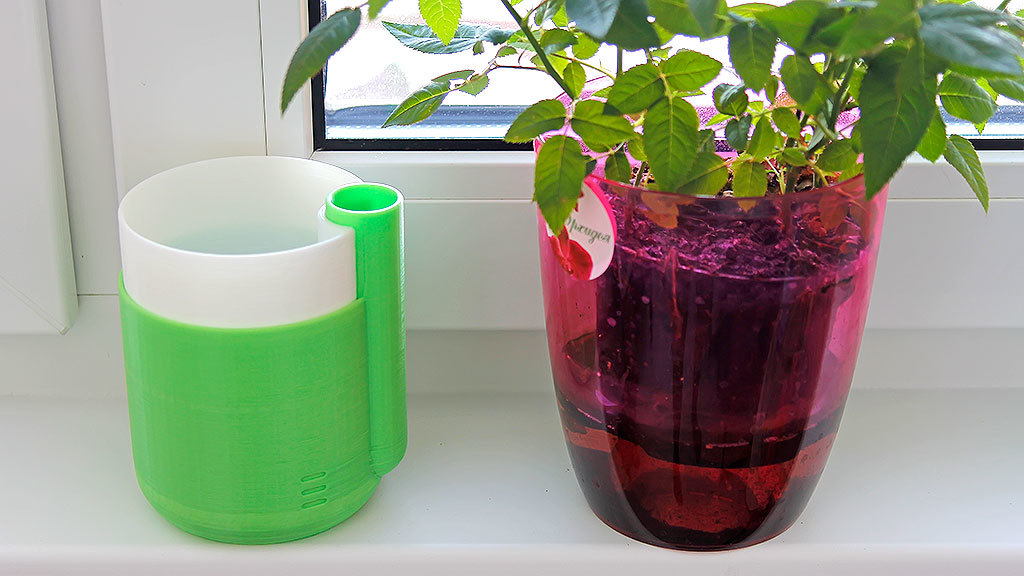
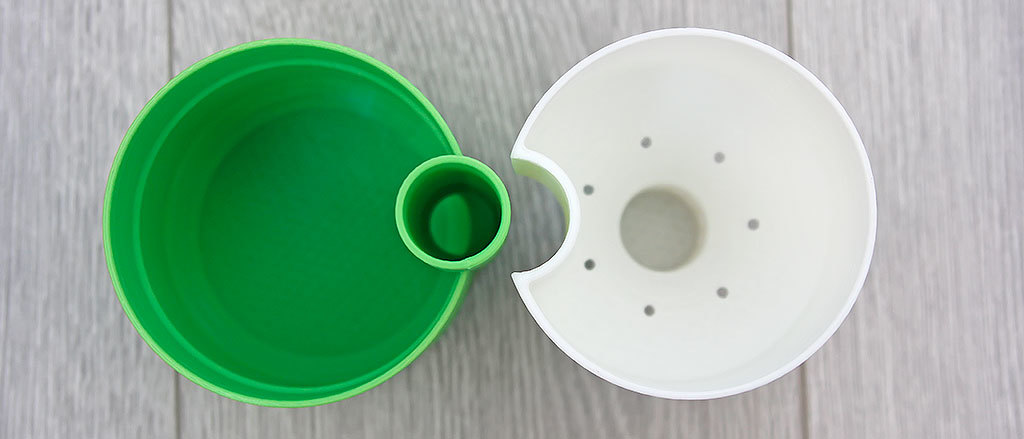
OK. Moving on. The next system of passive autowatering is the so-called orchid pot. This is a pot in which there is a certain amount of water, a second smaller pot is placed in it and the water enters through the bottom opening. In principle, in the case of an orchid, it is something akin to hydroponics, only water does not move through the pipes, but is always at the bottom of the pot, but the roots are always in water. Last year, a popular pot of free models for 3D printers - Thingiverse for a long time hung like a pot in the top, only more advanced, with a convenient filler neck and an interesting design.

I printed it out for the sake of interest, now it is waiting for a decent flower for planting inside.
Who wants to spend about 14 hours and print such and such a link to the model: Self-Watering Planter
All these systems of automatic watering produce the so-called passive automatic watering, that is, it is either impossible to intervene in the process, or it can be done in a very poor form. In addition, water tanks in these systems are limited and have a small volume. For true geeks, any system must have an electrical basis and the ability to customize everything and everything to fit every whim is desirable.
That's the same way I thought a couple of years ago and purchased a submersible pump for small fountains or aquariums on e-bay.
I don’t remember how much it cost, but in addition to the pump I had to find the right pipes to connect the pump with the dropper tube. In addition, purchase splitters and faucets. In general, such a DIY in the end goes a lot of money, especially when the reluctance to wait for the parcels and go to local shops. As a brain there was an arduin which monitored the soil moisture through a special sensor. As it turned out, such sensors very quickly fail from corrosion, especially if your sketch is not optimized and voltage is often applied to the sensor.
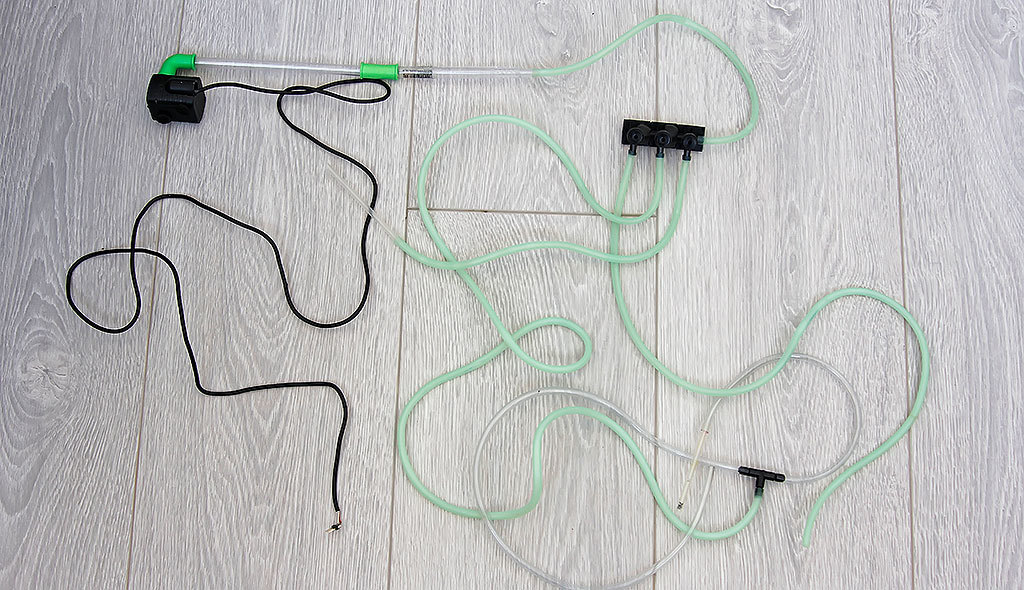
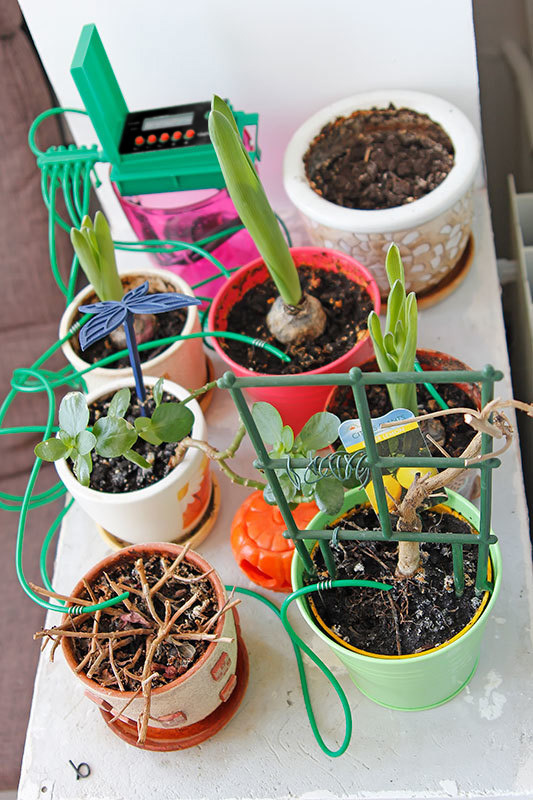
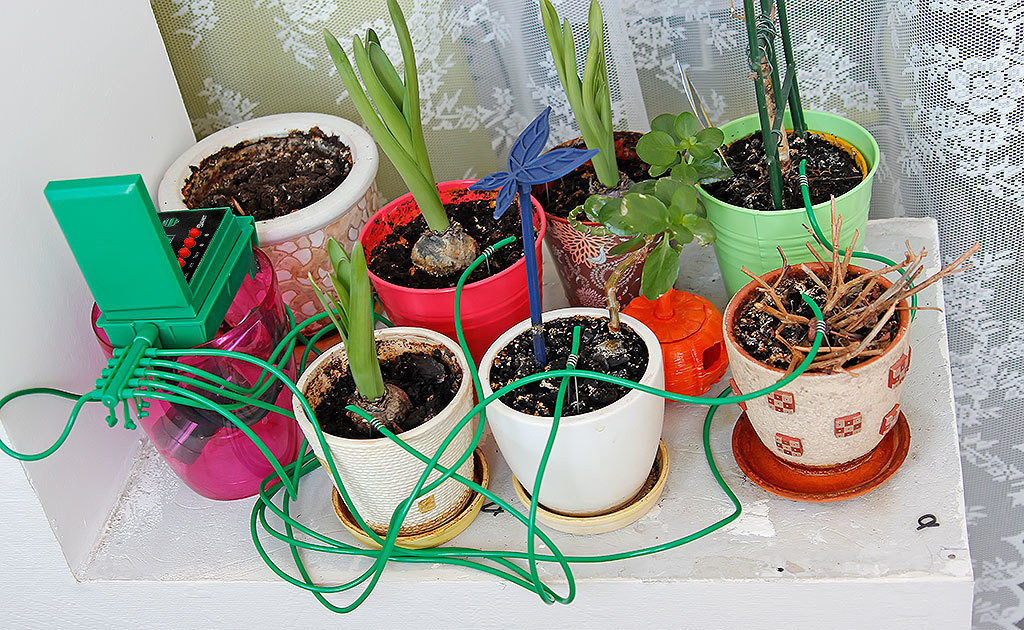
I still have some elements from that system, in the photo you can see how monstrous it is. At that time, I only dreamed of a 3D printer and it was not necessary to make beautiful cases. Everything was on the line, and the pump was immersed in a 5-liter tank.
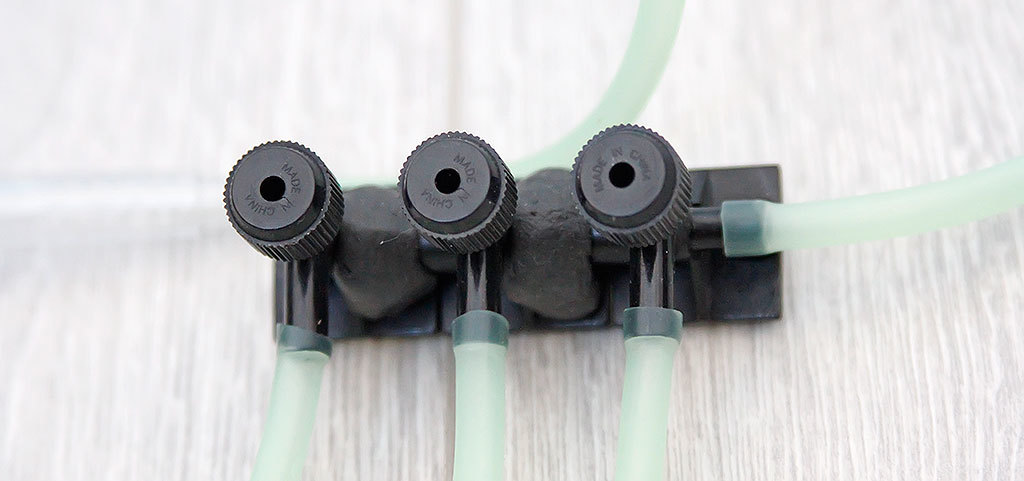
So that the articulations of the faucets did not leak, I had to close them up with what was at that moment at hand. I did not find the best use of SUGRU residues, it deteriorates over time and will not work for a long time even in a sealed package.
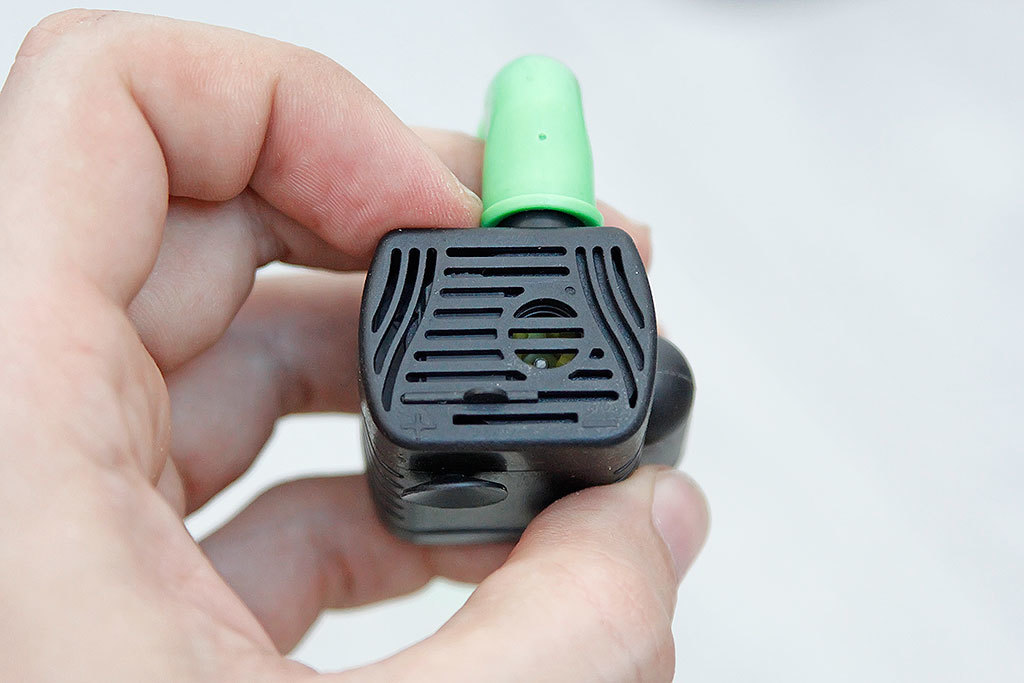
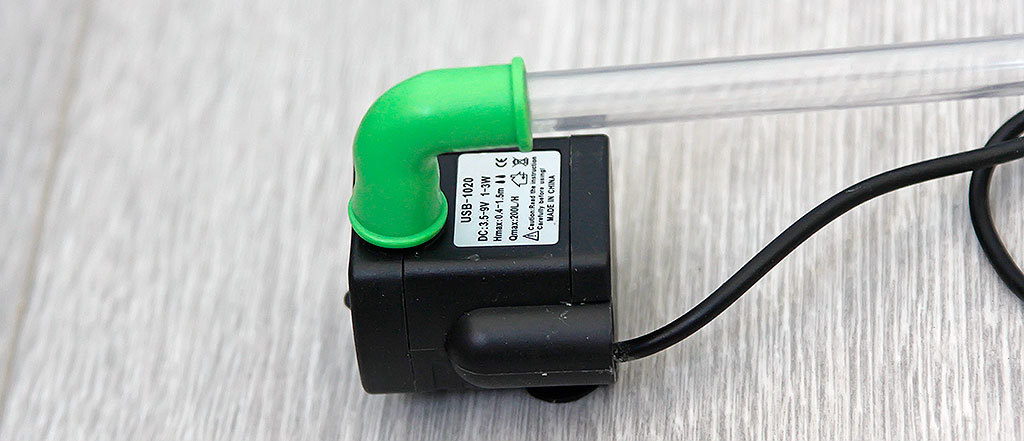
By the way, the pump is quite simple and even has a mechanical pressure regulator by closing the inlet.
I bought tubes in the store for aquariums, in the same place as faucets. There they are softer than a regular dropper.
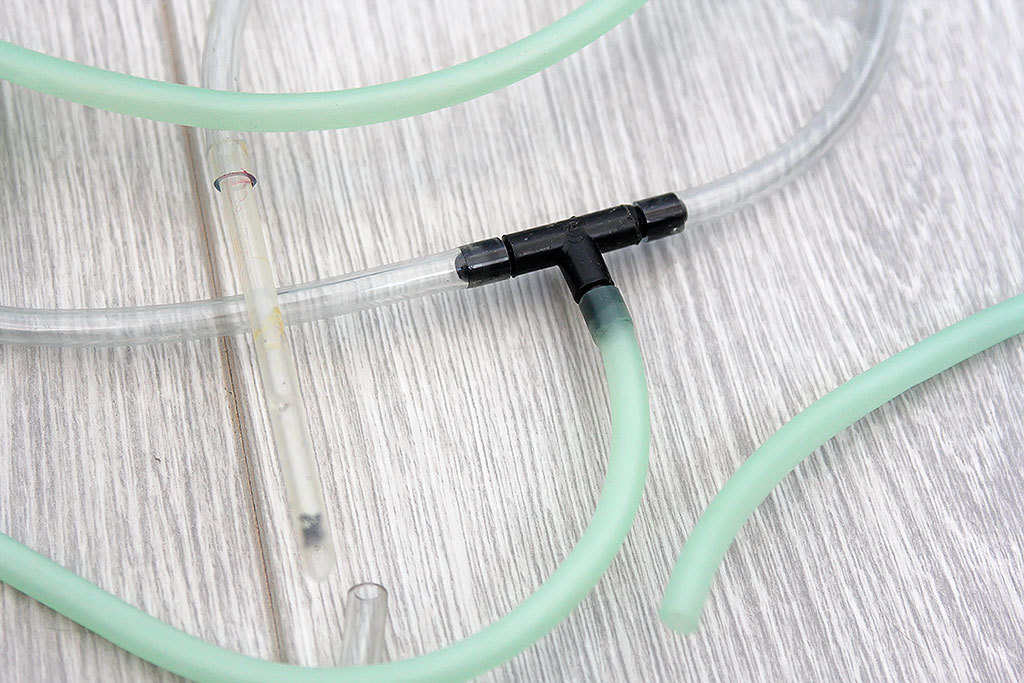
And by the way, the greenish tint of the tubes is no accident, the usual transparent tubes become cloudy over time, and on the inner walls under the influence of sunlight and water begins to appear plaque.
In general, this self-made automatic watering did not last long for me, after moving only some components remained, and it was already reluctant to reassemble it, and it was no longer possible to place it beautifully.
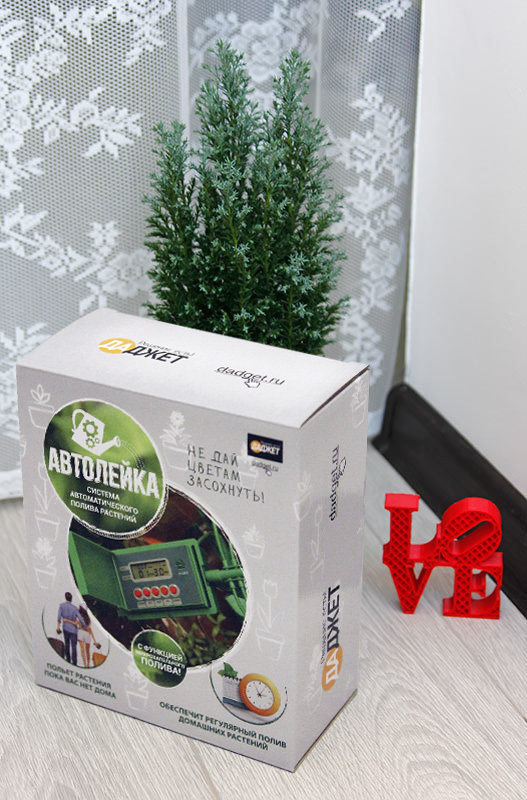
But as a rule, you think of something, invent something, and then bam, this is already ready, produced at the factory. So here, autolyka comes to replace home frankenstein .
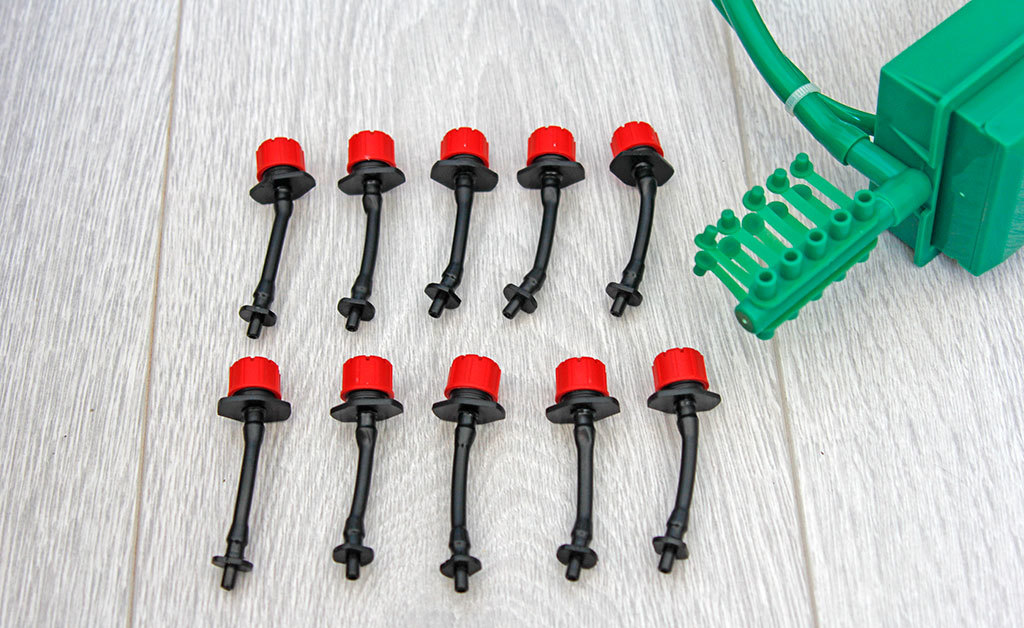
Inside the package is:
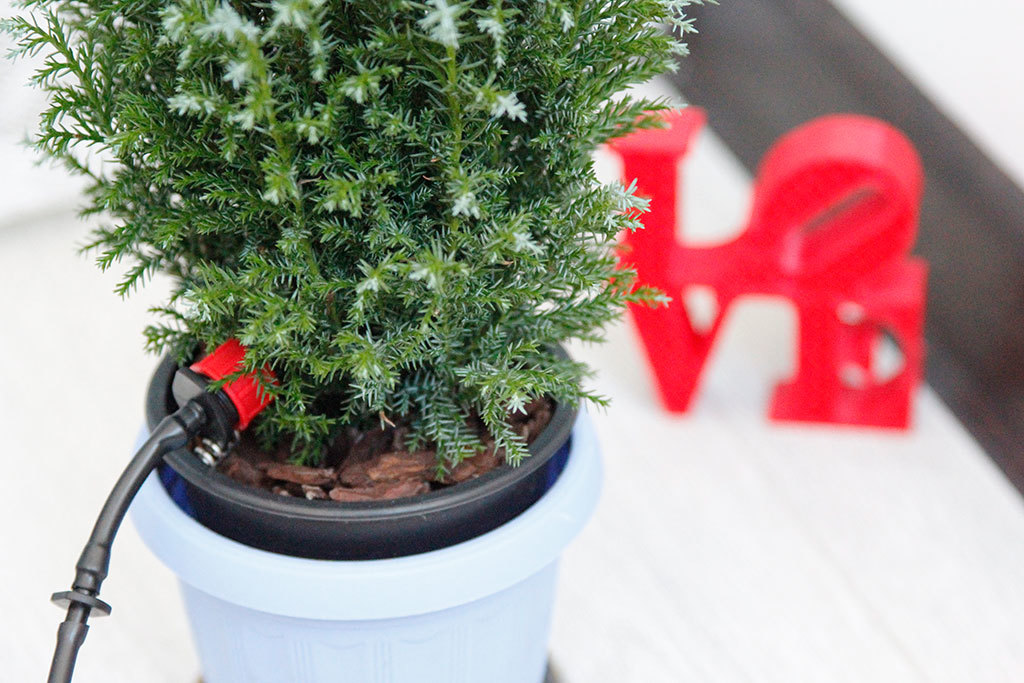
Here holders are a cool thing, everything is elegant and simple. I put the tube inside the spring and stuck the antennae into the ground. Everything. You can adjust clearly where the water will be poured: in the center right on the roots or closer to the edge.

Cranes is also an interesting solution. There are exactly ten of them to fit on each tube. Outlets here just 10.
If they were not, then the length of the tubes would affect the watering, in principle, this can be calculated by the formula, what is the length of the tube, how much water will pour. Well, or approximately you can select values from the table. I did not bother and just made all the tubes of the same length.
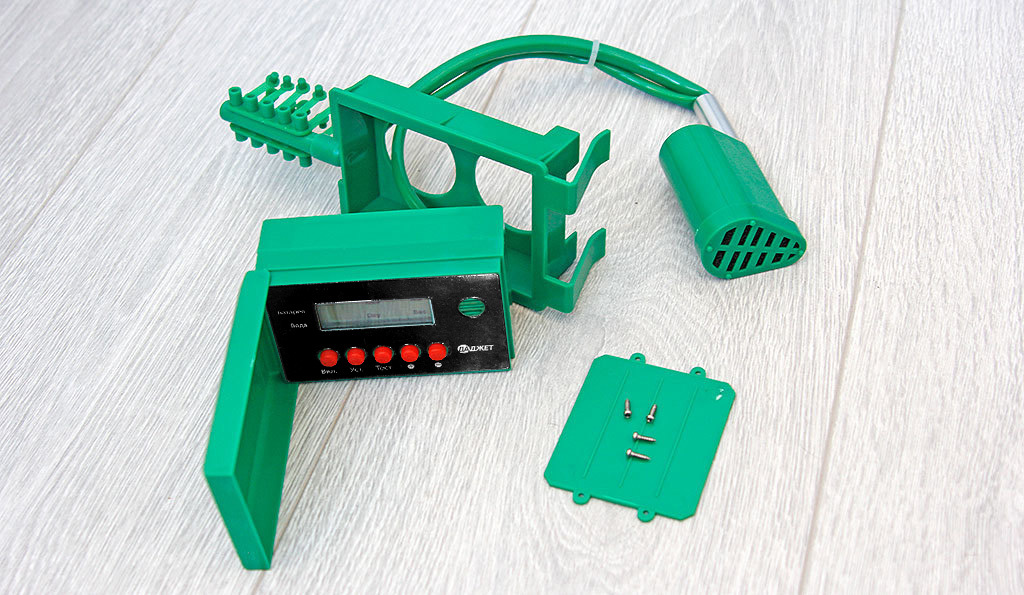
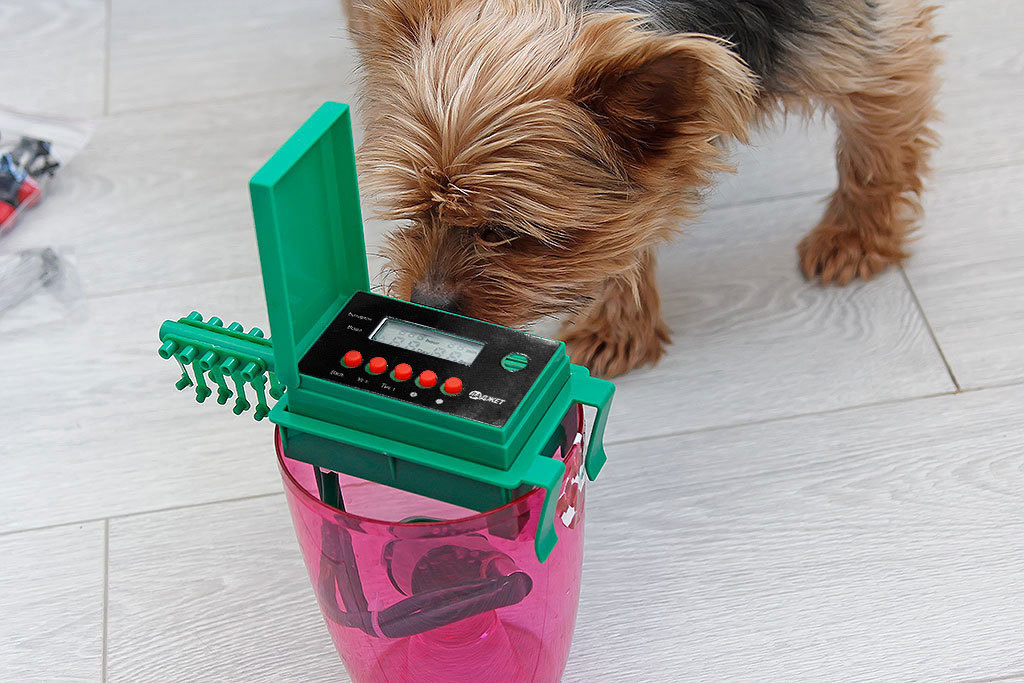
It looks like autoleigh itself. Submersible pump on a remote thick hose in a sealed housing with a filter at the inlet. This is good, garbage will not damage the pump if it accidentally falls into the water.
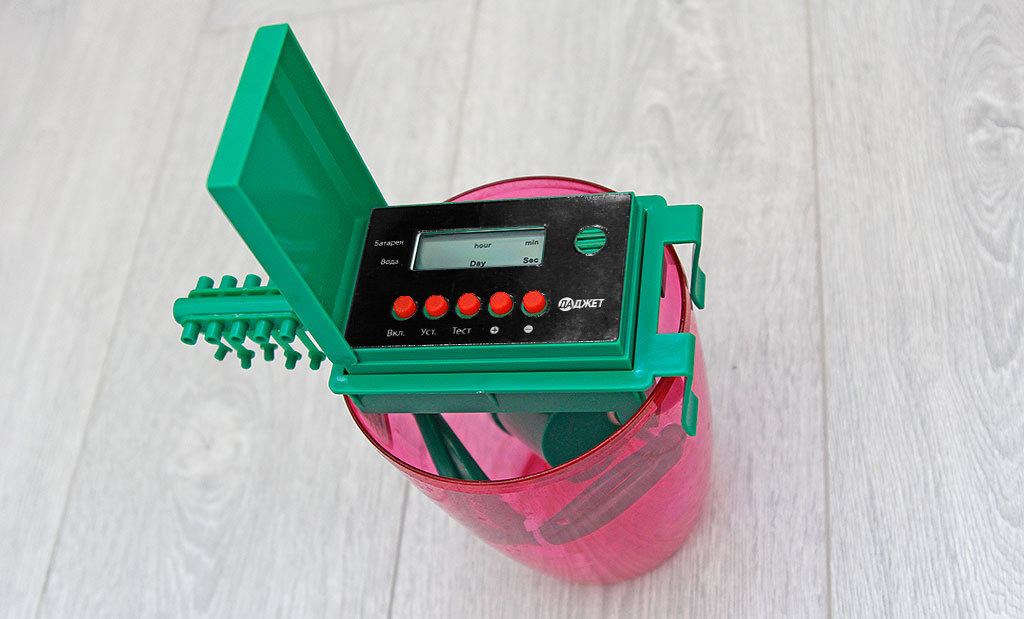
Frame with mounts on the tank wall, which houses the control unit.
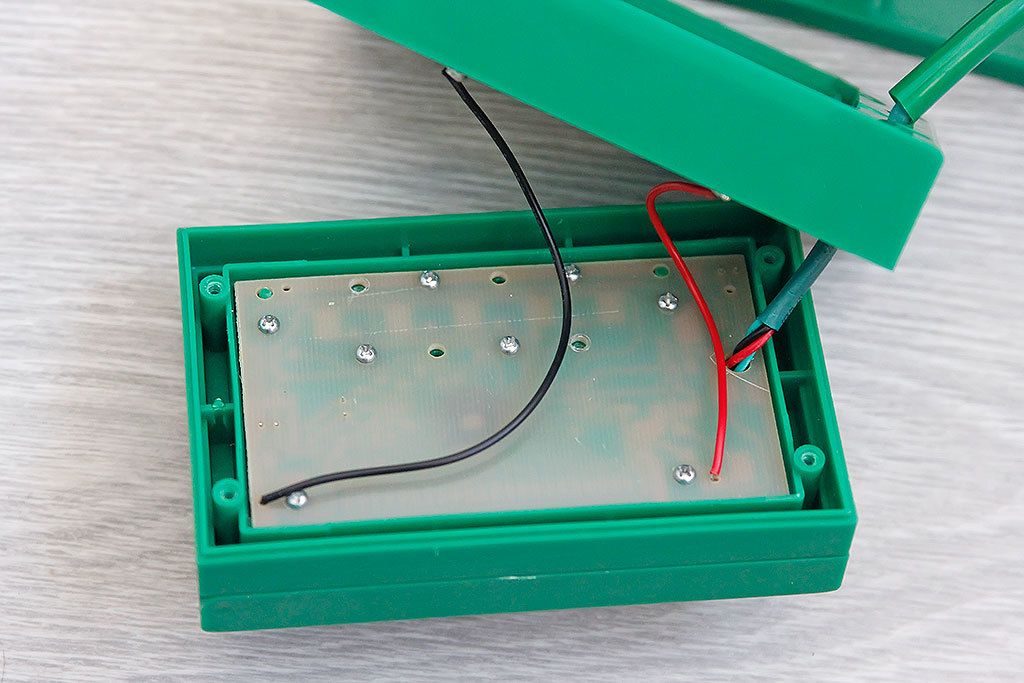
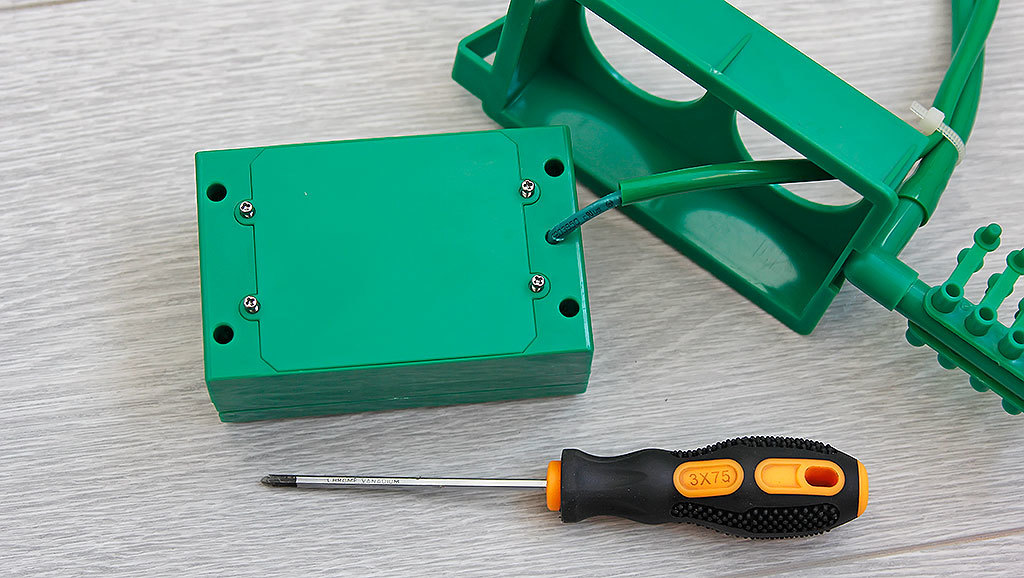
What's inside? Unscrew 4 screws, remove the lower part of the body. Under it is a board attached by an even greater number of screws.
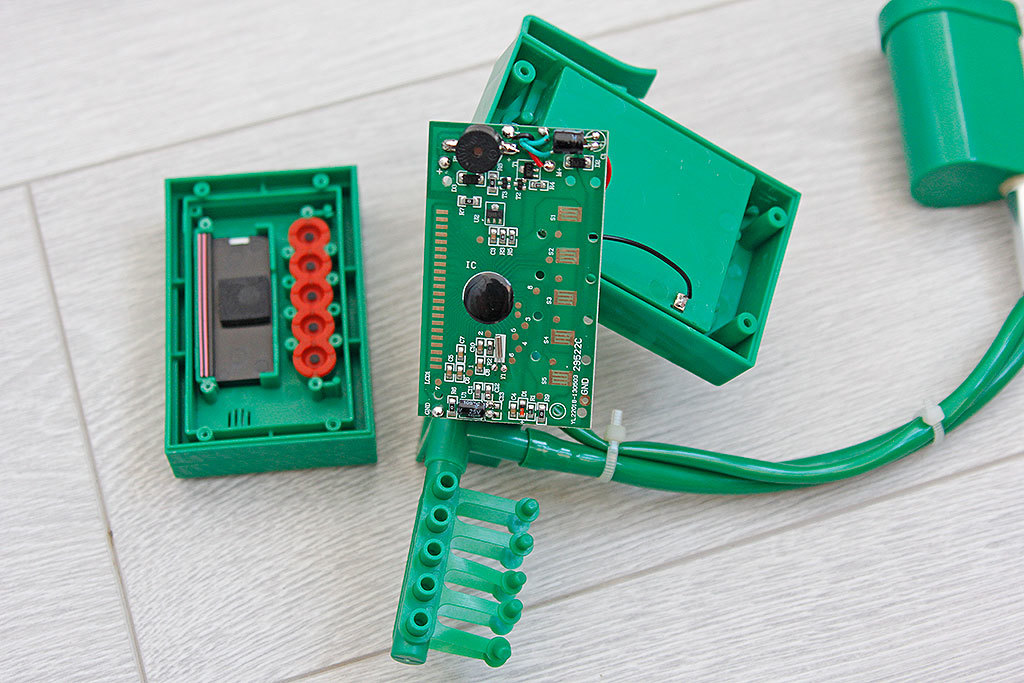
Yes, there were no regrets about self-tapping screws. The microcircuit itself is flooded with a solid compound and there is no possibility to identify it, otherwise everything is quite simple, but of high quality.

The only moment that confused me was the buttons. I love when they click when clicked, and then the usual rubber closing tracks. As I recall, these buttons are short-lived if they are often clicked. Although, what is there to press? Set up once and forget :)
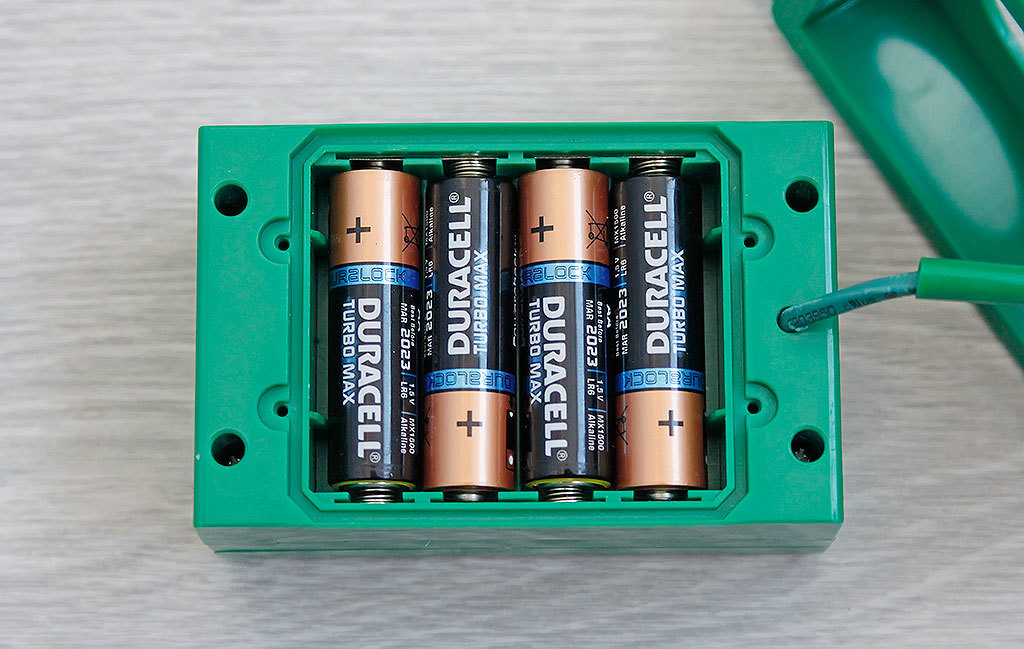
We assemble in the reverse order and insert the batteries.
Here at this stage, when I screwed the battery compartment lid, I already imagined myself as some kind of collector of almost a satellite to launch into orbit. Why so many screws? Especially in the battery compartment? Already 4 pieces, would add even to the pile then the rubber seal chtoli ...
Let's call the inspector, conduct the final inspection before the first launch and press the “test” button.
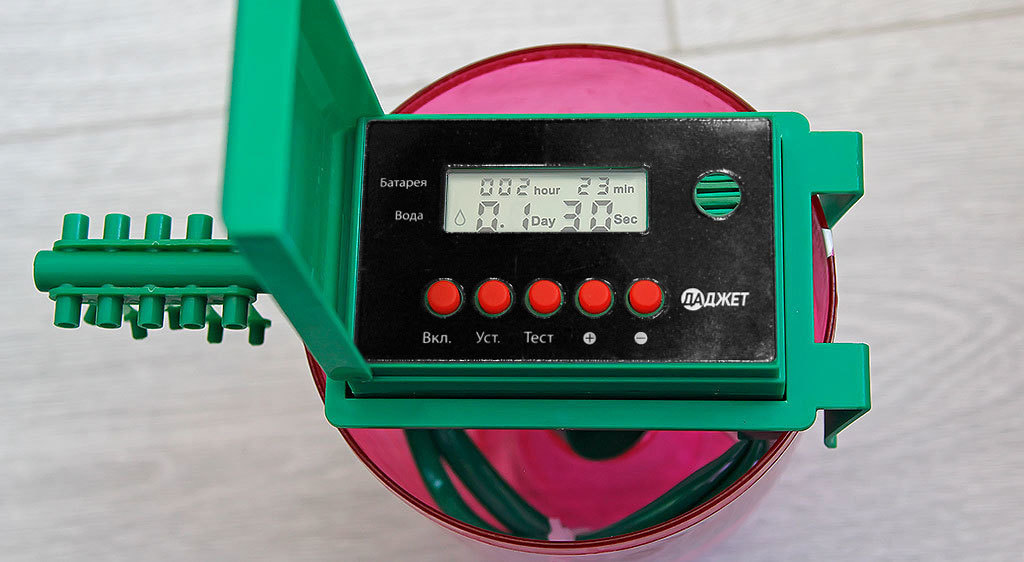
Yeah, autoleave squeals and a droplet icon appears on the screen. There is no water in the reservoir. By the way, plus autoleans, she is not trying to suck air before losing consciousness. A motor without water does not work, otherwise it could have burned.
Next, fill the water in a temporary tank and entangle pots with a network of pipes.
For the first test is enough, I will do more carefully.
We set the frequency and duration of watering. By default, the frequency of 0.1 times a day, you need to be careful. At the top, the timer shows 2 hours and 40 minutes and the countdown begins. We change for 1 time per day and set 20 seconds.
We press the button and the motor, having rumbled merrily, sends life-giving moisture through the tubes to the plants.
By the way, the tank itself should not be higher than the level of the tubes, otherwise the whole system, in addition to auto-irrigation, will also be an auto-drip system. From the ends will drip, sorry.
Therefore, you must either place the tank below the pots or monitor the water level and prevent it from exceeding the level of the ends of the tubes.
In principle, everything. What is useful such a system? First of all, the tank can be of almost any size, although I think the pump has limits on how high it can lift water. If it is the same as with DIY self-watering, then it is about a meter and a half or a bit more. Then there is the opinion that it is better to water the plants at a certain time of the day, there is plenty of room for adjustment. Still, it seems to be good to water the flowers often, but little by little, although here I can already be mistaken, but in any case there is an opportunity to adjust the watering as your heart desires, all that is lacking is the feedback from the flowers. While going to Instructables, you can find a bunch of options for monitoring soil moisture monitoring and even sending data to Twitter.
Link to the autowatering system in the store of the dadjet: autoleaf .
The easiest option for self-watering is the so-called "balls". They represent a kind of closed container with a long spout, which is inserted into the ground. Since this tank is only with one hole that is inserted into the ground, water is consumed only when the soil moisture decreases. very simple method, but for a long time you will not leave a flower with such a thing. Such balls are usually found in sets of 6 pieces each, the price of such a set is around 1000r. plus minus 200r. The volume of one ball is 250 mg. Sometimes they are also called watering cans.
')
By the way, for owners of 3D printers such a ball can be made independently, it will be much cheaper, though ... Having such a tool as a 3D printer, you can make auto-irrigation systems much more interesting.
Link to the model itself for printing: Automatic Plant Water-er - Self Watering Plant Bulb
Well, since we can print such a watering can-ball, then why not make a more interesting model, with a universal thread for ordinary bottles. Although this model is already there, you just download and print: self-watering device
I tried it in action:
Such a thing can be made without plastic printing, it’s enough to remember how we made bryzgalki in childhood. The bottle cap and the base of the handle + a little bit of glue will come off.
The minus here is that the water pours out until it reaches the level of the top hole, in fact a few centimeters of land from the bottom will always be flooded with water, not all colors will like it, put this “watering can” aside.
Speaking about the basics of self-watering systems of plants, it should be noted, and the usual drip. What could be easier? Hung up the tank higher, set the amount of water supplied and that's it. Add some water. There are at least two difficulties here: you need to hang a container somewhere, but this is not always possible, and such a design will not look very good. Plus, you must either calculate, or empirically determine the number of drops, and it will take some time. For the price, I do not understand how much a dropper costs at a pharmacy, I spotted this method in discussing other auto-irrigation systems and simply share information.
OK. Moving on. The next system of passive autowatering is the so-called orchid pot. This is a pot in which there is a certain amount of water, a second smaller pot is placed in it and the water enters through the bottom opening. In principle, in the case of an orchid, it is something akin to hydroponics, only water does not move through the pipes, but is always at the bottom of the pot, but the roots are always in water. Last year, a popular pot of free models for 3D printers - Thingiverse for a long time hung like a pot in the top, only more advanced, with a convenient filler neck and an interesting design.
I printed it out for the sake of interest, now it is waiting for a decent flower for planting inside.
Who wants to spend about 14 hours and print such and such a link to the model: Self-Watering Planter
All these systems of automatic watering produce the so-called passive automatic watering, that is, it is either impossible to intervene in the process, or it can be done in a very poor form. In addition, water tanks in these systems are limited and have a small volume. For true geeks, any system must have an electrical basis and the ability to customize everything and everything to fit every whim is desirable.
That's the same way I thought a couple of years ago and purchased a submersible pump for small fountains or aquariums on e-bay.
I don’t remember how much it cost, but in addition to the pump I had to find the right pipes to connect the pump with the dropper tube. In addition, purchase splitters and faucets. In general, such a DIY in the end goes a lot of money, especially when the reluctance to wait for the parcels and go to local shops. As a brain there was an arduin which monitored the soil moisture through a special sensor. As it turned out, such sensors very quickly fail from corrosion, especially if your sketch is not optimized and voltage is often applied to the sensor.
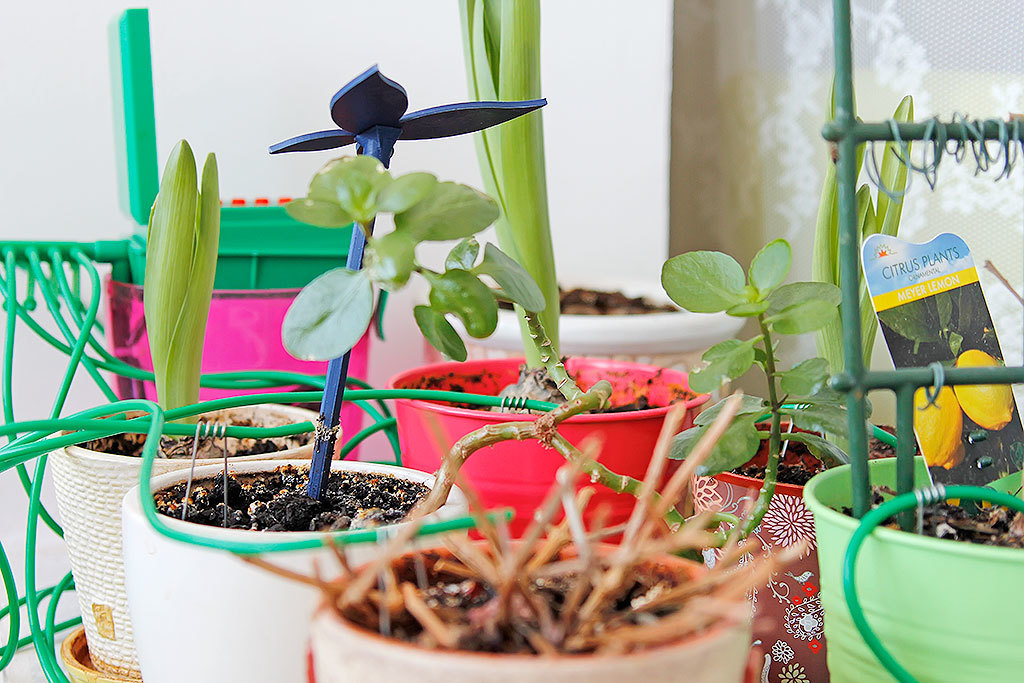
I still have some elements from that system, in the photo you can see how monstrous it is. At that time, I only dreamed of a 3D printer and it was not necessary to make beautiful cases. Everything was on the line, and the pump was immersed in a 5-liter tank.
So that the articulations of the faucets did not leak, I had to close them up with what was at that moment at hand. I did not find the best use of SUGRU residues, it deteriorates over time and will not work for a long time even in a sealed package.
By the way, the pump is quite simple and even has a mechanical pressure regulator by closing the inlet.
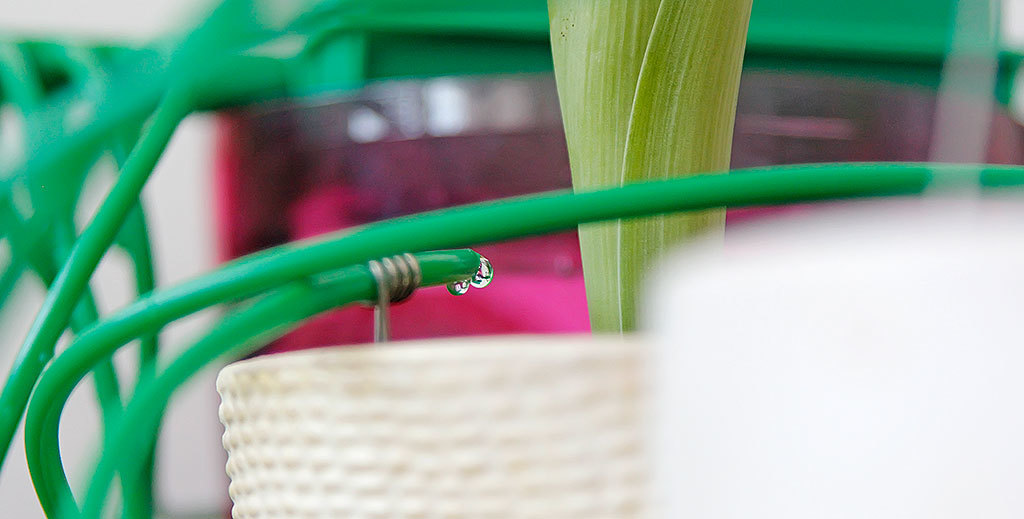
I bought tubes in the store for aquariums, in the same place as faucets. There they are softer than a regular dropper.
And by the way, the greenish tint of the tubes is no accident, the usual transparent tubes become cloudy over time, and on the inner walls under the influence of sunlight and water begins to appear plaque.
In general, this self-made automatic watering did not last long for me, after moving only some components remained, and it was already reluctant to reassemble it, and it was no longer possible to place it beautifully.
But as a rule, you think of something, invent something, and then bam, this is already ready, produced at the factory. So here, autolyka comes to replace home frankenstein .
Inside the package is:
- autoleigh itself
- instructions for use
- a coil of flexible tube green
- cap with four screws for the battery compartment
- set of ten faucets
- optional black coil
- Holders for automatic pot irrigation
Here holders are a cool thing, everything is elegant and simple. I put the tube inside the spring and stuck the antennae into the ground. Everything. You can adjust clearly where the water will be poured: in the center right on the roots or closer to the edge.
Cranes is also an interesting solution. There are exactly ten of them to fit on each tube. Outlets here just 10.
If they were not, then the length of the tubes would affect the watering, in principle, this can be calculated by the formula, what is the length of the tube, how much water will pour. Well, or approximately you can select values from the table. I did not bother and just made all the tubes of the same length.
It looks like autoleigh itself. Submersible pump on a remote thick hose in a sealed housing with a filter at the inlet. This is good, garbage will not damage the pump if it accidentally falls into the water.
Frame with mounts on the tank wall, which houses the control unit.
What's inside? Unscrew 4 screws, remove the lower part of the body. Under it is a board attached by an even greater number of screws.
Yes, there were no regrets about self-tapping screws. The microcircuit itself is flooded with a solid compound and there is no possibility to identify it, otherwise everything is quite simple, but of high quality.
The only moment that confused me was the buttons. I love when they click when clicked, and then the usual rubber closing tracks. As I recall, these buttons are short-lived if they are often clicked. Although, what is there to press? Set up once and forget :)
We assemble in the reverse order and insert the batteries.
Here at this stage, when I screwed the battery compartment lid, I already imagined myself as some kind of collector of almost a satellite to launch into orbit. Why so many screws? Especially in the battery compartment? Already 4 pieces, would add even to the pile then the rubber seal chtoli ...
Let's call the inspector, conduct the final inspection before the first launch and press the “test” button.
Yeah, autoleave squeals and a droplet icon appears on the screen. There is no water in the reservoir. By the way, plus autoleans, she is not trying to suck air before losing consciousness. A motor without water does not work, otherwise it could have burned.
Next, fill the water in a temporary tank and entangle pots with a network of pipes.
For the first test is enough, I will do more carefully.
We set the frequency and duration of watering. By default, the frequency of 0.1 times a day, you need to be careful. At the top, the timer shows 2 hours and 40 minutes and the countdown begins. We change for 1 time per day and set 20 seconds.
We press the button and the motor, having rumbled merrily, sends life-giving moisture through the tubes to the plants.
By the way, the tank itself should not be higher than the level of the tubes, otherwise the whole system, in addition to auto-irrigation, will also be an auto-drip system. From the ends will drip, sorry.
Therefore, you must either place the tank below the pots or monitor the water level and prevent it from exceeding the level of the ends of the tubes.
In principle, everything. What is useful such a system? First of all, the tank can be of almost any size, although I think the pump has limits on how high it can lift water. If it is the same as with DIY self-watering, then it is about a meter and a half or a bit more. Then there is the opinion that it is better to water the plants at a certain time of the day, there is plenty of room for adjustment. Still, it seems to be good to water the flowers often, but little by little, although here I can already be mistaken, but in any case there is an opportunity to adjust the watering as your heart desires, all that is lacking is the feedback from the flowers. While going to Instructables, you can find a bunch of options for monitoring soil moisture monitoring and even sending data to Twitter.
Link to the autowatering system in the store of the dadjet: autoleaf .
Source: https://habr.com/ru/post/368113/
All Articles