As I did the LED panel for monitoring servers, and at the same time, the light music for parties
I am involved in server administration and web services support as a freelancer. With the increase in the number of "wards", simple monitoring began to take an indecently long time. I wanted to make for myself a full-fledged information panel. What came out of this read under the cut.
Yes, I am aware that there are many different ways to receive operational alerts on certain events: a smartphone, various displays, indicators, and even a smart watch. But…
Many years ago, I liked the traffic warning system in Yandex : the usual traffic lights, which in different colors showed the degree of traffic congestion. The implementation of Yandex inspired to collect something similar, also unusual, so that it would be useful.
')
Over time, the idea was formed - a light box with colored LEDs inside - that's what I need!
Want!..
Originally wanted to see in the finished product:
- Ethernet control
- the ability to set each LED its own color and brightness,
- inclusion on the motion sensor, for the night mode.
The first! The first! Welcome! Welcome!
As a protocol for communication, I chose the usual HTTP request, in which REQEST itself contains the command, in the form of hexadecimal numbers.

This method seemed to me the most versatile. The command is easy to submit from scripts, applications, even from a regular browser. Hosts may be different, not connected to each other. The command from the example will look like this:
http: //192.168.1.241/05FF800000000000
Muhtar! To me!
The list of commands is small, but includes the necessary set:
- Turn on a separate LED
- Batch turn on all LEDs
- Motion Sensor Setup
The controller recognizes them in length.
Control of a separate LED (8 bytes)
NN RR GG BB rr gg bb AA
Where:
NN - LED number,
RR GG BB - LED color,
rr gg bb - the second color, when using animation,
AA — the transition time between the primary and the second color (animation speed); at zero, the primary color is constantly lit.

Transition diagram between two colors, with animation enabled
Management of all LEDs at once (288 bytes (96 * 3))
RR GG BB RR GG BB RR GG BB ... RR GG BB
Where:
RR GG BB - LED color.
Batch management is convenient to use in cases when you need to display an animation.
Note: if the number of LEDs is different from 96, the command will change its size to the corresponding number.
Motion sensor behavior control (1 byte)
CC
Where:
CC is a team.
List of control commands:
00 - OFF, the glow is off, the motion sensor is off,
01 - ON, the glow is on, the motion sensor is off,
02 - AUTO, the glow turns on when the motion sensor responds.
The duration of work from the motion sensor is regulated by a variable resistor on the sensor itself. If desired, you can implement the duration defined by the controller, and adjustable via commands.
Make me beautiful!
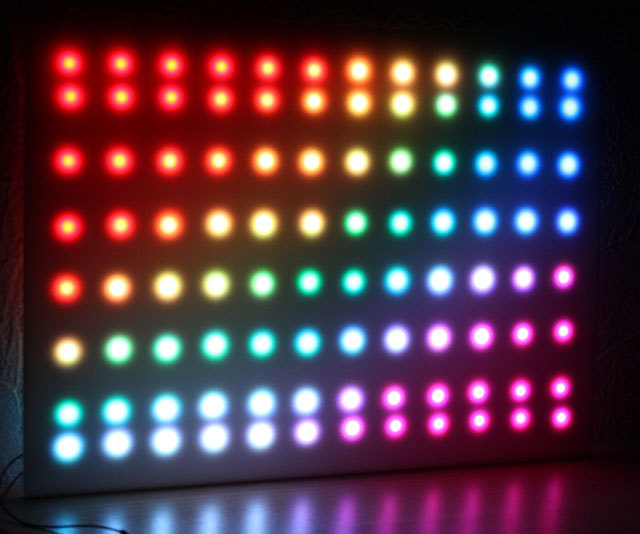
I wanted the device to be not only functional, but also to please the eye with its appearance.
Despite the small size, the LEDs themselves are very bright, so the thought immediately came to disperse it through white plastic. Milk acryl was most suitable for this purpose. When passing through it, the light is scattered and acquires a pleasant glow to the eye.
If you take a simple transparent plexiglass and glue it with a film, it will be cheaper, but the light will not be diffused when passing through it. And even though the LEDs themselves behind the film will not be visible, but the spot of light will be clear, which looks ugly for my taste.
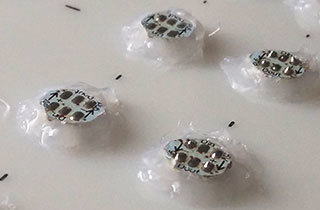
LEDs are mounted on the back with a glue gun. They keep with this method not too reliably, but nobody will pull them there either. It is advisable to touch contacts before sticking.
The frame is simple, the corners are rounded off to taste, an aluminum or plastic profile is glued along the edge so that you can hang it on the wall as a picture.
I never get bored!
The options for the location of the indicators are infinite, who have enough imagination. In the process of operation, I will not once again refine the scheme and change the position and purpose. On that she and universality, has bothered one - has made another.
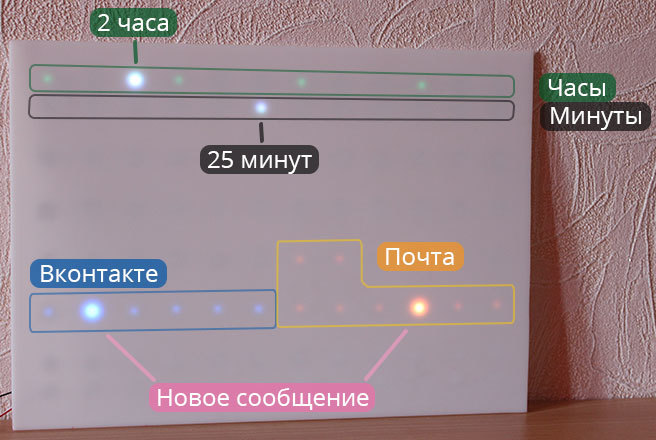
The top two rows are clocks showing the current time. The first row is the current hour, the second row is the minutes, rounded down to 5 minutes. Green highlights the reference values (0, 3, 6, and 9).
Next are the indicators of different events on the servers (for example, disabled).
The sixth row is an indicator of new messages in social networks and mail. Different indicators for different senders. With one message, the indicator just lights up and lights up constantly. With a few - pulsing. The more messages, the more pulsing.

I use the bottom two rows as needed for various temporary tasks.
I want more!
In the process of creating different ideas came. Not all were useful to me, but perhaps they seem interesting to someone.
When the sensor is triggered, you can send an event to a remote host (server).
Implement Watchdog so that the controller tracks the amount of time elapsed since the last access, and when the limit was exceeded, turned on the red indicator and blinked to them more often as the period increased.
Add a wifi module for wireless operation.
Add a Bluetooth module for direct communication with a smartphone.
A smartphone application that will check various events: SMS and missed calls from certain senders, calendar events, etc.
Offer your functional options in the comments.
From what, from what, from what, are made ours ...
For the technical part of the project, I used the following components:
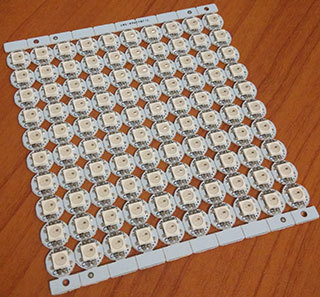
- controlled color LEDs RGB LED 5050 WS2812B (100 pcs)
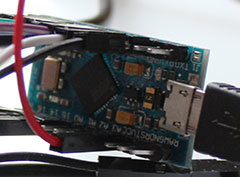
- Microcontroller Arduino Pro Micro 16 MHz, 32 KB ROM, 2.5 KB RAM
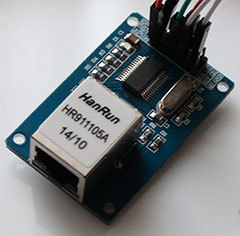
- network adapter on ENC28J60 chip
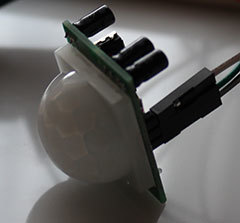
- Motion Sensor
- power supply 2A
- acrylic plexiglass, white, 420 x 300 mm, 3 mm thick
- aluminum channel 10x10x10x1.5 mm
We built, built and finally built!
For me, the benefits are obvious:
- time spent on monitoring servers has been significantly reduced,
- there is no need to constantly check mail and messages,
- at night pleases automatically switched on room lighting,
- Guests are delighted with color music.

The cost of all components of about 2000 p. ($ 25). The build scheme and firmware sources can be taken on GitHub .
Source: https://habr.com/ru/post/367781/
All Articles