3D printer? No, 3D-frezer
Thanks to our MC2 and MC5 printers , a fairly large 3D printing community has gathered around 3D MasterKit .
For them, 3D printers have gradually become a common and necessary thing in home workshops. So! The community is demanding the development of home modeling and have been looking at milling machines for a long time, dreaming about such inexpensive, easy-to-use home milling machines.
If you dream, you have to do it. If you have to do it, you have done it!
It turned out not just a mill, but a 3D mill . The appearance of the router can be viewed on our website .
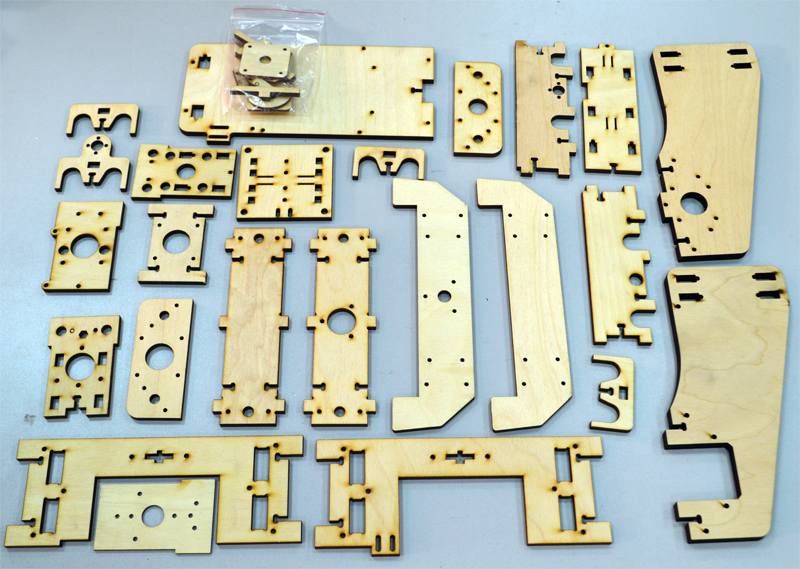
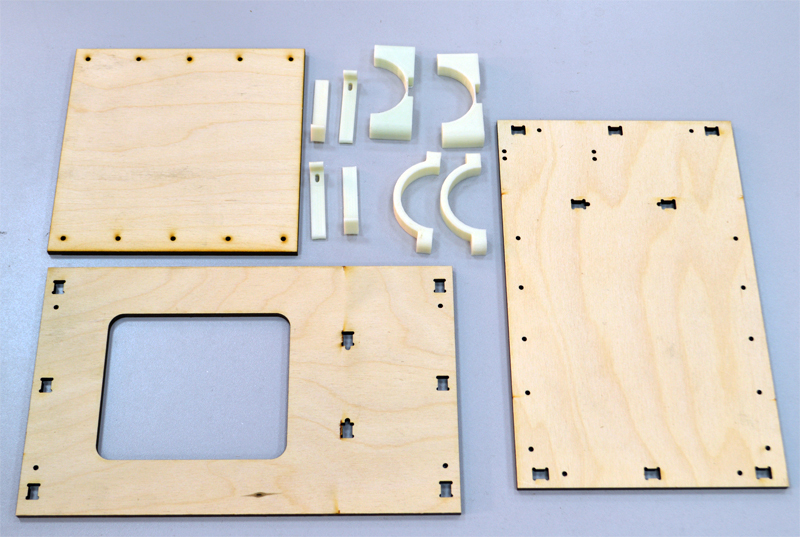
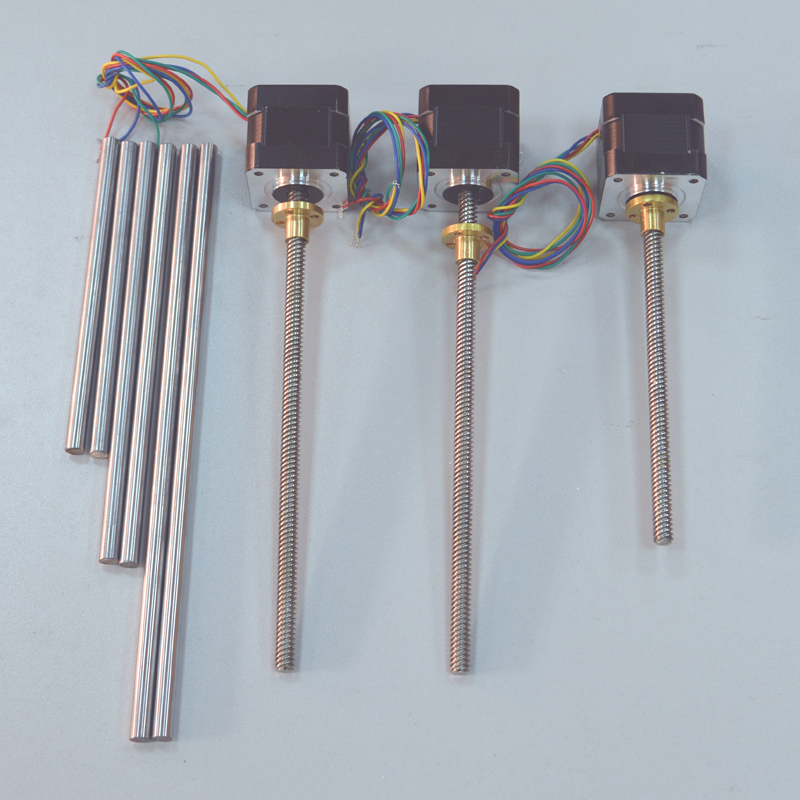
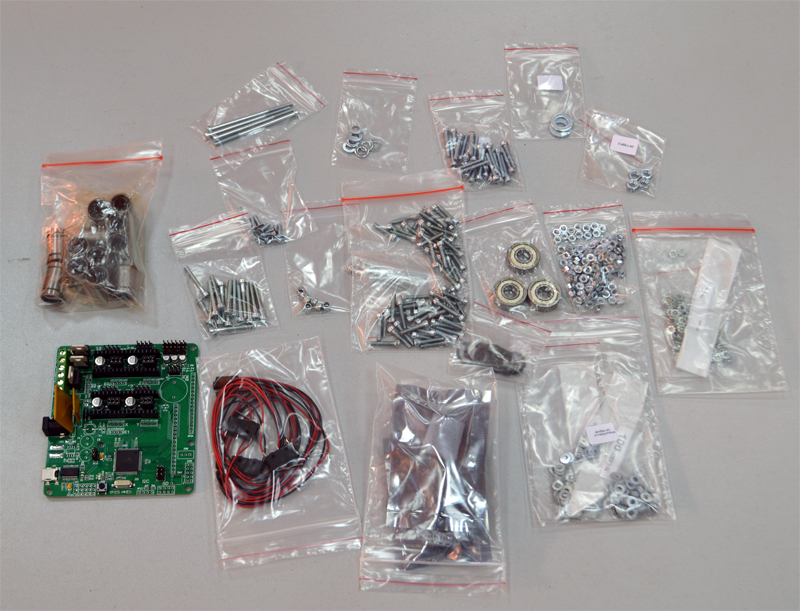
Below the photo shows all the details of the designer - the structure, kinematics and electronics.
')
Now about the continuity of the software.
If a 3D printer layer-by-layer grows a model, then a 3D router bit-by-layer removes the excess. Since this is a DIY 3D router, it should be clear in the management of anyone who exploits a 3D printer.
Like any Reprap, our 3D printers are running a completely free RepetierHost program. This program has long been a benchmark for all DIY printers. It is intuitive for beginners, Russified and regularly updated. This means that the 3D milling machine should be controlled by RepetierHost. And the files of the models that the router “eats” should be stl exactly the same as for the 3D printer.
We have seriously worked on RepetierHost. And now he manages the 3D router as an ordinary 3D printer.
Modified RepetierHost can be downloaded only from our site.
Next, using the standard set of 3D printer programs, I'll show you how to make a housing for an electronic router. Printer electronics is our Mastertronics board. The board is attached to the printer and in the basic version does not close the case. In principle, nothing wrong with that, but it turns out some incompleteness.
See the video.
All the details of this case look like this:
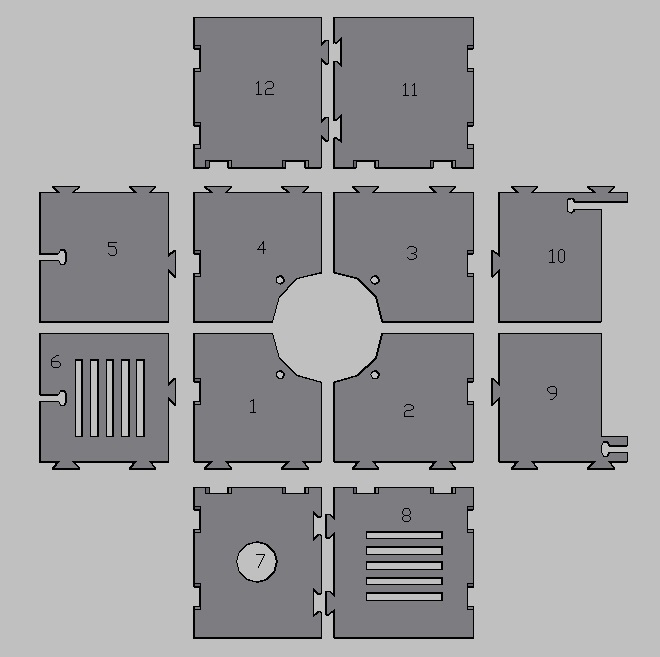
Here are all the stl files drawn in sketchup.
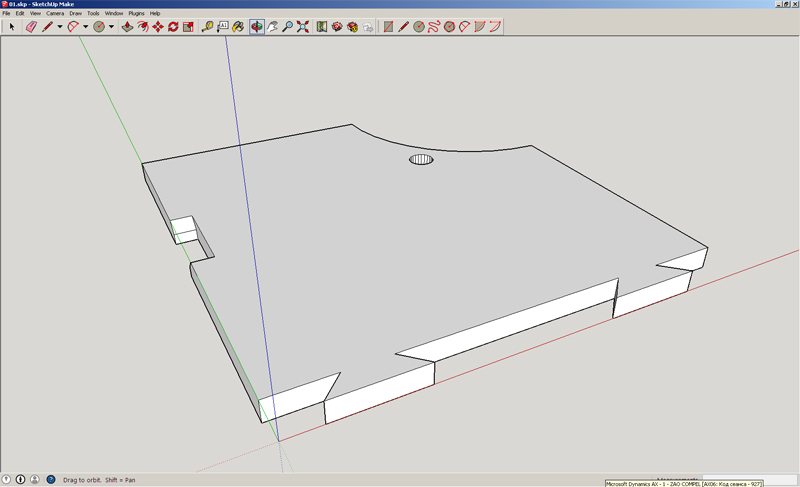
1. Creating a model . Sketchup is one of the most accessible and free software for 3D modeling.
I will not describe how to create a model in a sketch. And just show that the model is made exactly in it and exported to a stl-file.
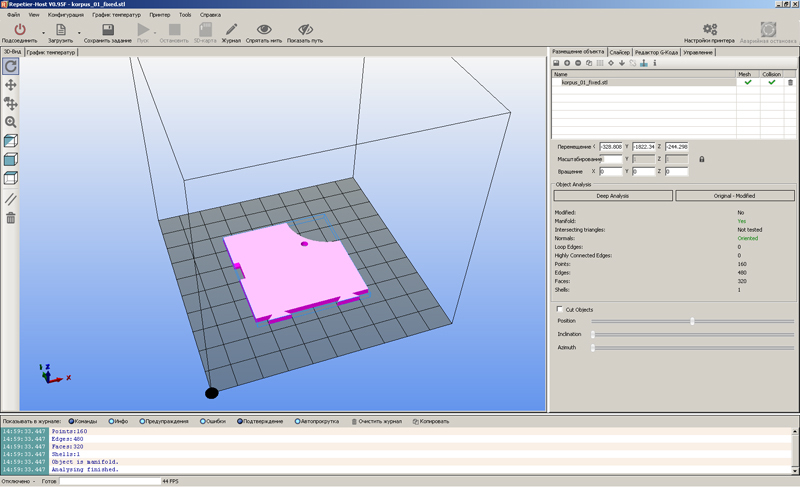
2. Load the stl file exported from Sketchup into RepetierHost. We process it in the built-in slicer. And send to print. ABOUT! Not for printing but for milling!
For owners of 3D printers, these are the most familiar operations.
In the next article I will compare the details printed on a 3D printer and milled on a 3D router.
I will make two cases on a 3D printer and on a 3D router.
See you later!
For them, 3D printers have gradually become a common and necessary thing in home workshops. So! The community is demanding the development of home modeling and have been looking at milling machines for a long time, dreaming about such inexpensive, easy-to-use home milling machines.
If you dream, you have to do it. If you have to do it, you have done it!
It turned out not just a mill, but a 3D mill . The appearance of the router can be viewed on our website .
Below the photo shows all the details of the designer - the structure, kinematics and electronics.
')
Now about the continuity of the software.
If a 3D printer layer-by-layer grows a model, then a 3D router bit-by-layer removes the excess. Since this is a DIY 3D router, it should be clear in the management of anyone who exploits a 3D printer.
Like any Reprap, our 3D printers are running a completely free RepetierHost program. This program has long been a benchmark for all DIY printers. It is intuitive for beginners, Russified and regularly updated. This means that the 3D milling machine should be controlled by RepetierHost. And the files of the models that the router “eats” should be stl exactly the same as for the 3D printer.
We have seriously worked on RepetierHost. And now he manages the 3D router as an ordinary 3D printer.
Modified RepetierHost can be downloaded only from our site.
Next, using the standard set of 3D printer programs, I'll show you how to make a housing for an electronic router. Printer electronics is our Mastertronics board. The board is attached to the printer and in the basic version does not close the case. In principle, nothing wrong with that, but it turns out some incompleteness.
See the video.
All the details of this case look like this:
Here are all the stl files drawn in sketchup.
1. Creating a model . Sketchup is one of the most accessible and free software for 3D modeling.
I will not describe how to create a model in a sketch. And just show that the model is made exactly in it and exported to a stl-file.
2. Load the stl file exported from Sketchup into RepetierHost. We process it in the built-in slicer. And send to print. ABOUT! Not for printing but for milling!
For owners of 3D printers, these are the most familiar operations.
In the next article I will compare the details printed on a 3D printer and milled on a 3D router.
I will make two cases on a 3D printer and on a 3D router.
See you later!
Source: https://habr.com/ru/post/366927/
All Articles