The work of WiFi modules "Master Keith" in the control system of home automation OpenHAB. Part 1: Connection and Setup
A noticeable number of wireless devices for home automation has appeared in the Master Keith product range, but it is often difficult to assemble them into some kind of optimal home control system due to the lack of necessary, and most importantly, convenient software. To solve this problem, we will try to use the already existing popular home automation systems. This is real! For example, the OpenHAB home automation system is an open project, about which quite a lot has already been written, even in the Russian part of the Internet.
One of these publications: "OpenHAB - become a programmer of your own home" (I recommend reading, if you have not done so before).
The distribution for a very simple installation of OpenHAB can be taken absolutely free here .
')
It will be logical if I omit the description of OpenHAB and the way it is installed on the computer. The purpose of the article is to figure it out for yourself and show you some examples of connecting the Master Keith modules to OpenHAB.
First of all, you will need to download and install the Runtime core - the main OpenHAB module, which is independent of the operating system.
For simplicity, I will use the usual text editor Notepad, since all the files you will have to deal with are text files. Just in the future, we will save them not in the .txt format, but with the necessary extensions; with what exactly - let's figure it out as we go ...
Having installed the demo version, I began to try various settings, and when it began to work, I removed all the “extras” so as not to interfere. The result was a small configuration called "Test Drive MK". It can be downloaded and installed on your computer, so as not to type manually.
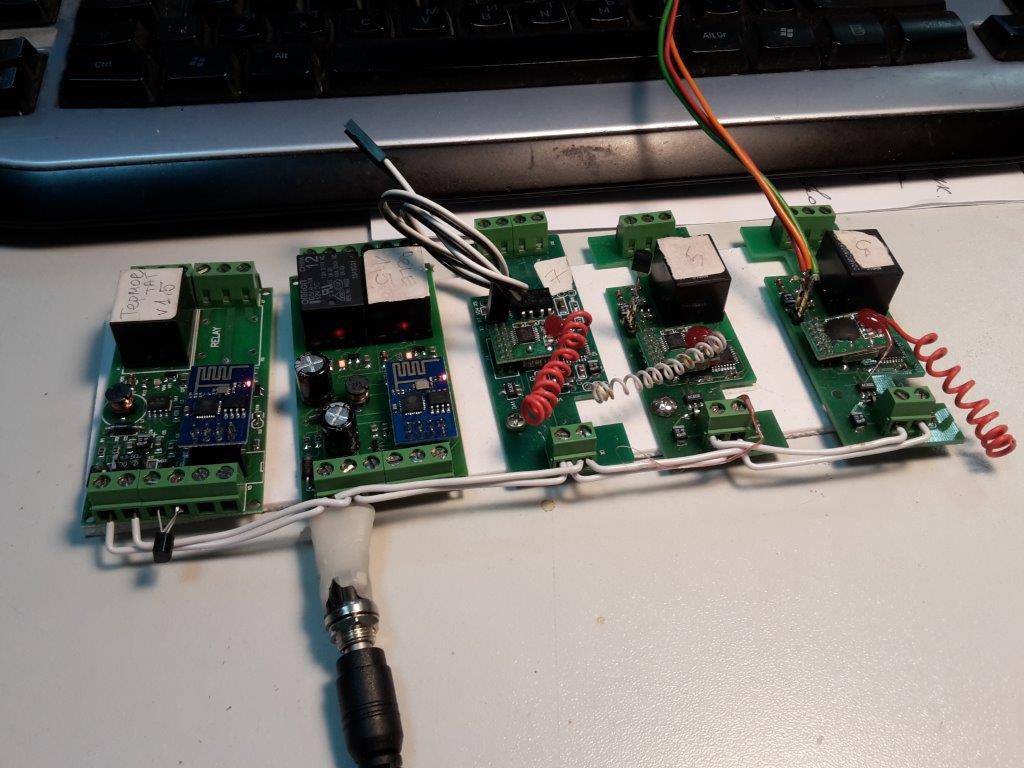
Another necessary preparatory step was to connect all the devices under test to the same local network as the computer with OpenHAB installed.
So…
Test drive device number 1
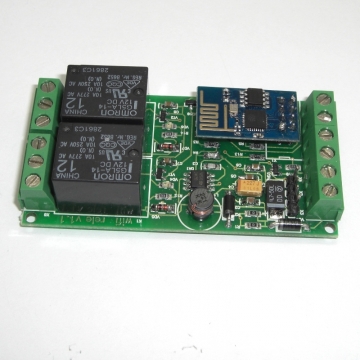
MP3500 Wi-Fi relay, 2 channels (based on ESP8266).
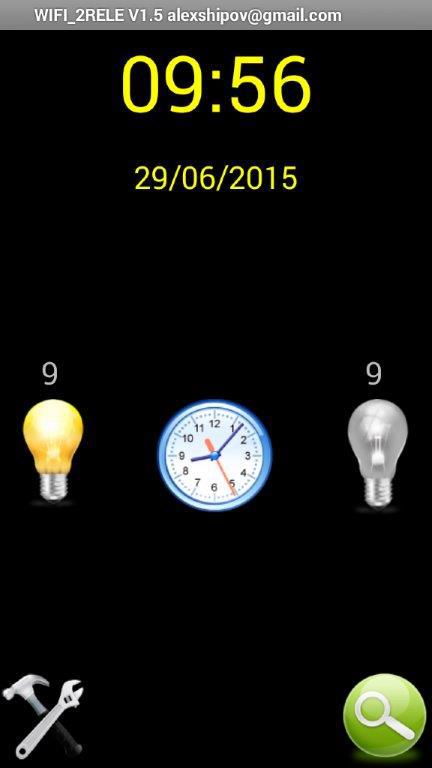
This is the first module in the line of devices based on the ESP8266 Wi-Fi chip, which is so popular today. It allows using a simple Android application (such as DEMO) to click two relyushkami, count the time each load. To do this, you must either connect to its own wireless network, or connect it to your home Wi-Fi network.
I chose the latter, and using the included Configurator I connected the module to the same local network as OpenHAB. The module itself is controlled by AT commands like! SetR0_1, and sends a response of the format! LEDOFF1. The commands are described in detail in the WORK PRINCIPLE section.
Now directly on configuring OpenHAB. All the files that we will change are in the folder C: \ OpenHab \ configurations. This folder should be saved as a backup.
1. General settings. Find in the folder C: \ OpenHab \ configurations file openhab.cfg. These are the basic system settings. Next, from the OpenHAB DEMO configuration, we remove the extra comments (lines starting with #). For us here, it is important to correctly launch the necessary "TCP - UDP Binding" - a driver for communicating with devices using TCP / UDP protocols, which will provide communication with the MP3500 module using the UDP protocol. We make all the settings specifically for UDP (only the necessary lines with explanations are left):
########### TCP - UDP Binding ########################
# Listening port for incoming connections of modules of the MP3500, 3502 family
udp: port = 7777
# Maximum buffer size for read data and other fine-tuning
udp: buffersize = 1024
udp: itemsharedconnections = true
udp: bindingsharedconnections = true
udp: directionssharedconnections = true
udp: selecttimeout = 1000
udp: charset = ASCII
# Allow mask when addressing ip: port, for example 192.168.0.1:*
udp: addressmask = true
# Without this parameter, banding will not start at all: update interval
udp: refreshinterval = 250
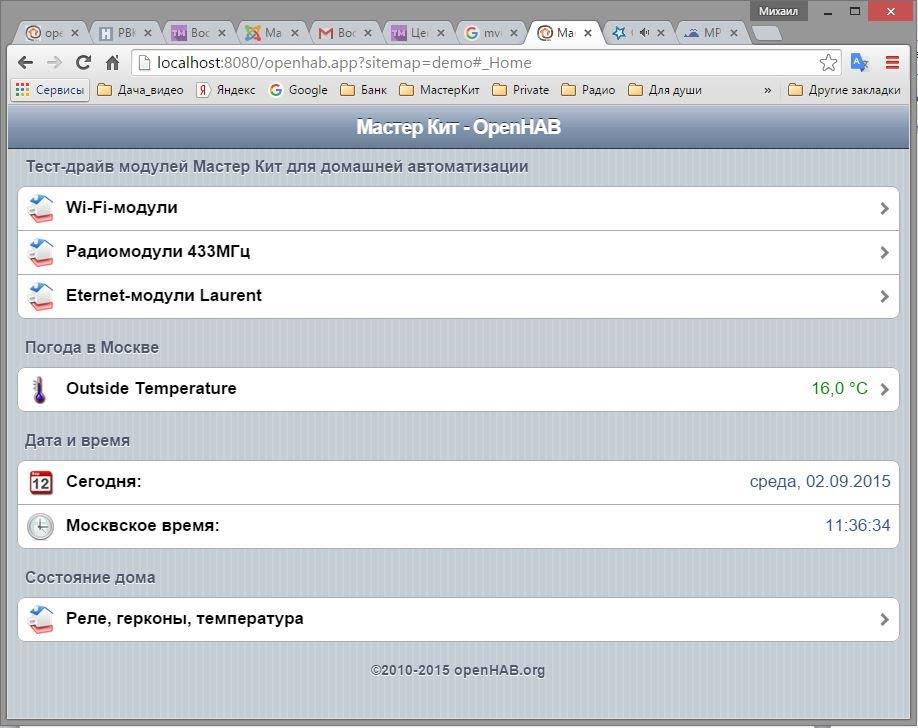
2. System interface. After we have dealt with the system settings, we will deal with the WEB interface. In many ways (but not completely), the file with the extension .sitemaps is responsible for it. The name of the file itself determines the address of the site on the network, which you will type on the browser command line.
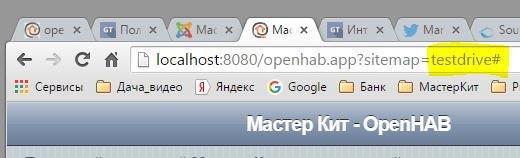
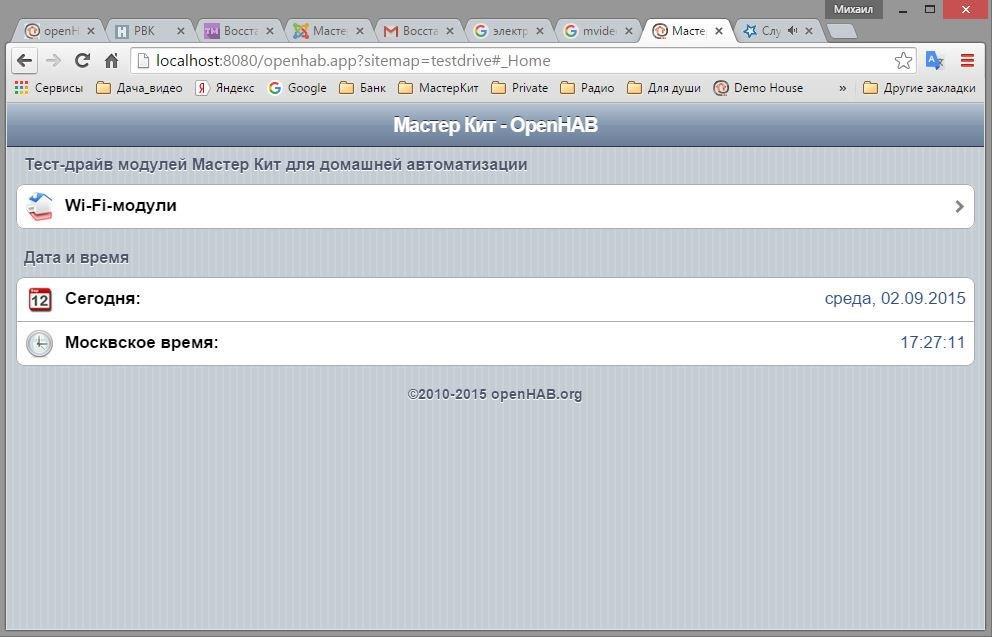
The file is located in the folder C: \ OpenHab \ configurations \ sitemaps. To get such a picture of the main screen:
The following content is required for the testdrive.sitemap file:
// The title is described here.
sitemap testdrive label = "Master Kit - OpenHAB"
{
Frame label = "Test drive modules Master Kit for home automation" {
// Create a group for Wi-Fi modules
Group item = gFF label = "Wi-Fi modules" icon = "cellar"
}
// Leave to confirm that the system is "live" display of time and date. In // configuration file for this, I left a link to the site of time and its update period:
Frame label = "Date and time" {
Text item = Date
Text item = Time
}
Do not lose the braces {} - they are important!
3. Description of the MP3500 module in the system and how to control it. All controls are described in the file with the .items extension, which is located in the C: \ OpenHab \ configurations \ items folder.
Group gFF (All) // Creates an interface page for Wi-Fi modules
Group WIFI_3500 "MP3500 Wi-Fi Relay, 2 Channels" (gFF)
/ * Page for working with MP3500 WiFi relay, 2 channels * /
Switch MP3500_R1 "MP3500_Relay 1" (WIFI_3500) {udp = "> [ON: 192.168.2.109: 7777: MAP (MP3500_R1.map)],> [OFF: 192.168.2.109: 7777: MAP (MP3500_R1.map)]"}
Switch MP3500_R2 "MP3500_Relay 2" (WIFI_3500) {udp = "> [ON: 192.168.2.109: 7777: MAP (MP3500_R2.map)],> [OFF: 192.168.2.109: 7777: MAP (MP3500_R2.map)]"}
Switch MP3500_R2_Button "MP3500_Relay 2 Pulse" (WIFI_3500) {udp = "> [ON: 192.168.2.109: 7777: MAP (MP3500_R2_Pulse.map)]]}
Switch MP3500_Request "MP3500 Request Status" (WIFI_3500) {udp = "> [ON: 192.168.2.109: 7777: MAP (MP3500_Info.map)]"}
String MP3500_Stat "Answer received: [:% s]" (WIFI_3500) {udp = "<[192.168.2.109:*:'REGEX ((.*))]] ']"}
/ * NTP binding demo item * /
DateTime Date "Today: [% 1 $ tA,% 1 $ td.% 1 $ tm.% 1 $ tY]" {ntp = "Europe / Moscow: en_EN"}
DateTime Time "Moscow time: [% tT]" {ntp = "Europe / Moscow: en_EN"}
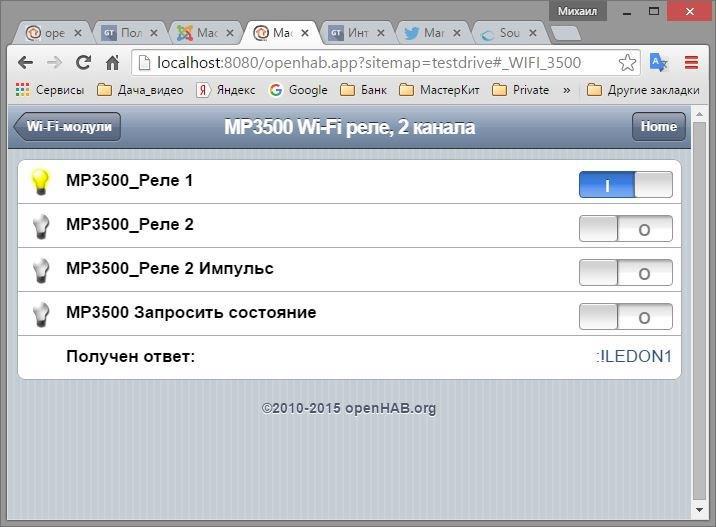
A file with this content forms the following page on the screen.
Attention! In the file, the text relating to one element (Item), should be written in one line. On the page of this publication, this text in one line does not fit; See the source file testdrive.items.
Group elements are responsible for grouping controls and for navigating to them on the page. DateTime elements provide a date and time display on the main page. For the control page by the MP3500 module itself, there are 4 elements of the type Switch and one type of String.
For example, I made switches for each of the outputs. These are MP3500_Relay 1 and MP3500_Relay 2. A switched on light bulb and a blue color of the switch engine indicate that the relay is on and, respectively, vice versa. This is the most common way to control a relay.
The third top element MP3500 Relay 2 Impulse demonstrates the ability of the WiFi relay to operate in a pulsed mode, that is, by pressing the button, the relay is switched on for a period of time specified by you in the program, for example, 2 seconds. After this, the relay returns to the off state, and the on-screen switch together with the light bulb also goes into the off state.
I did not find in the OpenHAB description an item of the BUTTON type, so resetting the switch to the off state had to be done by using the RULES tool (Rules), but more on that below.
The button MP3500 Request Status allows you to read information from the module about its state, namely: each relay is on or off and the operation time of each relay in minutes is the motorcycle hours counter. Sometimes this is useful, for example, for analyzing heating costs. You can find out how many hours a day the heater is running to maintain the set temperature.
And the response line is received. Actually, the module response is displayed. In the figure above, you can see that channel 1 is enabled.
Now we will analyze the command structure that controls the relay through the TCP / UDP Binding we are running. The overall command pattern looks like this:
udp = "[:::], [:::], ..."
(I remind you once again - the text is written in one line). Read more here .
From the template can be seen:
• you can select a protocol, in our case it is udp;
• you can specify the direction of transmission, incoming or outgoing;
• bind to the event - the OpenHAB team;
• specify the IP address and port;
• and ... the most interesting thing is to specify the transformation or transformation rule, since to send a command to the port in an explicit form - a combination of symbols of the type! SetR0_1 will not work.
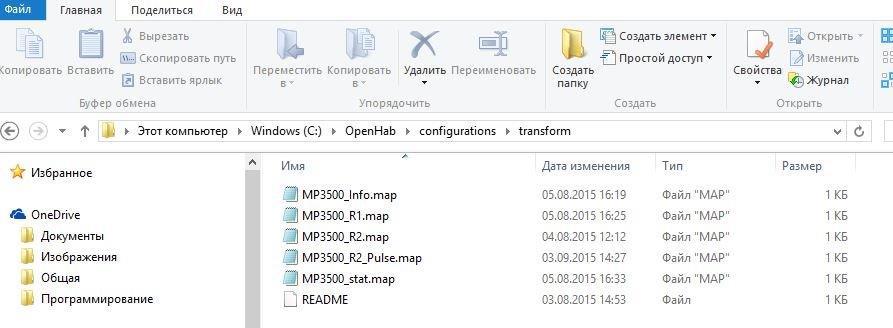
More information about the rules of transformation (this is important)! For storage of transformation rules files with the .map extension are used. They are stored in the C: \ OpenHab \ configurations \ transform folder. As usual, these are simple text files with the contents of the form:
ON =! StartPulseR2,2 \ r
OFF =! SetR0_2 \ r
That is, you describe the correspondence between the OpenHAB team and the command of the module itself. In the first line, for example, on the ON command, which is generated inside OpenHAB when you click on the switch image, a character string is sent to the port itself! StartPulseR2,2 \ r, which will force the MP3500 module to work. This approach has some disadvantages in that for each control you have to create your own file, but if you give them a clear name, then you can live. My folder with files turned out like this:
Now consider a specific line, for example:
Switch MP3500_R1 "MP3500_Relay 1" (WIFI_3500) {udp = "> [ON: 192.168.2.109: 7777: MAP (MP3500_R1.map)],> [OFF: 192.168.2.109: 7777: MAP (MP3500_R1.map)]"}
In human language, it translates as:
- Switch MP3500_R1 - element of type Switch with the name of the system MP3500_R1;
- “MP3500_Relay 1” - the name that we see on the screen;
- (WIFI_3500) - belongs to the group WIFI_3500;
- udp = "> [ON: 192.168.2.109: 7777: MAP (MP3500_R1.map)] - reads like this: in the case of the ON command, establish an outgoing connection with the address on the network 192.168.2.109 * and send characters through the port 7777 via the UDP protocol which are in the file MP3500_R1.map;
- > [OFF: 192.168.2.109: 7777: MAP (MP3500_R1.map)] "} - similarly for the OFF command. If there were other commands, they could be written similarly, separated by commas.
* the specific address that my router specifically assigned to my module, you will have your address. If there are difficulties - contact the technical support service Master Keith .
All text is written all in one line. We must not forget or skip round, square and just brackets, quotes and commas - everything matters. Often for this reason, the device does not work.
This command reads the module’s response and displays it in the “Answer received” line.
String MP3500_Stat "Answer received: [:% s]" (WIFI_3500) {udp = "<[192.168.2.109:*:'REGEX ((.*)) ']"}
Please note - there is already an incoming connection and I used a mask (*) in order to read the signal from any port. If you specify port 7777, then nothing will be read. On this, I "killed" a couple of evenings. But now it does not threaten you. Consider the new and incomprehensible parts of the command:
'REGEX ((. *))' Is the “Regular Expression” function, with which you can find and select the necessary parts of the text in the read line. Used in many programming languages. Read more here .
I will explain how to use this mechanism as needed when connecting the following modules (still a nuisance!), And this, the simplest case, is deciphered as follows: read (capture) any number of any characters in the incoming line except the ending sign.
[:% s] - this part of the command displays the read value on the screen.
4. Work. This is the minimum that is needed in order to start managing the MP3500 Wi-Fi relay. We give food, we wait for registration in a network and we start to press buttons.
You can preview a short video:
5. And finally, a few words on how to make the switch on the screen automatically go OFF in the BUTTON mode. To do this, we find in the folder C: \ OpenHab \ configurations \ rules the file testdrive.rules. We use the capabilities of the internal timer of the system.
If you do not consider the standard connection of the necessary libraries and the declaration of variables, then the main element of the code is this:
if (receivedCommand == ON) {
if (timer == null) {
timer = createTimer (now.plusSeconds (2)) [|
sendCommand (MP3500_R2_Button, OFF)
If the received command is ON and the timer is reset, we start a new cycle of the timer until “from now” to “plus N” seconds and then send the OFF command to the desired element. 2 is just the number of seconds that I use to control the relay in the ON =! StartPulseR2,2 \ r command, that is, turn on relay 2 for 2 seconds.
It was an introductory part, it will be shorter and more interesting further, because you will not have to talk about basic things, such as the location of folders. Winter is just around the corner, we will connect WiFi - the MP3502 thermostat to OpenHAB.
I hope that you will install OpenHAB on your computer and will also begin experiments on managing your home.
ps By the way, OpenHAB has a mobile application!
Posted by: Miklebor
Source: https://habr.com/ru/post/366355/
All Articles