Who needs high resolution 3D printing? And whether it is necessary at all
Hello! My name is Sergey. I often read Habrahabr and Geektimes and now I decided to write my first article on 3D printing, namely the resolution of 3D printers. For this, I launched my printing press ...
... well, here I was a little misleading, before it was launched, it was necessary to carry out the preparatory work.
Well, before that a little background. A friend of mine, is engaged in jewelry production, purchased a 3D printer, which is based on a DLP projector. The jeweler says that they say that vertical stripes are visible on the elements of small diameter. It is clear that these bands are due to a small, relatively, resolution. Usually, the resolution of 3D printers based on DLP projectors in the region of 45-55 microns and more. I became extremely interested in how this manifests itself in the details, and I set to work.
Let's continue the main narrative, preparatory work:
')
Preparation includes designing (big word here) model, which I will print. It is a base with protruding cylinders of different diameters. The size of the model can look at the picture below.

A little running ahead, the number 1 marks the cylinder, which in the photographs is marked with a dot in the middle, and the number 2 marks the cylinder opposite the mark, since point on the end of the handle is no longer put.
Z resolution for all models will be the same - 50 microns, and in the XY plane - different. I decided that I would make a “palette” of resolutions 10, 30, 50, 75 microns.
The picture of the place of interest will look like this.

Top - the highest resolution (10 microns), at the very bottom the lowest (75 microns).
Print
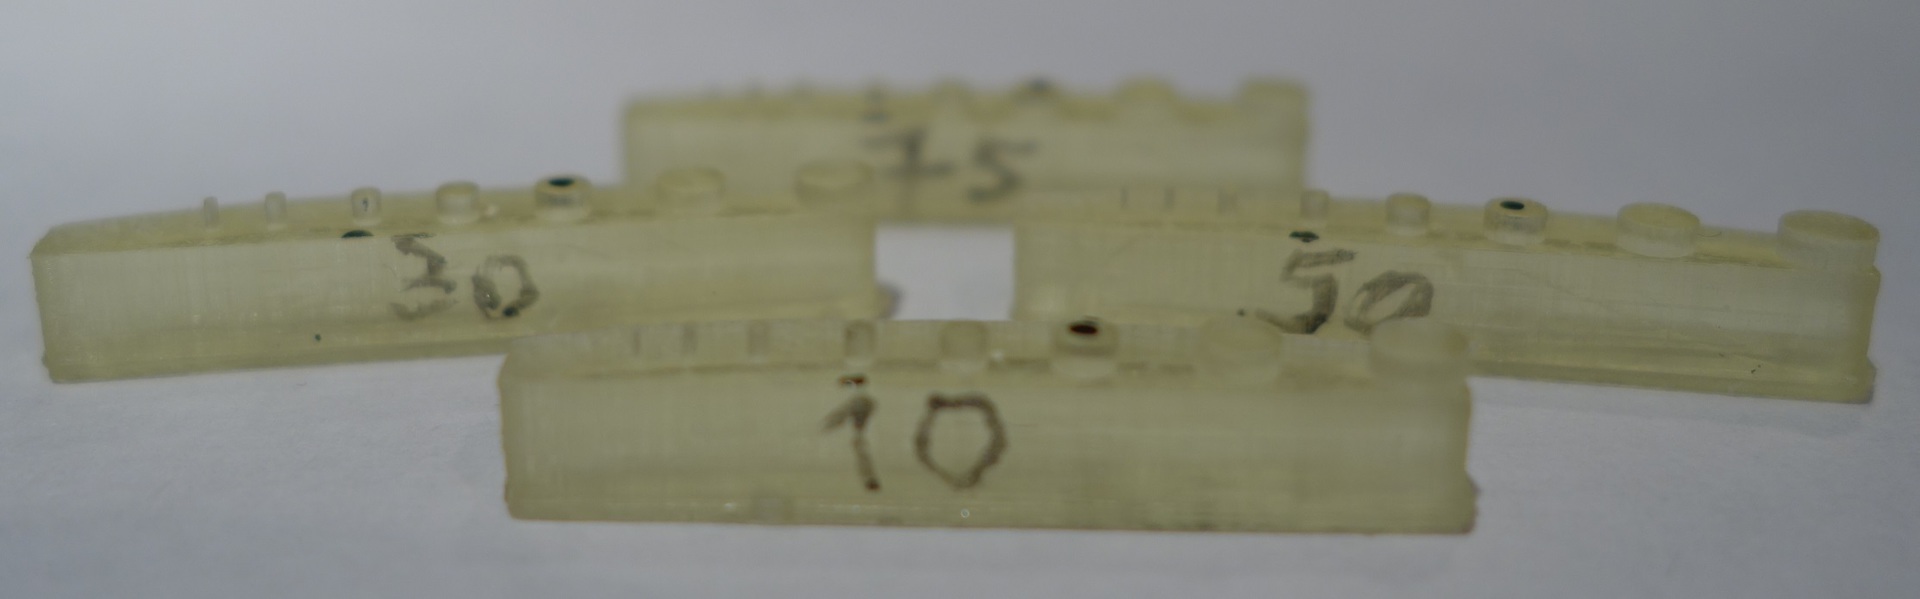
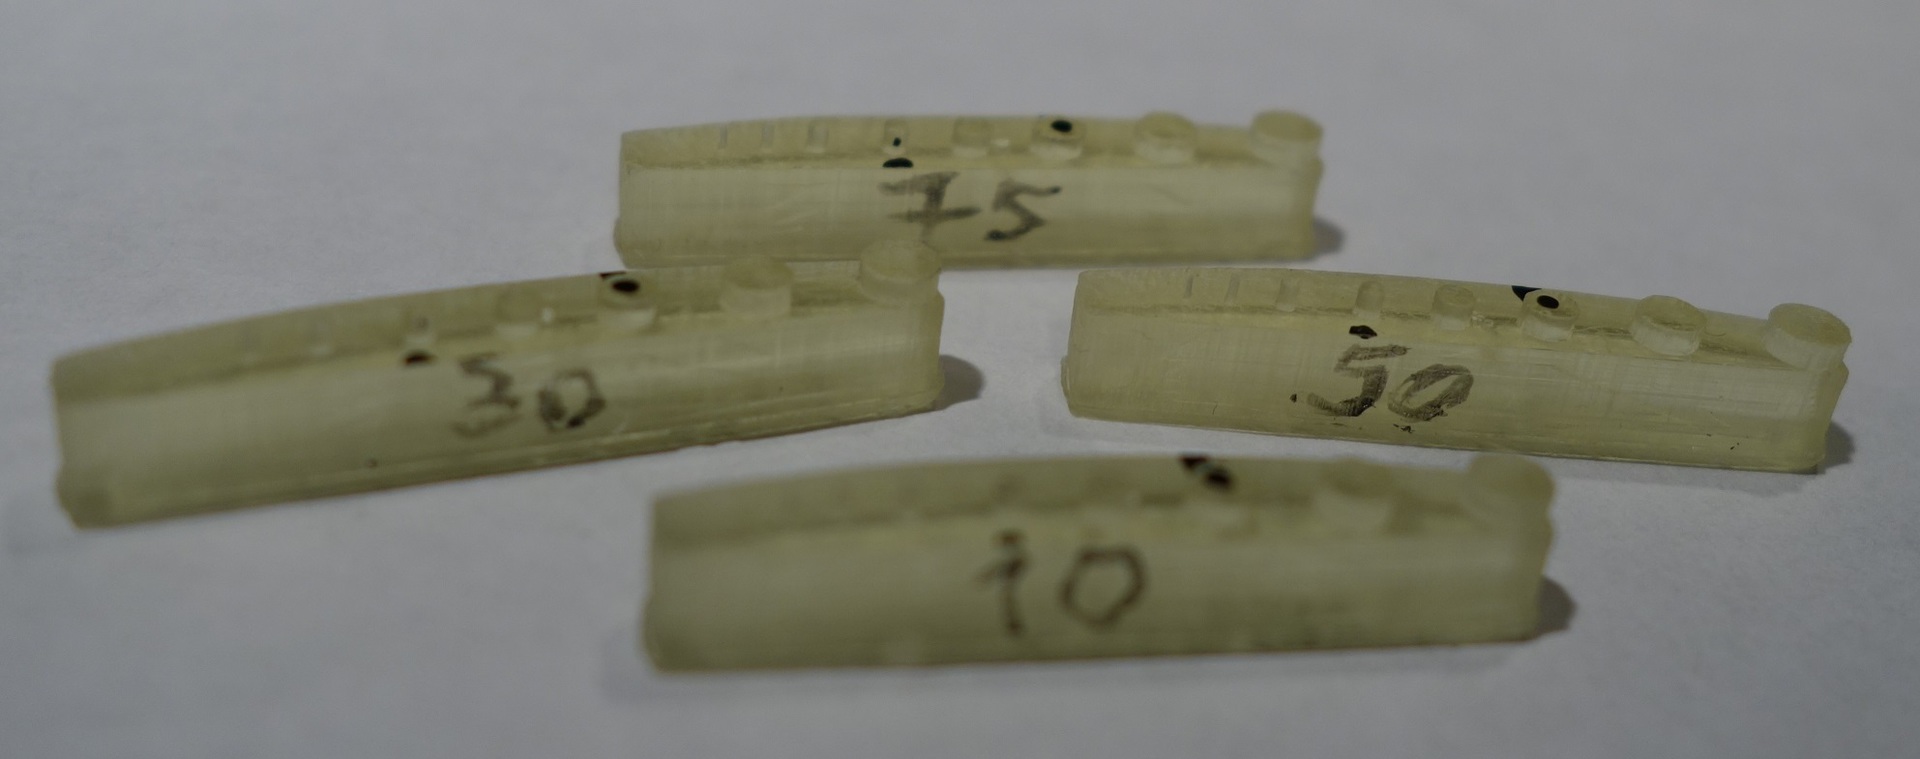
I printed 4 models with different resolutions, signed each sample and put the dots and tags that I wrote about above (numbers 1 and 2).
And photo 2:
Judging by the photos above, there is no difference. BUT, if you take into your playful hands the miracle of Chinese technology called a digital USB microscope, you can see that taking a photo with a camera is extremely problematic.
At once I will say that the last two cylinders tore off during the washing of the excess photopolymer. On a sample of 50 μm, I accidentally tore off a cylinder with a diameter of 0.2 mm, trying to measure its diameter with a caliper.
I think I'll just post the photos by signing them.
Let's start with the worst resolution - 75 microns in the XY plane.
With a point:

Tagged with:

The resolution in the XY plane is 50 μm. This is the “normal” resolution of 3D DLP printers.
With a point:

Tagged with:

The resolution in the XY plane is 30 μm.
With a point:

Tagged with:

The resolution in the XY plane is 10 μm. My printer cannot do more resolution.
With a point:

Tagged with:

I managed to show the reason for the appearance of vertical stripes on small-diameter elements, visually, they are visible, I could not take a picture with a camera. Also, the stripes can be caused by the scratched bottom of the bath, which is also seen in the enlarged photos. Who needs high resolution ... I think those people who care about a “clean” surface, ready for further work without significant modifications.
As for me, I usually print using a resolution of 20 microns. The resolution does not affect the print speed, and cutting the model takes significantly less time.
Do you have a different opinion or have any questions? Please write in the comments.
Thanks for attention!
... well, here I was a little misleading, before it was launched, it was necessary to carry out the preparatory work.
Well, before that a little background. A friend of mine, is engaged in jewelry production, purchased a 3D printer, which is based on a DLP projector. The jeweler says that they say that vertical stripes are visible on the elements of small diameter. It is clear that these bands are due to a small, relatively, resolution. Usually, the resolution of 3D printers based on DLP projectors in the region of 45-55 microns and more. I became extremely interested in how this manifests itself in the details, and I set to work.
Let's continue the main narrative, preparatory work:
')
- prepare a 3D model;
- cut it into layers (only for the purpose of seeing what happens with the cutting);
- type
Preparing a 3D model
Preparation includes designing (big word here) model, which I will print. It is a base with protruding cylinders of different diameters. The size of the model can look at the picture below.
A little running ahead, the number 1 marks the cylinder, which in the photographs is marked with a dot in the middle, and the number 2 marks the cylinder opposite the mark, since point on the end of the handle is no longer put.
Z resolution for all models will be the same - 50 microns, and in the XY plane - different. I decided that I would make a “palette” of resolutions 10, 30, 50, 75 microns.
The picture of the place of interest will look like this.
Top - the highest resolution (10 microns), at the very bottom the lowest (75 microns).
I printed 4 models with different resolutions, signed each sample and put the dots and tags that I wrote about above (numbers 1 and 2).
And photo 2:
Judging by the photos above, there is no difference. BUT, if you take into your playful hands the miracle of Chinese technology called a digital USB microscope, you can see that taking a photo with a camera is extremely problematic.
Print results
At once I will say that the last two cylinders tore off during the washing of the excess photopolymer. On a sample of 50 μm, I accidentally tore off a cylinder with a diameter of 0.2 mm, trying to measure its diameter with a caliper.
I think I'll just post the photos by signing them.
Let's start with the worst resolution - 75 microns in the XY plane.
With a point:
Tagged with:
The resolution in the XY plane is 50 μm. This is the “normal” resolution of 3D DLP printers.
With a point:
Tagged with:
The resolution in the XY plane is 30 μm.
With a point:
Tagged with:
The resolution in the XY plane is 10 μm. My printer cannot do more resolution.
With a point:
Tagged with:
findings
I managed to show the reason for the appearance of vertical stripes on small-diameter elements, visually, they are visible, I could not take a picture with a camera. Also, the stripes can be caused by the scratched bottom of the bath, which is also seen in the enlarged photos. Who needs high resolution ... I think those people who care about a “clean” surface, ready for further work without significant modifications.
As for me, I usually print using a resolution of 20 microns. The resolution does not affect the print speed, and cutting the model takes significantly less time.
Do you have a different opinion or have any questions? Please write in the comments.
Thanks for attention!
Source: https://habr.com/ru/post/366029/
All Articles