Minor repair of LG 23MP55A monitor stand
Probably, I was “lucky” in this way alone, but in a recently acquired monitor, the angle of inclination was very tight from the very moment of purchase. When buying, I just checked the work of the monitor: I didn’t see the point of getting and screwing my “leg”. In vain, everything should be checked, marriage is present everywhere, and even less so in budget products.
“Nothing, he'll get used to)” - I thought, and didn’t go to the store. But after about a month, the “leg” stuck in such a way that there could be no question of adjusting the angle - without knowing the device, I began to fear for the state of the matrix. A call to the service department of the store found that the case is somehow not guaranteed, can be repaired with money without saving the guarantee on the spot (for money), or sent to an authorized service for examination and wait for the result from them.
')
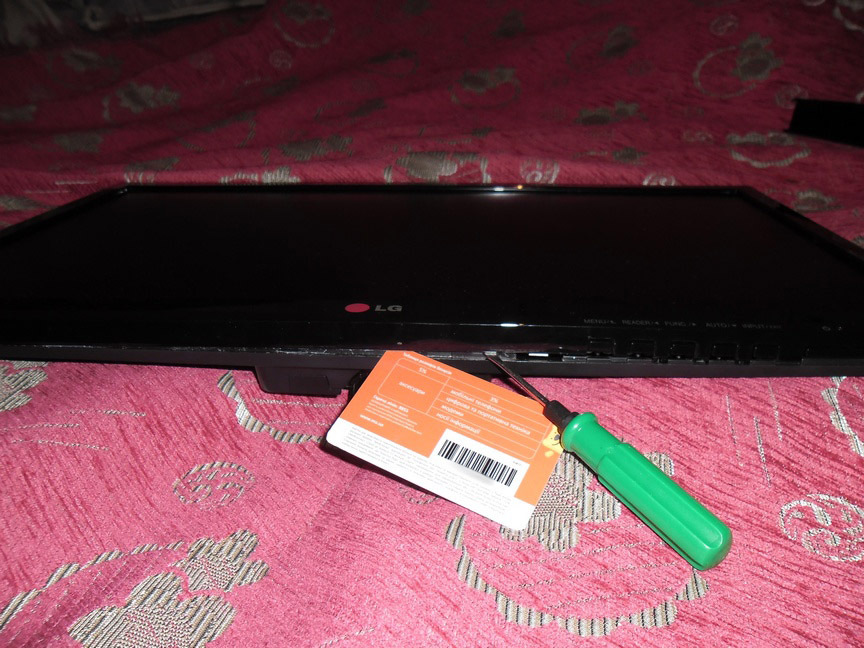
If the monitor were more expensive, I would wait for the month of his wanderings back and forth, but since the monitor is inexpensive and I lost the habit of working on the old one, I decided to repair it myself. Maybe a “Chukchi” is a poor searcher, but I didn’t find a disassembly service manual - so who cares how to carefully disassemble this product - please under the cat.
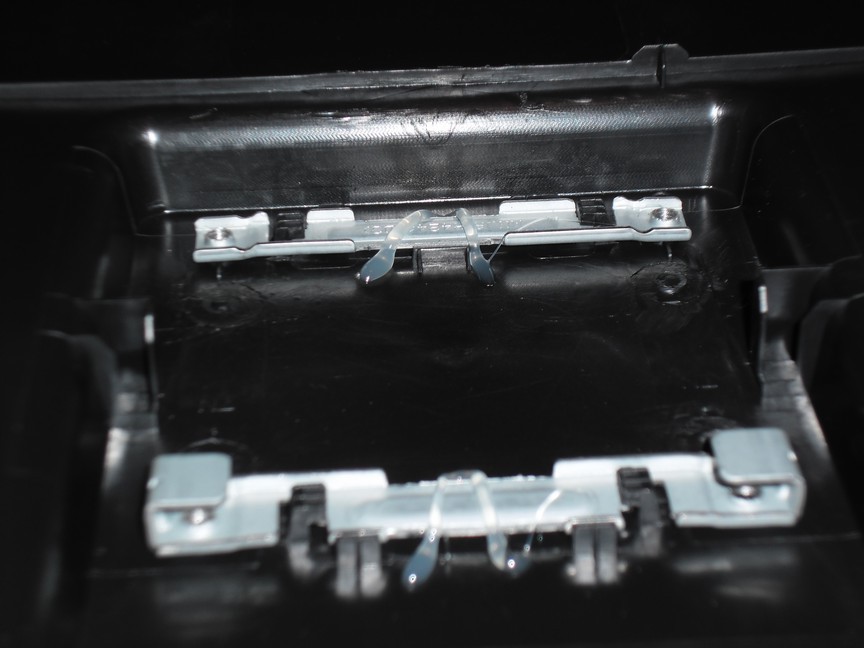
In modern technology, oh, they like latches, and even more like plastic. This model is no exception - the case on the latches. To leave the product "marketable" form, I recommend to get a special plastic mediators, but you can do with improvised means - a plastic card. The snaps in this model turned out to be enough, and they are quite wide - so I was able to “help” the screwdriver a little bit besides the card. Starting "opening" follows from the control buttons - there are fewer latches and it will be easier to pry and move from them to the left, it turns out clockwise.

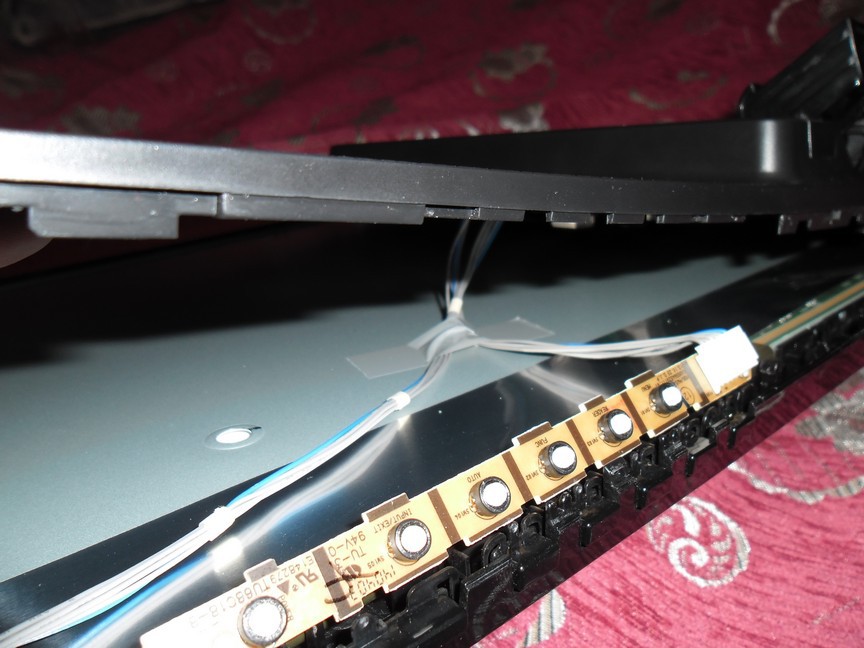
"Release" the latch must be carefully, not trying to tear off the top cover - otherwise you may damage several cables inside. Namely, we will be held back by the wires to the control buttons, the power of the LEDs and the matrix cable itself.
In order - the control buttons are the easiest to get straight from the board, bending the retaining plastic latch back.

Next, turn off the backlight, the easiest way to raise this connector a little bit with a thin screwdriver - then it will get to grab.

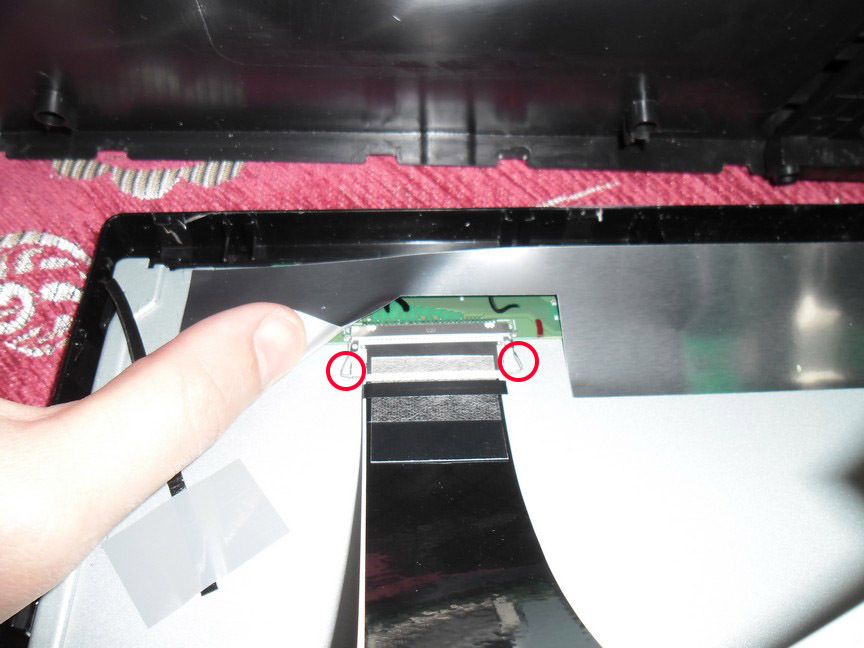
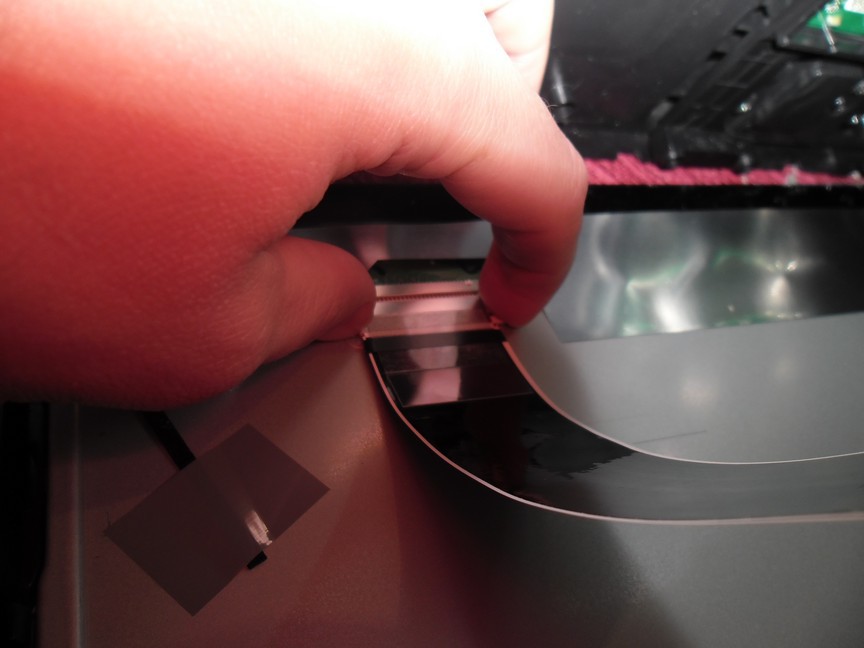
After disconnecting, gently poddevyat and remove the mounting tape from the matrix casing.
The matrix cable is fastened with rag tape - it is held tightly, therefore we carefully approach the process so that it does not break sharply and does not damage the cable.
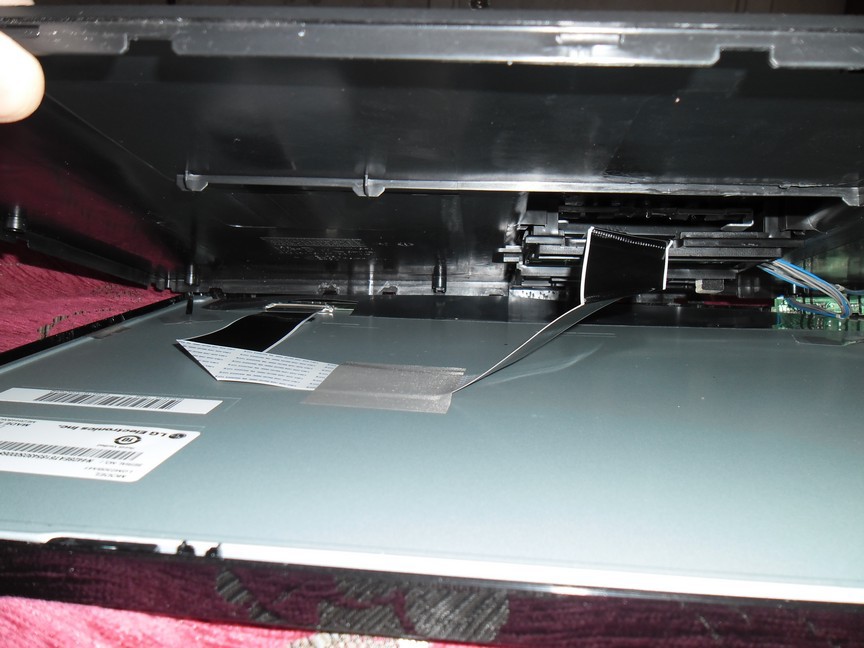
To detach the cable, press the locking “antennae” on the sides and disconnect with a slight movement of the hand.
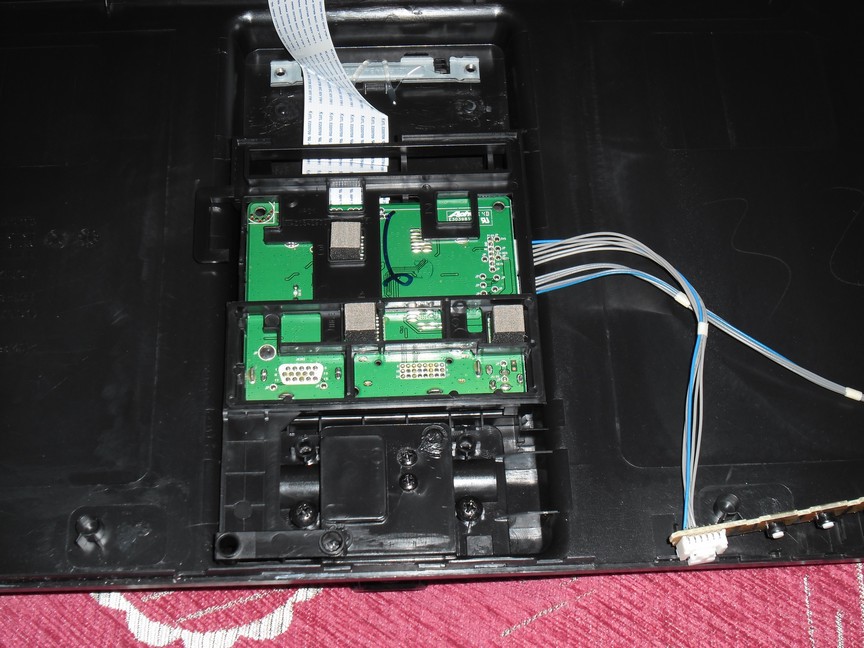
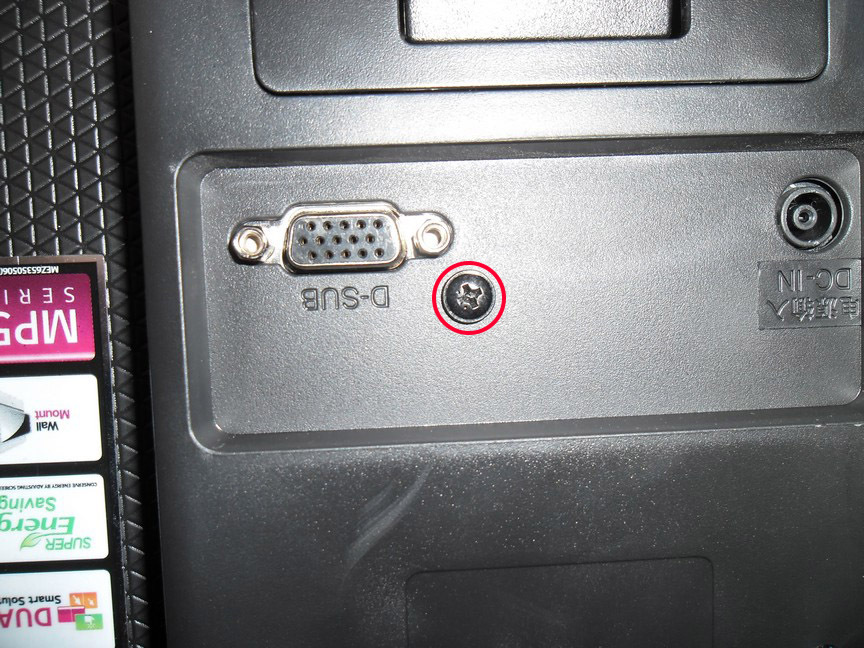
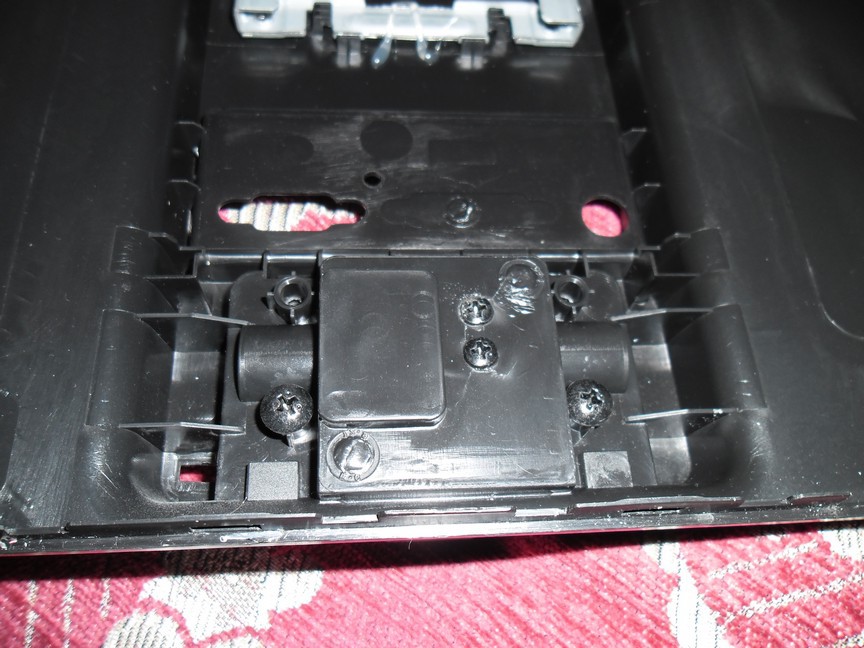
Now you can confidently remove the back cover. In order to approach directly to the swivel mechanism, we remove the central board with a plastic frame — to do this, unscrew the screw on the reverse side.
Here we see the miracle of engineering and economy - VESA-mount. I understand that the device is budget, and even though the monitor is quite light - I wouldn’t hang it on the wall.

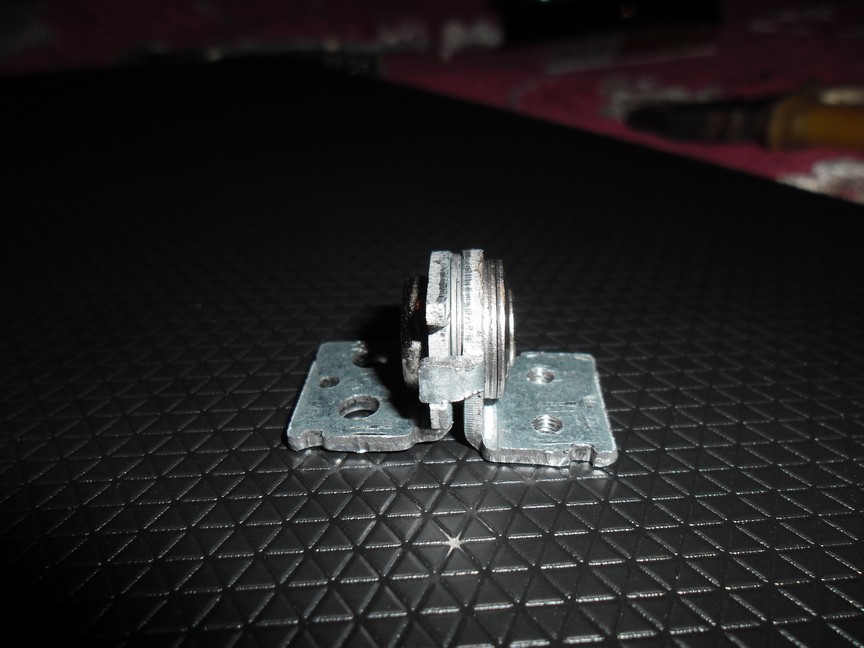
Then we twist all the screws and get to the originator of the "celebration". As can be seen in the photo, the attachment site for about a month of use has fairly battered, even surface cracks have gone. Savings mad - an inclined mechanism rests on a thin plastic casing. And if you have similar problems with a tight slope - hurry to solve the problem. I forgot to take a picture, but I placed wide washers at the attachment point, which made it possible to increase the contact area - thus the likelihood that the next time you adjust the cog head stupidly “break through” the plastic became smaller. The solution is not perfect, maybe in the future I will replace it with metal inserts, but for now - let it be so.


The turning mechanism itself, as we see, is two corners riveted together. Turning them with two pliers was not easy. A drop of oil and loosening the problem did not solve. I was already thinking of drilling out the rivets and replacing them with a bolt, but there were no suitable ones, like the Grover itself. Yes, and still this mount after some time would unwind.
Therefore, a different path was chosen - I just heated this corner on the stove and swayed it, cooled it with water. After that, wipe, it is possible to dry over the fire, give a drop of oil - and we get a smooth adjustment with an adequate effort. And let not look like a corner (I didn’t clean it up too much), we don’t look at it, the main thing is that it works as it should!

We put the mount in place, collect the monitor (in reverse, as they say the sequence) and - voila, it works as it should have been from the very beginning, and even better).
Well, if this article will help someone.
Source: https://habr.com/ru/post/365887/
All Articles