How to quickly distribute wifi from a laptop - 3 simple commands
Periodically, I come across situations where you need to quickly set up Internet distribution via WiFi from your laptop and there is no special program at hand. And now my router ordered to live a long time and left the house without the Internet. And not so long ago, the friend's phone refused to connect to my router and we quickly organized an additional wifi-signal from my laptop, which saved the situation.
And help me in this 3 commands:
netsh wlan set hostednetwork mode = allow
netsh wlan set hostednetwork mode = allow ssid = FastWifi key = 12345678 keyUsage = persistent
netsh wlan start hostednetwork
Under the cut, I will tell you in detail how and what to do and will show with the example of setting up Windows 7.
')
Step 1:
First we need to turn off the Internet on our laptop.
Step 2:
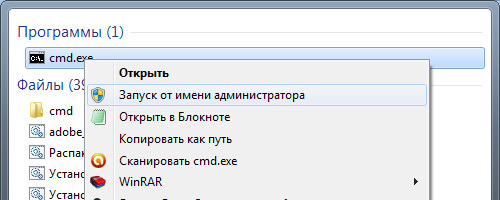
Now we find the command line. To do this, open the “Start” menu and enter the query in the search line - cmd
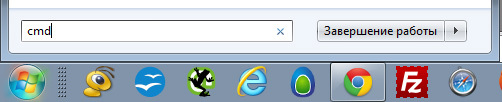
Now we run it as an administrator by clicking on the icon that appears with the right mouse button.
Step 3:
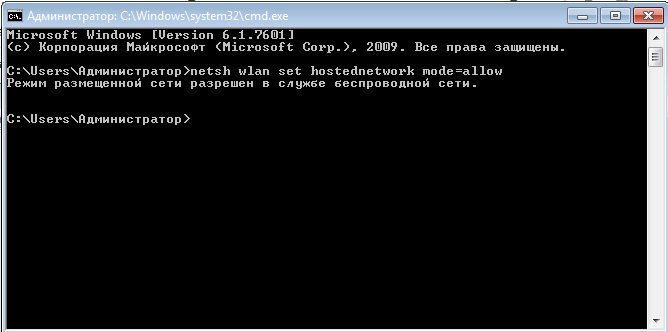
Enter the first command: netsh wlan set hostednetwork mode = allow
Note:
If everything is good, then we got this picture:
Step 4:
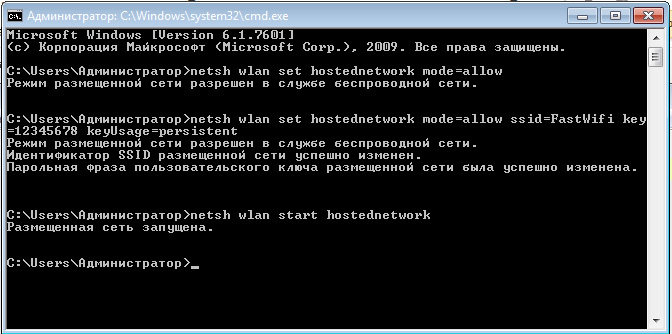
Enter the data of your created network, its name and password, using the command:
netsh wlan set hostednetwork mode = allow ssid = FastWifi key = 12345678 keyUsage = persistent
Where “FastWifi” is the name of the network, and “12345678” is the password for it.
Here is what we get:

Step 5:
And finally, enter the command that will launch our access point:
netsh wlan start hostednetwork
We see:

Step 6:
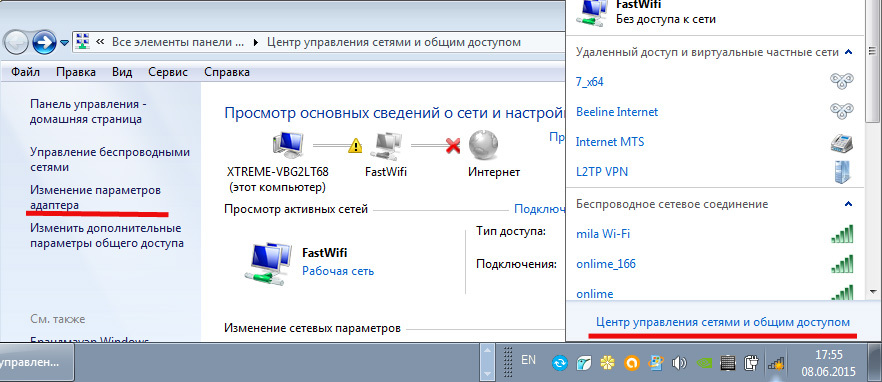
Now we need to transfer the rights from our current Internet to our new “router”. To do this, go to the "Network and Sharing Center", there we go by the link "Change adapter settings".
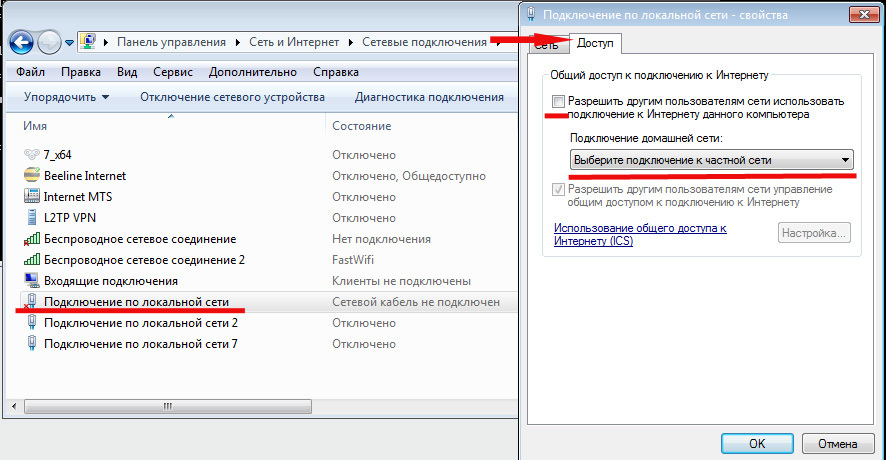
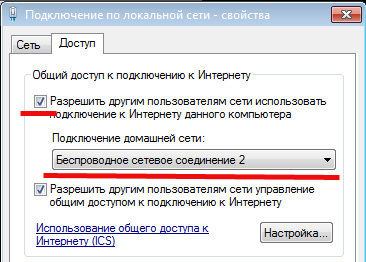
Find the icon of your Internet, right-click on it, select “Properties”. Next, select the “Access” tab, tick the option “Allow other network users to use the Internet connection of this computer” and in the “Connect to home network” list select our new connection that we have just created.
Step 7:
We turn on the Internet and enjoy the result.

Total:
In the end, you need to remember only 3 commands:
- netsh wlan set hostednetwork mode = allow
- netsh wlan set hostednetwork mode = allow ssid = FastWifi key = 12345678 keyUsage = persistent
- netsh wlan start hostednetwork
And you will be able to set up the Internet in 5 minutes, and on the configured computer you will need only 2 commands:
- netsh wlan start hostednetwork - to start the access point
- netsh wlan stop hostednetwork - to stop the access point
ps It is worth noting that this method is still temporary, because when the laptop is restarted, the network turns off and needs to be started again via the command line, so I recommend to look at high-quality wireless routers so that you do not have such problems at home.
And help me in this 3 commands:
netsh wlan set hostednetwork mode = allow
netsh wlan set hostednetwork mode = allow ssid = FastWifi key = 12345678 keyUsage = persistent
netsh wlan start hostednetwork
Under the cut, I will tell you in detail how and what to do and will show with the example of setting up Windows 7.
')
I must say that the guide that I describe is not very unique. A similar guide can be found on the net, but I think that a well-designed and up-to-date hykaymes guide will be very convenient for reading and application.
Step 1:
First we need to turn off the Internet on our laptop.
Step 2:
Now we find the command line. To do this, open the “Start” menu and enter the query in the search line - cmd
Now we run it as an administrator by clicking on the icon that appears with the right mouse button.
Step 3:
Enter the first command: netsh wlan set hostednetwork mode = allow
Note:
In the command line, the standard TRL + C / TRL + V does not work, but by copying the line you can paste it by clicking the right mouse button in cmd and selecting the “paste” option

If everything is good, then we got this picture:
Step 4:
Enter the data of your created network, its name and password, using the command:
netsh wlan set hostednetwork mode = allow ssid = FastWifi key = 12345678 keyUsage = persistent
Where “FastWifi” is the name of the network, and “12345678” is the password for it.
Here is what we get:
In the login and password, write only English letters and / or numbers.
Step 5:
And finally, enter the command that will launch our access point:
netsh wlan start hostednetwork
We see:
Step 6:
Now we need to transfer the rights from our current Internet to our new “router”. To do this, go to the "Network and Sharing Center", there we go by the link "Change adapter settings".
Find the icon of your Internet, right-click on it, select “Properties”. Next, select the “Access” tab, tick the option “Allow other network users to use the Internet connection of this computer” and in the “Connect to home network” list select our new connection that we have just created.
Step 7:
We turn on the Internet and enjoy the result.
If you want to give full access rights, not just access to the Internet through a browser, then in the “Access” tab, click “Settings” and tick all necessary items.

Total:
In the end, you need to remember only 3 commands:
- netsh wlan set hostednetwork mode = allow
- netsh wlan set hostednetwork mode = allow ssid = FastWifi key = 12345678 keyUsage = persistent
- netsh wlan start hostednetwork
And you will be able to set up the Internet in 5 minutes, and on the configured computer you will need only 2 commands:
- netsh wlan start hostednetwork - to start the access point
- netsh wlan stop hostednetwork - to stop the access point
ps It is worth noting that this method is still temporary, because when the laptop is restarted, the network turns off and needs to be started again via the command line, so I recommend to look at high-quality wireless routers so that you do not have such problems at home.
Source: https://habr.com/ru/post/365635/
All Articles