Meet the new MakerBot Replicator 5th generation 3D printer
As everyone already knows, MakerBot has released a new generation of 3D printers .
And here came to us from our friends, the new MakerBot Replicator 5th generation for testing.
The company has confused everyone with their names, but this is the newest model of their printers.
A little about this printer already told .
Immediately make a reservation, in our center there are a lot of 3D printers: two MakerBot Replicator 2, two UP! Plus, BFB 3D Touch 2 head and CubeX trio, Picaso designer, Wanhao duplicator4.
We worked very closely with all the printers, we know all the advantages and disadvantages, so we compare the new device with the existing equipment. I'll tell you a lot of small moments that came across already in the first week.
The box turned out weighty. More than 16 kg.

')
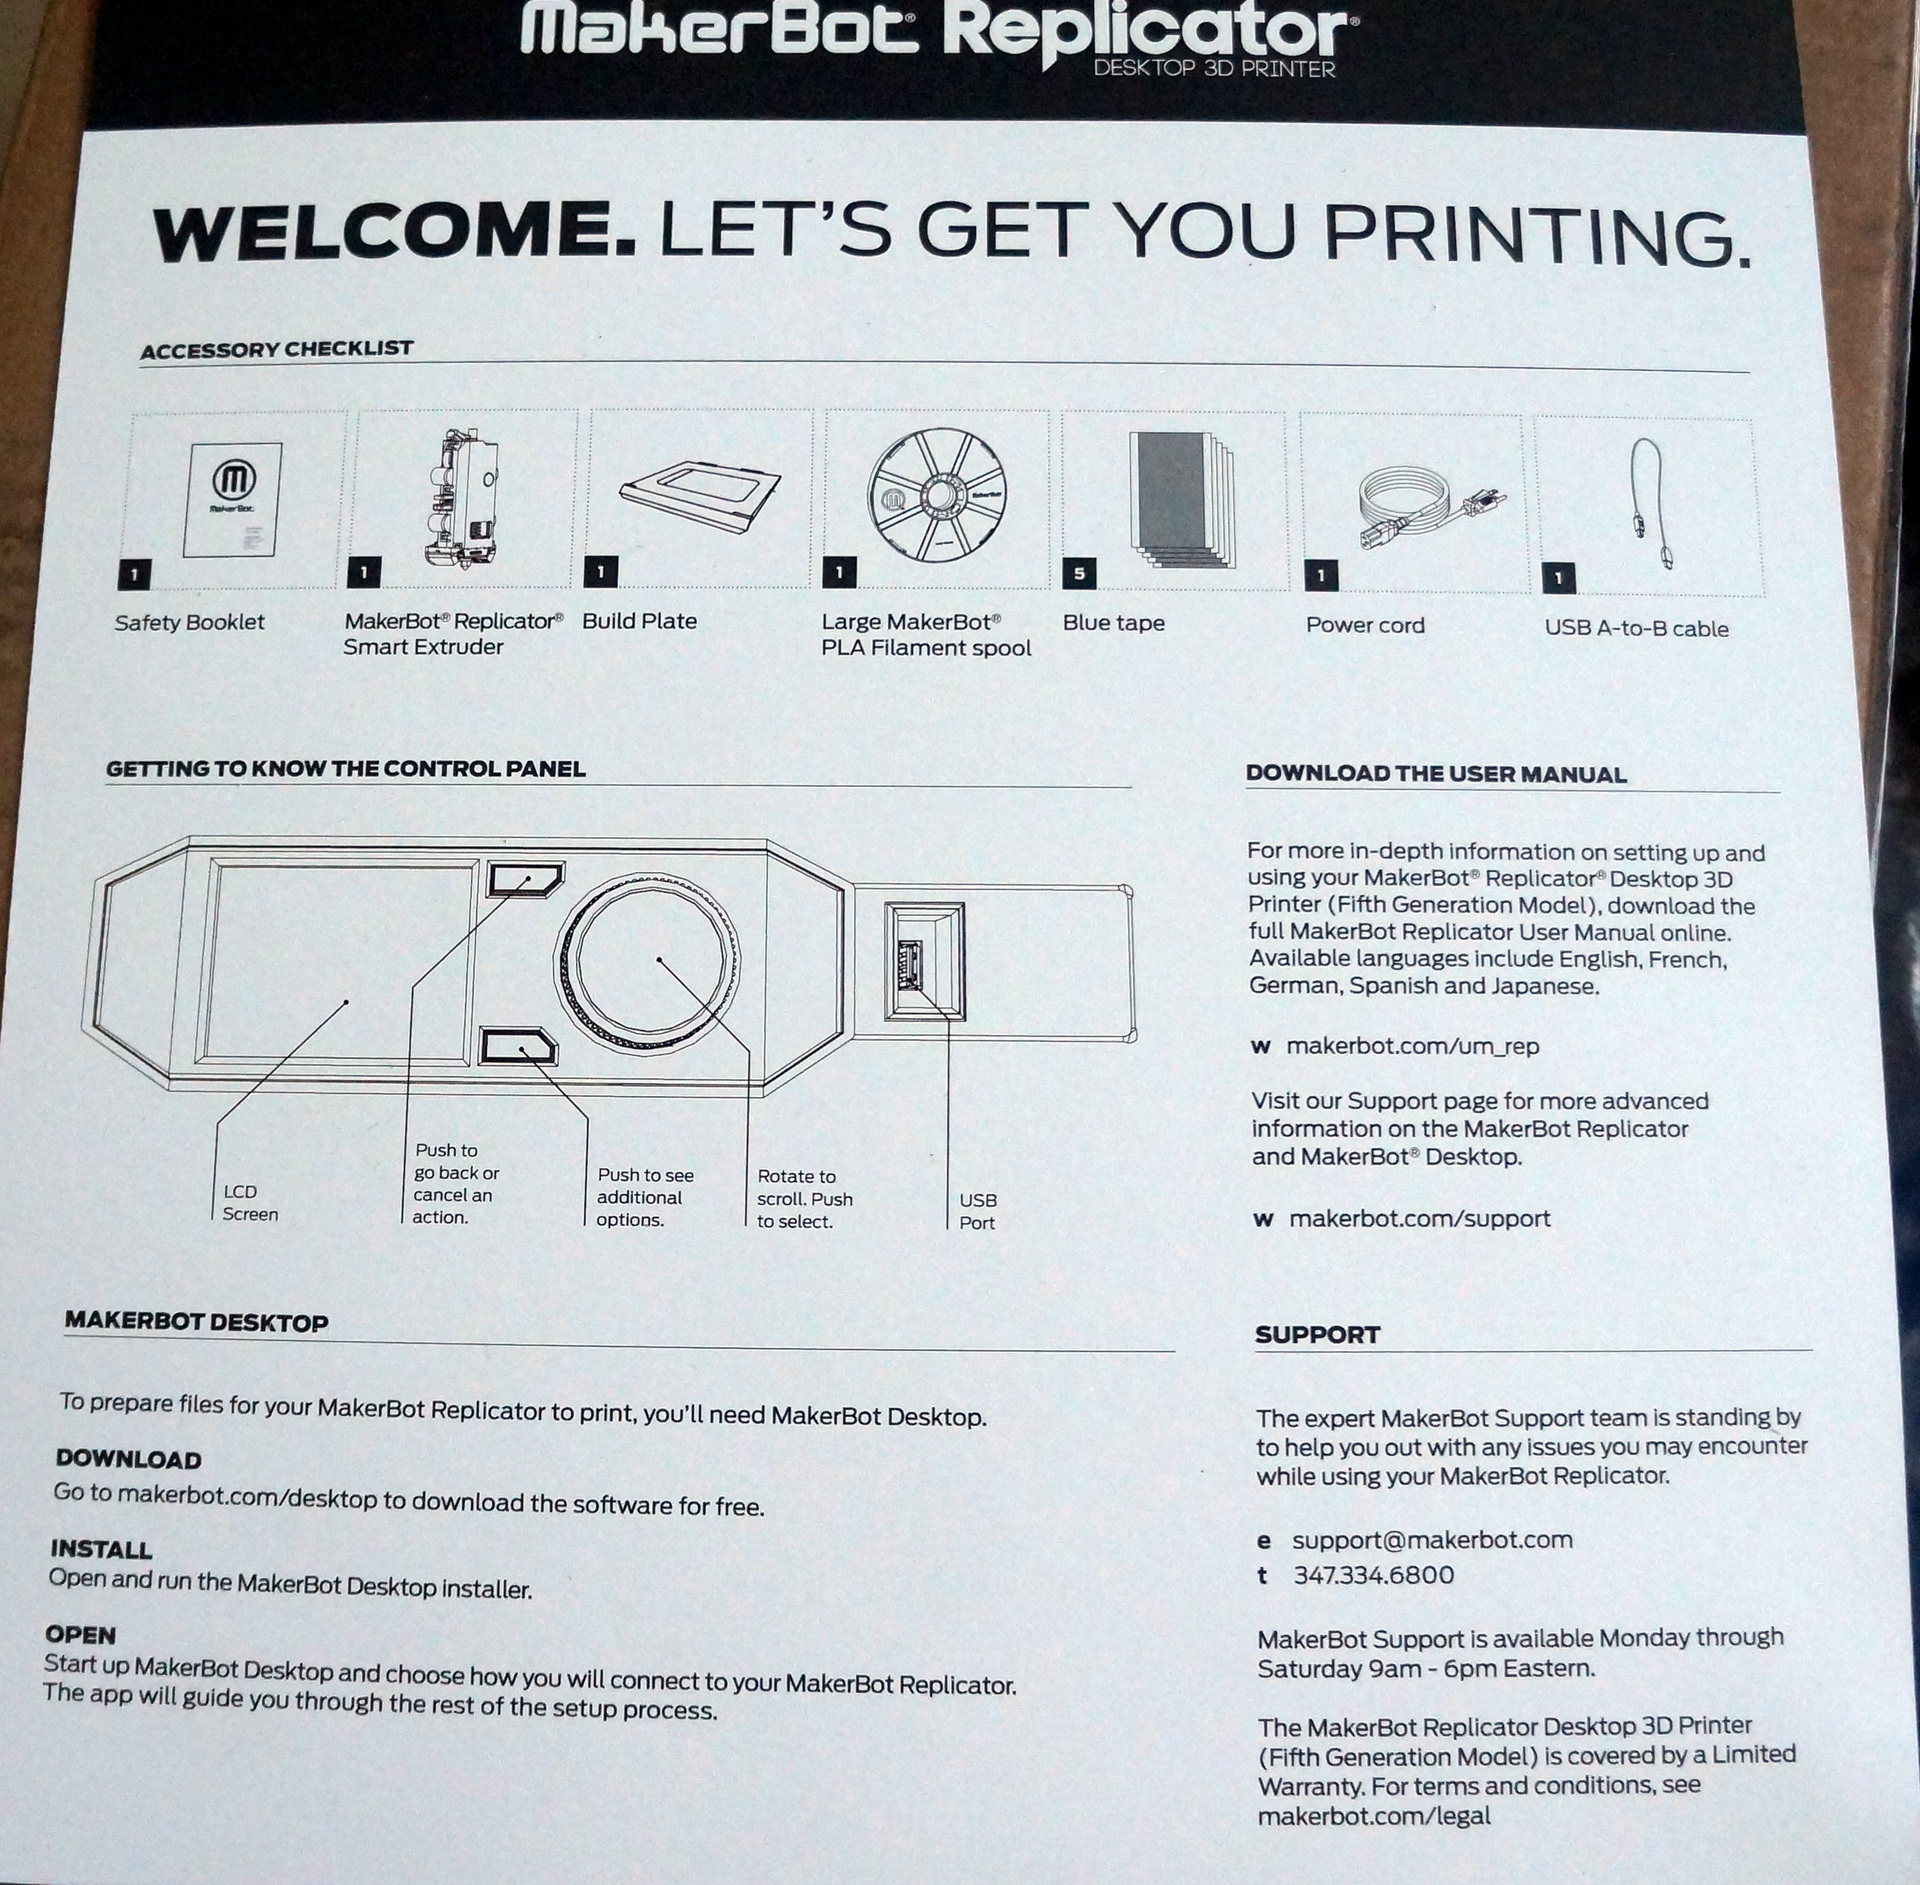
Inside we are waiting for quite a small instruction. The steps described are not entirely consistent with reality, but first things first.

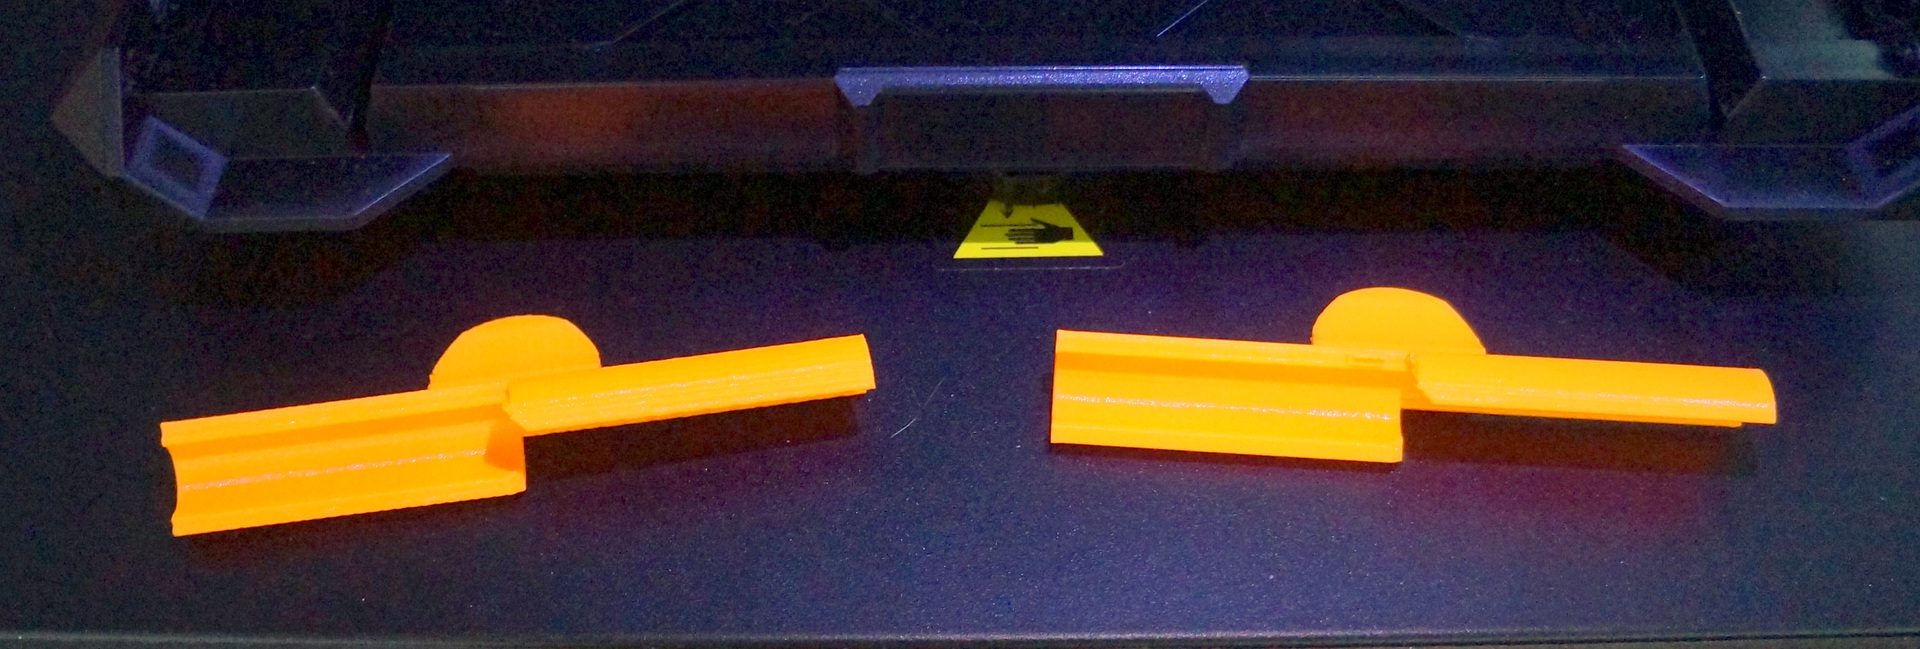
At the second step, we are waiting for remarkable clips to secure the platform. They are made on makerbota and very high quality.
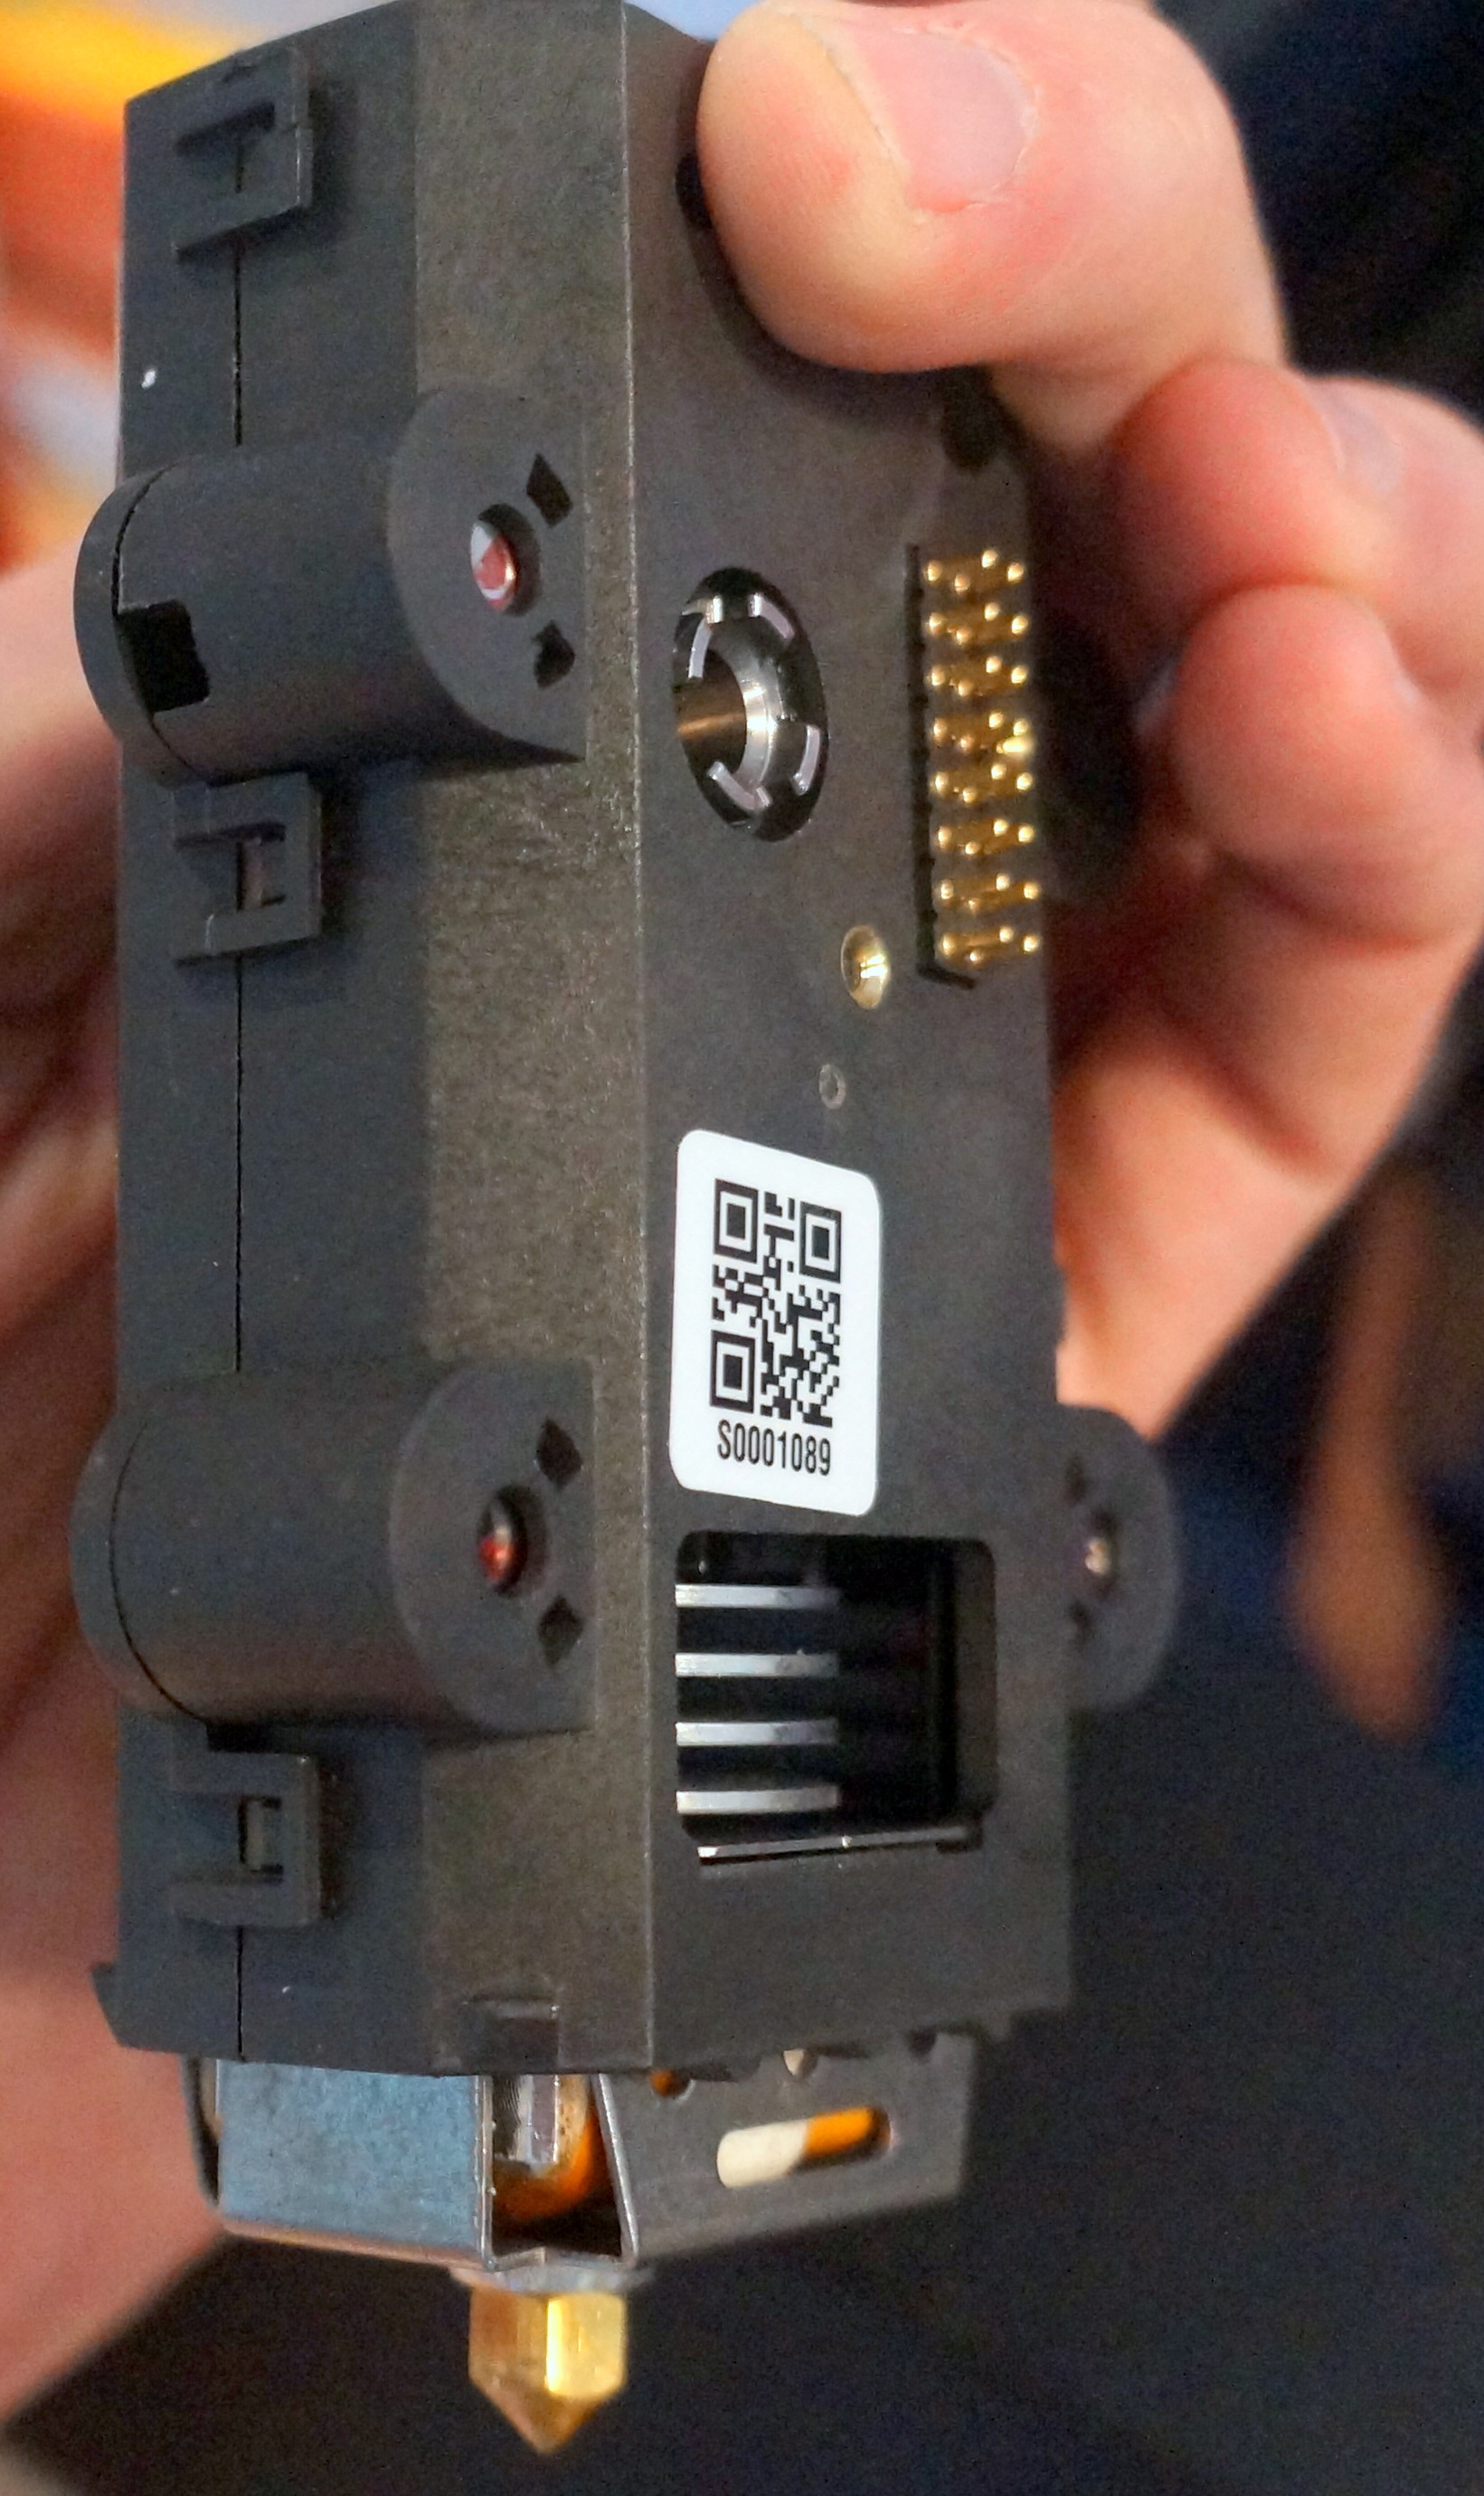
Next comes the magnetic “smart extruder”. More precisely, it was necessary to call it "Not so smart extruder".
There is one axiom: “Simpler mechanisms break less”. Here the company decided not to listen to anyone and made an unusually complex mechanism. It had a mysterious inscription MK11 V5. I really hope that this is a test sample. The extruder itself is assembled on snaps (thanks for being external). Plastic latches break very easily, so be extremely careful!
I will begin the description of the mechanism from top to bottom.
The first thing I see is an inclined opening for entry. But it does not work. When assembled, it is closed with a plug and redirects to a vertical entrance. After getting inside we get to the big wheel, which, apparently, serves to detect the presence of plastic in the extruder. This is a very good feature, which is lacking in other printers. And this wheel sticks out and you can visually see whether the plastic is going or not.
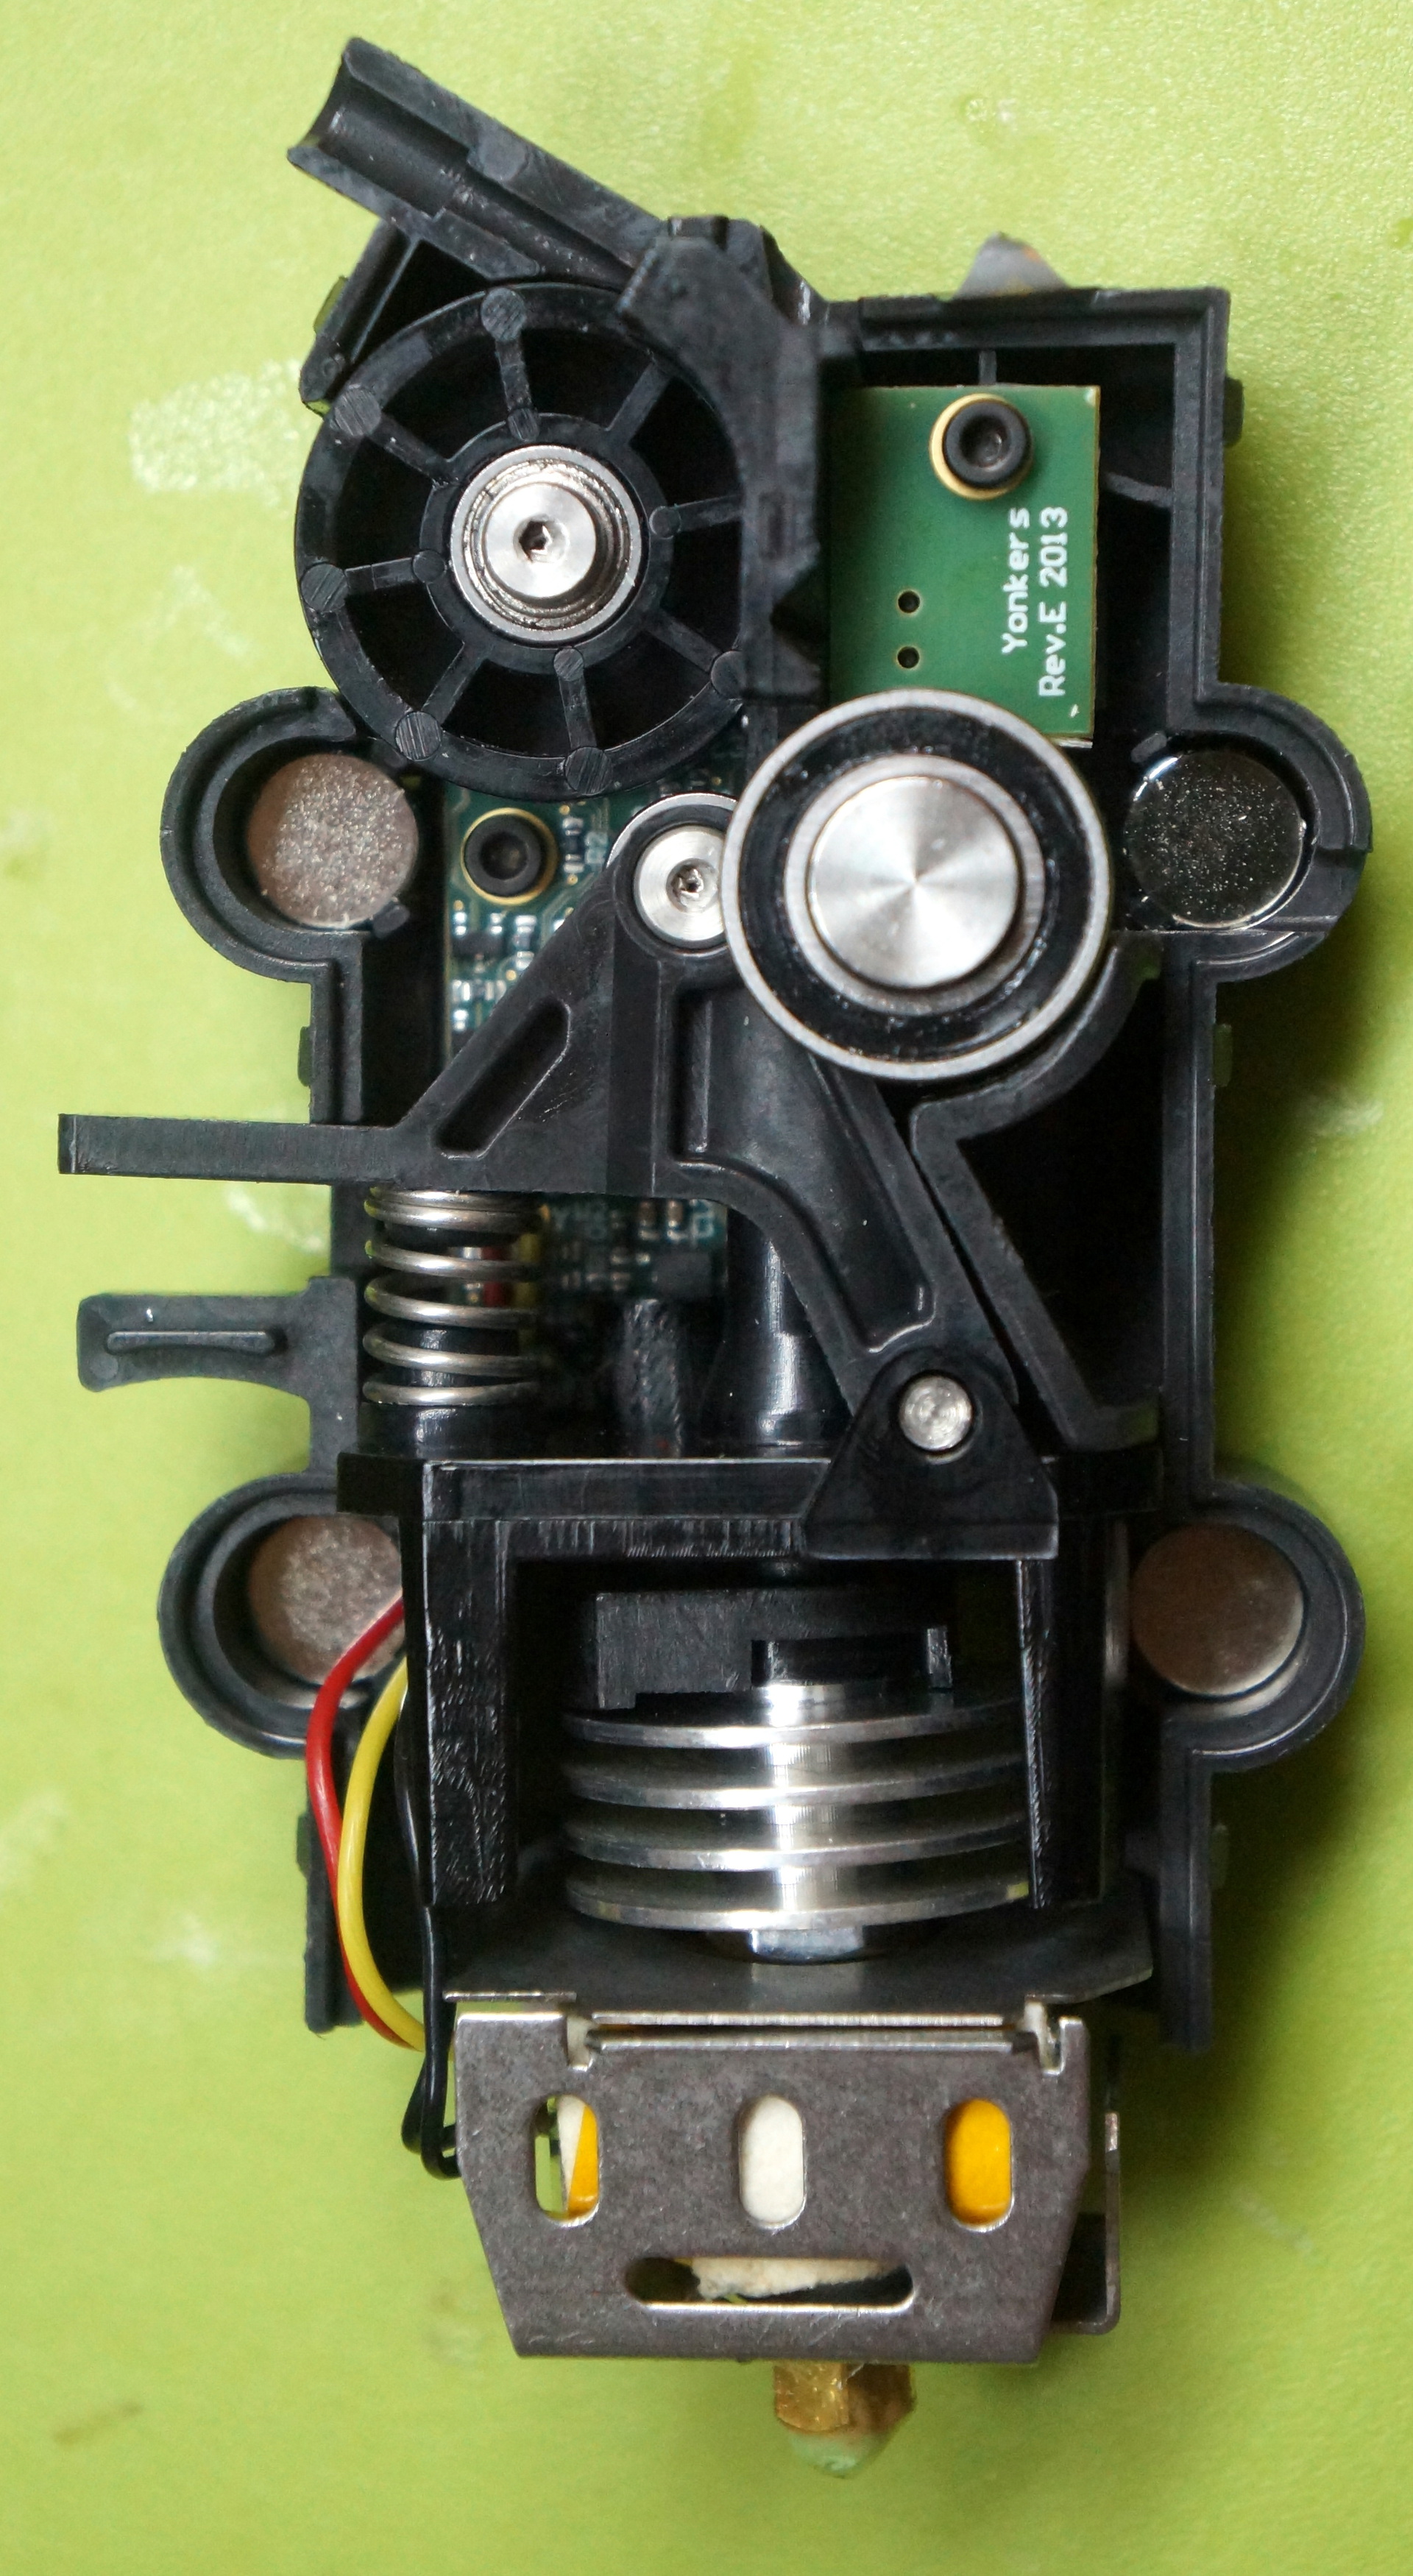
Then we get to the heart of any extruder - it is a pushing mechanism. It is made of a massive shaft with two bearings and an additional pressure bearing. They realized that such a mechanism is better than that used in the first revisions of Replicator 2. But for some strange reason, this mechanism pulls plastic very badly. The spring is very powerful, and here apparently the non-optimal geometry of the recess on the shaft.
The brains of this extruder are mounted on the back side with many external pins. These pins are spring-loaded and must be tightly in contact with the printer itself. This helps 4 very powerful magnet. But the snag is that when the smart extruder is docked, the teeth of the engine and the teeth of the broaching mechanism often do not match. For a normal person, it will not be difficult to check whether everything has joined correctly, especially as the printer itself writes about the absence of a print head.
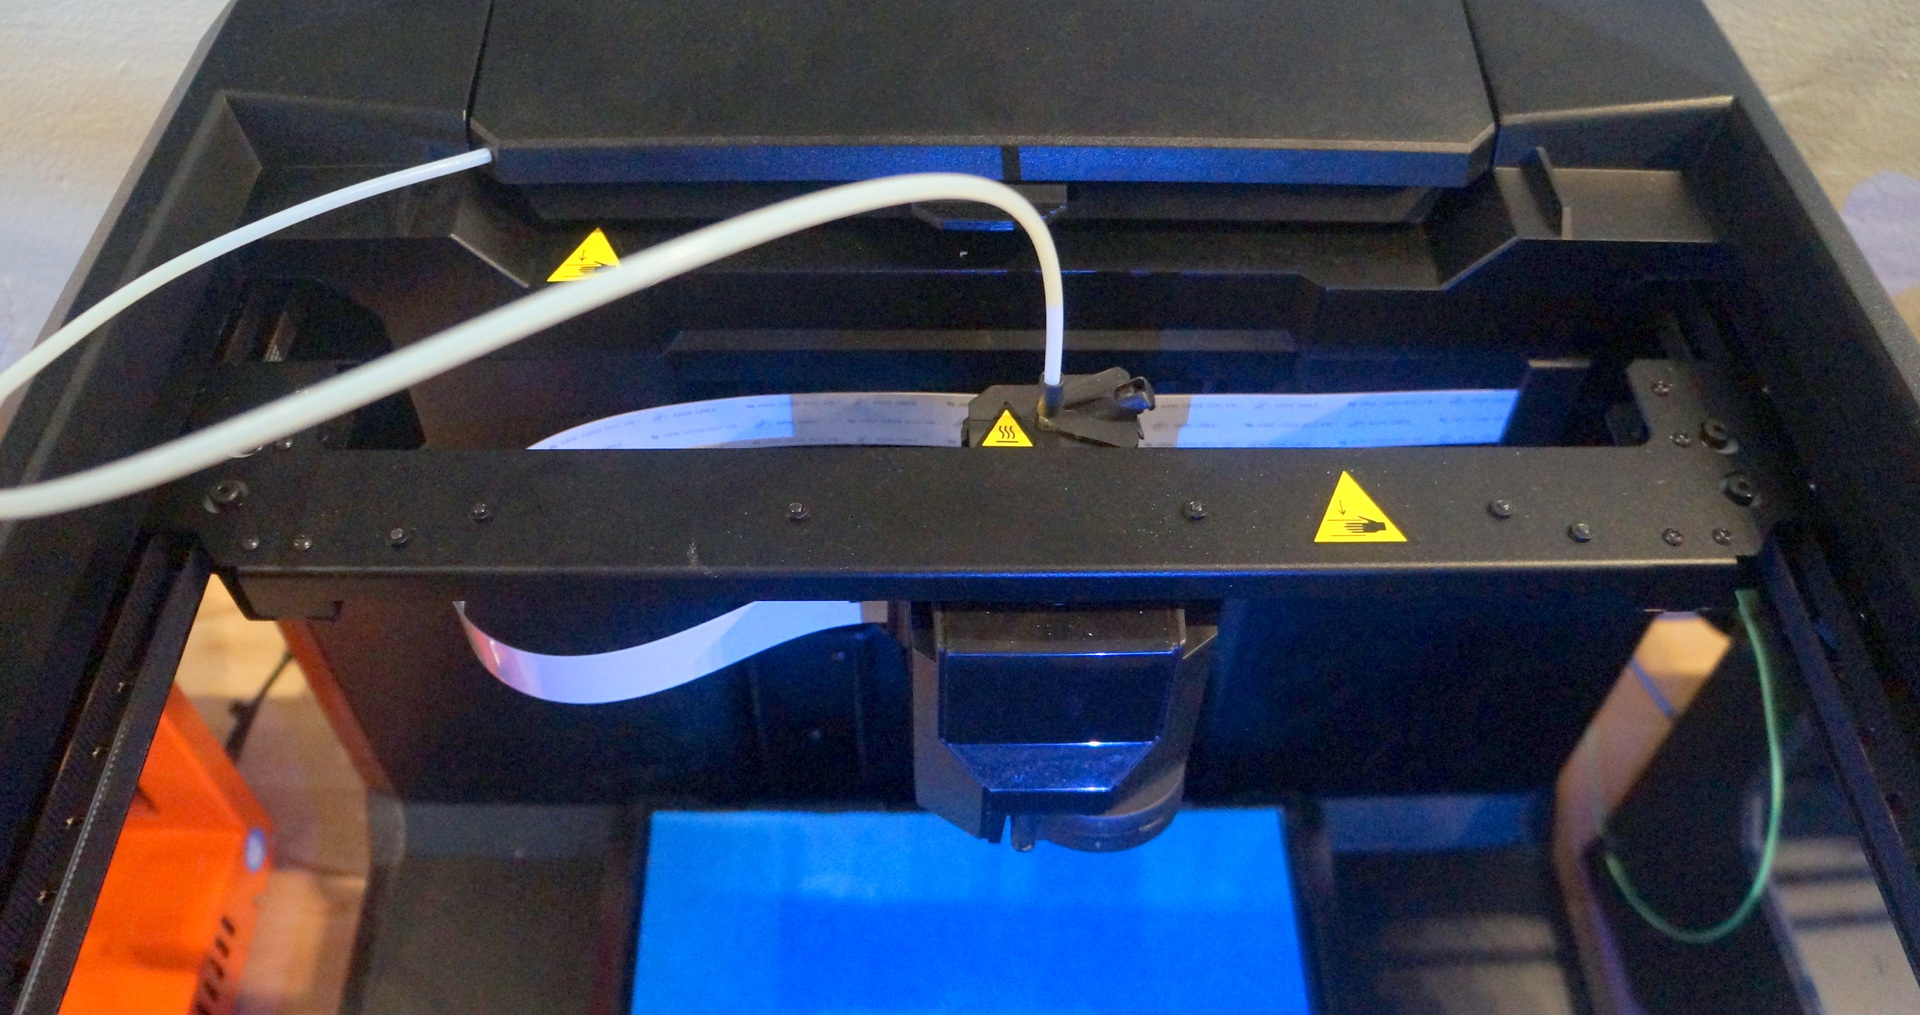
Then the engineers tried their best and made a heating head, which can lift while working. This significantly improves printing accuracy due to the rare use of the Z axis. This is done by reversing the movement of the plastic. Plastic as it pulls the heating element. Immediately they built a touch sensor. Everything is simple, when the head moves, the metal contacts open.
We now turn to plastic:
Now it is loaded into a beautiful retractable vertical compartment. Made a small lever for fixing.
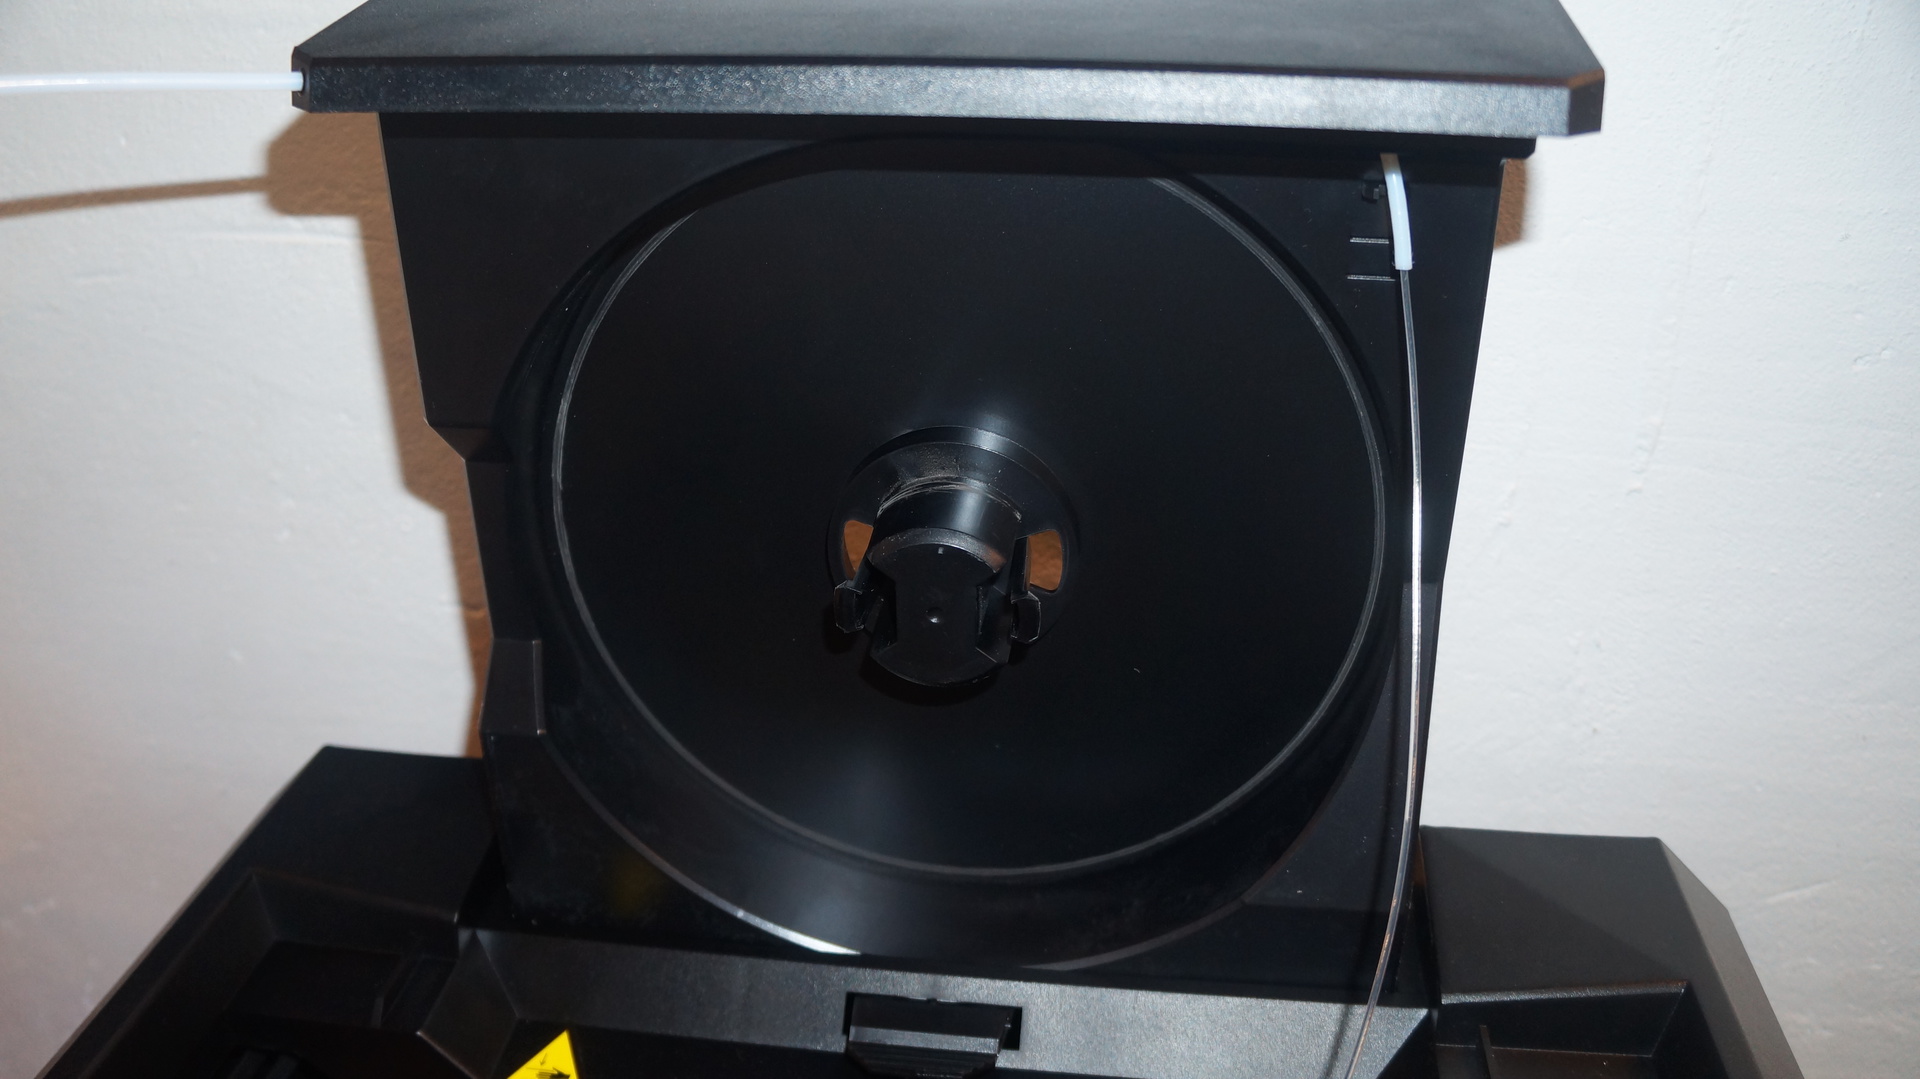
Very nice and discreet looks when closed.
Attention! Now the coil is narrower and larger in diameter. Old Coils do not fit!
The photo is not visible, but wider coils do not fit into this compartment. Exit two, buy only the original plastic from the official website, or use external devices to hold the plastic. The diameter of the rod remained the same - 1.75mm.

This plastic is pulled through a narrower and longer tube. Noticeably harder for him to go.
Next you need to insert the platform. There is only one joy! It is now glass and comes with as many as five BlueTape stickers. Has increased by 11% compared with the previous generation. Fixed now on the sled. Firm and reliable. And the plastic sticks perfectly to the platform.

It seems with the mechanical part of all. It remains to run all this.
The kit did not have a power cord with a European outlet, but this was decided by a simple adapter.
Another very good improvement is that now, in addition to connecting to a computer via USB, there is a connection via an Ethernet cable!
The instruction further lies a little.
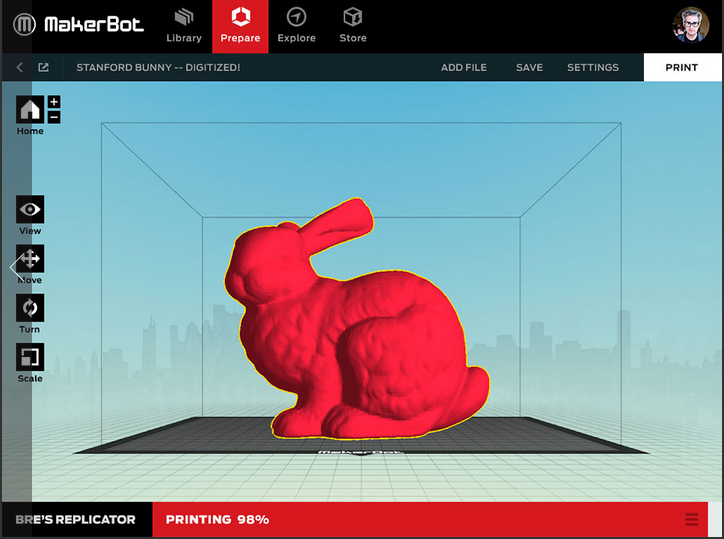
We connected the computer via USB, turned on the power. And after a long download, the printer gave the message that the firmware is needed and nothing else. Now the printer is not MakerWare, but MakerBot Desktop .
The program is not immediately connected to the printer and not the first time was able to find the firmware for it. Again helps the tambourine with a reboot. The process of downloading the firmware is quite tedious and takes about 15 minutes.
After that, the printer is loaded. By the way, every time you turn on the printer is loaded for a very long time, more than 3 minutes.
The initial installation has begun. First of all, he himself checks the platform level using his smart extruder (he does this every time before printing starts). Then he checks two more control points and asks to twist two handles. The calibration process is very simple and straightforward.
Then he offers to print a test model. For some reason, the models did not want to print, and the printer did not let this step through. I had to reboot.
All actions are accompanied by clear instructions on a large color display. Although the printer slows down a bit in the menu and there is no longer that little bit of humor as in the second version, the control is much more comfortable and friendly. The printer now supports ordinary USB drives (not included).
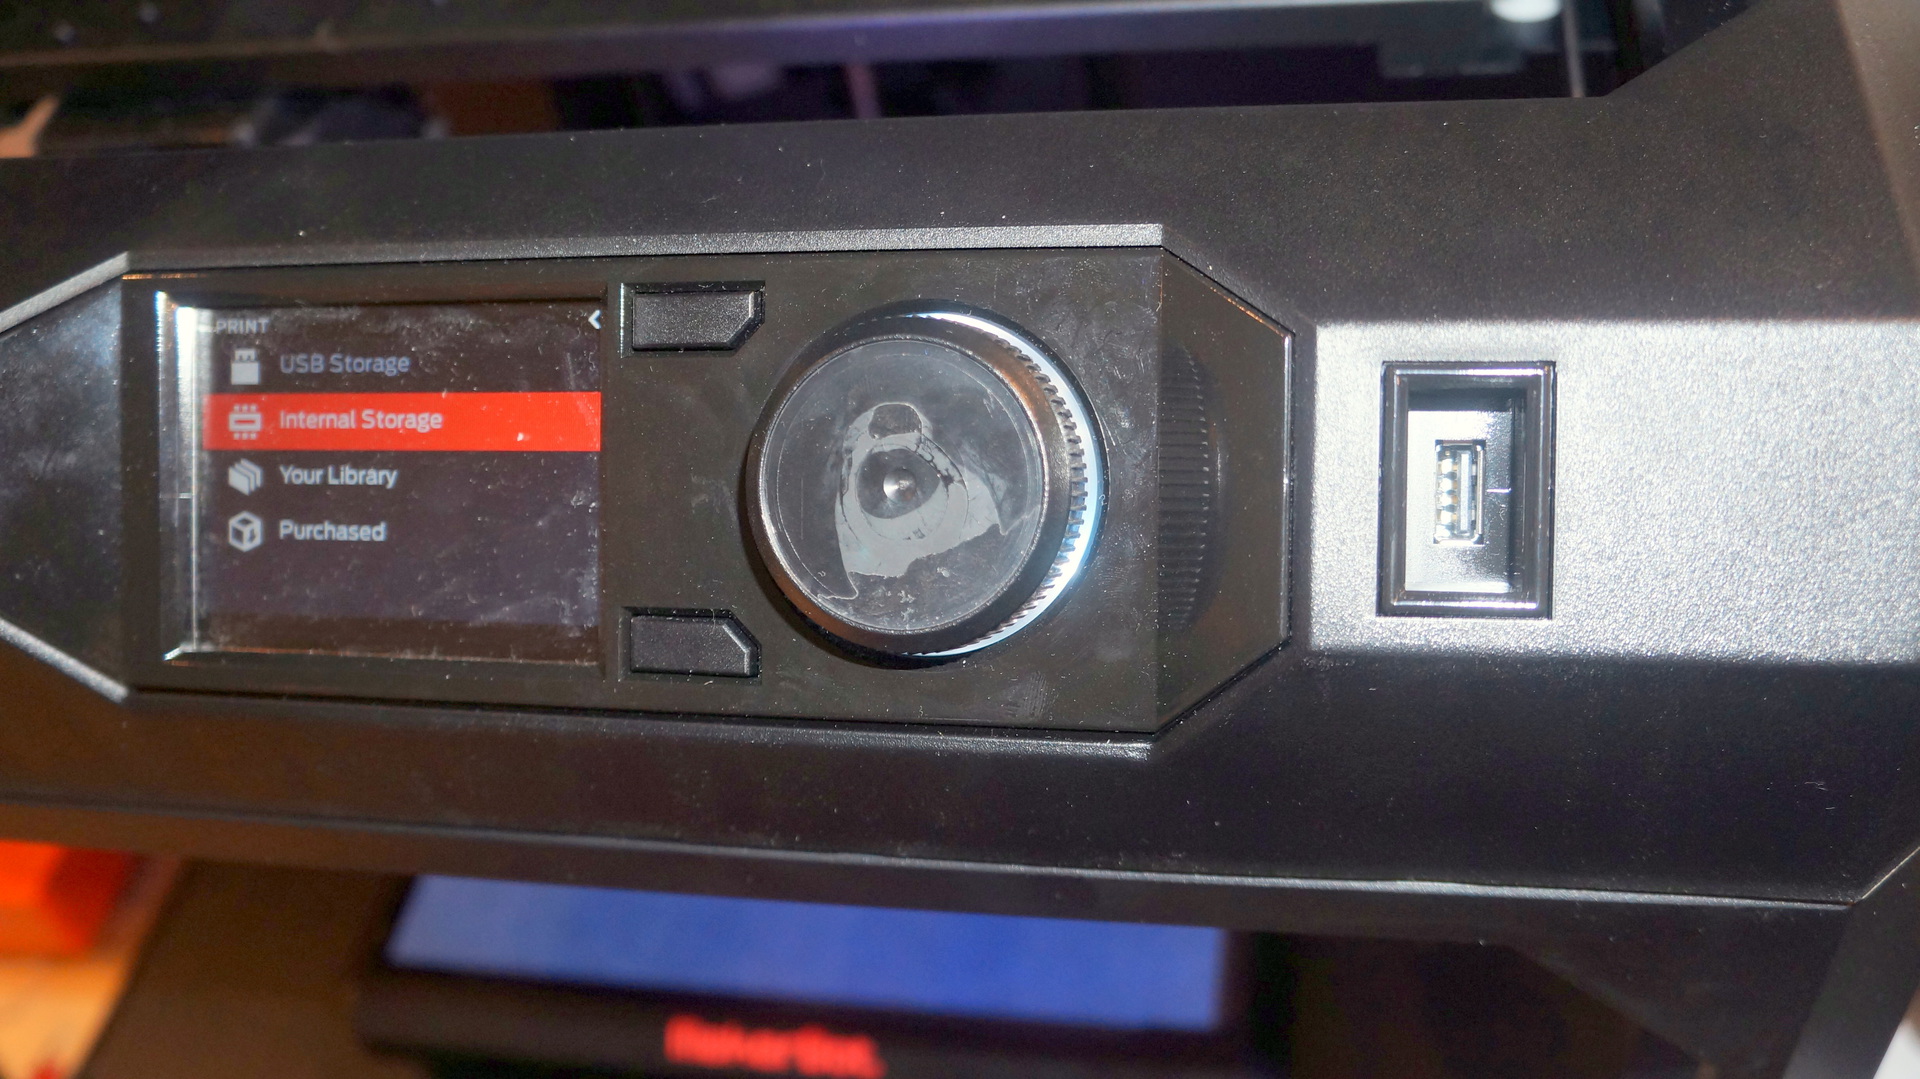
A little amused by the falling away metal sticker on the central button.
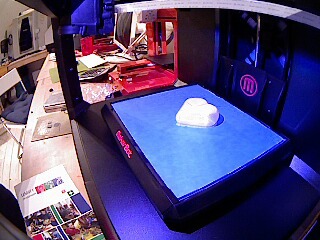
The printer has a camera. The resolution and quality is very mediocre, but you can understand what is happening there.

The camera does not know how to shoot video and takes a photo long enough. Sample photo below.
You can get a photo from the printer directly to the computer only if you connect via Ethernet.
Through it, you can connect an account at thingiverse.com . Yes, without an account, the program will not work.
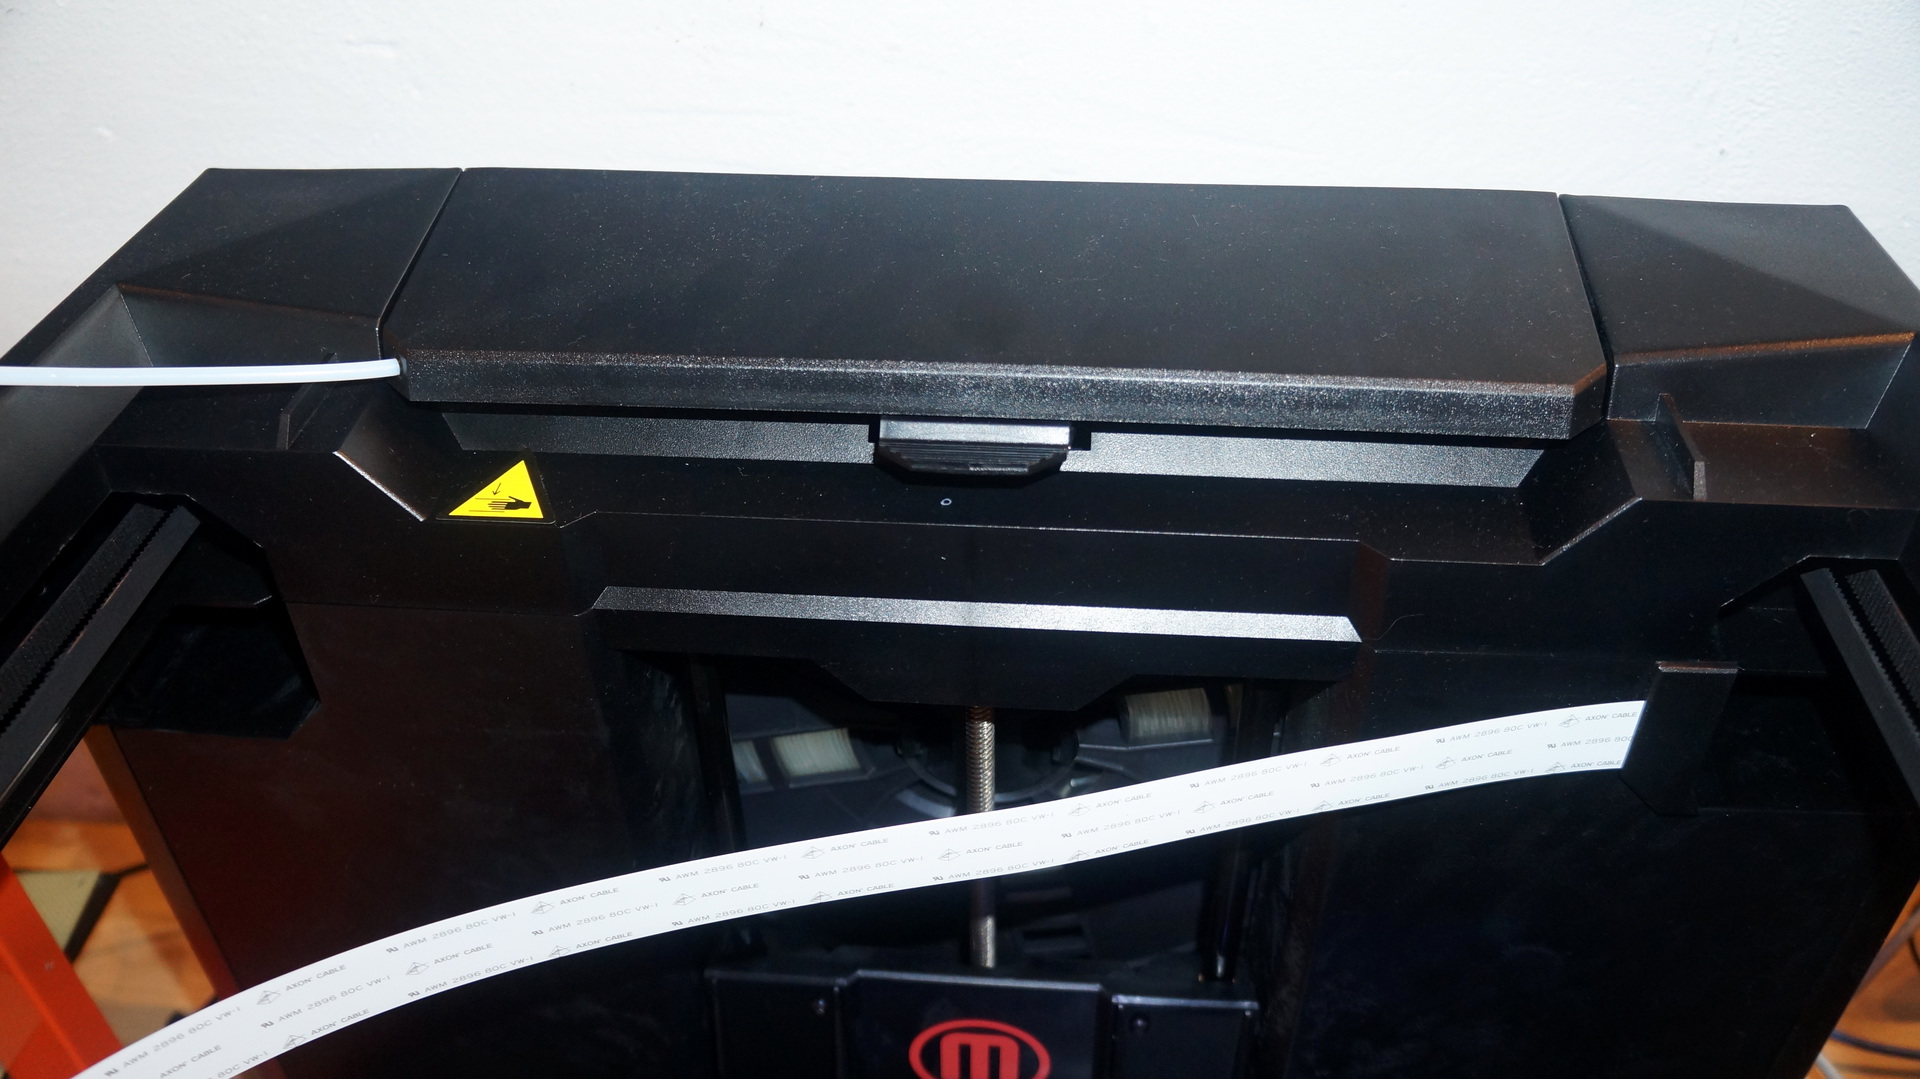
A little more about the design. The huge large block in the middle does not contain a motor for the X axis. There is only a motor for plastic, two fans and a LED (which never glowed). The control of this axis is carried out through the difference of movement of the left and right belt. Non-standard solution for 3D printers, but in the industry it is quite common.
Brief conclusions:
+ Enlarged and improved the platform
+ A little more accurate
+ Convenient operation and excellent display
+ There is a camera
+ Ethernet connection
+ The printer will not lose printing when the connection is broken
+ Improved extruder
+ Automated calibration
+ More friendly for the average man in the street
- lost speed second replicator
- a lot of software related bugs
- very expensive model
- much louder than other printers
- long and frequent auto-calibration
- stopped normally tighten plastic in a week
- extruder has serious flaws
I really hope that everything will be fixed in the new samples and it will become the best 3D printer.
Thank you all!
Waiting for questions and feedback from other owners of this news.
Updated!
Video example of the beginning of work Makerbot
Photos of the printed model (standard fast mode)
photo number 1
photo number 2
photo number 3
And here came to us from our friends, the new MakerBot Replicator 5th generation for testing.
The company has confused everyone with their names, but this is the newest model of their printers.
A little about this printer already told .
Immediately make a reservation, in our center there are a lot of 3D printers: two MakerBot Replicator 2, two UP! Plus, BFB 3D Touch 2 head and CubeX trio, Picaso designer, Wanhao duplicator4.
We worked very closely with all the printers, we know all the advantages and disadvantages, so we compare the new device with the existing equipment. I'll tell you a lot of small moments that came across already in the first week.
The box turned out weighty. More than 16 kg.
')
Inside we are waiting for quite a small instruction. The steps described are not entirely consistent with reality, but first things first.
At the second step, we are waiting for remarkable clips to secure the platform. They are made on makerbota and very high quality.
Next comes the magnetic “smart extruder”. More precisely, it was necessary to call it "Not so smart extruder".
There is one axiom: “Simpler mechanisms break less”. Here the company decided not to listen to anyone and made an unusually complex mechanism. It had a mysterious inscription MK11 V5. I really hope that this is a test sample. The extruder itself is assembled on snaps (thanks for being external). Plastic latches break very easily, so be extremely careful!
I will begin the description of the mechanism from top to bottom.
The first thing I see is an inclined opening for entry. But it does not work. When assembled, it is closed with a plug and redirects to a vertical entrance. After getting inside we get to the big wheel, which, apparently, serves to detect the presence of plastic in the extruder. This is a very good feature, which is lacking in other printers. And this wheel sticks out and you can visually see whether the plastic is going or not.
Then we get to the heart of any extruder - it is a pushing mechanism. It is made of a massive shaft with two bearings and an additional pressure bearing. They realized that such a mechanism is better than that used in the first revisions of Replicator 2. But for some strange reason, this mechanism pulls plastic very badly. The spring is very powerful, and here apparently the non-optimal geometry of the recess on the shaft.
The brains of this extruder are mounted on the back side with many external pins. These pins are spring-loaded and must be tightly in contact with the printer itself. This helps 4 very powerful magnet. But the snag is that when the smart extruder is docked, the teeth of the engine and the teeth of the broaching mechanism often do not match. For a normal person, it will not be difficult to check whether everything has joined correctly, especially as the printer itself writes about the absence of a print head.
Then the engineers tried their best and made a heating head, which can lift while working. This significantly improves printing accuracy due to the rare use of the Z axis. This is done by reversing the movement of the plastic. Plastic as it pulls the heating element. Immediately they built a touch sensor. Everything is simple, when the head moves, the metal contacts open.
We now turn to plastic:
Now it is loaded into a beautiful retractable vertical compartment. Made a small lever for fixing.
Very nice and discreet looks when closed.
Attention! Now the coil is narrower and larger in diameter. Old Coils do not fit!
The photo is not visible, but wider coils do not fit into this compartment. Exit two, buy only the original plastic from the official website, or use external devices to hold the plastic. The diameter of the rod remained the same - 1.75mm.
This plastic is pulled through a narrower and longer tube. Noticeably harder for him to go.
Next you need to insert the platform. There is only one joy! It is now glass and comes with as many as five BlueTape stickers. Has increased by 11% compared with the previous generation. Fixed now on the sled. Firm and reliable. And the plastic sticks perfectly to the platform.
It seems with the mechanical part of all. It remains to run all this.
The kit did not have a power cord with a European outlet, but this was decided by a simple adapter.
Another very good improvement is that now, in addition to connecting to a computer via USB, there is a connection via an Ethernet cable!
The instruction further lies a little.
We connected the computer via USB, turned on the power. And after a long download, the printer gave the message that the firmware is needed and nothing else. Now the printer is not MakerWare, but MakerBot Desktop .
The program is not immediately connected to the printer and not the first time was able to find the firmware for it. Again helps the tambourine with a reboot. The process of downloading the firmware is quite tedious and takes about 15 minutes.
After that, the printer is loaded. By the way, every time you turn on the printer is loaded for a very long time, more than 3 minutes.
The initial installation has begun. First of all, he himself checks the platform level using his smart extruder (he does this every time before printing starts). Then he checks two more control points and asks to twist two handles. The calibration process is very simple and straightforward.
Then he offers to print a test model. For some reason, the models did not want to print, and the printer did not let this step through. I had to reboot.
All actions are accompanied by clear instructions on a large color display. Although the printer slows down a bit in the menu and there is no longer that little bit of humor as in the second version, the control is much more comfortable and friendly. The printer now supports ordinary USB drives (not included).
A little amused by the falling away metal sticker on the central button.
The printer has a camera. The resolution and quality is very mediocre, but you can understand what is happening there.
The camera does not know how to shoot video and takes a photo long enough. Sample photo below.
You can get a photo from the printer directly to the computer only if you connect via Ethernet.
Through it, you can connect an account at thingiverse.com . Yes, without an account, the program will not work.
A little more about the design. The huge large block in the middle does not contain a motor for the X axis. There is only a motor for plastic, two fans and a LED (which never glowed). The control of this axis is carried out through the difference of movement of the left and right belt. Non-standard solution for 3D printers, but in the industry it is quite common.
Brief conclusions:
+ Enlarged and improved the platform
+ A little more accurate
+ Convenient operation and excellent display
+ There is a camera
+ Ethernet connection
+ The printer will not lose printing when the connection is broken
+ Improved extruder
+ Automated calibration
+ More friendly for the average man in the street
- lost speed second replicator
- a lot of software related bugs
- very expensive model
- much louder than other printers
- long and frequent auto-calibration
- stopped normally tighten plastic in a week
- extruder has serious flaws
I really hope that everything will be fixed in the new samples and it will become the best 3D printer.
Thank you all!
Waiting for questions and feedback from other owners of this news.
Updated!
Video example of the beginning of work Makerbot
Photos of the printed model (standard fast mode)
photo number 1
photo number 2
photo number 3
Source: https://habr.com/ru/post/361247/
All Articles