3D character stylization: model, texture, details
Stunning 3D artist Luana Bueno told in detail about the creation of her low poly fan version by Horizon Zero Dawn Eloy.
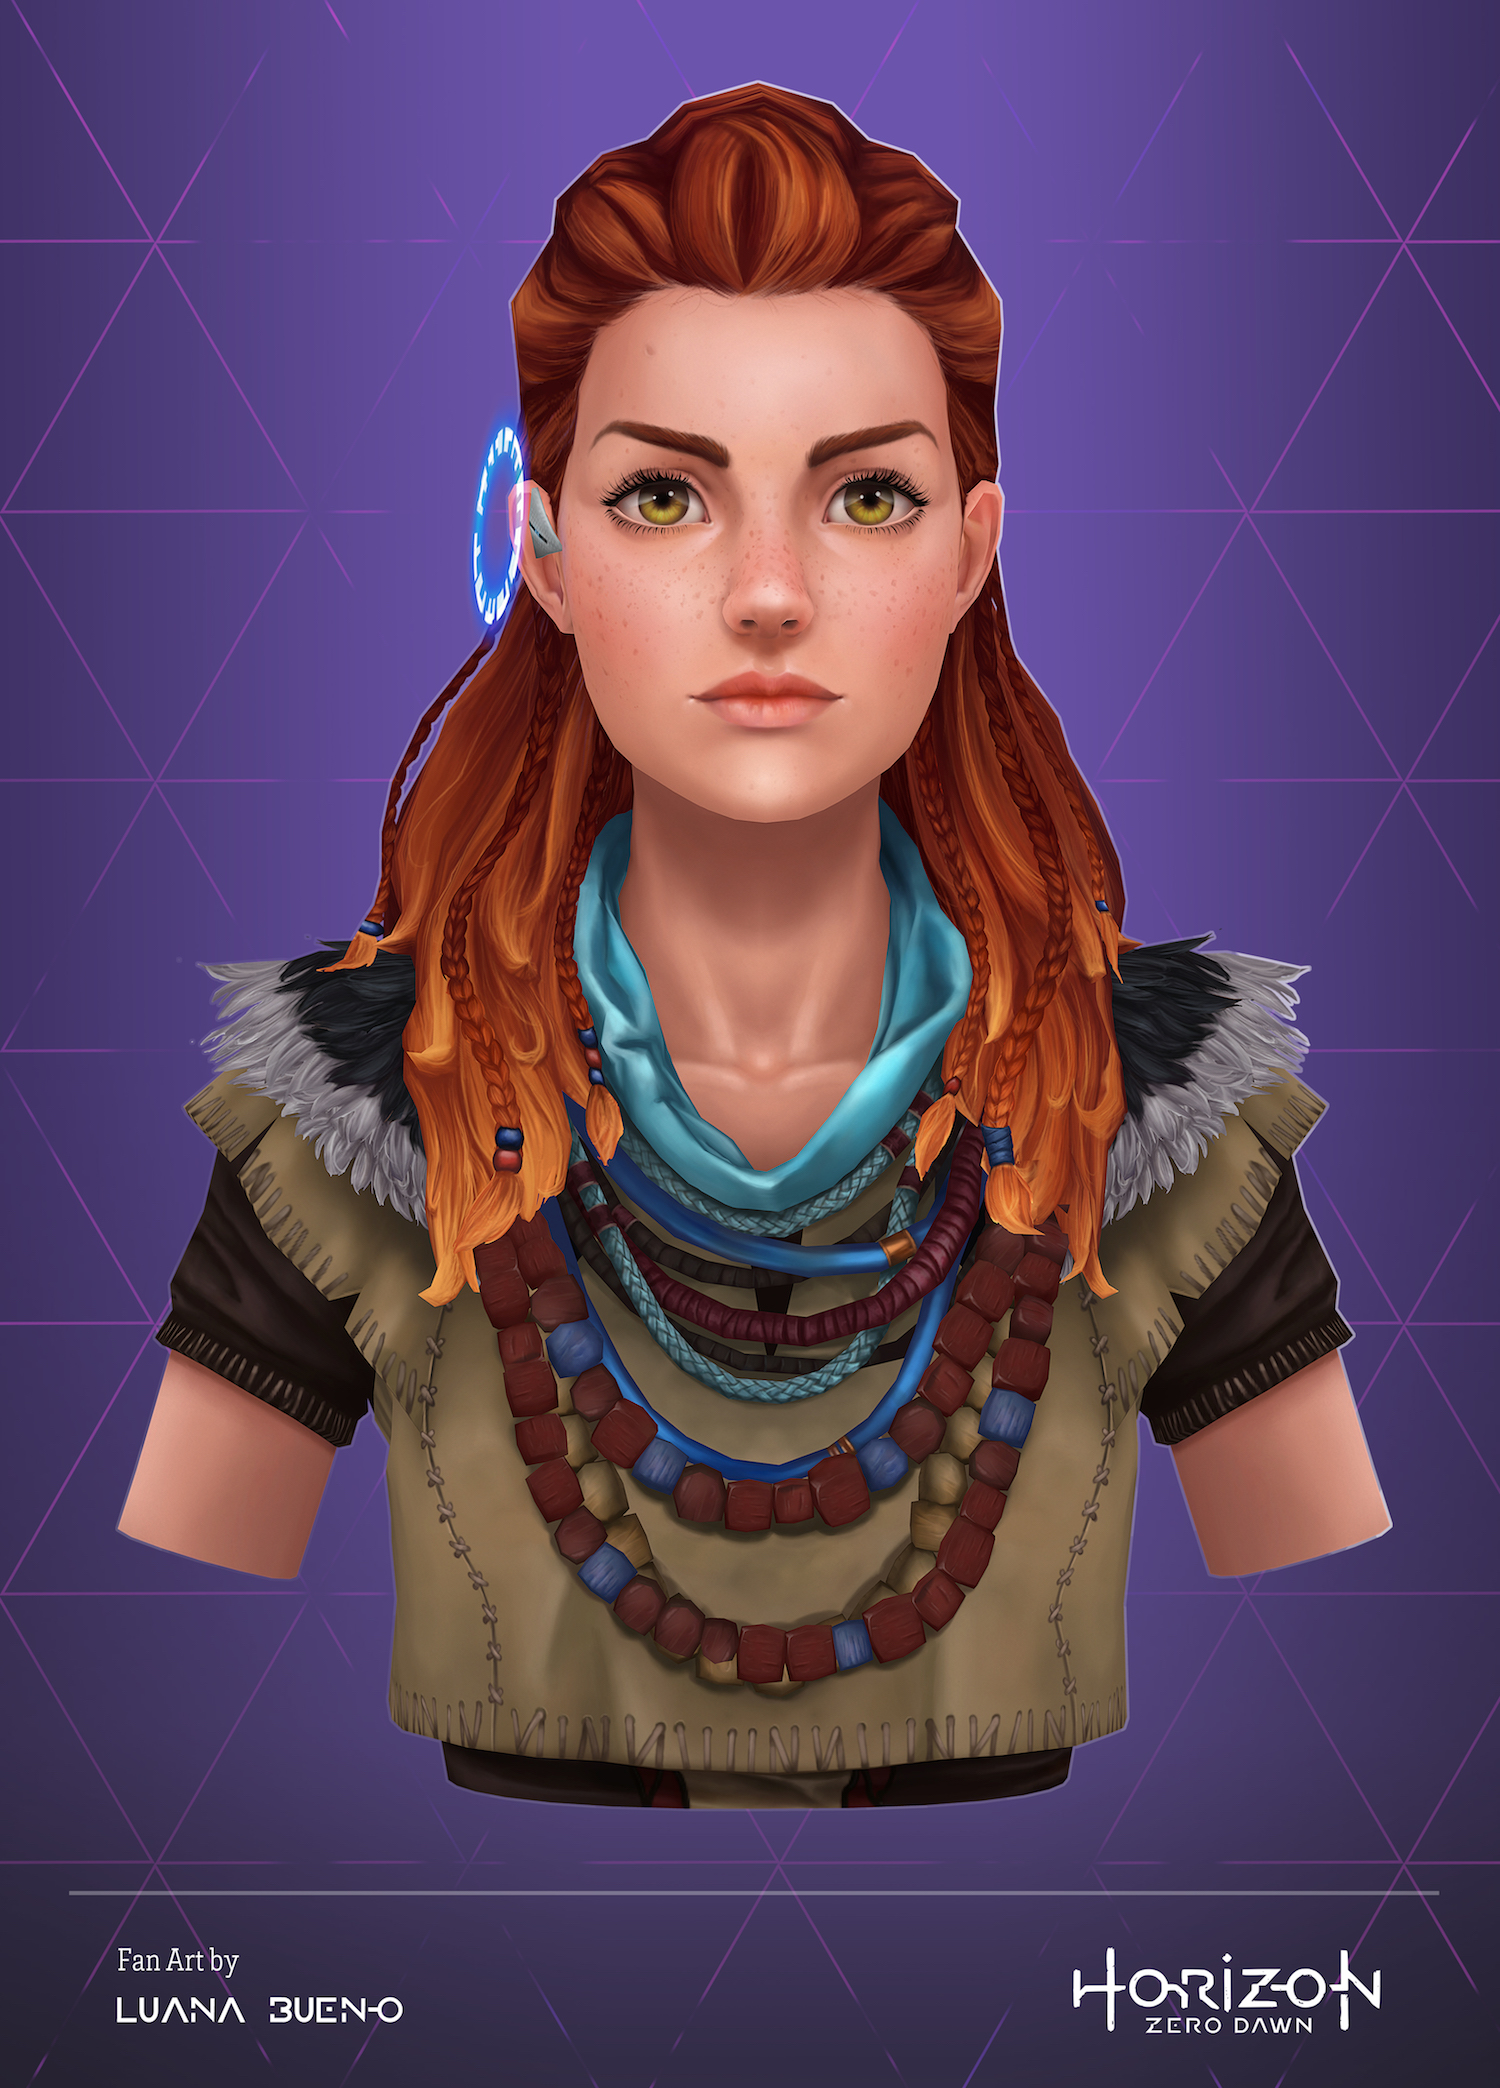
My name is Luana , I am an artist of 3D characters from Sao Paulo. I moved here six years ago because I won a game design course at Anhembi Morumbi College.
I first met 3D in college, but at that time I was already engaged in concepts and illustrations in my group, then I did not have the opportunity to study this area in depth.
')
When I first saw a hand-painted model, I realized that I had found myself a job that I wanted to do.
For a long time I worked in advertising, and in the evenings I studied 3D. After that, I worked for a while as a modeler for the RoVr VR game.
Now I am freelancing and working on my portfolio.
I can say with confidence that it is more pleasant to study 3D when you have a company of friends that can help and make the trip more interesting. They are like mana potions that restore my energy when I overcome every obstacle.
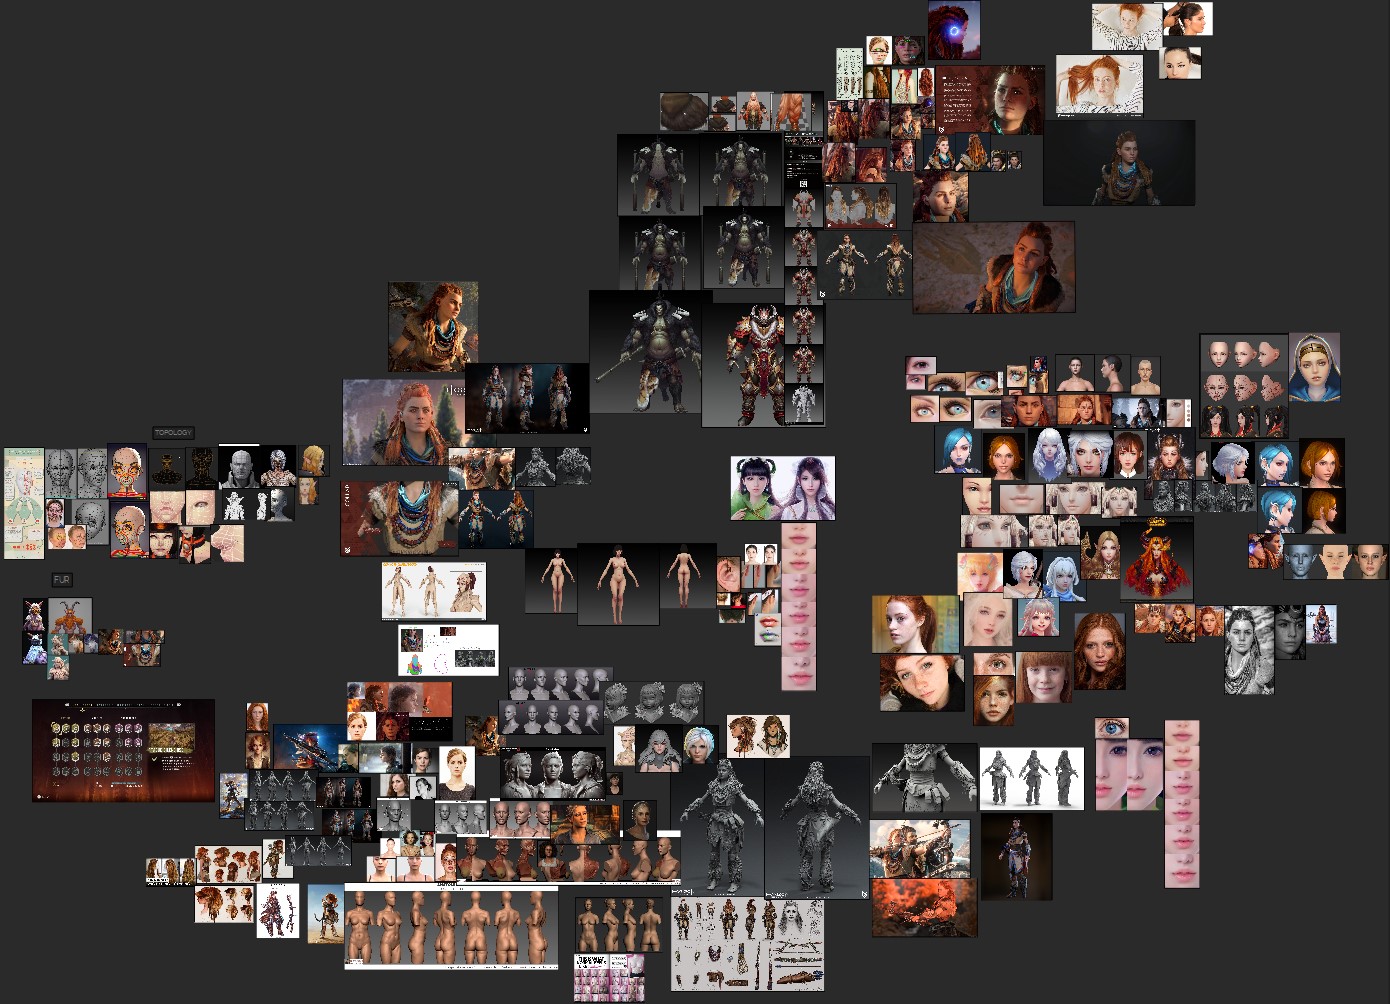
I started the project by collecting a lot of references: Eloy herself, actresses or models that I thought would help me sketch some parts of Eloy's face or create a texture. This was important to say, because I see that many people start a project without using references. I can say with confidence that if you collect good references, the probability of project success becomes 50% higher.
There are different programs for organizing references. I use Pure Ref.
Here is my reference board. At the beginning she was more orderly, but in the process of working on the project I moved the images.
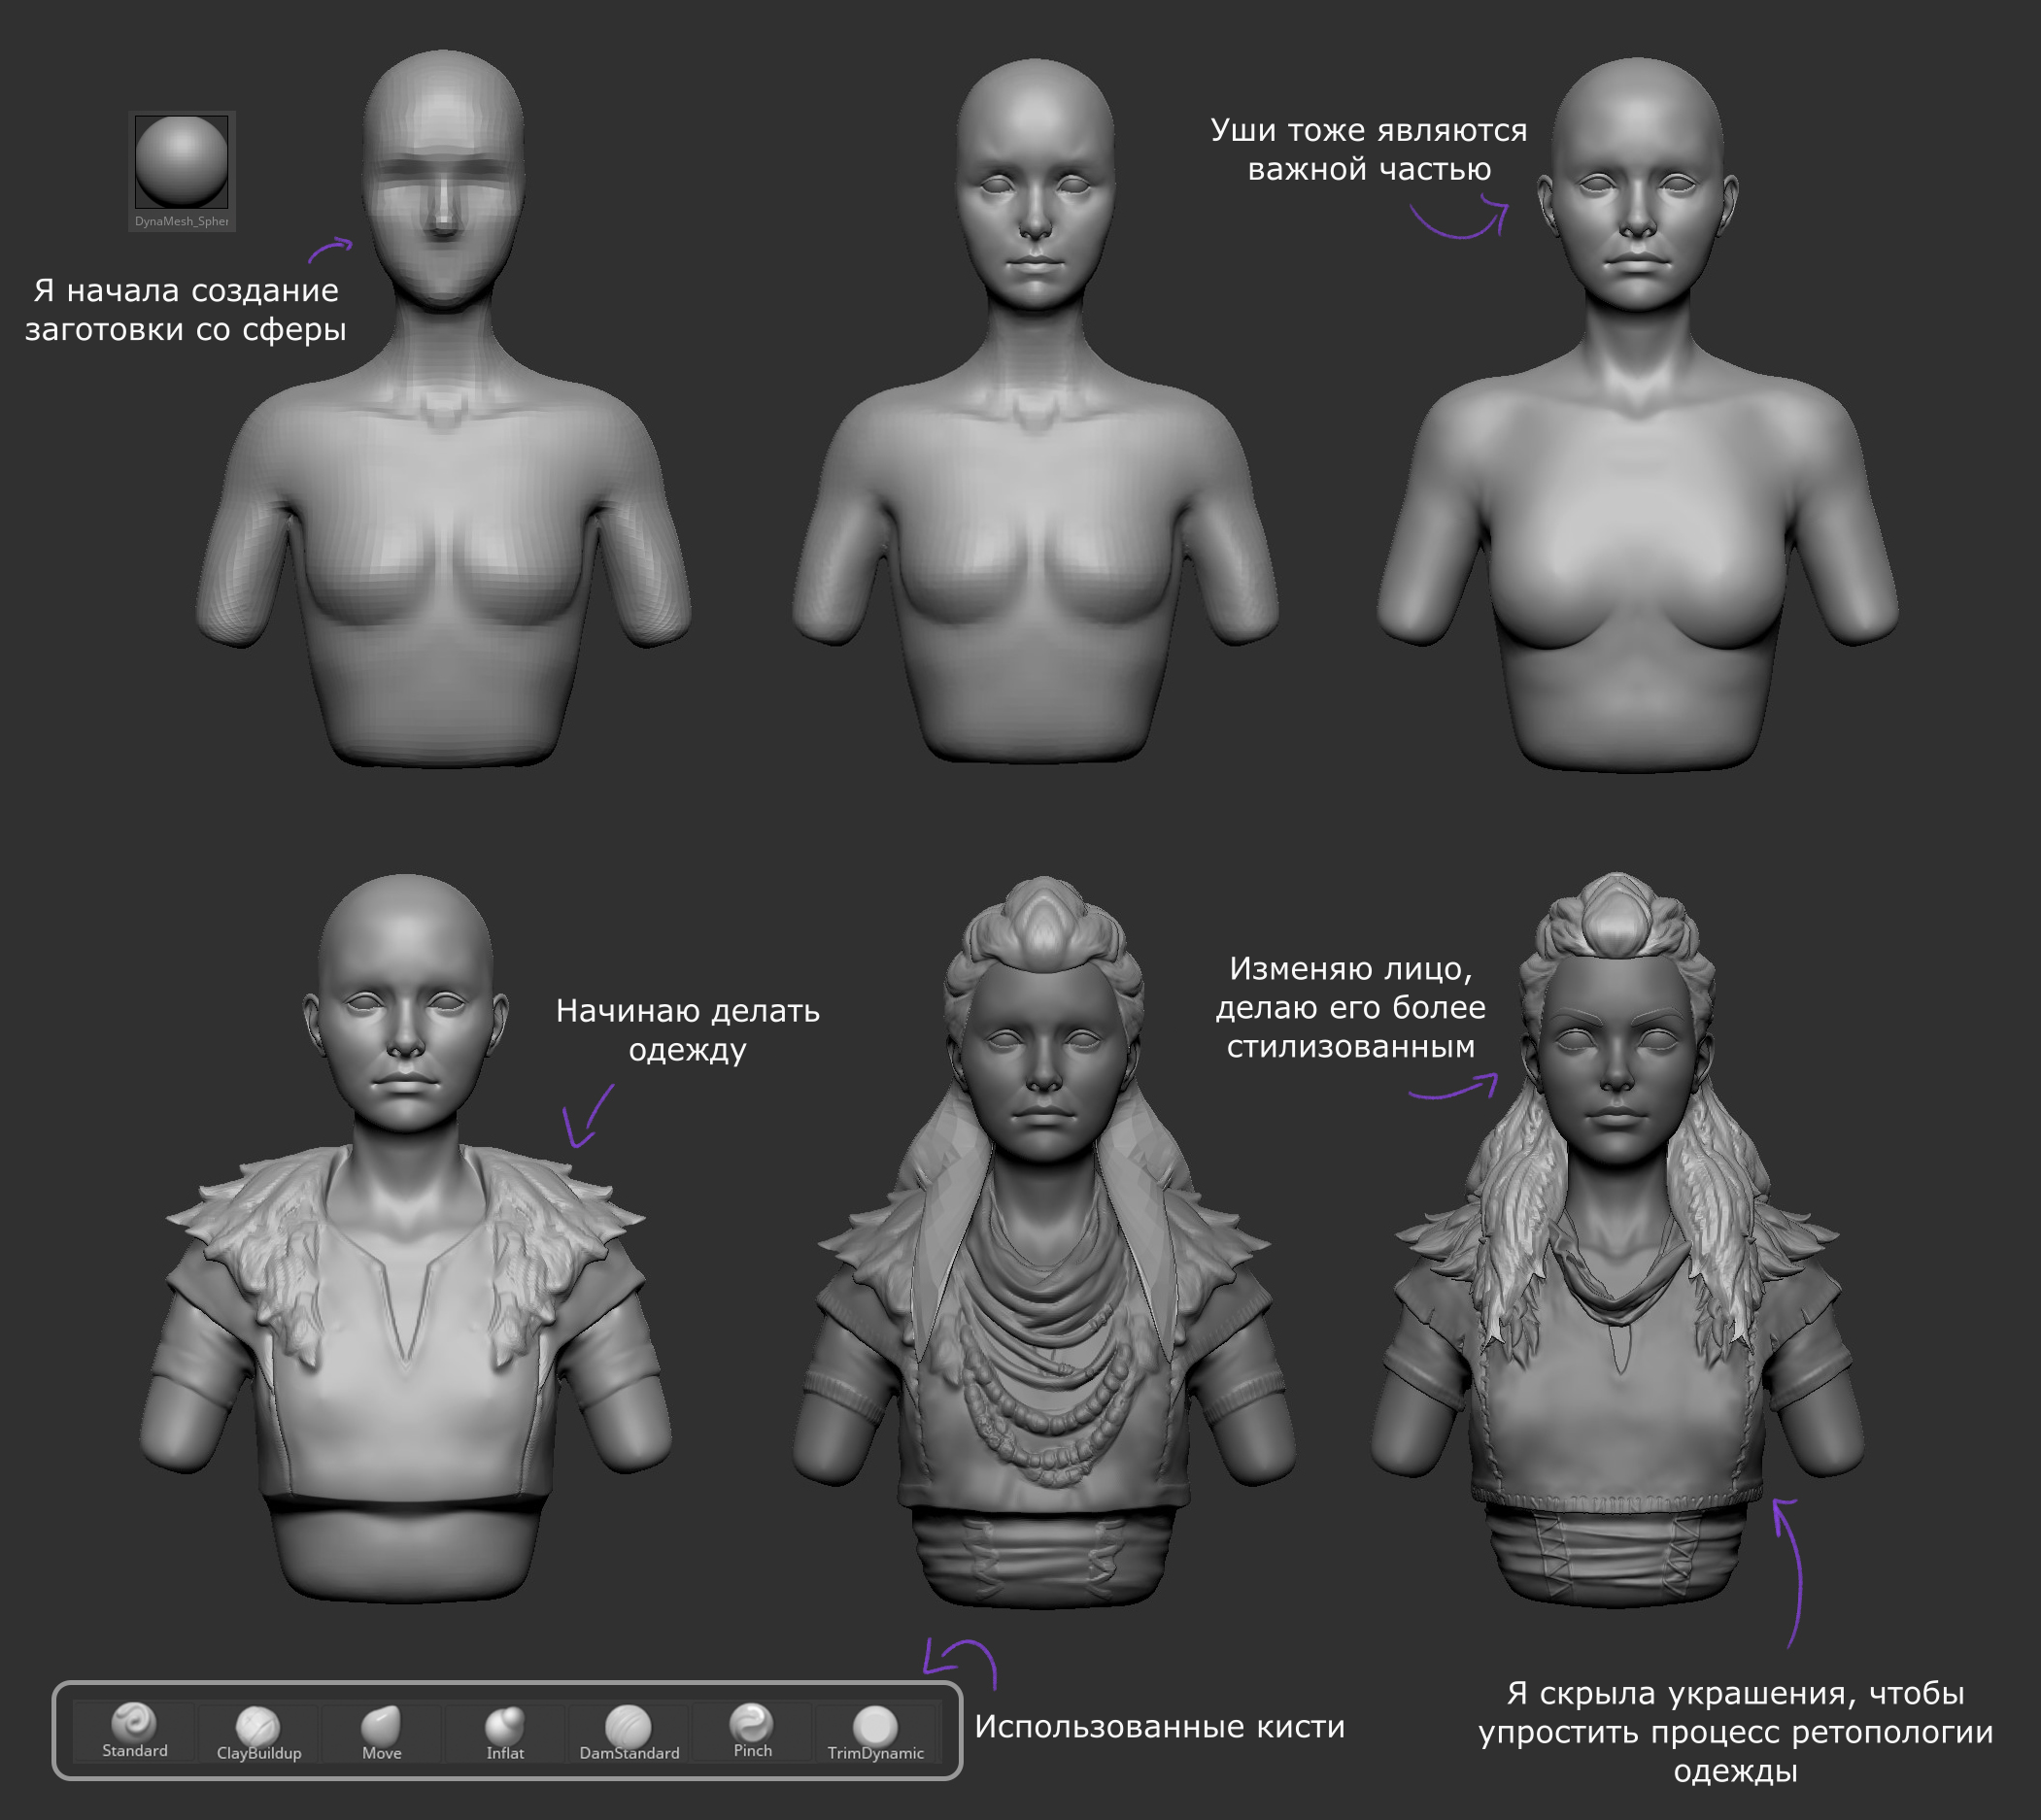
I started by creating a blank in ZBrush . This preparation is very rough and is needed only as a basis for future retopology.
Note that I did not go into details, because I knew that these details would be implemented in texture.
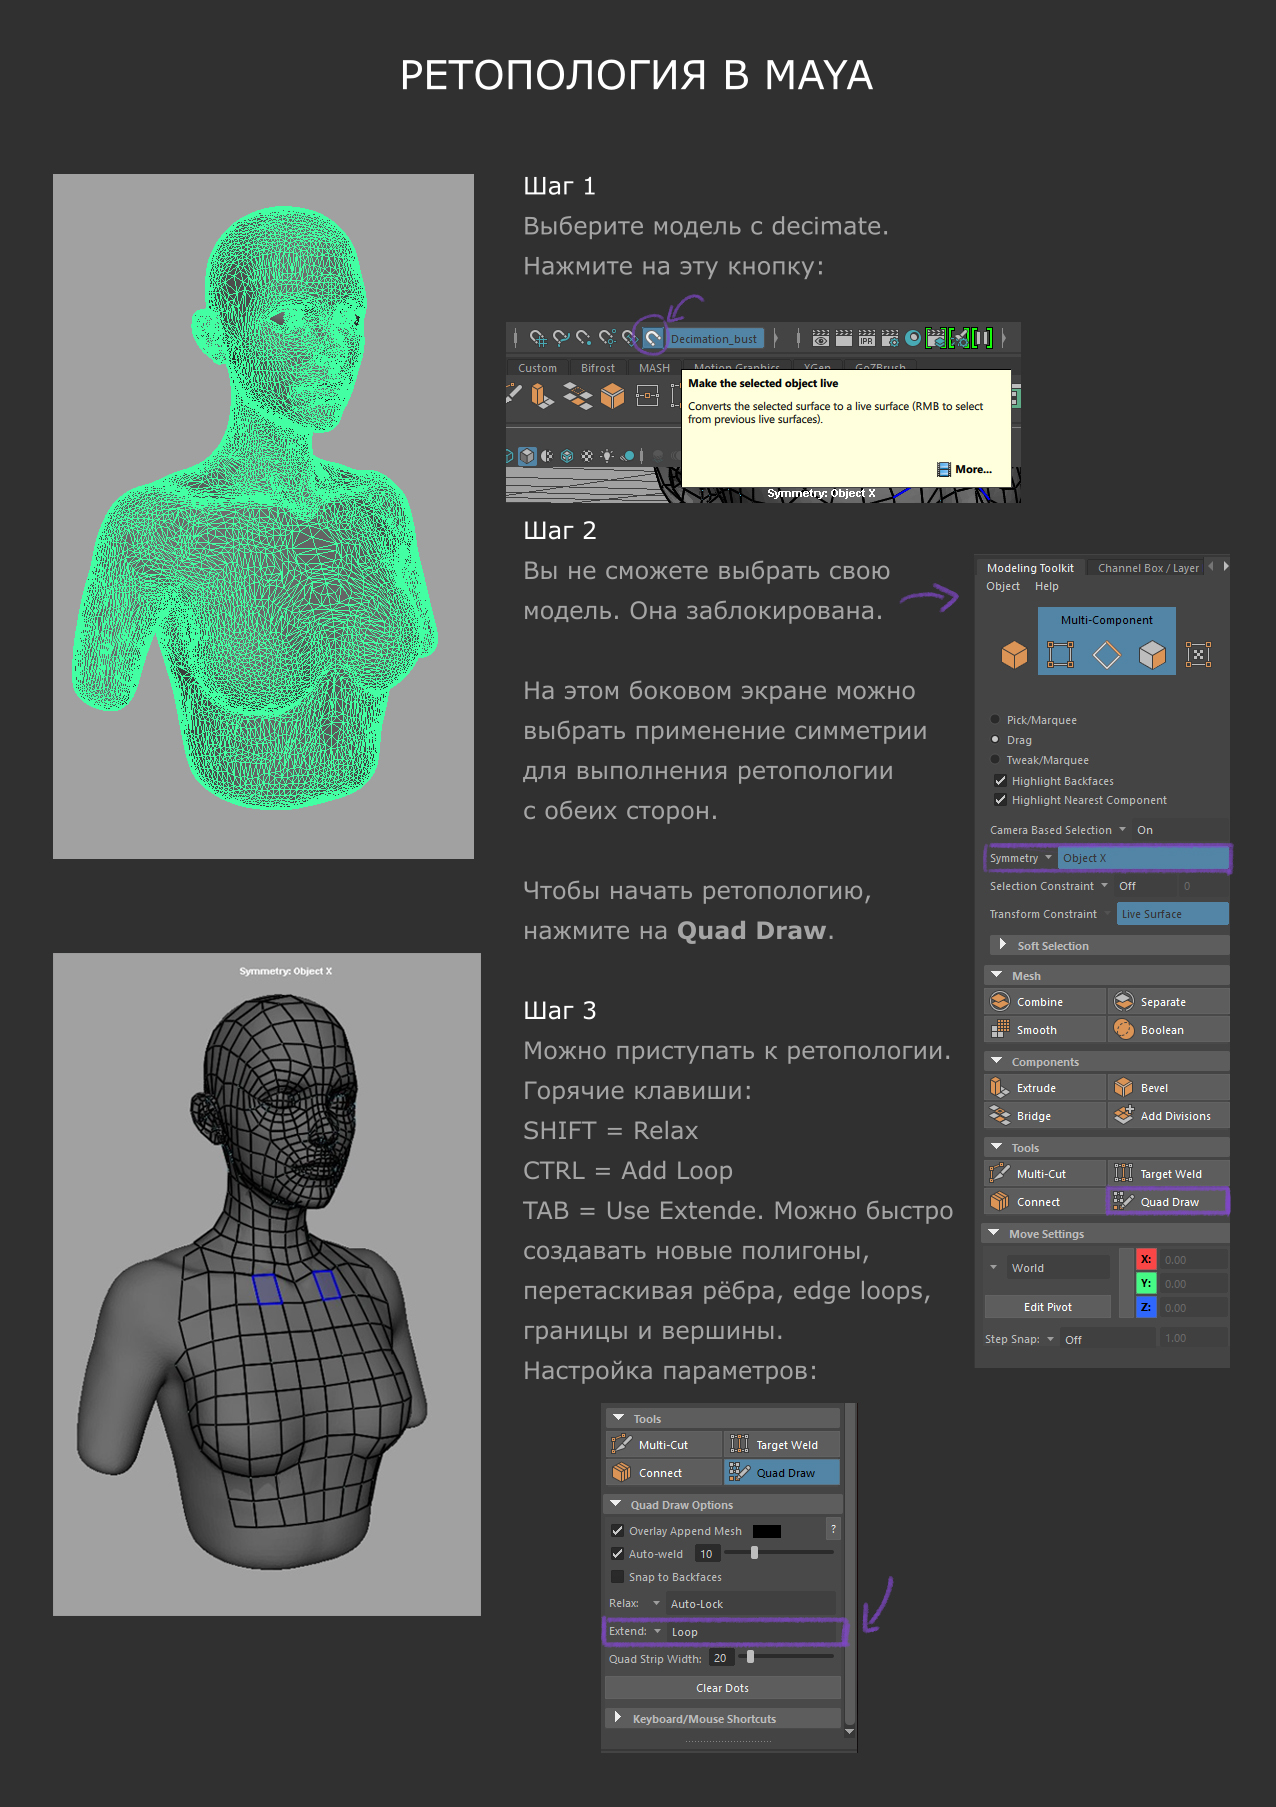
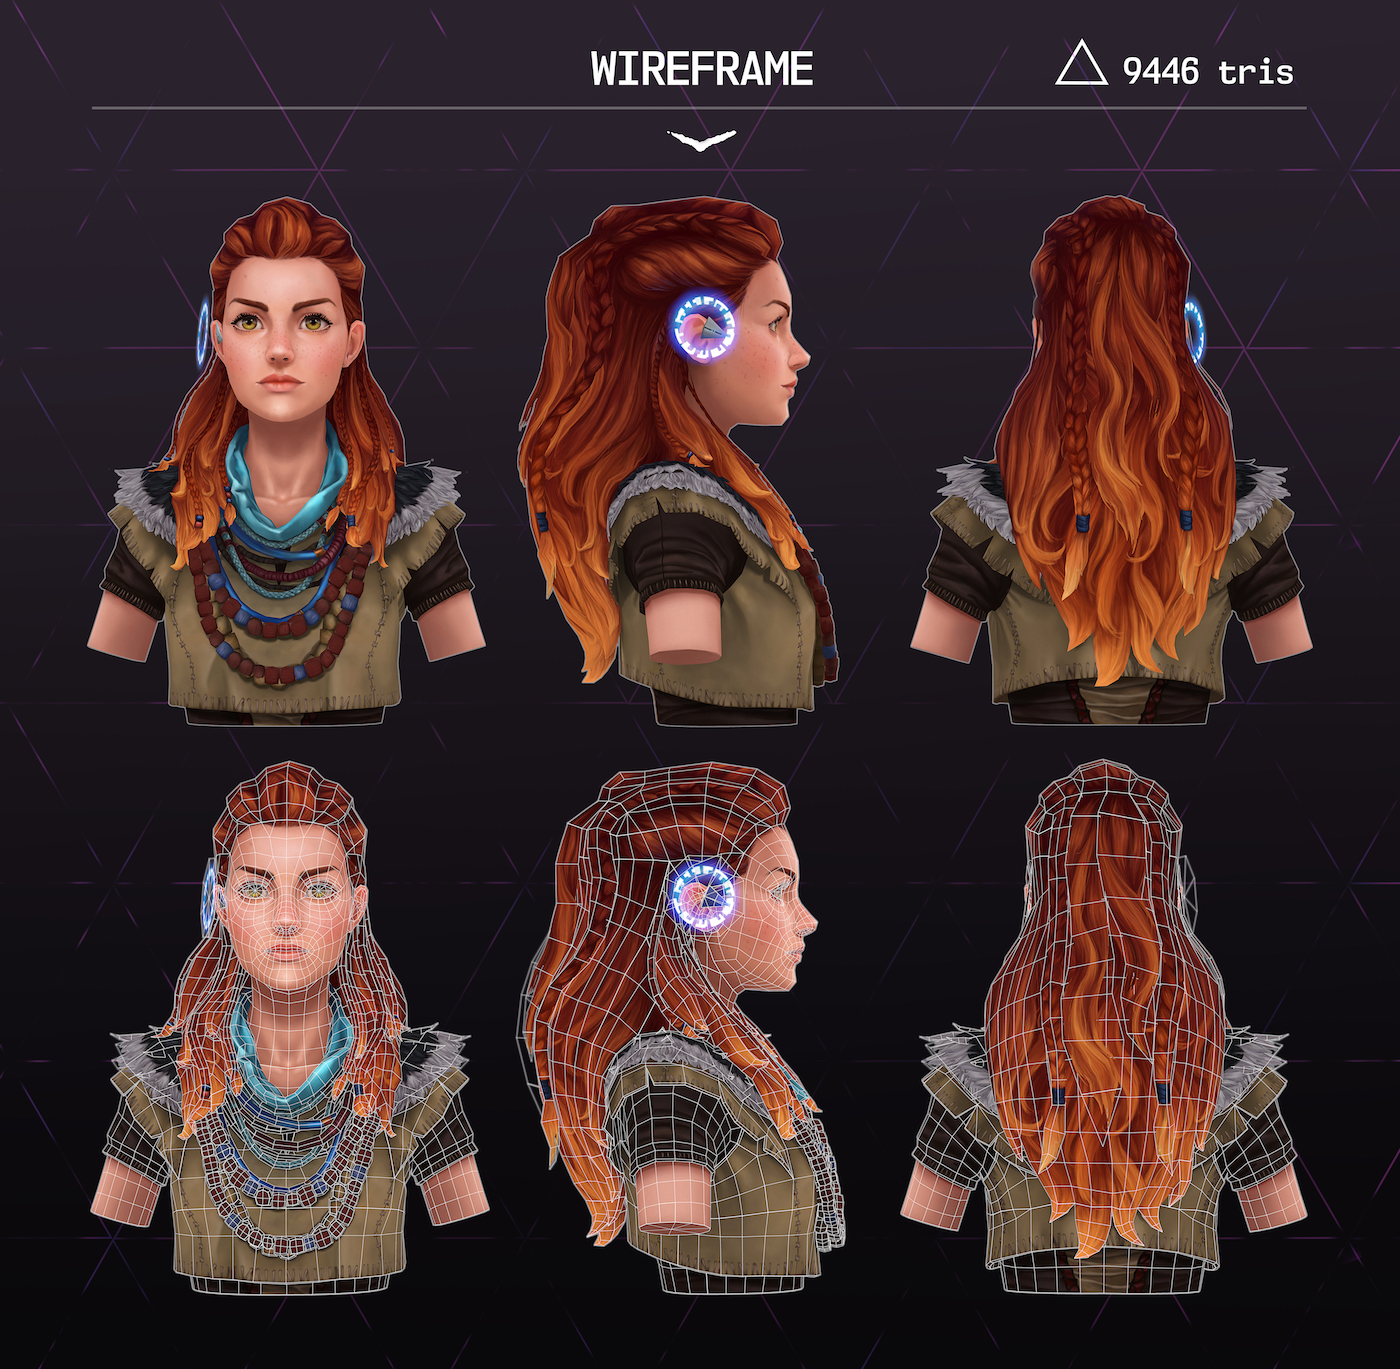
When finished, I exported .obj to Maya and started retopology. At this stage it is important to select references for the correct topology. The topology must follow the correct loop of the polygons; you need to imagine that maybe the character will be animated in the future.

Ready topology:
Before starting the project, I imported the reference into Photoshop and created the necessary linear guides that should help me in modeling.
This is an important concept study process. I analyze the proportions and the number of accessories worn on the character.
In fact, all the details were drawn on the texture. The model is a simple mesh created in Maya with a silhouette and shape that I needed to create a good texture pattern.
We start with UV: although the model is a bust, I decided to divide it into two UVs, one for the face and clothes, and the other for hair, fur and other parts that required transparency. I made this choice because I needed a high resolution texture.
Thanks to friends, I learned to be very picky about how my UVs are organized; they are very demanding and made me critical of my work.
Creating clear and streamlined UVs has already become an integral part of my workflow, and this is also very simple. From the artist is required only not to stretch the texture in some areas.
Let's go to the textures. In hand-drawn textures, I like the fact that it is not technical understanding that is important in them, but observation and perseverance. We have to work with a variety of tools, but when it comes to texture, only I and a completely gray model are waiting for life to be breathed into it.
The goal of this project from the very beginning was to improve my skill in drawing textures by hand. I did not bake any maps that could help me in drawing.
I started by applying basic colors to the whole model, and then improving it part by part. The first part that I noticed was the face.
As a reference, I used the work of an artist named Pug.
Here is a link to the blog of his school, which has several works created by him and his students. Hopefully, these models will become a source of inspiration for other freehand artists.
Note: I do not know Chinese, so in order to understand the blog, I also had to use a translator. But it was worth it!
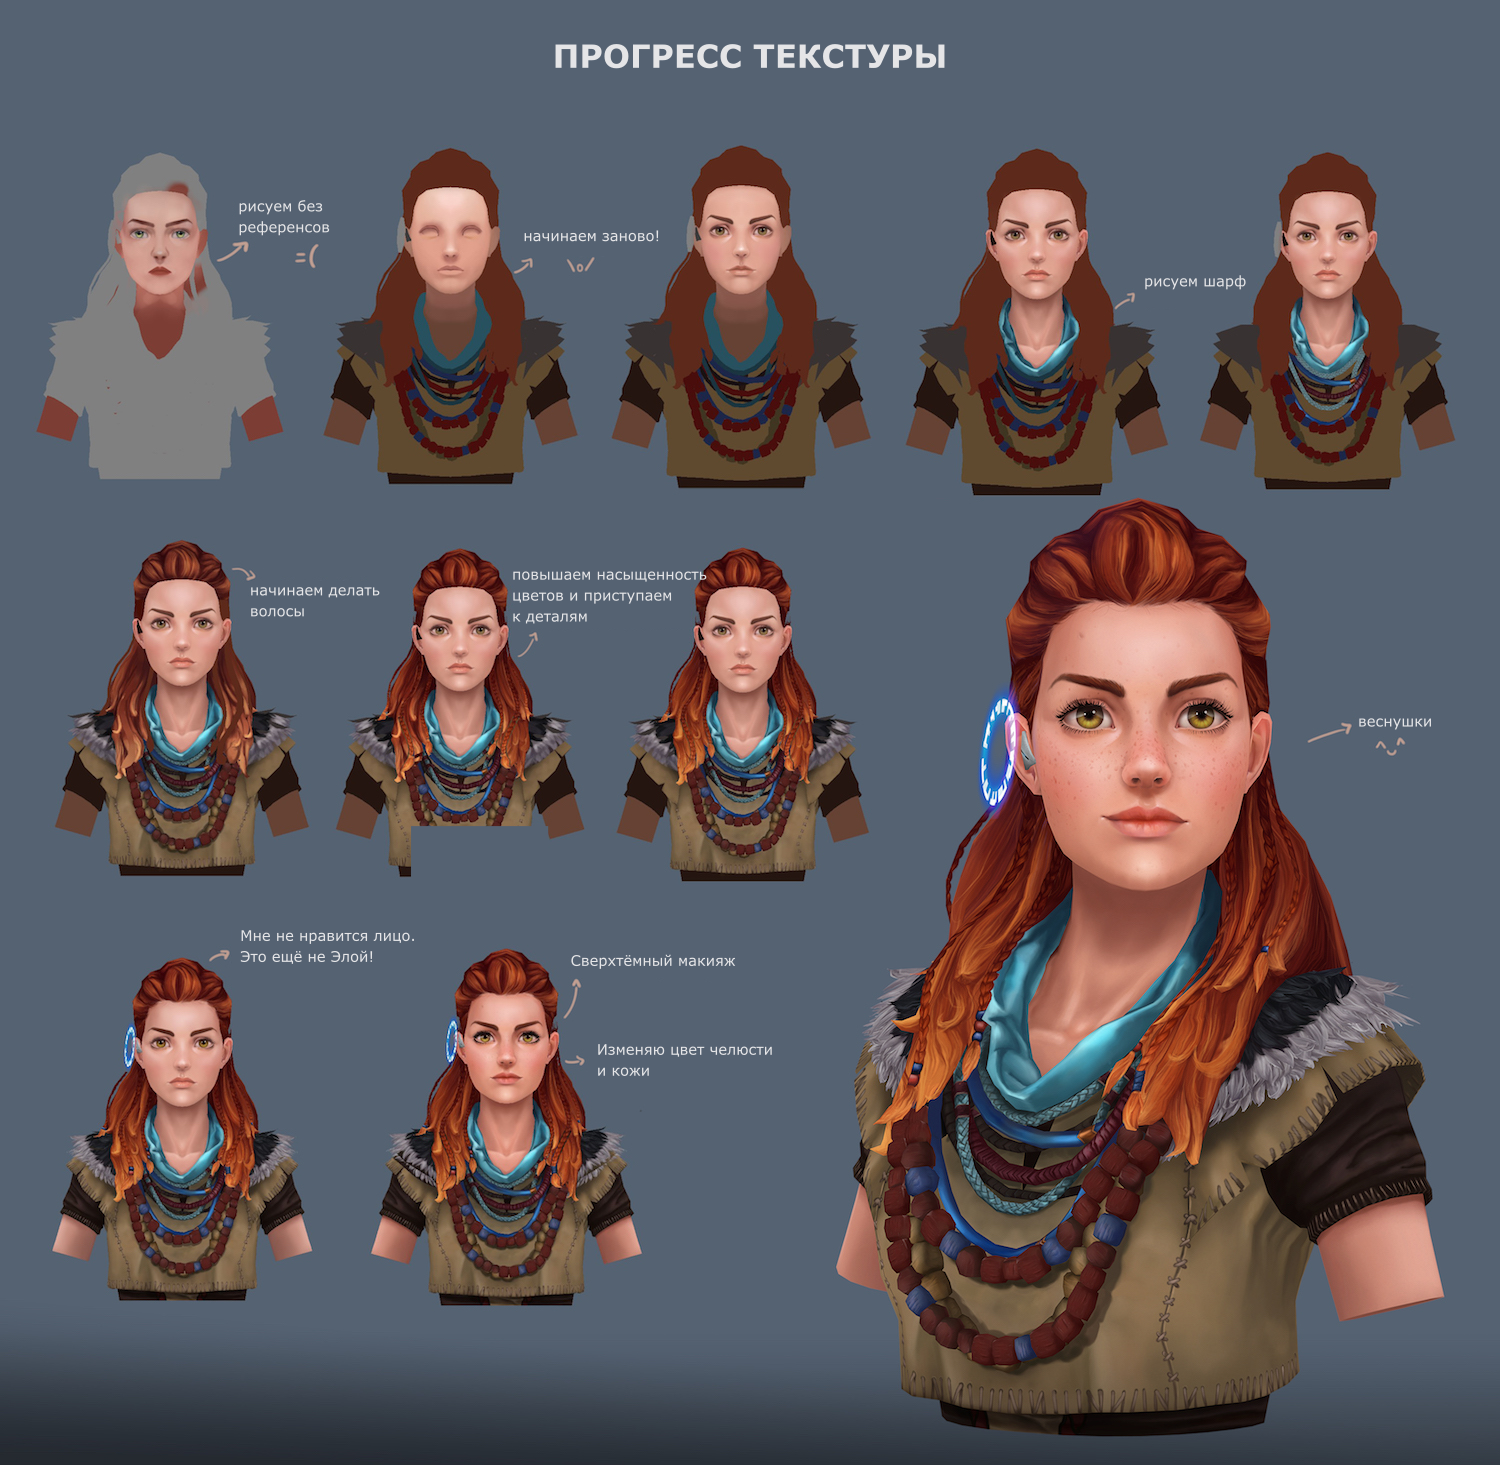
As for the head, I drew each hair separately. It looks like crazy work, but it was worth the effort - drawing and redrawing many areas I learned a lot.
When working with texture, there are no secrets or magic brushes with which you can get the perfect texture. You just have to do and rework, until in time you inevitably achieve a good result.
Almost all of Eloy was painted in 3D-Coat . This is an ideal texturing tool for hand-drawn models. I use the flat view (hot key “2” in 3dCoat), which gives me full control over the drawing.
To create a wicker jewelry on the neck, I used Photoshop. I tried to draw it by hand, but I could not make it homogeneous, so I found an image of weaving similar to Eloy’s decoration and in Photoshop I applied it directly to UV, and then used it as a drawing sample in 3DCoat.
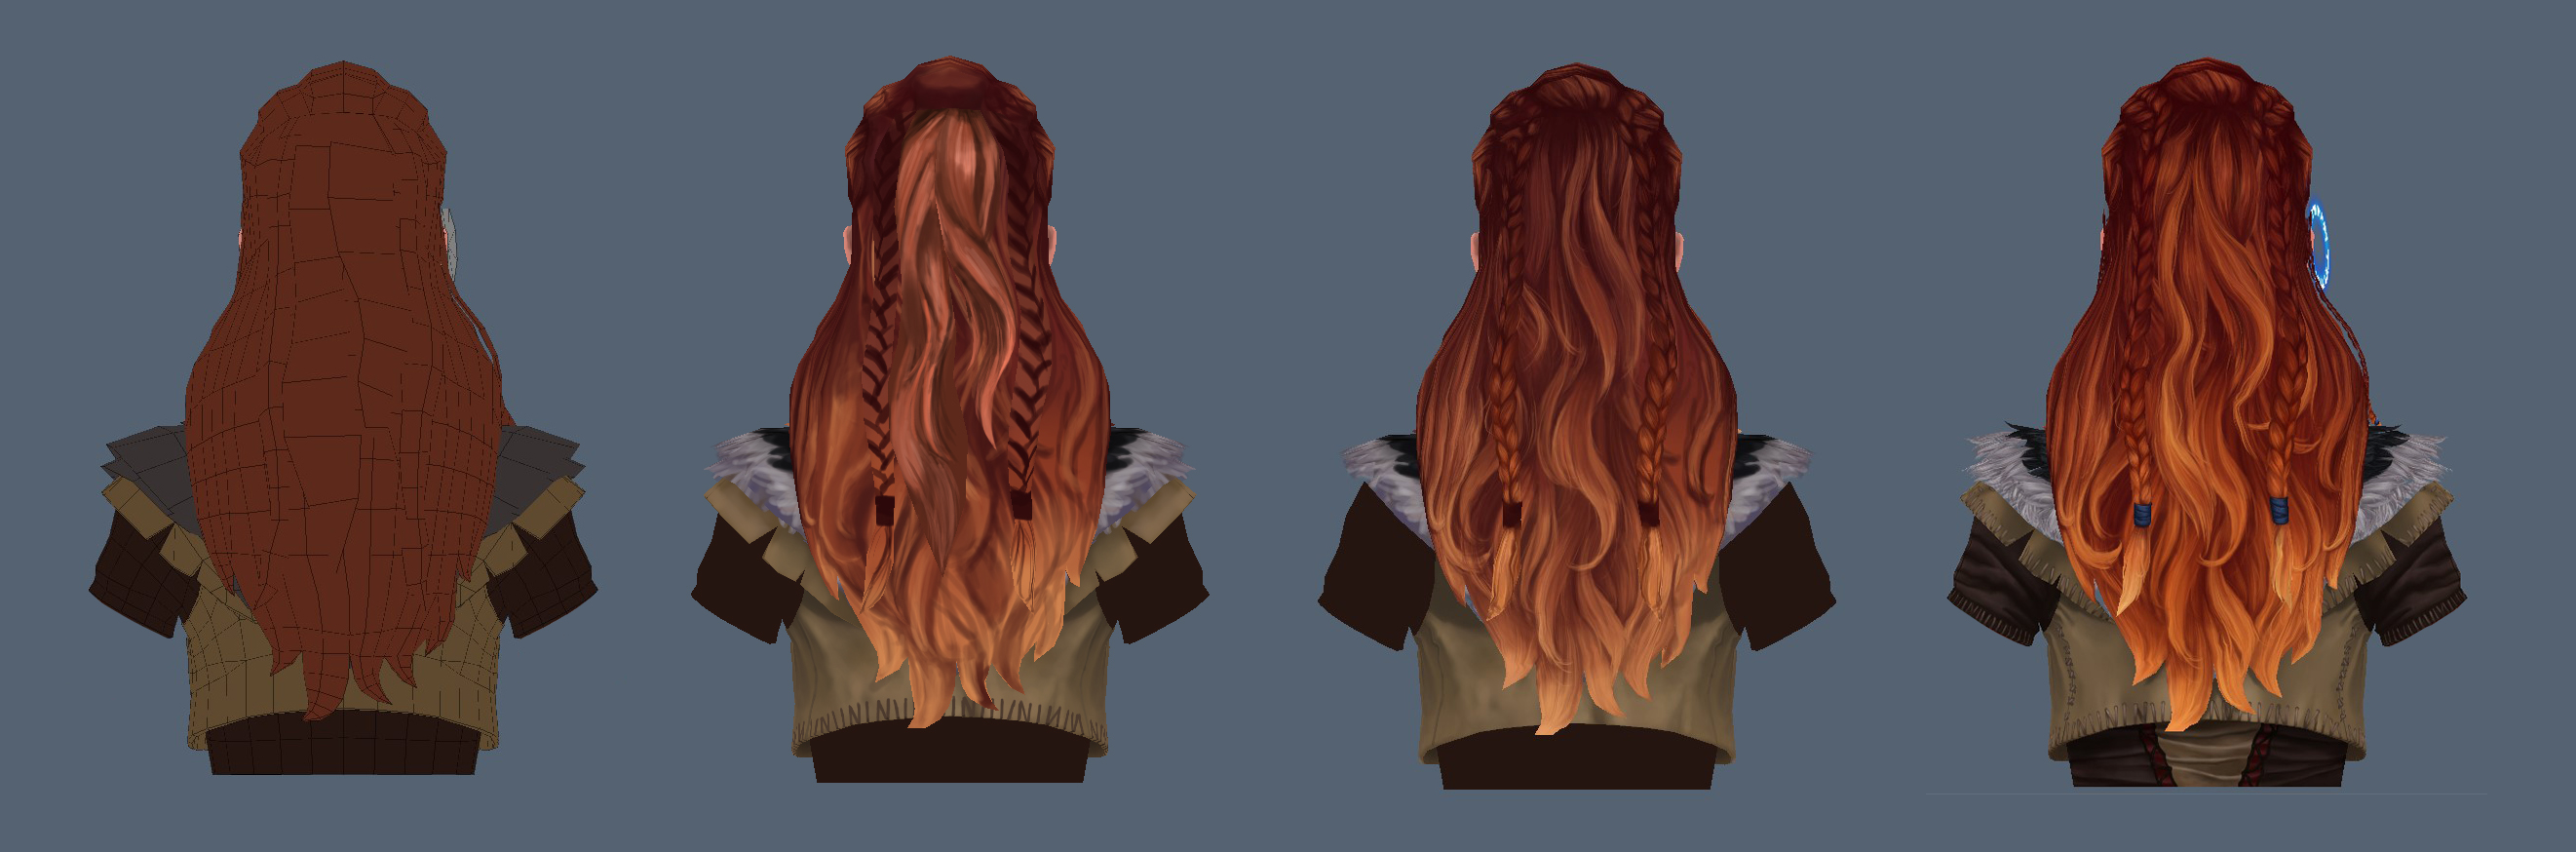
After drawing the textures, I set up an opacity map in Photoshop and corrected the hair color.
Before this project, there were no human characters in my portfolio, and I understood that I would inevitably have to study anatomy and drawing by hand. I would still have to do it, and for this, it is the right time.
I really wanted to make a bust of a female character with a different haircut and a few details.
I began to look for concepts that might please me, but did not find them. Once in a conversation, my friend Alex mentioned the Horizon game and then I realized that I would be modeling by Eloy.
I knew that starting with the bust of such a complex character would not be easy, but I was not very worried about the complexity, I just took it and did it.
I was most worried about neck jewelery and hair. I decided to deal with jewelry much faster than I could imagine, and the progress made by the model gave me more confidence to continue working.
With hair, everything turned out to be a little more difficult - when I started drawing the texture, I saw that the mesh did not behave very well, so I returned to Maya and redid the blank, after which I opened the UV scan again. And even after these changes, I had to redraw the hair several times until the result was acceptable for my eyes.
What makes this model interesting? To complete each part of it, I had to overcome myself as an artist. I know that this is not only my work - every review I received from friends helped me to complete with Eloy and, step by step, to make it even more real Eloy.
Luana Bueno , 3D character artist.
The interview was taken by Cyril Tokarev.
Introduction
My name is Luana , I am an artist of 3D characters from Sao Paulo. I moved here six years ago because I won a game design course at Anhembi Morumbi College.
I first met 3D in college, but at that time I was already engaged in concepts and illustrations in my group, then I did not have the opportunity to study this area in depth.
')
When I first saw a hand-painted model, I realized that I had found myself a job that I wanted to do.
For a long time I worked in advertising, and in the evenings I studied 3D. After that, I worked for a while as a modeler for the RoVr VR game.
Now I am freelancing and working on my portfolio.
I can say with confidence that it is more pleasant to study 3D when you have a company of friends that can help and make the trip more interesting. They are like mana potions that restore my energy when I overcome every obstacle.
Production
I started the project by collecting a lot of references: Eloy herself, actresses or models that I thought would help me sketch some parts of Eloy's face or create a texture. This was important to say, because I see that many people start a project without using references. I can say with confidence that if you collect good references, the probability of project success becomes 50% higher.
There are different programs for organizing references. I use Pure Ref.
Here is my reference board. At the beginning she was more orderly, but in the process of working on the project I moved the images.
I started by creating a blank in ZBrush . This preparation is very rough and is needed only as a basis for future retopology.
Note that I did not go into details, because I knew that these details would be implemented in texture.
When finished, I exported .obj to Maya and started retopology. At this stage it is important to select references for the correct topology. The topology must follow the correct loop of the polygons; you need to imagine that maybe the character will be animated in the future.
Ready topology:
Proportions
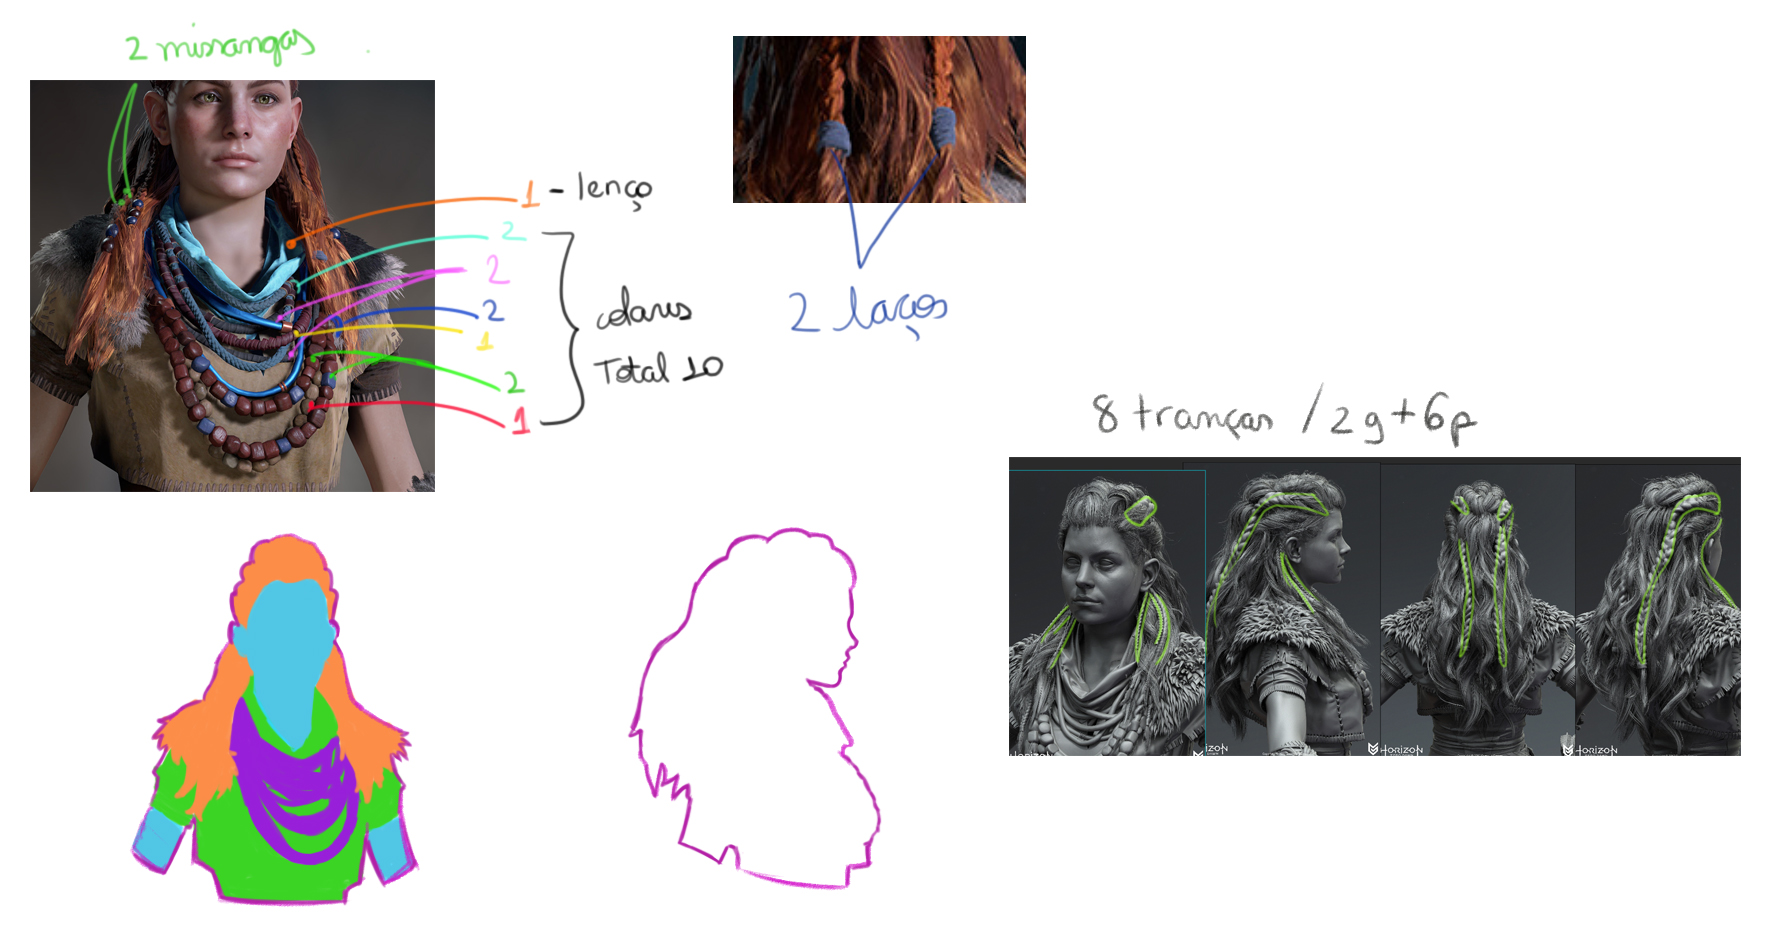
Before starting the project, I imported the reference into Photoshop and created the necessary linear guides that should help me in modeling.
This is an important concept study process. I analyze the proportions and the number of accessories worn on the character.
In fact, all the details were drawn on the texture. The model is a simple mesh created in Maya with a silhouette and shape that I needed to create a good texture pattern.
Texturing
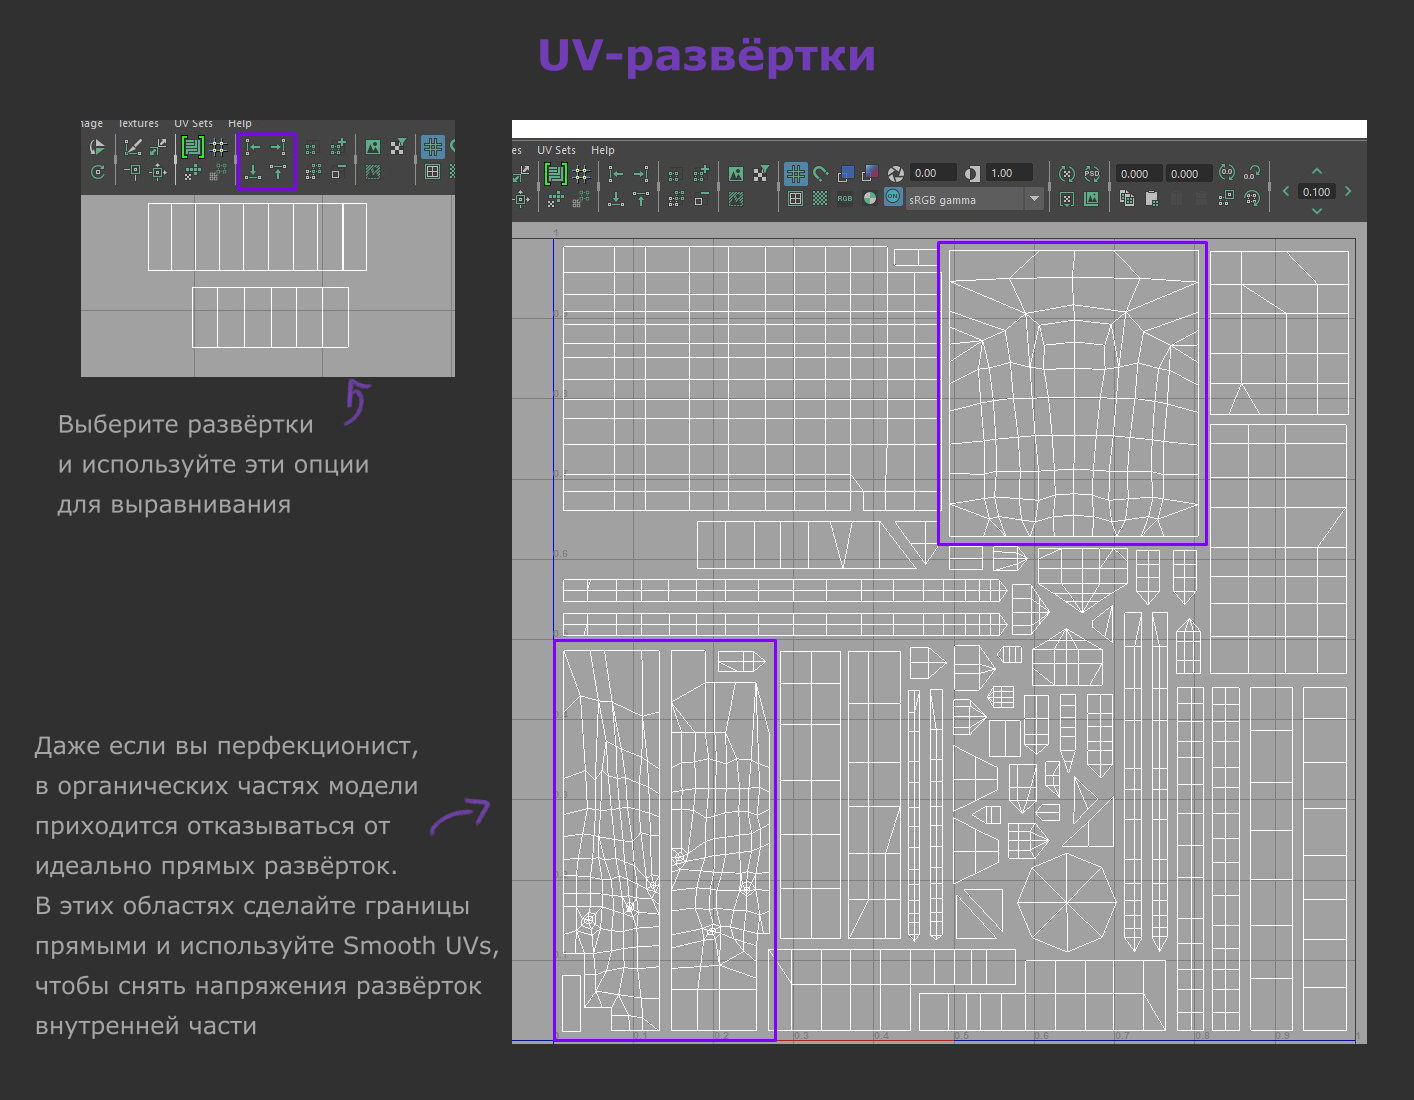
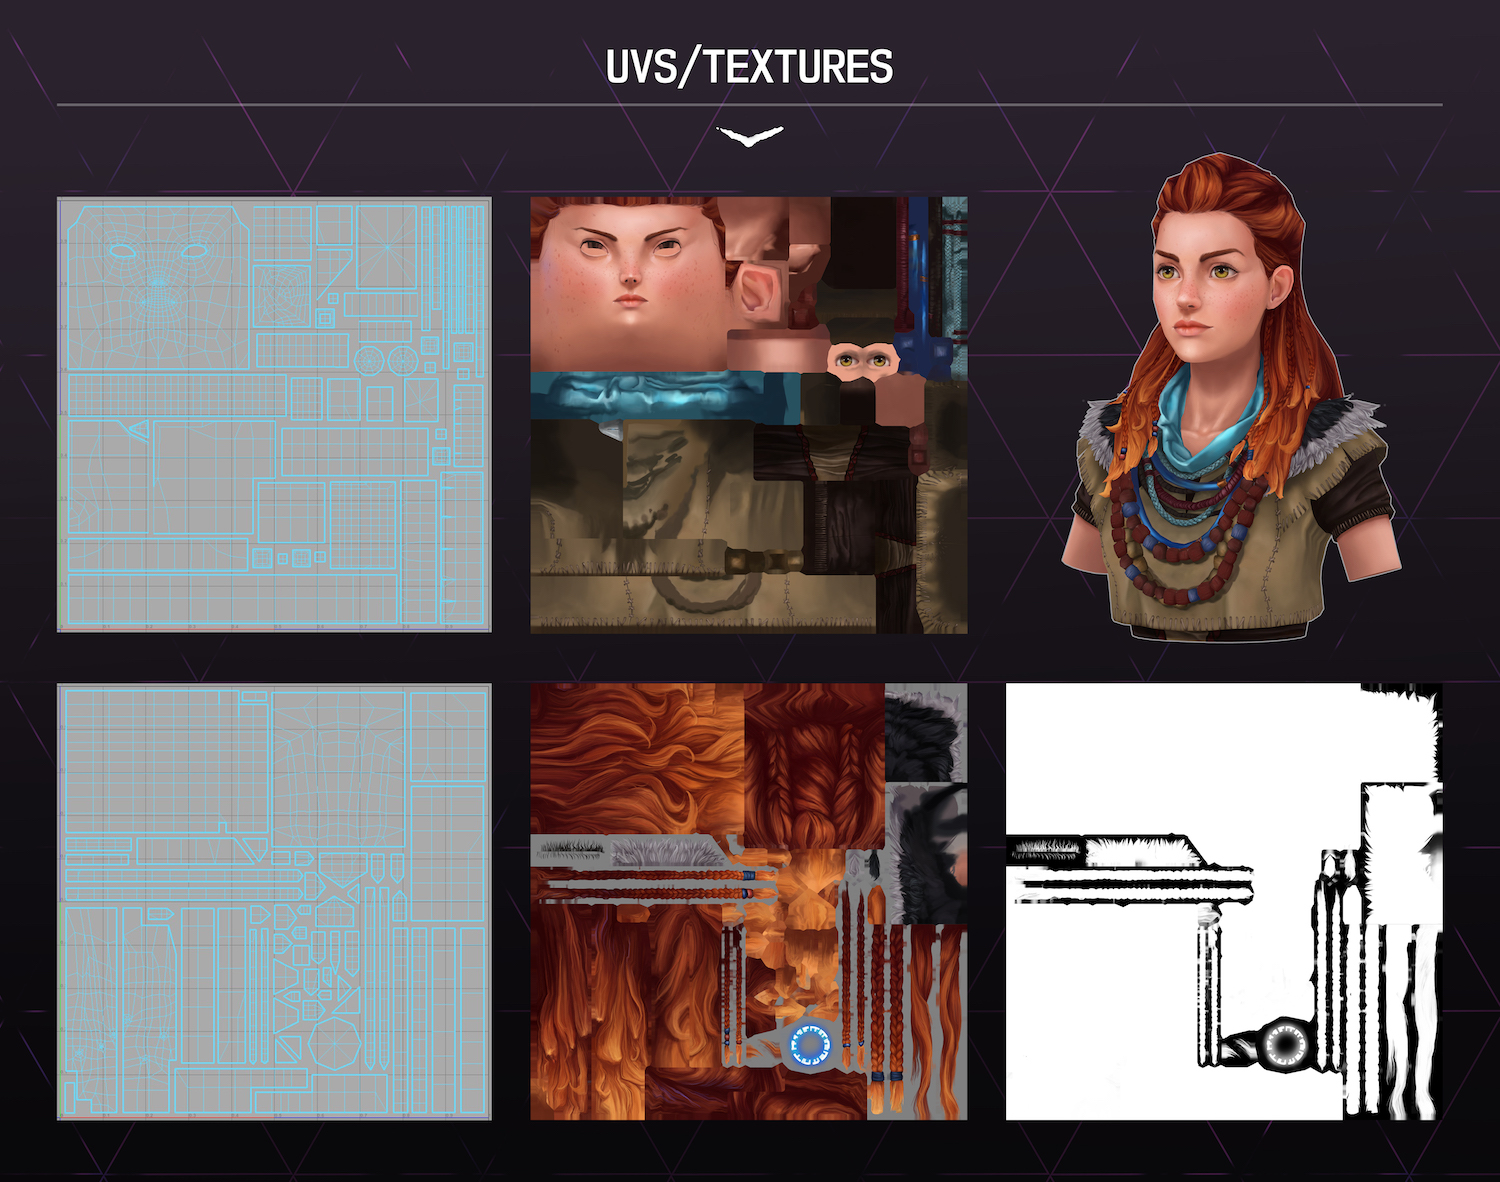
We start with UV: although the model is a bust, I decided to divide it into two UVs, one for the face and clothes, and the other for hair, fur and other parts that required transparency. I made this choice because I needed a high resolution texture.
Thanks to friends, I learned to be very picky about how my UVs are organized; they are very demanding and made me critical of my work.
Creating clear and streamlined UVs has already become an integral part of my workflow, and this is also very simple. From the artist is required only not to stretch the texture in some areas.
Let's go to the textures. In hand-drawn textures, I like the fact that it is not technical understanding that is important in them, but observation and perseverance. We have to work with a variety of tools, but when it comes to texture, only I and a completely gray model are waiting for life to be breathed into it.
The goal of this project from the very beginning was to improve my skill in drawing textures by hand. I did not bake any maps that could help me in drawing.
I started by applying basic colors to the whole model, and then improving it part by part. The first part that I noticed was the face.
As a reference, I used the work of an artist named Pug.
Here is a link to the blog of his school, which has several works created by him and his students. Hopefully, these models will become a source of inspiration for other freehand artists.
Note: I do not know Chinese, so in order to understand the blog, I also had to use a translator. But it was worth it!
As for the head, I drew each hair separately. It looks like crazy work, but it was worth the effort - drawing and redrawing many areas I learned a lot.
When working with texture, there are no secrets or magic brushes with which you can get the perfect texture. You just have to do and rework, until in time you inevitably achieve a good result.
Work with 3D-Coat
Almost all of Eloy was painted in 3D-Coat . This is an ideal texturing tool for hand-drawn models. I use the flat view (hot key “2” in 3dCoat), which gives me full control over the drawing.
To create a wicker jewelry on the neck, I used Photoshop. I tried to draw it by hand, but I could not make it homogeneous, so I found an image of weaving similar to Eloy’s decoration and in Photoshop I applied it directly to UV, and then used it as a drawing sample in 3DCoat.
After drawing the textures, I set up an opacity map in Photoshop and corrected the hair color.
Difficulties
Before this project, there were no human characters in my portfolio, and I understood that I would inevitably have to study anatomy and drawing by hand. I would still have to do it, and for this, it is the right time.
I really wanted to make a bust of a female character with a different haircut and a few details.
I began to look for concepts that might please me, but did not find them. Once in a conversation, my friend Alex mentioned the Horizon game and then I realized that I would be modeling by Eloy.
I knew that starting with the bust of such a complex character would not be easy, but I was not very worried about the complexity, I just took it and did it.
I was most worried about neck jewelery and hair. I decided to deal with jewelry much faster than I could imagine, and the progress made by the model gave me more confidence to continue working.
With hair, everything turned out to be a little more difficult - when I started drawing the texture, I saw that the mesh did not behave very well, so I returned to Maya and redid the blank, after which I opened the UV scan again. And even after these changes, I had to redraw the hair several times until the result was acceptable for my eyes.
What makes this model interesting? To complete each part of it, I had to overcome myself as an artist. I know that this is not only my work - every review I received from friends helped me to complete with Eloy and, step by step, to make it even more real Eloy.
Luana Bueno , 3D character artist.
The interview was taken by Cyril Tokarev.
Source: https://habr.com/ru/post/358924/
All Articles