ARM MBED OS. Work with arbitrary MK STM32 under PlatformIO
 When in January of this year I wrote a material about the LittleFS file system (integrated into arm mbed os), I promised to soon describe the creation of a project with arm mbed os for an arbitrary STM32 microcontroller. As is known, the online IDE from ARM (or rather, the dedicated division of Arm mbed ) supports, firstly, a strictly defined number of debugging boards, and their number is small; secondly, it exports online examples on the basis of which it is possible to build some of its projects, only for the most well-known IDEs: ARM , uVision KEIL and IAR . Moreover, some examples are not exported at all. That is, only options for IAR , or only for KEIL , and so on are available for export. So, as it seemed at that time, learning how to “fasten” the arm mbed os to any MK would not be superfluous at all.
However, life makes its own adjustments to any plans, and for a long time it did not work in this direction. But the question remained open, and now, after a considerable time, I return to the subject.
One way or another, an important question remained unresolved. We all use different IDEs and different toolchains. The porting process is quite complicated, and requires certain dances with a tambourine. For example, the assembler for GCC does not support the x86 syntax (there is AT & T ), so the very first and elementary problem that a programmer will face here is a curse of the same GCC compiler on assembler inserts in the source code of the Arm mbed operating system.
Someone is using IAR , someone is uVision , someone is writing in Sublime Text , and someone (like me) - in Code :: Blocks . Someone is using Windows, and someone is using Linux. To embrace the immense and embrace the uncovered we are unable to, and at the same time leave one of the options without consideration - it means leaving some part of the audience behind.
')
The solution came suddenly and turned out to be quite simple and universal.
PlatformIO IDE.
PlatformIO is a cross-platform toolchain written in python, the presence of which on the user's machine is perhaps the only mandatory condition (not lower than version 2.7).
In terms of its performance and the used PlatformIO toolkit, I was reminded a few years ago of the IDE MicroEJ Studio , which could write code for microcontrollers in Java. Subsequently, MicroJVM (written in C) was poured into the MC, and the code was executed in it. However, the environment did not receive wide distribution, and did not go to the masses.
PlatformIO can be used as part of a number of common IDE and code editors:
- Atom ;
- Clion ;
- Eclipse ;
- Emacs ;
- NetBeans ;
- Qt Creator ;
- Sublime Text ;
- Vim ;
- Visual Studio ;
- Vscode etc.
The main feature of PlatformIO is the use of the configuration file “platformio.ini”, which is used to determine the target platform of the project, and then load the libraries and build dependencies in accordance with the description that is in this configuration file.
The main elements are PlatformIO IDE and PlatformIO Core .
In a rather distant 2016, PlatformIO was a candidate for award in the nomination “Best IoT Software & Tools” in the 2016 IoT Awards competition.
This is in general terms. Detailed documentation can be found on the project platformio.org website and in the Documentation section.
Our task is to install the required development tools, create a project, and do something in it.
Atom vs. VS Code
There are two editors available for download on the home page: Atom and VS Code . I tried both, and immediately say: VS Code is more convenient. If only because there is an elementary transition in the code. Looking ahead, I’ll say: you don’t see arm mbed os in the library and source project, they’re all in the local repository, so only your main.cpp and everything else you create will be in the project tree. Therefore, to watch some declarations, classes and their objects, class interfaces, will have one hundred percent. And Atom doesn't have such an opportunity ... And when using Atom, you will have to be content with only the documentation of mbed os. Agree, it is inconvenient.
So, further consideration of the process I spend as applied to VS Code . We need to do the following steps:
- Install VS Code.
- Install PlatformIO IDE.
- Configure udev rules (for Linux users) - it may not be necessary, but in order not to bounce on a chair, we will put a preemptive strike.
- Create a project and include the minimum functionality. Make sure that it is assembled, loaded and debugged on the board (OCD / GDB is used as the server).
Install VS Code by clicking on the link and downloading the installer for the desired system.
After installation, run the editor, open the Extensions panel, and enter “platformio” in the search. The first option will pop up “ PlatformIO IDE ”. Click “Install”, wait for the installation to finish, reboot the editor.

Linux users can immediately install udev rules for adequate debugging. In principle, this step can be omitted, and you can return to it if the terminal displays a message like “ Remote communication error. ” At the start of the debugger . Target disconnected .: Connection reset by peer. "
Open the terminal and write in it:
sudo curl -fsSL https://raw.githubusercontent.com/platformio/platformio-core/develop/scripts/99-platformio-udev.rules > /etc/udev/rules.d/99-platformio-udev.rules If the terminal issues “Permission denied”, then download the file “99-platformio-udev.rules” by reference , and forcibly copy the file into etc / udev:
sudo cp 99-platformio-udev.rules /etc/udev/rules.d/99-platformio-udev.rules Note that after the cp command, the full path to the file must be specified. If the .rules file is in the folder, for example, “Downloads,” then the terminal command will look like this:
sudo cp ~/Downloads/99-platformio-udev.rules /etc/udev/rules.d/99-platformio-udev.rules Next, perform:
sudo usermod -a -G dialout $USER sudo usermod -a -G plugdev $USER where $ USER is your username. For example, I have this subdia.
After that, all problems with the debugger, if they could arise, should be solved.
Environment and local repository arm mbed os
After installing the environment, it will not be superfluous to understand where the arm mbed os local repository is located (as I said, you will not see it in the project tree), where all the mbed os sources are located, and where the compiled project is stored.
During the installation, platformIO deploys the arm mbed local repository (and not only it) along the $ HOME / .platformio / packages path. Here, for example, arm mbed.
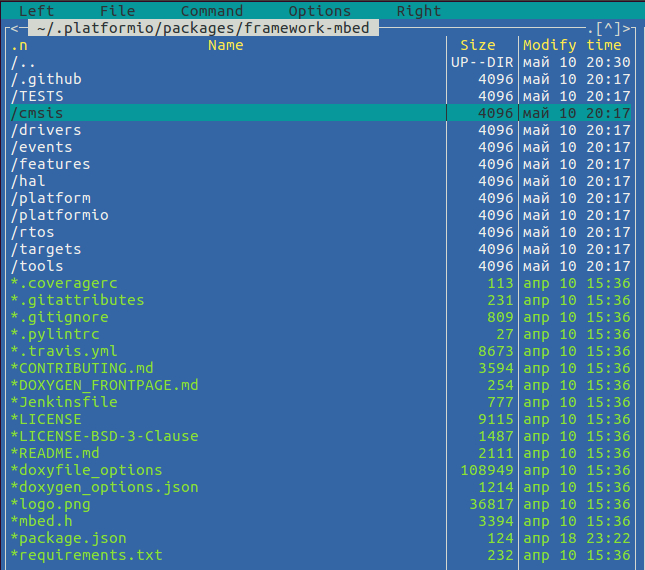
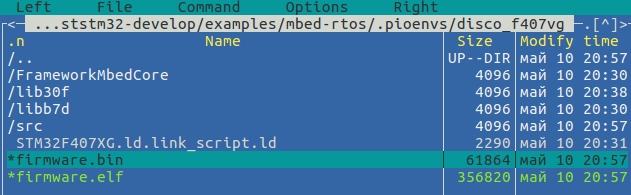
Firmware files and precompiled sources are located directly in the project folder.
That's all we need to know about where it is stored. We proceed directly to the creation of the project.
Creating a project.
Briefly about the project being created. For obvious reasons, I decided to create a project for the board, which is not included in the structure supported by ARM online IDE, namely STM32F4DISCOVERY .
In the world of embedded systems, it is customary to create demonstration projects with flashing LEDs. We will not do this - it is already simple and uninteresting. PlatformIO implies several types of projects: cmsis , hal , rtos , and so on. Since we are talking about arm mbed os, that is, the operating system, we will create a project for rtos .
In the project, we will create and run three tasks (Task): the first will multiply the float arrays (we have the Cortex-M4F processor, so use the FPU), the second task ... well, blink the LEDs (=)), and the third to determine CPU utilization.
So let's go.
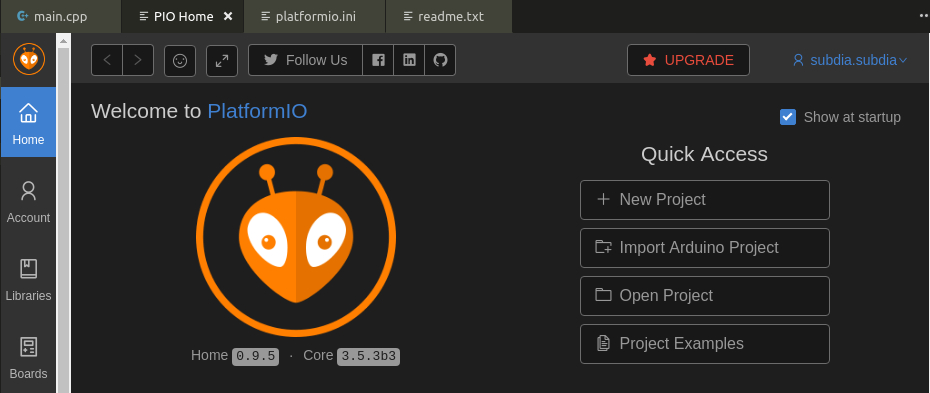
Open VS Code . First of all, the PIO Home window will open. Choose “ New Project ”.
In the “ Project Wizard ” window, indicate the name of the project (for us, let it be “armmbed_F407_CPU_usage”), and select the board in the “ Board ” drop-down list. For readers who plan to use the material when writing software for their copyright boards: yes, binding to a specific board, but all the legs and the periphery can be reconfigured. Next, I will say a few words about it, do not rush to get upset. So, Board .

Select STM32F4DISCOVERY , and go to the “ Framework ” window. Here we have several options.

Since we agreed to use arm mbed os, it is obvious that here we choose the option “ mbed ”. Click “ finish ” - done. The master will think a little and open the newly created project blank. Take a look at this.
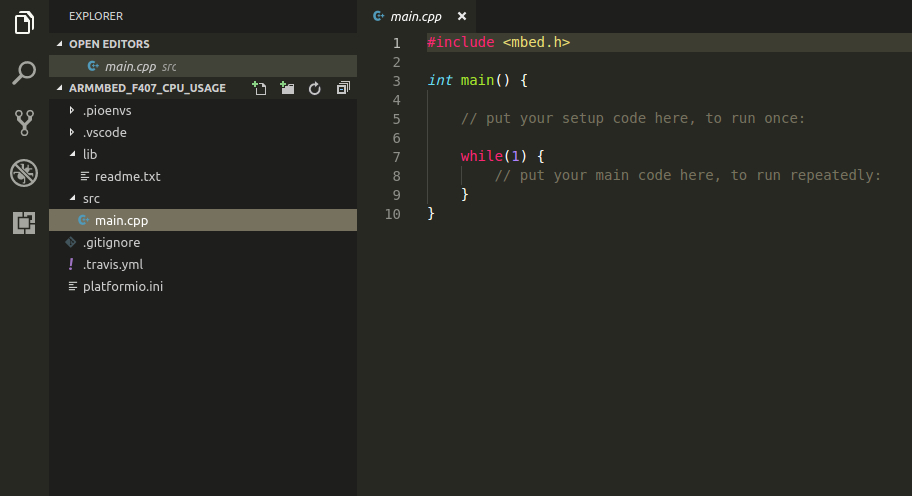
As I mentioned above, there are only two default folders in the project: lib (empty) and src , which contains a single main.cpp file. I’m not going to see the whole source code here. But nevertheless, we have the opportunity to use all the functionality of arm mbed os. To use rtos , we have to add the build flag to the “ platformio.ini ” file:
build_flags =-DPIO_FRAMEWORK_MBED_RTOS_PRESENT In general, the configuration file deserves separate consideration. This approach reminded me of TIRTOS / SYSBIOS from Texas Instruments with their config file .cfg , even though everything is much simpler in arm mbed. In the configuration file, you can declare a lot - from hardware resources to build flags and debugging. For example, here is the composition of the simplest configuration file:
[env:disco_f407vg] platform = ststm32 framework = mbed board = disco_f407vg And this is the config file of our example in its final form:
[env:disco_f407vg] platform = ststm32 board = disco_f407vg framework = mbed build_flags = -DPIO_FRAMEWORK_MBED_RTOS_PRESENT -O1 -Wl,-u_printf_float -D std=gnu99 -fno-builtin-printf -fexceptions -fpermissive debug_flags = -D DEBUG=1 -DDEBUG_LEVEL=DEBUG_NONE monitor_baud = 115200 So there is something to learn at your leisure.
So, we begin to bring the project in the form that we need.
I will give the code in blocks, and explain what is happening in it. To begin with, we need to include the header files “ mbed.h ” and “ rtos.h ” in the source code. I think it is clear why.
The “ main ” function will take the following form:
/**************************************************************************/ int main (void) { Thread thread0; Thread thread1; Thread thread2; Thread::attach_idle_hook (&sleeping_sun); thread0.start (&ledblink); thread1.start (&cpu_usage); thread2.start (&math_thread); while (true) { } } /**************************************************************************/ First, we create objects of the class “ Thread ”, that is, in essence, our tasks (Task, Thread), which will provide us with a certain functionality.
If someone noticed, the next line is
Thread::attach_idle_hook (&sleeping_sun); This is the “ idle ” task - that is, a task with a low priority, which only has the time that is left for the processor after performing tasks with normal and high priorities. Well, in our case, this task will remain hungry, since the processor will not have time for it. I brought it here just for example.
Next, we start the tasks in turn using the “ start ” method, passing it links to the functions of the tasks, namely, what will be performed in the process. This “ ledblink ” is a shmorgalka, “ cpu_usage ” is the CPU usage count, and the hardest is “ math_thread ”, which performs the multiplication of arrays.
Let's take a look at each of the tasks. With “ ledblink ” everything is simple.
/**************************************************************************/ void ledblink (void) { while (true) { myled1 = !myled1; Thread::wait (500); } } /**************************************************************************/ We alternately change the state of the output with the LED to the opposite, and cause a delay of 500 ms. By the way, the declaration “ myled1 ” looks like this:
DigitalOut myled1(LED1); Let us now turn our attention to the “ cpu_usage ” task.
/**************************************************************************/ void cpu_usage (void) { Timer tim; CPU_Usage cpu(tim, 1); cpu.working(); uint8_t value = 0; while (true) { cpu.delay(0.25); value = cpu.update(); pc.printf("CPU %i", value); } } /**************************************************************************/ Here everything is somewhat more complicated. In general, in order not to invent a bicycle, I used a ready-made library written by one cheerful guy in 2014 for arm mbed, which is called: CPU_Usage . You can take it by reference , there is a brief description of it. The library uses a timer (we see an object of class Timer tim ). First, the constructor of the class “ cpu ” is called, then alternately the methods “ working ” (start of work), and “ update ” - calculation of the processor load in percent.
Perhaps now is the best time to demonstrate. I will show a screen from the debug mode.

At the top left, we see the value “ value ” = 95. This means that the processor was 95% loaded at that moment. In general, according to the results of the experiment, this value when performing the same tasks ranged from 87 to 98%.
By the way, why do I show screenshots from a debugger and not from a terminal? It's simple, I have no UART-USB adapter at hand, so I can't use the UART terminal (this is the “ pc.printf () ” function - this is just the output from the UART, pc is an object of the Serial class).
Both the last and the most voracious for the processor is the math_thread task. We will look at it - first in the “bare” form, then we will slightly complement the arm mbed with buns.
/**************************************************************************/ void math_thread(void) { volatile uint16_t rand_num_dmassi1 = 0; volatile uint16_t rand_num_dmassi2 = 0; float result; while (true) { rand_num_dmassi1 = RandomMassIndex(); rand_num_dmassi2 = RandomMassIndex(); result = (DigMas1[rand_num_dmassi1]*DigMas2[rand_num_dmassi2]); } } /**************************************************************************/ When I thought of how to load the processor, multiplying the arrays immediately came to my mind. And I remembered the situation as a customer, for whom I did something remotely (and also debugged remotely, after half the world), shouted to me on Skype: “ You are a programmer, so load the processor! He is quite cold, make it so that he warmed up! ". Let's now make it so that our MCU warms up. =)
And I decided not to multiply arrays sequentially, but to generate their indices using a random number generator. And here to me one wonderful mathematical library came to the rescue: alglib . It covers a huge layer of mathematical functionality, and you can take it here . We will not use the entire huge layer of functionality, of course, but we will use a small piece.
If you look at the task calculator of the work, then we will see there two calls “ RandomMassIndex () ”. This is just a function that returns a value in the range (our range is limited by the number of elements of the arrays).
/**************************************************************************/ uint16_t RandomMassIndex (void){ uint16_t randval; alglib_impl::ae_state mystate; randval = alglib_impl::ae_randominteger(18, &mystate); return randval; } /******************************END_OF_FILE*********************************/ So what are we doing here? First, we initialize the “ ae_state ” structure (it is used for internal needs), and then we simply call the “ ae_randominteger ” method, to which we give a link to our structure, and the range in which we want to get the generated random number (we have 0..18 ). This number must be less than the maximum generated value. The number of elements in the array is 20 (0..19), and the maximum number is 19. So, as a boundary argument, 18 fits us perfectly.
By the way, you can look at the results of calling this function.

At the top left, the generated random indices of the arrays, “ rand_num_dmassi1 ” and “ rand_num_dmassi2 ”. 13 and 12.
Let's run another cycle, see if it changes.
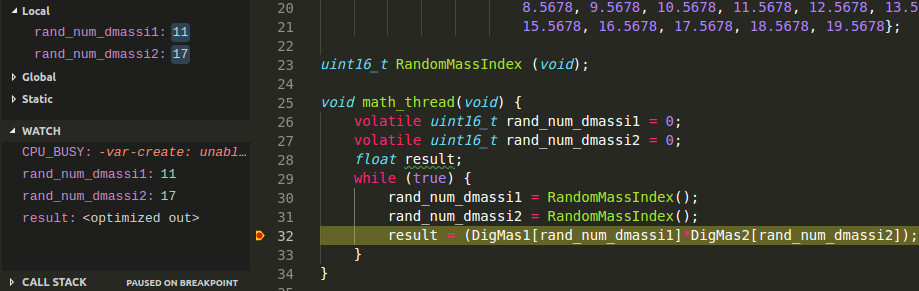
11 and 17. Changed. So it works.
Since we are talking about the analysis of resources (in particular, about the use of CPU time), we devote a little time to memory and the priorities of tasks. Arm mbed os implements a whole class of rtos :: Thread for these needs.
Directly in the task “ math_thread ” we add the following lines:
osThreadId_t this_thread_id; volatile uint32_t this_thread_stacksize; volatile osPriority_t this_thread_priority; this_thread_id = osThreadGetId(); this_thread_stacksize = osThreadGetStackSize(this_thread_id); this_thread_priority = osThreadGetPriority(this_thread_id); Here (and above) I used the keyword volatile - so that the variable can be monitored.
So, first we get the task ID for further use. Then we call the methods to determine the stack of the task and its priority. Priority can be changed on the go - in some applications it is claimed.
We look.
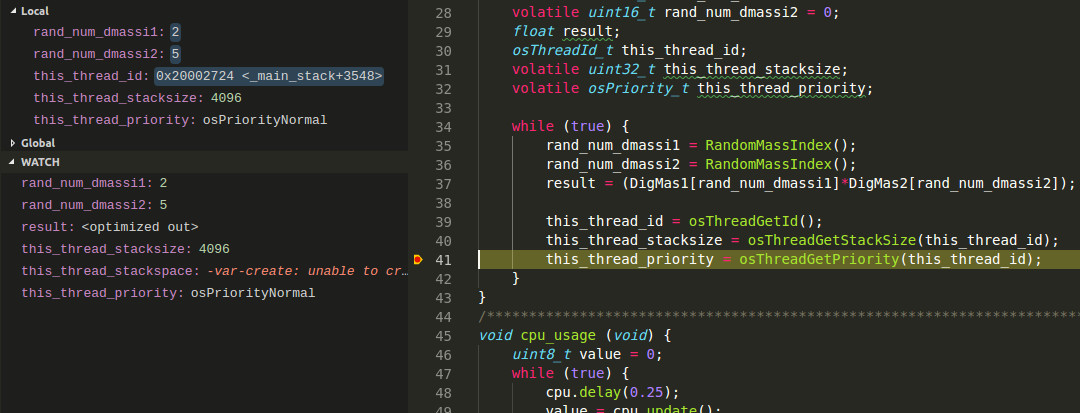
We see that the size of the task stack is 4096 bytes, and the priority is osPriorityNormal . Normal, in general, priority.
In addition, we can estimate the degree of usability, the size of the unused and used stack. Right in the main add:
volatile uint32_t threads_stack; volatile uint32_t threads_max_stack; volatile uint32_t free_stack; volatile uint32_t used_stack; And after running tasks:
threads_stack = thread0.stack_size(); threads_stack = thread1.stack_size(); threads_stack = thread2.stack_size(); threads_max_stack = thread0.max_stack(); threads_max_stack = thread1.max_stack(); threads_max_stack = thread2.max_stack(); free_stack = thread0.free_stack(); free_stack = thread1.free_stack(); free_stack = thread2.free_stack(); used_stack = thread0.used_stack(); used_stack = thread1.used_stack(); used_stack = thread2.used_stack(); Four methods are called here. “ Stack_size () ” returns the size of the task stack (similar to what we evaluated a little earlier), “ max_stack () ” returns the size of the maximum used during execution, “ free_stack () ” returns the size of free space, and “ used_stack () ” - size used Return values are in bytes. For all three of our tasks, these values will be the same.
Let's see what they show us

As you can see, we have eaten quite a bit from 4096 bytes - only 64 bytes, and we still have 4032 bytes in stock.
Perhaps, we will end up on this with experiments and analysis - I already started playing.
Yes, what else I would like to say about the author's boards. Now someone can say, they say, he took F4Discovery , he played it for his own pleasure, and I have a homemade board in general, and the LEDs generally hang on other legs, and in general, I want to raise SPI on it. So, in the armbed repository, in the “ targets ” folder (we select further our very specific MCUs - they are dark there), in the directories of each microcontroller, there are wonderful headers named “ PinNames.h ”, “ PeripheralPins.h ” and “ PeripheralNames .h ”. Editing these files, you can add / edit / delete peripherals.
On this, perhaps, I will stop. More examples for various applications arm mbed (including non- rtos , and just bare metal ) can be cloned or downloaded by the archive here .
I attach the link to the archive (Google Drive) with our created example to the material, and place the full source code below under the spoiler - for complete coverage of the whole picture. If anything - welcome to mail subdia.subdia@gmail.com.
main.cpp
#include "mbed.h" #include "rtos.h" #include "CPU_Usage.h" #include "alglibmisc.h" #include "ap.h" DigitalOut myled1(LED1); DigitalOut myled2(LED2); Timer tim; CPU_Usage cpu(tim, 1); Serial pc(USBTX,USBRX,9600); #define PRETTY_ENOUGH 20 float DigMas1[PRETTY_ENOUGH] = {0.1234, 1.1234, 2.1234, 3.1234, 4.1234, 5.1234, 6.1234, 7.1234, 8.1234, 9.1234, 10.1234, 11.1234, 12.1234, 13.1234, 14.1234, 15.1234, 16.1234, 17.1234, 18.1234, 19.1234}; float DigMas2[PRETTY_ENOUGH] = {0.5678, 1.5678, 2.5678, 3.5678, 4.5678, 5.5678, 6.5678, 7.5678, 8.5678, 9.5678, 10.5678, 11.5678, 12.5678, 13.5678, 14.5678, 15.5678, 16.5678, 17.5678, 18.5678, 19.5678}; uint16_t RandomMassIndex (void); /**************************************************************************/ void math_thread(void) { volatile uint16_t rand_num_dmassi1 = 0; volatile uint16_t rand_num_dmassi2 = 0; float result; osThreadId_t this_thread_id; volatile uint32_t this_thread_stacksize; volatile osPriority_t this_thread_priority; while (true) { rand_num_dmassi1 = RandomMassIndex(); rand_num_dmassi2 = RandomMassIndex(); result = (DigMas1[rand_num_dmassi1]*DigMas2[rand_num_dmassi2]); this_thread_id = osThreadGetId(); this_thread_stacksize = osThreadGetStackSize(this_thread_id); this_thread_priority = osThreadGetPriority(this_thread_id); } } /**************************************************************************/ void cpu_usage (void) { uint8_t value = 0; while (true) { cpu.delay(0.25); value = cpu.update(); pc.printf("CPU %i", value); } } /**************************************************************************/ void ledblink (void) { while (true) { myled1 = !myled1; Thread::wait (500); } } /**************************************************************************/ void sleeping_sun(void) { return; } /**************************************************************************/ int main (void) { Thread thread0; Thread thread1; Thread thread2; volatile uint32_t threads_stack; volatile uint32_t threads_max_stack; volatile uint32_t free_stack; volatile uint32_t used_stack; Thread::attach_idle_hook (&sleeping_sun); thread0.start (&ledblink); thread1.start (&cpu_usage); thread2.start (&math_thread); threads_stack = thread0.stack_size(); threads_stack = thread1.stack_size(); threads_stack = thread2.stack_size(); threads_max_stack = thread0.max_stack(); threads_max_stack = thread1.max_stack(); threads_max_stack = thread2.max_stack(); free_stack = thread0.free_stack(); free_stack = thread1.free_stack(); free_stack = thread2.free_stack(); used_stack = thread0.used_stack(); used_stack = thread1.used_stack(); used_stack = thread2.used_stack(); cpu.working(); while (true) { } } /**************************************************************************/ uint16_t RandomMassIndex (void){ uint16_t randval; alglib_impl::ae_state mystate; randval = alglib_impl::ae_randominteger(18, &mystate); return randval; } /******************************END_OF_FILE*********************************/ Thank you for your attention, all a good day and good mood.

Source: https://habr.com/ru/post/358682/
All Articles