Arduino Home Weather Station
Instead of introducing
Like most working people, doing your own projects takes the only free time left. Therefore, he did not create for a long time and “itched his hands” to do something. This opportunity appeared oddly at the university. Outside the window, September, 4 course and the looming coursework on circuitry. We were told that coursework can be done in two variations: paper and "iron".
For 5 years, paper course in our university was made on the principle of "take the old and put them together." This approach did not suit me with my routine, so I immediately chose the coursework in the hardware. An Arduino microcontroller has been proposed as a heart for coursework due to its easy learning. After determining the type of course there was one more question: what exactly to do. Since there was no experience in programming microcontrollers, I immediately opened Google and began to study existing projects. There are many projects, some of them are quite simple, some are brilliant (a 3D scanner, for example), but the vast majority have not been applied in practice. And I just wanted something that would not be lying on the shelf later and did not collect dust there. After a half-hour excursion into the world of Arduino, I was interested in the topic of home weather stations, and the projects did not seem very difficult to implement (which was mostly a bribe for a beginner).
This was the way the topic was chosen for the coursework and over time, problems seemed to be outlined.
Component selection
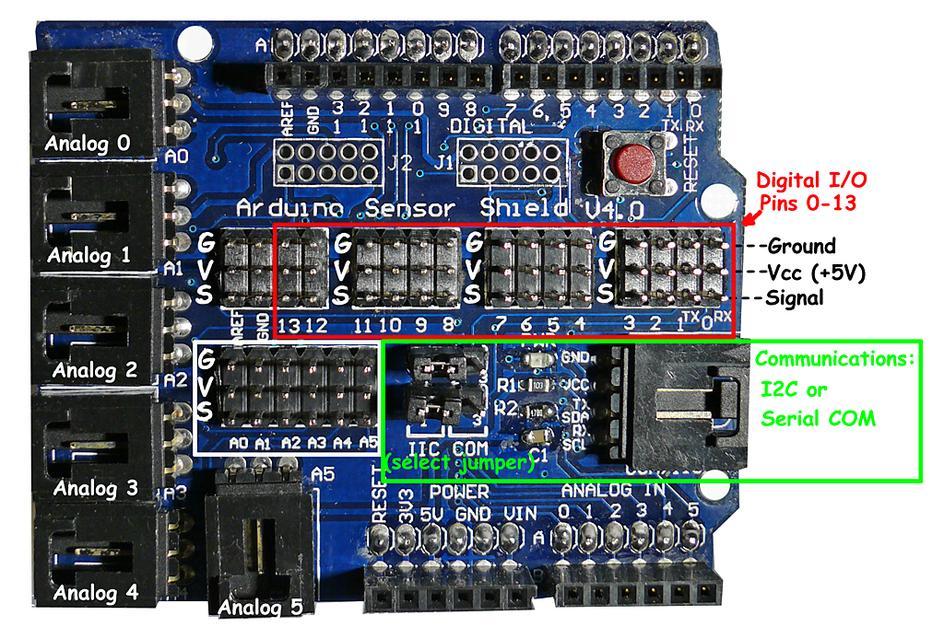
Looking through various projects, I realized that it would be quite enough for me to have a Nano or even a Pro Mini, but I still chose Arduino Uno in the hope that I would like programming for the Arduino and then implement some more projects. I never held a soldering iron in my hands before, so for easier development I also decided to purchase Sensor Shield v4.
')
Read more
The board facilitates quick connection of sensors, modules, servo motors, Serial and I2C interfaces, and also outputs all ports of the Duemilanova / Uno form factor (can also be connected to the mega series, but with limitations and ensuing consequences). Supports other shields over it.
The following sensors were selected as sources for meteorological data:
- Sensor for measuring pressure and temperature BMP180:Read moreThe BMP180 sensor was a further development of the BMP085 sensor. The BMP180 has become smaller in size, consumes less power, the sensor has also become more accurate and is more stable.BMP180 image
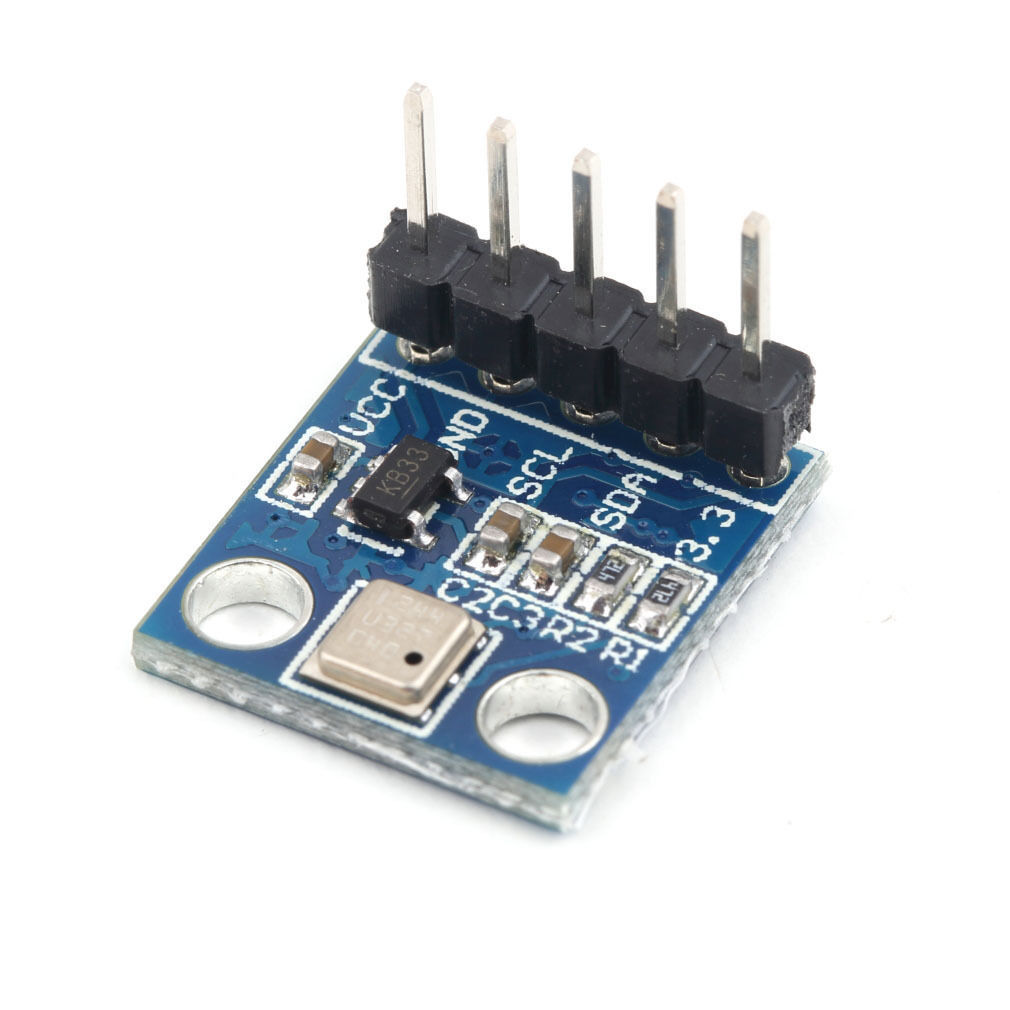
Pressure measurement range 300-1100 gpa Pressure measurement error 0.06 GPa (power saving mode), 0.02 GPa (enhanced accuracy mode) Altitude measurement error 0.5 meters (power saving mode), 0.17 meters (high accuracy mode) Absolute measurement accuracy (p = 300..1100 GPa, t = 0..65 0 , power supply 3.3 V) Pressure: - 4.0… + 2.0 GPa Temperature: ± 1 0 Average current consumption (at a data refresh rate of 1 Hz) 3 μA - power saving mode, 32 μA - advanced mode Maximum current 650 mA Pressure measurement time 5 ms (normal mode) Data transmission frequency maximum 3.4 MHz - DHT22 Temperature and Humidity SensorRead moreThe temperature and humidity sensor DHT-22 (AM2302) differs from the DHT-11 sensor by greater accuracy and range of humidity and temperature measurements. Contains an ADC (analog-to-digital converter) to convert analog values of humidity and temperature. When connecting the sensor to the microcontroller, it is recommended to place a pull-up pull-up resistor between the VCC and SDA terminals of 10 kΩ and a 100 nF capacitor between the power supply and the ground. But I did not have to solder anything, so I found the sensor, soldered on the board with a capacitor and a resistor.Image DHT22

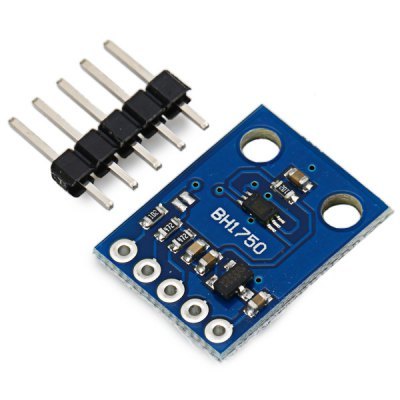
Supply voltage 3.3 - 5 V Humidity measurement range 0 - 100% with an accuracy of 2 - 5% Temperature measurement range - 40 - + 125 0 with an accuracy of ± 0.5 0 Sensor polling frequency no more than every 2 seconds - Illumination sensor BH1750 (I will not consider it here, since during the soldering of the legs to it, I burned one of the tracks).Picture BH1750
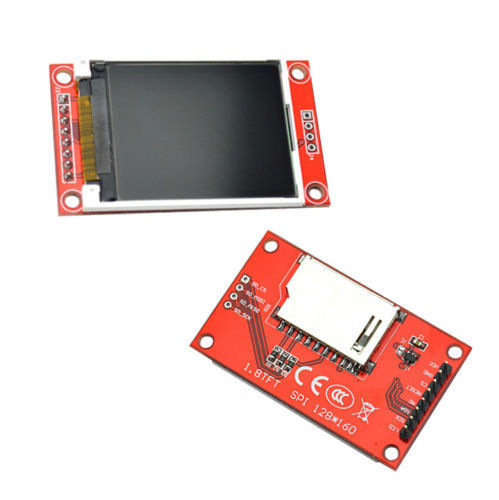
Determined with the sensors. But what to do with the data coming from the sensors. I decided to display it. I wanted a color picture, so I dropped the monochrome solutions right away. After several minutes of searching, the ST7735 TFT display with a size of 1.8 inches was selected.
Read more
Since the display uses a 4-wire SPI protocol for communication and has its own pixel-addressable frame buffer, it can be used with any kind of microcontroller. The 1.8 inch display has 128x160 color pixels. There is also a slot for a microSD memory card, therefore, you can easily download full-color bitmaps from the FAT16 / FAT32 file system of the microSD card.
Specifications:
Specifications:
- Display diagonal - 1.8 inches, resolution 128x160 pixels, 18-bit color (262,144 colors)
- Controller with integrated video memory buffer pixel addressing
- Built-in microSD slot - uses more than 2 digital lines
- Compatible with 3.3 and 5V
- Dimensions: 34 mm x 56 mm x 6.5 m
Arduino controller programming
Once we have decided on the components for the weather station, we will start programming the controller. For the Arduino firmware, the Arduino IDE was used. Also used libraries from Adafruit.
Before going to the sketch, consider the functionality:
- The readings are taken from the sensors every 10 seconds and only those indicators are updated on the screen that have been changed from the previous measurement.
- Implemented data transfer via COM port
Sketch
#include <Wire.h> // library for communication with I2C devices #include <Adafruit_Sensor.h> // Core library for all sensors #include <Adafruit_BMP085_U.h> // library for BMP180 #include <Adafruit_GFX.h> // Core graphics library #include <Adafruit_ST7735.h> // Hardware-specific library #include <SPI.h> // library for communication with SPI devices #include "dht.h" // library for DHT #define DHT22_PIN 2 // connect data pin of DHT22 to 2 digital pin #define TFT_CS 10 // connect CS pin of TFT to 10 digital pin #define TFT_RST 9 // connect RST pin of TFT to 9 digital pin // you can also connect this to the Arduino reset // in which case, set this #define pin to 0! #define TFT_DC 8 // connect DC pin of TFT to 8 digital pin Adafruit_ST7735 tft = Adafruit_ST7735(TFT_CS, TFT_DC, TFT_RST); //initialize TFT #define TFT_SCLK 13 // connect SCLK pin of TFT to 13 digital pin #define TFT_MOSI 11 // connect MOSI pin of TFT to 11 digital pin dht DHT; Adafruit_BMP085_Unified bmp = Adafruit_BMP085_Unified(10085); //initialize BMP180 int bmpFlag = 0; struct { uint32_t total; uint32_t ok; uint32_t crc_error; uint32_t time_out; uint32_t connect; uint32_t ack_l; uint32_t ack_h; uint32_t unknown; } stat = { 0,0,0,0,0,0,0,0}; // struct for dht status void setup(void) { Serial.begin(9600); Serial.println("Meteo Test"); Serial.println(""); if(!bmp.begin()) // check connection for BMP180 { Serial.print("Ooops, no BMP180 detected ... Check your wiring or I2C ADDR!"); bmpFlag = 1; } tft.initR(INITR_BLACKTAB); // Initialize TFT and fill with black color tft.fillScreen(ST7735_BLACK); tft.setRotation(tft.getRotation() + 1); tft.setTextSize(1.5); delay(500); // delay in order to ensure that TFT was initialized } // last measured data float oldTemperature = 0, oldAltitude = 0, oldPressure = 0, oldDHTHumidity = 0, oldDHTTemperature; bool wasUpdate = false; void loop(void) { if(Serial.available() > 0) // we have data is Serial port { Serial.read(); // read byte from serial port and send last measured data printValue("Pressure", oldPressure, " hPa", false); printValue("Temperature", oldTemperature, " C", false); printValue("Altitude", oldAltitude, " m", false); printValue("Humidity", oldDHTHumidity, "%", false); printValue("DHT_temperature", oldDHTTemperature, " C", false); Serial.println("END_TRANSMISSION"); } sensors_event_t event; float temperature, altitude; if(bmpFlag == 0){ bmp.getEvent(&event); // get data from BMP180 if (event.pressure) { bmp.getTemperature(&temperature); float seaLevelPressure = SENSORS_PRESSURE_SEALEVELHPA; altitude = bmp.pressureToAltitude(seaLevelPressure, event.pressure, temperature); } else { Serial.println("Sensor error"); } } uint32_t start = micros(); int chk = DHT.read22(DHT22_PIN);// get data from DHT22 uint32_t stop = micros(); stat.total++; switch (chk) // check status of DHT22 { case DHTLIB_OK: stat.ok++; break; case DHTLIB_ERROR_CHECKSUM: stat.crc_error++; Serial.print("Checksum error,\t"); break; case DHTLIB_ERROR_TIMEOUT: stat.time_out++; Serial.print("Time out error,\t"); break; case DHTLIB_ERROR_CONNECT: stat.connect++; Serial.print("Connect error,\t"); break; case DHTLIB_ERROR_ACK_L: stat.ack_l++; Serial.print("Ack Low error,\t"); break; case DHTLIB_ERROR_ACK_H: stat.ack_h++; Serial.print("Ack High error,\t"); break; default: stat.unknown++; Serial.print("Unknown error,\t"); break; } if(bmpFlag != 0 || !event.pressure) // update data { tft.fillRect(0, 30, 160, 6, ST7735_BLACK); tft.setCursor(0, 30); tft.setTextColor(ST7735_RED); printValue("ERROR BMP INITIALIZATION", 0, "", true); } else { if(event.pressure != oldPressure) { tft.fillRect(0, 30, 160, 7, ST7735_BLACK); tft.setCursor(0, 30); tft.setTextColor(ST7735_RED); printValue("Pressure", event.pressure, " hPa", true); oldPressure = event.pressure; wasUpdate = true; } if(temperature != oldTemperature) { tft.fillRect(0, 38, 160, 7, ST7735_BLACK); tft.setCursor(0, 38); tft.setTextColor(ST7735_WHITE); printValue("Temperature", temperature, " C", true); oldTemperature = temperature; wasUpdate = true; } if(altitude != oldAltitude) { tft.fillRect(0, 46, 160, 7, ST7735_BLACK); tft.setCursor(0, 46); tft.setTextColor(ST7735_BLUE); printValue("Altitude", altitude, " m", true); oldAltitude = altitude; wasUpdate = true; } } if(DHT.humidity != oldDHTHumidity) { tft.fillRect(0, 54, 160, 7, ST7735_BLACK); tft.setCursor(0, 54); tft.setTextColor(ST7735_GREEN); printValue("Humidity", DHT.humidity, "%", true); oldDHTHumidity = DHT.humidity; wasUpdate = true; } if(DHT.temperature != oldDHTTemperature) { tft.fillRect(0, 80, 160, 7, ST7735_BLACK); tft.setCursor(0, 80); tft.setTextColor(ST7735_YELLOW); printValue("DHT_temperature", DHT.temperature, " C", true); oldDHTTemperature = DHT.temperature; wasUpdate = true; } if(wasUpdate) { Serial.println("END_TRANSMISSION"); } wasUpdate = false; delay(10000); } void printValue(char* title, double value, char* measure, bool tftPrint) { if(tftPrint) // print data to TFT { tft.print(title); tft.print(": "); tft.print(value); tft.println(measure); } Serial.print(title); // send data to Serial port Serial.print(": "); Serial.print(value); Serial.println(measure); } It's time to assemble the case
The main condition for the course was a working prototype in a presentable form. So I had to buy a case and, armed with a file, in any way put the weather station in the case.
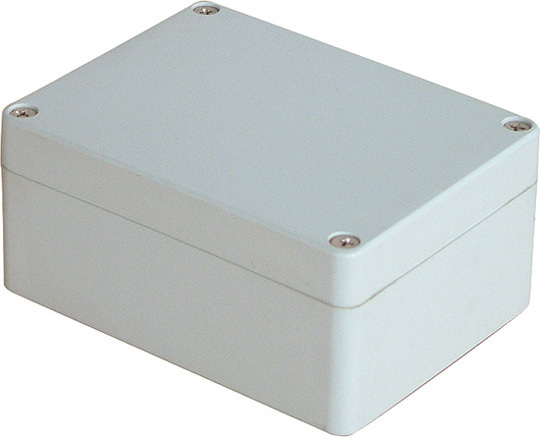
In the local electronics store was purchased housing.
Housing
(The case is a little different in the photo. I have a transparent cover)
Then, wielding a file, holes were made for the output of the sensors and power supply. I decided to bring the sensors out, because during testing of a system without a case I noticed that the back of the screen was very hot, which would affect the temperature inside the case.
Body with openings for sensors and power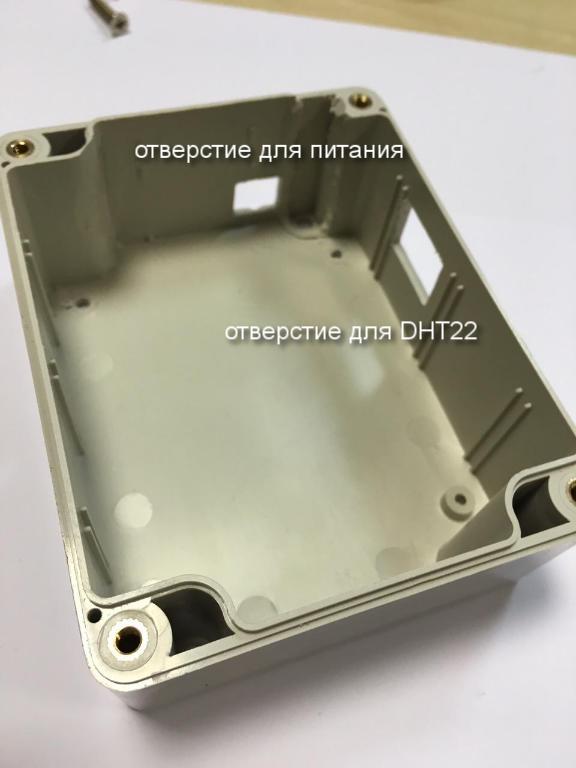

Since I had to solder the legs to 2 sensors and I burned a track at one of them, I decided not to tempt fate and not to solder the wires to the sensors (I would practice on something else), and in order to make the connection more or less reliable, I decided to rewind electrical tape.
System before 'stuffing' into the case
Since the case is much larger than the Arduino (there was no less), I had to invent a backup so that the board did not go inside the case. Also, a figure was cut from the paralon, and in it a rectangle for the screen in order to hide the inside of the case. Superglue was not at hand, so I had to sit on double-sided tape.
Miracle yuda whale fish
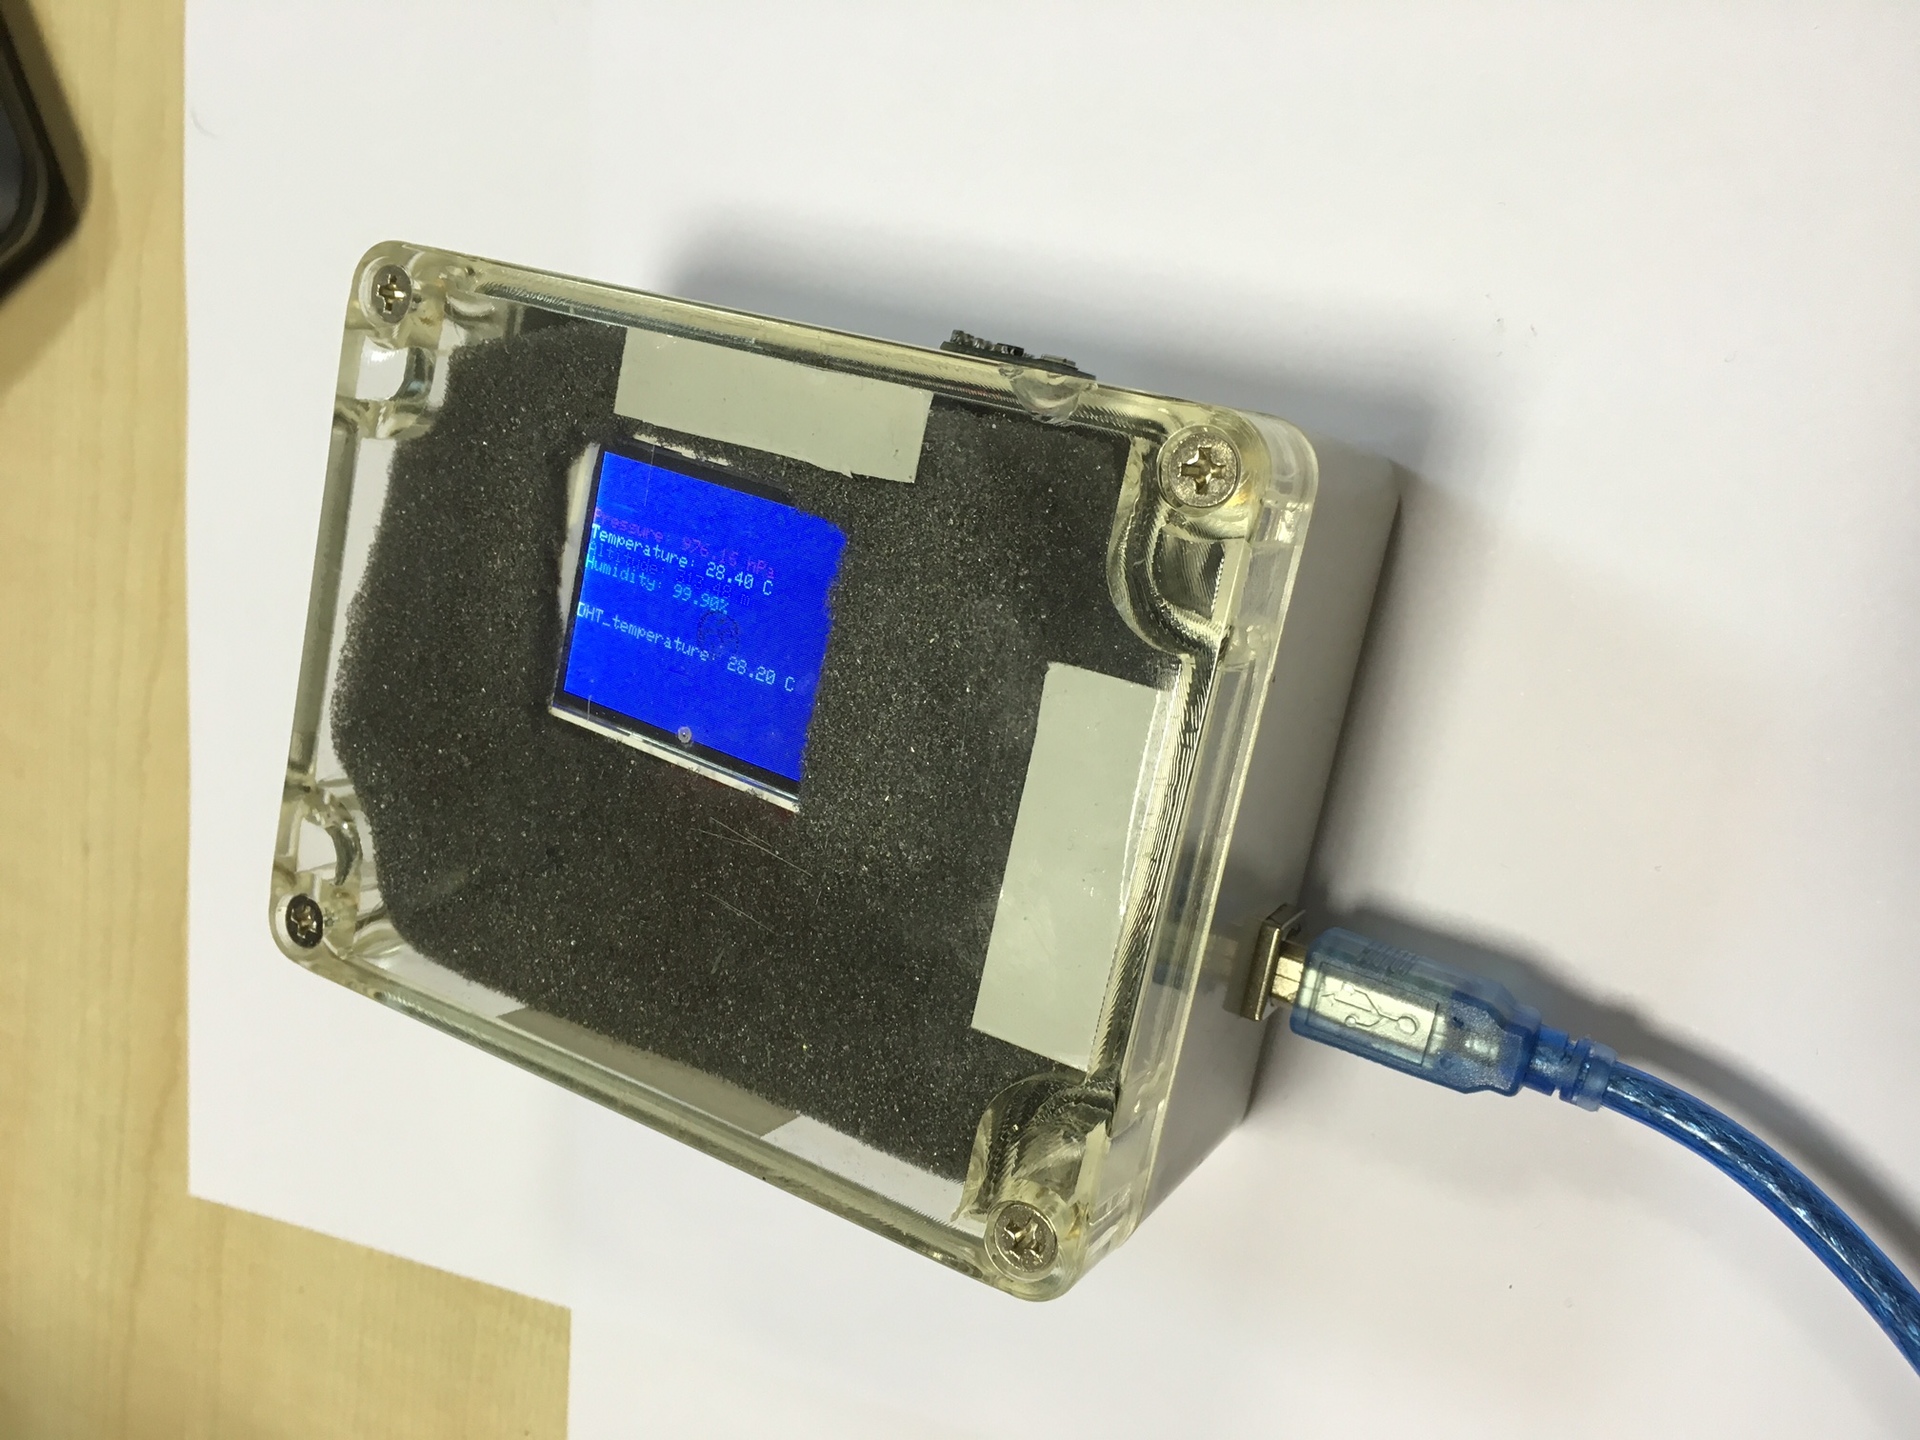
We fasten the lid, connect the power and wait.
Complete weather station in the enclosure

After displaying the results on the screen, we identify an unpleasant moisture measurement error: DHT22 diligently gives the figure of 99.90% (1.00% is extremely rare). We start to understand what the problem is. The first thing we are doing is looking at outputting values to the COM port. It feels good. After neksolki perezalivok, disassembly and assembly of the body in the head the thought comes to look for the answer in Google. As expected, Russian Google did not say anything meaningful. Okay. We start to look in English and in one of the forums we come across guys with a similar problem. The first four pages of discussion do not give anything efficient, and on the fifth page we find the answer to our question:
Humidity sensors can be easily exposed to high humidity IIRC. In the datasheet, you can give it a try.
The only question left was when and how did I damage the DHT22. But it was time to take the course paper and therefore I left the solution to this problem for later.
Afterword
Coursework was delivered. Weather station postponed indefinitely until the closure of all tailings at the university. However, I had to return to the weather station earlier than I thought. It so happened that in the middle of November I changed the workplace and in the new team I met people who are interested in the Arduino platform and the like. Therefore, my interest in this platform, not having time to cool down, flared up again. I pulled out my weather station, plugged it in to my computer, and remembered that I was implementing data transfer from the Arduino to the COM port. And then an idea occurred to me to write a program that receives data through the COM port from Arduino and transmit this data to popular monitoring , but this is a completely different story.
I would also like to have wireless sensors and still implement a weather station on the Arduino Pro Mini. Therefore, I have ordered 4 Arduino Pro Mini with a power supply of 3.3V, 4 radio modules nRF24L01 + and some additional sensors, which I will also try to tell next time. In the meantime, I’m waiting for a package, I’m planning to implement a real-time clock connection to save the update time and the data on the microSD card provided there is no connection to the client via the COM port.
Source: https://habr.com/ru/post/357896/
All Articles