How to make Push notifications in Safari browser on macOS
Recently, it was necessary to implement push notifications into their web services, having found instructions on the Internet found a lot of things for GCM, Firebase, etc. but no detailed or step-by-step instructions for the Safari browser (on macOS, I don’t know or will work in Windows). In principle, Firebase in Safari asked for permission to be notified, and even got into the settings, but this is just dust in the eyes, because It is clear that the browser did not want to receive any notifications from Firebase.
I did all this according to this instruction here, there are many useful things, but there is a lot of things missing, you have to constantly search for and collect something, so I decided to write an article in and out: “How to make Push notifications in Safari on macOS” who will come in handy!
The instruction implies that you have an Apple developer account. I don’t know if I’m paying for free, I haven’t tried it for free (I use corporate).
Go to your developer account, and here we register a new Website Push ID:
We go into the keychain, in the menu we select “Certification Assistant” - “Request a certificate from a certification authority”, enter your mail, name, and select “Saved on Disk” and choose where to save the file.
')
Go back to the developer account, click on the plus sign here, thereby create a new certificate, select the “Website Push ID Certificate” option, select our generated Website Push ID, then, then, and then select the file generated in the second step, then we will be told that everything is okay, and will download the file. Naturally, swing it to your computer, and double-clicking on it, add it to your keychain.
When I did this for the first time, I spent about an hour of time, until I realized what was needed from me, but the magic was simple: you had to export not only the certificate, but also the key! To do this, it is necessary to “open” and export both the key and the certificate in turn, right-click on the certificate and choose “Export” and the same for the key. I advise you to immediately name the certificate apns-pro-cert and the key apns-pro-key, this in order to just copy the commands in the next step and not rewrite the file names on your own. Also, when exporting, specify passwords, and remember, when converting, you will need to enter them.
I found a very cool instruction on which I converted the certificate into pem format from p12 (which is needed both for sending notifications and for generating files (will be further)). We need a "Production Phase". I duplicate the code here, otherwise I got into many articles where links were indicated and they turned out to be broken.
Carefully look at step 3 (which deletes the password) and then step 4 and 5, which differ depending on whether you did step 3 or not, I personally did not do, and left the password, how you do it - decide for yourself.
It is better to put them above the folder so that they do not have access from the web, we only need 2 files from all received: apns-pro.pem - to send notifications, and apns-pro-cert.p12 to generate a notification package ( will be further).
In order for the browser to allow you to receive requests from your website, you need to create the correct batch of files, which will include icons, manifest.json, signature, website.json, when you first request notifications, the browser downloads it all to itself and stores it locally. To do this, make such a structure, put it all in the root of our site.
Specification: In the website.json file “urlFormatString”: “ awery.workreports.pro/#/app/%@ ”, this is the link that the user will click on the notification, % @ is the url-argument that can be passed to the user Different types of notifications went through different paths.
To get the correct files manifest.json and signature, you must use the generation file from Apple. I tweaked it a bit, deleted a bit more, this one works as it should.
We put it in the file and call it, he will give us an answer to download the file right away, just call it “pushPackage.zip”. Save, unpack and check if all the necessary files were created (namely, signature).
I made a folder v1, in which I put the necessary files, an archive that we generated in the previous step, and an index.php file for processing requests. It is necessary for the site to respond to such requests:
/ v1 / pushPackages / {website} should give the archive in response
/ v1 / devices / {device} / registrations / {website} for registration and deletion (GET / POST - DELETE)
/ v1 / log for error logging
In fact, you need to make the workers only a route that gives the archive in return, the rest can simply give up 200 status, without much processing, but you can (and preferably) do everything as it should. The route / v1 / devices / {device} / registrations / {website} in the device will be passed to the token and on the website your registered ID (in my case it is com.pro.workreports.awery) if the POST (or GET) request then we register device, if the DELETE request is then deleted. But there will be another way, from JS'a.
On the route / v1 / log you will receive errors, if suddenly something is wrong. For the first time it helped me a lot, I understood that I didn’t finish it and repaired it.
I have Firebase on my site (for notifications in Chrome) and APNS for safari notifications. So that both works correctly - I do a check (application on AngularJS):
and checkRemotePermission function:
And of course, there is no point in describing the sendTokenToServer function, it accepts a token and a device type as input and stores it in the database, I think you can handle it.
The script to send notifications to Safari is the same as on iOS, just leave it here:
Everything is very clear here - I catch all the tokens of the user with the type “safari” and send notifications for all the tokens.
We try to launch the site, allow notifications, * look, or the token is saved *, and try to send. Try sending from a different browser, and Safari should be closed. If everything is done correctly, you will see a notification! They are beautiful, more beautiful than from Chrome, they look like native, and come more often, because I and Firebase and Safari see that sometimes there are Safari notifications, but they don't always come from Chrome.
If suddenly after reading the article there are still questions or misunderstandings - write, I will, if possible, answer in the comments. I will be glad to constructive criticism and comments. I do not pretend to a super advanced programmer, so I admit that somewhere I may not be quite right. But according to this algorithm, I made notifications for 2 of my resources and everywhere they work.
I did all this according to this instruction here, there are many useful things, but there is a lot of things missing, you have to constantly search for and collect something, so I decided to write an article in and out: “How to make Push notifications in Safari on macOS” who will come in handy!
The instruction implies that you have an Apple developer account. I don’t know if I’m paying for free, I haven’t tried it for free (I use corporate).
Here are the queries from Firebase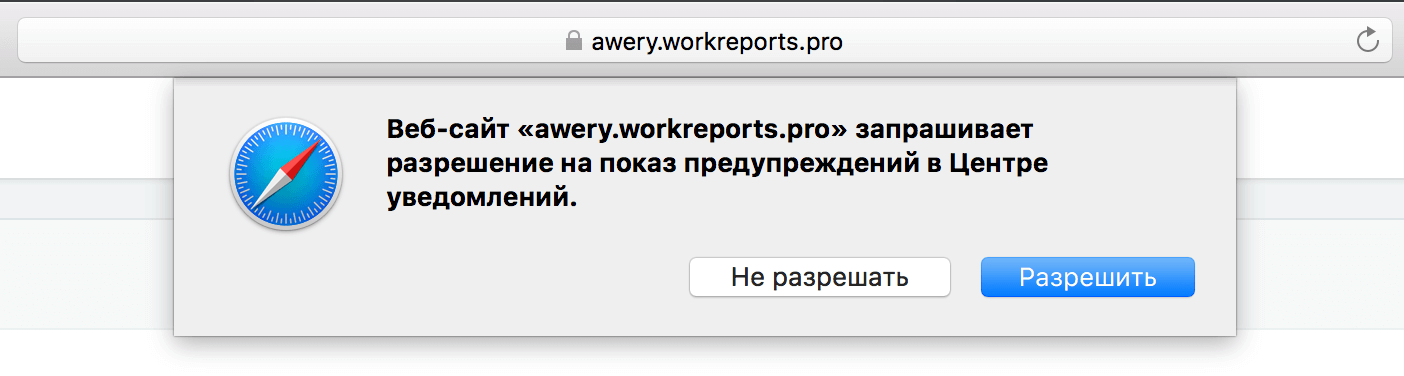
Step 1: Register Website Push ID
Go to your developer account, and here we register a new Website Push ID:
Website Push ID


Step 2: Request a certificate in Keychain on MacOS
We go into the keychain, in the menu we select “Certification Assistant” - “Request a certificate from a certification authority”, enter your mail, name, and select “Saved on Disk” and choose where to save the file.
')
Certificate Request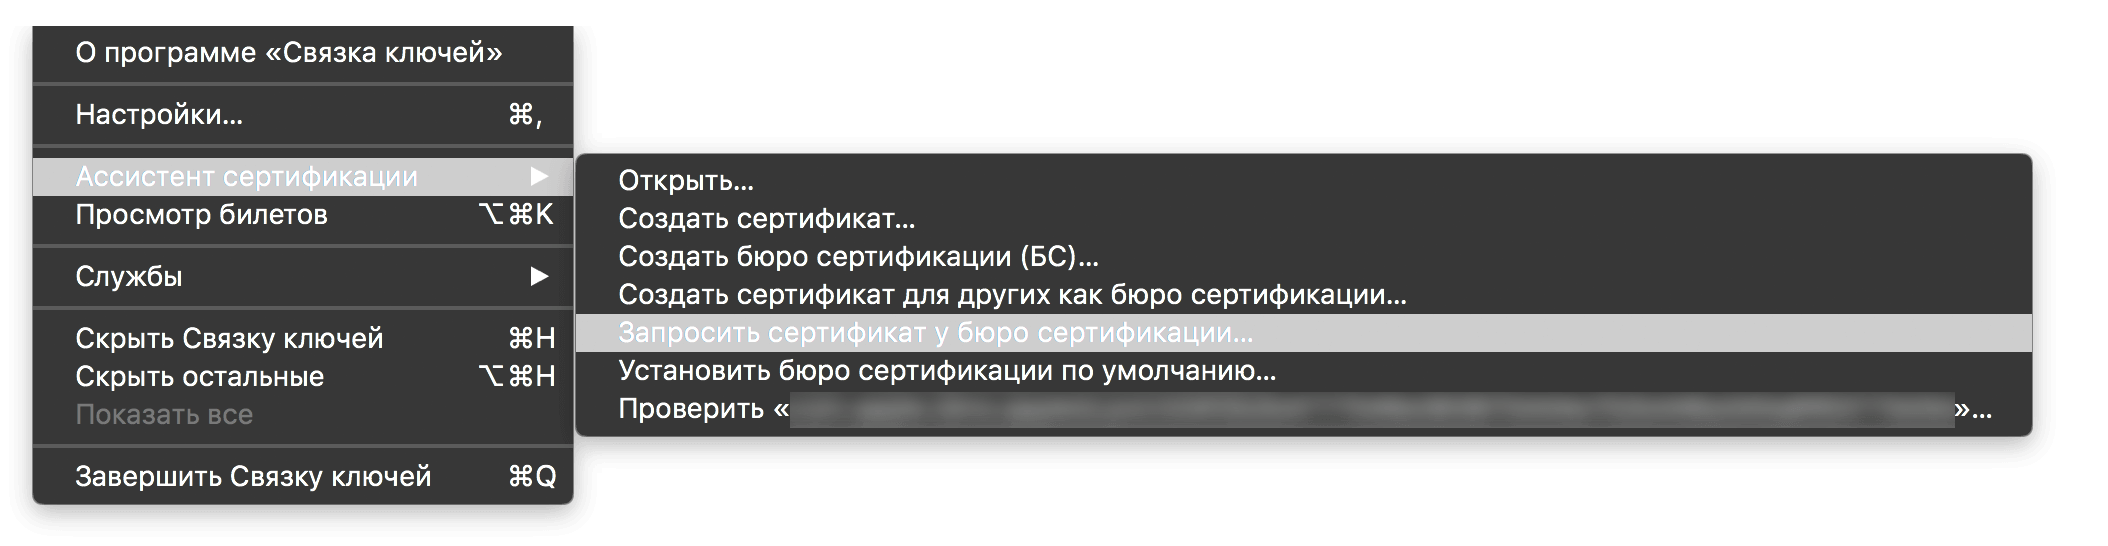

Step 3: Generate the certificate
Go back to the developer account, click on the plus sign here, thereby create a new certificate, select the “Website Push ID Certificate” option, select our generated Website Push ID, then, then, and then select the file generated in the second step, then we will be told that everything is okay, and will download the file. Naturally, swing it to your computer, and double-clicking on it, add it to your keychain.
Certificate Generation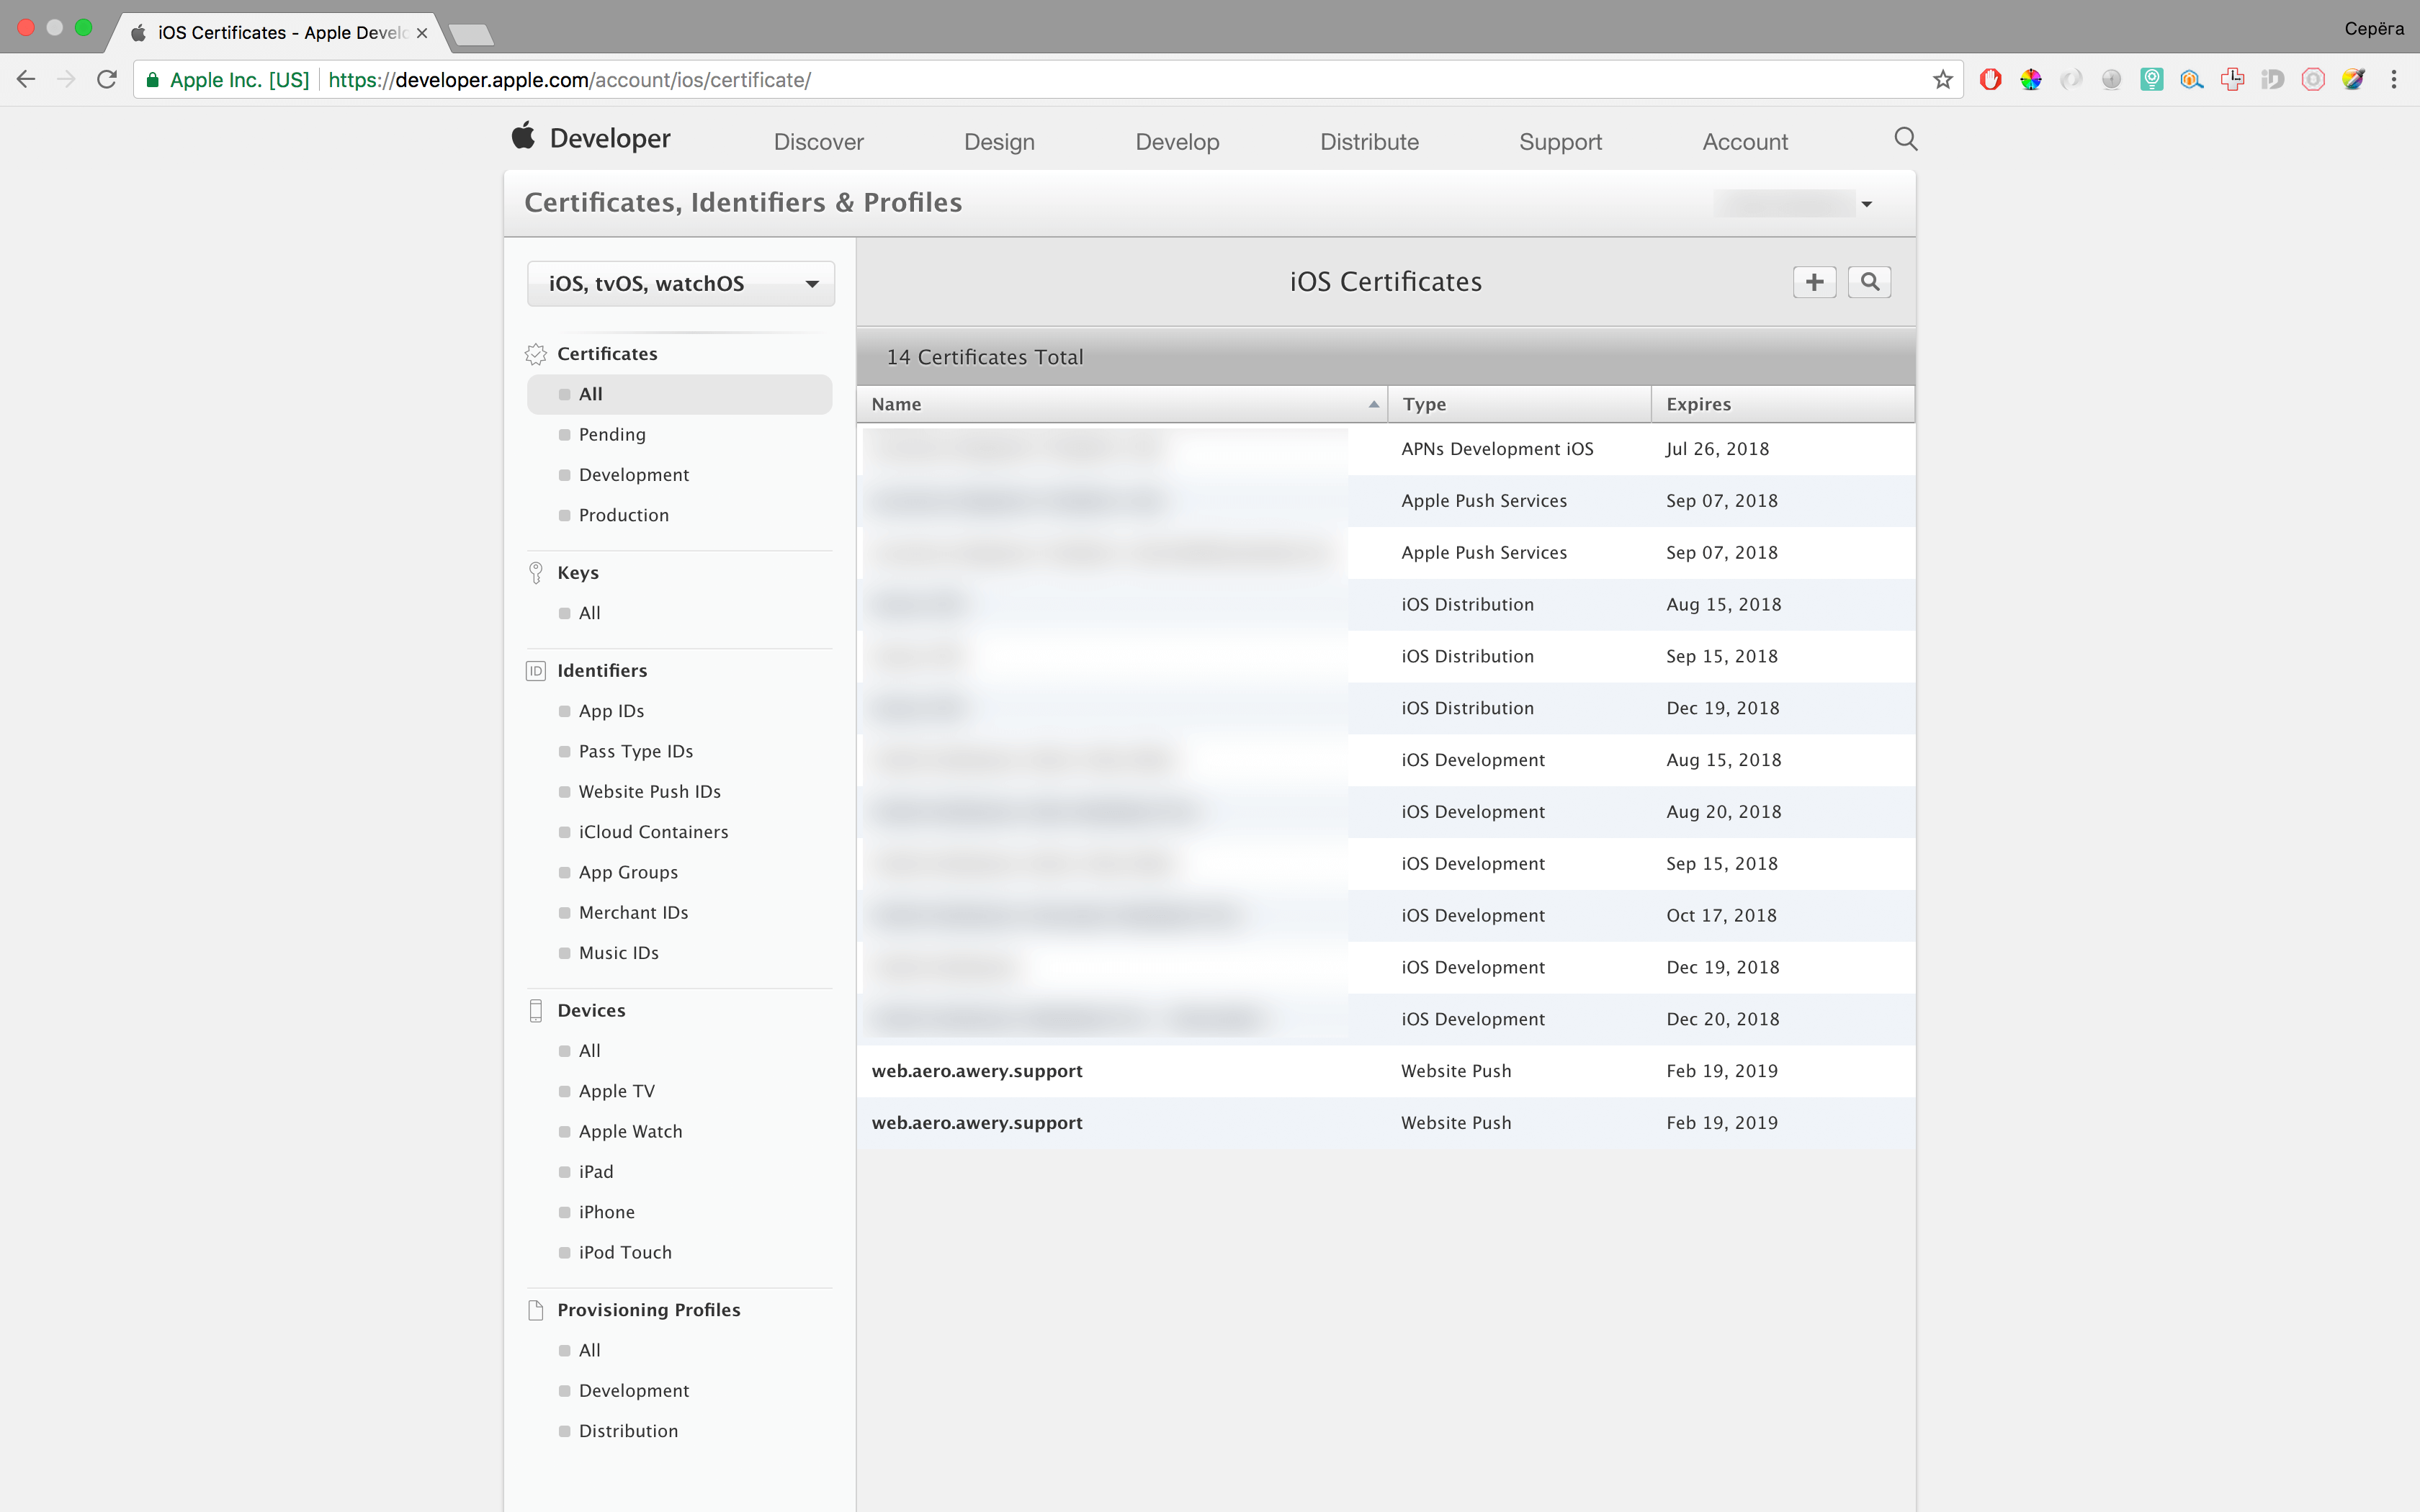


Step 4: Export Key and Certificate
When I did this for the first time, I spent about an hour of time, until I realized what was needed from me, but the magic was simple: you had to export not only the certificate, but also the key! To do this, it is necessary to “open” and export both the key and the certificate in turn, right-click on the certificate and choose “Export” and the same for the key. I advise you to immediately name the certificate apns-pro-cert and the key apns-pro-key, this in order to just copy the commands in the next step and not rewrite the file names on your own. Also, when exporting, specify passwords, and remember, when converting, you will need to enter them.
Export key and certificate


Step 5: Converting the certificate to p12
I found a very cool instruction on which I converted the certificate into pem format from p12 (which is needed both for sending notifications and for generating files (will be further)). We need a "Production Phase". I duplicate the code here, otherwise I got into many articles where links were indicated and they turned out to be broken.
Step 1: Create Certificate .pem from Certificate .p12 Command: openssl pkcs12 -clcerts -nokeys -out apns-pro-cert.pem -in apns-pro-cert.p12 Step 2: Create Key .pem from Key .p12 Command : openssl pkcs12 -nocerts -out apns-pro-key.pem -in apns-pro-key.p12 Step 3: Optional (If you want to remove pass phrase asked in second step) Command : openssl rsa -in apns-pro-key.pem -out apns-pro-key-noenc.pem Step 4: Now we have to merge the Key .pem and Certificate .pem to get Production .pem needed for Push Notifications in Production Phase of App Command : cat apns-pro-cert.pem apns-pro-key-noenc.pem > apns-pro.pem (If 3rd step is performed ) Command : cat apns-pro-cert.pem apns-pro-key.pem > apns-pro.pem (if not) Step 5: Check certificate validity and connectivity to APNS Command: openssl s_client -connect gateway.push.apple.com:2195 -cert apns-pro-cert.pem -key apns-pro-key.pem (If 3rd step is not performed ) Command: openssl s_client -connect gateway.push.apple.com:2195 -cert apns-pro-cert.pem -key apns-pro-key-noenc.pem (If performed ) Carefully look at step 3 (which deletes the password) and then step 4 and 5, which differ depending on whether you did step 3 or not, I personally did not do, and left the password, how you do it - decide for yourself.
Certificate conversion to p12
Step 6: We throw certificates on the site
It is better to put them above the folder so that they do not have access from the web, we only need 2 files from all received: apns-pro.pem - to send notifications, and apns-pro-cert.p12 to generate a notification package ( will be further).
Step 7: Preparing Resources
In order for the browser to allow you to receive requests from your website, you need to create the correct batch of files, which will include icons, manifest.json, signature, website.json, when you first request notifications, the browser downloads it all to itself and stores it locally. To do this, make such a structure, put it all in the root of our site.
Specification: In the website.json file “urlFormatString”: “ awery.workreports.pro/#/app/%@ ”, this is the link that the user will click on the notification, % @ is the url-argument that can be passed to the user Different types of notifications went through different paths.
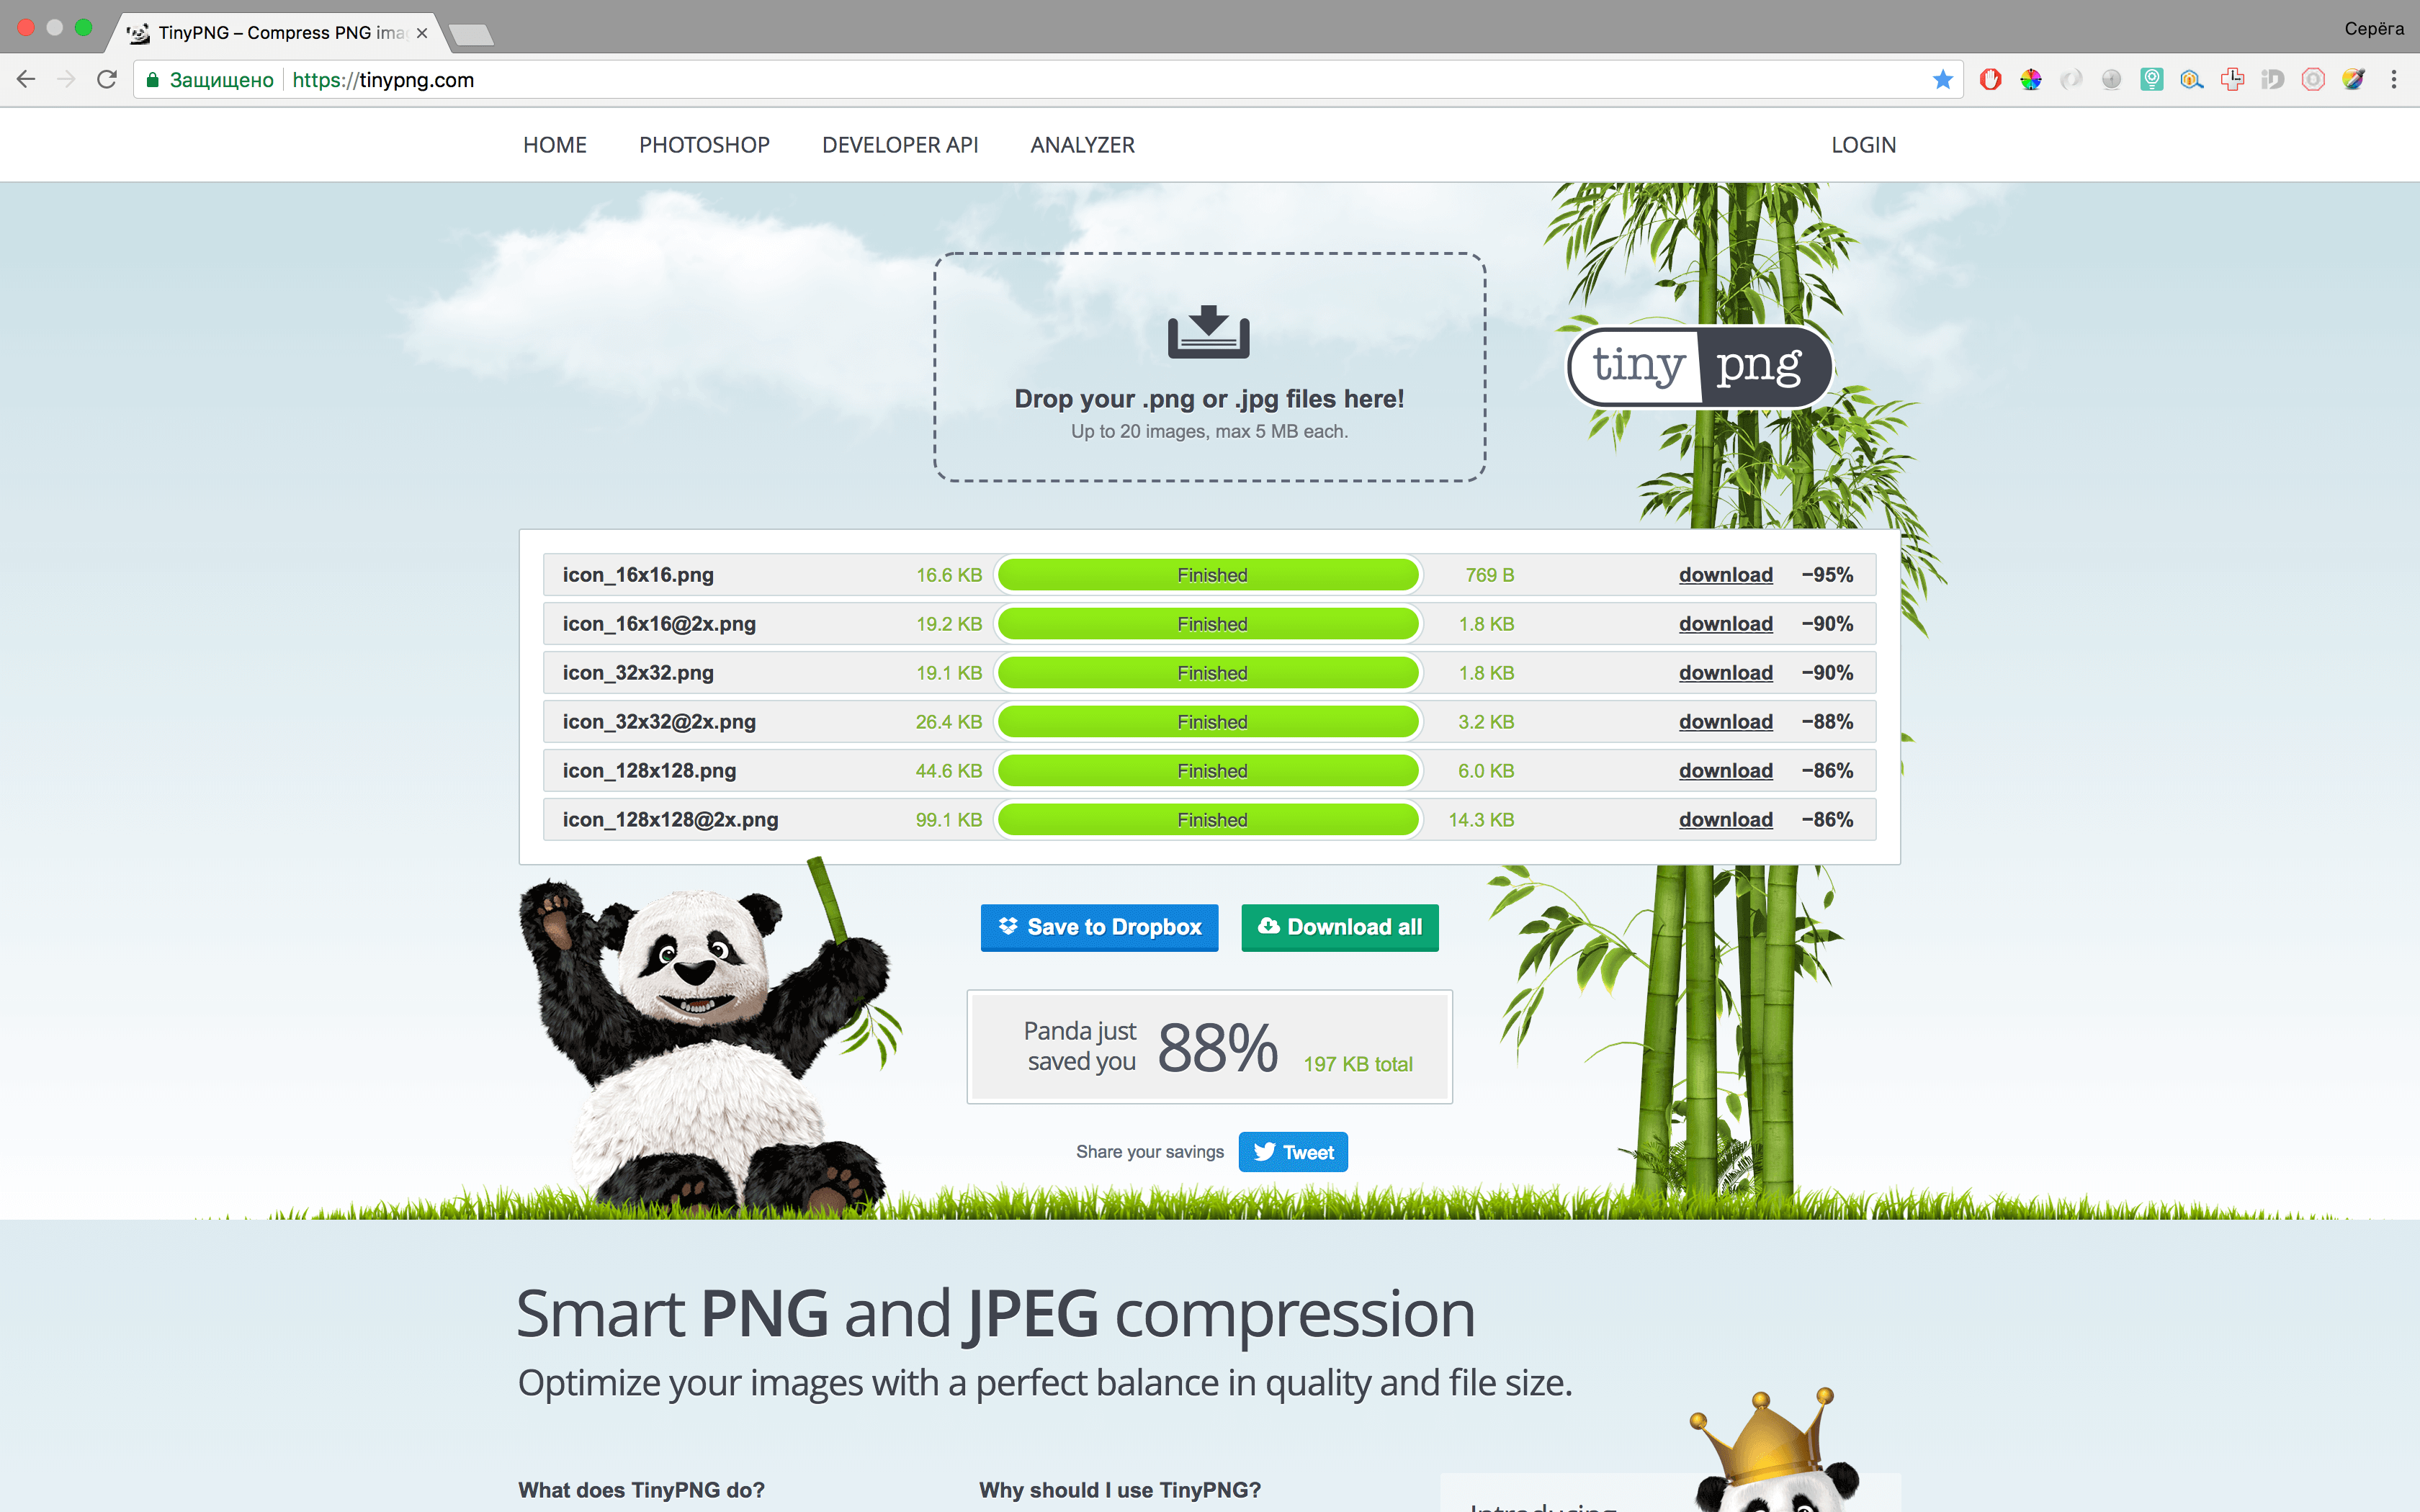
We prepare resources
Reduce pictures (who didn't know - a cool resource: tinypng.com reduces the weight of pictures for the web)

Step 8: Archive Generation
To get the correct files manifest.json and signature, you must use the generation file from Apple. I tweaked it a bit, deleted a bit more, this one works as it should.
<?php // This script creates a valid push package. // This script assumes that the website.json file and iconset already exist. // This script creates a manifest and signature, zips the folder, and returns the push package. // Use this script as an example to generate a push package dynamically. $certificate_path = "../certs/apns-pro-cert.p12"; // Change this to the path where your certificate is located $certificate_password = "PASSPHRASE"; // Change this to the certificate's import password // Convenience function that returns an array of raw files needed to construct the package. function raw_files() { return array( 'icon.iconset/icon_16x16.png', 'icon.iconset/icon_16x16@2x.png', 'icon.iconset/icon_32x32.png', 'icon.iconset/icon_32x32@2x.png', 'icon.iconset/icon_128x128.png', 'icon.iconset/icon_128x128@2x.png', 'website.json' ); } // Copies the raw push package files to $package_dir. function copy_raw_push_package_files($package_dir) { mkdir($package_dir . '/icon.iconset'); foreach (raw_files() as $raw_file) { copy("pushPackage.raw/$raw_file", "$package_dir/$raw_file"); } } // Creates the manifest by calculating the SHA1 hashes for all of the raw files in the package. function create_manifest($package_dir) { // Obtain SHA1 hashes of all the files in the push package $manifest_data = array(); foreach (raw_files() as $raw_file) { $manifest_data[$raw_file] = sha1(file_get_contents("$package_dir/$raw_file")); } file_put_contents("$package_dir/manifest.json", json_encode((object)$manifest_data)); } // Creates a signature of the manifest using the push notification certificate. function create_signature($package_dir, $cert_path, $cert_password) { // Load the push notification certificate $pkcs12 = file_get_contents($cert_path); $certs = array(); if(!openssl_pkcs12_read($pkcs12, $certs, $cert_password)) { exit('Something wrong with certificate. Err 1'); return; } $signature_path = "$package_dir/signature"; // Sign the manifest.json file with the private key from the certificate $cert_data = openssl_x509_read($certs['cert']); $private_key = openssl_pkey_get_private($certs['pkey'], $cert_password); openssl_pkcs7_sign("$package_dir/manifest.json", $signature_path, $cert_data, $private_key, array(), PKCS7_BINARY | PKCS7_DETACHED); // Convert the signature from PEM to DER $signature_pem = file_get_contents($signature_path); $matches = array(); if (!preg_match('~Content-Disposition:[^\n]+\s*?([A-Za-z0-9+=/\r\n]+)\s*?-----~', $signature_pem, $matches)) { exit('Something wrong with certificate. Err 2'); return; } $signature_der = base64_decode($matches[1]); file_put_contents($signature_path, $signature_der); } // Zips the directory structure into a push package, and returns the path to the archive. function package_raw_data($package_dir) { $zip_path = "$package_dir.zip"; // Package files as a zip file $zip = new ZipArchive(); if (!$zip->open("$package_dir.zip", ZIPARCHIVE::CREATE)) { error_log('Could not create ' . $zip_path); return; } $raw_files = raw_files(); $raw_files[] = 'manifest.json'; $raw_files[] = 'signature'; foreach ($raw_files as $raw_file) { $zip->addFile("$package_dir/$raw_file", $raw_file); } $zip->close(); return $zip_path; } // Creates the push package, and returns the path to the archive. function create_push_package() { global $certificate_path, $certificate_password; // Create a temporary directory in which to assemble the push package $package_dir = '/tmp/pushPackage' . time(); if (!mkdir($package_dir)) { unlink($package_dir); die; } copy_raw_push_package_files($package_dir); create_manifest($package_dir); create_signature($package_dir, $certificate_path, $certificate_password); $package_path = package_raw_data($package_dir); return $package_path; } // MAIN $package_path = create_push_package(); if (empty($package_path)) { http_response_code(500); die; } header("Content-type: application/zip"); echo file_get_contents($package_path); die; We put it in the file and call it, he will give us an answer to download the file right away, just call it “pushPackage.zip”. Save, unpack and check if all the necessary files were created (namely, signature).
Step 9: Making the v1 folder (or setting up the routing)
I made a folder v1, in which I put the necessary files, an archive that we generated in the previous step, and an index.php file for processing requests. It is necessary for the site to respond to such requests:
/ v1 / pushPackages / {website} should give the archive in response
/ v1 / devices / {device} / registrations / {website} for registration and deletion (GET / POST - DELETE)
/ v1 / log for error logging
In fact, you need to make the workers only a route that gives the archive in return, the rest can simply give up 200 status, without much processing, but you can (and preferably) do everything as it should. The route / v1 / devices / {device} / registrations / {website} in the device will be passed to the token and on the website your registered ID (in my case it is com.pro.workreports.awery) if the POST (or GET) request then we register device, if the DELETE request is then deleted. But there will be another way, from JS'a.
On the route / v1 / log you will receive errors, if suddenly something is wrong. For the first time it helped me a lot, I understood that I didn’t finish it and repaired it.
Folder v1
Step 10: Request a token from JS'a
I have Firebase on my site (for notifications in Chrome) and APNS for safari notifications. So that both works correctly - I do a check (application on AngularJS):
if ('safari' in window && 'pushNotification' in window.safari) { var permissionData = window.safari.pushNotification.permission('web.com.example.domain'); $scope.checkRemotePermission(permissionData); }else { //FIREBASE HERE } and checkRemotePermission function:
$scope.checkRemotePermission = function (permissionData) { if (permissionData.permission === 'default') { // This is a new web service URL and its validity is unknown. window.safari.pushNotification.requestPermission( 'https://awery.workreports.pro', // The web service URL. 'web.pro.workreports.awery', // The Website Push ID. {}, // Data that you choose to send to your server to help you identify the user. $scope.checkRemotePermission // The callback function. ); } else if (permissionData.permission === 'denied') { if($rootScope.log) console.war('User not allowed notifications'); } else if (permissionData.permission === 'granted') { // The web service URL is a valid push provider, and the user said yes. // permissionData.deviceToken is now available to use. console.log(permissionData.deviceToken, 'YEAH!'); $rootScope.sendTokenToServer(permissionData.deviceToken, 'safari'); } }; And of course, there is no point in describing the sendTokenToServer function, it accepts a token and a device type as input and stores it in the database, I think you can handle it.
Request rights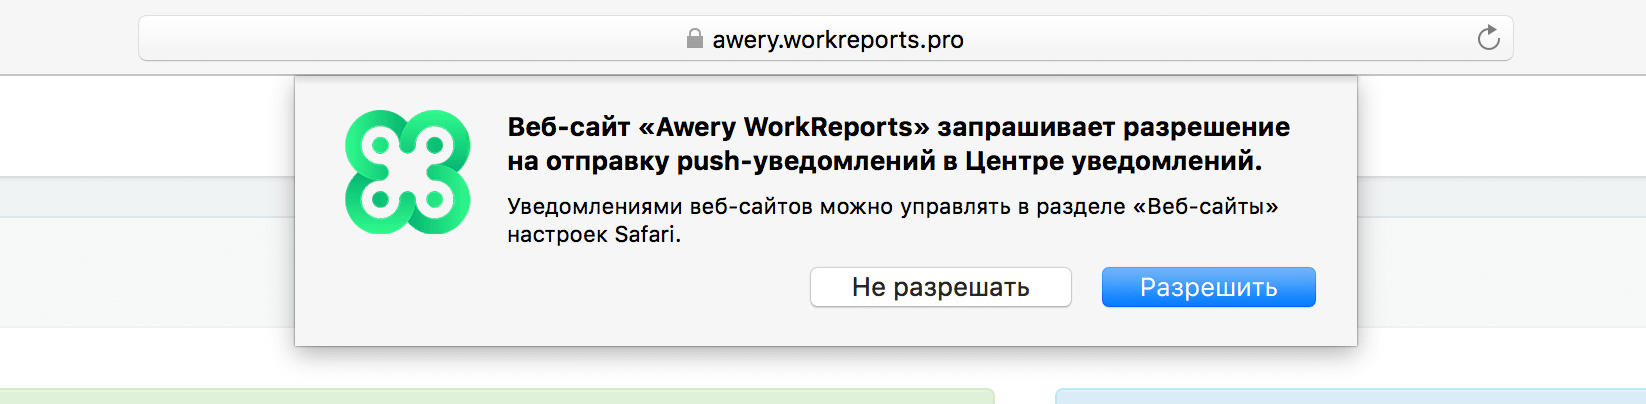
Step 11: Sending a notification from the backend:
The script to send notifications to Safari is the same as on iOS, just leave it here:
$sql = "SELECT * FROM `user_devices` WHERE `id_user` = ? AND `type` = ?"; $tokens = $dbh->fetchAll($sql, array($id_user, 'safari')); $result = false; if (count($tokens) > 0) { $ctx = stream_context_create(); stream_context_set_option($ctx, 'ssl', 'local_cert', __DIR__ . '/certs/apns-pro.pem'); stream_context_set_option($ctx, 'ssl', 'passphrase', 'PASSPHAREHERE'); // $fp = stream_socket_client( 'ssl://gateway.push.apple.com:2195', $err, $errstr, 60, STREAM_CLIENT_CONNECT | STREAM_CLIENT_PERSISTENT, $ctx); if (!$fp) $log->addError("Failed to connect: $err $errstr"); else { foreach ($tokens as $token) { $deviceToken = $token['token']; // Create the payload body $payload = json_encode(array( 'aps' => array( 'alert' => array( 'title' => $title, 'body' => $message, 'action' => 'Details' ), 'url-args' => array($route!=''?route:'generalUser/notifications/list') ) )); $msg = chr(0) . pack('n', 32) . pack('H*', $deviceToken) . pack('n', strlen($payload)) . $payload; $result = fwrite($fp, $msg, strlen($msg)); $log->addInfo('Push SAFARI send successfully; result ' . $result . ' Sent message: "' . $payload . '"; ID user: ' . $id_user); } fclose($fp); } } Everything is very clear here - I catch all the tokens of the user with the type “safari” and send notifications for all the tokens.
Step 12: Testing
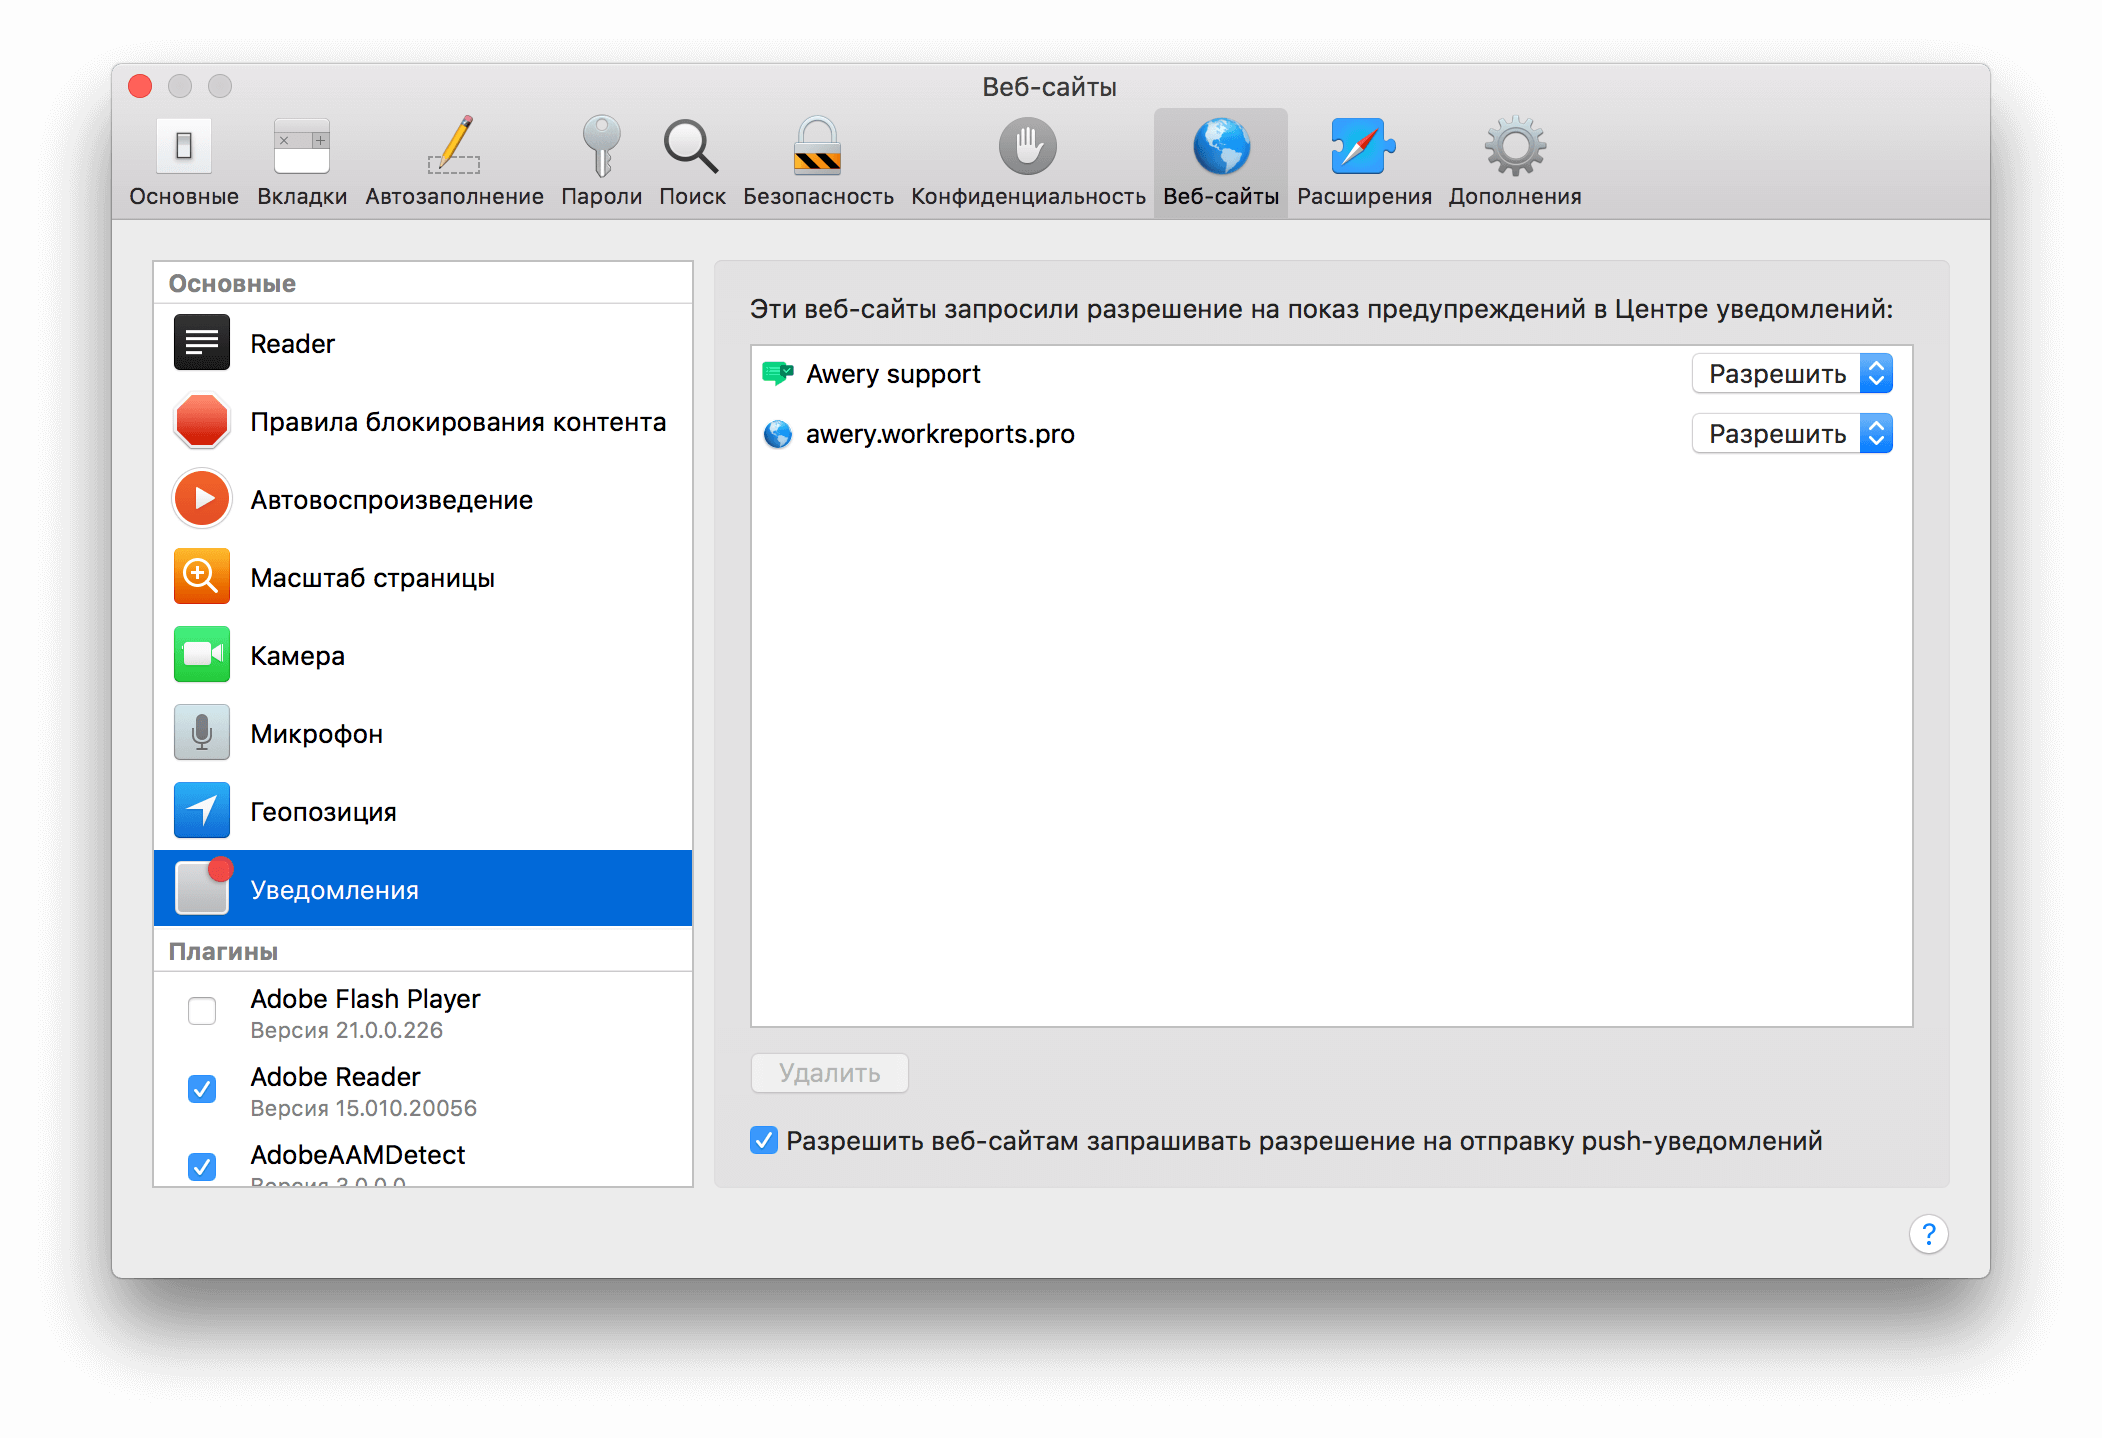
We try to launch the site, allow notifications, * look, or the token is saved *, and try to send. Try sending from a different browser, and Safari should be closed. If everything is done correctly, you will see a notification! They are beautiful, more beautiful than from Chrome, they look like native, and come more often, because I and Firebase and Safari see that sometimes there are Safari notifications, but they don't always come from Chrome.
Testing

If suddenly after reading the article there are still questions or misunderstandings - write, I will, if possible, answer in the comments. I will be glad to constructive criticism and comments. I do not pretend to a super advanced programmer, so I admit that somewhere I may not be quite right. But according to this algorithm, I made notifications for 2 of my resources and everywhere they work.
Source: https://habr.com/ru/post/357862/
All Articles