Splunk Distributed Search. Or how to build an indexer cluster on Splunk?
We are often asked how to deploy a cluster on Splunk. Many users in the process of operation there is a need to move from standalone to cluster configuration, which provides a stable system of data storage and indexing, as well as constant data availability, which will not depend on equipment failures. And therefore, in this article we will explain how to deploy an Indexer cluster on Splunk, which will allow you to constantly have access to all stored data, even if one of the indexers falls.
Task
We will build a cluster that will load data, replicate it, creating two copies on the indexers.
For this we need:
')
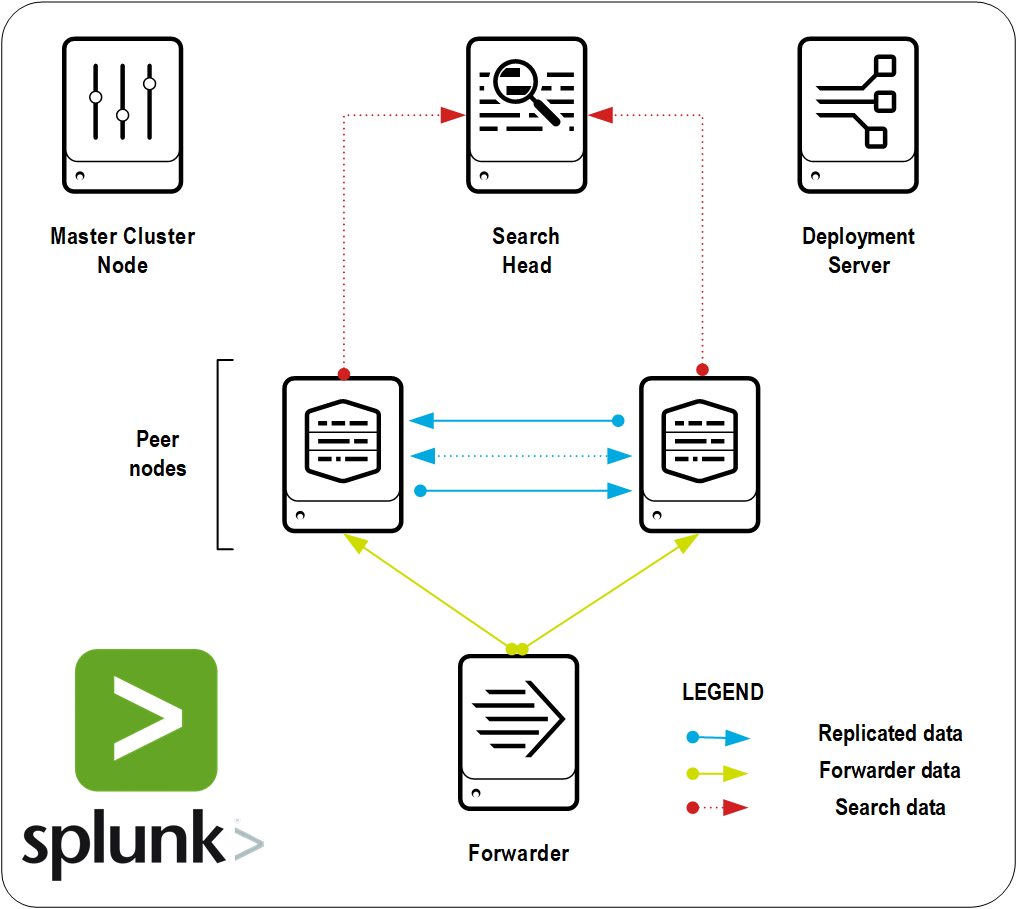
Indexers (2) - nodes on which data will be replicated;
Search Head is a component that represents a graphical interface for searching data stored in indexers, building dashboards, creating alerts, etc.
Cluster Master - the main node that coordinates the actions of all other nodes;
Forwarder (s) - components responsible for sending data;
Deployment Server is the component responsible for sending data send parameters to all forwarders (In our case it will be located along with Search Head).
Cluster Deployment
1. Definition of requirements
Before deploying a cluster, it is necessary to determine the requirements for the cluster:
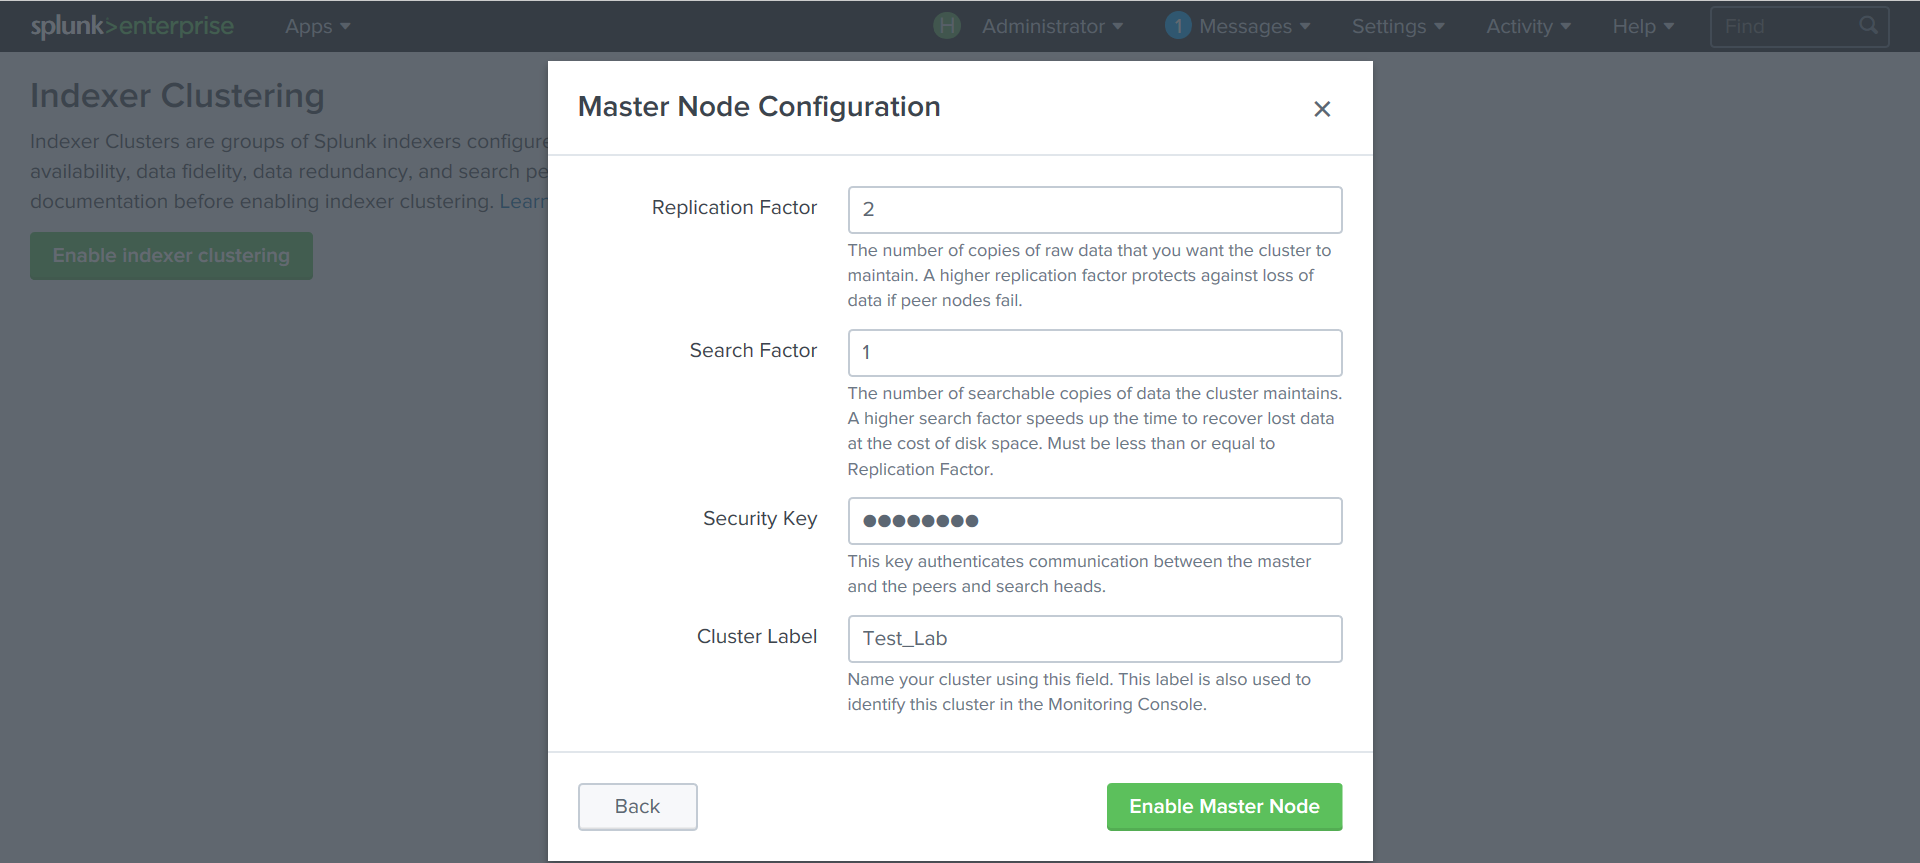
• Replication factor - the number of copies of the data.
It is necessary to choose such a factor that will be optimal in terms of increasing the memory capacity and the fault tolerance of the system. An increase in the replication factor during the operation of the system is possible, but it will slow down the cluster during the creation of additional copies.
In our case, Replication factor = 2
• Search factor
The search ratio tells the cluster how many copies of the indexed data are supported for the search. This helps determine the rate at which a cluster can recover after losing a node. A higher search ratio allows the cluster to recover faster, but it also requires more memory and processing power. Search factor must be less than or equal to Replication factor. In our case, Search factor = 1.
2. Installing Splunk Enterprise
The number of instances should be at least Replication factor + 2. In our case, this is 4 instances. Detailed step-by-step installation instructions can be found here .
2 instances are needed for indexers, but more can be done to increase indexing performance. And 2 more copies for Cluster Master and Search Head.
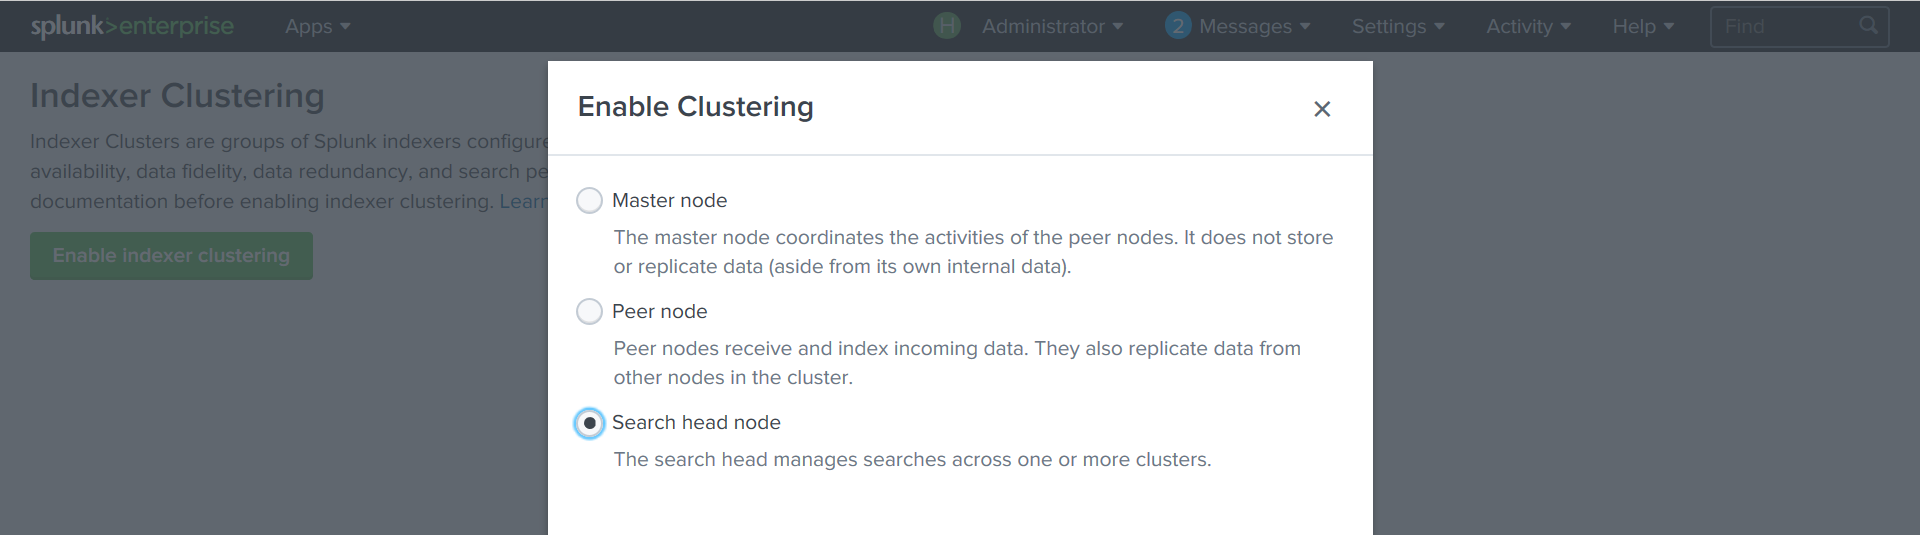
3. Enable clustering
For each Splunk instance, you must define its role in the cluster.
Create a Cluster Master:
Settings - Indexer Clustering - Enable Indexer clustering - Master node
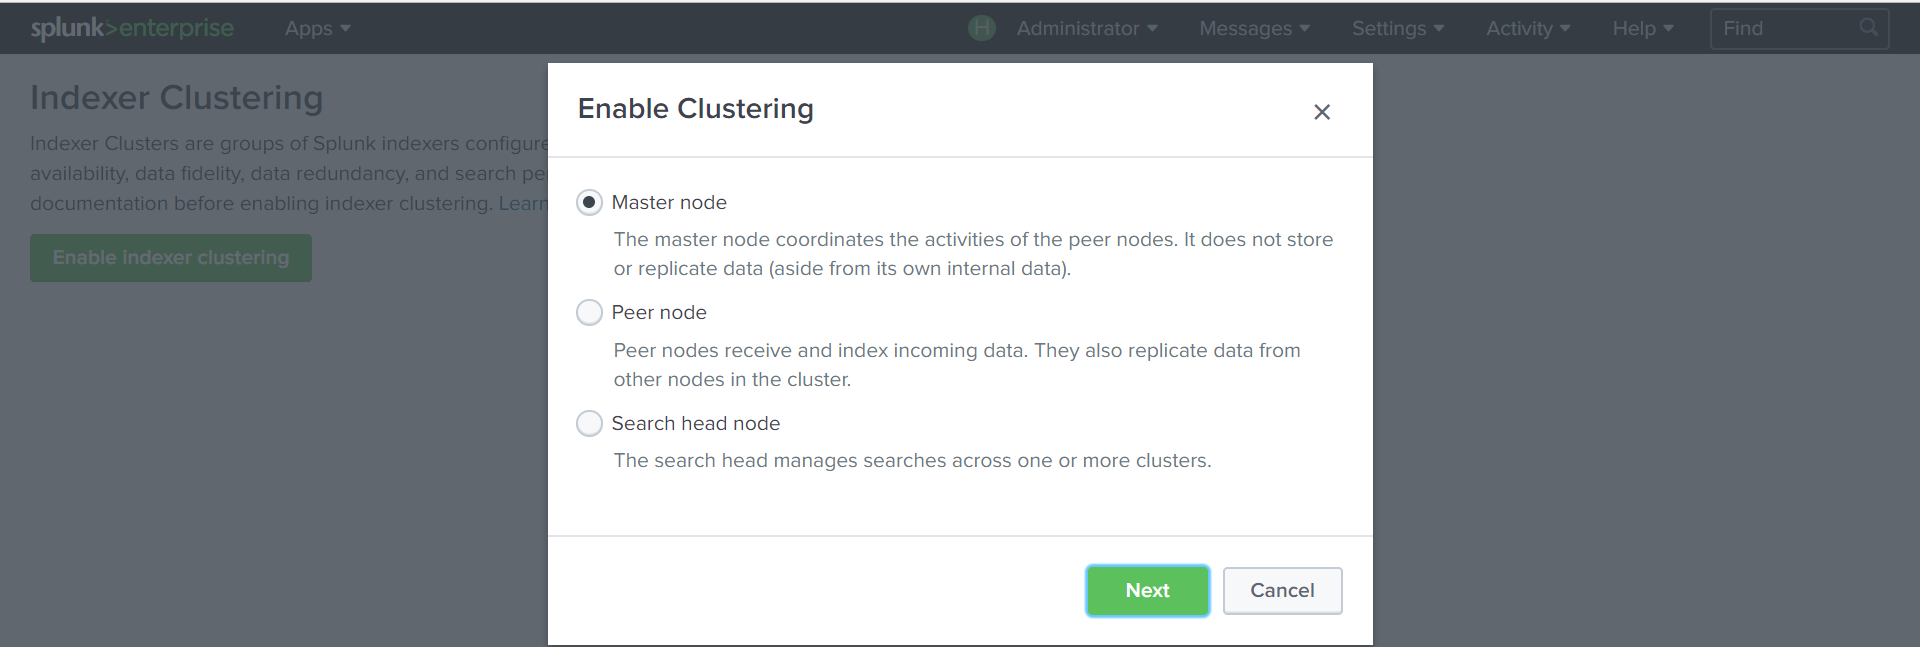
We set the cluster parameters: replication ratio, search, the key by which the cluster nodes will be authenticated.
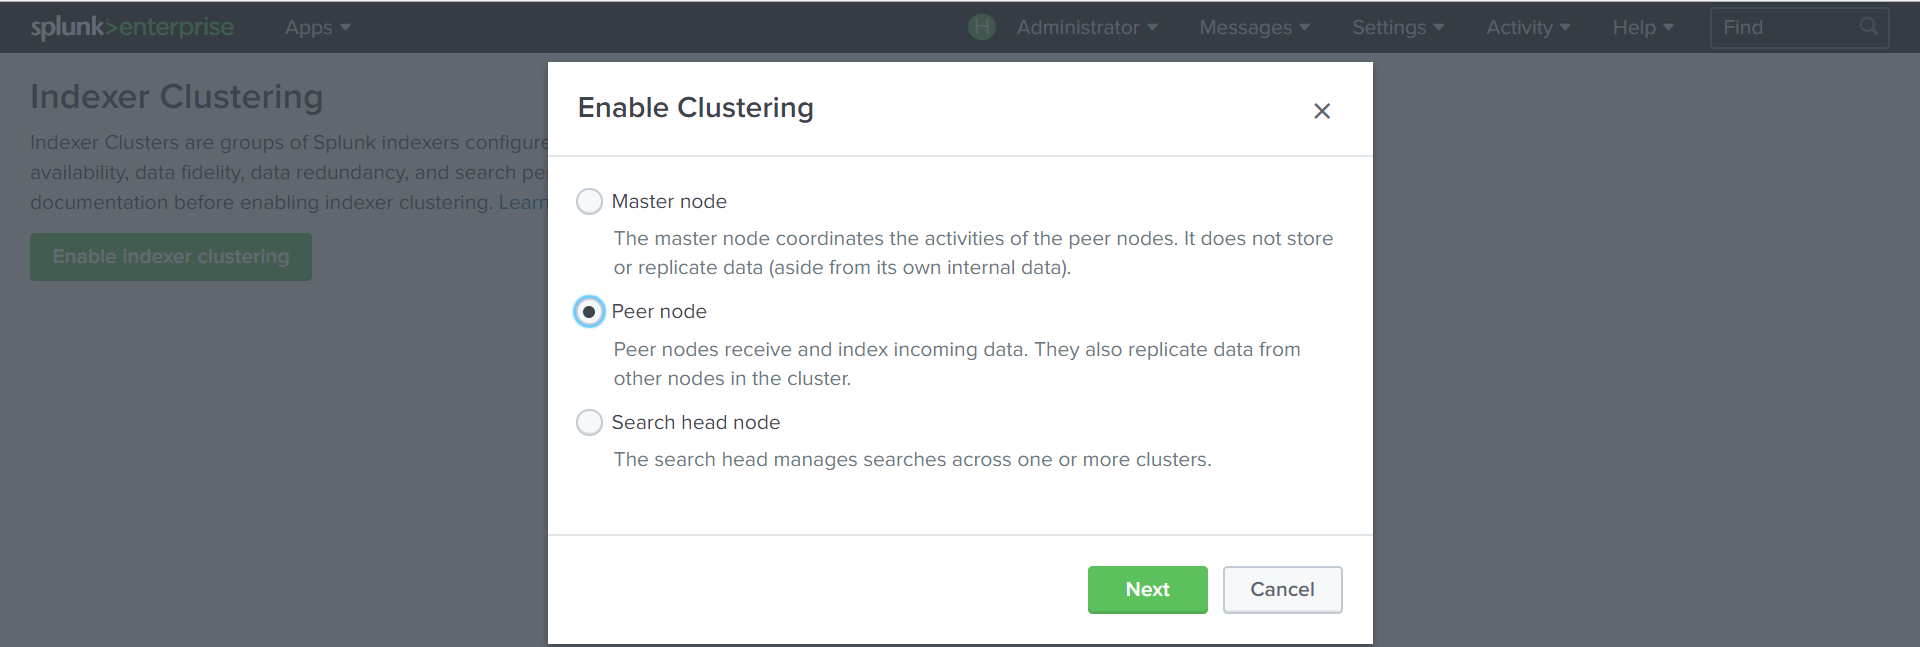
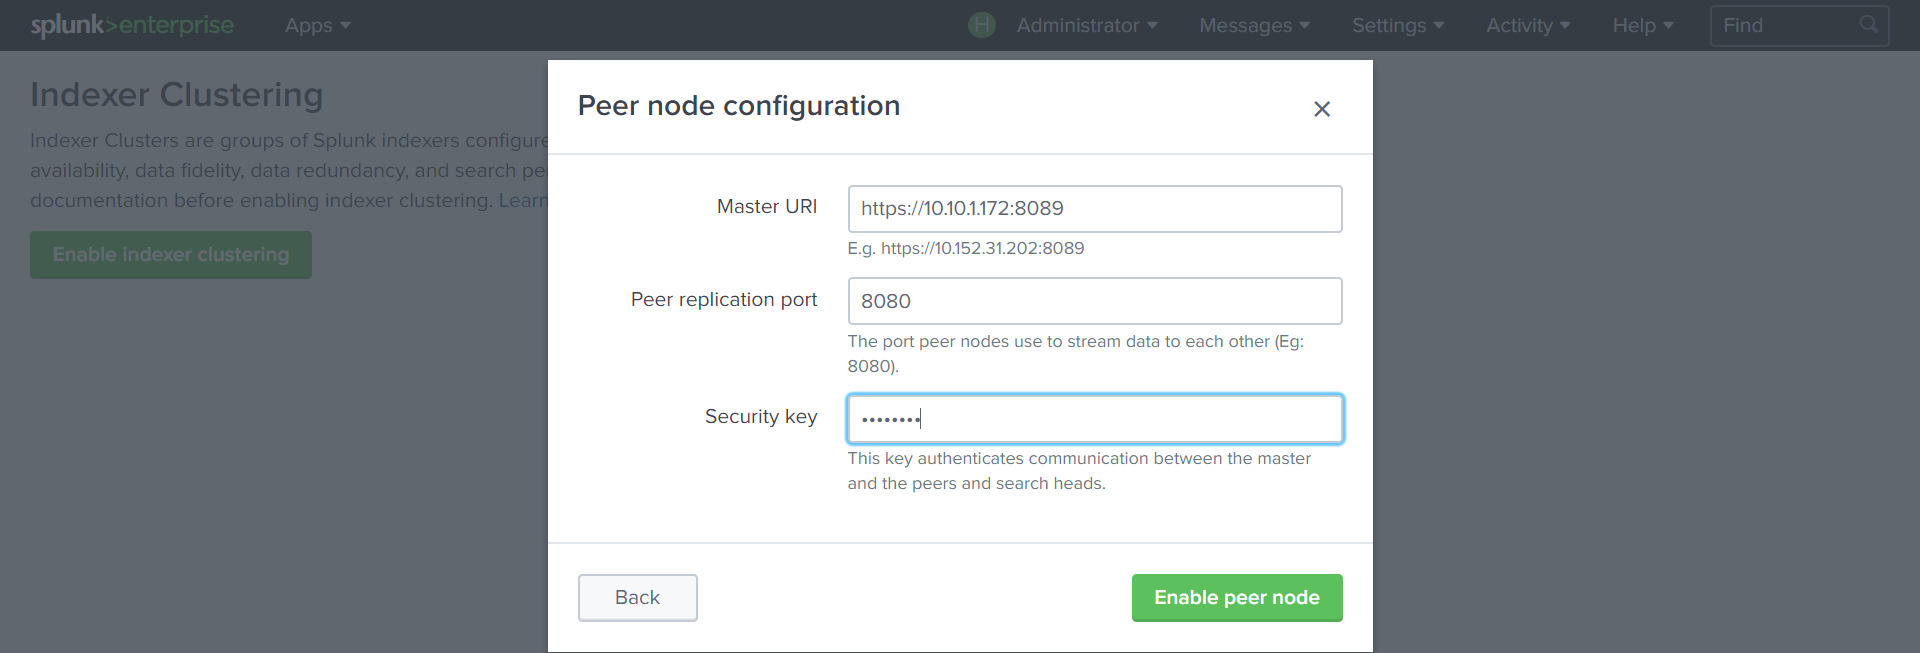
Create indexers:
Settings - Indexer Clustering - Enable Indexer clustering –Peer node
We specify the address of the Cluster Master with port 8089 , the port over which the data will be replicated ( 8080 ) and the key that was created in the previous step.
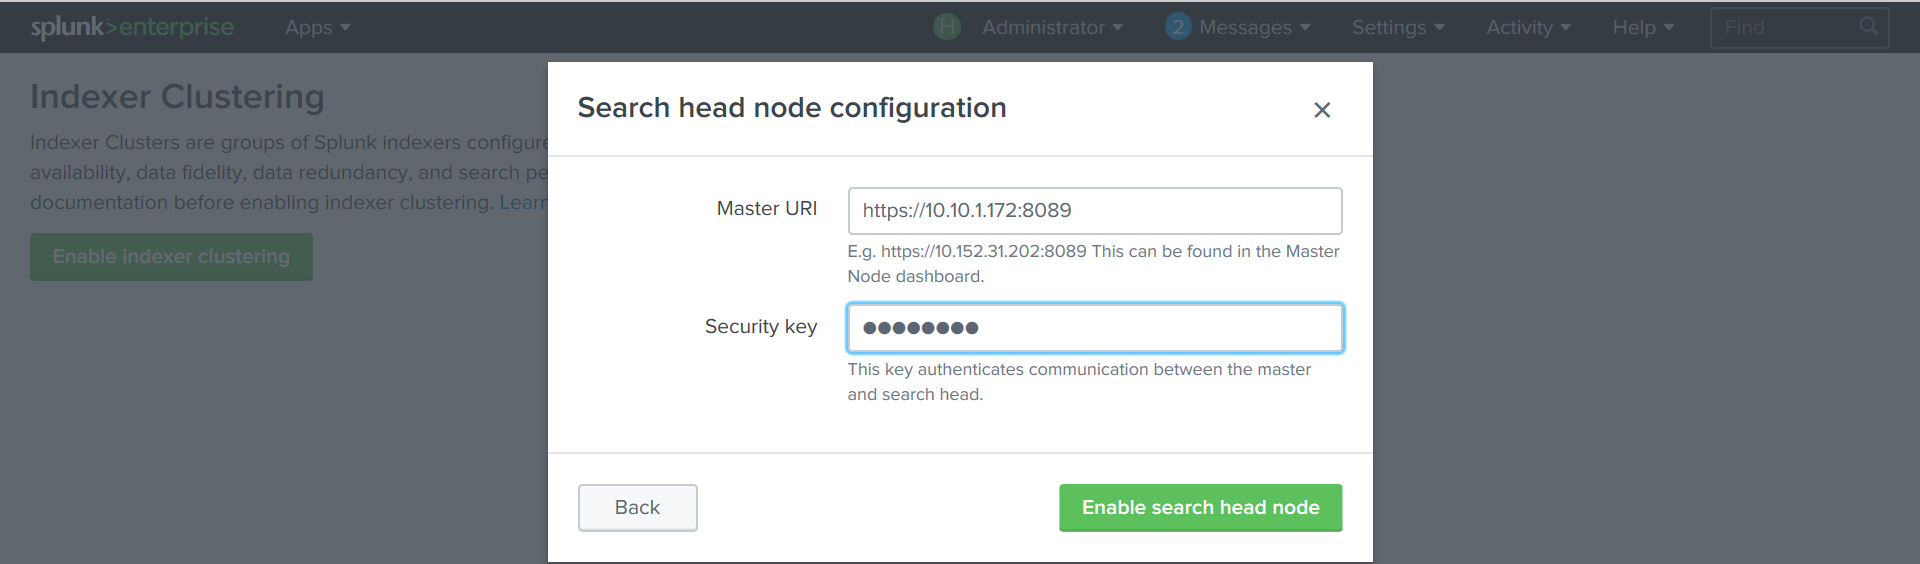
Create a Search Head:
Settings - Indexer Clustering - Enable Indexer clustering - Search Head node.
We indicate the address of the Cluster Master with port 8089 and the key .
After creating all the components, you need to restart Splunk on each machine.
4. Creating a new index
Next, create a new test index. Cluster Master is responsible for creating indexes, which creates the specified index on each indexer.
To do this, copy the indexes.conf file from ... splunk / etc / master-apps / _cluster / default to the / opt / splunk / etc / master-apps / _cluster / local directory
Add a new index to the file and its data storage locations:
[test]
repFactor = auto
homePath = $SPLUNK_HOME/var/lib/splunk/testdb/db/
coldPath = $SPLUNK_HOME/var/lib/splunk/testdb/colddb
thawedPath = $SPLUNK_HOME/var/lib/splunk/testdb/thaweddb
Then you need to push the settings from the wizard to the indexers.
5. Configure Forwarder and Deployment Server
We wrote about how to configure Forwarder and Deployment Server here . Therefore, in this article we note the differences in the settings for the situation of working with clusters.
In our case, we set up the Deployment Server on Search Head and specified its IP address during installation.
To set up a forwarder to load data into a cluster, another outputs.conf file is needed with the following content:
[tcpout]
defaultGroup=my_LB_peers

[tcpout:my_LB_peers]
autoLBFrequency=40
server=IP_indexer_1:9997, IP_indexer_2:9997
useACK=true
In the outputs.conf file, you must specify the IP addresses of the cluster indexers.
After setting up the Forwarder and Deployment Server, you can upload data and perform searches through the Search Head. It should be noted that there will be no test index on SH in the list of indexes, but a search on this index will be carried out.
Conclusion
Thus, we deployed a cluster that replicates data, created a new index in it, and told how to configure sending data to the cluster.
Please note :
If you have errors during the deployment process, check the following points:
1. All ports must be open to the firewall (8089, 8080, 9997)
2. The names of the machines used in Splunk should not be the same. You can change them in the ..splunk / etc / system / local / server.conf directory
[general]
serverName = Indexer1
pass4SymmKey = $1$0rPdsD/7byyP
If you are interested in this topic or Splunk as a whole, then write comments, we will be happy to answer you. Also in our blog there are many other articles that relate to Splunk and can help you learn a lot of interesting things about implemented cases, functionality and much more. Subscribe to our VK group and Telegram channel if you want to keep abreast of new articles. You can also write us a request through the form on our website .
We are the official Premier Splunk Partner .

PS
On June 28, 2018, “ Splunk Getting Started ” will be taught in Moscow , where in 6 hours the participants will receive a theoretical base and practical skills for working in Splunk. Learn more about learning and register at this link .
Source: https://habr.com/ru/post/354970/
All Articles