Plausible reconstruction of Instagram-like filters
There is a bunch of software that allows users to apply different color filters to their picture. Instagram was a pioneer in this business, and sometimes you want to make filters already familiar to users in your application. And I want to present a set of utilities that will allow in a semi-automatic mode to very accurately reproduce the color filters from other applications in my application.
https://github.com/homm/color-filters-reconstruction
People like Instagram filters. They try to reproduce them again and again . And again and again . And again and again . The problem with these attempts is that people are trying to manually adjust the color correction, which will be at least somewhat similar to what the original filters do. For me it was much more interesting to try to reproduce the filters based on more reliable methods and mathematics. And it seems that this is the only attempt to really accurately recreate the color filters.
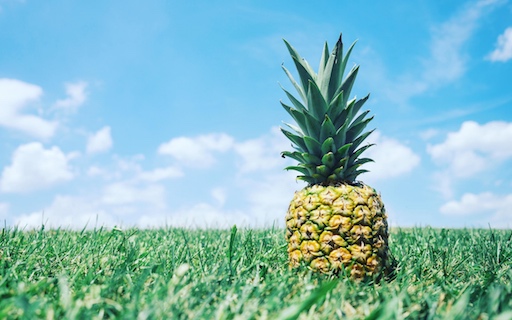
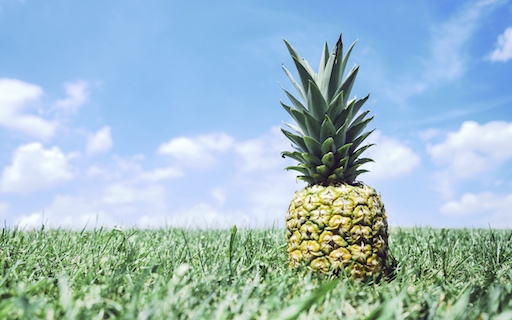
For example, one of the following images was taken using the Clarendon filter on the original image on Instagram itself, and the other using the overlay of the restored filter. Try to guess which recovered.

For comparison, this is the result of applying the same filter from the commercial set of “Instagram-like filters”, which you can easily google:
This filter with a stretch can be called similar to the original.
How it works
The method is based on three-dimensional search color tables (3D color LUT) and their two-dimensional representation - images of Khald . The basic idea is very simple - a sample of the image of Khalda with a uniform color distribution is processed using the original filter, the color transformations of which you want to reproduce. The Hald image processed in this manner can be used to very accurately approximate the color transformations of the original filter.
The resulting image of Khald can be used in a variety of programs and libraries, such as GraphicsMagick or Photoshop. It can also be used in applications for macOS and iOS using the CocoaLUT library. In addition, the image of Khalda can be converted to a 3D LUT cube format, which is very common in video processing applications. And a small spoiler: support for 3D color LUT will appear in the next version of Pillow 5.2 for Python.
Restrictions
This method can capture only uniform color conversions. Any scratches, gradients, vignetting and other textures applied over the image will not get into the reconstruction and will even interfere with the correct reconstruction. Also, the reconstruction is not very likely if the original filter acts differently in different areas of the image.
Nevertheless, in my opinion, this method most likely restores 32 of 40 instagram filters (except for vignetting, which is not difficult to apply after processing) and with varying success allows you to achieve something similar for the remaining eight.
Requirements
To generate and convert images of Hald, you need a Python interpreter with pip.
$ git clone https://github.com/homm/color-filters-reconstruction.git $ cd color-filters-reconstruction $ pip install -r requirements.txt After receiving the images of Khald, you no longer need any software from this repository. But you will need some library that can use them. This can be GraphicsMagick, which has bindings for most popular languages, including Python, Ruby, PHP, JavaScript ™, and a command line interface.
Manual
First you need to create a single image. Just follow:
$ ./bin/generate.pyYou will see a file called
hald.5.png. The number in the file name is the square root of the search table size. That is, 5 means that the file contains a table of25×25×25elements.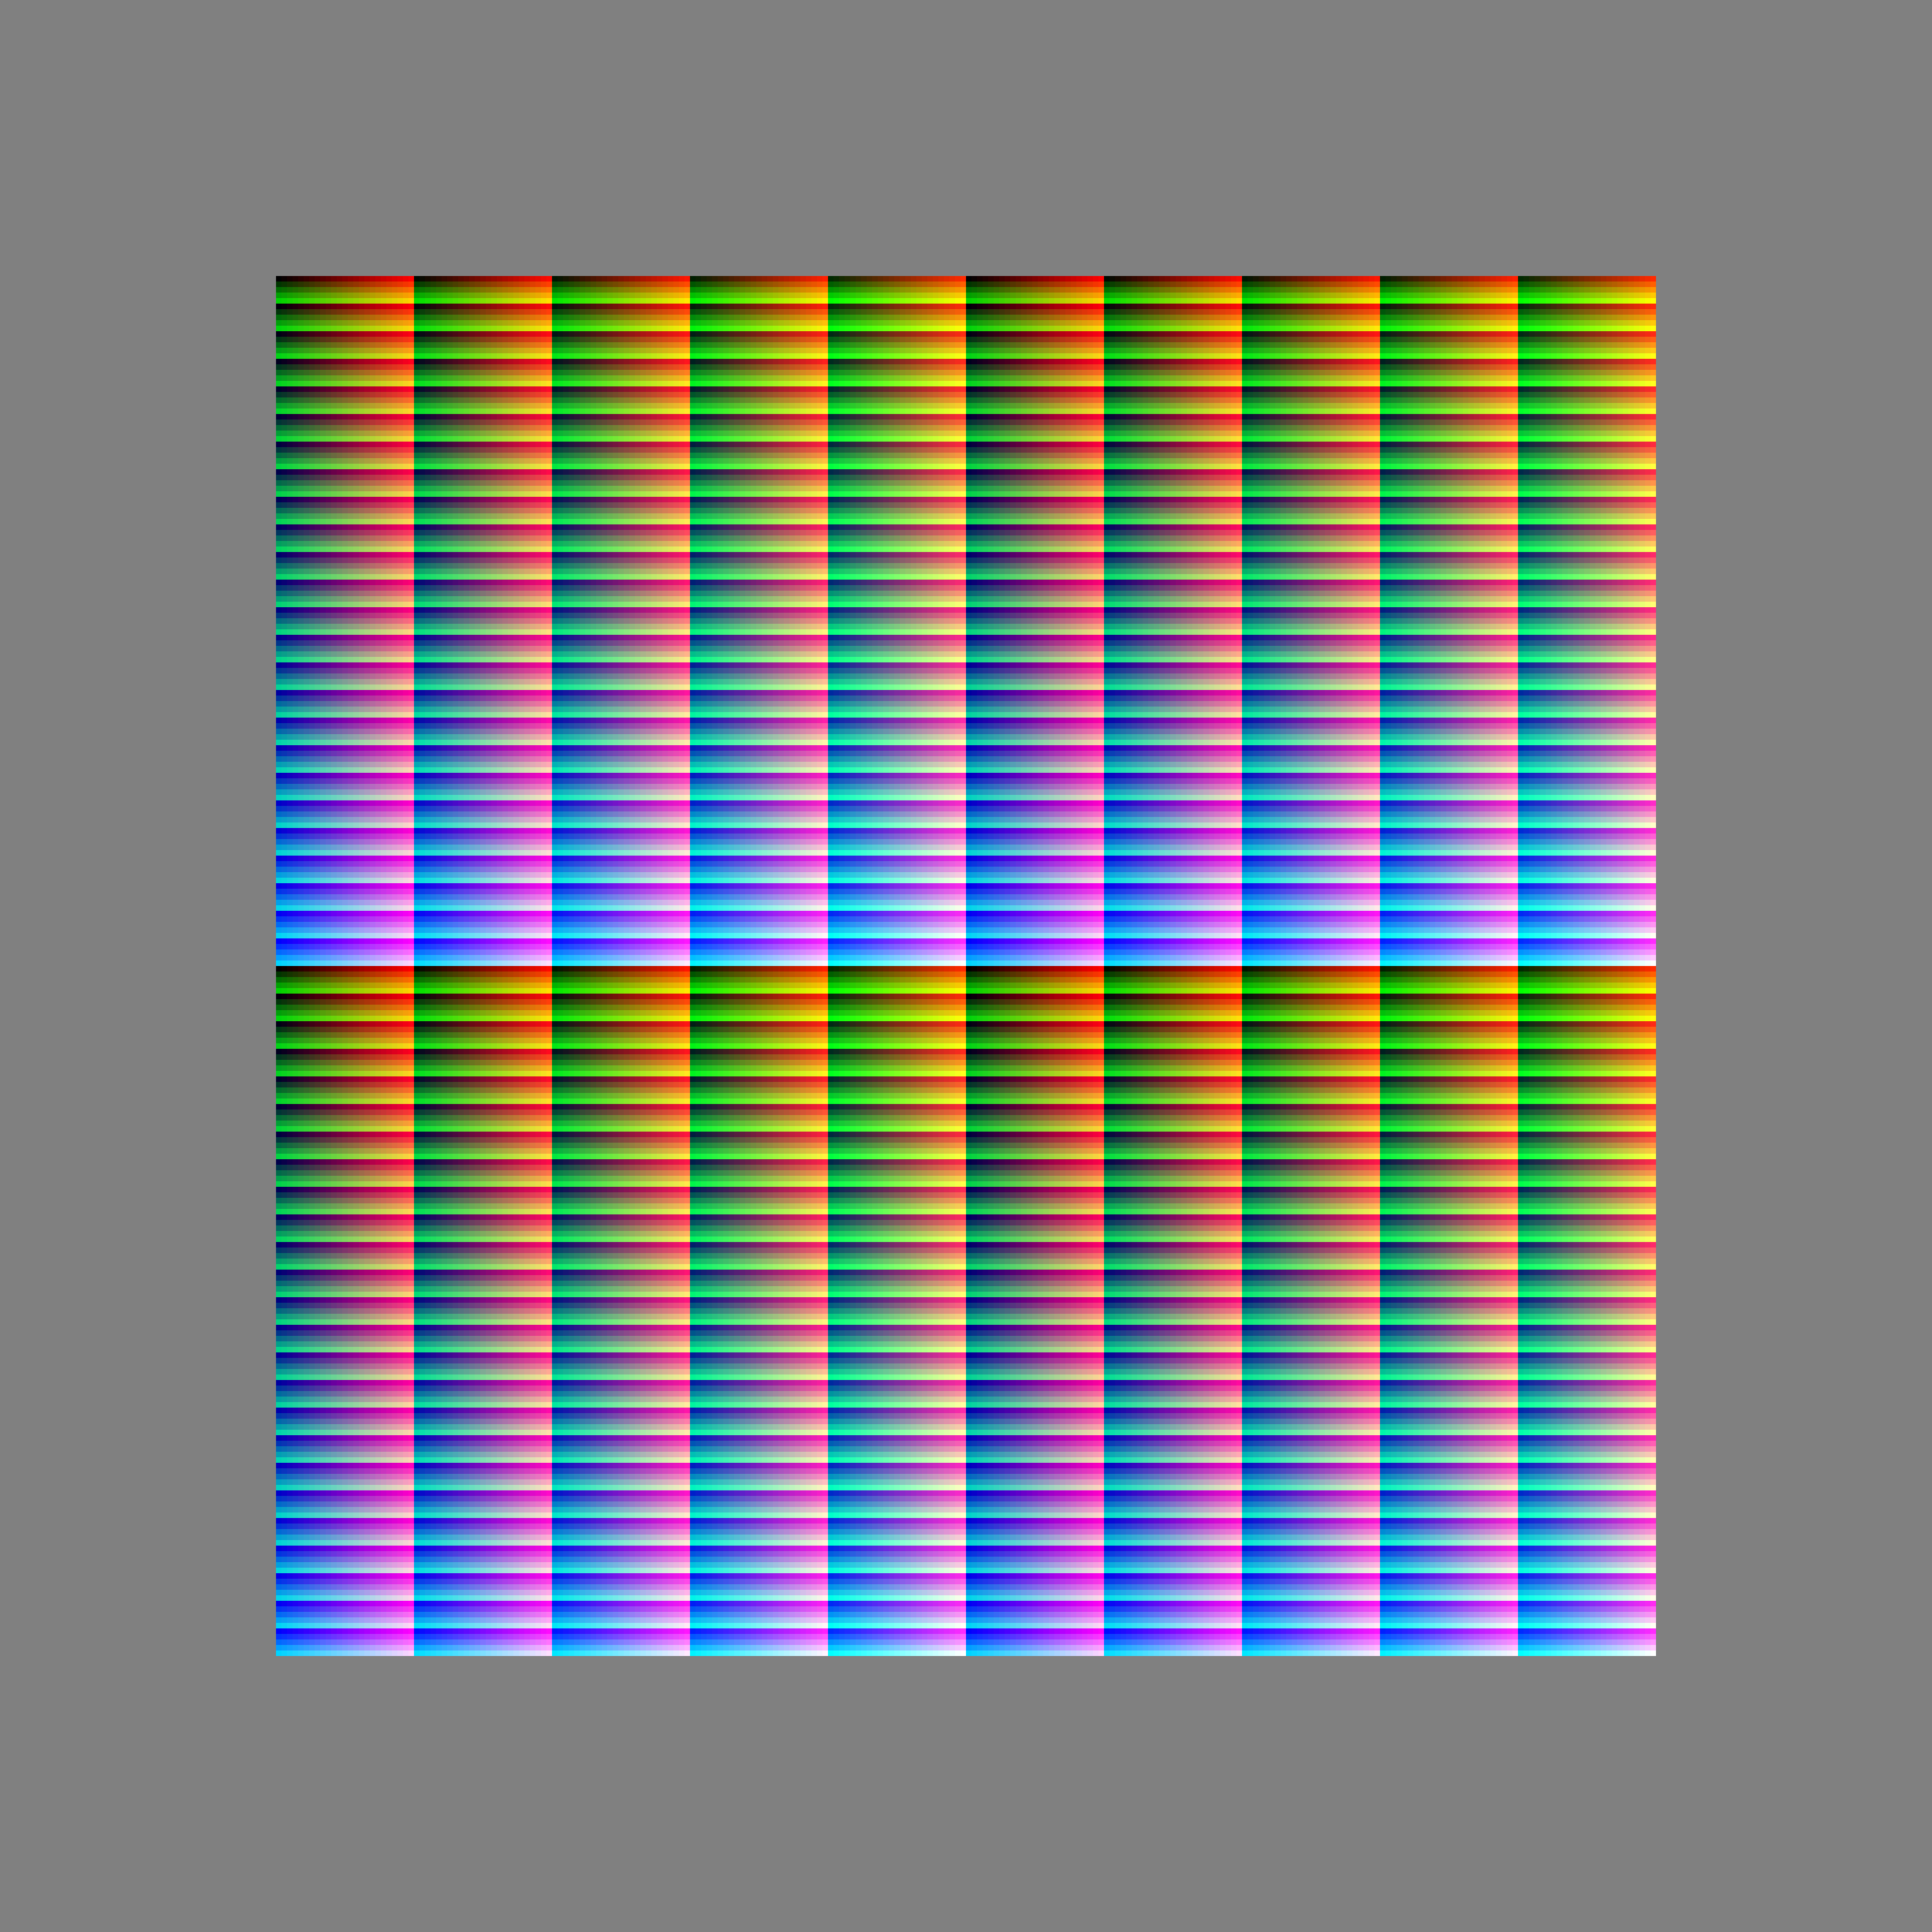
This file is slightly different from the usual representation of the images of Khald. In it, the table is replicated 4 times and indents are added. In addition, each table cell occupies not one pixel, but a square of 8 × 8 pixels. All this is done to withstand the various distortions of both the source filter itself and JPEG compression.
Process a single image using the original filter. If we are talking about Instagram, then a single image should be uploaded to a mobile device and published with the imposition of the filter of interest. After that, the processed single image will appear in the photostream. It also needs to be taken back from the device.
It is important that the resolution of the resulting image with the filter is exactly the same as the original single image.
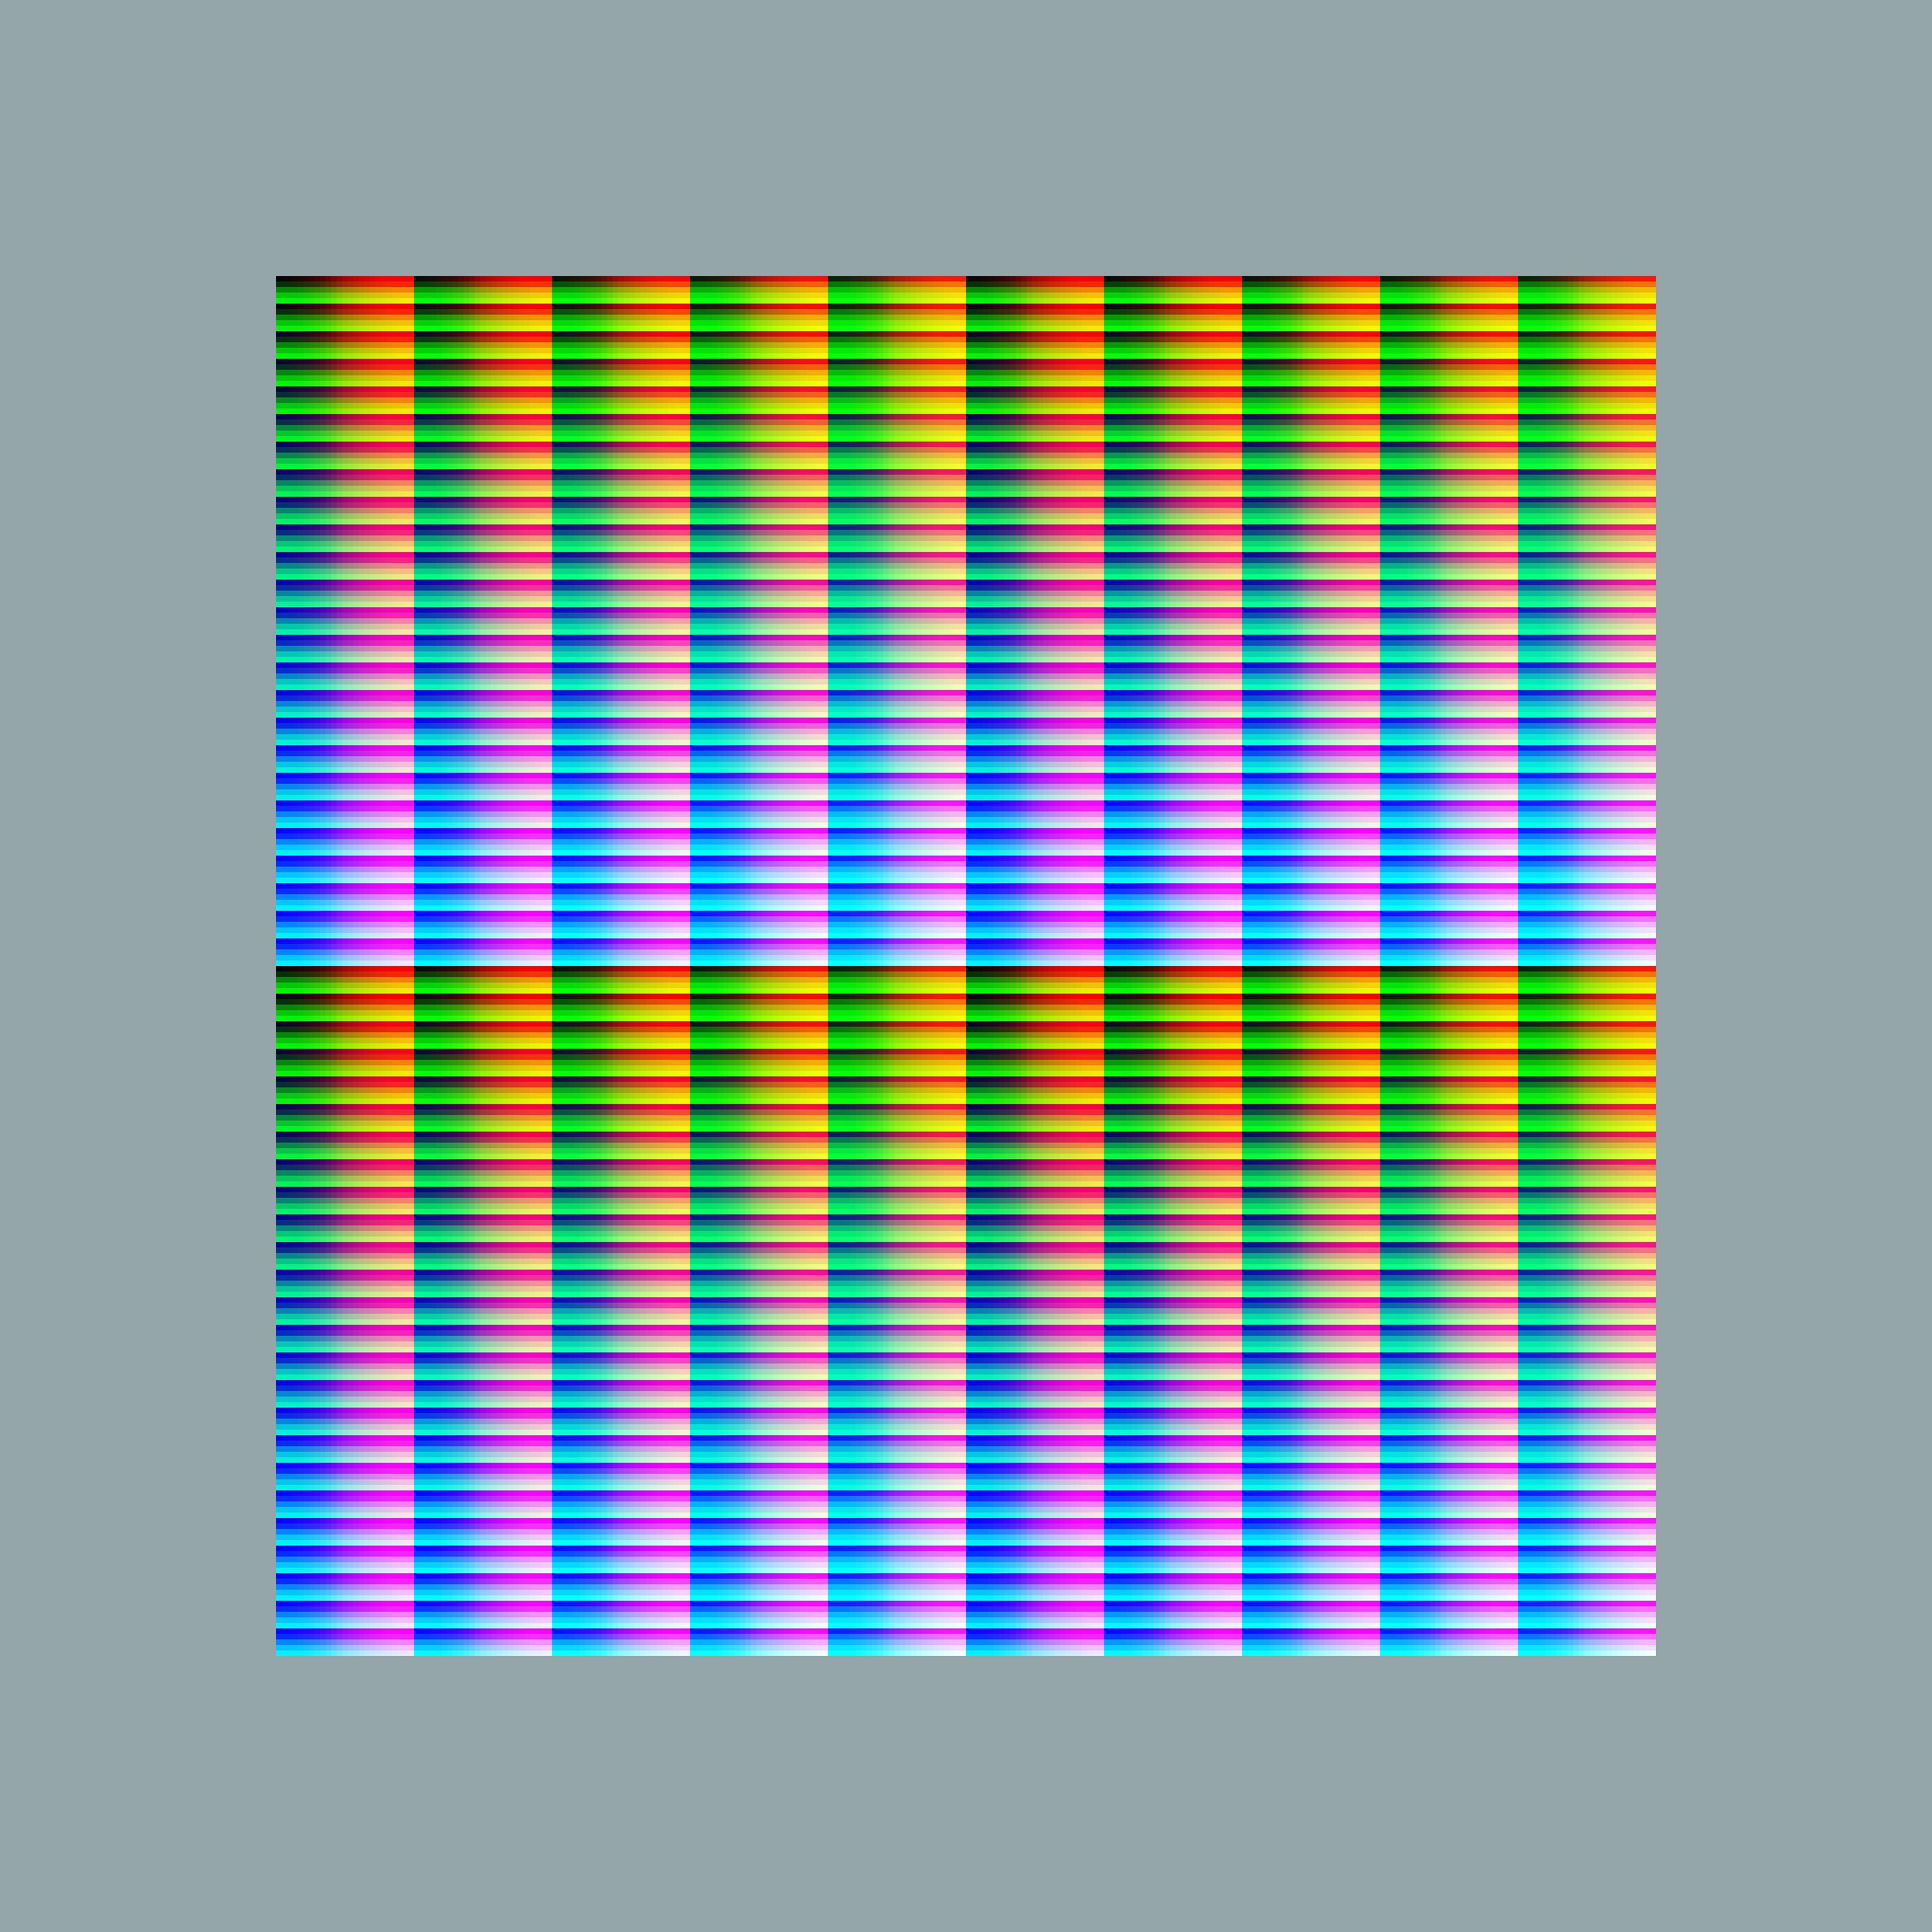
Convert the filtered image into the real image of Khald:
$ ./bin/convert.py raw/1.Clarendon.jpg halds/Here
halds/is the directory where the resulting filter will go.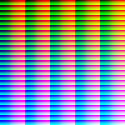
You are wonderful! The resulting filter can immediately be applied to any other images.
$ gm convert sample.jpg -hald-clut halds/1.Clarendon.png out.jpeg

Additional tips
Although the default settings in most cases allow you to get high-quality Khulda filters, there are situations when this is not enough.
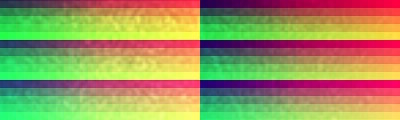
Some unwanted effects can occur if the source filter has strong local distortions or noticeable gradients in the center of the image. The most noticeable unpleasant effect is monochrome stripes. Here, for example, the original image and the image obtained after processing the restored Hudson filter, in which these problems are most noticeable:
# $ ./bin/convert.py raw/15.Hudson.jpg halds/ # $ gm convert girl.jpg -hald-clut halds/15.Hudson.png girl.15.jpg 

On the processed image, objects look flat and pasteurized: face, hair, chairs in the background. Although pasteurization is a fairly common effect in image processing, it was not part of the original Hudson filter.
If you take a closer look at a single image with a Hudson filter applied , you will notice that it is rather noisy. And this is the source of the problem.
Fortunately, you can ask the convert.py utility to apply a three-dimensional Gaussian blur to the lookup table during conversion, which will reduce the noise. To do this, you need to install the SciPy package (included in the macOS package by default).
# $ pip install scipy $ ./bin/convert.py raw/15.Hudson.jpg halds/ --smooth 1.5 $ gm convert girl.jpg -hald-clut halds/15.Hudson.png girl.15.fixed.jpg 
As you can see, all the unpleasant effects are gone. You can find other options from convert.py by executing ./bin/convert.py --help .
Good luck with reverse engineering!
')
Source: https://habr.com/ru/post/354934/
All Articles