Failover VoIP Cluster 3CX
The 3CX failover cluster consists of two replicated PBX servers. When the main server fails, the replica server is activated, minimizing the time of telephony failure. In this article, we will look at how to correctly configure the fault tolerance of the 3CX PBX.
To use fault tolerance, you will need one Enterprise (ENT) or Professional (PRO) license. The ENT license sets the lifetime (TTL) of the 3CX A-record FQDN of the server to 5 minutes. In the PRO TTL license, A-records are set to 6 hours. This means that in the PRO edition, the time for emergency reconnection of IP phones, 3CX clients, 3CX SBC clients and the web client will be much higher.
3CX uses the principle of active-passive cluster with configuration replication once every minimum of 24 hours. The primary (active) node performs the processing of VoIP calls, and the backup (passive) node monitors the active host. If the active host fails (regardless of the cause), the passive host starts working from approximately the same state. The mechanism for determining the failure of an active host depends on the settings on the passive host and is discussed below.
')
3CX failover cluster is designed to work in the following topologies:

Fault tolerance between local and cloud nodes is not officially supported. It is also assumed that the FQDN of the 3CX server is provided and maintained by 3CX. Of course, you can use a more complex topology and your own FQDN name, but in this case, managing DNS records and reconfiguring devices is the responsibility of the system administrator.
Before running a failover cluster on 2 servers, 3CX server should be installed as follows:
In other topologies, for example, one node in the private network and the other in the cloud, you need to use scripts to update the DNS A records. Scripts must be executed at the time of the failover. Below we will talk about this in more detail.
Suppose that the main (active) server is already installed and configured 3CX v15.5.
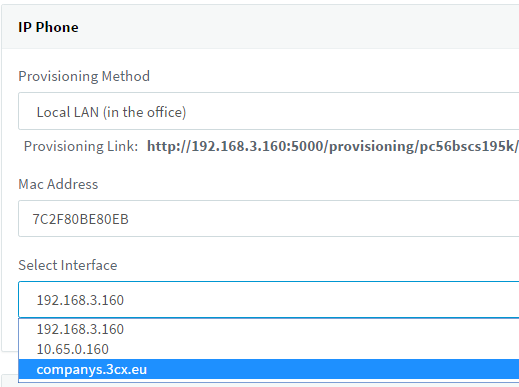
For all extensions, specify the option of auto-configuring IP phones via the FQDN (Auto-configuration tab of the phone, option Select interface).
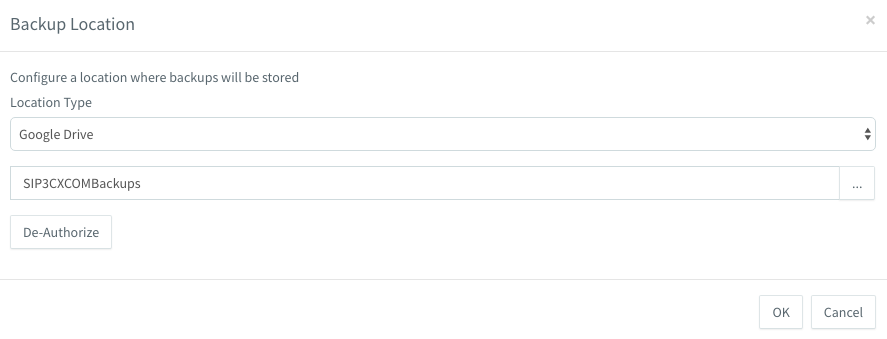
In the Backup section, click the Location button and select Google Drive. You can choose a different location accessible from both servers. In our example, the cluster stores the configuration in the SIP3CXCOMBackups folder on Google Drive.
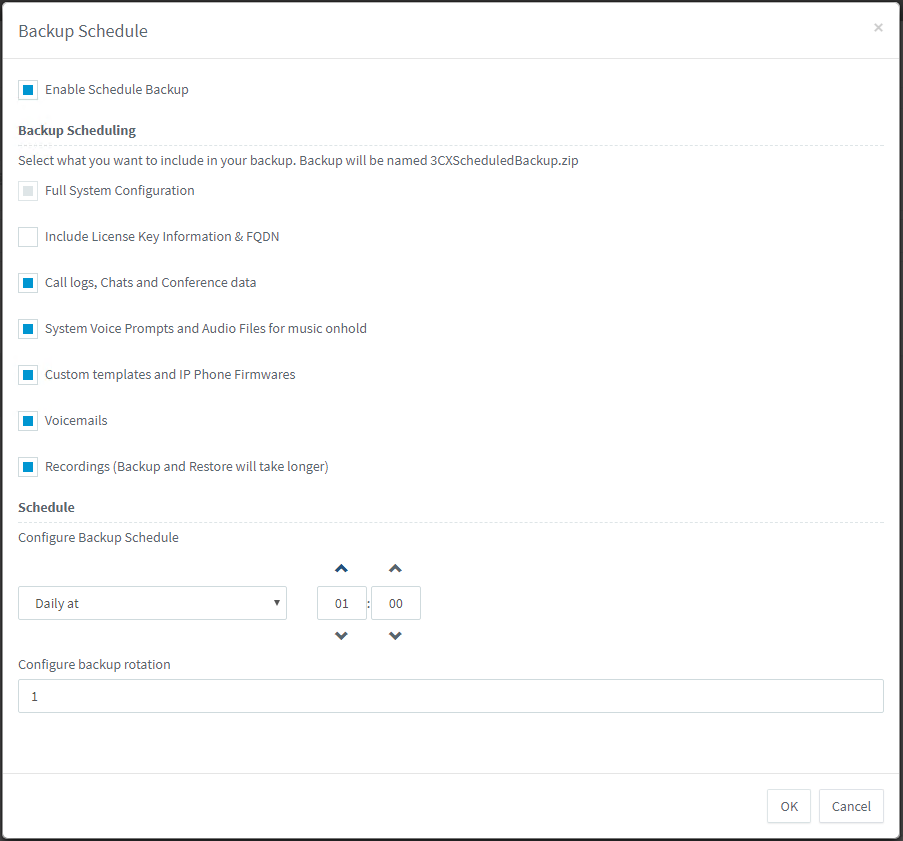
Click the Backup Plan button and select the data that you want to synchronize in the cluster, as well as the synchronization time. It is recommended to set up daily night synchronization, as shown above. The backup file name 3CXScheduledBackup.zip has been re-sliced to 3CX for the last unloaded configuration and is used by both nodes in the cluster.
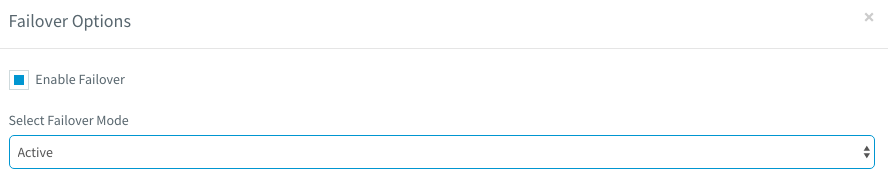
In the same section, click the Failsafe button, enable the Enable backup option and select Backup Switch Mode - Primary.
This completes the configuration of the active cluster node.
Install 3CX on the backup server, taking into account the prerequisites listed above. Please note that if your primary and backup servers use different public IP addresses, after installing a backup server, the common FQDN of the cluster will be resolved to the backup node (and first, after installing the primary server, it resolves to its IP). In order to associate the FQDN with the IP address of the main server again, on the main server in the Home section, click the License link, then click Change and OK. Now the FQDN will start pointing to the IP of the main server again.
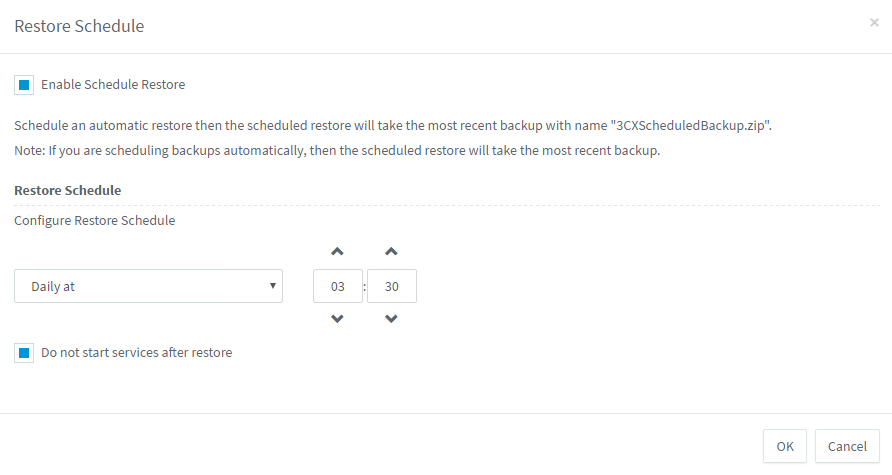
Go to the Backup section and click the Recovery Plan button. Turn on recovery and specify the recovery time (of course, it should be a little bit later than the backup time). Then set the Do not start services after recovery option.
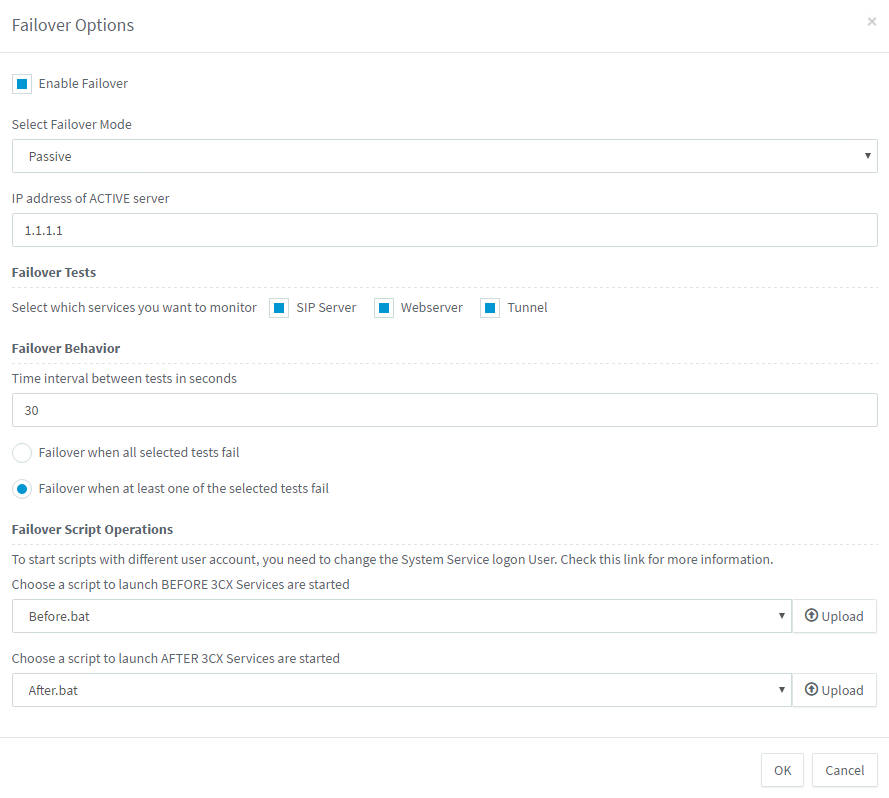
In the same section, click the Failsafe button, enable the Enable backup option and select Backup Switch Mode - Backup. Specify the IP address of the main server (in our example 1.1.1.1) and the services that should be monitored: SIP Server, Web Server or Tunnel Server. Set the check interval and the switching triggering logic — when only one service or all services “crashes”.
If the backup server detects a primary failure, it is activated using the data from the last restored backup. In addition, it notifies DNS 3CX (which is located in the Google infrastructure) of the change of the A-record FQDN to the IP address of the backup host.
It is important that the “fallen” primary server be completely shut down, because if it has 3CX services running on it, there may be a conflict with similar services on the backup node.
It should be noted that 3CX does not officially support the operation of FXO or FXS gateways in a failover cluster, since the interaction of the gateways and the server in such a topology depends on the features of the vendor, the specific model and firmware version.
If you use your own FQDN in the LAN-LAN topology or the LAN-Cloud topology, you need to use special scripts (in Windows, this is Powershell fault-tolerance scripts for Active Directory ) that run with certain privileges.
By default, scripts that can run during the backup switching process run with the privileges of the 3CX Event Notification Manager service (by default, Local System). As a rule, to run the script, you need the privileges of managing the DNS server (dnscmd or psexec).
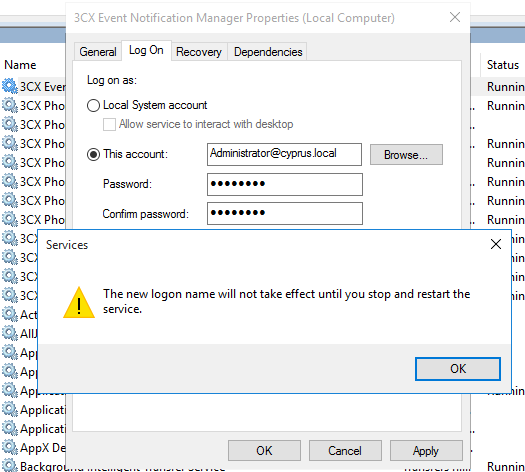
Click on the service in the corresponding Windows snap-in and on the Log On tab, change the account from the Local System to the one that has the appropriate privileges to configure the DNS, and restart the service. It is recommended that you create a separate user with this privilege and set him an unchangeable password.
Licensing
To use fault tolerance, you will need one Enterprise (ENT) or Professional (PRO) license. The ENT license sets the lifetime (TTL) of the 3CX A-record FQDN of the server to 5 minutes. In the PRO TTL license, A-records are set to 6 hours. This means that in the PRO edition, the time for emergency reconnection of IP phones, 3CX clients, 3CX SBC clients and the web client will be much higher.
Fault tolerance implementation
3CX uses the principle of active-passive cluster with configuration replication once every minimum of 24 hours. The primary (active) node performs the processing of VoIP calls, and the backup (passive) node monitors the active host. If the active host fails (regardless of the cause), the passive host starts working from approximately the same state. The mechanism for determining the failure of an active host depends on the settings on the passive host and is discussed below.
')
Supported Network Topologies
3CX failover cluster is designed to work in the following topologies:
- Local Server (NAT)
- Cloud (public server)
Fault tolerance between local and cloud nodes is not officially supported. It is also assumed that the FQDN of the 3CX server is provided and maintained by 3CX. Of course, you can use a more complex topology and your own FQDN name, but in this case, managing DNS records and reconfiguring devices is the responsibility of the system administrator.
Prerequisites
Before running a failover cluster on 2 servers, 3CX server should be installed as follows:
- One 3CX in the cloud (first public IP) and another PBX in the cloud (second public IP) with a FQDN name from 3CX
- Both servers are installed with identical settings - the same FQDN, SSL certificate and SIP ports, tunnel and web server.
- In the IP phone auto configuration tab, you must specify the interface as a FQDN, and not as an IP address (see below).
In other topologies, for example, one node in the private network and the other in the cloud, you need to use scripts to update the DNS A records. Scripts must be executed at the time of the failover. Below we will talk about this in more detail.
Configure the primary node
Suppose that the main (active) server is already installed and configured 3CX v15.5.
For all extensions, specify the option of auto-configuring IP phones via the FQDN (Auto-configuration tab of the phone, option Select interface).
In the Backup section, click the Location button and select Google Drive. You can choose a different location accessible from both servers. In our example, the cluster stores the configuration in the SIP3CXCOMBackups folder on Google Drive.
Click the Backup Plan button and select the data that you want to synchronize in the cluster, as well as the synchronization time. It is recommended to set up daily night synchronization, as shown above. The backup file name 3CXScheduledBackup.zip has been re-sliced to 3CX for the last unloaded configuration and is used by both nodes in the cluster.
In the same section, click the Failsafe button, enable the Enable backup option and select Backup Switch Mode - Primary.
This completes the configuration of the active cluster node.
Backup node setup
Install 3CX on the backup server, taking into account the prerequisites listed above. Please note that if your primary and backup servers use different public IP addresses, after installing a backup server, the common FQDN of the cluster will be resolved to the backup node (and first, after installing the primary server, it resolves to its IP). In order to associate the FQDN with the IP address of the main server again, on the main server in the Home section, click the License link, then click Change and OK. Now the FQDN will start pointing to the IP of the main server again.
Go to the Backup section and click the Recovery Plan button. Turn on recovery and specify the recovery time (of course, it should be a little bit later than the backup time). Then set the Do not start services after recovery option.
In the same section, click the Failsafe button, enable the Enable backup option and select Backup Switch Mode - Backup. Specify the IP address of the main server (in our example 1.1.1.1) and the services that should be monitored: SIP Server, Web Server or Tunnel Server. Set the check interval and the switching triggering logic — when only one service or all services “crashes”.
If the backup server detects a primary failure, it is activated using the data from the last restored backup. In addition, it notifies DNS 3CX (which is located in the Google infrastructure) of the change of the A-record FQDN to the IP address of the backup host.
It is important that the “fallen” primary server be completely shut down, because if it has 3CX services running on it, there may be a conflict with similar services on the backup node.
It should be noted that 3CX does not officially support the operation of FXO or FXS gateways in a failover cluster, since the interaction of the gateways and the server in such a topology depends on the features of the vendor, the specific model and firmware version.
Scripts in a complex topology
If you use your own FQDN in the LAN-LAN topology or the LAN-Cloud topology, you need to use special scripts (in Windows, this is Powershell fault-tolerance scripts for Active Directory ) that run with certain privileges.
By default, scripts that can run during the backup switching process run with the privileges of the 3CX Event Notification Manager service (by default, Local System). As a rule, to run the script, you need the privileges of managing the DNS server (dnscmd or psexec).
Click on the service in the corresponding Windows snap-in and on the Log On tab, change the account from the Local System to the one that has the appropriate privileges to configure the DNS, and restart the service. It is recommended that you create a separate user with this privilege and set him an unchangeable password.
Source: https://habr.com/ru/post/354722/
All Articles