Animations in the world of states
Many have already learned how to build clean interfaces and write “undo-redo” in a few lines. But what about the animations? They are often bypassed, and they do not always fit into the (state) DOM approach. There are great solutions like React Motion, but what if you need to do complex animations or work with Canvas using a physics engine?
Our text describes how to work with animations in React-applications, and compares several approaches (D3, React-Motion, “dirty components”). And also about how to "run" animations in Redux-applications. The material is based on the decoding of the report by Alexey Taktarov from our December conference HolyJS 2017 Moscow. We attach at the same time the video of this report:
Careful traffic: under the cut a lot of pictures and gifs (you know, the material about the animation).
I would like to start with a story. If you were in ancient Rome about the first century BC, you could meet Vitruvius.
')

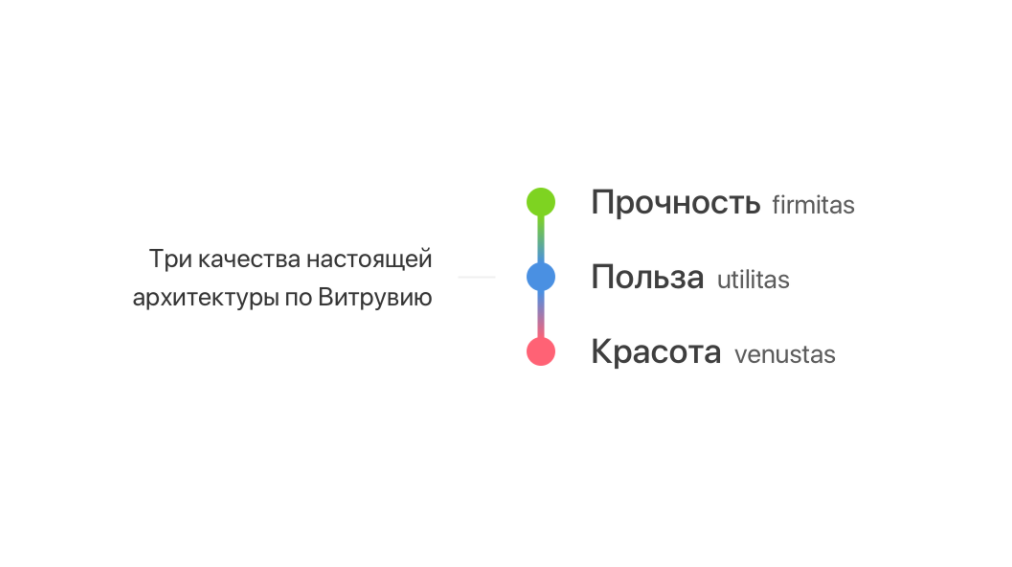
Vitruvius is one of the most famous architects of the time. He wrote 10 volumes on architecture. His works were inspired by many. But the most interesting thing is that in one of the books he brought out three main qualities that good architecture should have: strength, usefulness and beauty.
It seems to me that this triad can also be found in the design of the things we use. Why all this? We - the developers - write applications, sites. We do things that people use. Therefore, we, too, I think, should take a look at the rules that were derived two thousand years ago. After all, the applications that we do should solve specific tasks of people.

I think the whole point is in the feedback. This is the key point. And to some extent the feedback is animation, transitions between states.
Further I will talk about animation in stateful applications using React as an example.
Before we talk about React, let's think about how animations work in browsers in general, and what it is.
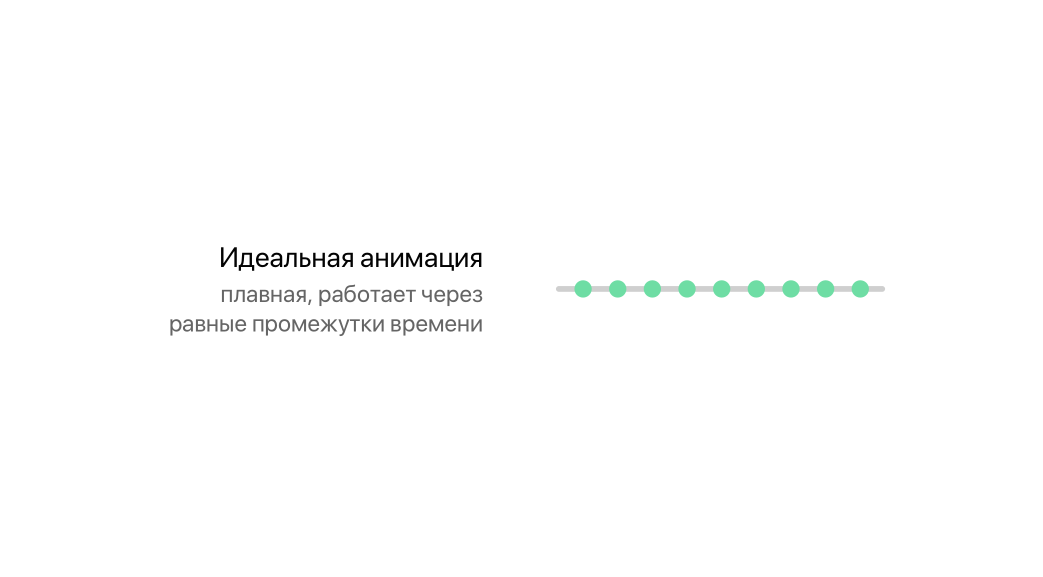
In the ideal world, animations should work smoothly. It would be naive to believe that they can be done, for example, using setinterval or settimeout. And here there are two misconceptions.
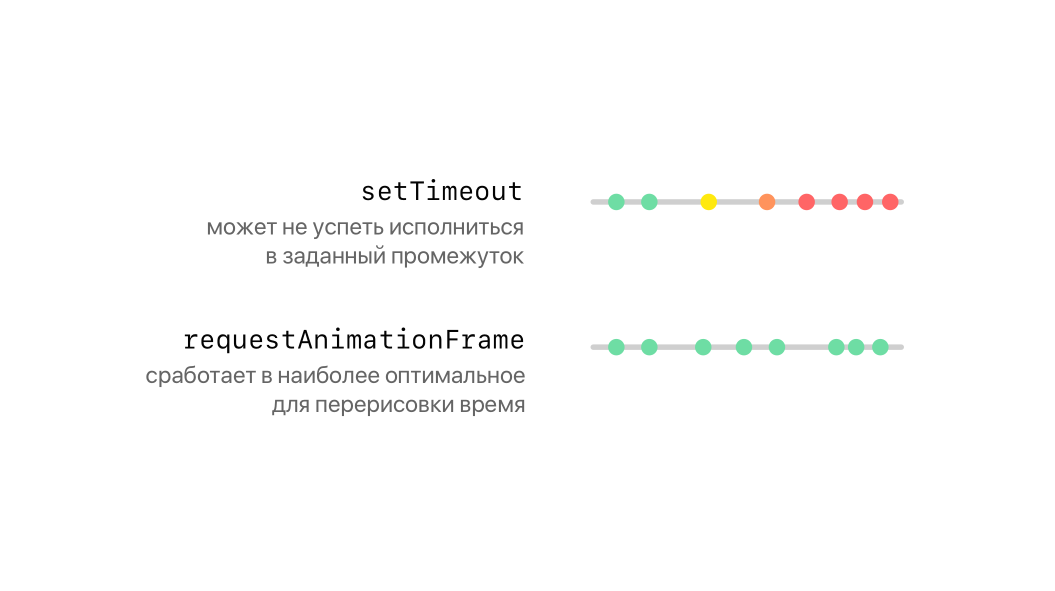
We are wrong . Because we cannot use setTimeout for animation. After all, setTimeout will not guarantee that your function will actually work in the specified period of time. This can lead to effects such as frame blending. That is, you will think that your animation will come in 16 milliseconds, which roughly corresponds to 60 frames per second, but in fact it will work more, and this debt will accumulate and accumulate.
Fortunately, there is a function that allows you to deal with this problem - requestAnimationFrame. It guarantees that the callback will work at a convenient time for the browser scheduler. At the same time I want to note that it can also work at irregular intervals. If you want to use requestAnimationFrame, I highly recommend looking at which browsers you are targeting.
If you want to use requestAnimationFrame in your projects, then you will use something like this pattern. That is, you declare a function that will be triggered at the moment when the animation should occur. Then you call requestAnimationFrame - this will mean that we will execute our function at the right time.
Next interesting point. In principle, at the end of the function, we could call the planning of the next frame, but such a pattern is calling the requestAnimationFrame for the next frame at the very beginning. Since no one knows what can happen during the execution of a function. Maybe she, for example, will throw an exception. Therefore, it is better to immediately plan the next frame at the very beginning.
requestAnimationFrame is an indispensable tool for browser animations.
Next, you want to animate some property over time, for example, take the coordinate of some object and increase it by some constant, which is essentially speed. And here we are faced with delusion number 2.
The speed is constant!
View demo
Since the function is called at different intervals, this can happen if some other computations occur at the same time in the system, and you get another trajectory that will not satisfy you. Therefore, it is important to adapt how requestAnimationFrame works, based on the time difference. And requestAnimationFrame, as the first parameter, gives the timestamp, which is a certain timestamp since the browser was opened. In some browsers, this label will be a high accuracy label.
The rAF transmits a timestamp to the callback with an accuracy of five microseconds.
In general, you can expect that it will be some kind of double (if you use a polyfil, it is unlikely), which contains milliseconds to the comma, and microseconds - after.
We can use this label to calculate the difference between this and the previous function call.
It is important to count the time difference between calls and animate the value in proportion to the delta!
Therefore, we can enter a certain delta, which is the difference between the current label and the previous one for the call, and further we animate our variable, but only then it becomes a function. Now that delta, which we got, we pass into the function. And we consider speed proportional.
Let's see what happens.
View demo
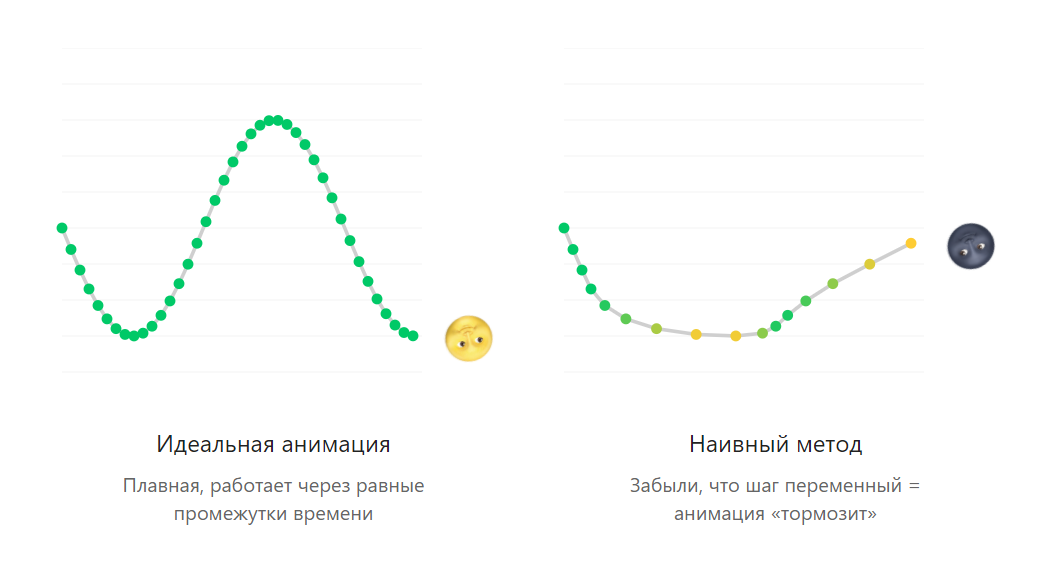
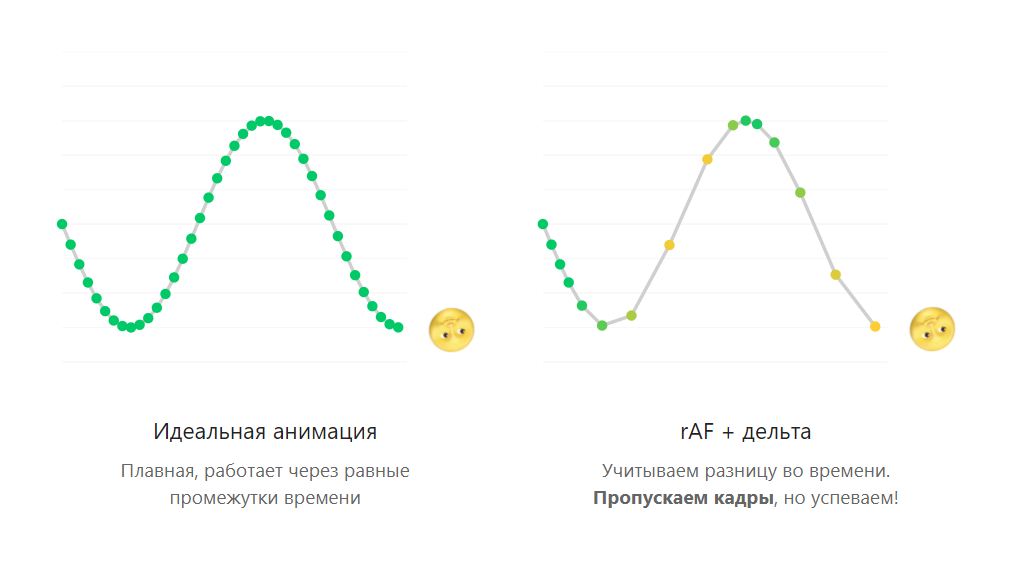
On the left - perfect animation, on the right - with our adaptive algorithm. You may notice that the calls still do not occur at regular intervals. And the animation on the right may not be as smooth as on the left - but it also has the same shape. That is, we guarantee that it will look the same. This is called frame skipping. Performing animation at a specified time interval is not normal, but skipping frames in the animation is completely normal. Therefore, using the delta approach, you can make high-performance animation.
In the video, it starts at 13:09 .
requestAnimationFrame is a great tool for arbitrary browser animations. Because on it you can do any logic for animation.
View demo
In the example, I derived particles that move according to some law. This is a simulation of the movement of birds during the flight. How would you make such an example in the browser? Most likely, you would get the function tick, which would be called at the moment of animation rendering. She would do two things: consider physics and then redraw.
About redrawing is very interesting, because if you use divs, as I am in the example, then in order to animate them quickly in browsers, you need to use transform. But if you used margin, padding, or absolute positioning, then nothing would work for you, and if it worked, it would be very slow.
It is very important that these elements have the property 'will-change: transform'. This will ensure that the squares will be immediately in a separate layer of the browser and then composted into one common. So it will be possible to achieve maximum performance. Then we go over all points and expose what the turn and position of the point on the screen will be.
Now, about stateful applications.
I’m sure that many work with stateful applications without even knowing it. And, most likely, they use an approach called Immutable UI.
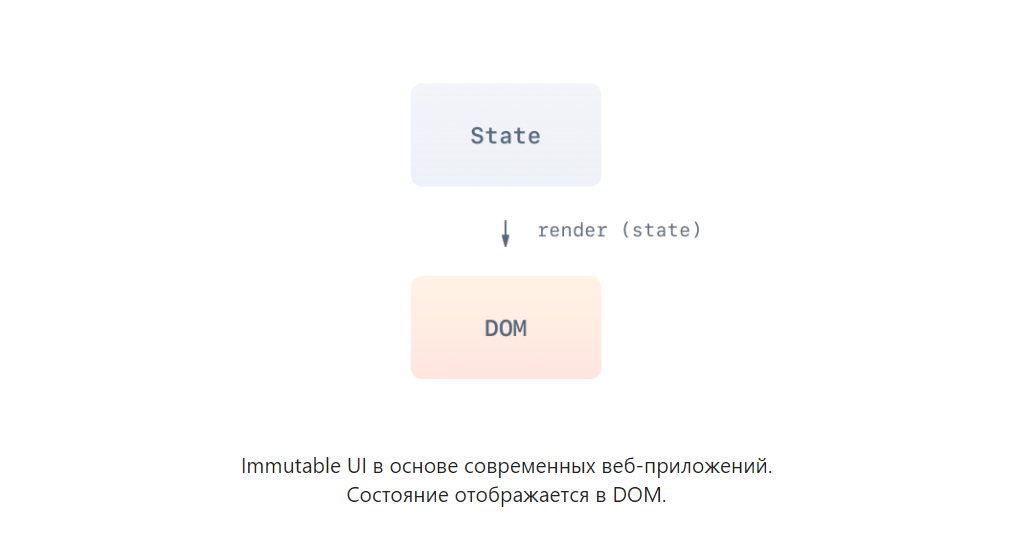
What is Immutable UI? This is when you have a certain state, and you uniquely translate it into elements on the page. This is usually just a render. That is, you call the render function, after which the data that you have is translated into elements, and you get the status on the page. Everything is great! But then you start to perform some actions on the page, drive with a mouse or press keys on the keyboard, thereby creating events.
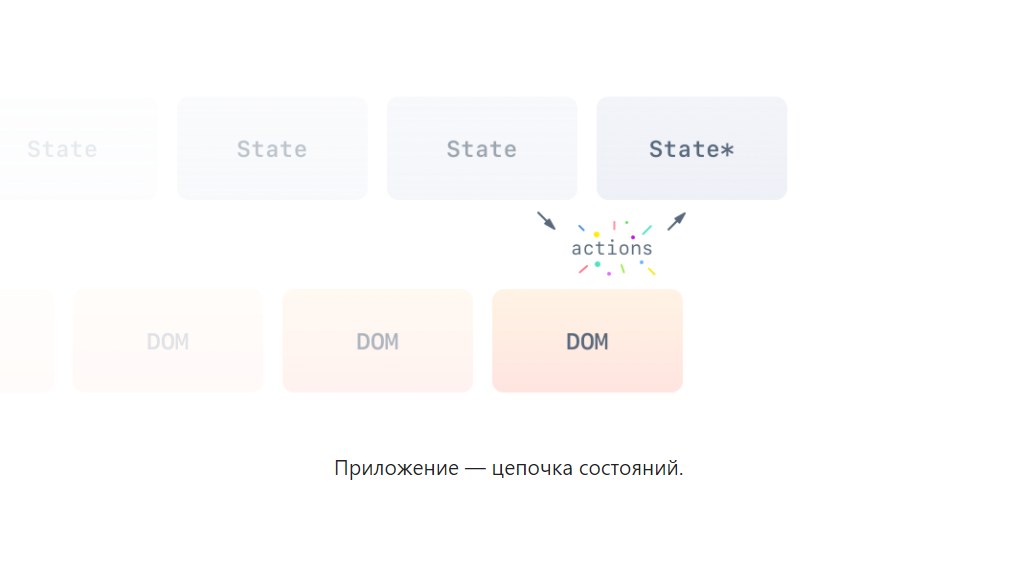
These events in your application cause states to change, as well as elements on the page. That is, in fact, our application is a chain of states and the corresponding states of elements on the page. But the problem is that if you work in react or in angular, then most likely for you, as a developer, this is hidden, because when you update the state, you see a redrawn new state on the screen. Therefore, the question arises as to what to do with animations in this case.
It should be noted that such an approach Immutable UI has many advantages, because you can easily test it and do absolutely crazy things.
In the example under the spoiler, I made a semblance to do sheet (from 6:55 pm , insert the spoiler).
I changed the states of his items, then brought them all at the same time and could travel back in time with respect to my actions. All this is very cool.

Let's now take a look at the easiest way to create animation in Immutable applications. These are css transitions.
CSS animations in React work out of the box. Property transition + state change = animation.
They are good because they are suitable for almost all the tasks that you have. They work in the same way as our state-based applications. We define a property, say how we want to animate it, how it should go from one state to another. In addition, there are patterns for working with animation in React and other libraries.
One of the patterns is replacing one class with another. Well, you can manually change the styles on the element. This is all clear.
View demo
I made an example to demonstrate how CSS transitions work in React applications. We have a set of points, according to a certain law, I translate them into coordinates and draw them. This is just an array of elements with different properties. If I completely change all the data, the image will change instantly, and the browser will finish the transition itself.
In some cases, CSS transitions do not behave very naturally. For example, if you run one animation and at the same time another one, then nothing will break, because the browser knows how to stop and go to a new state. But real programs should not work that way.
Fortunately, in the case of React there is a React-Motion library. And on it I made the second demo ( 21:25 ). We took the same example: there is an array of points, we change their state, but we get a wrapper called Motion. Everything happens the same way, and the library itself makes the transitions manually.
View demo
React-Motion uses something similar to a physics engine. That is, if you overlay the animation on each other, you will notice that the movements have become spring-loaded, and in general it looks nice.
In React, it looks like this.
React-Motion uses an excellent function-as-a-prop pattern. If you have any component and it has a body, its children, then these children need not be elements. They can be any type of data, including a function that takes a state and returns items. Such a recording scares newbies a little, but it works very well. You may think that React-Motion climbs into the DOM, changes some properties. In fact, it is not.
This is the same requestAnimationFrame, about which we spoke at the very beginning, and at each animation step we simply update their state. That is, each frame is a new state, a new render. Surprisingly, it works.
View demo
One tip - do not use React-Motion everywhere.
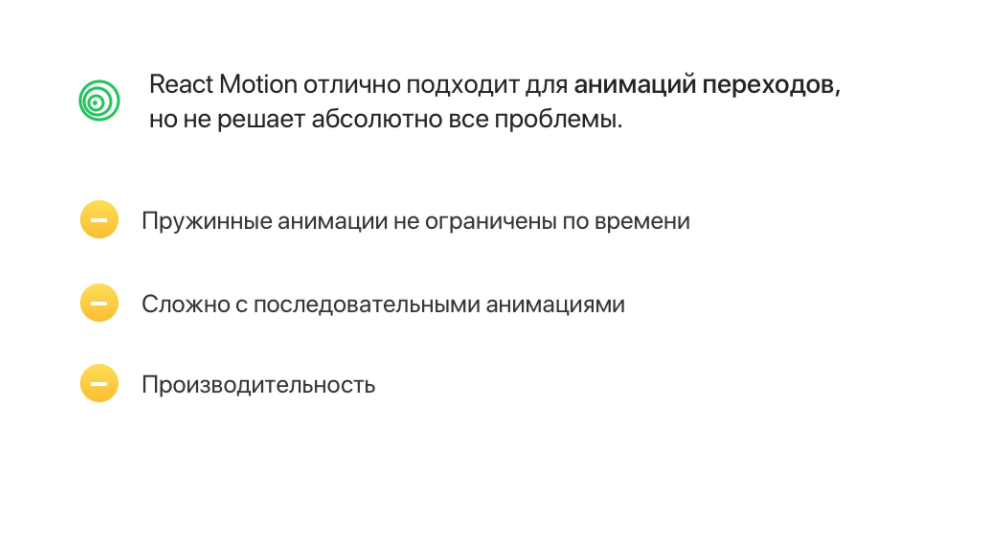
Unfortunately, it is not suitable for all cases. Spring animations are not limited in time, that is, you need to make an animation that will run and run for 10 seconds, then React-Motion is not an assistant here.
It is also difficult to work with complex animations, where one element is first animated, and then the second. In principle, this can be done by the library, but it will not be very convenient.
And finally, performance. Anyway, nothing can compare with manual animation, that is. when we climb into an element and change its transform. Therefore, in some cases, React-Motion behaves “gluttonously”, although it works well.

Dirty animations - animations in which not always everything can be built on states.
The “animation on input” pattern works through the componentDidMount hook and direct access to the element.
Let's take a look at this using a dialog box. You probably met this when you needed to show or hide the dialog box. Most often, this was done using the componentDidMount pattern, that is, there is a hook in React that is called after the component has been added to the DOM. But there is a problem: the dialog box may leave the DOM before the animation ends. Therefore, this also needs to be monitored.
If you are working with dirty input animations, that is, you are animating something at the input, the best advice is to save the animation handle and then cancel it if the component leaves the DOM ahead of time. This feature is available when using the Velocity or jQuery animate libraries.
That is, you can extract the component before the animation ends.
View demo
In our example, the dialog box disappears immediately, and in principle we cannot animate the output. Usually you get a certain flag that is responsible for showing the window or not, and you optionally render this component. And here it will not be possible to make the output animation, because as soon as the component leaves the DOM, it will not be possible to animate it. And with this you need to do something.
So let's write a wrapper that will work similarly and allow us to do output animation. In our case, I called it Animated.
When the child elements appear inside, we start the input animation, and as soon as they disappear, we make the output animation and look at the edge cases.
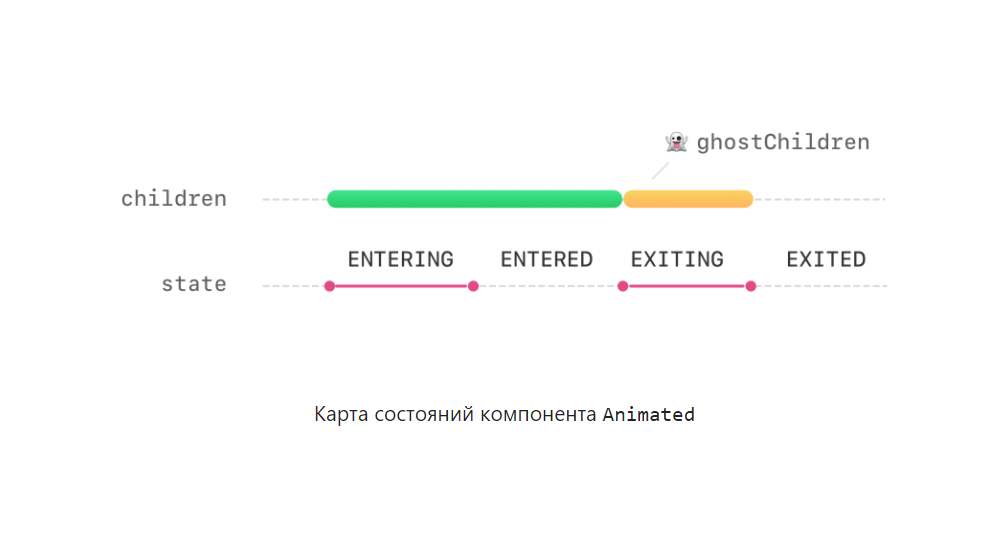
If we imagine how the component could work, then we get just such a map. We have four states in which a component can be at a certain moment: when it is animated, when on the screen, when it goes out and when it is already released. With the first two states, everything is clear (entering, entered), but the question is what to do with the state (exitting) when the component goes out? We no longer have these children who have been given to us. We have to draw something. Therefore, you can use such a trick, which is called ghostChildren, that is, leave it on the elements and components until the animation works.
What is behind JSX?
When we need to make an exit animation, we take the children, save, add to the state and make an exit animation. In general, the code is not very pleasant.
When we get new children, we can see that they have changed. In this function, we look at what state we want to go to and what additional options we take. The most important thing is that, using the link to the component, we can call its exit animation function and make the right transition.
Animated helper component with support for animated output.
Let's see what happened (in the video from 31:33 ).
View demo
Interestingly, if you change states too quickly, the animation will behave correctly. Transitions will not be animated to the end and on time to leave the screen.
But if you are writing to React, you will not have to do everything that we are doing now, because you can use the react-transition-group library. It used to be a React addon. I like the fact that the new version has a convenient helper called transition. In general, this is a low-level component that emulates roughly the same thing that we just did.
React-transition-group@2.0 is a declarative component for entry / exit animations.
Using the so-called dirty components, you can make complex components in which state changes occur.
View demo
In the next example (in the video from 32:57 ) I made a histogram on which the values changed. In essence, this is a large component that automatically receives states from the network and from websockets. It is necessary that the animation itself was executed, so my component looks like a normal one, but inside it animates states with the help of dirty animations. In this case, I used D3.
Sometimes it is impossible to access the element and you need to use the Web API, the so-called dirty components - this is Canvas and so on. In this case, you can apply the pattern - taking over responsibility.
With the help of hooks, you can completely take over the responsibility for rendering. For example, to work with Canvas, WebGL, WebAudio and so on.
So, you render once. Then you say that you will not render this component, since you take responsibility and return false in a special function. Next in the componentWillReceiveProps hook, you see which properties came in, if they changed, and perform the desired animation. It sounds simple, but in practice it turns out that it is not always convenient to animate. Let's see why.
I made this component on WebGL. This is an icosahedron. I pass through two properties to it from above, = how to turn it vertically and horizontally. And inside the componentWillReceiveProps function, I compare the cast and do the necessary transformations.
View demo
This rotation is not entirely natural, it looks rough and is accompanied by jerks. But there is a trick called a controller that allows you to make a smooth animation.

What is the difference? In the fact that earlier we looked at what came from above and renewed the internal state, therefore, the turn was instantaneous. And the controller works a little differently. The controller is a concept from control theory. In our case, this is a P-controller, a special case of a PID controller. This is the area that controls the hands of the robot.
In our case, this is a simple controller, and its actions are based on the following effect.
P-controller is convenient for smooth unlimited time animations.
We have a string, there is a value (this.x) and we need to translate it into the target. We look how far we are from the right place, multiply by the coefficient and move to this point. In general, the formula is the same as for Hooke's law, and for the springs. I want to note that if you use requestAnimationFrame and controllers in animation, it is best if you add a delta. The one you received between calls requestAnimationFrame. And in this case, I have limited it, because if you switch to another tab of the browser, and then come back, you will have a very large delta. This will cause you to have very large values, and the spring will break. Therefore, we limit it, multiply by some constant and use.
Using the pattern of "interception of responsibility", you can work with physics.
View demo

If you make dirty components, then you must ensure that:

In principle, these rules work in the opposite direction. For example, you are working in a stateful application and you need to run animations. Then you need to set some trigger (for example, a state change), monitor this change inside the component and start the animation.
It is convenient to use the pattern in Redux-applications, where the global state is the only way to communicate.
We often work with Redux, and in order to make an animation, sometimes we have to do so that the application animates all things independent of our current module.
I published a small open-source utility - redux-actuator. There is such an actuator that allows you to trigger events inside the components.
View demo
How it looks, you can look at the video from 40:27 . The fact is that we take a key in our state and change it to another. That is, we need to make sure that the state really changes. In the case of an actuator, I do the following: I take some event id and make it out of the current time and counter in order to avoid collisions. And so you can trigger an animation.
View demo
You may have a question about how to make complex animations (for example, see the video from 41:27 ).I will say this, the animations in the code will almost always look ugly. The main thing is to make the right decomposition. We know how to do exit animations, so the trick is to properly share responsibility. In this case, we take the layer that goes away, that is, the one in which the item's are located. We leave it on the screen while the animation is on, and then we apply a technique called FLIP. In my example, not quite FLIP, but the principle is the same. FLIP is when you take an element, immediately draw what you want to get, as if you instantly go into the route with a preview. You make the first route transparent, and you position the second one, put it in the DOM, start the animation. Then, when the animation worked and this element appears under another, you simply replace it and remove it from the DOM. But, unfortunately, in React now there is no simple utility in orderto do it, but it is possible. The main thing is to make the right decomposition.
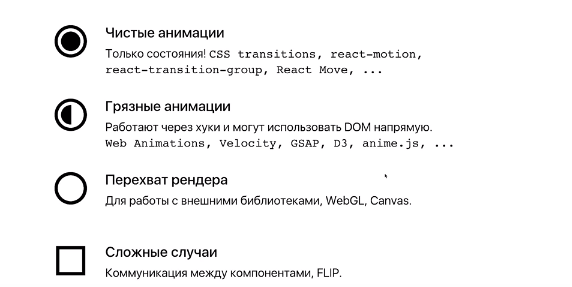
Today we have considered several approaches to animation. We mainly worked under one component. We first looked at pure animations. They are called like that because they fully work on states. Next come the dirty animations: they basically look clean, but inside they use access to the DOM. Finally, there is a third type of component that completely intercepts the render. When you need to work with Canvas, WebGL, you use a render capture approach. Plus complex cases that are solved by proper decomposition.
In conclusion, I would like to advise reports on the topic of animation, which can be viewed.

In React, starting from version 16.3, the componentWillReceiveProps method becomes deprecated, since The new renderer will not be able to support it. Usually this hook was used to set the state based on the props that are passed to the component. Now the React team advises to smoothly move away from componentWillReceiveProps towards getDerivedStateFromProps. But the problem is that the method is now static, so if it still works to transform props into a state, then there is definitely no responsibility for intercepting responsibility.
Read more here .
Now there is no official solution for this case, but its support should appear very soon, as there are enough packets in npm that use interception of responsibility. For example, react-canvas.
There is an official way to launch high-performant animations in React Native. I learned about this API after the report. It is called <Animated />, as a component of the examples in the report. At the same time, these are components completely different in principle of operation. The meaning is the following: to make productive animations in RN, the trick with setState and redrawing each frame as in react-native will not work - this is too hard for smartphones, given that RN applications work through so-called. "bridge". Those.JS and render are performed in a separate thread, and the result is then synchronized with the native View (in iOS) in other threads. Therefore, the developers have provided such a tunnel for low-level animations. You wrap your component in <Animated />, say which styles should be animated, and connect with the properties being animated. Moreover, the properties may depend on each other, it is possible to make spring dependencies, sequences, etc. This approach has many limitations, the main one is that we cannot influence the method of calculating properties from JS, their dependencies are completely declarative, since the dependency tree must be serialized (in order to be sent to the lower levels). There are even components for setting animation algebra: https://github.com/motiz88/animated.macro
In any case, this is a very interesting designed API, the implementation of which on the web would solve the issues from the report. For example, canceling an animation when a component exits. Or it would be possible to describe complex cases, like “grabbed-pulled-animation”. The future of web animations in React is exactly here somewhere.
We hope you find the experience of Alexey useful. And if you like to savor the details of the development on JS just as we do, you will probably be interested in these reports at our HolyJS 2018 Piter conference , which was only a couple of weeks from now:
Our text describes how to work with animations in React-applications, and compares several approaches (D3, React-Motion, “dirty components”). And also about how to "run" animations in Redux-applications. The material is based on the decoding of the report by Alexey Taktarov from our December conference HolyJS 2017 Moscow. We attach at the same time the video of this report:
Careful traffic: under the cut a lot of pictures and gifs (you know, the material about the animation).
I would like to start with a story. If you were in ancient Rome about the first century BC, you could meet Vitruvius.
')
Vitruvius is one of the most famous architects of the time. He wrote 10 volumes on architecture. His works were inspired by many. But the most interesting thing is that in one of the books he brought out three main qualities that good architecture should have: strength, usefulness and beauty.
It seems to me that this triad can also be found in the design of the things we use. Why all this? We - the developers - write applications, sites. We do things that people use. Therefore, we, too, I think, should take a look at the rules that were derived two thousand years ago. After all, the applications that we do should solve specific tasks of people.
I think the whole point is in the feedback. This is the key point. And to some extent the feedback is animation, transitions between states.
Further I will talk about animation in stateful applications using React as an example.
Animation patterns on the example of a demo from real projects
Before we talk about React, let's think about how animations work in browsers in general, and what it is.
In the ideal world, animations should work smoothly. It would be naive to believe that they can be done, for example, using setinterval or settimeout. And here there are two misconceptions.
Misconception number 1
We are wrong . Because we cannot use setTimeout for animation. After all, setTimeout will not guarantee that your function will actually work in the specified period of time. This can lead to effects such as frame blending. That is, you will think that your animation will come in 16 milliseconds, which roughly corresponds to 60 frames per second, but in fact it will work more, and this debt will accumulate and accumulate.
Fortunately, there is a function that allows you to deal with this problem - requestAnimationFrame. It guarantees that the callback will work at a convenient time for the browser scheduler. At the same time I want to note that it can also work at irregular intervals. If you want to use requestAnimationFrame, I highly recommend looking at which browsers you are targeting.
If you want to use requestAnimationFrame in your projects, then you will use something like this pattern. That is, you declare a function that will be triggered at the moment when the animation should occur. Then you call requestAnimationFrame - this will mean that we will execute our function at the right time.
Next interesting point. In principle, at the end of the function, we could call the planning of the next frame, but such a pattern is calling the requestAnimationFrame for the next frame at the very beginning. Since no one knows what can happen during the execution of a function. Maybe she, for example, will throw an exception. Therefore, it is better to immediately plan the next frame at the very beginning.
// Or use a polyfill: // import requestAnimationFrame from 'raf' const { requestAnimationFrame } = window const animate = () => { requestAnimationFrame(animate) // Perform an animation step x += velocity } // Fire it up requestAnimationFrame(animate) requestAnimationFrame is an indispensable tool for browser animations.
Next, you want to animate some property over time, for example, take the coordinate of some object and increase it by some constant, which is essentially speed. And here we are faced with delusion number 2.
Misconception number 2
The speed is constant!
View demo
Since the function is called at different intervals, this can happen if some other computations occur at the same time in the system, and you get another trajectory that will not satisfy you. Therefore, it is important to adapt how requestAnimationFrame works, based on the time difference. And requestAnimationFrame, as the first parameter, gives the timestamp, which is a certain timestamp since the browser was opened. In some browsers, this label will be a high accuracy label.
requestAnimationFrame(timestamp => { // DOMHighResTimeStamp // timestamp ~> 30485.84100000153 }) The rAF transmits a timestamp to the callback with an accuracy of five microseconds.
In general, you can expect that it will be some kind of double (if you use a polyfil, it is unlikely), which contains milliseconds to the comma, and microseconds - after.
We can use this label to calculate the difference between this and the previous function call.
const animate = timestamp => { const delta = timestamp - prevTimestamp // Note, it's a function now! x += velocity(delta) requestAnimationFrame(animate) } It is important to count the time difference between calls and animate the value in proportion to the delta!
Therefore, we can enter a certain delta, which is the difference between the current label and the previous one for the call, and further we animate our variable, but only then it becomes a function. Now that delta, which we got, we pass into the function. And we consider speed proportional.
Let's see what happens.
View demo
On the left - perfect animation, on the right - with our adaptive algorithm. You may notice that the calls still do not occur at regular intervals. And the animation on the right may not be as smooth as on the left - but it also has the same shape. That is, we guarantee that it will look the same. This is called frame skipping. Performing animation at a specified time interval is not normal, but skipping frames in the animation is completely normal. Therefore, using the delta approach, you can make high-performance animation.
Small example
In the video, it starts at 13:09 .
requestAnimationFrame is a great tool for arbitrary browser animations. Because on it you can do any logic for animation.
View demo
In the example, I derived particles that move according to some law. This is a simulation of the movement of birds during the flight. How would you make such an example in the browser? Most likely, you would get the function tick, which would be called at the moment of animation rendering. She would do two things: consider physics and then redraw.
const redraw = _ => { points.forEach(point => { // make sure `will-change: transform` is set point.element.style.transform = ` translate3d(${point.x}px, ${point.y}px, 0.0px) rotate(${point.angle}rad)` }) } const tick = ts => { _lastRaf = requestAnimationFrame(tick) physicsStep(delta) redraw(delta) } About redrawing is very interesting, because if you use divs, as I am in the example, then in order to animate them quickly in browsers, you need to use transform. But if you used margin, padding, or absolute positioning, then nothing would work for you, and if it worked, it would be very slow.
It is very important that these elements have the property 'will-change: transform'. This will ensure that the squares will be immediately in a separate layer of the browser and then composted into one common. So it will be possible to achieve maximum performance. Then we go over all points and expose what the turn and position of the point on the screen will be.
Now, about stateful applications.
I’m sure that many work with stateful applications without even knowing it. And, most likely, they use an approach called Immutable UI.
What is Immutable UI? This is when you have a certain state, and you uniquely translate it into elements on the page. This is usually just a render. That is, you call the render function, after which the data that you have is translated into elements, and you get the status on the page. Everything is great! But then you start to perform some actions on the page, drive with a mouse or press keys on the keyboard, thereby creating events.
These events in your application cause states to change, as well as elements on the page. That is, in fact, our application is a chain of states and the corresponding states of elements on the page. But the problem is that if you work in react or in angular, then most likely for you, as a developer, this is hidden, because when you update the state, you see a redrawn new state on the screen. Therefore, the question arises as to what to do with animations in this case.
It should be noted that such an approach Immutable UI has many advantages, because you can easily test it and do absolutely crazy things.
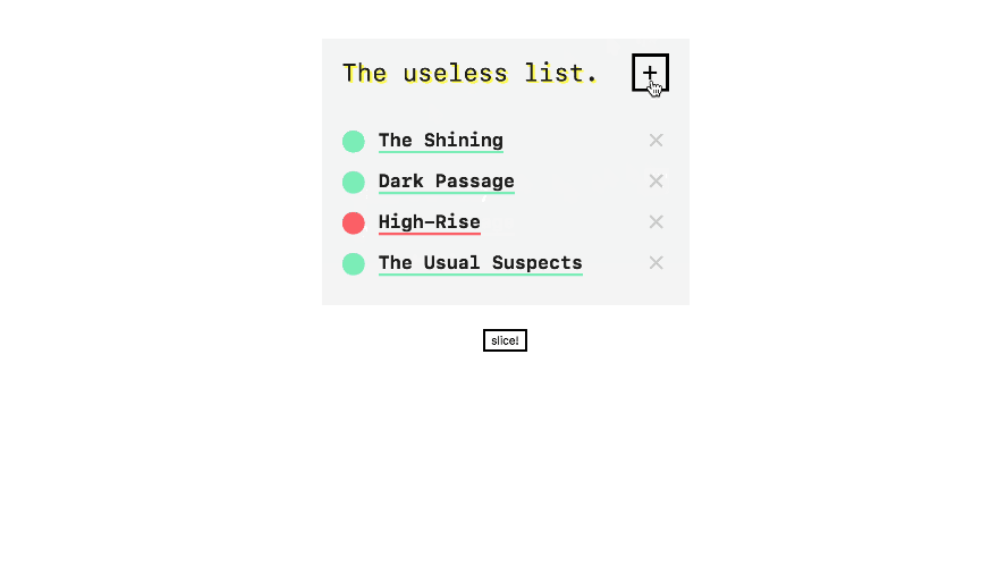
In the example under the spoiler, I made a semblance to do sheet (from 6:55 pm , insert the spoiler).
I changed the states of his items, then brought them all at the same time and could travel back in time with respect to my actions. All this is very cool.
The easiest way to animate in Immutable applications
Let's now take a look at the easiest way to create animation in Immutable applications. These are css transitions.
// CSS property // transition: transform is ease; // Conditional state change <div className ={isVisible ? 'is-visible' : 'is-hidden'} /> // Direct style manipulation <div style={{ transform: `translate(${scale})` }} /> CSS animations in React work out of the box. Property transition + state change = animation.
They are good because they are suitable for almost all the tasks that you have. They work in the same way as our state-based applications. We define a property, say how we want to animate it, how it should go from one state to another. In addition, there are patterns for working with animation in React and other libraries.
One of the patterns is replacing one class with another. Well, you can manually change the styles on the element. This is all clear.
<div> <div style="transform: translate(42.00px, 165.00px)" /> ... </div View demo
I made an example to demonstrate how CSS transitions work in React applications. We have a set of points, according to a certain law, I translate them into coordinates and draw them. This is just an array of elements with different properties. If I completely change all the data, the image will change instantly, and the browser will finish the transition itself.
In some cases, CSS transitions do not behave very naturally. For example, if you run one animation and at the same time another one, then nothing will break, because the browser knows how to stop and go to a new state. But real programs should not work that way.
Fortunately, in the case of React there is a React-Motion library. And on it I made the second demo ( 21:25 ). We took the same example: there is an array of points, we change their state, but we get a wrapper called Motion. Everything happens the same way, and the library itself makes the transitions manually.
<div> <Motion style={{x: spring(42.00, y: spring(165.00))}}> <div style="transform: translate(42.00px, 165.00px)" /> </Motion> ... </div> View demo
React-Motion uses something similar to a physics engine. That is, if you overlay the animation on each other, you will notice that the movements have become spring-loaded, and in general it looks nice.
In React, it looks like this.
<Motion> {interpolated => <div style={{ opacity: interpolated.x }} /> } </Motion> React-Motion uses an excellent function-as-a-prop pattern. If you have any component and it has a body, its children, then these children need not be elements. They can be any type of data, including a function that takes a state and returns items. Such a recording scares newbies a little, but it works very well. You may think that React-Motion climbs into the DOM, changes some properties. In fact, it is not.
This is the same requestAnimationFrame, about which we spoke at the very beginning, and at each animation step we simply update their state. That is, each frame is a new state, a new render. Surprisingly, it works.
View demo
One tip - do not use React-Motion everywhere.
Unfortunately, it is not suitable for all cases. Spring animations are not limited in time, that is, you need to make an animation that will run and run for 10 seconds, then React-Motion is not an assistant here.
It is also difficult to work with complex animations, where one element is first animated, and then the second. In principle, this can be done by the library, but it will not be very convenient.
And finally, performance. Anyway, nothing can compare with manual animation, that is. when we climb into an element and change its transform. Therefore, in some cases, React-Motion behaves “gluttonously”, although it works well.
"Dirty" animations
Dirty animations - animations in which not always everything can be built on states.
class Dialog extends Component{ componentDidMount(){ const node = findDOMNode(this) // Or $.animate, anime.js, GSAP, D3 ... Velocity(node, {scale: 1.5}, {duration: 1000}) } render(){ ... } } The “animation on input” pattern works through the componentDidMount hook and direct access to the element.
Let's take a look at this using a dialog box. You probably met this when you needed to show or hide the dialog box. Most often, this was done using the componentDidMount pattern, that is, there is a hook in React that is called after the component has been added to the DOM. But there is a problem: the dialog box may leave the DOM before the animation ends. Therefore, this also needs to be monitored.
If you are working with dirty input animations, that is, you are animating something at the input, the best advice is to save the animation handle and then cancel it if the component leaves the DOM ahead of time. This feature is available when using the Velocity or jQuery animate libraries.
class Dialog extends Component{ componentDidMount(){ const node = findDOMNode(this) // animate returns a cancellable // promise-like object this._anim = animate(node, { ... }) } componentWillUnmount(){ this._anim && this._anim.cancel() } } That is, you can extract the component before the animation ends.
View demo
In our example, the dialog box disappears immediately, and in principle we cannot animate the output. Usually you get a certain flag that is responsible for showing the window or not, and you optionally render this component. And here it will not be possible to make the output animation, because as soon as the component leaves the DOM, it will not be possible to animate it. And with this you need to do something.
<div> {this.state.showDialog && <Dialog />} </div> So let's write a wrapper that will work similarly and allow us to do output animation. In our case, I called it Animated.
<Animated> {this.state.showDialog && <Dialog />} </Animated> When the child elements appear inside, we start the input animation, and as soon as they disappear, we make the output animation and look at the edge cases.
If we imagine how the component could work, then we get just such a map. We have four states in which a component can be at a certain moment: when it is animated, when on the screen, when it goes out and when it is already released. With the first two states, everything is clear (entering, entered), but the question is what to do with the state (exitting) when the component goes out? We no longer have these children who have been given to us. We have to draw something. Therefore, you can use such a trick, which is called ghostChildren, that is, leave it on the elements and components until the animation works.
const element = <Dialog size="medium" /> // => { type: Dialog, props: { size: 'medium' }, ... } const element = React.createElement(Dialog, { size: 'medium'}) What is behind JSX?
When we need to make an exit animation, we take the children, save, add to the state and make an exit animation. In general, the code is not very pleasant.
When we get new children, we can see that they have changed. In this function, we look at what state we want to go to and what additional options we take. The most important thing is that, using the link to the component, we can call its exit animation function and make the right transition.
componentWillReceiveProps(nextProps){ // Exit transition if(this.props.children && !nextProps.children){ return this.transitionState(st.EXITING, {children: this.props.children}) } } transitionState(transitionTo, opt = {}){ // .. FSM logic .. // Wait for `this._content.animateExit()` } Animated helper component with support for animated output.
Let's see what happened (in the video from 31:33 ).
View demo
Interestingly, if you change states too quickly, the animation will behave correctly. Transitions will not be animated to the end and on time to leave the screen.
But if you are writing to React, you will not have to do everything that we are doing now, because you can use the react-transition-group library. It used to be a React addon. I like the fact that the new version has a convenient helper called transition. In general, this is a low-level component that emulates roughly the same thing that we just did.
import Transition from 'react-transition-group/Transition' // `state` is 'entered', 'entering', 'exited' etc. <Transition in={isVisible} timeout={duration}> {state => <ModalDialog animationState={state} />} </Transition> React-transition-group@2.0 is a declarative component for entry / exit animations.
Using the so-called dirty components, you can make complex components in which state changes occur.
View demo
In the next example (in the video from 32:57 ) I made a histogram on which the values changed. In essence, this is a large component that automatically receives states from the network and from websockets. It is necessary that the animation itself was executed, so my component looks like a normal one, but inside it animates states with the help of dirty animations. In this case, I used D3.
Sometimes it is impossible to access the element and you need to use the Web API, the so-called dirty components - this is Canvas and so on. In this case, you can apply the pattern - taking over responsibility.
render(){ return <canvas /> } // Render only once! shouldComponentUpdate() { return false } componentWillReceiveProps(nextProps){ if(this.props.color != nextProps.color){ // Animate on canvas... } } With the help of hooks, you can completely take over the responsibility for rendering. For example, to work with Canvas, WebGL, WebAudio and so on.
So, you render once. Then you say that you will not render this component, since you take responsibility and return false in a special function. Next in the componentWillReceiveProps hook, you see which properties came in, if they changed, and perform the desired animation. It sounds simple, but in practice it turns out that it is not always convenient to animate. Let's see why.
I made this component on WebGL. This is an icosahedron. I pass through two properties to it from above, = how to turn it vertically and horizontally. And inside the componentWillReceiveProps function, I compare the cast and do the necessary transformations.
View demo
This rotation is not entirely natural, it looks rough and is accompanied by jerks. But there is a trick called a controller that allows you to make a smooth animation.
What is the difference? In the fact that earlier we looked at what came from above and renewed the internal state, therefore, the turn was instantaneous. And the controller works a little differently. The controller is a concept from control theory. In our case, this is a P-controller, a special case of a PID controller. This is the area that controls the hands of the robot.
In our case, this is a simple controller, and its actions are based on the following effect.
// Limit delta to avoid divergence const delta = Math.min(100.0, ts - prevTs) const P = 0.001 + delta this.x = P + (this.target - x) P-controller is convenient for smooth unlimited time animations.
We have a string, there is a value (this.x) and we need to translate it into the target. We look how far we are from the right place, multiply by the coefficient and move to this point. In general, the formula is the same as for Hooke's law, and for the springs. I want to note that if you use requestAnimationFrame and controllers in animation, it is best if you add a delta. The one you received between calls requestAnimationFrame. And in this case, I have limited it, because if you switch to another tab of the browser, and then come back, you will have a very large delta. This will cause you to have very large values, and the spring will break. Therefore, we limit it, multiply by some constant and use.
Using the pattern of "interception of responsibility", you can work with physics.
View demo
If you make dirty components, then you must ensure that:
- Your components had a clean interface.
- Side effects were hidden
In principle, these rules work in the opposite direction. For example, you are working in a stateful application and you need to run animations. Then you need to set some trigger (for example, a state change), monitor this change inside the component and start the animation.
import { Actuator, actuate } from 'redux-actuator' // Inside the component <Actuator on={{ animateBadge: this.animateBadge }} /> // Where the business logic is store.dispatch(actuate('animateBadge')) store.dispatch(actuate('highlighUser', { id: 1 })) It is convenient to use the pattern in Redux-applications, where the global state is the only way to communicate.
We often work with Redux, and in order to make an animation, sometimes we have to do so that the application animates all things independent of our current module.
I published a small open-source utility - redux-actuator. There is such an actuator that allows you to trigger events inside the components.
View demo
How it looks, you can look at the video from 40:27 . The fact is that we take a key in our state and change it to another. That is, we need to make sure that the state really changes. In the case of an actuator, I do the following: I take some event id and make it out of the current time and counter in order to avoid collisions. And so you can trigger an animation.
View demo
You may have a question about how to make complex animations (for example, see the video from 41:27 ).I will say this, the animations in the code will almost always look ugly. The main thing is to make the right decomposition. We know how to do exit animations, so the trick is to properly share responsibility. In this case, we take the layer that goes away, that is, the one in which the item's are located. We leave it on the screen while the animation is on, and then we apply a technique called FLIP. In my example, not quite FLIP, but the principle is the same. FLIP is when you take an element, immediately draw what you want to get, as if you instantly go into the route with a preview. You make the first route transparent, and you position the second one, put it in the DOM, start the animation. Then, when the animation worked and this element appears under another, you simply replace it and remove it from the DOM. But, unfortunately, in React now there is no simple utility in orderto do it, but it is possible. The main thing is to make the right decomposition.
Today we have considered several approaches to animation. We mainly worked under one component. We first looked at pure animations. They are called like that because they fully work on states. Next come the dirty animations: they basically look clean, but inside they use access to the DOM. Finally, there is a third type of component that completely intercepts the render. When you need to work with Canvas, WebGL, you use a render capture approach. Plus complex cases that are solved by proper decomposition.
In conclusion, I would like to advise reports on the topic of animation, which can be viewed.
Links
Additions to the original report:
In React, starting from version 16.3, the componentWillReceiveProps method becomes deprecated, since The new renderer will not be able to support it. Usually this hook was used to set the state based on the props that are passed to the component. Now the React team advises to smoothly move away from componentWillReceiveProps towards getDerivedStateFromProps. But the problem is that the method is now static, so if it still works to transform props into a state, then there is definitely no responsibility for intercepting responsibility.
Read more here .
Now there is no official solution for this case, but its support should appear very soon, as there are enough packets in npm that use interception of responsibility. For example, react-canvas.
There is an official way to launch high-performant animations in React Native. I learned about this API after the report. It is called <Animated />, as a component of the examples in the report. At the same time, these are components completely different in principle of operation. The meaning is the following: to make productive animations in RN, the trick with setState and redrawing each frame as in react-native will not work - this is too hard for smartphones, given that RN applications work through so-called. "bridge". Those.JS and render are performed in a separate thread, and the result is then synchronized with the native View (in iOS) in other threads. Therefore, the developers have provided such a tunnel for low-level animations. You wrap your component in <Animated />, say which styles should be animated, and connect with the properties being animated. Moreover, the properties may depend on each other, it is possible to make spring dependencies, sequences, etc. This approach has many limitations, the main one is that we cannot influence the method of calculating properties from JS, their dependencies are completely declarative, since the dependency tree must be serialized (in order to be sent to the lower levels). There are even components for setting animation algebra: https://github.com/motiz88/animated.macro
In any case, this is a very interesting designed API, the implementation of which on the web would solve the issues from the report. For example, canceling an animation when a component exits. Or it would be possible to describe complex cases, like “grabbed-pulled-animation”. The future of web animations in React is exactly here somewhere.
We hope you find the experience of Alexey useful. And if you like to savor the details of the development on JS just as we do, you will probably be interested in these reports at our HolyJS 2018 Piter conference , which was only a couple of weeks from now:
- Mining crypto in browser: GPU, WebAssembly, JavaScript (Denis Radin, Evolution Gaming)
- JavaScript debugging using Chrome DevTools (Alexey Kozyatinsky, Google)
- Offline VS Online client speed metrics (Alexey Kalmakov, Yandex)
- React Native Deep Inside ( , Lowl.io)
Source: https://habr.com/ru/post/354550/
All Articles