Hybrid Storage for Out-of-the-House Homes and High Availability from Synology
 Several years ago, when choosing the first storage for the house, I looked in the direction of “boxed solutions” because of the lack of special awareness in building storage systems based on open source software and ordinary PCs. At that time, the choice fell on a 2-disk NAS - Shuttle KD20 . The vault was compact and quiet. RAID1 provided the necessary reliability, and at that time there was no need for high performance and advanced functionality. This NAS worked for almost 4 years, until one day the fan power supply line was covered. The wheels are heated to 60 degrees and miraculously survived. I sealed the fan directly to the motherboard, but began to pick up a replacement option. As a second NAS, I chose a 4-disk Synology. The tasks remained the same, so I didn’t go into the DiskStation Manager (DSM) functionality. This lasted until I decided to install home video surveillance on several channels. Despite the fact that Synology has its own video surveillance service, I stopped at Macroscop - there was a need for advanced functionality and serious analytics. Fortunately, I found a new Virtual Machine Manager package in DSM — the hypervisor, with which I created a virtual machine and installed Windows and Macroscop on it. The recording system worked fine, the built-in Pentium 1.6 GHz hardly, but managed to work out the tasks of the storage system and the virtual machine. But as soon as any analyst was activated, the service fell off due to processor overload. As a result, I was forced to start searching for a separate Windows budget device with adequate performance for the implementation of the video surveillance server, since Synology of the required level is not cheap. At that very moment, I once again stumbled across the network on articles on installing DSM on regular hardware and my XPenology project started ...
The cost of the necessary components for the new store was commensurate with the cost of the Intel NUC, which I looked after for the video surveillance server. Therefore, I decided to abandon the existing Synology in favor of my brother (and use it as a remote backup), and to assemble the all-in-one system based on DSM for myself.
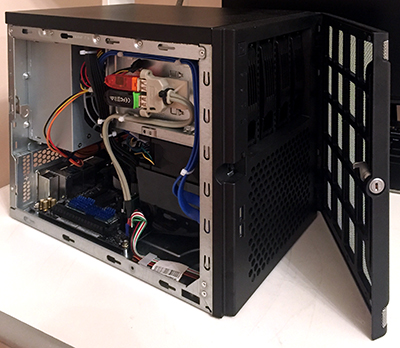
As a platform, I chose the well-known Chenbro SR30169 case for 4 hot-swap baskets. I chose a motherboard based on the number of LANs and on the form factor - I found only this one from fresh ones - the Asrock Z370M-ITX / ac . Two network interfaces, support for the 8th generation of processors, and most importantly - 6 x SATA on board, which means that you can still connect the SSD under the cache for reading. The i3-8100 processor with 4 cores and 16GB memory (with a margin for virtualoks). Left disks from the previous Synology - 4 x 6Tb.
Platform assembly
When used on a table, this case normally cools 4 disks in hot-swap baskets. But in the cabinet under load the temperature of the disks reached 48-50 degrees. Therefore, I decided to replace the regular 120th fan with a more productive one.
')
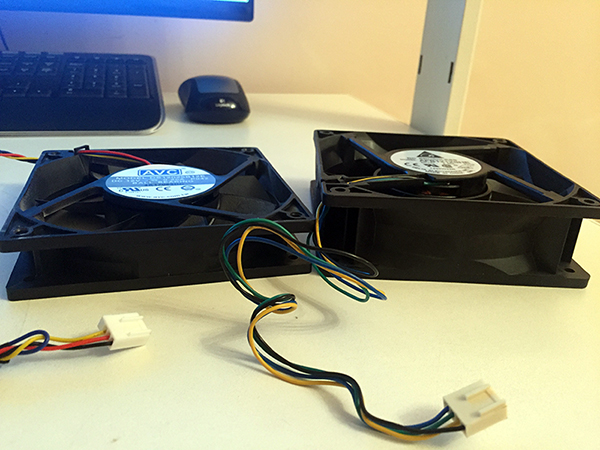
1.5A fan lowered the temperature of the discs to 36-40 degrees. After completion of the hood from the cabinet, I am sure that the temperature will still drop significantly.
I installed one SSD 2.5 "under the cache on a standard mount on one side of the disk basket. Its temperature did not exceed 30-32 degrees, and this despite the fact that it does not actively cool.

As a disk for DSM packages and a fast partition, I installed the M.2 SATA SSD in the slot on the motherboard. The drive was heated to 50 degrees, despite the direct blowing. I solved the problem by installing several radiators on it - the temperature dropped by 10 degrees.

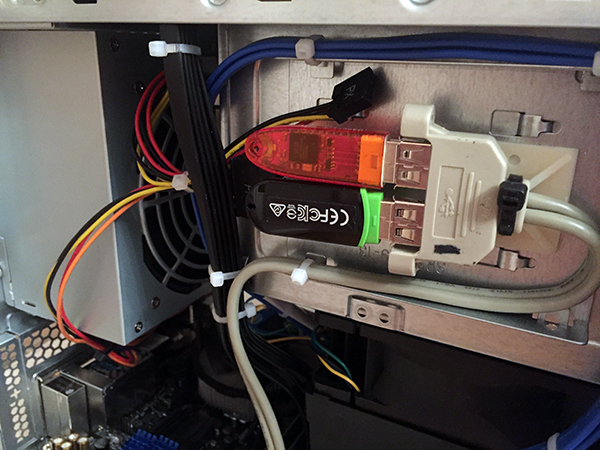
I have 2 constantly active USB devices: XPenology bootloader and Guardant dongle from Macroscop. In order not to occupy the external connectors, I attached these devices inside the case.
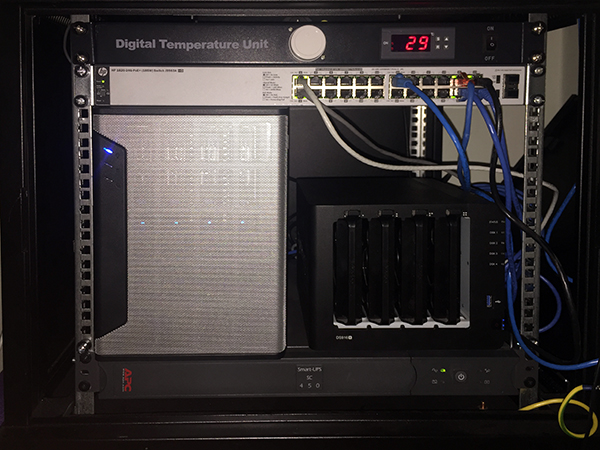
Ready storage with high performance processor and the most compact size with a creak, but fit into the free 6 units.
Bootloader preparation
In order to install DSM, you need a bootloader that will present the hardware as Synology storage.
There are a lot of instructions on this topic on the Internet, so I will not go into details, but if there are interested ones, I can describe the details of the preparation of the boot device.
After installing a valid serial / MAC pair and other parameters, the image for the DS3615 is uploaded to any device from which you can boot. You can use SATA DOM, but since I have SATA ports for reading out - I stopped at the classic version - USB flash drive.
In BIOS, you need to remove all boot devices except USB, and in the SATA settings, enable the HotPlug function so that new drives are detected hot, without waiting for a reboot.
Launch
When you first start looking for a device using find.synology.com. If this option does not work, then download Synology Assistant from the official site and scan the network using it.
After connecting to the storage address to the web interface, the system offers to install DSM. If at the step of preparing the bootloader everything was done correctly - the installation can be made not from the image file, but immediately from the official site in automatic mode.
The system formats all installed media and on each creates an area for the DSM. Thus, by moving disks to another Synology or Xpenology repository, you can migrate and save all data and system settings.
Before realizing everything at home, I practiced for a long time on various platforms. The system without problems migrated from a computer based on the Celeron J1900 to a server with 2 x E5-2680V4, and then to an ancient exhibit based on 2 x E5645. If there are virtuals, then of course it is necessary to enable processor compatibility mode before installing the OS on the virtual machine. This probably decreases productivity, since The processor in a virtualka becomes not real, but universal. But then, migration takes place without difficulties and BSOD.
Customization
Work through the Xpenology loader has almost no limitations compared to the original device. Among the differences, we can note the lack of the QuickConnect function - there is no remote access to the storage via the Synology account. But I have an external IP - this restriction is not relevant for my case.
Also, the processor model and the number of cores are incorrectly displayed - the information is sewn in the bootloader and will always look like for DS3615xs: INTEL Core i3-4130 / 2 cores. But then, the frequency is determined by the current. This feature does not interfere with the determination and use of the real number of cores by the hypervisor. But even here there are limitations - Virtual Machine Manager will see no more than 8 cores in the system. Therefore, it is pointless to install DSM on multi-core configurations.
With the amount of RAM everything is in order - the entire volume was determined and used (in practice, up to 48GB).
Integrated network controllers are defined without problems, but I did not find WiFi. I assume that this problem can be solved by adding drivers, but, unfortunately, my knowledge of Linux does not allow me to realize this. If there is a person from the readers of this article who can describe the instructions for adding drivers to the wireless controller to the assembly, I would be grateful.
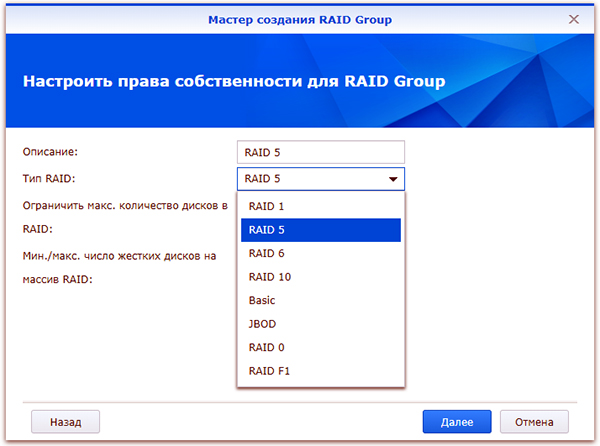
Before using storage, you must create a RAID group. After the transition to the first Synology, I left a “mirror”, and launched 2 additional disks on Hot Spare. When switching to Xpenology, I chose RAID5 + HS, but then added the 4th disk to RAID6. All the same, it is spinning and warming - even if with advantage.
Since DSM provides both file and block access, before creating a RAID array, you need to decide on the type of future storage.

I immediately created several LUNs for use on a home mini-PC and laptop. The file sphere is good, and the block access disk for installing programs is even better.

Next, create the required number of LUNs and partitions on RAID groups, shared folders, and so on. There is no point in describing the well-known functionality of Synology. All available expansion packs with a description of the functionality are available on the official website .
Under my tasks the following packages were relevant:
Virtual Machine Manager - actually because of him the whole idea with Xpenology.

The package has more advanced functionality than I use, so I decided to test its operation on several nodes in the High Availability Cluster mode.
But, was soon disappointed. The cluster requires 3 nodes: active, passive, and storage. Automatic migration of virtual machines when an active node fails is supported only on Synology Virtual DSM virtual machines - it will not roll with Windows and other operating systems. What is the point on DSM to raise a cluster with virtual DSMs I did not understand ...
In general, more than a banal hypervisor, I did not open this module for myself.
VPN Server - supports PPTP, OpenVPN and L2TP / IPSec
PPTP, as I found out, supports only one connection for free - I use it to communicate with remote Synology for backup.
I use OpenVPN to connect from iPhone and desktop computer, as well as to connect LUN remotely via iSCSI.
Hyper Backup is a convenient, functional and, at the same time, concise backup service.
You can back up both folders and LUNs. File backup can be merged to another Synology, to another NAS and into the clouds. LUN is backed up only locally or remotely to the Synology device. Therefore, if you need to backup the moon to the cloud, as I understand it, you can first save it to a local folder, and then to the cloud.
I use 3 types of redundancy:

- Reserve for a remote Synology - everything is copied there, except for the backup folder (there is a full backup of the remote Synology in it).
- Backup only the most important on Yandex disk (via WebDAV)
- Double to Google Drive (available in the list of available cloud services)
File backup features are pretty wide.

Selecting the method and specifying the data for authorization on the remote device are marked with folders for backup.
Next, configure the schedule and backup options.

If you select encryption, you will need to enter a password to access the backup. After creating the task, the key file is automatically unloaded, which can replace the forgotten password during data recovery.
Client-side encryption, in my opinion, is very useful when backing up to a public cloud. If Google can do anything with the archive of your photos, then an encrypted backup of the same photos will be of no use to anyone.
Then the backup rotation is enabled / configured.
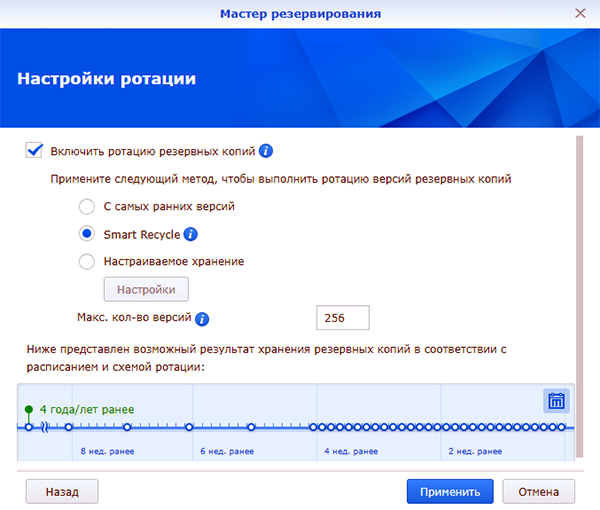
I use the Smart Recycle mode, but you can set the schedule for rotating copies of incremental backups in your own way.
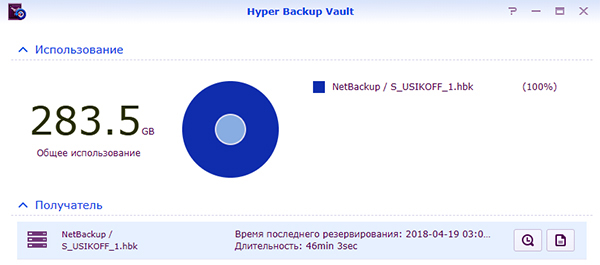
The Hyper Backup module only works in conjunction with the reverse part — the Hyper Backup Vault module.
This service accepts remote copies and is responsible for their storage.
Restoration of data, applications and settings is possible both on the current system (if the array is damaged, data is lost, etc.), or on a new one the same or completely different Synology or Xpenology. To restore, when creating a backup task, you need to specify that this is not a new task, but a connection to an existing one. Hyper Backup will see the necessary backup on the remote machine and will offer to select the version of the copy by date and time.
At the moment, this is still all the functionality that I managed to master and use.
Home Xpenology continues to work without problems - DSM and packages are periodically updated, computational capacities with a margin, and for money it cost me 1.5 times cheaper than Synology DS916 +.
Synology High Availability Cluster
I was interested in the High Availability Manager service , which turned out to be incompatible with the Virtual Machine Manager service, as it also does the cluster, but in a different way.
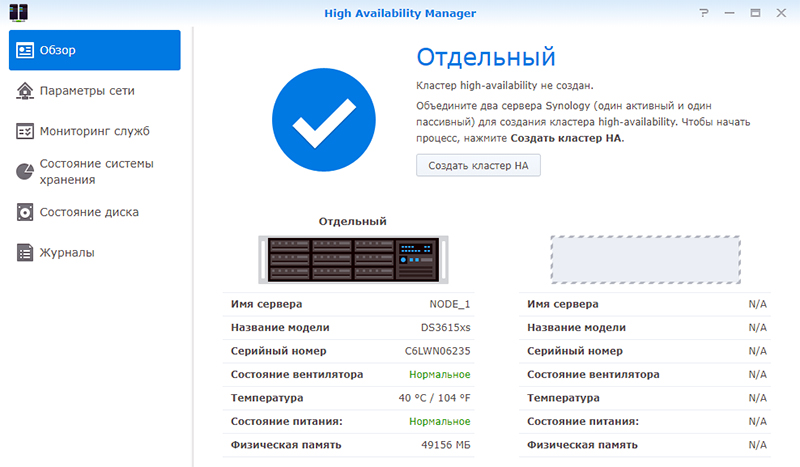
For testing, I picked up Xpenology on two servers based on 2 x Xeon E5645. The servers for this cluster must be identical, the IP addresses are static, the second port of each server is connected to each other directly (via a switch, but more efficiently).

After connecting the second node, the Heartbeat connection is tested. Next, a cluster name and a static local address are assigned. During a node merge, the passive node configuration is brought to the active state, applications, storage and data are synchronized. Both nodes fall off to access the network, and after creation - the cluster is available at its new address.

Depending on the amount of existing data, full synchronization of arrays can take a lot of time, but the cluster is available to work without fault tolerance within 10 minutes after the start of the merge.
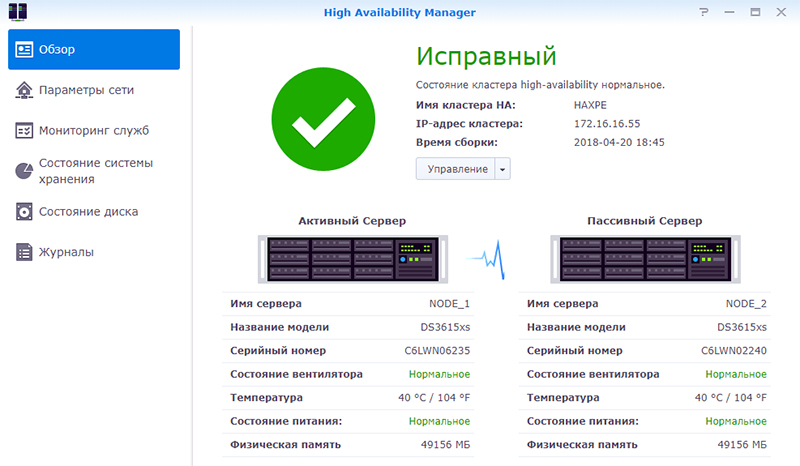
After the second node is a full copy of the first, the high availability mode is activated.
To test the fault tolerance, I created a LUN, connected it via iSCSI, and launched a voluminous task of reading and writing from my PC, along with playing a video.
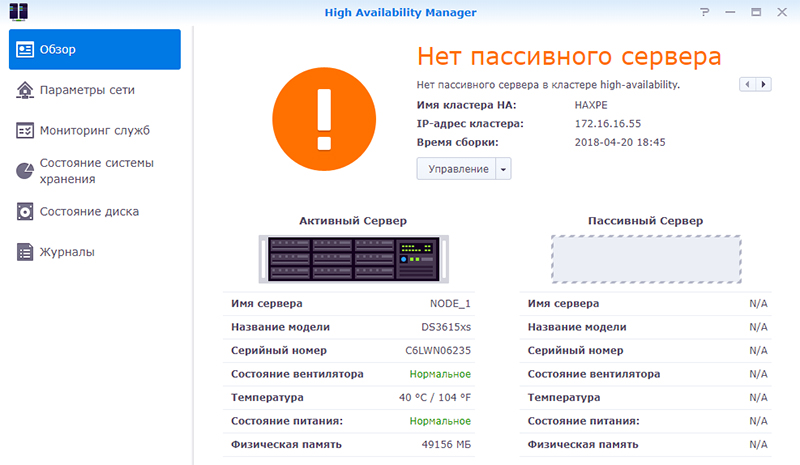
At the time of activity, I de-energized the main server. The LUN did not fall off, the copying process was not interrupted, but it stopped for 10-15 seconds - this time it took the passive server to take the role of an active one and start the dropped services. Playback also paused for a few seconds. After a short idle time, data copying and video playback continued in normal mode without the need to restart the process. Such a “failure” in most cases will not be noticeable to users, unless the video is played without buffering or any other processes are running that require continuous access to the repository.
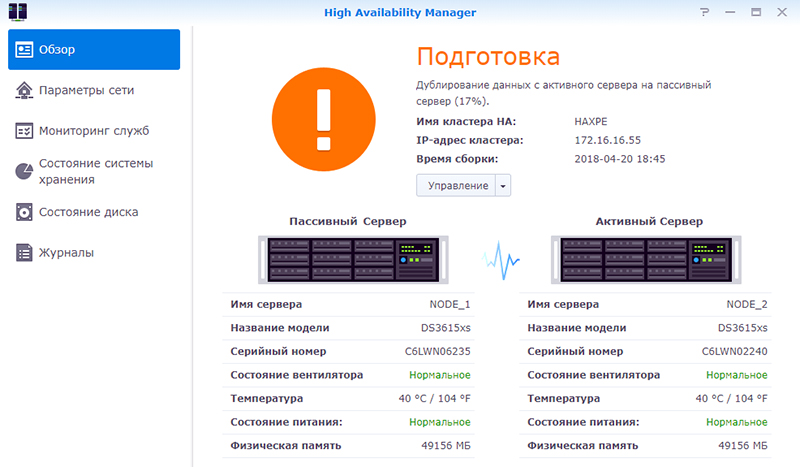
After turning on the first node, it goes into passive server mode. A background synchronization process starts, after which the high availability mode is restored again.
To replace the node, in case of complete failure, you must release the passive server.
The procedure for linking a passive server is similar to the procedure for creating a cluster, first synchronization - then High Availability. Only with one exception - the addition is already happening from the cluster interface, and not the active server.
From the minuses of such a solution - high redundancy, well, plus - honest fault tolerance.
The main costs fall on the drives, but for fans of RAID10, the most it! Mirror two nodes with RAID5 or RAID6 - the disks will be almost the same. But fault tolerance will be added multiple.
It is clear that this is not a unique functionality, but out of the box and does not require special experience and knowledge - just a web interface. And, considering that Xpenology works on any hardware, it turns out to be a very interesting, productive, and fault-tolerant solution for personal use.
Thanks for attention!
Source: https://habr.com/ru/post/353872/
All Articles