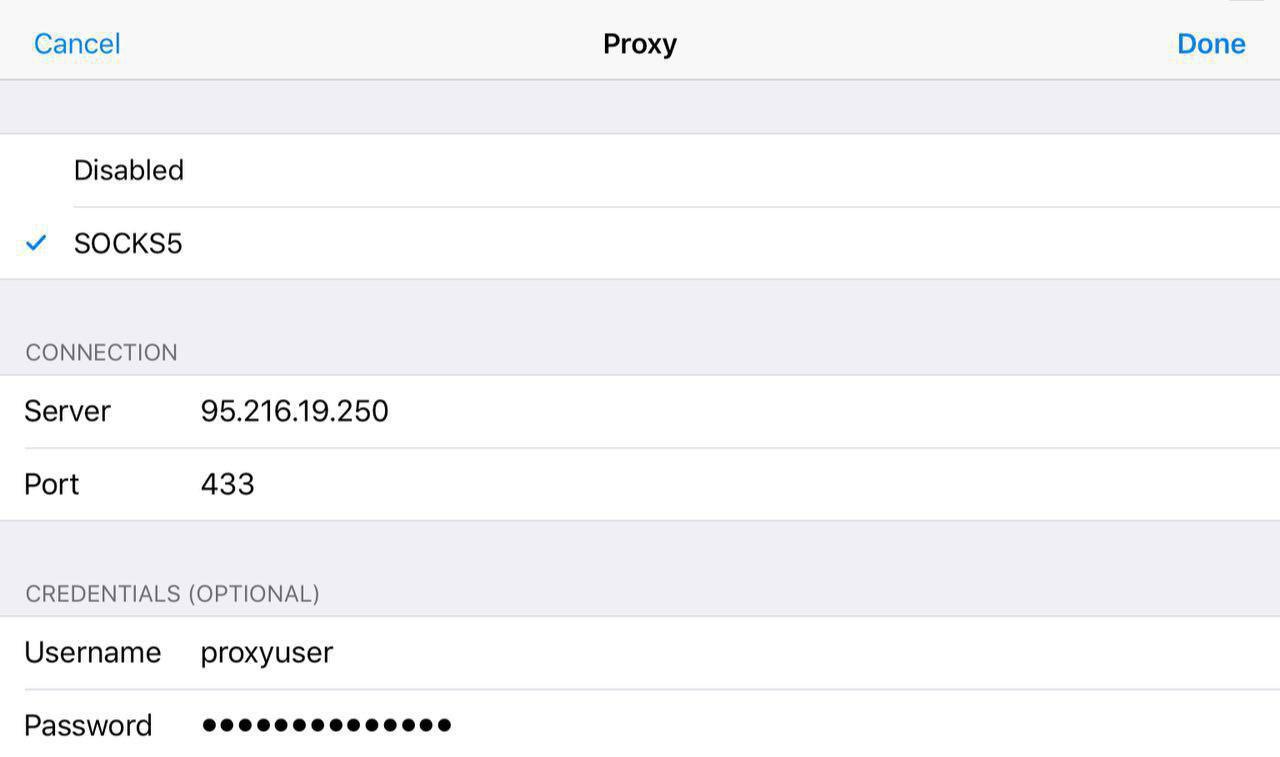
Raise SOCKS proxy for Telegram
It is very easy to raise your proxy socks - even a person far from Linux and server administration can handle it. It is enough to have a VDS / dedicated server abroad.
Step-by-step instructions for running your sockd proxy on Centos7
Add a repository
Turn on the repository and install Dante
')
Allow autorun service
Create a working folder
We make a backup of the original config
Find out the name of the network interface - for example eth0
We write the config
Substitute the name of your network interface and port, as well as add IP addresses Telegram
Click ctrl + C, type: wq and press Enter - the config is saved
Allow port in firewall
We start service
Checking status
Create a separate user
Set password
Everything - you can connect, I also recommend transferring the ssh port to another, disabling ssh connection for all users except the main one - you can read about it, for example, here
Five easy steps to protect ssh
VDS in Russia and the Netherlands
Dedicated servers in Russia and the Netherlands
t.me/audiotube_stream - our Telegram channel with free high-speed proxy on dedicated servers in Germany and the Netherlands
Step-by-step instructions for running your sockd proxy on Centos7
Add a repository
sudo yum install http://mirror.ghettoforge.org/distributions/gf/gf-release-latest.gf.el7.noarch.rpm Turn on the repository and install Dante
')
sudo yum --enablerepo=gf-plus install dante-server Allow autorun service
sudo systemctl enable sockd.service Create a working folder
sudo mkdir /var/run/sockd We make a backup of the original config
sudo mv /etc/sockd.conf /etc/sockd.conf.orig Find out the name of the network interface - for example eth0
sudo ifconfig We write the config
sudo vim /etc/sockd.conf Substitute the name of your network interface and port, as well as add IP addresses Telegram
sockd.conf
#logoutput: /var/log/socks.log logoutput: stderr # socks internal: eth0 port = 433 # IP external: eth0 #internal: xxxx port = 1080 #external: xxxx # . none - . #user.libwrap: nobody socksmethod: username #clientmethod: username #socksmethod: username none user.privileged: root user.unprivileged: nobody #user.libwrap: nobody client pass { from: 0/0 to: 0/0 log: error session.state.key: from session.state.max: 10 session.state.throttle: 10/2 session.inheritable: no } socks pass { from: 0/0 to: 149.154.167.99/32 log: error } socks pass { from: 0/0 to: 149.154.175.10/32 log: error } socks pass { from: 0/0 to: 149.154.175.117/32 log: error } socks pass { from: 0/0 to: 149.154.167.42/32 log: error } socks pass { from: 0/0 to: 149.154.175.50/32 log: error } socks pass { from: 0/0 to: 149.154.167.50/32 log: error } socks pass { from: 0/0 to: 149.154.167.51/32 log: error } socks pass { from: 0/0 to: 149.154.175.100/32 log: error } socks pass { from: 0/0 to: 149.154.167.91/32 log: error } socks pass { from: 0/0 to: 149.154.165.120/32 log: error } socks pass { from: 0/0 to: 149.154.166.120/32 log: error } socks pass { from: 0/0 to: 149.154.164.250/32 log: error } socks pass { from: 0/0 to: 149.154.167.117/32 log: error } socks pass { from: 0/0 to: 149.154.167.118/32 log: error } socks pass { from: 0/0 to: 149.154.167.192/27 log: error } socks pass { from: 0/0 to: 149.154.164.8/29 log: error } socks pass { from: 0/0 to: 91.108.8.0/27 log: error } socks pass { from: 0/0 to: 91.108.12.0/27 log: error } socks pass { from: 0/0 to: 91.108.16.0/27 log: error } socks pass { from: 0/0 to: 91.108.56.0/24 log: error } socks pass { from: 0/0 to: 91.108.4.0/24 log: error } socks pass { from: 0/0 to: 149.154.160.0/22 log: error } socks pass { from: 0/0 to: 149.154.164.0/22 log: error } socks pass { from: 0/0 to: 149.154.168.0/22 log: error } socks pass { from: 0/0 to: 149.154.172.0/22 log: error } socks pass { from: 0/0 to: 91.108.56.0/22 log: error } socks pass { from: 0/0 to: 91.108.4.0/22 log: error } socks pass { from: 0/0 to: 91.108.8.0/22 log: error } socks pass { from: 0/0 to: 91.108.16.0/22 log: error } socks pass { from: 0/0 to: 91.108.12.0/22 log: error } socks pass { from: 0/0 to: 149.154.160.0/20 log: error } socks pass { from: 0/0 to: 2001:b28:f23d:f001::e/128 log: error } socks pass { from: 0/0 to: 2001:67c:4e8:f002::e/128 log: error } socks pass { from: 0/0 to: 2001:b28:f23d:f001::a/128 log: error } socks pass { from: 0/0 to: 2001:67c:4e8:f002::a/128 log: error } socks pass { from: 0/0 to: 2001:b28:f23d:f003::a/128 log: error } socks pass { from: 0/0 to: 2001:67c:4e8:f004::a/128 log: error } socks pass { from: 0/0 to: 2001:b28:f23f:f005::a/128 log: error } socks pass { from: 0/0 to: 2001:67c:4e8:fa60::/64 log: error } socks pass { from: 0/0 to: 2001:b28:f23d::/48 log: error } socks pass { from: 0/0 to: 2001:b28:f23f::/48 log: error } socks pass { from: 0/0 to: 2001:67c:4e8::/48 log: error } socks pass { from: 0/0 to: 0/0 command: bind connect udpassociate bindreply udpreply log: error connect } Click ctrl + C, type: wq and press Enter - the config is saved
Allow port in firewall
sudo firewall-cmd --zone=public --add-port=433/tcp --permanent sudo firewall-cmd --zone=public --permanent --add-port=1024-65535/udp sudo iptables -A INPUT -p udp -m multiport --dports 1024:65535 -j ACCEPT sudo firewall-cmd --reload We start service
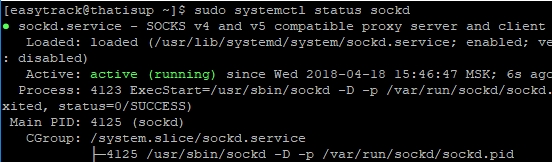
sudo systemctl start sockd Checking status
sudo systemctl status sockd nload -m –uh –UH Create a separate user
sudo useradd proxyuser Set password
sudo passwd proxyuser Everything - you can connect, I also recommend transferring the ssh port to another, disabling ssh connection for all users except the main one - you can read about it, for example, here
Five easy steps to protect ssh
VDS in Russia and the Netherlands
Dedicated servers in Russia and the Netherlands
t.me/audiotube_stream - our Telegram channel with free high-speed proxy on dedicated servers in Germany and the Netherlands
Source: https://habr.com/ru/post/353758/
All Articles