Explicit Proxy with authorization by AD Group + Interception Proxy with authorization by MAC

In many organizations, the network structure involves the use of terminal servers, personal computers, as well as mobile devices. This publication will talk about how to put all this through a Squid proxy server, without registering the browser settings on each device once again. There are many articles on configuring Squid, but everywhere in pieces. I decided to pack everything together and describe the working configuration from beginning to end.
On terminal servers, we will use Explicit Proxy with authorization based on Active Directory groups (servers must be located in the domain, and users must connect to them through domain accounts). For devices - Interception Proxy authorization will be based on MAC addresses, this will allow us to more flexibly configure access rules without being tied to ip address ranges.

We will use CentOS Linux 7.X.XXX and Squid 4.0.23.
In order to avoid confusion, the Explicit Proxy is an “opaque” proxy server, in which the client's browser specifies the proxy server address, Interception Proxy is a “transparent” mode, when the client specifies the proxy server as a gateway and the browser does not knows
Squid will listen on 3 ports:
- port 3127 - for HTTPS traffic with Interception Proxy. That is, we will use iptables to forward HTTPS requests from clients on which a proxy server is registered as a gateway;
- port 3128 - for HTTP and HTTPS traffic with Explicit Proxy. In this case, HTTP sharing
and HTTPS ports are not needed, because the browser understands that it works through a proxy server; - port 3129 - for HTTP traffic with Interception Proxy. That is, we will use HTTP to redirect HTTP requests from clients to this port, on which a proxy server is registered as a gateway.
Presetting
We have two Ethernet interfaces: eth0 - looks to the local network, eth1 - looks to the global network. In the case that will be described below, terminal servers and devices are located on the network 192.168.0.0/24. The proxy server has an address of 192.168.0.133.
Here is the configuration file / etc / sysconfig / network-scripts / ifcfg-eth0 to this type (we substitute our values):
TYPE=EthernetBOOTPROTO=noneDEFROUTE=noPEERDNS=yesPEERROUTES=noIPV4_FAILURE_FATAL=yesIPV6INIT=noIPV6_FAILURE_FATAL=noNAME=eth0UUID=f34ec600-6c46-485f-9216-0fd8954a9013DEVICE=eth0ONBOOT=yesUSERCTL=NONM_CONTROLLED=noIPADDR=192.168.0.133NETMASK=255.255.255.0DNS1=192.168.0.19DNS2=192.168.0.18DOMAIN=balt.localSEARCH=balt.local
In the directives DOMAIN and SEARCH you need to specify your domain name.
We bring the configuration file / etc / sysconfig / network-scripts / eth1 to this form (we substitute our values):
TYPE=EthernetBOOTPROTO=noneDEFROUTE=yesPEERDNS=noPEERROUTES=noIPV4_FAILURE_FATAL=yesIPV6INIT=noIPV6_FAILURE_FATAL=noNAME=eth1UUID=2e6072a6-a5fd-4f39-8786-501fa14e6015DEVICE=eth1ONBOOT=yesUSERCTL=noNM_CONTROLLED=noIPADDR=112.132.114.190NETMASK=255.255.255.252GATEWAY=112.132.114.189
Set the host name:
# hostnamectl set-hostname SRV-M29-PRX-03 We register on the DNS server A an entry for the proxy server so that it is resolved from the local network.
If the local network consists of subnets, then in order for them to communicate with each other on devices with a proxy server as a gateway, you need to configure routes and enable forwarding.
Create the file / etc / sysconfig / network-scripts / route-eth0 and add the required routes to it, for example:
192.168.0.0/24 via 192.168.0.78 dev eth0192.168.2.0/24 via 192.168.0.78 dev eth0192.168.3.0/24 via 192.168.0.78 dev eth010.254.253.0/24 via 192.168.0.78 dev eth0
Add to /etc/sysctl.conf:
net.ipv4.ip_forward = 1
Reboot.
Configure the firewall. Squid 4.X.XX works with both firewalld and iptables. Who is more convenient. This article uses iptables.
Stop and delete firewalld:
# systemctl stop firewalld # yum remove firewalld.noarch Install and run iptables:
# yum install iptables-services # systemctl enable iptables # systemctl enable ip6tables # systemctl start iptables # systemctl start ip6tables We allow SSH and ICMP only from the local network:
# iptables -R INPUT 4 -i eth0 -p tcp -m state --state NEW -m tcp --dport 22 -j ACCEPT # iptables -R INPUT 2 -i eth0 -p icmp -j ACCEPT We configure traffic redirections from http 80 and https 443 ports to the corresponding SQUID 3129 and 3127. We also use ipset to create a list of destination addresses that will not be redirected to Squid, but will pass by it. This is necessary, for example, for bank clients, for telegrams, etc.
Create an exception list:
# ipset create no_proxy_net_dst hash:net We add to it the addresses we need. For example, in order not to proxy telegram traffic from devices, we specify:
# ipset add no_proxy_net_dst 149.154.160.0/20 Created ipset settings will be erased after a reboot, which will also cause the iptables launch to fail. Therefore, we write a script for recovering data after a reboot.
Upload the ipset settings to the file:
# ipset save -file /etc/sysconfig/ipset-lists.conf Create a script /usr/scripts/system/ipset-restore.bash, which, when loaded, first clears all the rules, and then restores the configuration from /etc/sysconfig/ipset-lists.conf:
#!/bin/bashipset destroyipset restore -file /etc/sysconfig/ipset-lists.conf
This script should be run before starting iptables, so in the /etc/systemd/system/basic.target.wants/iptables.service service we add the line:
ExecStartPre=/usr/scripts/system/ipset-restore.bash
Reboot systemd:
# systemctl daemon-reload Create redirect rules in iptables:
# iptables -t nat -A PREROUTING -p tcp -m tcp -s 192.168.0.0/24 --dport 443 -m set ! --match-set no_proxy_net_dst dst -j REDIRECT --to-ports 3127 # iptables -t nat -A PREROUTING -p tcp -m tcp -s 192.168.0.0/24 --dport 80 -m set ! --match-set no_proxy_net_dst dst -j REDIRECT --to-ports 3129 That is, all http and https traffic from the network 192.168.0.0/24, except for the one whose destination address is specified in no_proxy_net_dst, is sent to Squid.
We edit the FORWARD chain, allow packets to go freely within the local network between all subnets, and also from the 192.168.0.0/24 network to go through the eth1 WAN interface.
# iptables -I FORWARD 1 -i eth0 -o eth0 -p all -j ACCEPT # iptables -I FORWARD 2 -i eth0 -o eth1 -s 192.168.0.0/24 -j ACCEPT # iptables -I FORWARD 3 -i eth1 -o eth0 -d 192.168.0.0/24 -j ACCEPT Configure SNAT on eth1:
# iptables -t nat -A POSTROUTING -s 192.168.0.0/24 -o eth1 -j SNAT --to-source 112.132.114.190 Well, we open the ports we need on the internal interface:
# iptables -I INPUT 1 -i eth0 -p tcp --dport 80 -j ACCEPT # iptables -I INPUT 1 -i eth0 -p tcp --dport 443 -j ACCEPT # iptables -I INPUT 1 -i eth0 -p tcp --dport 3127 -j ACCEPT # iptables -I INPUT 1 -i eth0 -p tcp --dport 3128 -j ACCEPT # iptables -I INPUT 1 -i eth0 -p tcp --dport 3129 -j ACCEPT Save the iptables configuration:
# /sbin/iptables-save > /etc/sysconfig/iptables You can also, for peace of mind, specify ssh to listen only on the internal interface. Edit / etc / ssh / sshd_config:
ListenAddress 192.168.0.133
We will authenticate with AD using Kerberos. This protocol requires that network time be synchronized. Therefore, we set up a proxy server to obtain time information from domain controllers. We will use NTP.
Install:
# yum install ntp We edit the configuration file /etc/ntp.conf, instead of the servers centos.pool.ntp.org we specify ours:
server srv-m29-dc-03.balt.local iburstserver srv-m29-dc-01.balt.local iburst
And indicate to use only the internal interface:
interface ignore wildcardinterface listen 192.168.0.133interface ignore ipv6
Run:
# systemctl enable ntpd # systemctl start ntpd You can check the work using the commands:
# ntpq -4 -c peers # ntpstat I know that disabling SELinux is wrong, but my hands have not reached the settings of Squid and SELinux. Soon I plan to return to this issue. Therefore, I disable SELinux, but in no case do I agitate to do the rest. If you have time, it will be better for you and Dan Walsh to figure it out and do it right.
We translate SELinux into Permissive mode, edit the / etc / sysconfig / selinux file:
SELINUX=permissive
Reboot.
Squid installation
The preparatory part is over. Now we proceed to the Squid installation.
In the official CentOS repositories there is only Squid 3.5. We will install Squid 4.0.23.
Therefore, we download Squid itself:
# wget http://www1.ngtech.co.il/repo/centos/7/beta/x86_64/squid-debuginfo-4.0.23-1.el7.centos.x86_64.rpm # wget http://www1.ngtech.co.il/repo/centos/7/beta/x86_64/squid-debuginfo-4.0.23-1.el7.centos.x86_64.rpm Helpers to him:
# wget http://www1.ngtech.co.il/repo/centos/7/beta/x86_64/squid-helpers-4.0.23-1.el7.centos.x86_64.rpm Helpers are scripts that add certain functions to Squid. For example, we will use ext_kerberos_ldap_group_acl, with which it will check the user's membership in a group in Active Directory.
We put dependences:
# wget http://www1.ngtech.co.il/repo/centos/7/x86_64/libecap-1.0.0-3.el7.centos.x86_64.rpm # wget http://www1.ngtech.co.il/repo/centos/7/x86_64/libecap-debuginfo-1.0.0-3.el7.centos.x86_64.rpm # wget http://www1.ngtech.co.il/repo/centos/7/x86_64/libecap-devel-1.0.0-3.el7.centos.x86_64.rpm # yum -y --nogpgcheck localinstall libecap-1.0.0-3.el7.centos.x86_64.rpm # yum -y --nogpgcheck localinstall libecap-devel-1.0.0-3.el7.centos.x86_64.rpm # yum -y --nogpgcheck localinstall libecap-debuginfo-1.0.0-3.el7.centos.x86_64.rpm # yum install libtool-ltdl openssl-devel cyrus-sasl-gssapi gnutls epel-release perl-Crypt-OpenSSL-X509 perl-DBI perl-Digest-MD5 perl-URI gcc gcc-c++ perl-Digest-SHA Install Squid:
# rpm -Uhv squid-4.0.23-1.el7.centos.x86_64.rpm # rpm -Uhv squid-debuginfo-4.0.23-1.el7.centos.x86_64.rpm # rpm -Uhv squid-helpers-4.0.23-1.el7.centos.x86_64.rpm Change the owner of the directories used by the squid:
# chown -R squid:squid /var/spool/squid/ # chown -R squid:squid /usr/bin/squidclient # chown -R squid:squid /etc/squid/ # chown -R squid:squid /usr/share/squid # chown -R squid:squid /usr/lib64/squid # chown -R squid:squid /var/log/squid/ Let's change the default configuration of /etc/squid/squid.conf:
acl localnet src fe80::/10 # RFC 1918 local private network (LAN)
#acl localnet src 192.168.0.0/16 # RFC 1918 local private network (LAN)acl localnet src fc00::/7 # RFC 4193 local private network rangeacl localnet src fe80::/10 # RFC 4291 link-local (directly plugged) machines
acl SSL_ports port 443acl Safe_ports port 80 # httpacl Safe_ports port 21 # ftpacl Safe_ports port 443 # httpsacl Safe_ports port 70 # gopheracl Safe_ports port 210 # waisacl Safe_ports port 1025-65535 # unregistered portsacl Safe_ports port 280 # http-mgmtacl Safe_ports port 488 # gss-httpacl Safe_ports port 591 # filemakeracl Safe_ports port 777 # multiling httpacl CONNECT method CONNECT
#http_access deny !Safe_ports
# CONNECT SSLhttp_access deny CONNECT !SSL_ports
# cachemgrhttp_access allow localhost managerhttp_access deny manager
# localhosthttp_access allow localhost
# ,http_access deny all
# Squidhttp_port 192.168.0.133:3128
# DNS.dns_nameservers 192.168.1.2 192.168.0.18dns_v4_first on
#cache_dir ufs /var/spool/squid 100 16 256coredump_dir /var/spool/squidrefresh_pattern ^ftp: 1440 20% 10080refresh_pattern ^gopher: 1440 0% 1440refresh_pattern -i (/cgi-bin/|\?) 0 0% 0refresh_pattern . 0 20% 4320
The correctness of the edited configuration file can be checked using:
# squid -k parse In the settings, we indicated that we will use caching. Therefore, we need to create a directory tree in which our cache will be stored. Execute the command:
# squid -z And we start Squid:
# systemctl enable squid # systemctl start squid Configure Explicit Proxy
The default configuration provides for the work of an "opaque" proxy with authorization based on ip addresses - all computers on the local network are allowed to access the Internet.
We are also interested in authentication in the Active Directory domain with authorization based on domain groups. For authentication in AD, we will use the Kerberos protocol. The helper negotiate_kerberos_auth will help us with this. For authorization by groups, we will use ext_kerberos_ldap_group_acl helper.
First, install the Kerberos client:
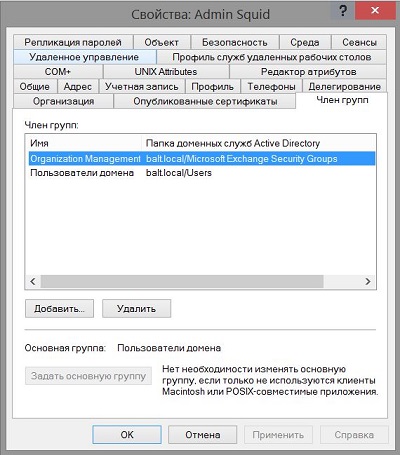
# yum install krb5-workstation Need to create a user in Active Directory. Let it be admin_squid. This user should have the right to read the domain users belonging to domain groups. Therefore, we add a user, for example, to the Organization Managment group.
! UPD: In most configurations, all users have this right, so no additional groups need to be added. If not, then it is better to use a group with more limited rights than the "Organization Managment"
We generate the keytab file on the domain controller. This file is used for authentication in the Kerberos infrastructure. At the same time, users will not need to enter a login and password, Squid will authenticate them themselves using a keytab file.
# ktpass -princ HTTP/srv-m29-prx-03.balt.local@BALT.LOCAL -mapuser BALT\admin_squid -pass 3EYldza1sR -crypto All -ptype KRB5_NT_PRINCIPAL -out C:\keytabs\PROXY.keytab ! UPD: set the "crypto" option according to your security settings.
princ, mapuser, pass, out naturally change to your own. The resulting PROXY.keytab file must be copied to the proxy server in / etc / squid and the rights to it must be changed:
# chown squid:squid /etc/squid/PROXY.keytab # chmod 640 /etc/squid/PROXY.keytab Edit the Kerberos configuration file on the /etc/krb5.conf proxy server:
includedir /etc/krb5.conf.d/[logging]default = FILE:/var/log/krb5libs.logkdc = FILE:/var/log/krb5kdc.logadmin_server = FILE:/var/log/kadmind.log[libdefaults]dns_lookup_realm = falsedns_lookup_kdc = falseticket_lifetime = 24hrenew_lifetime = 7dforwardable = truerdns = falsedefault_realm = BALT.LOCALdefault_ccache_name = KEYRING:persistent:%{uid}default_keytab_name = /etc/squid/PROXY.keytab[realms]BALT.LOCAL = {kdc = srv-m29-dc-03.balt.localkdc = srv-m29-dc-01.balt.localadmin_server = srv-m29-dc-03.balt.localdefault_domain = balt.local}[domain_realm].balt.local = BALT.LOCALbalt.local = BALT.LOCAL
Here,
default_realm, default_domain - FQDN domain
default_keytab_name is the path to the keytab file
kdc, admin_server - domain controllers
Checking:
# kinit -kV -p HTTP/srv-m29-prx-03.balt.local If everything is correct, then we will get “Authenticated to Kerberos v5” in response.
Remove the received ticket that we received from the Kerberos server in the previous step:
# kdestroy Now we make changes to the “squid startup script” / etc / sysconfig / squid so that squid knows where the keytab file is:
KRB5_KTNAME=/etc/squid/PROXY.keytabexport KRB5_KTNAME
Add to /etc/squid/squid.conf:
auth_param negotiate program /usr/lib64/squid/negotiate_kerberos_auth -s HTTP/srv-m29-prx-03.balt.localauth_param negotiate children 10auth_param negotiate keep_alive on
These lines should be at the beginning of the file before all acl. They describe the actual authentication using Kerberos. Information about the parameters of auth_param can be found at the link auth_param .
We also add acl, which corresponds to all Kerberos-authenticated users and allows them access:
acl kerb_auth proxy_auth REQUIREDhttp_access allow kerb_auth
Specify Squid to re-read the configuration:
# squid -k reconfigure After these manipulations, users with domain accounts can access the Internet. We indicate on terminal servers in the browser srv-m29-prx-03.balt.local, port 3128 in the proxy server settings and check. At this stage, we can already create access rules for each domain account. For example, if we want to prevent the user petrov.e from logging in to gmail.com, then we add to the configuration:
acl petrov-e proxy_auth petrov.e@BALT.LOCALacl gmail url_regex -i mail\.google\.comacl gmail url_regex -i gmail\.comhttp_access deny petrov-e gmail
We are also interested in authorization by groups. To do this, create the necessary groups in AD:
SQUID-INTERNET-STANDART - a standard group for which access to prohibited websites is restrictedSQUID-INTERNET-FULL-ACCESS - a group for which access to any sites is allowedSQUID-INTERNET-EXTENDED - a group for which the list of allowed sites is wider than for SQUID-INTERNET-STANDART
We will also create files on the proxy server and list the sites we need:blocked-http.txt - list of prohibited http / https sitesallowed-http-always.txt - list of always allowed http / https sites (for example, if the corporate portal should be accessible to everyone without exception)allowed-http-extended.txt - list of additional allowed sites for the SQUID-INTERNET-EXTENDED group.
Add, for example, in the blocked-http.txt website msn.com and vk.com:
www\.msn\.comvk\.com
In the above files, links to sites are specified using regular expressions.
We configure Squid to check the user's entry into the domain group. For this we will use the helper ext_kerberos_ldap_group_acl . Add to /etc/squid/squid.conf:
external_acl_type SQUID-INTERNET-FULL_ACCESS ttl=300 negative_ttl=60 %LOGIN /usr/lib64/squid/ext_kerberos_ldap_group_acl -a -m 0 -S srv-m29-dc-03 -g SQUID-INTERNET-FULL_ACCESS -D BALT.LOCALexternal_acl_type SQUID-INTERNET-EXTENDED ttl=300 negative_ttl=60 %LOGIN /usr/lib64/squid/ext_kerberos_ldap_group_acl -a -m 0 -S srv-m29-dc-03 -g SQUID-INTERNET-EXTENDED -D BALT.LOCALexternal_acl_type SQUID-INTERNET-STANDART ttl=300 negative_ttl=60 %LOGIN /usr/lib64/squid/ext_kerberos_ldap_group_acl -a -m 0 -S srv-m29-dc-03 -g SQUID-INTERNET-STANDART -D BALT.LOCALacl SQUID-INTERNET-FULL_ACCESS external SQUID-INTERNET-FULL_ACCESSacl SQUID-INTERNET-STANDART external SQUID-INTERNET-STANDARTacl SQUID-INTERNET-EXTENDED external SQUID-INTERNET-EXTENDED
Again, what external_acl_type can be read external_acl_type , because this article is so big. The name of the domain controller srv-m29-dc-03 and the domain name BALT.LOCAL substitute our own.
We describe acl with http / https addresses:
acl allowed-http-always url_regex -i "/etc/squid/allowed-http-always.txt"acl blocked-http url_regex -i "/etc/squid/blocked-http.txt"acl allowed-http-extended url_regex -i "/etc/squid/allowed-http-extended.txt"
And create rules based on these acl:
http_access allow allowed-http-alwayshttp_access allow SQUID-INTERNET-FULL_ACCESShttp_access allow SQUID-INTERNET-EXTENDED allowed-http-extendedhttp_access allow SQUID-INTERNET-EXTENDED !blocked-httphttp_access allow SQUID-INTERNET-STANDART !blocked-http
Commenting on the http_access allow kerb_auth line, since we no longer need any user registered on the server to go anywhere.
The final squid.conf should look something like this:
# Kerberosauth_param negotiate program /usr/lib64/squid/negotiate_kerberos_auth -s HTTP/srv-m29-prx-03.balt.localauth_param negotiate children 10auth_param negotiate keep_alive on
#acl localnet src 192.168.0.0/16 # RFC 1918 local private network (LAN)acl localnet src fc00::/7 # RFC 4193 local private network rangeacl localnet src fe80::/10 # RFC 4291 link-local (directly plugged) machines
acl SSL_ports port 443acl Safe_ports port 80 # httpacl Safe_ports port 21 # ftpacl Safe_ports port 443 # httpsacl Safe_ports port 70 # gopheracl Safe_ports port 210 # waisacl Safe_ports port 1025-65535 # unregistered portsacl Safe_ports port 280 # http-mgmtacl Safe_ports port 488 # gss-httpacl Safe_ports port 591 # filemakeracl Safe_ports port 777 # multiling httpacl CONNECT method CONNECT
# acl,external_acl_type SQUID-INTERNET-FULL_ACCESS ttl=300 negative_ttl=60 %LOGIN /usr/lib64/squid/ext_kerberos_ldap_group_acl -a -m 0 -S srv-m29-dc-03 -g SQUID-INTERNET-FULL_ACCESS -D BALT.LOCALexternal_acl_type SQUID-INTERNET-EXTENDED ttl=300 negative_ttl=60 %LOGIN /usr/lib64/squid/ext_kerberos_ldap_group_acl -a -m 0 -S srv-m29-dc-03 -g SQUID-INTERNET-EXTENDED -D BALT.LOCALexternal_acl_type SQUID-INTERNET-STANDART ttl=300 negative_ttl=60 %LOGIN /usr/lib64/squid/ext_kerberos_ldap_group_acl -a -m 0 -S srv-m29-dc-03 -g SQUID-INTERNET-STANDART -D BALT.LOCALacl SQUID-INTERNET-FULL_ACCESS external SQUID-INTERNET-FULL_ACCESSacl SQUID-INTERNET-STANDART external SQUID-INTERNET-STANDARTacl SQUID-INTERNET-EXTENDED external SQUID-INTERNET-EXTENDED
#acl allowed-http-always url_regex -i "/etc/squid/allowed-http-always.txt"acl blocked-http url_regex -i "/etc/squid/blocked-http.txt"acl allowed-http-extended url_regex -i "/etc/squid/allowed-http-extended.txt"
# acl, ,acl kerb_auth proxy_auth REQUIRED#http_access allow kerb_auth#http_access deny !Safe_ports
# CONNECT SSLhttp_access deny CONNECT !SSL_ports
# cachemgrhttp_access allow localhost managerhttp_access deny manager
# localhosthttp_access allow localhost
#http_access allow allowed-http-alwayshttp_access allow SQUID-INTERNET-FULL_ACCESShttp_access allow SQUID-INTERNET-EXTENDED allowed-http-extendedhttp_access allow SQUID-INTERNET-EXTENDED !blocked-httphttp_access allow SQUID-INTERNET-STANDART !blocked-http
# ,http_access deny all
# Squidhttp_port 192.168.0.133:3128
# DNS.dns_nameservers 192.168.1.2 192.168.0.18dns_v4_first on
#cache_dir ufs /var/spool/squid 100 16 256coredump_dir /var/spool/squidrefresh_pattern ^ftp: 1440 20% 10080refresh_pattern ^gopher: 1440 0% 1440refresh_pattern -i (/cgi-bin/|\?) 0 0% 0refresh_pattern . 0 20% 4320
Reboot Squid:
# systemctl restart squid After these manipulations, if the user enters the SQUID-INTERNET-STANDART domain group, he will be denied access to the sites msn.com and vk.com. Users who are not in any of the groups will not be allowed to access the Internet at all.
This completes the setting for the Explicit Proxy.
Configuring Interception Proxy
With the setting of the proxy server for domain users figured out, with the help of group policies, now we set the proxy server address on the terminal servers and use it. But for computers that are not part of the domain, and for different mobile devices, group policies do not work, and it is not convenient to manually set the proxy settings each time. And even if to register, then, for example, having come home with the device, there will be no access to the Internet from it. Therefore, you need to additionally configure a "transparent" proxy server. You can select a range of ip addresses, and create rules for it in Squid, but it is more convenient (for me) to use device MAC addresses.
To do this, create lists of mac addresses (this will be an analogue of the domain groups that we created earlier for the Explicit Proxy):
/etc/squid/ allowed-mac.txt - this includes devices with standard access/etc/squid/allowed-mac-extended.txt - this includes accessibility devices/etc/squid/allowed-mac-full-access.txt - this includes devices with full access
In the files, each new device must be listed in a new line. Comments begin with the # character. For example, for me it looks like this:
## (TEL)94:E9:6A:D3:E0:CB## (NB) (Wi-Fi)24:0A:64:74:2D:71
Further additional settings are needed for transparent https traffic proxying. When you go to the https site, only the CONNECT request will be displayed in the logs, that is, we will not see where the user entered on this site. To see the activity in more detail, you need to break the TLS connection, actually implementing the "man-in-the-middle" attack. Therefore, if you want to monitor what exactly the user did on the https resource, you need to install a self-signed proxy server certificate on his device. Otherwise, no additional actions on the client side are needed.
We create public and private keys for self-signed CA certificates. Squid will use them to generate dynamic certificates for sites that clients request.
Create a directory for the certificate:
# mkdir /etc/squid/ssl_cert # chown -R squid:squid /etc/squid/ssl_cert/ # chmod 700 /etc/squid/ssl_cert # cd /etc/squid/ssl_cert We generate it:
# openssl req -new -newkey rsa:2048 -sha256 -days 365 -nodes -x509 -extensions v3_ca -keyout myCA.pem -out myCA.pem Enter your data.
We also generate a certificate for installation on client devices, if an interception of https is required:
# openssl x509 -in myCA.pem -outform DER -out srv-m29-prx-03.der On the client side, it must be installed in trusted root certificates.
Create a directory for dynamic certificates. For this we use the ssl_crtd helper:
# /usr/lib64/squid/security_file_certgen -c -s /etc/squid/ssl_db -M 4MB # chown -R squid:squid /etc/squid/ssl_db/ We create lists of https sites:
/etc/squid/blocked_https.txt - blocked https sites/etc/squid/allowed-https-extended.txt - additional allowed https sites/etc/squid/allowed-https-always.txt - always allowed https sites/etc/squid/monitored-https.txt - sites whose traffic we want to decrypt
We rule config / etc / squid / squid.conf.
We specify Interception Proxy to work in squid.conf on ports 3127 for https and 3129 for http.
http_port 192.168.0.133:3129 intercepthttps_port 192.168.0.133:3127 intercept ssl-bump cert=/etc/squid/ssl_cert/myCA.pem generate-host-certificates=on dynamic_cert_mem_cache_size=4MB
Create acl for https traffic and MAC addresses:
acl allowed-mac arp "/etc/squid/allowed-mac.txt"acl allowed-mac-extended arp "/etc/squid/allowed-mac-extended.txt"acl allowed-mac-full-access arp "/etc/squid/allowed-mac-full-access.txt"acl step1 at_step SslBump1acl allowed-https-always ssl::server_name_regex -i "/etc/squid/allowed-https-always.txt"acl blocked-https ssl::server_name_regex -i "/etc/squid/blocked-https.txt"acl allowed-https-extended ssl::server_name_regex -i "/etc/squid/allowed-https-extended.txt"acl monitored-HTTPS ssl::server_name_regex -i "/etc/squid/monitored-HTTPS.txt"
Add permissive rules for devices and http traffic:
http_access allow allowed-mac-full-accesshttp_access allow allowed-mac-extended allowed-http-extendedhttp_access allow allowed-mac-extended !blocked-httphttp_access allow allowed-mac !blocked-http
Add allow rules for devices and traffic https:
ssl_bump peek step1ssl_bump bump allowed-mac-full-access monitored-HTTPSssl_bump bump allowed-mac-extended monitored-HTTPSssl_bump bump allowed-mac monitored-HTTPSssl_bump splice allowed-https-alwaysssl_bump splice allowed-mac-full-accessssl_bump splice allowed-mac-extended allowed-https-extendedssl_bump splice allowed-mac-extended !blocked-httpsssl_bump splice allowed-mac !blocked-httpsssl_bump terminate all
And settings for creating dynamic certificates:
sslcrtd_program /usr/lib64/squid/security_file_certgen -s /etc/squid/ssl_db -M 4MB
Restart Squid.
If we now register our proxy server as a gateway, then everything should work, without installing any certificates on the client side.
A little about proxying https. In Squid 3.5 and higher, the so-called SslBump Peek and Splice feature is used for these purposes. Its essence lies in the fact that Squid "spies" the TLS handshake process, when there are already known client SNI and a web server certificate sent in response to a client request. SNI is the name of the host with which the client wishes to establish a TLS connection. Based on this data, you can decide what Squid will do next - block or skip.
In fact, Squid looks at the TLS Client Hello message, creates an identical one, and sends it to the destination web server. The server responds with a TLS Server Hello message, which can also be analyzed.
That is, we have three stages (steps):
- we receive CONNECT from the client. At this step, we do not know the domain name of the requested site. Only tcp-level information - ip address and port. Therefore, to make decisions based on the domain name is now impossible;
- we receive tls client hello from the client. There is already SNI here, that is, the name of the destination server is already known;
- we get tls server hello from the server that has the server certificate.
At each step, we can perform one of 5 actions: peek, splice, stare, bump, terminate. The further processing of the connection depends on which step the action is performed on. I will not describe everything, as it will be a lot of text. Read what and how you can here SslPeekAndSplice .
I will describe only about our configuration.
The string “acl step1 at_step SslBump1” just describes the first step.
The string “ssl_bump peek step1” means to perform a peek in the first step, which will result in a transition to the second step, where we process TLS Client Hello and retrieve SNI.
Lines:
ssl_bump bump allowed-mac-full-access monitored-HTTPSssl_bump bump allowed-mac-extended monitored-HTTPSssl_bump bump allowed-mac monitored-HTTPS
they say if the server name extracted from SNI is in the monitored-https.txt file and the mac address of the client device is in the allowed lists, then establish a TLS connection with the server (using client SNI) and establish a TLS connection with the client (using a fake dynamic server certificate) . That is, in fact, we organize “squid-in-the-middle”. Since the certificate for the client is fake, the browser will swear. To do this, we created the above certificate srv-m29-prx-03.der, which must be installed on the client device.
Lines:
ssl_bump splice allowed-https-alwaysssl_bump splice allowed-mac-full-accessssl_bump splice allowed-mac-extended allowed-https-extendedssl_bump splice allowed-mac-extended !blocked-httpsssl_bump splice allowed-mac !blocked-https
they say if the server name extracted from SNI is in the allowed files with https lists, then we create a tcp tunnel without decoding the connection. That is, the client and server communicate directly, as if there is no proxy server between them. The browser receives a normal certificate from the web server, and not a fake from the proxy server, and naturally does not swear.
As a result, if we need to decrypt the TLS connection, then the self-signed certificate of the proxy server needs to be installed on the device. If you just need to decide whether to let us have a client on the site, or not, without activity logs on this site, then you can not install the certificate.
Final configuration:
# Kerberosauth_param negotiate program /usr/lib64/squid/negotiate_kerberos_auth -s HTTP/srv-m29-prx-03.balt.localauth_param negotiate children 10auth_param negotiate keep_alive on
#acl localnet src 192.168.0.0/16 # RFC 1918 local private network (LAN)acl localnet src fc00::/7 # RFC 4193 local private network rangeacl localnet src fe80::/10 # RFC 4291 link-local (directly plugged) machines
acl SSL_ports port 443acl Safe_ports port 80 # httpacl Safe_ports port 21 # ftpacl Safe_ports port 443 # httpsacl Safe_ports port 70 # gopheracl Safe_ports port 210 # waisacl Safe_ports port 1025-65535 # unregistered portsacl Safe_ports port 280 # http-mgmtacl Safe_ports port 488 # gss-httpacl Safe_ports port 591 # filemakeracl Safe_ports port 777 # multiling httpacl CONNECT method CONNECT
# acl,external_acl_type SQUID-INTERNET-FULL_ACCESS ttl=300 negative_ttl=60 %LOGIN /usr/lib64/squid/ext_kerberos_ldap_group_acl -a -m 0 -S srv-m29-dc-03 -g SQUID-INTERNET-FULL_ACCESS -D BALT.LOCALexternal_acl_type SQUID-INTERNET-EXTENDED ttl=300 negative_ttl=60 %LOGIN /usr/lib64/squid/ext_kerberos_ldap_group_acl -a -m 0 -S srv-m29-dc-03 -g SQUID-INTERNET-EXTENDED -D BALT.LOCALexternal_acl_type SQUID-INTERNET-STANDART ttl=300 negative_ttl=60 %LOGIN /usr/lib64/squid/ext_kerberos_ldap_group_acl -a -m 0 -S srv-m29-dc-03 -g SQUID-INTERNET-STANDART -D BALT.LOCALacl SQUID-INTERNET-FULL_ACCESS external SQUID-INTERNET-FULL_ACCESSacl SQUID-INTERNET-STANDART external SQUID-INTERNET-STANDARTacl SQUID-INTERNET-EXTENDED external SQUID-INTERNET-EXTENDED
# httpacl allowed-http-always url_regex -i "/etc/squid/allowed-http-always.txt"acl blocked-http url_regex -i "/etc/squid/blocked-http.txt"acl allowed-http-extended url_regex -i "/etc/squid/allowed-http-extended.txt"
# httpsacl allowed-https-always ssl::server_name_regex -i "/etc/squid/allowed-https-always.txt"acl blocked-https ssl::server_name_regex -i "/etc/squid/blocked-https.txt"acl allowed-https-extended ssl::server_name_regex -i "/etc/squid/allowed-https-extended.txt"acl monitored-HTTPS ssl::server_name_regex -i "/etc/squid/monitored-HTTPS.txt"
#acl allowed-mac arp "/etc/squid/allowed-mac.txt"acl allowed-mac-extended arp "/etc/squid/allowed-mac-extended.txt"acl allowed-mac-full-access arp "/etc/squid/allowed-mac-full-access.txt"acl step1 at_step SslBump1
# acl, ,acl kerb_auth proxy_auth REQUIRED#http_access allow kerb_auth#http_access deny !Safe_ports
# CONNECT SSLhttp_access deny CONNECT !SSL_ports
# cachemgrhttp_access allow localhost managerhttp_access deny manager
# localhosthttp_access allow localhost
#http_access allow allowed-http-alwayshttp_access allow SQUID-INTERNET-FULL_ACCESShttp_access allow SQUID-INTERNET-EXTENDED allowed-http-extendedhttp_access allow SQUID-INTERNET-EXTENDED !blocked-httphttp_access allow SQUID-INTERNET-STANDART !blocked-http
# mac httphttp_access allow allowed-mac-full-accesshttp_access allow allowed-mac-extended allowed-http-extendedhttp_access allow allowed-mac-extended !blocked-httphttp_access allow allowed-mac !blocked-http
# ,http_access deny all
# mac httpsssl_bump peek step1ssl_bump bump allowed-mac-full-access monitored-HTTPSssl_bump bump allowed-mac-extended monitored-HTTPSssl_bump bump allowed-mac monitored-HTTPSssl_bump splice allowed-https-alwaysssl_bump splice allowed-mac-full-accessssl_bump splice allowed-mac-extended allowed-https-extendedssl_bump splice allowed-mac-extended !blocked-httpsssl_bump splice allowed-mac !blocked-https
# https,ssl_bump terminate all
# Squidhttp_port 192.168.0.133:3128http_port 192.168.0.133:3129 intercepthttps_port 192.168.0.133:3127 intercept ssl-bump cert=/etc/squid/ssl_cert/myCA.pem generate-host-certificates=on dynamic_cert_mem_cache_size=4MB
# DNS.dns_nameservers 192.168.1.2 192.168.0.18dns_v4_first on
#sslcrtd_program /usr/lib64/squid/security_file_certgen -s /etc/squid/ssl_db -M 4MB
#cache_dir ufs /var/spool/squid 100 16 256coredump_dir /var/spool/squidrefresh_pattern ^ftp: 1440 20% 10080refresh_pattern ^gopher: 1440 0% 1440refresh_pattern -i (/cgi-bin/|\?) 0 0% 0refresh_pattern . 0 20% 4320
Reboot Squid:
# systemctl restart squid Additionally
To view the statistics, a large number of different log-analysis software is written.
The most famous SARG, ScreenSquid, lightsquid, SquidAnalyzer.
For the configuration above, I had to use a samopisny log analyzer so that the full user names, and not the logins and MAC addresses, were included in the report. Who knows perl and php can remake ScreenSquid to fit your needs. My python periodically parses access.log, uploads the result to mysql, and uploads statistics to the html document upon request. But this is a separate topic for conversation.
Also, to check the availability of the site in files with url lists, I use a simple python 3 script (if desired, you can do the same to determine the MAC address in the files):
import re allowed_http_extended = '/etc/squid/allowed-http-extended.txt' allowed_https_extended = '/etc/squid/allowed-https-extended.txt' blocked_http = '/etc/squid/blocked-http.txt' blocked_https = '/etc/squid/blocked-https.txt' monitored_HTTPS = '/etc/squid/monitored-HTTPS.txt' dict_blocked_http = {} with open(blocked_http,'r',encoding="utf-8") as f: for i, l in enumerate(f,start=1): if l.strip() != '': dict_blocked_http[i] = l.lower() dict_blocked_https = {} with open(blocked_https,'r',encoding="utf-8") as f: for i, l in enumerate(f,start=1): if l.strip() != '': dict_blocked_https[i] = l.lower() dict_allowed_http_extended = {} with open(allowed_http_extended,'r',encoding="utf-8") as f: for i, l in enumerate(f,start=1): if l.strip() != '': dict_allowed_http_extended[i] = l.lower() dict_allowed_https_extended = {} with open(allowed_https_extended,'r',encoding="utf-8") as f: for i, l in enumerate(f,start=1): if l.strip() != '': dict_allowed_https_extended[i] = l.lower() dict_monitored_HTTPS = {} with open(monitored_HTTPS,'r',encoding="utf-8") as f: for i, l in enumerate(f,start=1): if l.strip() != '': dict_monitored_HTTPS[i] = l.lower() checked_site = input(" : ") checked_site = checked_site.lower().strip() for i in dict_blocked_http: dict_key = dict_blocked_http.get(i).strip() result = re.search(dict_key,checked_site) if result != None: print (" 'blocked-http.txt', '" + str(i) + "' '" + dict_key + "'") for i in dict_blocked_https: dict_key = dict_blocked_https.get(i).strip() result = re.search(dict_key,checked_site) if result != None: print (" 'blocked-https.txt', '" + str(i) + "' '" + dict_key + "'") for i in dict_allowed_http_extended: dict_key = dict_allowed_http_extended.get(i).strip() result = re.search(dict_key,checked_site) if result != None: print (" 'allowed_http_extended.txt', '" + str(i) + "' '" + dict_key + "'") for i in dict_allowed_https_extended: dict_key = dict_allowed_https_extended.get(i).strip() result = re.search(dict_key,checked_site) if result != None: print (" 'allowed_https_extended.txt', '" + str(i) + "' '" + dict_key + "'") for i in dict_monitored_HTTPS: dict_key = dict_monitored_HTTPS.get(i).strip() result = re.search(dict_key,checked_site) if result != None: print (" 'monitored_HTTPS.txt', '" + str(i) + "' '" + dict_key + "'") Run the script, enter the url link, we get a list of files with indication of line numbers with which a match was found.
That's all.
')
Source: https://habr.com/ru/post/353100/
All Articles