Public Key Infrastructure: Certification Center based on the OpenSSL utility, SQLite3 and Tcl / Tk
 If one of the main objects of the public key infrastructure (PKI) are X509 certificates, then the central subject of the PKI is the Certification Authority (CA). It is CAs that issue certificates, terminate their validity (certificate revocation), confirm their validity. On the Habrahabr pages you can find various publications on the issue of issuing digital certificates using OpenSSL . These articles mainly cover the use of the openssl utility , describe its command-line interface and work with files that store everything: keys, requests, certificates, including the root one, etc. But if you develop a full-scale certifying center (CA) based on OpenSSL, then it is natural to want to get rid of this variety of files and go to work with databases, and also have a graphical interface for issuing and managing certificates. And if you remember the Federal Law of April 6, 2011. No. 63- “On electronic signature”, it is necessary for the TC to comply with the requirements of this law, as well as the “Requirements for the form of a qualified certificate of an electronic signature verification key” approved by order of the Federal Security Service of Russia No. 795 of December 27, 2011.
Ordinary citizens have the impression that the CA is something huge (as is the Center, almost like the Flight Control Center).
 From the point of view of responsibility, the TC is exactly that. After all, certificates issued by CA, in fact, today are equated in the passport.
From a programmer point of view, it's not so scary. Thus was born the project CAFL63 certification center. The implementation of the CAFL63 project is based on three “whales”, namely OpenSSL, SQLite3 and Tcl / Tk .
So, what is the Certification Authority today? First of all, it is the Registration Center, where representatives of legal entities, individuals, and individual entrepreneurs come for certificates with a package of necessary documents, in particular, the identity and credentials of the applicant. They can come with ready-made applications in electronic form. In the CR, they check documents, the request (the filled-in data, the correctness of the electronic signature, etc.), and, if everything went well, accept the request, approve it and send it to the Certification Authority (CA). But this is the ideal. In practice, everything looks different.
Citizens, organizations need a certificate (for access to the portal of state services, for tax reporting, to participate in the auction), but they do not know what it is and what to do with it. They are sincerely convinced that in CA receive an electronic signature like facsimile. But these are problems of enlightenment. Therefore, applicants come to the CR TC, submit documents. Together with a staff member of the CR, they go to a separate workplace and prepare a certificate request .

A prepared request on electronic media, as already mentioned, is submitted to the CR. What should the applicant remember? The first and most important thing is to pick up the carrier with the created private key!
The approved request on electronic media is transmitted to the CA where the certificate will be issued on its basis.
This is a schematic diagram of the TC. Details will become clear below. One note, in order to facilitate the demonstration of the request preparation utility, the CR and the CA are combined into one demonstration complex. But there are no problems with the separation of the functional. The easiest of them is to have a copy of CAFL63 at each workplace and use only the required functionality.
When the project was in full swing, the SimpleCA project came across . The study of this project was very helpful in the final implementation of CAFL63.
The distribution kit for the Win32 / Win64, Linux_x86 / Linux_x86_64 platforms, in addition to the CAFL63 source code, includes the README.txt file. After downloading the distribution package, you should carefully read the README.txt file.
So, run the CAFL63 utility and the start page appears on the screen:

We start the work by pressing the “Create DB” button. The CA database is created by means of the SQLite3 cross-platform database management system. DB CA contains several tables. The main table mainDB contains only one record in which the root certificate is stored, the private key is encrypted with the password, and the CA settings. There are two tables related to certificate requests: current reqDB requests and the reqDBArc query archive. Three tables are created for certificates: a table of certDBNew new certificates, a certDB certificate archive table and a certDBRev certificate revocation table:
. . . certdb eval {create table certDB( ckaID text primary key , nick text, sernum text, certPEM text, subject text, notAfter text, notBefore text, dateRevoke text, state text )} certdb eval {create table certDBRev( ckaID text primary key )} certdb eval {create table certDBNew( ckaID text primary key )} certdb eval {create table reqDB (ckaID text primary key, nick text, sernum text, subject text, type text, datereq text, status text, reqpem text, pkcs7 text)} certdb eval {create table reqDBAr (ckaID text primary key, nick text, sernum text, subject text, type text, datereq text, status text, reqpem text, pkcs7 text)} certdb eval {create table crlDB(ID integer primary key autoincrement, signtype text, issuer text, publishdate text, nextdate text, crlpem text)} . . . All request and certificate tables use the hash value (sha1) of the public key as the primary key. For convenience, the hash value from the public key value will be called CKAID (PKCS # 11 terminology). This turned out to be very convenient, for example, when searching for a certificate on request or vice versa. There is another crlDB table in the database that stores lists of revoked certificates.
The value of the public key is stored both in the request and in the certificate. Therefore, before putting them into the database, it is necessary to extract the public key from them and calculate the CKAID. To retrieve the value of the public key, it is convenient to use the pki package (package require pki), which contains tools for working with certificates and requests. However, this package is not designed to work with Russian cryptography. In this regard, on the basis of parse_cert and parse_csr procedures included in the pki package, write the procedures parce_cert_gost and parse_csr_gost:
... ## Convert Pubkey type to string set pubkey_type [::pki::_oid_number_to_name $pubkey_type] # Parse public key, based on type switch -- $pubkey_type { "rsaEncryption" { set pubkey [binary format B* $pubkey] binary scan $pubkey H* ret(pubkey) ::asn::asnGetSequence pubkey pubkey_parts ::asn::asnGetBigInteger pubkey_parts ret(n) ::asn::asnGetBigInteger pubkey_parts ret(e) set ret(n) [::math::bignum::tostr $ret(n)] set ret(e) [::math::bignum::tostr $ret(e)] set ret(l) [expr {int([::pki::_bits $ret(n)] / 8.0000 + 0.5) * 8}] set ret(type) rsa } "1.2.643.2.2.19" - "1.2.643.7.1.1.1.1" - "1.2.643.7.1.1.1.2" { # gost2001, gost2012-256,gost2012-512 set pubkey [binary format B* $pubkey] binary scan $pubkey H* ret(pubkey) set ret(type) $pubkey_type ::asn::asnGetSequence pubkey_algoid pubalgost #OID - ::asn::asnGetObjectIdentifier pubalgost oid1 #OID - ::asn::asnGetObjectIdentifier pubalgost oid2 } default { error "Unknown algorithm" } } ... Unlike native procedures, they allow working with objects not only in the PEM format, but also in the DER format. To work with the lists of revoked CRL certificates, the parse_crl procedure was written. All these procedures can be found in the source code.
Also in the pki package there are no Russian oids, for example, an INN, SNILS, etc. This problem is easily solved by adding Russian oids to the array :: pki :: oids:
. . . set ::pki::oids(1.2.643.100.1) "OGRN" set ::pki::oids(1.2.643.3.141.1.1) "OGRNIP" set ::pki::oids(1.2.643.3.131.1.1) "INN" set ::pki::oids(1.2.643.100.5) "SNILS" # set ::pki::oids(1.2.643.2.2.3) " 34.10-2001" set ::pki::oids(1.2.643.7.1.1.3.2) " 34.10-2012-256" set ::pki::oids(1.2.643.7.1.1.3.3) " 34.10-2012-512" . . . ')
Having functions parse_cert_gost and parse_csr_gost, the CKAID values (primary key for the database) are calculated as follows:
. . . array set b [parse_csr_gost $req] set pem $b(pem) set subject $b(subject) set pubkey $b(pubkey) set key1 [binary format H* $pubkey] set ckaID [::sha1::sha1 $key1] . . . So, press the button "Create DB":

Creating a CA begins with the selection of a directory in which we will store the database and set a password for access to the CA's private key. The CAFL63 utility closely monitors the length of the password:

The password is stored in the database CA as a hash:
. . . set hash256 [::sha2::sha256 $wizData(capassword)] . . . After pressing the “Next” key, the process of forming the self-signed root certificate of the CA being deployed begins. At the first step of this process, the type and parameters of the key pair are selected:

Having decided on the key pair for the root certificate of the certifying center being created, we proceed to filling out the form with information about the owner (the first screenshot is omitted).
Note that the CAFL63 utility has a certain “intelligence” and therefore controls not only the availability of data in the fields, but also the correctness (red highlighting is incorrect) of filling in such fields as TIN, OGRN, SNILS, OGRNP, e-mail address, etc .:

After filling in the fields with information about the CA owner, you will be asked to decide on the system settings of the CA:

If you are not going to work with Russian cryptography, you can use regular OpenSSL. To work with Russian cryptography, you must select the appropriate version, a modification of OpenSSL. Read more in README.txt in the downloaded distribution. Since it is planned to issue qualified certificates, it is also necessary to provide information on certification of the CA itself and the SKPI used by it (see “Requirements for the form of a qualified certificate of the electronic signature verification key”, approved by order of the Federal Security Service of Russia of 27.12.2011 No. 795).
After all the fields are filled in correctly, you will be asked once again to check their accuracy and click the “Finish” button:

After clicking the “Finish” button, the CA database will be created, in which the CA root certificate, private key, system settings will be saved, and the start page of the CAFL63 utility will reappear on the screen. Now, when we have created a newly created CA database, we press the "Open DB" button, select the database directory, go to the CA main working window and click the "View CA CA" button, make sure that the root certificate we created :

As a next step, we prepare application templates / profiles for legal entities, individuals, individual entrepreneurs ( Tools-> Settings-> Types of Certificates-> New ):

After specifying the name of a new profile, you will be asked to determine its composition:

The composition of the profile determines the distinguished name (distinguished / unique name of the certificate holder). Each profile has its composition with the required (required) or not fields / oid-s. The composition of the profile for legal entities, individuals, individual entrepreneurs is determined by the requirements of FZ-63 and the “Requirements for the form of a qualified electronic signature verification key certificate” of the FSB of Russia.
After the preparation of profiles, the TC is ready to receive applicants and applications from them. As noted above, the applicant can come either with a finished application for a certificate or without it.
If the applicant came with a finished application, then after checking his documents, the application is imported into the CA database. To do this, on the main working window, select the “Requests for certificates” tab, click the “Import request / CSR” button and select the file with the request. After that, a window will appear with information from the request:

After reviewing the request and making sure that it is filled in correctly, you can click the “Import” button to enter it into the database. Immediately, we note that when trying to re-submit a request to the CA database, a message will be displayed:

Requests to the CA database are marked (column “Type”) either as “Locale”, created in the registration center, or as “Import”, created by the applicant himself, and the time of receipt of the application to the CA is recorded. This can be useful when analyzing conflict situations. Therefore, when importing a certificate request, you should indicate who created the request (see screenshot).
The imported application is located in the database of the CA and is displayed on the main window on the “Requests for Certificates” tab. Received requests are in the “review” stage (the “Status” column of the “Certificate Requests” tab and the “Request Archive” tab). For each new request, a decision must be made (a drop-down menu when you right-click on the selected request):

Each request must be either denied or approved:

If the request is rejected, it is moved from the table of current requests reqDB to the table of requests archive reqDBArc and, accordingly, disappears on the tab “Requests for certificates” and appears on the tab “Archive of Requests”.
The approved application remains in the reqDB table and on the “Requests for Certificates” tab until the certificate is issued, and then it is also archived.
Before issuing a certificate, it is necessary, along with the applicant, to clarify for what purposes (for example, to access the Government services portal ) the certificate will be used ( Tools-> Settings-> Types of Certificates -> Personal Face -> Edit -> Key Usage ):

To issue a certificate, select the approved application on the “Requests for Certificates” tab, right-click and in the drop-down menu when you select “Issue certificate”. In the appeared widget it will be necessary to select a profile to which the request / certificate profile should correspond:

Note that in the process of issuing a certificate, you can clarify the values of a field:

The procedure for issuing a certificate itself (the menu item “Issue a certificate”) differs little from the procedure for creating a root certificate or issuing a certificate:
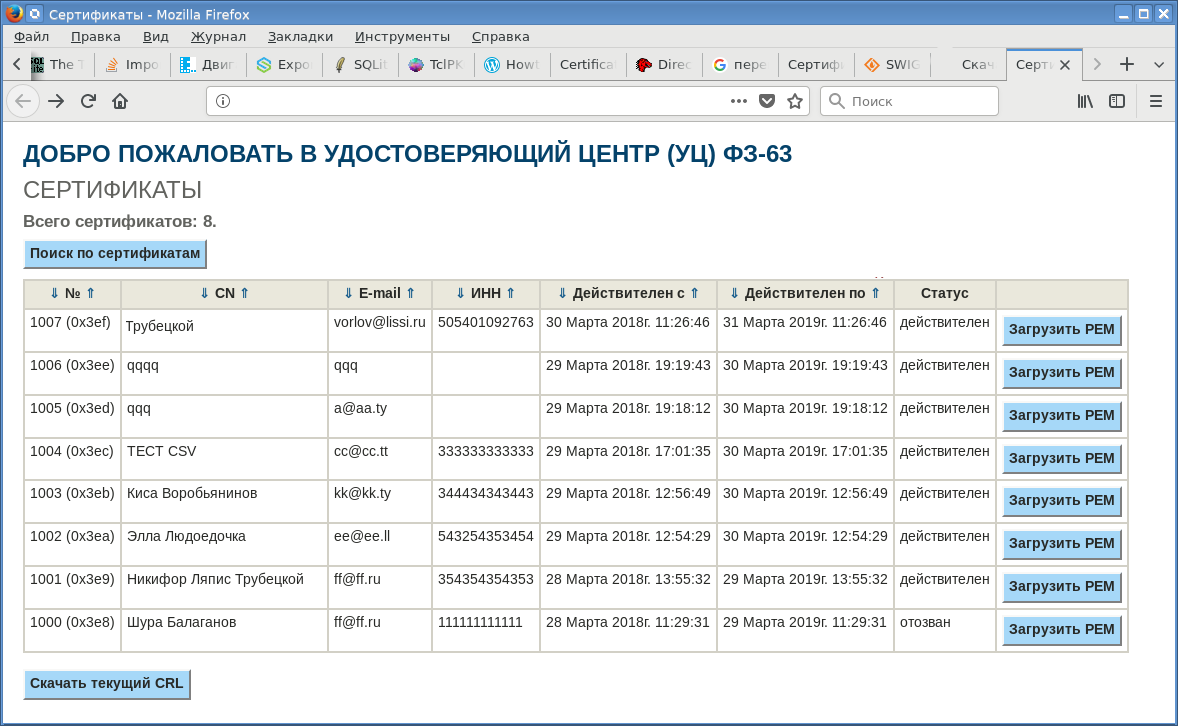
The issued certificate will immediately appear on the Certificates tab. At the same time, the certificate itself enters the certDBNew database of the CA database and remains there until it is published. A certificate is considered published after it is exported to a SQL-dump of new certificates, which is transferred to a public service. Publishing a certificate causes it to be moved from the certDBNew table to the certDB table.
If you right-click on the selected line in the Certificates tab, a menu with functions will appear:

These functions allow you to view both the certificate itself and the request on the basis of which it was issued. You can also export the certificate to a file or to the applicant's flash drive. The most important function here is the certificate revocation function! There is also such an exotic function as exporting a certificate to a secure container PKCS # 12. It is used when the applicant wants such a container. For such applicants, the function of generating a request with preservation of the private key in the file is specially provided (the button “Create a request / CSR” on the tab “Requests for certificates”).
So, TC started his life, issued the first certificate. One of the tasks of the CA is the organization of free access to the issued certificates. The publication of certificates usually goes through Web-services. There is such a service and CAFL63:
To publish certificates and certificate revocation lists on a public service, the TC pre-uploads certificates or files ( Certificates-> Export Certificates ), or SQL-dumps the entire certificate table, from which you can create a database of certificates and upload them to it. SQL-dump of new certificates from which they will be added to the public service database:

The last screenshot was made on the Windows platform and clearly demonstrates the cross-platform database of the CA: it was simply copied from the Linux platform.
The core function of a CA is to publish a list of revoked certificates, in the same way as the Ministry of Internal Affairs does regarding invalid passports. The certificate can be revoked at the request of the owner. The main reason for revocation is the loss of the private key or loss of trust in it.
To revoke a certificate, just select it in the Certificates tab, right-click and select the Certificate Revocation menu item:

The revocation procedure is no different from the procedure for approving a request or issuing a certificate. The revoked certificate enters the cerDBRev table of the CA database and appears in the "Revoked Certificates" tab.
It remains to consider the last function of the CA - issue CRL - list of revoked certificates. The CRL list is formed on the “Revoked Certificates” tab when you click the “Create COC / CRL” button. All that is required from the administrator is to enter the password of the CA and confirm its intention to release the CRL:

The released CRL enters the crlDB database table and is displayed on the CRL / SOS tab. To parse the CRL before it is placed in the database, the parse_crl procedure was written:
proc parse_crl {crl} { array set ret [list] if { [string range $crl 0 9 ] == "-----BEGIN" } { array set parsed_crl [::pki::_parse_pem $crl "-----BEGIN X509 CRL-----" "-----END X509 CRL-----"] set crl $parsed_crl(data) } ::asn::asnGetSequence crl crl_seq ::asn::asnGetSequence crl_seq crl_base ::asn::asnGetSequence crl_base crl_full ::asn::asnGetObjectIdentifier crl_full ret(signtype) #puts "KEY_TYPE=$ret(signtype)" ::::asn::asnGetSequence crl_base crl_issue set ret(issue) [::pki::x509::_dn_to_string $crl_issue] #puts "ISSUE=$ret(issue)" ::asn::asnGetUTCTime crl_base ret(publishDate) ::asn::asnGetUTCTime crl_base ret(nextDate) #puts "publishDate=$ret(publishDate)" return [array get ret] } To view the CRL or export it for publication on a public service, you must always select the desired line, right-click and select the menu item:

That's all.
Source: https://habr.com/ru/post/352790/
All Articles