3CX voice application development: an introduction for beginners
Call Flow Designer Development Environment
The 3CX Call Flow Designer (CFD) development environment allows the PBX administrator to create complex call processing logic (voice applications) in a convenient visual editor — with minimal or no programming skills. Voice applications interact with the user by phone, taking input from him and performing certain actions. You can, for example, request the customer's card number from the subscriber, check it in the CRM system and transfer it to the assigned manager. Or you can route the call depending on the date, time and other factors.
Warning: to run 3CX CFD applications, 3CX Pro edition is required.
')
A CFD application is “assembled” from building blocks called components. There are quite a few ready-made components, and their list is expanding, for example: Menu (Voice Menu / IVR), Prompt Playback (Playing Message to the User), User Input. Each component has several customizable parameters, which we will discuss below. The components, combined together, form a project (Project) voice application. This project after compilation is uploaded to the 3CX server (Windows or Linux) in the Call Queue interface. Then you direct calls to this Queue number from the voice menu (IVR) or directly from the outside line. In the process, the voice application can again transfer calls to Queues, Groups, IVR, certain users, etc.
The advantages of using the CFD development environment before writing scripts manually:
- The use of a variety of ready-made components - the record speed of the "assembly" of the application
- Visualization of the created algorithm - the application can easily change or modify another employee
- Use of the debugged code of components - minimization of development errors
- Support for popular C # language that enhances voice applications
- Compiling a CFD application (rather than interpreting a script) - high execution speed, minimum processor load
3CX Call Flow Designer installs only on a 64-bit version of Windows. The app takes about 15 MB plus space for user projects. CFD can be installed on any suitable computer, not only on a computer with the 3CX system. The project is created locally and then uploaded to the PBX server. This, in particular, allows 3CX partners to create custom voice applications for their customers.
Consider the terms you’ll meet when developing 3CX voice applications:
- Project (Project) - actually developed application. It consists of call processing threads, dealers, and other components.
- Callflow - a specific user interaction, i.e. a set of actions performed by a component (or components). For example, a stream is a user input request for numbers.
- Dialer — a processing flow that automatically makes an outgoing call.
- Components are the building blocks of a call flow, for example, playing menu items, getting user input, accessing a database, and so on. Components are part of an incoming processing flow, an outgoing flow (dialer), or a more complex user component.
- Custom Component - You can create your own components with special features.
Creating a simple voice application
Consider how to create a simple voice application in the CFD environment. Once you are comfortable with simple components, it is not difficult to go to more complex applications that consist of the same simple components.
Our application is a simple Voice menu (to transfer to the Sales Department, press 1, Support Department - 2, Outgoing call - 3, or stay on the line to connect with the Operator.
Project creation
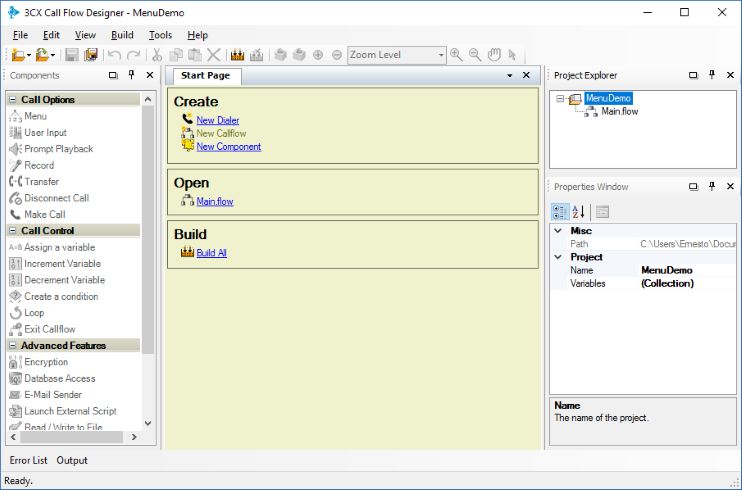
To create a project, go to File> New> Project and specify the file name. When you save a project, three folders are created: for project audio files, for additional libraries, and for a ready-built voice application. A project is created with a set of default parameters, which you can then modify.
Creating a processing flow
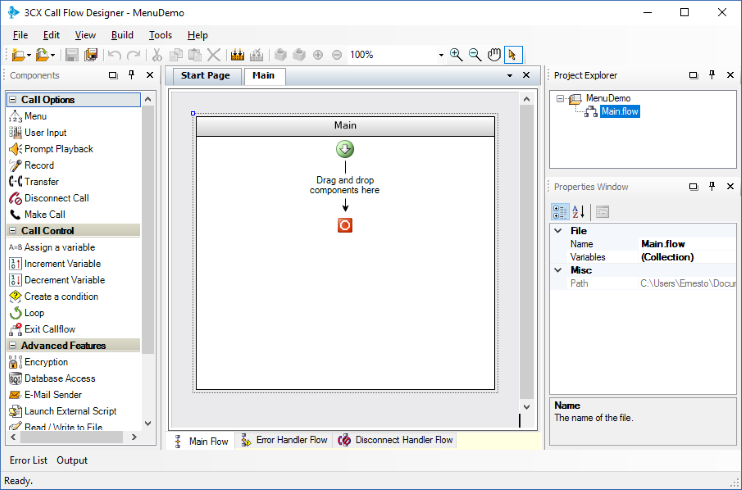
Creating a project also creates an empty Main processing flow. It is located in the tab of the main window to which you drag the components of the stream. Each stream has two properties: the name of the stream and the set of variables that are used in the stream.
Add components to stream
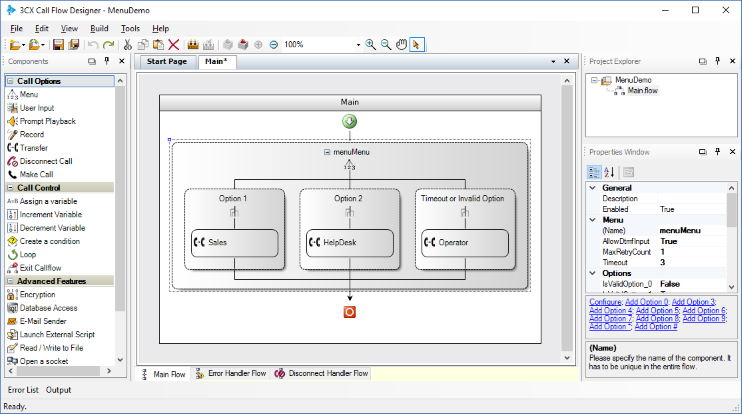
After creating an empty stream, fill it with working components. Let's start with the Menu component.
- Drag it to the flow tab and name it mainMenu
- By default, the menu has two options. Add a third - right-click on the component and select Add Option 3.
When you add a Menu component to a stream, its parameters are set according to a template in accordance with the settings in Tools> Options> Component Templates> Menu. You can set component parameters in three ways:
- In the Properties window
- By double clicking on the component
- From the component context menu
For example, to set the voice message that is played to the user, in the Properties window, change the InitialPrompts property. The Prompt Collection Editor voice file editor opens. Specify the AudioFilePrompt option, and then select the audio file to be played.
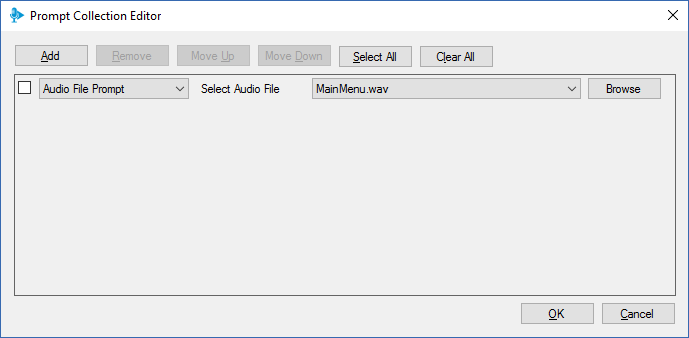
Audio files that are located in the project audio files folder are visible in the drop-down list. And if you select a file in a different location on the disk, it is automatically copied to the project folder.
Please note: CFD only supports audio files in the following format: WAV, mono, 8 kHz, 16 bit. You can prepare files of the correct format for this instruction .
To add a voice message that will sound to the user if you type incorrectly, change the InvalidDigitsPrompts parameter. A message with no user input is set in the TimeoutPrompts parameter.
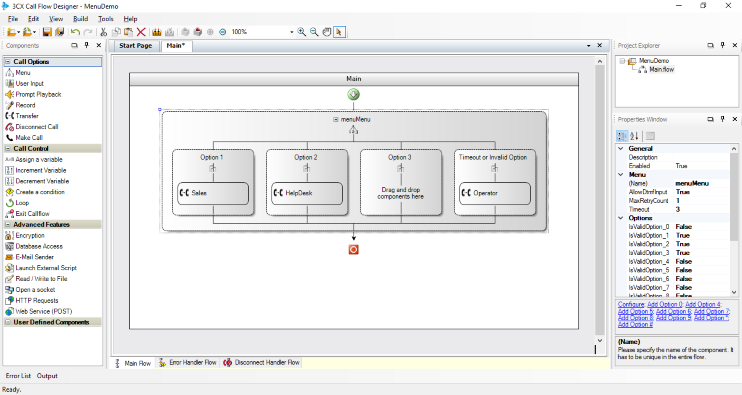
After configuring the basic parameters of the menu itself, we will add components that will be executed when choosing one or another option. For example, if you select Option 1, the application transfers the call to the Sales Department - add the Transfer component under the Option 1 branch and change the name of the component to Sales.

Double-click on the Transfer component and specify the direction - the extension number of the Sales Department. Similarly, indicate in Option 2 the extension number of the Service Department.
In Option 3, the algorithm is slightly more complicated. We will ask the user the number to which you want to transfer the call, and then transfer to the entered number. To get the number, use the User Input component:
- Drag it to the Option 3 branch, change the name and add a message that will prompt the user to enter a number.
- Please enter valid digits - from 0 to 9 (asterisk and period are not allowed).
- Specify the minimum and maximum length of the number (MinDigits and MaxDigits parameters), for example, from 3 to 5.
- If the user made an incorrect input, the call is transferred to the operator.
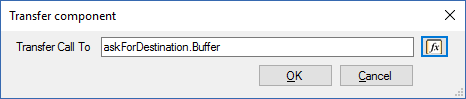
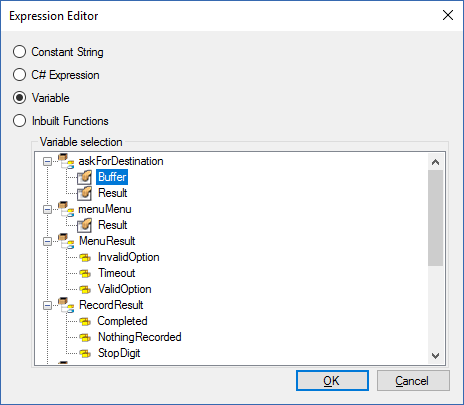
To set up call transfer to the entered number, double click on the Transfer component in option 3 and click on the Expression Editor fx button. As an expression, specify the buffer property of the askForDestination component.
Compiling and uploading the application to the server
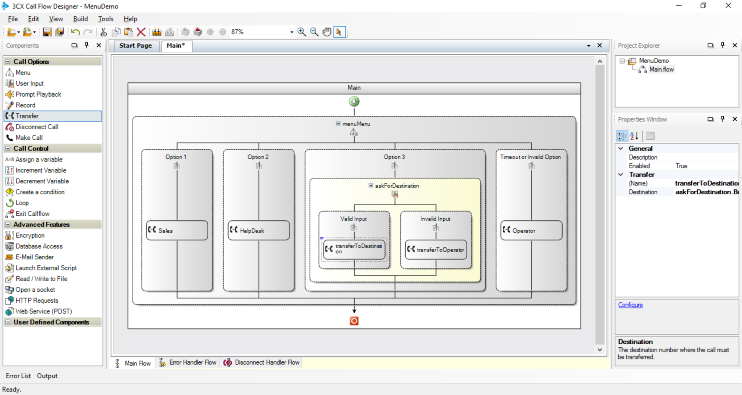
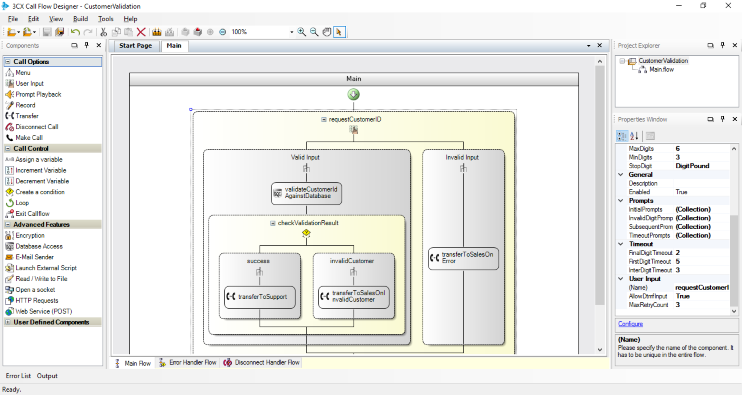
The completed project will look something like the screenshot above. However, we need to compile the finished application (file with the tcxvoiceapp extension, which is installed on the server.
To do this, select the option Build> Build All in the CFD menu. A compilation window and an error window will appear, in which all errors and warnings that appear during the compilation process are visible. Then Windows Explorer will open with the file of the finished application.
To upload a file to the PBX server, in the 3CX management interface, create a Call Queue, specify its name and extension number, and go to the Voice Applications section.
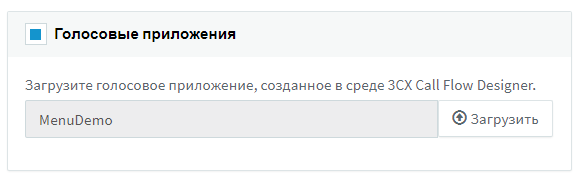
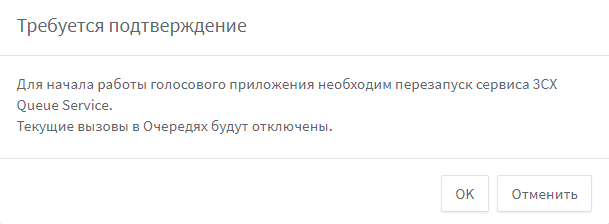
Check the Voice Applications checkbox and download your application. After that, a warning will appear about restarting the Queue Manager Service. Note that when you restart, all calls in the Queues will be interrupted.
Application launch
The voice application is registered in the 3CX system under the extension number of the Call Queue. The application is launched either when a direct external call is received on this Queue, or when it is transferred to the Queue. In our case - just call the extension of the Queue and the application will start!
Additional Information
We described the basic principles for developing applications for 3CX. Of course, the possibilities of the CFD environment are much greater. It is constantly complemented by new components and gets the ability to integrate with third-party services, for example, the Amazon Polly natural speech generation service. In addition, recently it became possible to access the 3CX server API directly from CFD applications using the C # language. Understanding the basics, you can move on to creating more complex and useful applications. We have repeatedly considered such applications in the past:
- Using the 3CX server API from a CFD application
- CFD natural speech generation
- Predictive outgoing calls with 3CX
- Automatic outbound dialing in CFD application
- Difficult incoming call routing
- Read user input in CFD application
- Work with databases in CFD application
- Sending e-mail in CFD application
If you have any questions about the development of voice applications, the best place for consultation is the 3CX CFD Developers Forum and the 3CX CFD Documentation .
Source: https://habr.com/ru/post/352646/
All Articles