Controller for Lego
Slightly less than six months ago, he gave his son a birthday present - designer Xiaomi MITU . Unexpectedly for me, the child for a week is stuck in this constructor. When the first models and their control from the tablet were tried, a natural question arose - “How do you write programs for it?”
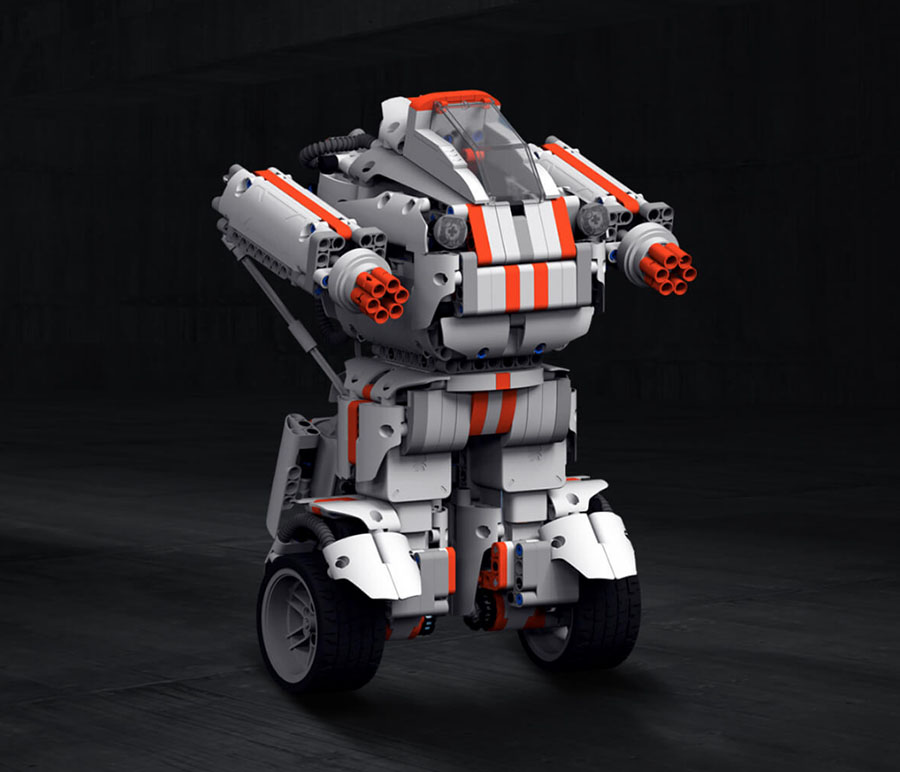
And here I was in for a cruel disappointment - this creation of the gloomy Chinese genius contained a programming system that is quite accessible to reptiloids from the planet Nubiru, but hardly suitable for a child of 6 years. Plus, it suddenly turned out that sensors compatible with Mitu could well not wait.
But if a child asks, dad cannot refuse. Began to explore options, of course I look at Lego, for a start on the NXT / EV3. The price immediately disappoints both the computer and the motors / buttons, then I start looking at their last Wedo squeak - and there everything is depressing.
')
Ok, there are alternative versions, I find an interesting Sbrick project - the price is more or less imputed, compatible motors can be taken on Ali , but there is little programming there.
There were also all sorts of Shilda at the Biglbons and Arduins, but nothing worthy of attention came across.
Well, there were long winter evenings ahead, we took a file and started to cut.
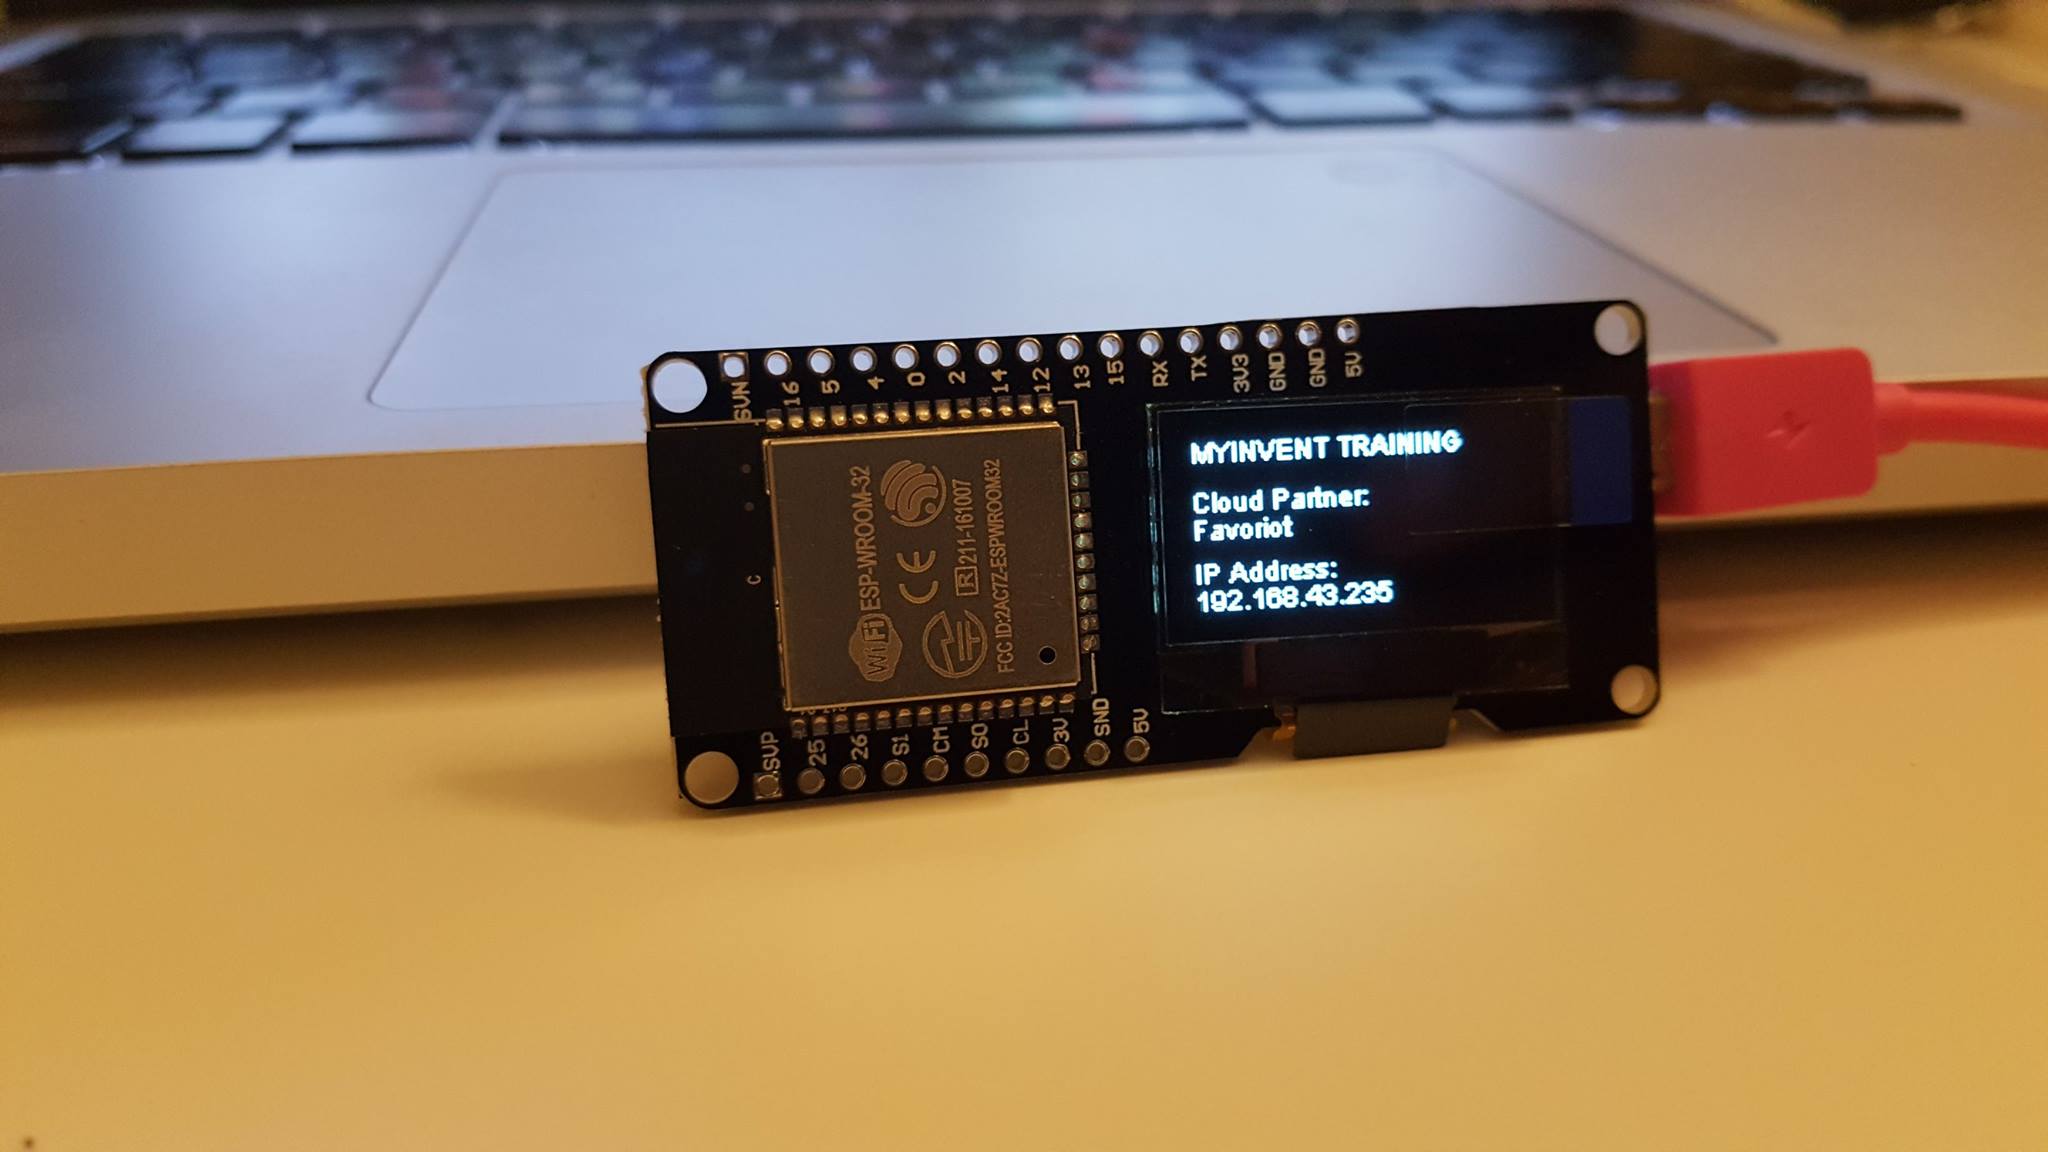
For the first version took the advertised ESP32, so even with OLED on board. Beauty.
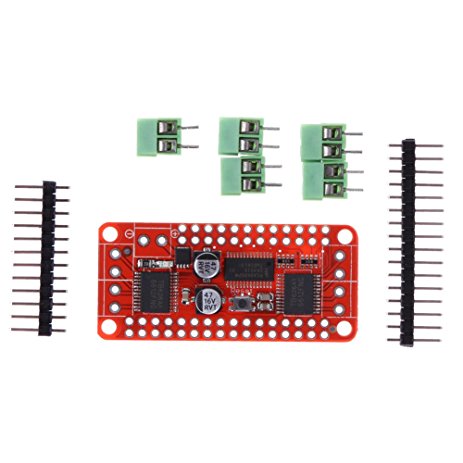
To her, the company bought a shield with drivers for motors and PCA9685:
My enthusiasm was enough for about a week. Those. and it shows something on the screen, and the motor is spinning, but I feel something backward - not that chip. Perhaps, somewhere for him there will be a niche, but very narrowly specialized, too unbalanced and some kind of Chinese .
I put a fat cross on ESP32, take the next patient. By chance, it turned out to be RTL8710, bought shortly before by Ali on the pretext of “Oh, funny! And inexpensive!
But even there was not much time to spend :)

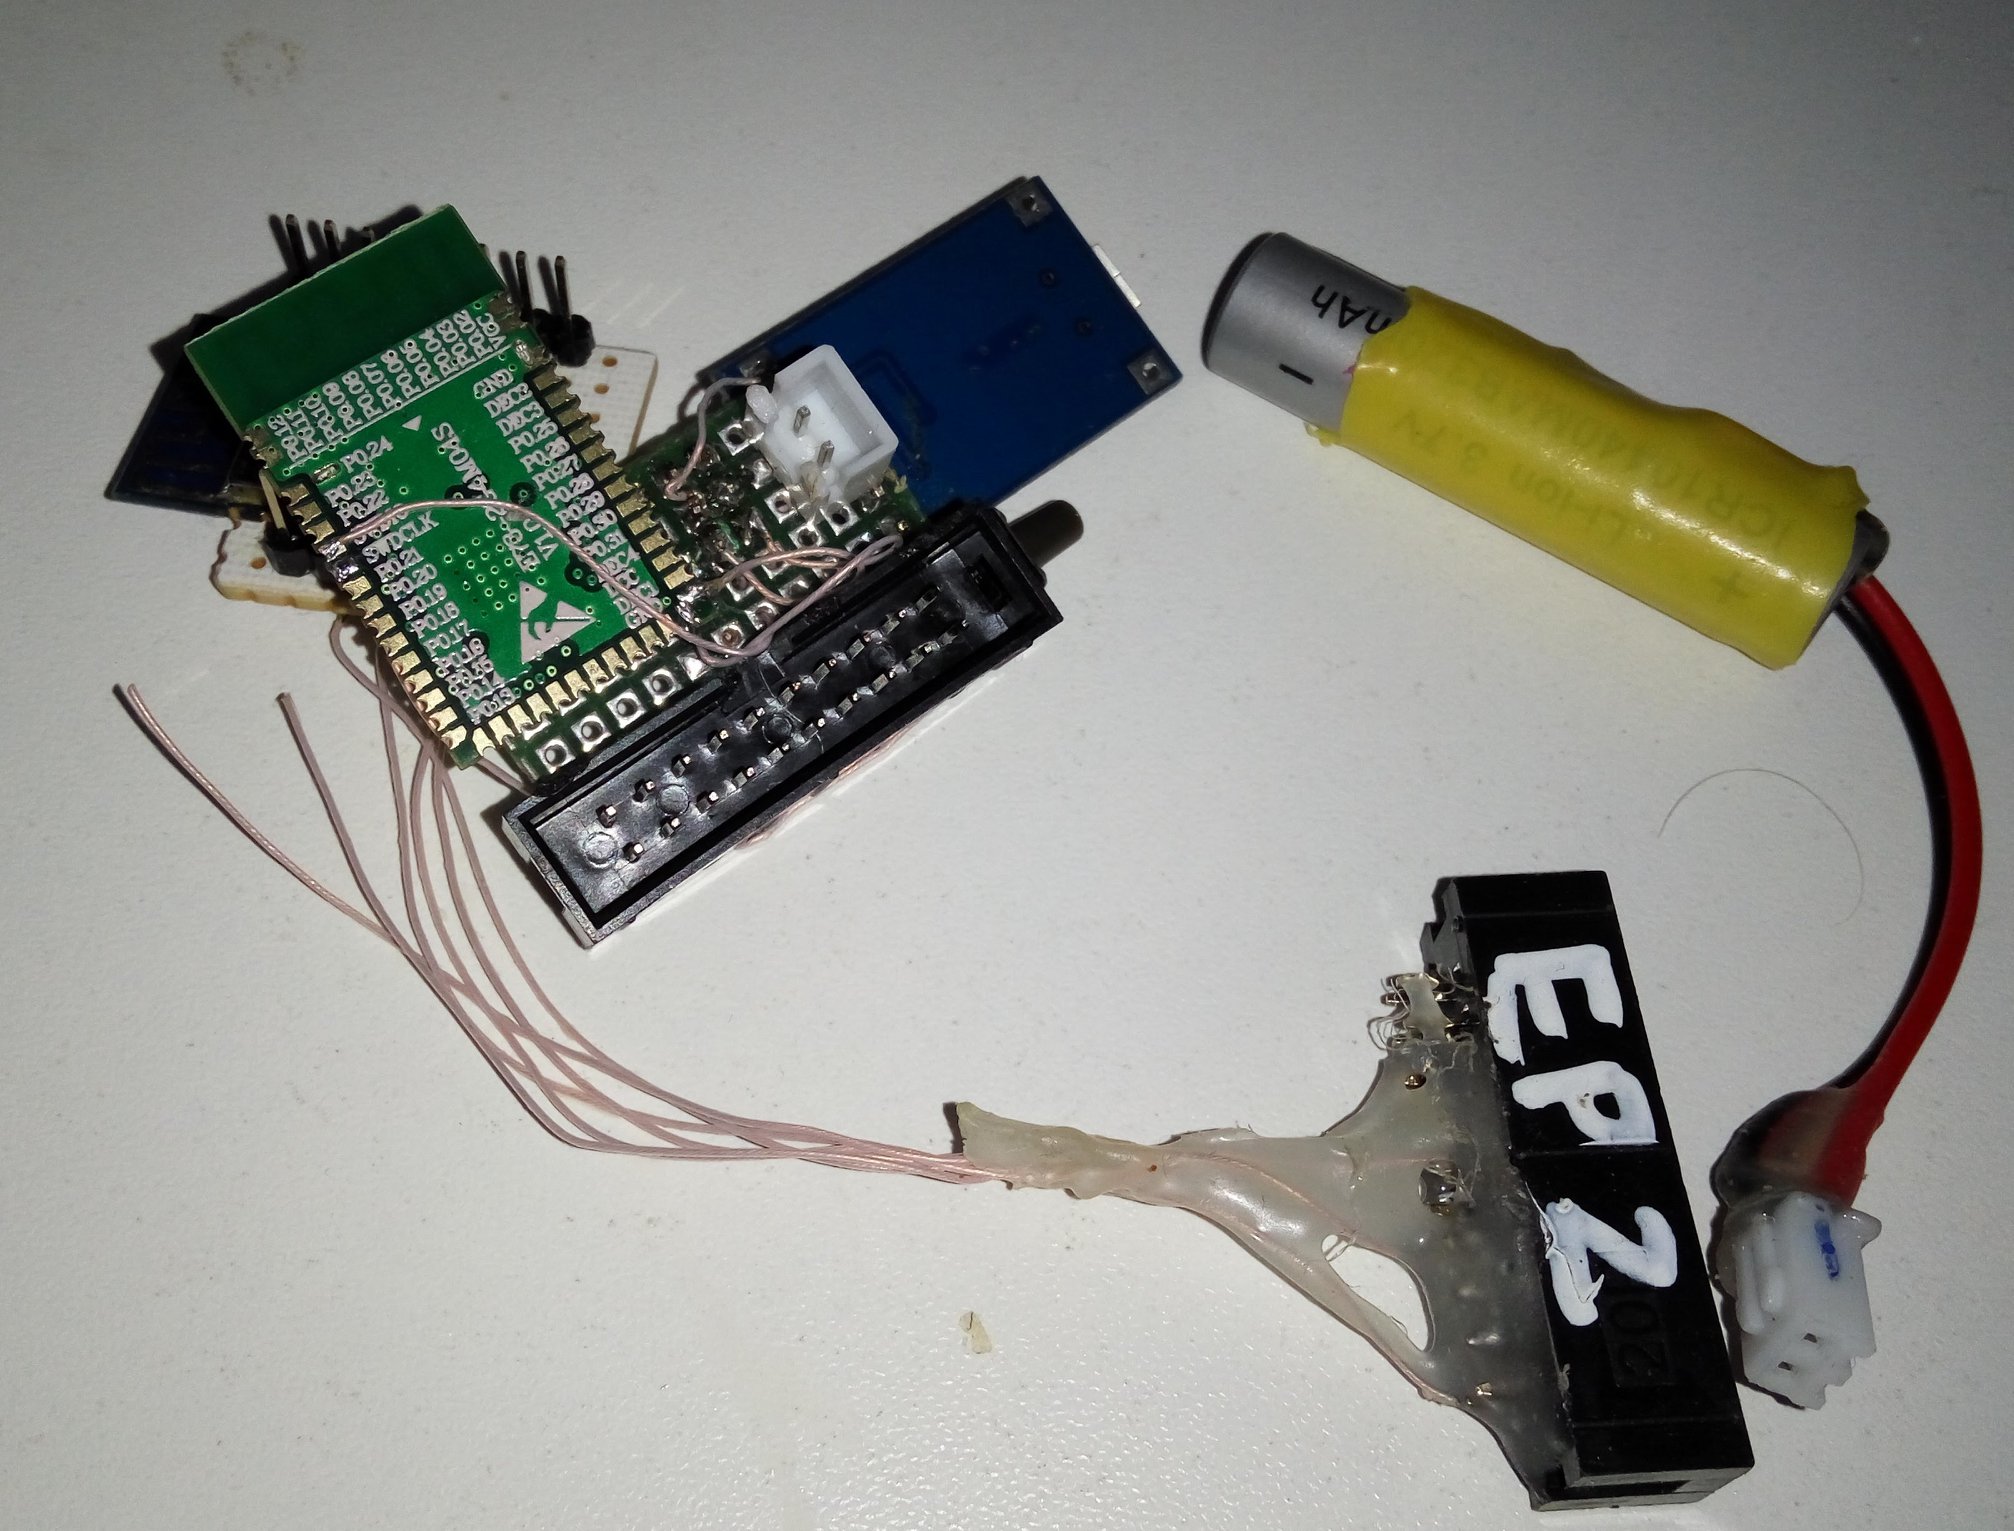
With a clear conscience, the chip is sent to a landfill. And here the introduction ends and we proceed to the actual project. For the next on my table was the NRF52. And it is not by chance that a well-balanced AWP, with good KFOR and sensible technical support. I collect the first knee-length option:
For starters, only LEDs and Bluetooth profiles. I debug the most basic things and I understand that this is it! This is exactly the chip I need. Now you can add a little muscle to the project:
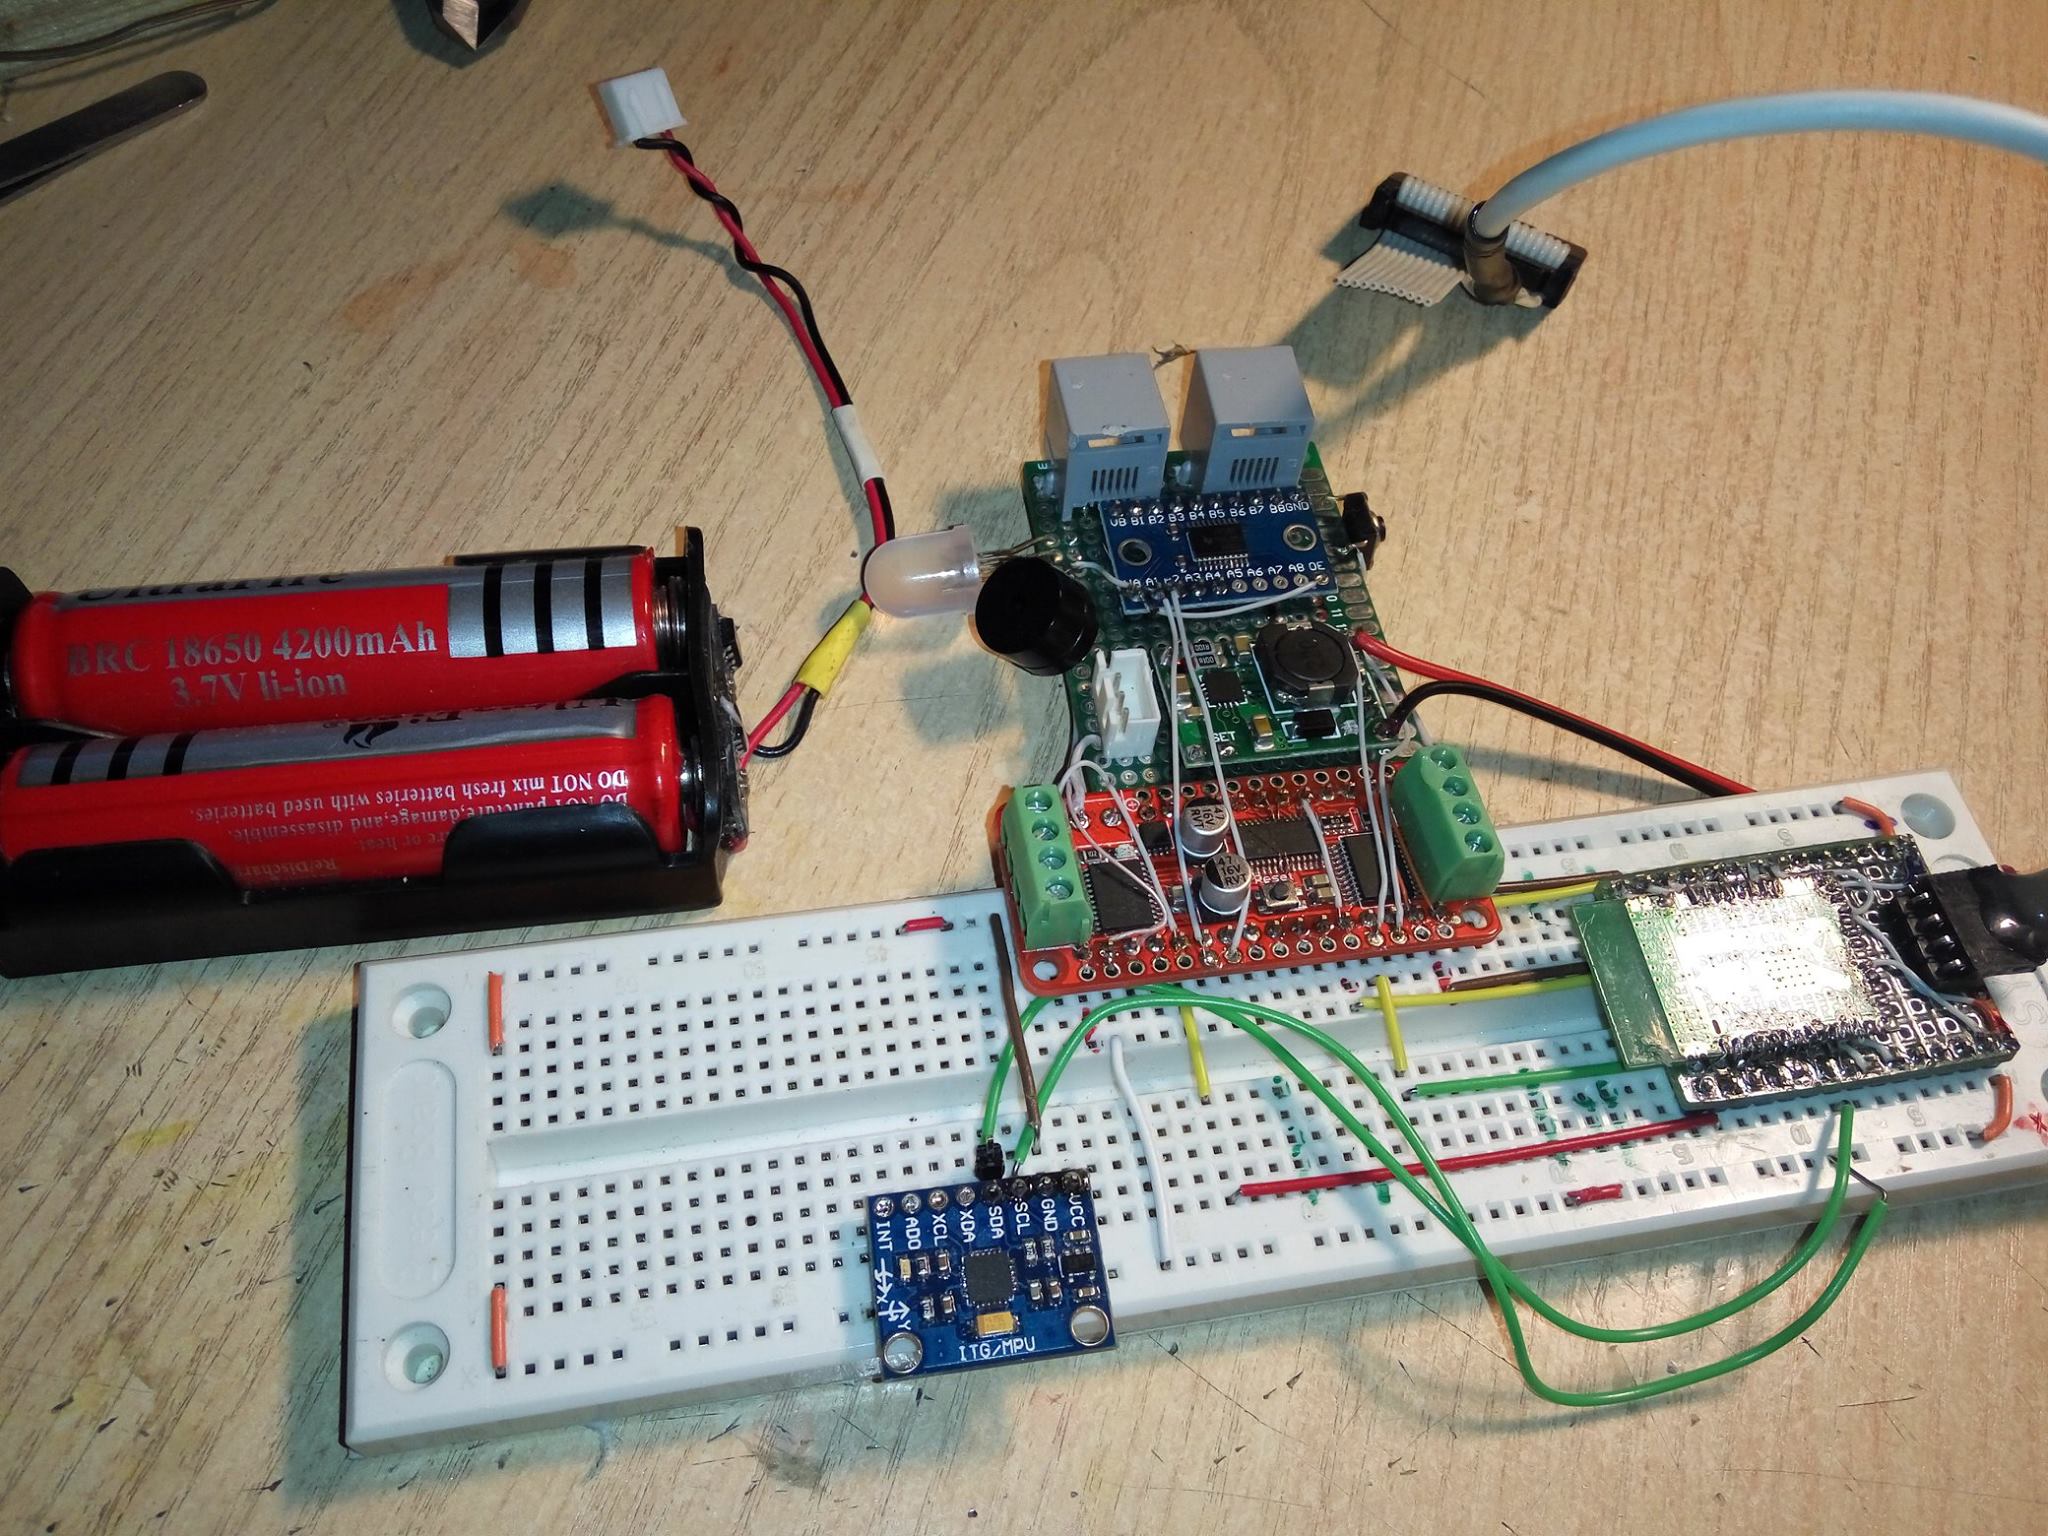
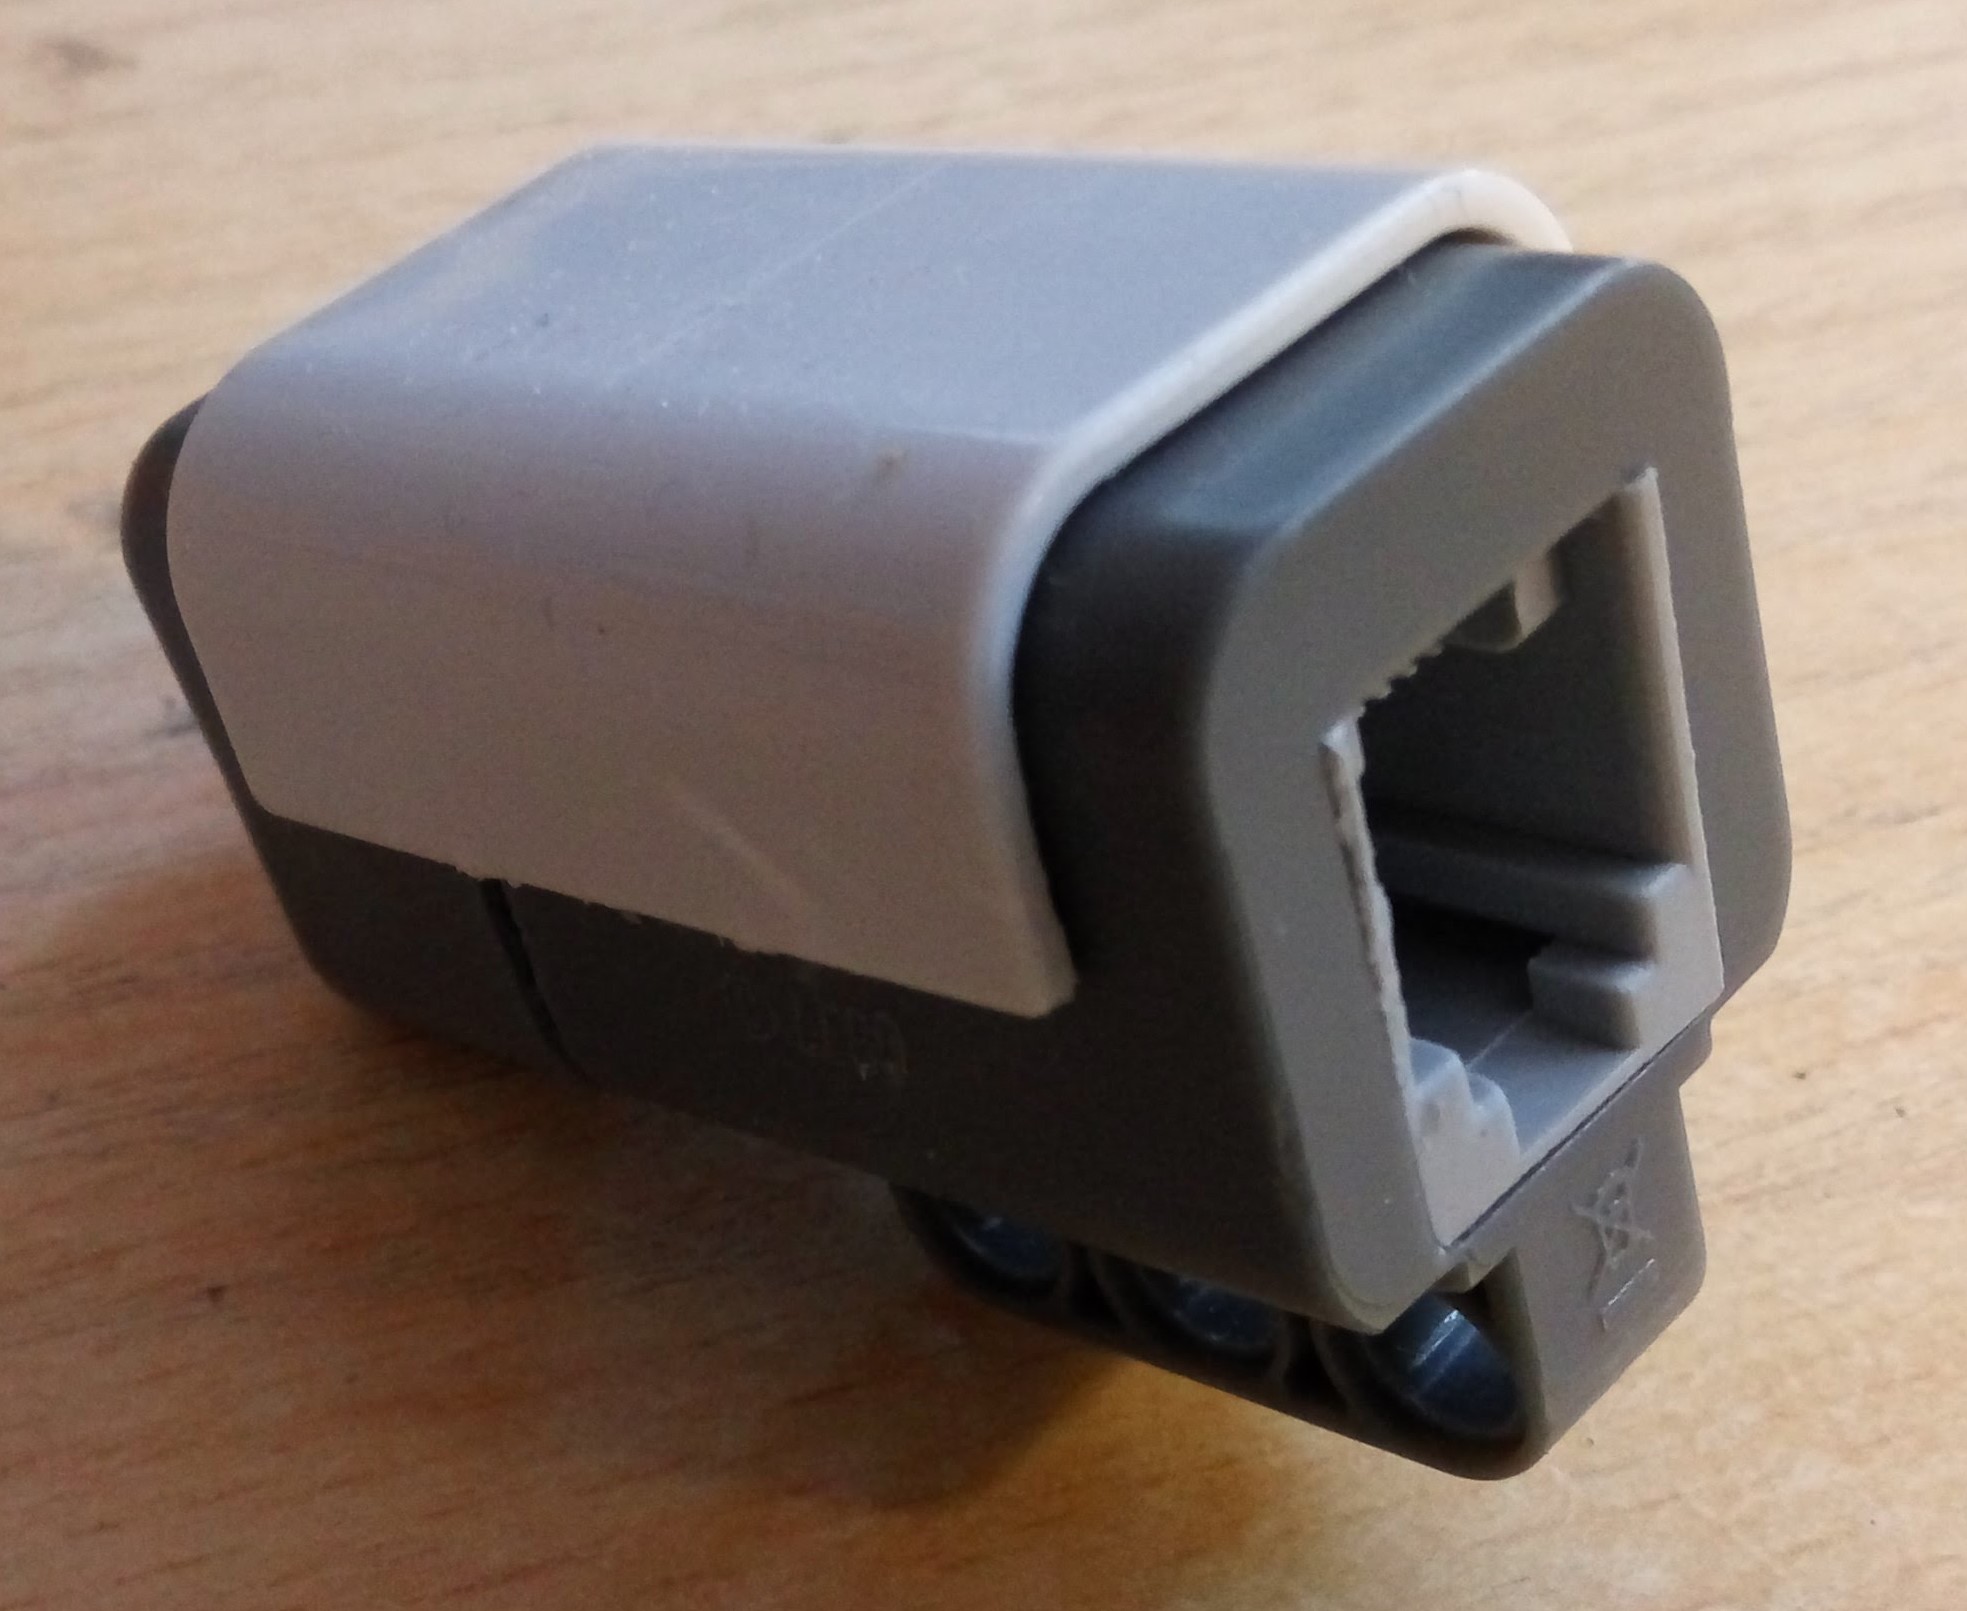
Well, there is already a speaker, and drivers, and an accelerometer, and peripheral connectors. As connectors, they initially considered the USB-C variant, as in Mitu, but was confused by the complexity of manufacturing connecting cables. Therefore, I did not reinvent the wheel, but simply put almost compatible with the Lego RJ-12. They are easy to compress, they are cheap and quite reliable, as for children’s playful hands.
Well, in the usual legkovsky parts the connector changes in 3 minutes:
There is already written more or less intelligent software, you can configure and manage a piece of iron from a phone through bluetooth.
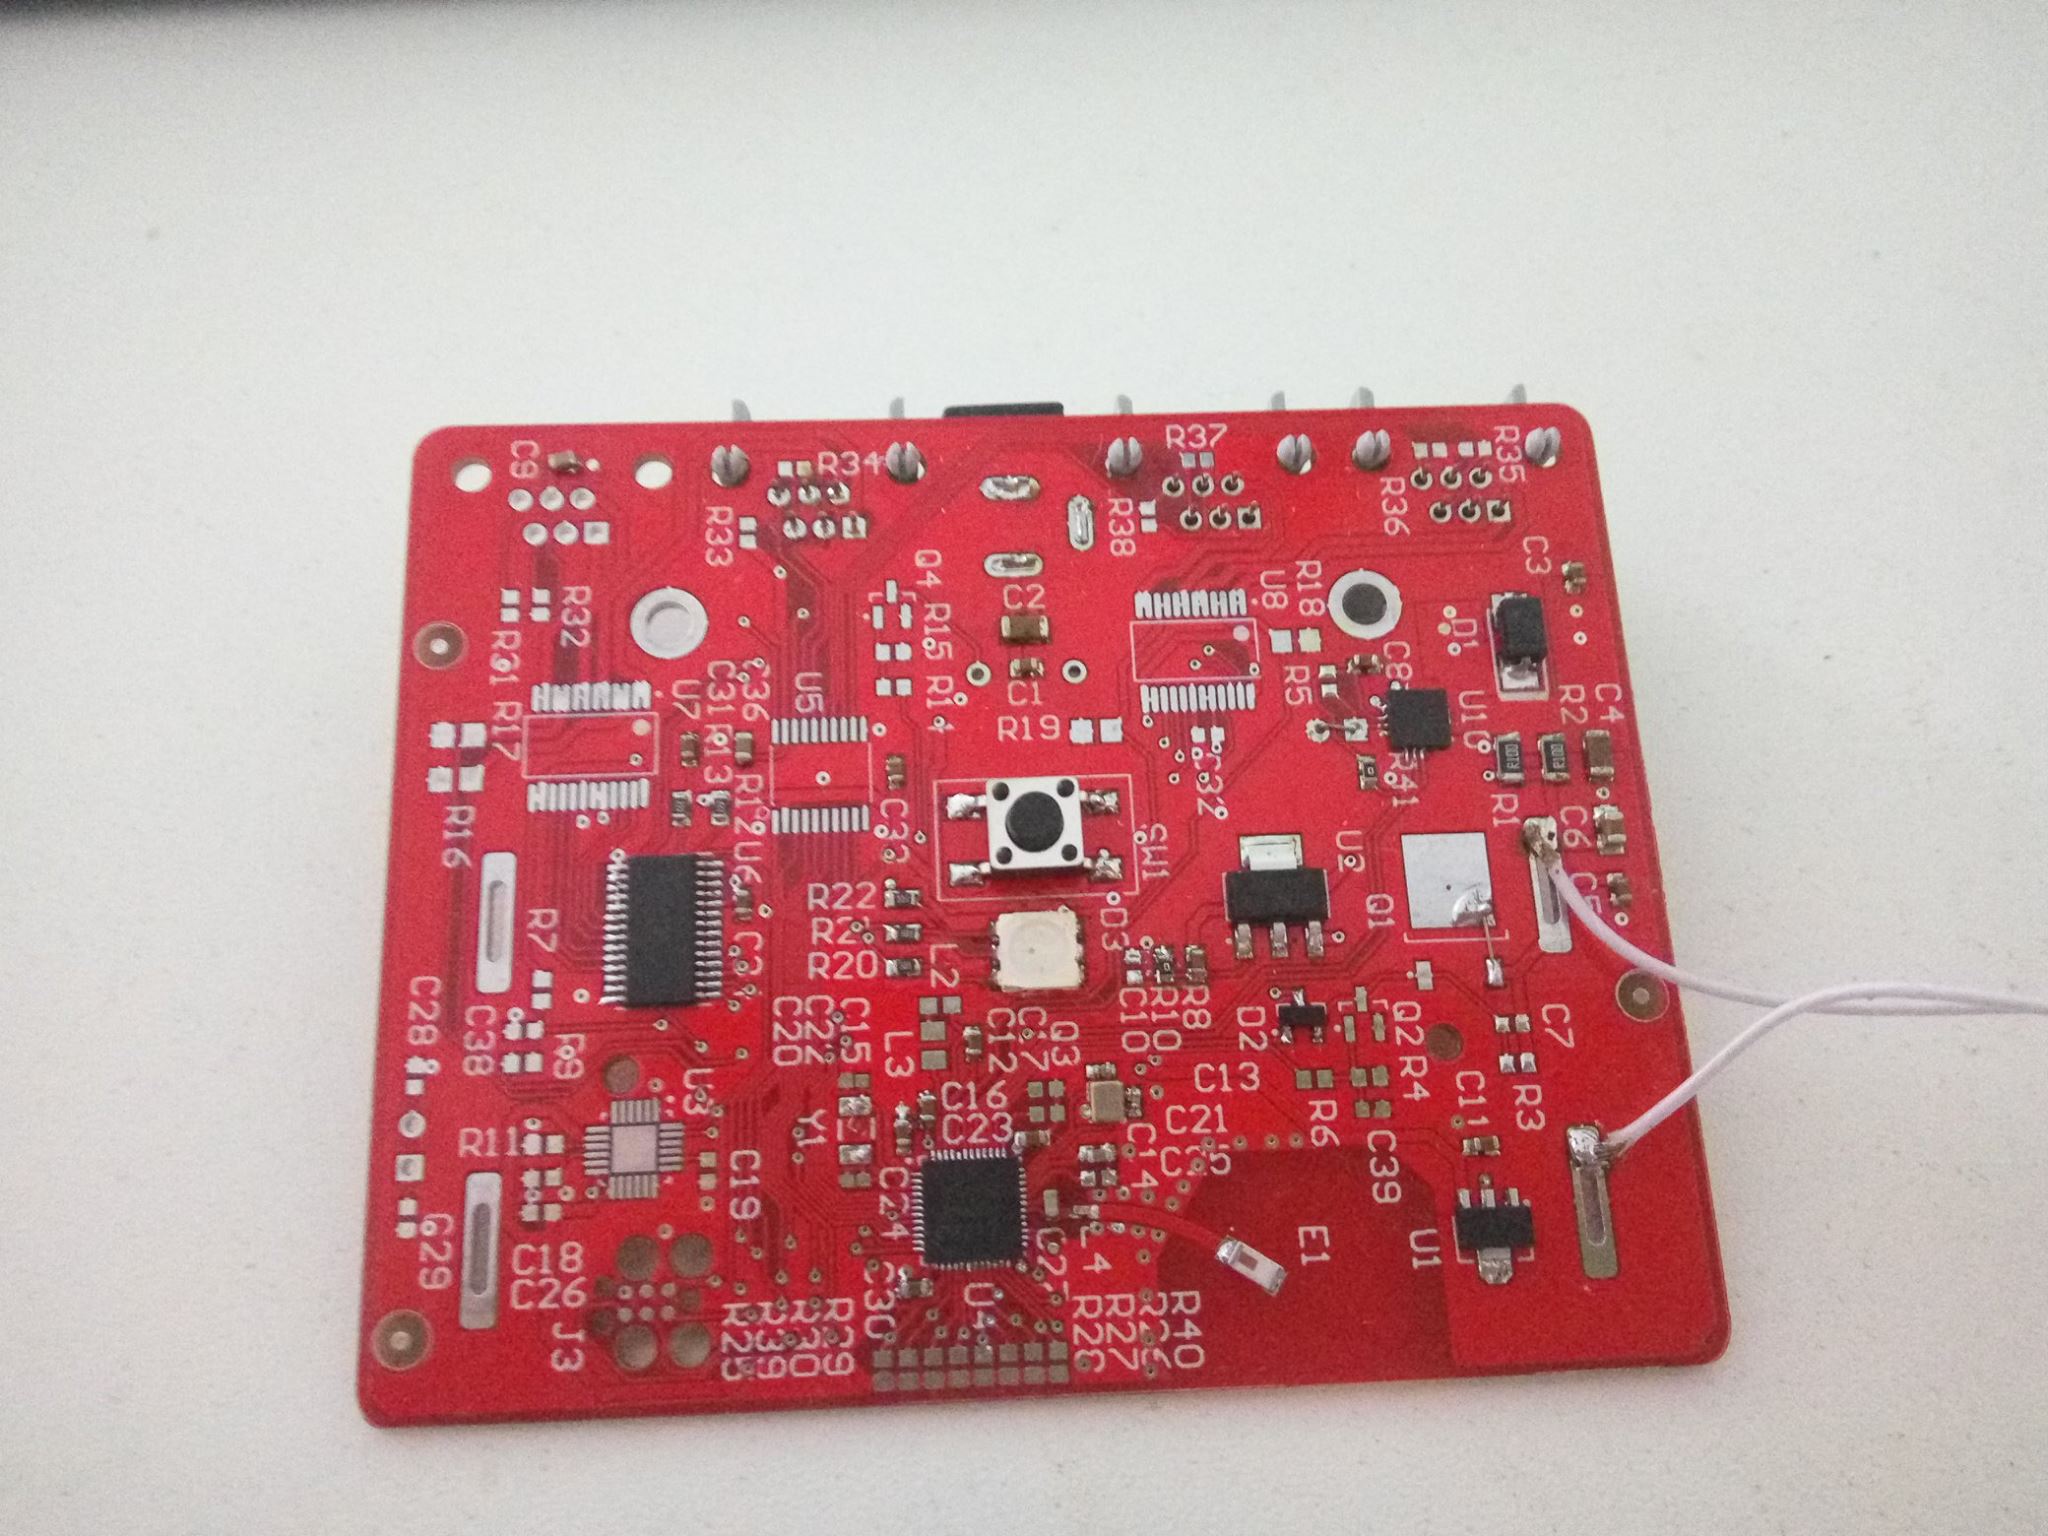
In parallel, a project is being created on CircuitMaker (this is the same Altium, only free), where the circuit and the board are drawn.
On Ali, do-it-yourself purchases are made, on Siidstudio - the making of a board, and while they are slowly sailing the seas-oceans, we continue to write a firmware.
Finally came the board and some of the details:
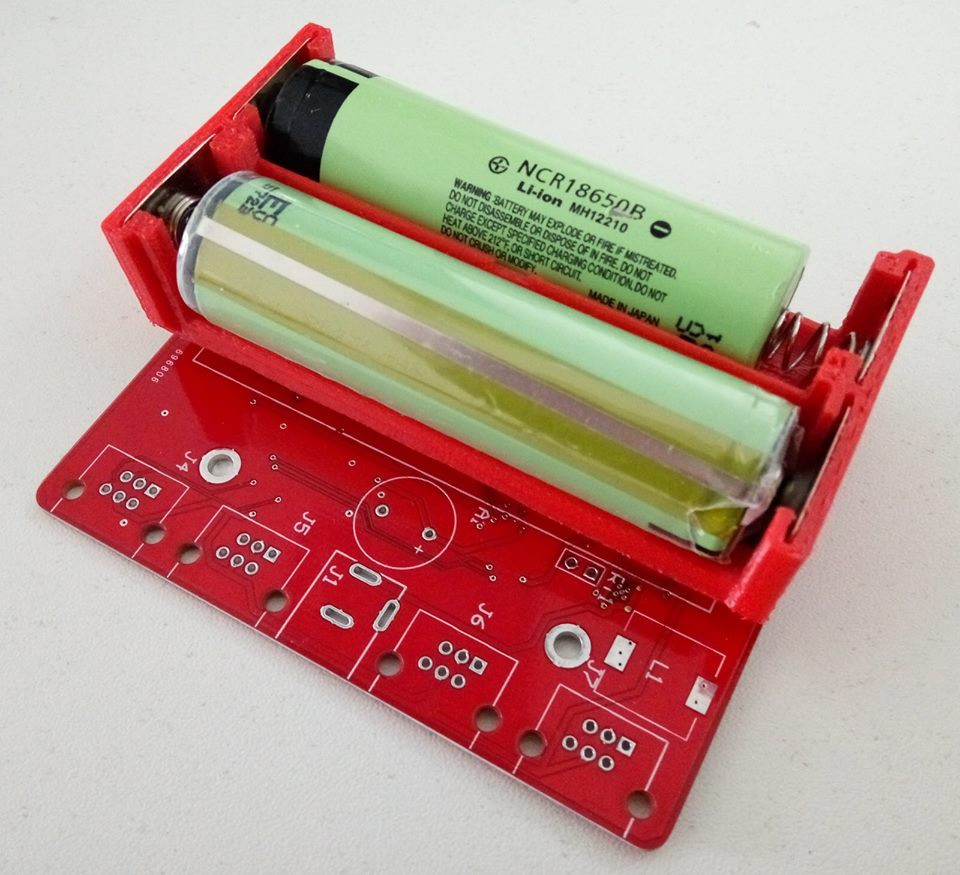
Fill firmwareist, enjoy flashing LED. It is time for the next part. We draw a model of the battery compartment and print it on a 3D printer:
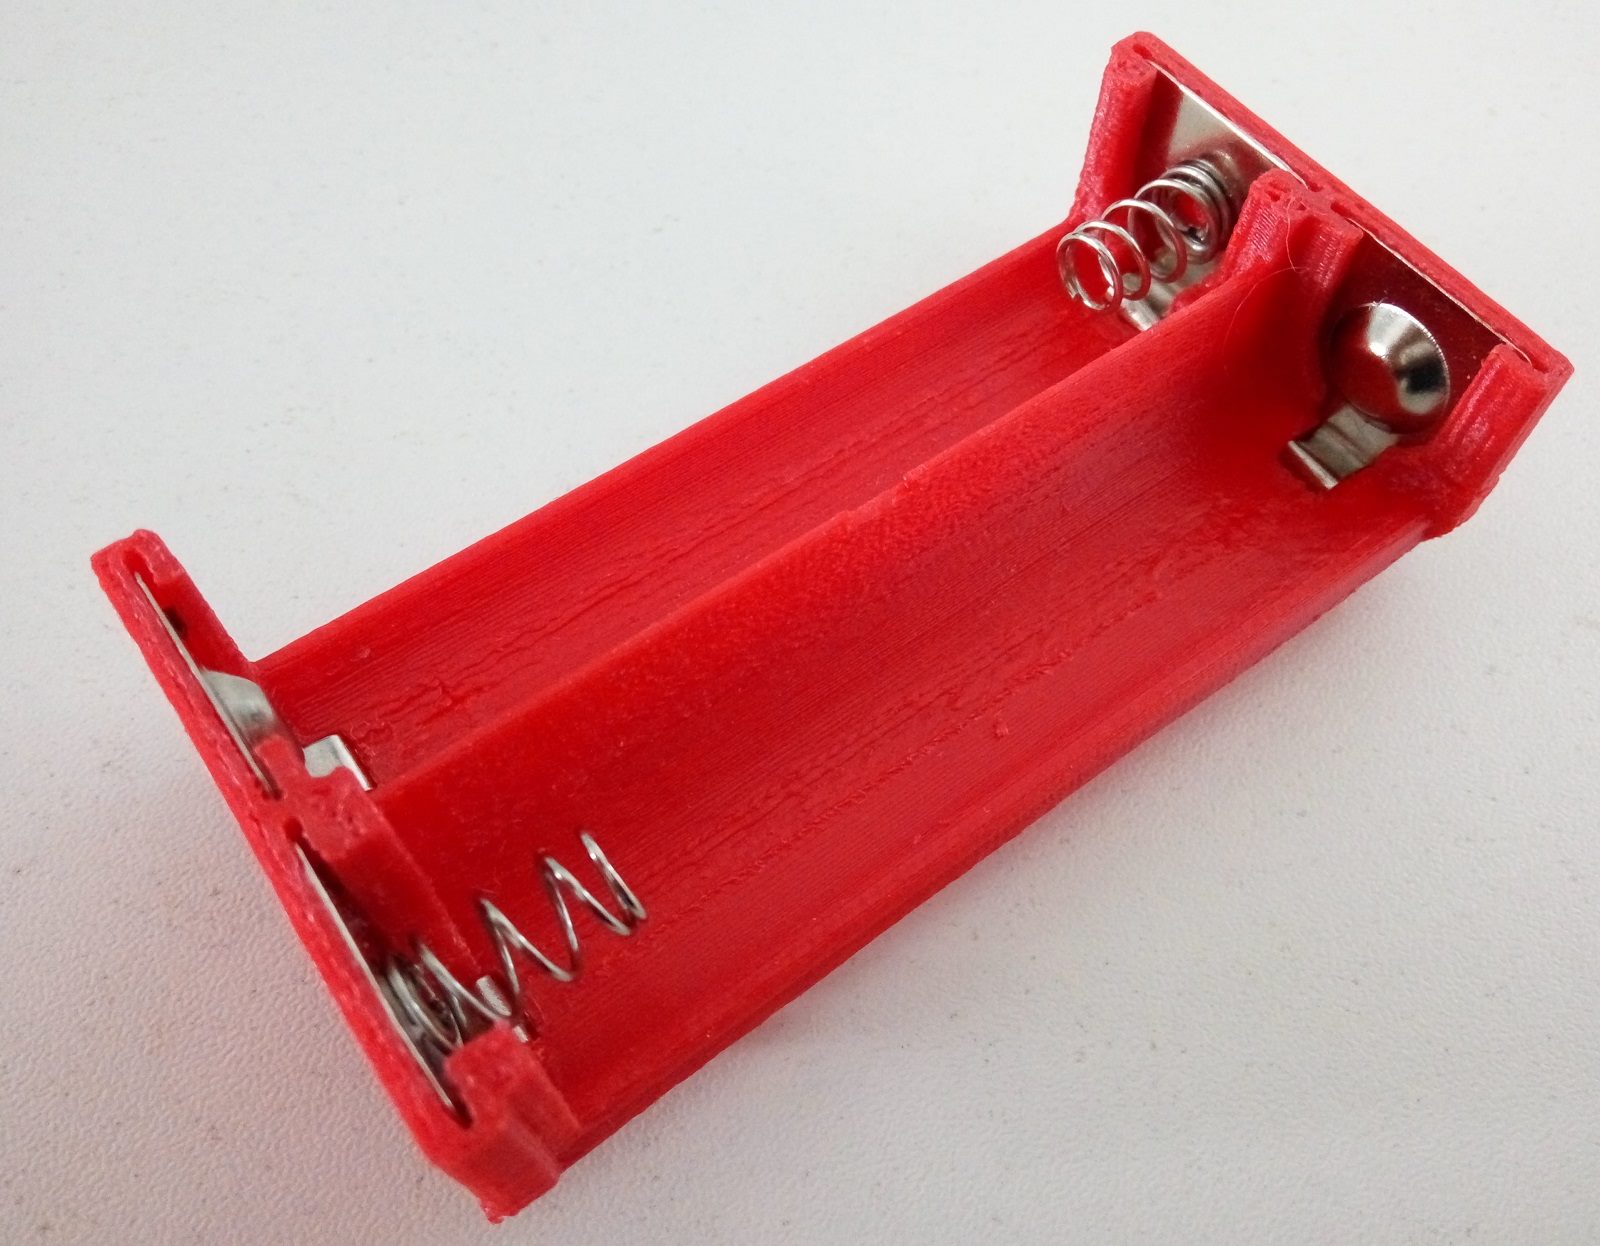
Moreover, unlike Chinese holders, batteries can be inserted into this one with or without protection:
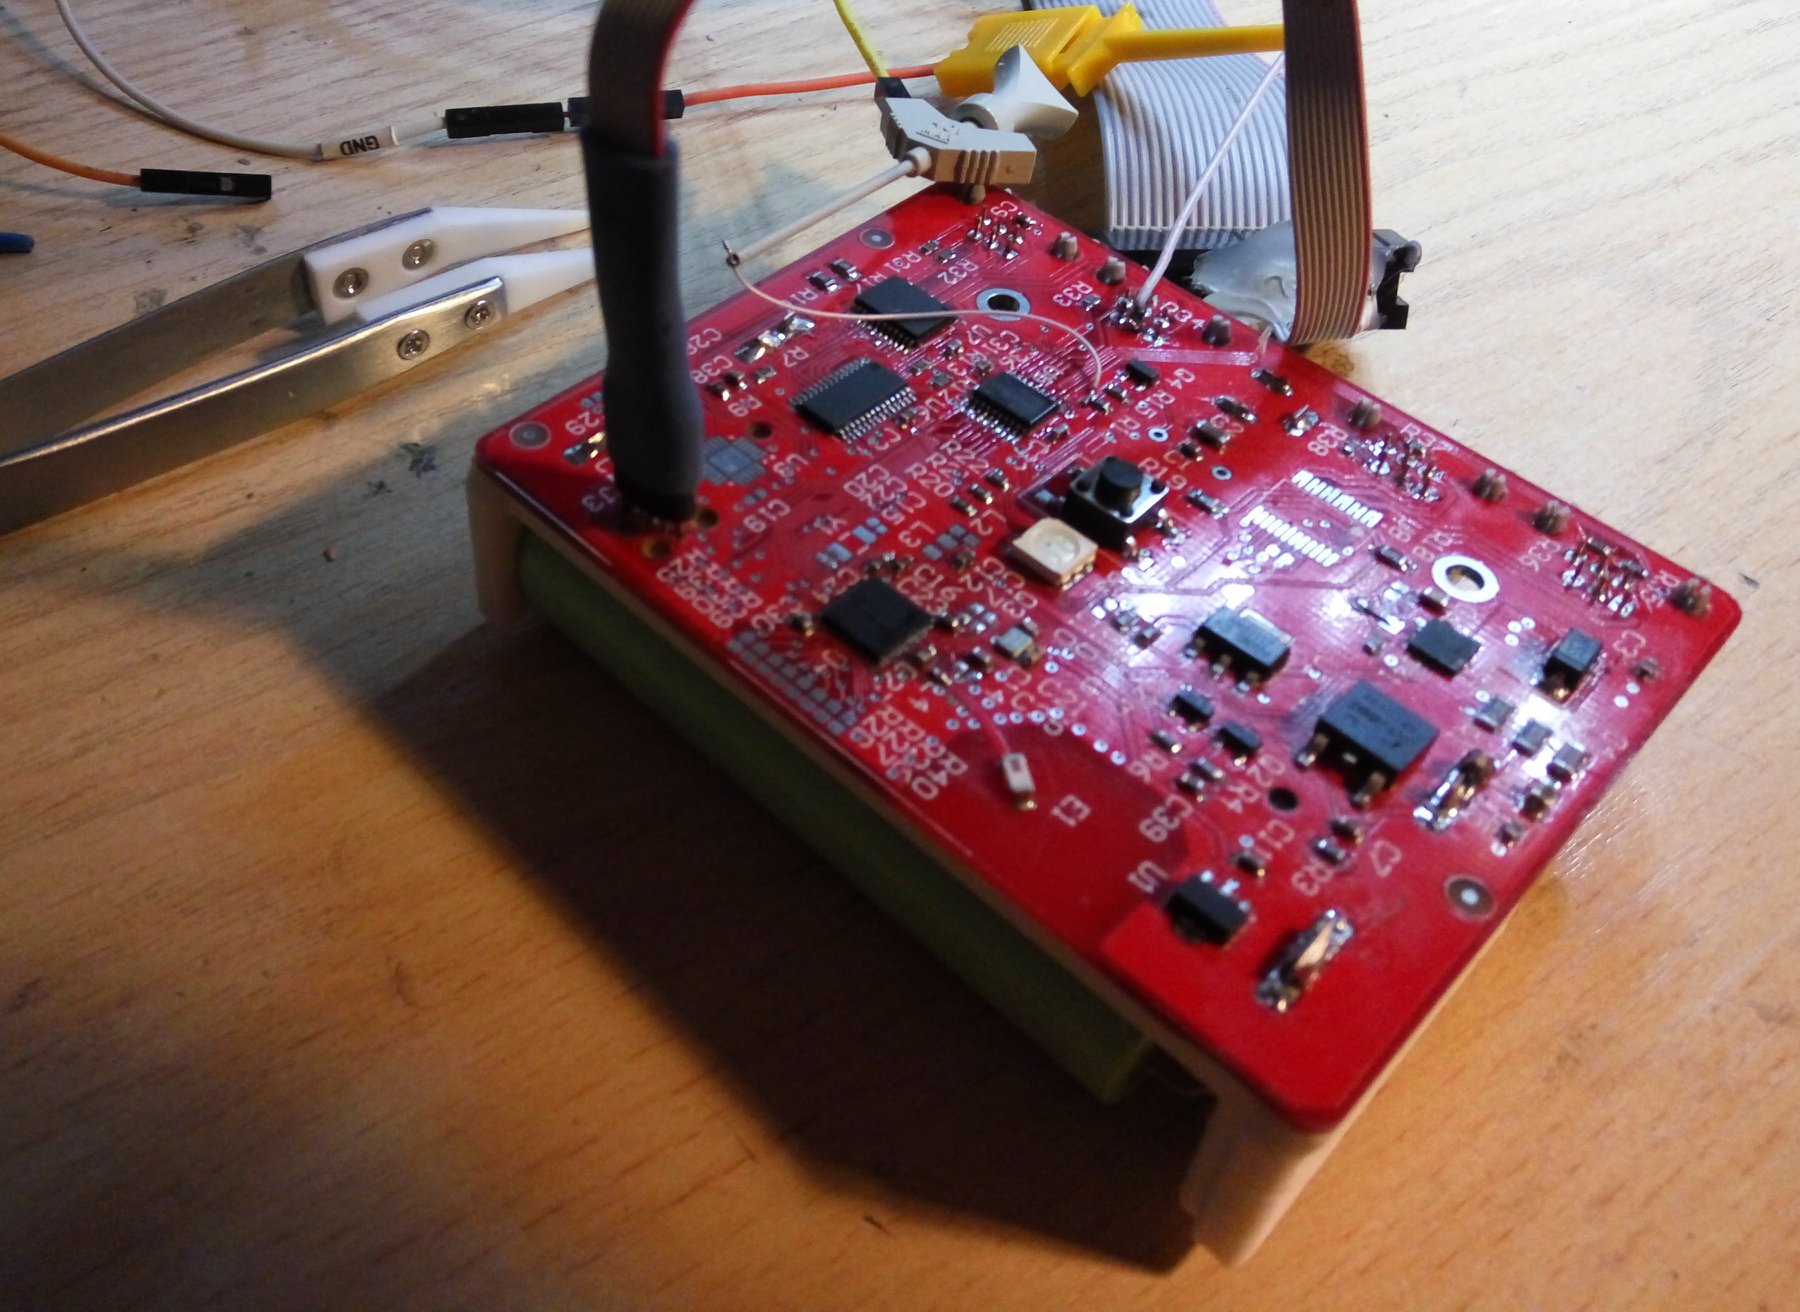
Suddenly for me it turns out that the very first version of the board turned out to be without global jambs, all the details are sticking out, no jumper is forgotten anywhere, minor updates do not count:
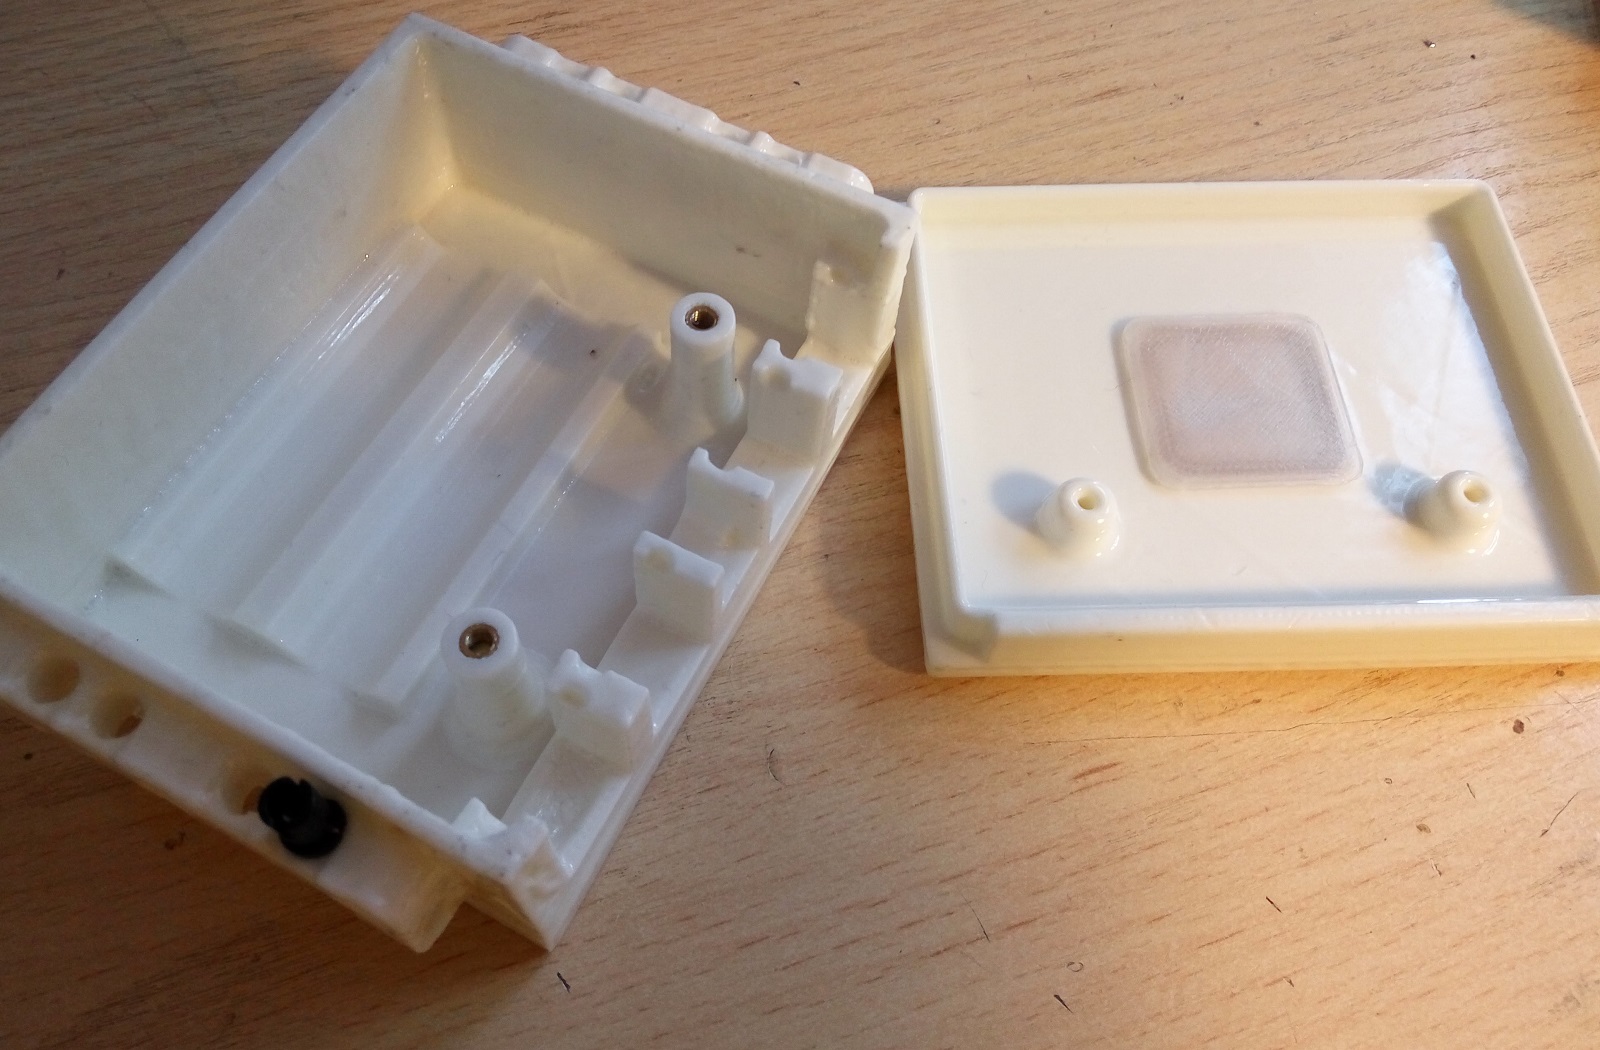
Again, put off the soldering iron and take a 3D printer. After a dozen unsuccessful models, it turns out a decent case:
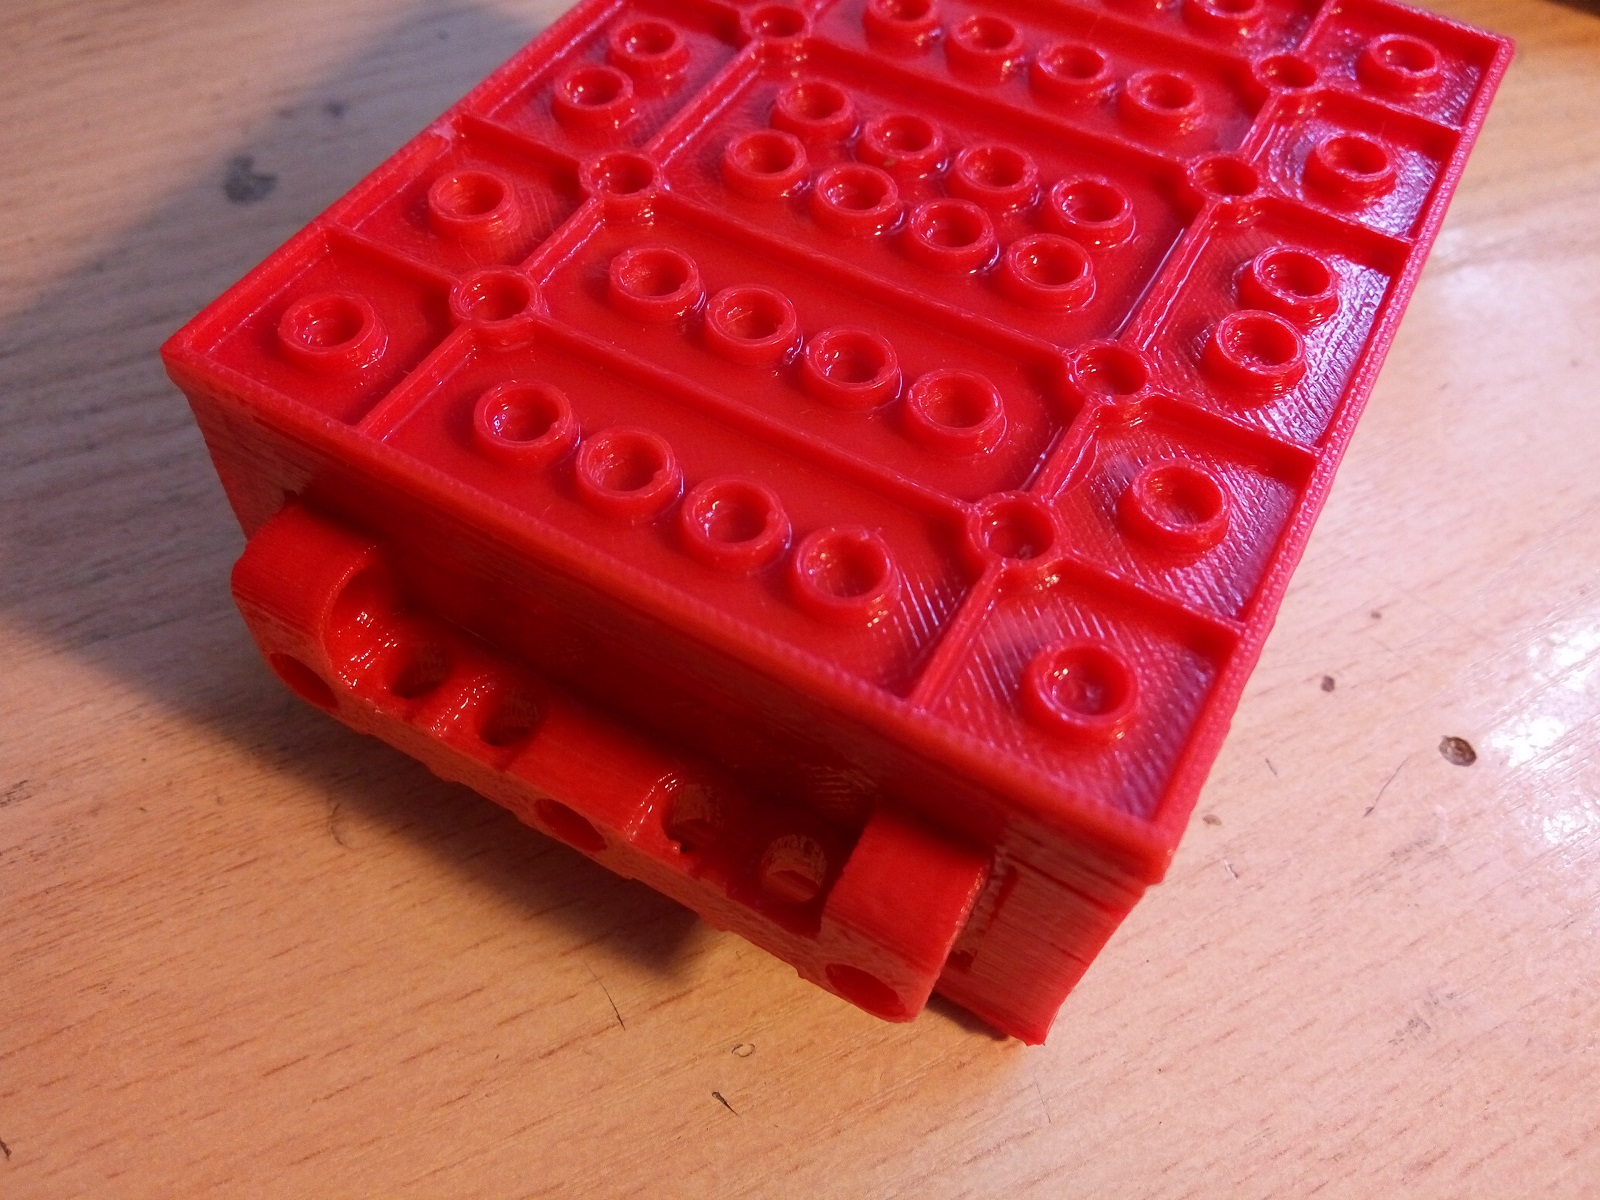
On the reverse side, he is ready to connect to a regular Lego, his ears are the same in size with the Lego Technic:
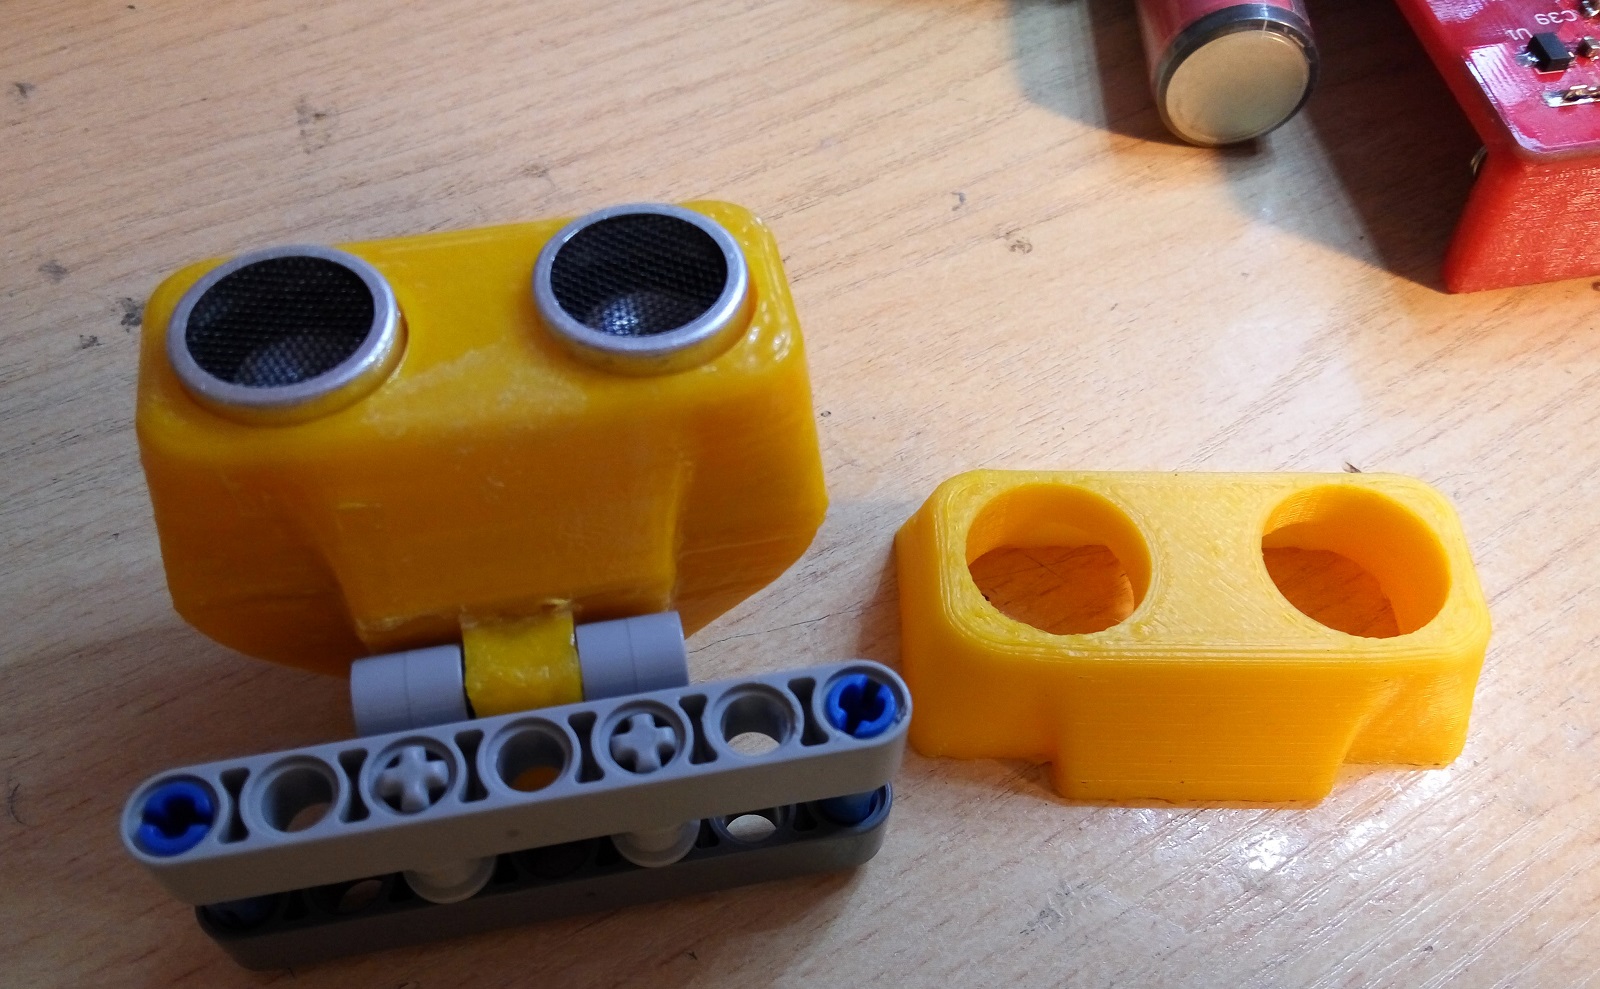
Motors use the usual Chinese, Lego-compatible, but all sorts of extra buns do separately. For example, from Chinese HC-SR04 for a dollar it turned out a great Range srnsor:

With the printed case and the connector, its cost is less than 3 dollars, while a similar legovsky costs $ 57 :
Total for today there is a box that is able to steer with motors and sensors with the help of javascript (a slightly neutered Espruino turns inside as a submodule), the box is able to update its firmware through bluetooth, circuits, boards, samples, 3D models - everything is laid out in the open on the github .
Unfortunately, I still have one unclosed task. I'm still more on the hardware, and when I needed to write a softphone for Android, then I was somewhat depressed.
In the plan, take the usual Blockly code and add an appload to it via bluetooth. And if you want to join or make yourself the same toy - Wellcome.
Github
Scheme
Facebook group
I hope this piece of iron is useful not only for my baby.
And here I was in for a cruel disappointment - this creation of the gloomy Chinese genius contained a programming system that is quite accessible to reptiloids from the planet Nubiru, but hardly suitable for a child of 6 years. Plus, it suddenly turned out that sensors compatible with Mitu could well not wait.
But if a child asks, dad cannot refuse. Began to explore options, of course I look at Lego, for a start on the NXT / EV3. The price immediately disappoints both the computer and the motors / buttons, then I start looking at their last Wedo squeak - and there everything is depressing.
')
Ok, there are alternative versions, I find an interesting Sbrick project - the price is more or less imputed, compatible motors can be taken on Ali , but there is little programming there.
There were also all sorts of Shilda at the Biglbons and Arduins, but nothing worthy of attention came across.
Well, there were long winter evenings ahead, we took a file and started to cut.
For the first version took the advertised ESP32, so even with OLED on board. Beauty.
To her, the company bought a shield with drivers for motors and PCA9685:
My enthusiasm was enough for about a week. Those. and it shows something on the screen, and the motor is spinning, but I feel something backward - not that chip. Perhaps, somewhere for him there will be a niche, but very narrowly specialized, too unbalanced and some kind of Chinese .
I put a fat cross on ESP32, take the next patient. By chance, it turned out to be RTL8710, bought shortly before by Ali on the pretext of “Oh, funny! And inexpensive!
But even there was not much time to spend :)
With a clear conscience, the chip is sent to a landfill. And here the introduction ends and we proceed to the actual project. For the next on my table was the NRF52. And it is not by chance that a well-balanced AWP, with good KFOR and sensible technical support. I collect the first knee-length option:
For starters, only LEDs and Bluetooth profiles. I debug the most basic things and I understand that this is it! This is exactly the chip I need. Now you can add a little muscle to the project:
Well, there is already a speaker, and drivers, and an accelerometer, and peripheral connectors. As connectors, they initially considered the USB-C variant, as in Mitu, but was confused by the complexity of manufacturing connecting cables. Therefore, I did not reinvent the wheel, but simply put almost compatible with the Lego RJ-12. They are easy to compress, they are cheap and quite reliable, as for children’s playful hands.
Well, in the usual legkovsky parts the connector changes in 3 minutes:
There is already written more or less intelligent software, you can configure and manage a piece of iron from a phone through bluetooth.
In parallel, a project is being created on CircuitMaker (this is the same Altium, only free), where the circuit and the board are drawn.
On Ali, do-it-yourself purchases are made, on Siidstudio - the making of a board, and while they are slowly sailing the seas-oceans, we continue to write a firmware.
Finally came the board and some of the details:
Fill firmwareist, enjoy flashing LED. It is time for the next part. We draw a model of the battery compartment and print it on a 3D printer:
Moreover, unlike Chinese holders, batteries can be inserted into this one with or without protection:
Suddenly for me it turns out that the very first version of the board turned out to be without global jambs, all the details are sticking out, no jumper is forgotten anywhere, minor updates do not count:
Again, put off the soldering iron and take a 3D printer. After a dozen unsuccessful models, it turns out a decent case:
On the reverse side, he is ready to connect to a regular Lego, his ears are the same in size with the Lego Technic:
Motors use the usual Chinese, Lego-compatible, but all sorts of extra buns do separately. For example, from Chinese HC-SR04 for a dollar it turned out a great Range srnsor:
With the printed case and the connector, its cost is less than 3 dollars, while a similar legovsky costs $ 57 :
Total for today there is a box that is able to steer with motors and sensors with the help of javascript (a slightly neutered Espruino turns inside as a submodule), the box is able to update its firmware through bluetooth, circuits, boards, samples, 3D models - everything is laid out in the open on the github .
Unfortunately, I still have one unclosed task. I'm still more on the hardware, and when I needed to write a softphone for Android, then I was somewhat depressed.
In the plan, take the usual Blockly code and add an appload to it via bluetooth. And if you want to join or make yourself the same toy - Wellcome.
Github
Scheme
Facebook group
I hope this piece of iron is useful not only for my baby.
Source: https://habr.com/ru/post/351886/
All Articles