Unity: particle systems
Particle systems are like salt: even a small amount can add to the upcoming “dish” of style. Modern games that do not use particle systems look rather pale.
In the past, we had to program every stream of smoke on our own. Fortunately, thanks to the built-in modular particle system, Unity Shuriken makes creating particles a fairly simple task. This particle system is easy to learn and allows you to create complex effects.
In this tutorial you will learn the following:
')
- How to add new particle systems to Unity.
- Find out which particle system modules are used most often, and learn how to use them.
This tutorial consists of two main parts: in the first we will create a flame of a torch, in the second - the effect of a bomb explosion.
Note: this tutorial assumes that you are familiar with the basics of working in Unity. If you are new to Unity or you need to refresh your knowledge, then start by reading our tutorial Introduction to Unity .
Getting Started with Particle Systems
Download the project template for this tutorial and unpack it in a place convenient for you. Note that to work with tutorial you need at least Unity 2017.2.
Open the Starter Project in Unity. Assets inside it are distributed in several folders:
- Materials : contains fire material.
- Models : contains models of torch and bombs, as well as their materials.
- Prefabs : contains prefab bombs.
- Scenes : contains scenes of Torch and Bomb.
- Scripts : here are the source scripts.
- Textures : here is the texture for the fire material.
Having dealt with where what is, we can begin to study the work of particle systems in Unity.
Add particle system
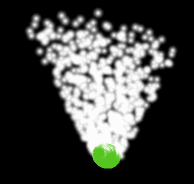
In the general case, a particle system emits particles at random points within a predetermined space, which may be in the form of, for example, a sphere or a cone. The system determines the lifetime of the particle itself, and when it ends, the system destroys the particle.
In particle systems, it’s convenient that they are components that can be added to any GameObject in the scene. Do you want laser rays to escape from shark eyes? Just add a particle system to your GameObject!
Open the Torch scene in the Project Window and run the scene:
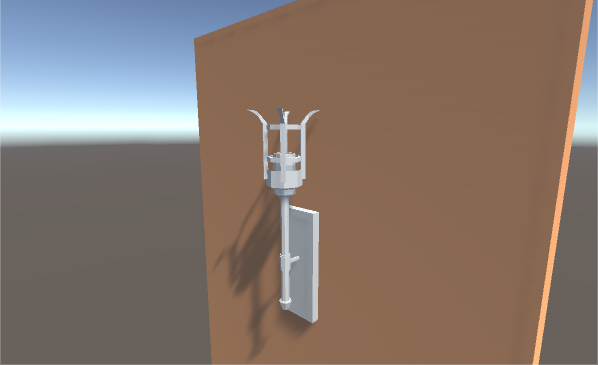
So far nothing interesting happens here. The torch hangs on the wall, but there is no fire on it. First we need to add a particle system.
Stop the scene and select TorchFireParticles in the Hierarchy. In the Inspector, click on the Add Component button. Find the Particle System and click to add it:

Note: You may have noticed that I did not add the particle system directly to the GameObject MedievalTorch. I made the particles emit from the fuel tank in the upper part, and not from the middle of the torch.
Launch the scene and you will see that particles are already being emitted:
Gif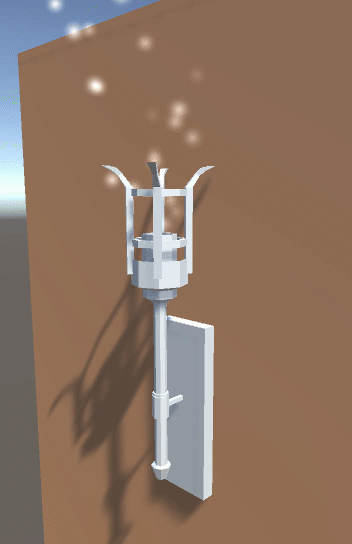
Note: you can see pink particles instead of white. It seems that this is a Unity bug with the default texture setting. If this has happened to you, then do not worry, soon we will set the correct flame texture. If you want to fix this bug now, then click on the Render section of the particle system, click on the dot next to the Material field and double-click Default-Particle in the window that opens.
When you select a GameObject with a particle system attached to it, you will notice a black dialog box in the lower right corner of the scene window. This dialog box allows you to simulate or stop a particle system. Clicking on the Simulate button activates the particle system and replaces it with the “Pause” button. To stop the simulation, you need to click on the “Stop” button.
This dialog box is useful when creating particle systems that run for a limited period of time, for example, for explosions.
Consider a particle system more carefully.
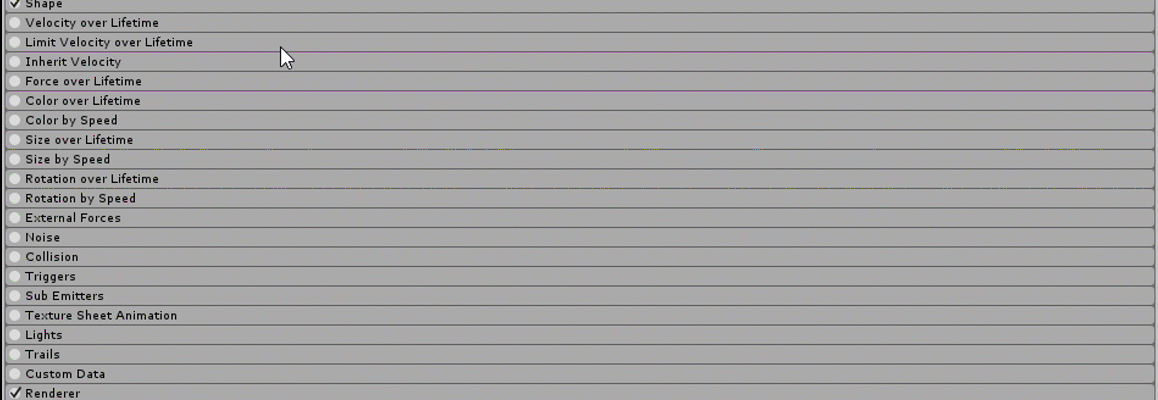
Take a look at the Inspector. You will notice that the particle system component we added has several subsections:
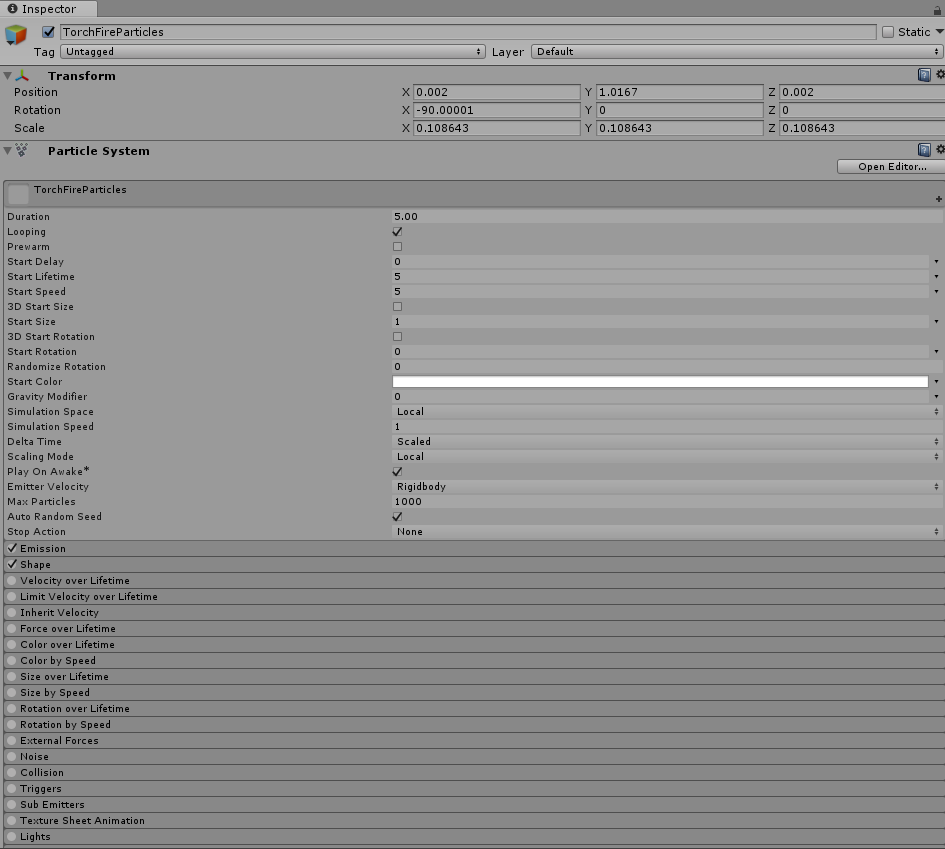
Each of these subsections is called a module. These modules contain the parameters of the particle system. The default module is called the Main module:
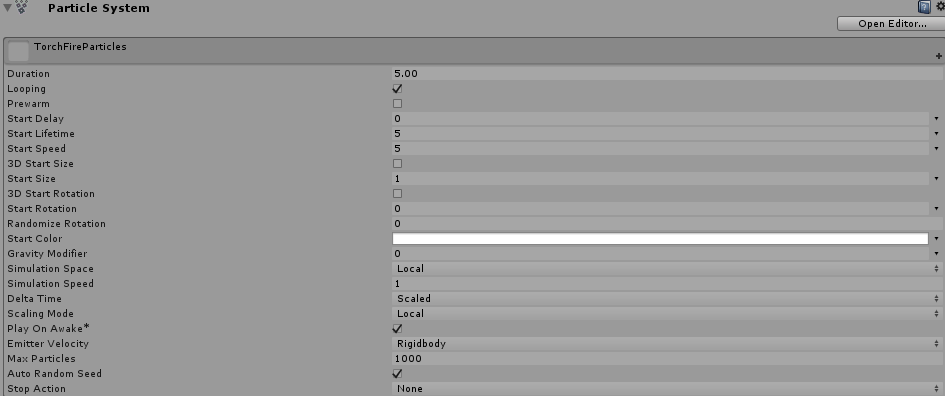
The Main module is the foundation of any particle system in Unity. Here are the most basic parameters of the particles:
- Duration : the execution time of the particle system in seconds. Leave here the default value of 5.00 .
- Looping : re-emit particles until the particle system stops. The cycle is restarted after reaching the Duration time. The fire should be lit constantly, so leave this option on.

Enabled and Disabled - Prewarm : Used only when Looping is on . The particle system will behave as if it has completed a full cycle at startup.Gif

Enabled and Disabled
For the fire effect, turn it off to make it appear that the torch has just been set on fire. - Start Delay : delay in seconds before the particle system starts to emit particles. Leave here the default value of 0 .
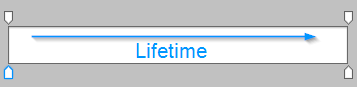
- Start Lifetime : the initial lifetime of the particles in seconds. After the end of time the particle is destroyed.

Above: 8 seconds. Down: 3 seconds
Let's make the lifetime equal to 4 seconds; thanks to this, the flame will not be too high. - Start Speed : the initial velocity of the particles. The greater the velocity of the particles, the more they will spread.

From above: 2. From below: 10
Set the speed to 0.75 ; so the flame effect will be slower and denser.
Note: by changing the parameters of the particle system, you will see its preview in the Game window. In the process of doing the tutorial, look at this preliminary review.
Run the scene to see how the changes have affected:
Gif
We set up a torch, but the effect of fire leaves much to be desired. Fortunately, in the Main module there are additional options to improve the shape and behavior of the torch.
Other properties of the Main module
Select TorchFireParticles in the GameObject hierarchy and scroll down to the particle system. In the Main Module, look at the following properties:
- Start Size : the initial particle size.

Above: 0.2. Below: 1.
Choose size 3 ; This is a convenient size that allows you to see individual particles more clearly. - Start Rotation : The initial angle of rotation of the particles.

Above: 0 °. Below: 45 °
Leave the value 0 ° ; the particles are round, so you can hardly notice the difference. - Start Color : the original color of the particles. Leave the color equal to the original pure white (255,255,255) ; we will color the fire using texture.
- Gravity Modifier : scales the gravity value specified in the Unity Physics Manager window. If it is 0, then gravity will be disabled.Gif

This is an image from a system with a gravity modifier equal to 1 , that is, particles fall down like a waterfall. Make the gravity in your system equal to 0 ; particles will move up at the speed specified in Start Speed . - Simulation Space : moves particles to Local Space along with a particle system. When choosing World Space, particles move freely after emission.

From above: local space. Below: world space
Leave the Space value for your simulation. The effect of the parameter will be noticeable only when the particle system moves. - Play On Awake : starts to emit particles immediately after switching on. If this parameter is disabled, then you will have to manually launch the particle system through a script or animation system. Leave it on, because we want the flame to start burning when the scene starts.
- Max Particles : The maximum number of particles that can be alive in a particle system at a time. If you try to emit more particles than the value specified here, they will not be emitted at all. This parameter is mainly needed for performance reasons, and the default value of 1000 particles in our case is more than enough.
Wow, this is the list! But as a result, we learned how to add a particle system to the scene and customize it to your liking.
Run the scene again to see how it was affected by the changes:
Gif
Each time it becomes more and more like a flame, right?
However, we need more particles. For this we need to change the emission system.
Introduction to the Emission Module
The Emission module controls the number and time of emitted particles in the system and allows you to create any effects, from constant flow to a sharp explosion of particles.
While in the particle Inspector, click on the Emission module header:

This will open the Emission module:

Rate over Time represents the number of particles emitted per second. Set Rate over Time to 15 .
Run the scene again; now the particle system will look more like a burning flame.
Gif
But it is noticeable that it is still more like smoke. And here we will make the biggest change at the current stage of the tutorial: your own texture!
Add your own texture
All particles have a particle material and texture that defines their appearance. With the default texture, we can only do this. Replacing the texture, we can create effects like magic stars, smoke and, of course, fire.
Replacing the texture of particles is quite simple. Up to this point, the particles were drawn on the screen using the Default-Particle material, which is a material of particles with a circular gradient texture:

To replace this material, select TorchFireParticles in the GameObject hierarchy . Then, find the particle system components in the inspector and open the particle system's Renderer module.
Open the Materials folder in the Project View window and drag and drop onto the FireMaterial Material onto the Material property:
Gif
Then run the scene to see how our selected texture is applied:
Gif
Feel the heat? However, the flame is too wide; To fix this, we need to change the shape of the particle system.
Reshaping the particle system
The Shape module, as the name implies, controls the shape and behavior of particles in this shape. You can choose from several different shapes; each has its own parameters. This allows you to create particles in a parallelepiped, in a sphere or even in your own mesh!
Deploy the Shape module in the inspector:

As the shape ( shape ) of the particle system, a cone ( cone ) is selected, that is, particles are emitted from the base base and move outward at an angle ( angle ):

In the example shown above, the base is colored blue , the corner is green , and the particles are red . It is also worth noting that with the Shape module deployed, we see in the Scene window a convenient preview of the cone:

Changing Angle , you can change the size of the cone, making it wider or narrower. Enter a value of 7 ; this way we get a convenient narrow border that expands a bit when the particles go up.
By changing the Radius , we can change the size of the base. The larger the value, the more particles will be scattered during emission. Select a value of 0.2 ; so we will ensure the creation of a flame inside the tank for the fuel torch.
Start the scene and see how the shape of the flame has changed:
Gif
It begins to resemble a real flame! The last thing you can do is change the size of the particles over time.
Resizable over time
Using the Size over Lifetime module, you can create particles that increase or decrease with the course of their life, or even pulsate, like fireflies in the forest.
Find the Size over Lifetime section in the list of modules of the particle system. The default is off, so check the box next to the module name:

Expand the Size over Lifetime module by clicking on its name. This will open a dark gray background with a flat curve ( Curve ) at the top:

Click on the dark gray background to open the curves editor at the bottom of the inspector. The horizontal axis represents the lifetime of the particle, and the vertical axis - its size:
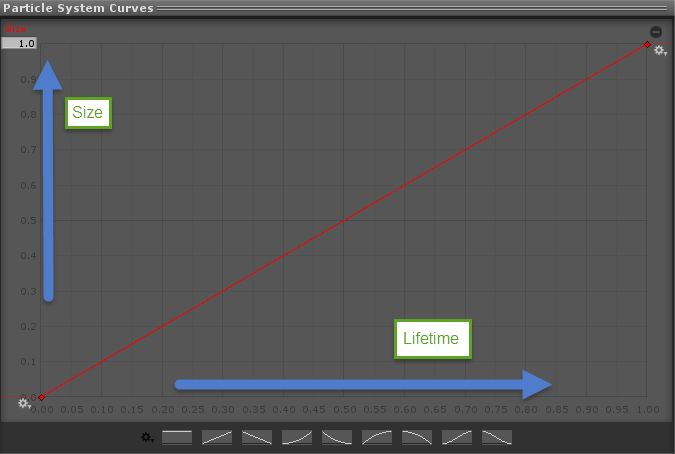
To edit the curve, you can move the key points on both sides of the red line; You can add new keys by double clicking anywhere on the curve. To delete key points, right-click the point and select Delete Key . You can also choose one of the previously created curves in the lower part of the window:
Gif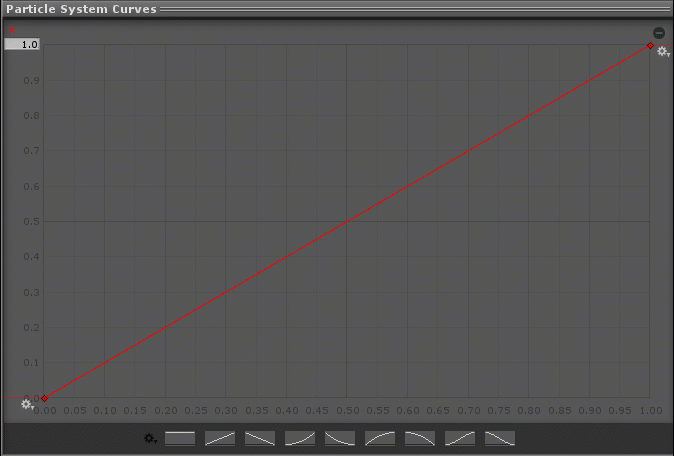
Remember how the flames behave in the real world: they decrease when the particles are lifted up. To simulate this behavior, we will select the third ready curve on the right to create a smoothly descending curve:

Run the scene to see the effect in its entirety!
Gif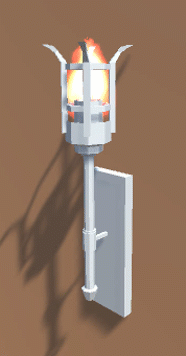
Congratulations! You have learned how to customize a new particle system and modify it to your liking to create a beautiful fire effect.
In the next section, we’ll wake up the inner Michael Bay in ourselves to learn how to create the effects of explosions!
Bomb effect creation
Creating an explosion effect in Unity is quite simple. Once you figure out how to create particles of your own, you can use this effect for things like car wheels, sparks when rubbing on the ground, or balloons that explode and throw confetti out of you.
Open the Bomb scene in the Project Window and run the scene:

There is a floor at the bottom of the scene, but nothing besides it happens in the scene.
To create bombs, pass the Bomb prefab to the Bomb Emitter prefab slot:
Gif
Run the scene again to see the bombs appear:
Gif
The emitter creates a new bomb every two seconds. So that they rotate , you need to add a small rotational force when creating the bomb.
Open the Bomb script in the Scripts folder of the Project Window.
Add the following code to
Start() : void Start() { float randomX = UnityEngine.Random.Range (10f, 100f); float randomY = UnityEngine.Random.Range (10f, 100f); float randomZ = UnityEngine.Random.Range (10f, 100f); Rigidbody bomb = GetComponent<Rigidbody> (); bomb.AddTorque (randomX, randomY, randomZ); } The first three lines generate random float values from 10 to 100 for the x, y, and z axes. Next, we get a reference to the Rigidbody bomb component and apply a moment to it. Due to this, the bomb begins to rotate in a random direction. Save the changes in the script, go back to Unity and run the scene.
Gif
Now the bombs when falling fall beautifully. But I promised you explosions!
In the hierarchy, click the Create button and select Create Empty . Click on the created GameObject and name it ExplosionParticles . Next, add to this GameObject a new particle system. If you forgot how to create a particle system, then look at the first section of the tutorial.
After creating the particle system, drag GameObject ExplosionParticles from the hierarchy to the Prefabs folder in the Project Browser. After that, remove the GameObject ExplosionParticles from the Project Hierarchy.
Gif
Then select the Bomb prefab in the Prefabs folder and drag the ExplosionParticles prefab into the Explosion Particles Prefab Bomb slot as follows:
Gif
Now when the bomb touches the ground, a new GameObject Explosion Particles will be created.
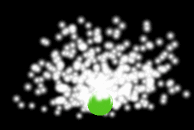
Run the scene to see what the blast looks like. If you again have a bug with pink textures, then do not worry, we will change the texture.
Gif
Very magical , but so far completely unlike the explosion!
As in the case of the torch, we will use the material Fire for the particle system.
Select the Prefab ExplosionParticles in the Project Window, and then deploy the Renderer module in the inspector. Drag FireMaterial from the Materials folder from the Project Window to the Material slot, as shown below:
Gif
To complete the effect, we need to change the following parameters in the Main module:

- Set the Duration to 0.70 .
- Looping needs to be disabled. Particles should be emitted only once.
- Set the Start Lifetime value to 0.7 .
- Set Start Speed to 10 .
- Set the Start Size to 2 .
- Set the Gravity Modifier to 1 . Due to this, the particles at the end will slightly go down.
Run a scene with a bomb to see. what we created:
Gif
Well, this is already like an explosion, but you can definitely do better!
Making a blast
To improve the explosion, we will change the properties of the modules of the particle system. Guess what module we will change? Here's a hint - we already used it.
If you decide that this is an Emission module, then you are well done!
Deploy the Emission Module . Rate is the number of particles created per second. For an explosion, we need not a constant stream of particles, but a sharp flash.
Set the Rate over Time to 0 . Now go to Rate over Distance and you will see a list of Bursts , which is empty by default:

A burst is a collection of particles emitted simultaneously at a certain point in time.
Click the + button in the bottom right corner to add a new burst. You will see two fields: Time and Count :

Leave Time equal to 0 , and set Count to 150 . Such parameters will cause the particle system to simultaneously emit 150 particles at the beginning of the system.
Run the scene. How does everything look now?
Gif
Now it's more like a blast! Although this explosion looks better, it still has an ugly conical shape, and the particles do not fade, but simply disappear. To give the explosion a final look, he needs to set the correct form.
First, let's deploy the Shape module:

We have already used this module to form a flame of a torch, but here you can choose other forms. Click on the drop-down box that says Cone to see all the available options:

Each form affects the emitter in its own way. Each animation shown below shows the same emitter, in which only the shape changes:
Sphere

Hemisphere (HemiSphere)
Cone (Cone)
Box

Mesh (cube) (Mesh)

Circle

Edge

From one system you can get a lot of different effects, just changing its shape! To create a realistic explosion, choose the shape of Sphere .
Launch the scene and get ready to explode :
Gif
Now everything looks amazing!
Although the explosion is beautiful, we have a small problem. The particles just disappear. This creates a feeling of trembling and looks completely unnatural. Instead of just disappearing, the particles should fade out with time so that the explosion disappears gradually.
Color change
With the particle system open in the inspector, click the checkbox next to the Color over Lifetime module to turn it on, and then expand it. You will immediately see the word Color with a white block next to it. Click on the white block :

This will open the gradient editor:

The color change during the lifetime of the particles is represented as a gradient. The initial color is on the left, and the particles gradually change color to the one on the right:
Four white stripes on the edges are called markers ; Click between two existing markers to add a new one. To remove a marker, drag it from the bar:
Gif
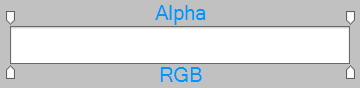
The upper markers control the Alpha or the opacity of the color, and the lower markers control the RGB (Red, Green, Blue) color values.
Click on the rightmost alpha marker. The current value of the alpha channel will be shown at the bottom of the gradient editor:

Drag the slider to 0 . Now the particles will gradually become transparent over the course of their lifetime.
Run the scene again to see how the changes have affected:
Gif
Wonderful blast!
Want to further enhance the scene? Go back to the scene with the torch and have the flame use the Size Over Lifetime Module to get a similar effect.
Where to go next?
The finished project can be downloaded from here .
In this tutorial, you learned how particle systems and their modules work in Unity, as well as how to customize them to get the desired effect. Experiment with different parameters to see what other effects can be achieved.
For more information about the Shuriken particle system and its modules, see the official Unity documentation and the particle system video . You can also learn more about particle system scripting here .
Source: https://habr.com/ru/post/351458/
All Articles