Mobile 3D game on Unity3D in less than 90 hours
 Greetings Today I will tell you about my experience of developing a game on Unity for the Android platform, in less than 90 hours, using the example of creating a simple runner. In the process of storytelling, I will touch on some details and key stages, with a description of all possible pitfalls and methods for their solution. This story describes the process of creating a game for mobile platforms, starting from the concept and ending with the finished product. I hope it will inspire you to create your own project, or help shed light on some features of the Unity engine. Without further ado, let's get down to business!
Stage 1: concept
As a rule, novice developers, attacking their first and most significant rakes already at this stage, because before starting to create something, it would be nice to evaluate their own capabilities. Just ask yourself a question: do you have enough strength, time and skills to create an AAA class project? The answer is no! Throw this idea in the back burner, and do not go back to it until you implement a damn dozen of successful projects. By the way, by luck we mean the number of installations from 500 thousand, the rating is over 3.5 on a 5-point scale and commercial success. For a start, work on simpler ones, I would even say mundane projects, like addictive games style arcades, combining all the criteria we need for a “successful” project.
Advantages of addictive games style:
- Addictive, "sticky" gameplay;
- Lack of plot;
- Simple and intuitive control, requiring the player a minimum of action;
- Minimum requirements for graphics.
The last point stands apart, since the lion's share of time is spent not on writing code, but on polishing the visual component of the game, which in our case does not play a special role. Considering the above, I decided to stop at a 3D runner, namely on an odd job like the famous game ZIGZAG , only better.
')
Stage 2: Sketching
Here we come to the most important stage of development, and while a disappointing smile has not yet disappeared from your face, let me remind you that a sketch is a product vision. Having created it, you actually approve the technical task of the future game, thanks to which all further shamanism and dancing will proceed precisely from this task. The degree of elaboration of the sketch to determine you and only you. After all, you create this sketch for yourself, not for an art gallery. At this stage, I just take a pen and notebook, and then begin to draw, occasionally leaving brief comments and explanations:

From the outline it is clear that the game is designed for mobile platforms, and it will be launched in portrait mode. The gameplay is also simple-minded: the player’s task is to overcome dangerous ground on the car provided by the game, collecting crystals on the way. For each collected crystal and successfully passed the turn, the player receives a reward in the form of bonus points. Touching the screen causes you to change the direction of movement of the vehicle along the X and Z axes.
Stage 3: prototyping
Having at hand a detailed plan of action, you can safely begin to create a "mocap" or a prototype of the future game. In essence, this stage is the beginning of work with Unity, and it should be started with setting up the environment. Here is how I set it up:
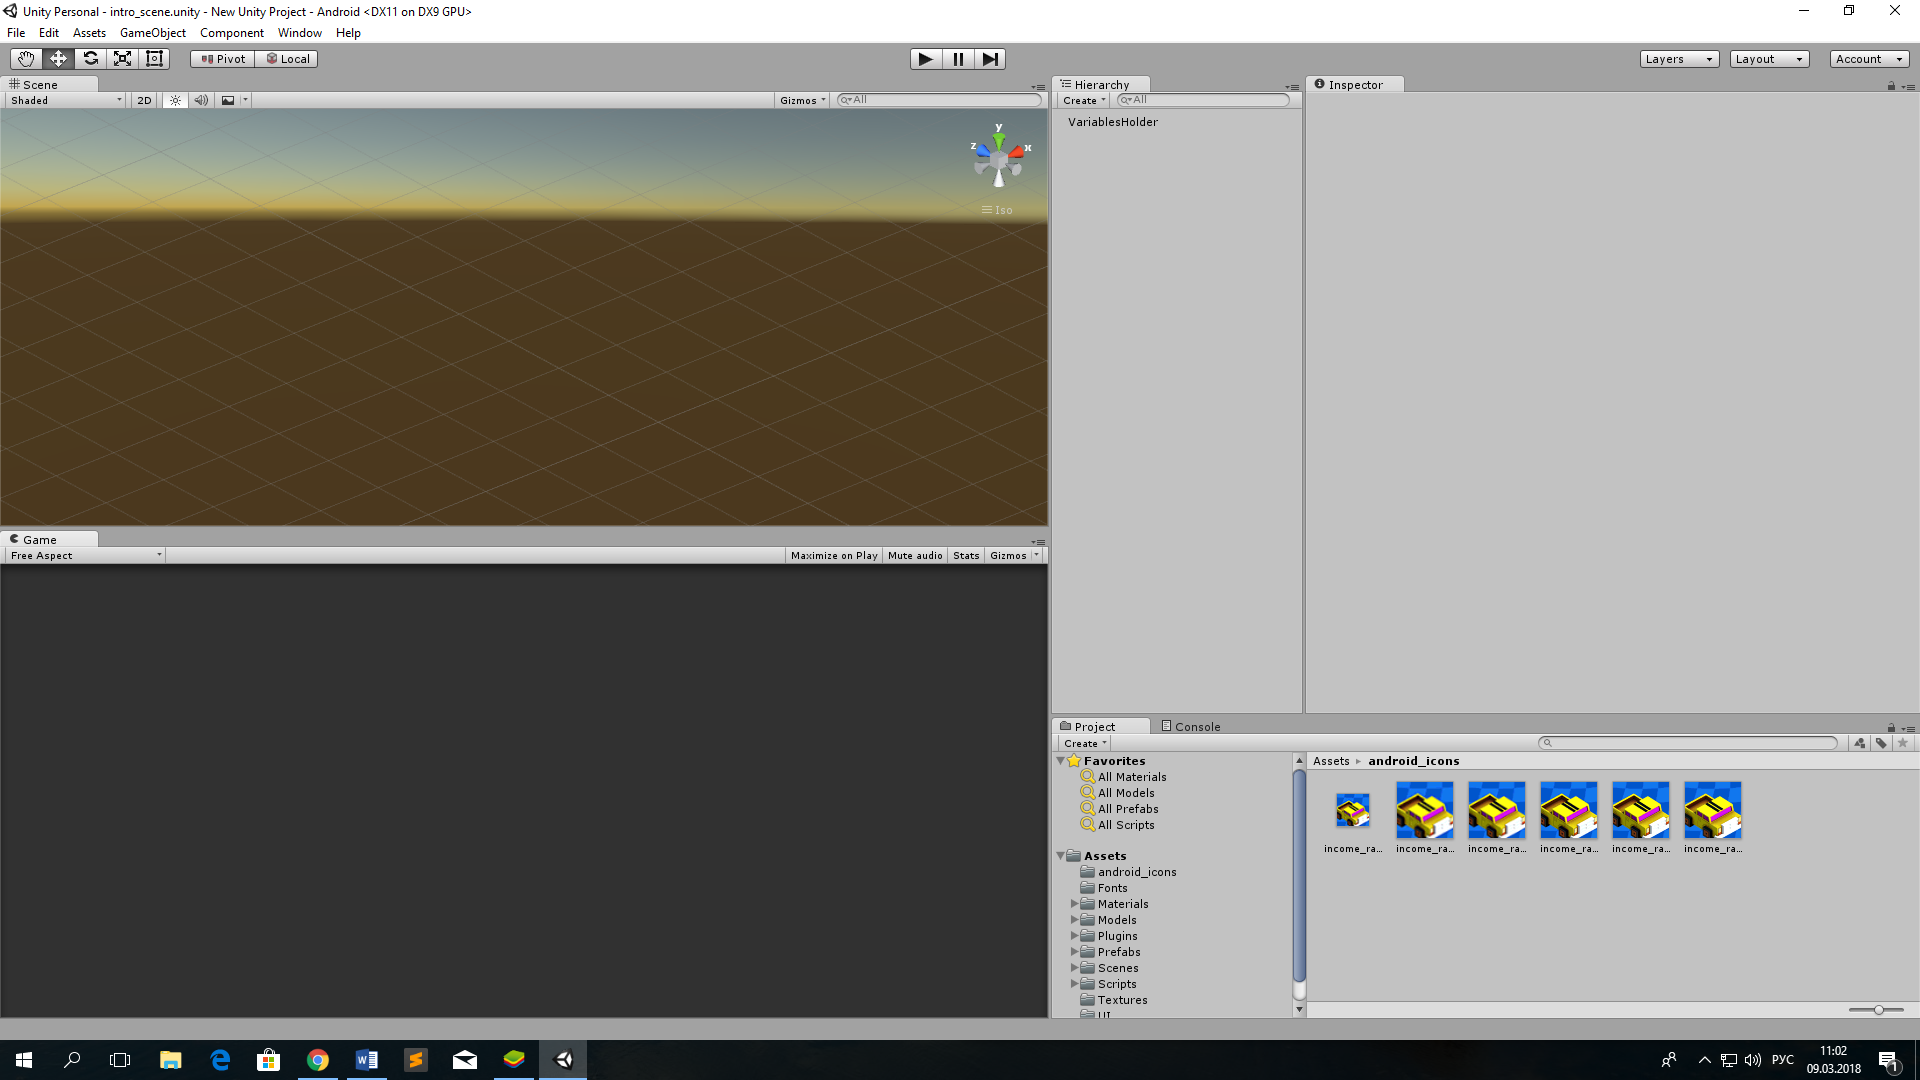
On the left side of the screen are the editor Scene and Game. The latter displays exactly how the game looks on devices. On the right side: the Hierarchy and Inspector panels, and just below are the Project and Console panels.
Stage 3.1: under the hood
Attention! Below will be described the simplest code for the implementation of the game, designed for beginners, and demonstrating how quickly and simply you can achieve results in Unity. The final game code is implemented on a deeper knowledge of the language, including problems of data storage, optimization and monetization of the project, however, for obvious reasons, this article will not talk about them. We will write all the scripts in C #, and for those who are not interested, I suggest boldly moving on to Stage 4: visual design
My prototyping always begins with blanks, that is, as actors, I always use primitive elements, like cubes and spheres. This approach significantly simplifies the development process, allowing you to abstract from everything that is not related to the mechanics of the game. In the first step, we form a basic understanding of the appearance of the future game, and since, as planned, our game is created in an isometric style, the first thing we need to do is set up the camera. Here we come to one of the key features of Unity. The fact is that you can experiment with the camera settings for a long time, selecting the necessary values ... But it is easier to simply set your favorite view using the View panel and then activate GameObject -> Align With View, after which your camera will immediately take the necessary values. Here is such a shortcut from the creators of Unity.

So, the scene is ready, but how to give the character a movement? To begin with, we will perform some manipulations with the Sphere object, adding components such as Rigidbody and the newly created sphereBehavior script to it. Do not forget to disable the Use Gravity checkbox, since at this stage we will not need it.

In short, the Rigidbody component allows an object to experience all the charms of the physical world, such as mass, gravity, gravity, acceleration, etc. That is why for us it is so important! And now, to make the body move in the direction we need, we only need to slightly change the velocity parameter, but we will do this with the help of the code. Let's make the sphere move along the X axis, for this we will make changes to the sphereBehavior script:
using UnityEngine; using System.Collections; public class sphereBehavior : MonoBehaviour { private Rigidbody rb; // Rigidbody private float speed = 5f; // void Start() { rb = GetComponent<Rigidbody> (); // Rigidbody } void Update() { rb.velocity = new Vector3 (speed, 0f,0f); } } In Unity, bodies describe their position and direction using special vectors that store values along the x, y, and z axes. By changing these values, we achieve the direction or position of a particular body we need. The string rb.velocity = new Vector3 (speed, 0f, 0f) sets a new direction for the body along the X axis, thereby giving our sphere the direction we need.
If you did everything exactly as I did, then your sphere will go on an endless journey along the X axis, at a speed of speed.
Now let's make our sphere change its direction, with each click of the left mouse button, as it is implemented in the game ZIGZAG. To do this, we’ll go back to the sphereBehavior code and change it as follows:
using UnityEngine; using System.Collections; public class sphereBehavior : MonoBehaviour { private Rigidbody rb; // Rigidbody private bool isMovingRight = true; // , private float speed = 5f; // void Start() { rb = GetComponent<Rigidbody> (); // Rigidbody } void changeDirection() { if (isMovingRight) { isMovingRight = false; } else { isMovingRight = true; } } void Update() { if(Input.GetMouseButtonDown(0)) { changeDirection(); } if (isMovingRight) { rb.velocity = new Vector3 (speed, 0f, 0f); } else { rb.velocity = new Vector3 (0f, 0f, speed); } } } Let us agree that when a sphere moves along the X axis, this movement is called “right” movement, and along the Z axis - “left”. Thus, we can easily describe the direction of our body with the special boolean variable isMovingRight.
if(Input.GetMouseButtonDown(0)) { changeDirection(); } This piece of code tracks the left mouse button, and if the key was pressed, runs the changeDirection () function, with simple logic: if at the time the left mouse button was clicked, the isMovingRight variable was true, now it is false and vice versa. Let me remind you that the Boolean variable allows us to answer one simple question: is the statement that the body moves along the X axis is true or not? In other words, pressing the left mouse button constantly changes the value of isMovingRight, then to true (the body moves to the right), then to false (the body moves to the left).
Alternatively, the changeDirection () function can be written in one line:
void changeDirection() { isMovingRight = !isMovingRight; } And the last thing that needs to be done is to rewrite the method of driving direction, taking into account the isMovingRight variable:
if (isMovingRight) { rb.velocity = new Vector3 (speed, 0f, 0f); } else { rb.velocity = new Vector3 (0f, 0f, speed); } If isMovingRight is true (if the sphere is actually moving to the right), then the velocity value is taken by the new direction vector rb.velocity = new Vector3 (speed, 0f, 0f); If isMovingRight is false, then the body no longer moves to the right, which means it's time to change the direction vector to rb.velocity = new Vector3 (0f, 0f, speed);
Start the game, do a few mouse clicks, and if you did everything exactly as I did, you will see how the sphere begins to describe the zigzags.
Cool? Of course not! After all, the sphere is moving, and we stand still. Let's modify the game so that we can move with the sphere and not lose sight of it. To do this, we need to create a cameraFollow script and attach it to the Main Camera object:

But the script code of cameraFollow:
using UnityEngine; using System.Collections; public class cameraFollow : MonoBehaviour { public GameObject player; public Vector3 offset; void Start () { offset = transform.position - player.transform.position; } void Update () { transform.position = player.transform.position + offset; } } How to carry out tracking object? First, we need to calculate the offset difference between the Camera and Sphere objects. To do this, it is enough to subtract the coordinates of the sphere from the position of the camera, and save the resulting difference in the variable offset. But first, you need to get access to the coordinates of the sphere. To do this, we need the player variable, which is a simple GameObject. Since our sphere is in constant motion, we must synchronize the coordinates of the camera with the coordinates of the sphere, adding on the previously obtained offset. It remains only to indicate in the player field our object of tracking, and you can safely admire the result. Just drag the Sphere object into the Player field of the cameraFollow script, as shown in the picture (the Main Camera must remain selected):

Now, let's think about the generation of the road along which our sphere could move, because now it literally floats in the air. Let's start with setting up a Cube object, representing, in our opinion, a stretch of path.

If there is no Ground tag in your list, then you need to create it in the Add Tag tab ...
The next thing we have to do is to create a special folder called Prefabs in the root of the project, and drag our Cube into it, directly from the inspector. If after this, the name of the Cube object became blue, it means that you did everything correctly.

Prefabs are a special type of object that allows you to store a GameObject, as well as all its values and properties in one place. Prefabs allow you to create an infinite number of objects, and any change to it immediately reflects on all its copies. In other words, we can now call a section of the Cube path, directly from the Prefabs folder, as many times as necessary.
Now let's create an empty GameObject, (right-click on the Hierarchy) rename it to RoadContainer and attach the roadBehavior script just created to it:


And here is the roadBehavior code itself:
using UnityEngine; using System.Collections; public class roadBehavior : MonoBehaviour { public GameObject road; // private Vector3 lastpos = new Vector3 (0f,0f,0f); // void Start() { for(int i=0; i<10; i++) { GameObject _platform = Instantiate (road) as GameObject; _platform.transform.position = lastpos + new Vector3 (1f,0f,0f); lastpos = _platform.transform.position; } } } What is really going on here? As you can see, we have a variable, which later will be manually tied to our Cube prefab, and there is a Vector3 object that stores the coordinates of the last prefab set (now the values are zero).
for(int i=0; i<10; i++) { GameObject _platform = Instantiate (road) as GameObject; _platform.transform.position = lastpos + new Vector3 (1f,0f,0f); lastpos = _platform.transform.position; } This section of the code performs the following: as long as i <10, we will take the prefab, set its position taking into account the last position lastpos + position taking into account the X offset, keep the last position. That is, as a result, we get 10 Cube prefabs set exactly one after the other. Before checking, do not forget to assign our Cube object from the Prefabs folder to the road variable:


Ok, but what to do next? And then we need to continue installing the blocks in random order. To do this, we need a random pseudo-random number generator. Let's tweak the roadBehavior script to reflect the innovations:
using UnityEngine; using System.Collections; public class roadBehavior : MonoBehaviour { public GameObject road; // private Vector3 lastpos = new Vector3 (0f,0f,0f); // void Start() { for(int i=0; i<10; i++) { GameObject _platform = Instantiate (road) as GameObject; _platform.transform.position = lastpos + new Vector3 (1f,0f,0f); lastpos = _platform.transform.position; } InvokeRepeating ("SpawnPlatform", 1f, 0.2f); } void SpawnPlatform() { int random = Random.Range (0, 2); if (random == 0) { // X GameObject _platform = Instantiate (road) as GameObject; _platform.transform.position = lastpos + new Vector3 (1f,0f,0f); lastpos = _platform.transform.position; } else { // Z GameObject _platform = Instantiate (road) as GameObject; _platform.transform.position = lastpos + new Vector3 (0f,0f,1f); lastpos = _platform.transform.position; } } } The InvokeRepeating (“SpawnPlatform”, 1f, 0.2f) line is designed to activate the SpawnPlatform () function 1 second after the start of the game, and to call it again every 0.2 second. As for the function itself, then, as they say, everything is simpler than the steamed turnip! Every 0.2 seconds, the system makes a random number between the numbers from 0 to 1. If the system has guessed 0 - we install a new prefab on the X axis, and if 1 - then the Z axis. That's all the magic!

Finally, let's make the sphere fall every time it drops out. To do this, create a new playerFalls script and attach it to our Sphere object:

And here is the playerFalls script code itself:
using UnityEngine; using System.Collections; public class playerFalls : MonoBehaviour { private Rigidbody rb; void Start() { rb = GetComponent<Rigidbody> (); } void Update() { RaycastHit hit; if(Physics.Raycast (transform.position, Vector3.down, out hit, 5f) && hit.transform.gameObject.tag == "Ground") { rb.useGravity = false; } else { rb.useGravity = true; } } } Raycast is a special kind of laser beam that radiates towards the scene. In case the beam is reflected from an object, it returns information about the object it encountered. And this is very cool, because that is how, through such a ray, directed from the center of the sphere downwards, we will check whether we are on the Cube platform or not (we check if the object has the tag "Ground"). And as soon as we leave the regions of the roadway, we automatically activate the Gravity parameter of our sphere (remember how we deliberately turned it off at the very beginning?), After which the sphere, under the influence of gravity, will fall down, ha ha!
Stage 4: Visual Design
When all the work on game mechanics is completed, it is time to move to the visual part of the project. All the same, the gameplay is good, and the pleasant gameplay is even better. And despite the fact that at the very beginning we outlined the graphics, how far the most important thing was, we still want to add some zest, adding colors to the game being created. After some deliberation, the following idea came to mind:

According to the plan, you drive a car, rushing across the endless expanses of the sea, fleeing from the oncoming cataclysm. Procrastination is akin to death, as the platforms now and then strive to topple into the depths of the sea, dragging the player into the abyss of shame and frustration. Plus, from time to time, the platforms begin to change color, and the car spontaneously increases its speed. All this is intended to bring into the game a kind of "Challenge". As it was said, for each successfully completed turn or a collected crystal, the player is rewarded with “Inkam” - the local likeness of salary. Salary can then be exchanged in the shop for cars with a higher Inkam. The concept gave the sonorous name "Income Racer".
All assets were modeled in Blender, a free 3D editor. In it, the necessary textures were created, subsequently brought to an acceptable form in Photoshop. The nice thing was that Unity easily imports 3D models from Blender, without any headaches, making the creation process enjoyable and painless.
Stage 5: polishing
Finishing the project - those are still a rake, because there is always a place for something that can be improved, or redone. Often, it happens that it is at the polishing and finishing stage that the development process loses much of its time, or even comes to a standstill. The reason is that you are already noticeably tired: the game seems monotonous and not interesting enough. Sometimes, at the end of development, comes the revelation that you are capable of remaking the game from scratch, improving it at least twice! Drop those thoughts and think about the plan, how it all began. It is better to complement the game after the release, by rolling out updates, rather than delaying the development indefinitely. Otherwise, you risk ruining the project by putting a fat cross on it. For example, at the time of this writing, the game did not even have an introductory screen. The reason for this is the fact that according to the plan I could not go beyond the 90 hours allocated for the development process. Of course, one could spend a few more hours creating the introductory screen, however, he is planning to follow it. And it is normal that some moments are added to the game after its release.
Last, it remains to create the presentation documents: a brief description, video, as well as the game icon. This stage should be given as much attention as possible, because it is by the icon that users begin to judge your project.
The result was what turned out. Everything about everything was spent a little more than 90 hours, which by the standards of modern geymdev is not so much. After this time, the game was uploaded to the Play Market and put up for a general trial, this is the story! If you liked the article, or just have something to talk about, then welcome to the comments. I will be glad to answer your questions.
Source: https://habr.com/ru/post/351244/
All Articles