Security Basics: Keychain and Hashing
One of the most important aspects of software development, which is also considered one of the most mysterious and scary (therefore avoided like the plague), is application security. Users expect their applications to work correctly, store their personal information and protect this information from potential threats.
In this article, you dive into the basics of security in iOS. You will work with some basic cryptographic hashing methods for secure storage of received data in Keychain - while maintaining and protecting user data in the application.
')
Apple has several APIs to help protect your applications, and you will learn about them when working with Keychain. In addition, you will use CryptoSwift - study and browse through an open source library that implements cryptographic algorithms.
Use this link to download the project for work.
We will work on an application that allows users to register and see photos of their friends. Most of the application is already implemented, your task is to protect this application.
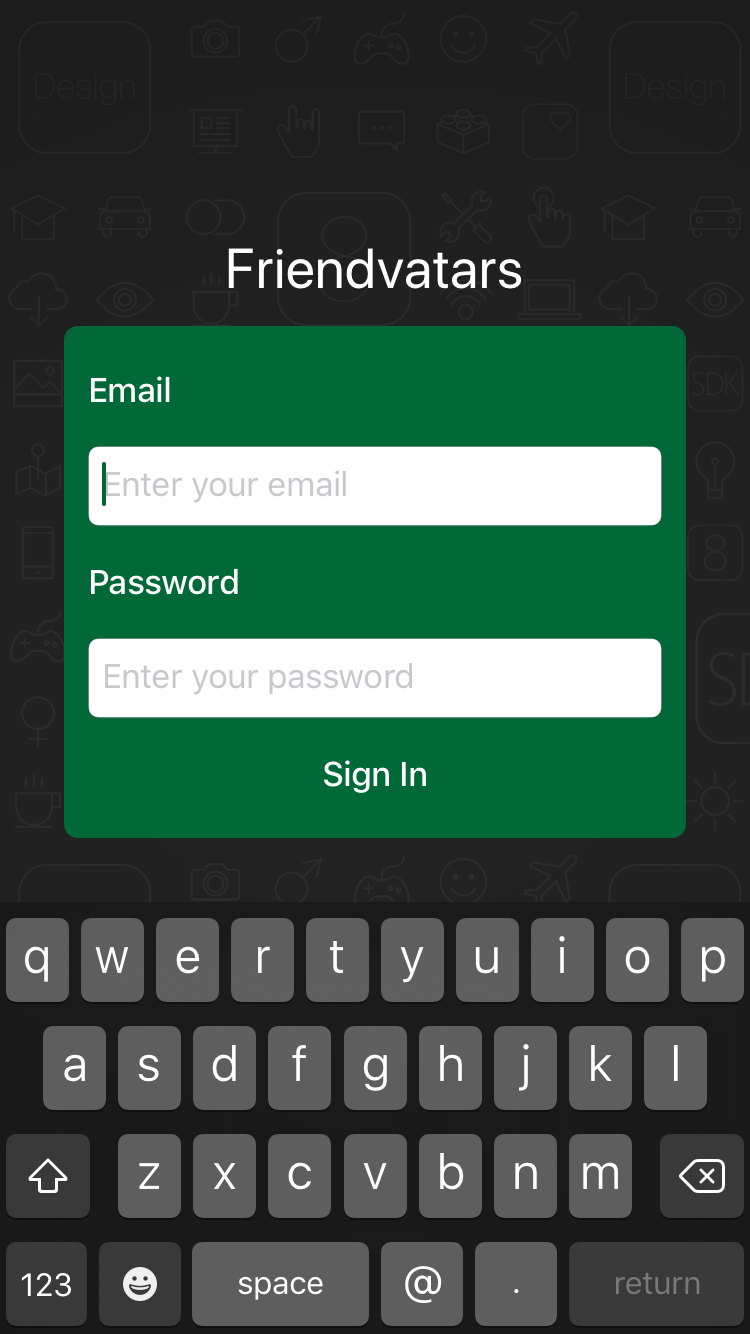
Once you unzip the archive, be sure to open the Friendvatars.xcworkspace file, and use CocoaPod to add dependencies. Compile and run the application. You will see that it starts from the login screen:
Currently, when you click on the Sign in button, nothing happens. This is due to the fact that the application does not implement a way to store user credentials. This is what you will need to add first.
Before you dive into working with the code, you need to understand why security is necessary in your application. The security of your application is especially important if you store personal user data, such as emails, passwords, or bank account data.

Why is Apple taking security so seriously? The photos that you photograph, up to the number of steps that were taken during the day, your iPhone stores a lot of personal data. The protection of this data is very important.
Who are the intruders in the iOS ecosystem and what do they want? An attacker can be a criminal, a business rival, even a friend or relative. Not all attackers want the same thing. Some may want to damage or spoil the information, while others may want to know what gifts they will receive on their birthdays.
Your task is to make sure that the data stored in your application is protected from possible threats. Fortunately, Apple has developed many powerful APIs that simplify this task.
One of the most important security elements for iOS developers is Keychain , a specialized database for storing metadata and confidential information. Using Keychain is the best practice for storing small pieces of data that are crucial to your application, such as secrets and passwords.
Why use Keychain for simpler solutions? Is it enough to store the user's password in base-64 in UserDefaults ? Definitely not! It is quite trivial for an attacker to recover a password saved in this way. Security is complicated, and trying to create your own solution is not a good idea. Even if your application is not for a financial institution, storing user personal data should not be taken lightly.

Direct interaction with Keychain is not easy, especially in Swift. You should use Security frameworks , which are mostly written in C.
Fortunately, you can avoid using these low-level APIs by borrowing Apple's wrapper for Swift from the GenericKeychain example. KeychainPasswordItem provides an easy-to-use interface for working with Keychain and has already been added to the start project.
Time to dive into the code!
Open AuthViewController.swift . This controller is responsible for the authorization form that you saw at the beginning. If you go to the Actions section, you will notice that the signInButtonPressed method does nothing. It's time to fix it.
Add the following code to the Helpers section at the bottom:
Here’s how it happens:
Note: You can change the name of your Mac (which is used by the SIM card) by going to System Preferences -> Sharing . In addition, you can change the name of your iPhone by going to Settings -> General -> About -> Name .
Now add the following to the signInButtonPressed method :
This code calls the signIn method when signInButtonPressed is executed.
Find textFieldShouldReturn and replace TextFieldTag.password.rawValue in the break under case with the following:
Now the signIn () method will be called when the user presses Return on the keyboard, after he entered the text in the password field, while the password field has focus and already contains text.
The signIn () method is not yet fully implemented. We still need to save user and password objects. All this will be implemented in auxiliary class.
Open AuthController.swift , which is a static class — it will contain the business logic associated with authentication.
To begin with, at the very top of the file above isSignedIn , add the following:
This code defines the name of the service that will be used to identify application data in Keychain. To use this constant, create a signIn method at the end of the class:
This method will reliably store information for user authorizations in Keychain. It creates a KeychainPasswordItem with the name of the service that you identified along with the unique identifier (account).
For this application, the user's email is used as an identifier for Keychain, but other data can also serve as an identifier or unique user name. Finally, in Settings.currentUser is assigned the value of user - all this is stored in UserDefaults .
This method should not be considered complete! Storing a user's password directly is not the best practice. For example, if an attacker hacked Keychain, he could get each user's passwords in plain text. The best solution is to store a password hash, built on the basis of user identification.
At the top of the AuthController.swift immediately after import Foundation add the following
CryptoSwift is one of the most popular collections of many standard cryptographic algorithms written in Swift. Cryptography is complex and needs to be done correctly in order for it to be beneficial. Using a popular library for security means that you are not responsible for implementing standardized hashing functions. The best methods of cryptography are open to the public.
Note: Apple’s CommonCrypto framework provides many useful hashing functions, but Swift is not easy to work with. That is why for this article we chose the CryptoSwift library.
Then add the following code above signIn :
This method takes an email address and password, and returns a hashed string. The salt constant is a unique string that makes a rare .sha256 () from a regular password - this is the CryptoSwift c method, which hashes the entered string using the SHA-2 algorithm.
In the previous example, the attacker who hacked Keychain will find this hash. An attacker can create a table of frequently used passwords and their hashes for comparison with this hash. If you only hashed user input without a salt, and the password existed in the intruder’s hash table, the password can be cracked.
Using salt increases the difficulty of hacking. In addition, you combine the user's email and password with a salt to create a hash that cannot be easily cracked.
Note: For user authentication, the mobile app and server will use the same salt . This allows them to build hashes in the same way and compare two hashes to verify identity.
Go back to the signIn method (_: password :) , replace the line of code that calls the savePassword method with the following:
signIn now stores a strong hash, not a raw password. Now it's time to add it to the view controller.
Return to AuthViewController.swift and add this code to the end of the signIn () method:
Although this code saves the user and saves the hashed password, the application will need something else in order to log in. AppController.swift should be notified when authentication changes.
You may have noticed that AuthController.swift has a static variable named isSignedIn . Currently, it always returns false, even if the user is registered.
In AuthController.swift, change isSignedIn :
This is what happens here:
Now the handleAuthState in AppController.swift will work correctly, but after logging in you will need to restart the application in order to correctly update the UI . But there is a good way to notify an application about a state change, for example, user authentication, using notification.
Add the following to the end of AuthController.swift :
A good practice is to use a domain identifier when composing custom notifications, which is usually taken from the bundle identifier of the application. Using a unique identifier can help you debug an application, so everything related to your notification is highlighted from other frameworks mentioned in your logs.
To use this custom notification name, add the following to the bottom of the signIn method (_: password :) :
This code will send a notification that may be detected by other parts of the application.
Inside the AppController.swift, add the init method above the show (in :) :
This code will register AppController as an observer of your login name. When triggered, it calls callAuthState .
Compile and run the application. After logging in to the system using any combination of email and password, you will see a list of friends:

You will notice that there are no avatars, just the names of friends. This is not very pleasant to look at. You should probably get out of this unfinished application and forget about it. Oh yes, even the exit button does not work. Time to put a 1-star as a rating and really give this app back to its developer!

Logging works fine, but there is no way to exit the application. This is actually quite easy to achieve, since there is a notification that will signal a change in the authentication state.
Go back to AuthViewController.swift and add the following under signIn (_: password :) :
It's pretty simple:
To enable this, go to FriendsViewController.swift and add the following to signOut:
Your new method is invoked to clear the logged in user data when the "Logout" button is pressed.
Working with errors in your application is a good idea, but in view of this lesson, ignore any errors.
Compile and run the application, then click “Exit”.
Now you have a full working example of authentication in the application!
You have done a great job creating authentication! However, the fun is not over. Now you will convert this empty space before the names in the list of friends.
FriendsViewController.swift displays a list of objects in the User model. You also want to display avatar images for each user in the view. Since there are only two attributes for a User, a name and an email address, how are you going to display the image?
It turns out that there is a service that takes an email address and associates it with an avatar image: Gravatar ! If you have not heard of Gravatar, it is usually used in blogs and forums to globally associate an email address with an avatar. It simplifies the work, so users do not need to upload a new avatar to every forum or site they join.
Each of these users already have an avatar associated with their email. So the only thing you need to do is to execute a request to Gravatar and get the images for the requested users. To do this, you will create an MD5 hash of their email to create URL requests.
If you look at the documentation on the Gravatar website, you will see that you need a hashed email address to create a request. This will be a piece of cake, since you can use CryptoSwift . Add Gravatar comments to the tableView (_: cellForRowAt :) with the following:
Let's look at:
Compile and run the application. Now you can see the images and names of your friends:
Note: If your email returns a default image (white on blue G), go to the Gravatar website and upload your own avatar and join your friends!
If you are interested in other ways to protect your applications, explore the use of biometric sensors in the latest Apple products in this article .
You can also learn more about Apple’s security infrastructure if you really want to look into the framework.
Finally, be sure to learn the additional security algorithms provided by CryptoSwift.
Hope you enjoyed this article! If you have any questions or comments, join the discussion!
In this article, you dive into the basics of security in iOS. You will work with some basic cryptographic hashing methods for secure storage of received data in Keychain - while maintaining and protecting user data in the application.
')
Apple has several APIs to help protect your applications, and you will learn about them when working with Keychain. In addition, you will use CryptoSwift - study and browse through an open source library that implements cryptographic algorithms.
Start
Use this link to download the project for work.
We will work on an application that allows users to register and see photos of their friends. Most of the application is already implemented, your task is to protect this application.
Once you unzip the archive, be sure to open the Friendvatars.xcworkspace file, and use CocoaPod to add dependencies. Compile and run the application. You will see that it starts from the login screen:
Currently, when you click on the Sign in button, nothing happens. This is due to the fact that the application does not implement a way to store user credentials. This is what you will need to add first.
Why safety is important
Before you dive into working with the code, you need to understand why security is necessary in your application. The security of your application is especially important if you store personal user data, such as emails, passwords, or bank account data.
Why is Apple taking security so seriously? The photos that you photograph, up to the number of steps that were taken during the day, your iPhone stores a lot of personal data. The protection of this data is very important.
Who are the intruders in the iOS ecosystem and what do they want? An attacker can be a criminal, a business rival, even a friend or relative. Not all attackers want the same thing. Some may want to damage or spoil the information, while others may want to know what gifts they will receive on their birthdays.
Your task is to make sure that the data stored in your application is protected from possible threats. Fortunately, Apple has developed many powerful APIs that simplify this task.
Keychain
One of the most important security elements for iOS developers is Keychain , a specialized database for storing metadata and confidential information. Using Keychain is the best practice for storing small pieces of data that are crucial to your application, such as secrets and passwords.
Why use Keychain for simpler solutions? Is it enough to store the user's password in base-64 in UserDefaults ? Definitely not! It is quite trivial for an attacker to recover a password saved in this way. Security is complicated, and trying to create your own solution is not a good idea. Even if your application is not for a financial institution, storing user personal data should not be taken lightly.
Direct interaction with Keychain is not easy, especially in Swift. You should use Security frameworks , which are mostly written in C.
Fortunately, you can avoid using these low-level APIs by borrowing Apple's wrapper for Swift from the GenericKeychain example. KeychainPasswordItem provides an easy-to-use interface for working with Keychain and has already been added to the start project.
Time to dive into the code!
Using Keychain
Open AuthViewController.swift . This controller is responsible for the authorization form that you saw at the beginning. If you go to the Actions section, you will notice that the signInButtonPressed method does nothing. It's time to fix it.
Add the following code to the Helpers section at the bottom:
private func signIn() { // 1 view.endEditing(true) // 2 guard let email = emailField.text, email.count > 0 else { return } guard let password = passwordField.text, password.count > 0 else { return } // 3 let name = UIDevice.current.name let user = User(name: name, email: email) } Here’s how it happens:
- You remove the keyboard to confirm that a user action has been completed.
- You accept the email address and password of the user. If the length of the entered information in the field is zero, then the function will not continue. In a real application, you must show the user an error.
- You assign a user name, which for training purposes in this article, you take from the device name.
Note: You can change the name of your Mac (which is used by the SIM card) by going to System Preferences -> Sharing . In addition, you can change the name of your iPhone by going to Settings -> General -> About -> Name .
Now add the following to the signInButtonPressed method :
signIn() This code calls the signIn method when signInButtonPressed is executed.
Find textFieldShouldReturn and replace TextFieldTag.password.rawValue in the break under case with the following:
signIn() Now the signIn () method will be called when the user presses Return on the keyboard, after he entered the text in the password field, while the password field has focus and already contains text.
The signIn () method is not yet fully implemented. We still need to save user and password objects. All this will be implemented in auxiliary class.
Open AuthController.swift , which is a static class — it will contain the business logic associated with authentication.
To begin with, at the very top of the file above isSignedIn , add the following:
static let serviceName = "FriendvatarsService" This code defines the name of the service that will be used to identify application data in Keychain. To use this constant, create a signIn method at the end of the class:
class func signIn(_ user: User, password: String) throws { try KeychainPasswordItem(service: serviceName, account: user.email).savePassword(password) Settings.currentUser = user } This method will reliably store information for user authorizations in Keychain. It creates a KeychainPasswordItem with the name of the service that you identified along with the unique identifier (account).
For this application, the user's email is used as an identifier for Keychain, but other data can also serve as an identifier or unique user name. Finally, in Settings.currentUser is assigned the value of user - all this is stored in UserDefaults .
This method should not be considered complete! Storing a user's password directly is not the best practice. For example, if an attacker hacked Keychain, he could get each user's passwords in plain text. The best solution is to store a password hash, built on the basis of user identification.
At the top of the AuthController.swift immediately after import Foundation add the following
import CryptoSwift CryptoSwift is one of the most popular collections of many standard cryptographic algorithms written in Swift. Cryptography is complex and needs to be done correctly in order for it to be beneficial. Using a popular library for security means that you are not responsible for implementing standardized hashing functions. The best methods of cryptography are open to the public.
Note: Apple’s CommonCrypto framework provides many useful hashing functions, but Swift is not easy to work with. That is why for this article we chose the CryptoSwift library.
Then add the following code above signIn :
class func passwordHash(from email: String, password: String) -> String { let salt = "x4vV8bGgqqmQwgCoyXFQj+(o.nUNQhVP7ND" return "\(password).\(email).\(salt)".sha256() } This method takes an email address and password, and returns a hashed string. The salt constant is a unique string that makes a rare .sha256 () from a regular password - this is the CryptoSwift c method, which hashes the entered string using the SHA-2 algorithm.
In the previous example, the attacker who hacked Keychain will find this hash. An attacker can create a table of frequently used passwords and their hashes for comparison with this hash. If you only hashed user input without a salt, and the password existed in the intruder’s hash table, the password can be cracked.
Using salt increases the difficulty of hacking. In addition, you combine the user's email and password with a salt to create a hash that cannot be easily cracked.
Note: For user authentication, the mobile app and server will use the same salt . This allows them to build hashes in the same way and compare two hashes to verify identity.
Go back to the signIn method (_: password :) , replace the line of code that calls the savePassword method with the following:
let finalHash = passwordHash(from: user.email, password: password) try KeychainPasswordItem(service: serviceName, account: user.email).savePassword(finalHash) signIn now stores a strong hash, not a raw password. Now it's time to add it to the view controller.
Return to AuthViewController.swift and add this code to the end of the signIn () method:
do { try AuthController.signIn(user, password: password) } catch { print("Error signing in: \(error.localizedDescription)") } Although this code saves the user and saves the hashed password, the application will need something else in order to log in. AppController.swift should be notified when authentication changes.
You may have noticed that AuthController.swift has a static variable named isSignedIn . Currently, it always returns false, even if the user is registered.
In AuthController.swift, change isSignedIn :
static var isSignedIn: Bool { // 1 guard let currentUser = Settings.currentUser else { return false } do { // 2 let password = try KeychainPasswordItem(service: serviceName, account: currentUser.email).readPassword() return password.count > 0 } catch { return false } } This is what happens here:
- You immediately check the current user stored in UserDefaults . If the user does not exist, then the identifier for finding the password hash in Keychain will also be absent, so you indicate that he is not registered in the system.
- You get the hash password from Keychain , and if the password exists and is not empty, the user is considered registered.
Now the handleAuthState in AppController.swift will work correctly, but after logging in you will need to restart the application in order to correctly update the UI . But there is a good way to notify an application about a state change, for example, user authentication, using notification.
Add the following to the end of AuthController.swift :
extension Notification.Name { static let loginStatusChanged = Notification.Name("com.razeware.auth.changed") } A good practice is to use a domain identifier when composing custom notifications, which is usually taken from the bundle identifier of the application. Using a unique identifier can help you debug an application, so everything related to your notification is highlighted from other frameworks mentioned in your logs.
To use this custom notification name, add the following to the bottom of the signIn method (_: password :) :
NotificationCenter.default.post(name: .loginStatusChanged, object: nil) This code will send a notification that may be detected by other parts of the application.
Inside the AppController.swift, add the init method above the show (in :) :
init() { NotificationCenter.default.addObserver( self, selector: #selector(handleAuthState), name: .loginStatusChanged, object: nil ) } This code will register AppController as an observer of your login name. When triggered, it calls callAuthState .
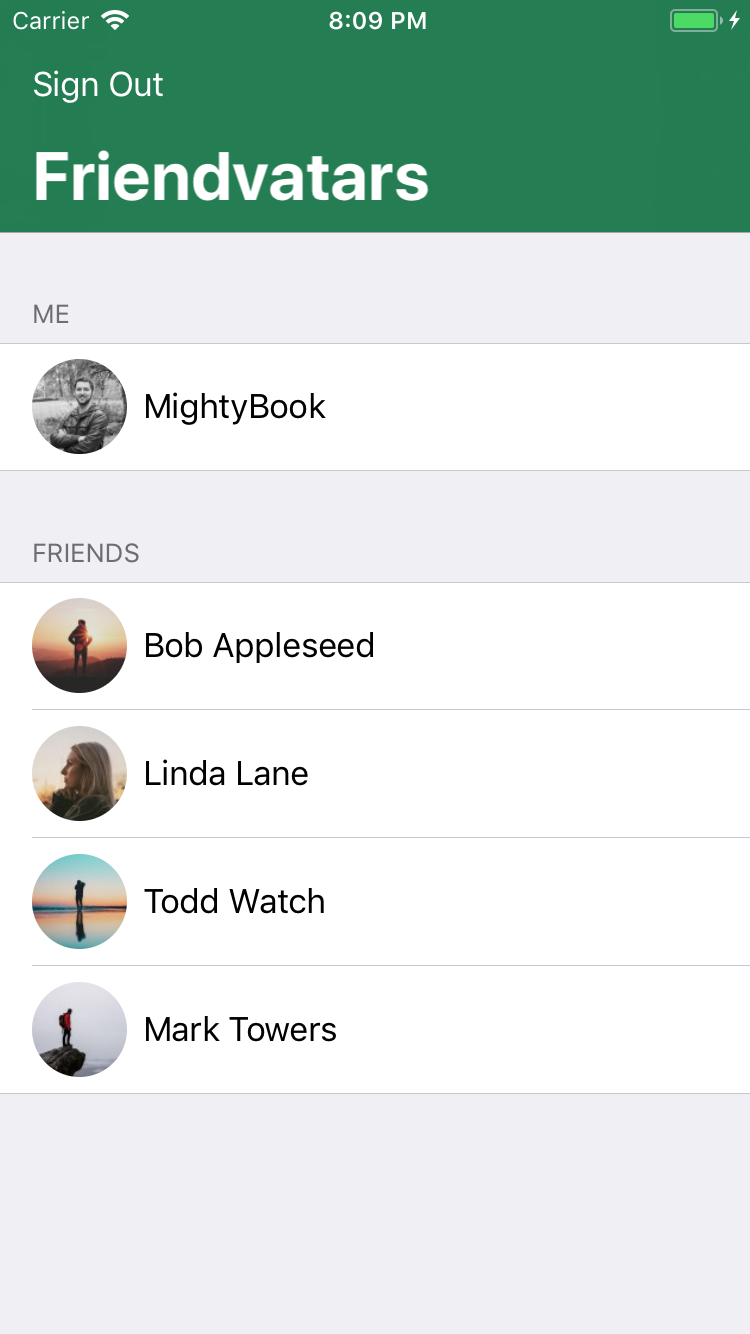
Compile and run the application. After logging in to the system using any combination of email and password, you will see a list of friends:
You will notice that there are no avatars, just the names of friends. This is not very pleasant to look at. You should probably get out of this unfinished application and forget about it. Oh yes, even the exit button does not work. Time to put a 1-star as a rating and really give this app back to its developer!
Logging works fine, but there is no way to exit the application. This is actually quite easy to achieve, since there is a notification that will signal a change in the authentication state.
Go back to AuthViewController.swift and add the following under signIn (_: password :) :
class func signOut() throws { // 1 guard let currentUser = Settings.currentUser else { return } // 2 try KeychainPasswordItem(service: serviceName, account: currentUser.email).deleteItem() // 3 Settings.currentUser = nil NotificationCenter.default.post(name: .loginStatusChanged, object: nil) } It's pretty simple:
- You check whether you have saved the current user or not, if you have not done so before.
- You delete the hash password from Keychain.
- You clear the user object and post a notification.
To enable this, go to FriendsViewController.swift and add the following to signOut:
try? AuthController.signOut() Your new method is invoked to clear the logged in user data when the "Logout" button is pressed.
Working with errors in your application is a good idea, but in view of this lesson, ignore any errors.
Compile and run the application, then click “Exit”.
Now you have a full working example of authentication in the application!
Hashing
You have done a great job creating authentication! However, the fun is not over. Now you will convert this empty space before the names in the list of friends.
FriendsViewController.swift displays a list of objects in the User model. You also want to display avatar images for each user in the view. Since there are only two attributes for a User, a name and an email address, how are you going to display the image?
It turns out that there is a service that takes an email address and associates it with an avatar image: Gravatar ! If you have not heard of Gravatar, it is usually used in blogs and forums to globally associate an email address with an avatar. It simplifies the work, so users do not need to upload a new avatar to every forum or site they join.
Each of these users already have an avatar associated with their email. So the only thing you need to do is to execute a request to Gravatar and get the images for the requested users. To do this, you will create an MD5 hash of their email to create URL requests.
If you look at the documentation on the Gravatar website, you will see that you need a hashed email address to create a request. This will be a piece of cake, since you can use CryptoSwift . Add Gravatar comments to the tableView (_: cellForRowAt :) with the following:
// 1 let emailHash = user.email.trimmingCharacters(in: .whitespacesAndNewlines) .lowercased() .md5() // 2 if let url = URL(string: "https://www.gravatar.com/avatar/" + emailHash) { URLSession.shared.dataTask(with: url) { data, response, error in guard let data = data, let image = UIImage(data: data) else { return } // 3 self.imageCache.setObject(image, forKey: user.email as NSString) DispatchQueue.main.async { // 4 self.tableView.reloadRows(at: [indexPath], with: .automatic) } }.resume() } Let's look at:
- First, you format the email address according to the Gravatar documentation, and then create an MD5 hash.
- You create a Gravatar URL and URLSession . You load a UIImage from the returned data.
- You cache the image to avoid duplicate selections for the email address.
- You reload the row in the table view so that the avatar image is displayed.
Compile and run the application. Now you can see the images and names of your friends:
Note: If your email returns a default image (white on blue G), go to the Gravatar website and upload your own avatar and join your friends!
If you are interested in other ways to protect your applications, explore the use of biometric sensors in the latest Apple products in this article .
You can also learn more about Apple’s security infrastructure if you really want to look into the framework.
Finally, be sure to learn the additional security algorithms provided by CryptoSwift.
Hope you enjoyed this article! If you have any questions or comments, join the discussion!
Source: https://habr.com/ru/post/351116/
All Articles