How to write a one-page application (SPA) using Vue.js

Single-page applications (SPAs) have many advantages, such as speed, a really good UX, and full control of HTML markup. It is becoming more and more SPA sites; more and more tools that simplify the SPA development process. You probably have already read about the young and promising framework Vue.js. I suggest you dive deeper into Vue and use a simple example to deal with a simple SPA.
We will write a client-server application of the simplest blog. The application will display a list of entries as well as the full text of each individual entry. And by itself, all this will happen without reloading the page.
')
After reading the example of this application, you will learn how to extract data in Vue, create routes and deal with an interesting feature of Vue - single-file components.
Backend
In this tutorial, we will mainly focus on the front end on Vue . We will not think about writing a REST backend. For example, the jsonplaceholder.typicode.com service will be used to provide a stub in the form of a REST API.
Frontend
Instruments
Getting started with Vue is easy. Using the right tools makes it even easier. I recommend to look at the vue-awesome project, which contains a list of tools, components, libraries and plug-ins for all occasions.
Vue-cli
When creating a new project, it is recommended to use Vue-cli. So you can create projects using official template projects Vue, or one of the many template projects with open source, and, of course, you can create your own and use it anywhere.
So, first, install vue-cli as a global package:
$ npm install -g vue-cli Then we initialize the project with the selected template; for our example, it is more than enough to use webpack-simple.
$ vue init webpack-simple vue-spa Next, go to the vue-spa folder and run npm install in the terminal. After installing all the packages, we can run our application in development mode.
$ npm run dev This command will automatically launch our project on the local webpack dev server. Our simplest Vue application will appear in the browser. Of course, it does not look at all like we would like, and is only suitable as a starting point for the start of something bigger. To continue the work, I suggest first to get acquainted with the structure of our template.
Webpack-simple template
Inside the webpack-simple template has the following structure:

The index.html file contains simple HTML markup with a single “app” element in the body. It will be replaced with DOM, generated by vue. For this reason, the body tag is not recommended as a root element.
The src folder contains the main.js file, which contains the webpack entry point. Vue components are imported there as well. There is also described the root instance of Vue, which so far has two properties. The 'el' property provides a Vue instance connection to the specified DOM element. Another one is the render function that generates the DOM from App.vue . In general, this is all that we need to know about the structure of the webpack-simple template, not so much, is it? The main part of our application will be programmed in App.vue. The .vue extension defines a file as a single-file component vue. This is one of the features of Vue with which we will take a closer look now.
Single file components
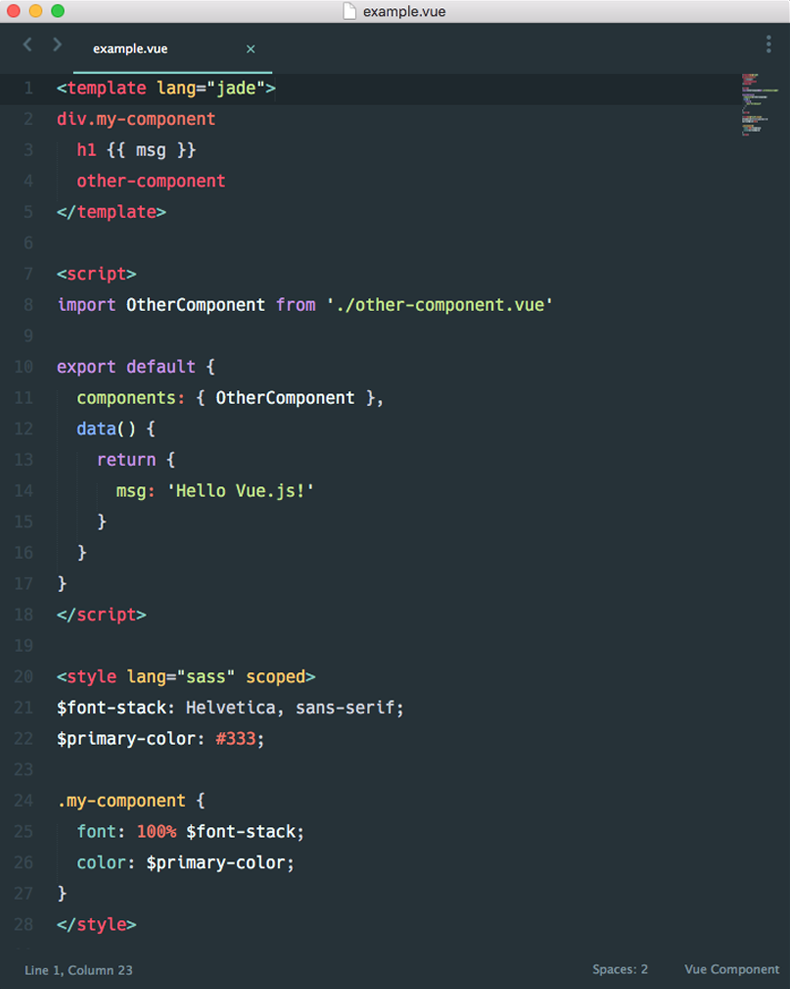
Each * .vue file consists of three types of blocks: <template>, <script> and optionally <style>. As a result, we can divide the project into related components. Inside the component, its pattern, logic, and styles are inherently related, and their combination actually makes the component more holistic and easily maintained. Now we are ready to start creating a blog on Vue.
We write application
Let's see what we are actually going to implement. We will have a headline with the name of our blog at the top of the page. On the left side we will have a fixed sidebar in which we will display the titles of our records, it will be something like a table of contents. The rest of the page will be occupied by a dynamic block in which the text of the entry will be displayed.

Step 1
First of all, delete all the extra lines from App.vue. And rewrite the template in accordance with our requirements.
<template> <div id="app"> <header> <h1>Vue.js SPA</h1> </header> <main> <aside class="sidebar"> </aside> <div class="content"> </div> </main> </div> </template> Second, create an instance of Vue with the data property, which we will place in the array with our messages. At the moment it is empty, but soon we will put in it the data received from the server inside the array.
After the first call, you can no longer add reactive properties to the root data object. Therefore, before creating an instance of Vue, it is recommended to declare all the reactive properties at the root level.
<script> export default { data () { return { posts: [] } } } </script> In addition, you can add a few styles to make the app look better.
Application code is hosted on github.com . It is enough to clone the repository and switch the branch by step number to follow the development of the application step by step for example:
$ git checkout step-1 At the moment we have absolutely nothing to display in our navigation bar, so let's get data from the server. For this, I chose Axios, an easy-to-use HTTP client. You can also use any method convenient for you, for example, a Vue-resource or your own sample or even jQuery Ajax.
Step 2
Install Axios
$ npm install --save-dev axios Then we import it into the App component and define the getAllPosts () method that will make a request to the server and assign it to the posts property. We call the method in the created () hook, which will be called after creating the Vue instance and after setting the access settings to the data.
import axios from 'axios' export default { data () { return { posts: null, endpoint: 'https://jsonplaceholder.typicode.com/posts/', } }, created() { this.getAllPosts(); }, methods: { getAllPosts() { axios.get(this.endpoint) .then(response => { this.posts = response.data; }) .catch(error => { console.log('-----error-------'); console.log(error); }) } } } And now we will display all the headers of the entries in the sidebar.
<aside class="sidebar"> <div v-for="post in posts"> {{ post.title }} </div> </aside> Until now, we only displayed the record headers, but for the time being we cannot see the records themselves. Now you need to display the full post in the content section according to the selected name in the sidebar. At the same time, we would like each entry to be available at its unique address.
Step 3
To do this, use the official Vue library vue-router. As the name implies, the library allows you to customize the routing for our application.
Install the library:
$ npm install --save-dev vue-router To set up routing, let's go back to the main.js file. Here we define the routing settings and add them to our Vue instance.
import Vue from 'vue' import Router from 'vue-router' import App from './App.vue' import Post from './components/Post.vue' import Hello from './components/Hello.vue' Vue.use(Router) const router = new Router({ routes: [ { path: '/', name:'home', component: Hello, }, { path: '/post/:id', name:'post', component: Post, props: true, }, ] }) new Vue({ el: '#app', render: h => h(App), router }) In the settings of the routing, we have indicated which component causes the rendering to the appropriate path. Since only the Post.vue component will be responsible for rendering each post, we don’t need to determine the path to each post, it’s enough to define a dynamic path.
path: '/post/:id' This path contains a dynamic segment: an id that points to a specific post. At the same time, we have access to this segment in the Post component via this. $ Route.params.id . However, using $ route in our component will fix a hard link with the route, which in turn limits the component's flexibility, since it can be used only on certain URL addresses. Instead, we can use the props option and set it to true . After that, $ route.params will become associated with the props option of the Post component.
Now that we’ve created a router, we can go back to our application and add a few more lines to the template.
<main> <aside class="sidebar"> <router-link v-for="post in posts" active-class="is-active" class="link" :to="{ name: 'post', params: { id: post.id } }"> {{post.id}}. {{post.title}} </router-link> </aside> <div class="content"> <router-view></router-view> </div> </main> Here we have two components vue-router : <router-link> and <router-view>. The first is a component to enable user navigation in an application with support for routing. The second component is a functional component that draws a consistent component for a given path.
There is a final step. We need to display the contents of the post entry.
Step 4
Let's go to the Post.vue file, in which we add a simple template:
<template lang="html"> <div class="post" v-if="post"> <h1 class="post__title">{{ post.title }}</h1> <p class="post__body">{{ post.body }}</p> <p class="post__id">{{ post.id }}</p> </div> </template> Then we need to set the Vue instance parameters for this component. Here everything is the same as in the display settings of all posts. Let's declare the props option with a changing id , which will receive the number of our post. Next, let's declare a data object, as we did in App.vue:
import axios from 'axios'; export default { props: ['id'], data() { return { post: null, endpoint: 'https://jsonplaceholder.typicode.com/posts/', } } } Then we describe the getPost () method, which will receive only one post entry by identifier and call it in the created () hook.
methods: { getPost(id) { axios(this.endpoint + id) .then(response => { this.post = response.data }) .catch( error => { console.log(error) }) } }, created() { this.getPost(this.id); }, Almost done. If we run the application now, we will see that, although the URL is changing, we see the only post that was drawn first. The fact is that for rendering different posts we have the same component, and Vue does not need to re-create it due to waste of resources, and this also means that component lifecycle hooks will not be called.
To fix this, we just need to set watcher for the $ route object.
watch: { '$route'() { this.getPost(this.id); } } Now everything works as it should. To get the version for production, just run the npm run build command in the console.
Let's sum up
We wrote a simple one-page application using Vue in four steps. We learned how easy it is to start your project with vue-cli. We looked at the concept of Vue single-file components that make your project more flexible and scalable. We learned how to extract data from an external API using Axios. And we saw how to configure routing using vue-router. Of course, this is a basic knowledge, but I hope that this will help you start using Vue.js using its advanced features.
useful links
→ Original article
→ Link to the GitHub project with source code from the article
→ Project vue-awesome
Source: https://habr.com/ru/post/350750/
All Articles