How to make friends Siri and Xiaomi
This article presents a guide to setting up Xiaomi luminaires working over Wi-Fi and Bluetooth with Siri using Homebridge. And also described the rake, which I managed to step on.
Winter. Cold. Darkness. Getting up in the morning is hard.
They said that dawn lighting can help wake up.
So what? I took a nightlight from Xiaomi, or rather Yeelight . It was played a little, was upset from crookedly working software. But bright and colorful lighting added positive, the workplace has changed, it became more comfortable.
Looked through the catalog, found the LED strip with the ability to connect via Wi-Fi. Compared with analogues, turned out to be brighter and cheaper. I take!
And again problems with software. The device falls off, you have to reconnect at the entrance to the program. Grouping also did not always work correctly, and reaching out to the phone for setting and turning on is not a very gratifying exercise. Search and buy additional hubs did not, postponed everything until better times.
For their birthday, colleagues presented a “raspberry”, in common parlor - Raspberry Pi 3 Model B. It is important that the device has both Wi-Fi and Bluetooth module. Since I already wrote and studied software for working with HomeKit devices, I remembered that it is possible to include unsupported devices in this infrastructure via a homebridge server written in NodeJS, which emulates the HomeKit API.
Step 1. Install the OS
We start with the installation of the OS. I chose Raspbian as the distribution.
- We take a memory card of 8 GB or more (I got 16 GB from% # & @).
- Format and copy the installer
At this stage, the first problems arose. Files for some reason were not copied to the card correctly, although the formatting with the help of the proprietary utility SD Memory Card Formatter was successful. I was going to take the card to the store and take another one, but decided to try an external card reader before that. And, lo and behold - it all worked!
It turned out that the problem was in Mac mini, which did not support SDHC format cards.
- We insert the card into the “raspberry”, connect the keyboard, mouse and monitor via HDMI and turn on the power.
The installer is very simple, and the download is quite fast. If you have any problems, check out the official documentation .
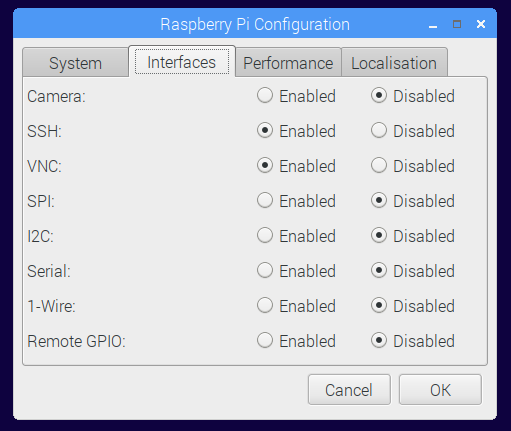
Step 2. Initial OS Setup
- We change passwords and set up accounts.
For remote work with Rasperry Pi
- We include access on SSH and VNC . It is possible through a graphical interface.
Initially, the “Malinka” was powered from a USB port, but at the same time, an indication on the screen that the power was definitely not enough. Charger from iPhone + micro USB-cord solved this problem.
All manipulations were carried out in the office due to the lack of a monitor for the initial setup of the house.
By the weekend, the “raspberry” got to the apartment, and her hands were already itching to quickly connect smart lights.
Launched Raspberry ...
Attempting to connect via VNC ... Black screen .
Attempting to connect via SSH ... No reaction .
Waiting for Monday and returning to work. I connect the keyboard, mouse and monitor.
The system does not age. The problem may have arisen due to damage to the SD card or divine intervention.
Reinstalled the system. I remembered the old quote: “People are divided into two categories:
those who still do not make backups, and those who already make them, ” and made a willful decision.
Step 0. Make a backup
There are many ways. I chose the most, in my opinion, simple. Full copy of the SD card image to a USB flash drive.
Create an image
- Find the SD card in the list:
diskutil list

- Save the image to disk:
sudo dd if=/dev/disk2 of=~/Desktop/raspberrypi.dmg
Restore the image
Find the SD card in the list:
diskutil listUnmount the SD card:
diskutil unmountDisk /dev/disk2Format the card. It is possible through the utility, it is possible through the Terminal:
sudo newfs_msdos -F 16 /dev/disk2- Restore the previously saved image:
sudo dd if=~/Desktop/raspberrypi.dmg of=/dev/disk2
The disadvantage is a long time to restore the image. It depends on the size of the card, its speed and card reader characteristics. My process took about 4 hours.
The advantage is simplicity and reliability.
By the way, you can try to speed up this process. Detailed instructions on
StackExchange .
After a couple of days, I had to restore from backup again. When performing any operation, the error "segmentation fault" occurred. Most likely, the problem was due to a faulty memory card. I got a new one, this time from Transcend, so far the flight is normal.
Step 3. Installing the components
We start with the components that will be needed to start the server:
As always, we start by updating the system:
sudo apt-get update sudo apt-get upgrade After the update, check version g ++:
g++ -v I had gcc version 6.3.0 , to install homebridge I need version 4.9+.
Next, install NodeJS. I put version 9:
curl -sL https://deb.nodesource.com/setup_9.x | sudo -E bash - sudo apt-get install -y nodejs The next step is to install Avahi, the library for working with Apple Bonjour services:
sudo apt-get install libavahi-compat-libdnssd-dev At this stage of preliminary preparation is completed.
Step 4. Install homebridge
Now you can follow the main instructions in the project repository .
With the help of the command npm install -g homebridge, the installation was not possible, therefore we follow the instructions of the author of the project and run the installer with sudo and the -g flag --unsafe-perm homebridge :
sudo npm install -g --unsafe-perm homebridge Homebridge is installed. If you have any problems, you can read
wiki
We proceed to setting up and connecting devices:
- Xiaomi Yeelight Smart Light Strip
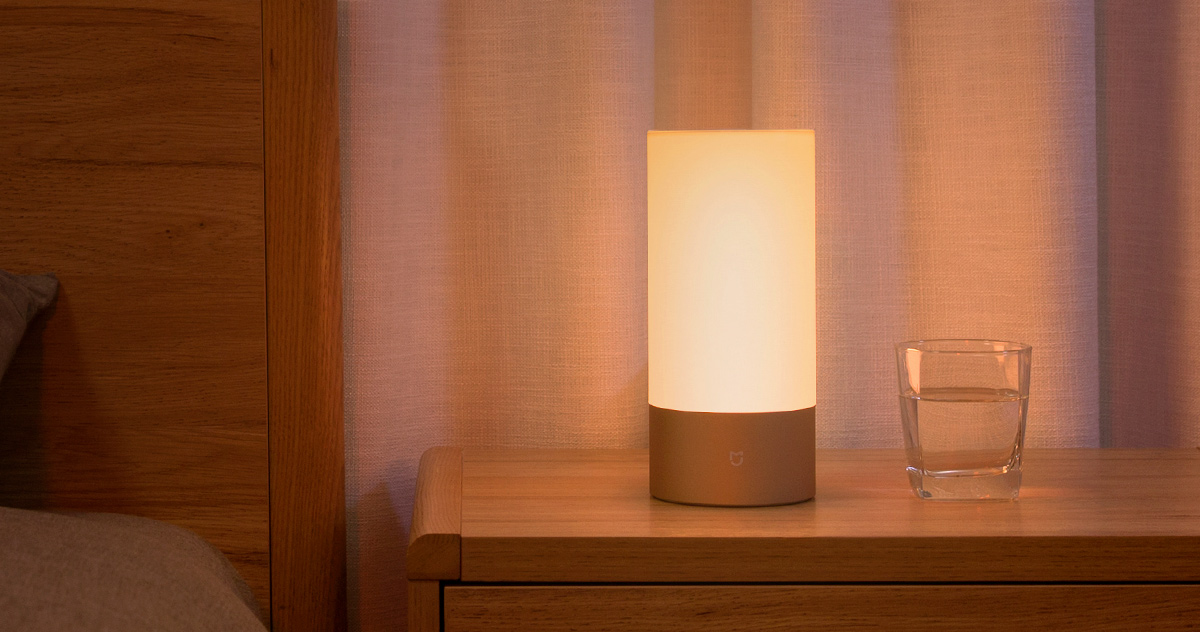
- Xiaomi Yeelight Bedside Lamp
Step 5. Yeelight Smart Light Strip

Light Strip connects via WiFi, its setup is easier. Start by installing the plugin :
sudo npm install -g homebridge-re-yeelight sudo npm install -g miio@0.14.1 We limit the version of miio to 0.14.1, with a newer plugin it will not work at the moment.
Now we are searching for devices on the local network. Before this, of course, you need to connect Yeelight Smart Light Strip over WiFi:
miio --discover We get about the following output to the console:
INFO Discovering devices. Press Ctrl+C to stop. Device ID: xxxxxxxx Model info: yeelink.light.strip1 Address: 192.168.1.xxx Token: xxxxxxxxxxxxxxxxxxxxxxxxxxxxxxxx via auto-token Support: At least basic Write on a piece of paper and proceed to the configuration file configuration.
Step 6. Creating config.json
Create a configuration file. Go to the ~ / .homebridge directory :
touch config.json nano config.json Add the hub and devices we want to manage to the configuration file. Usually configurations for specific devices are listed on the page with the plugin project, in the config.json file.
In the config, we add the following information about homebridge and the device that we received in the previous step.
{ "bridge": { "name": "Yeebridge", "username": "18:00:27:40:BC:1B", "port": 51825, "pin": "031-45-154" }, "platforms": [ { "platform": "ReYeelightPlatform", "deviceCfgs": [{ "type": "ColorLEDStrip", "ip": "192.168.1.253", "token": "5d0b94f872b4372164b6e61d472d424b", "Name": "LED Strip", "updatetimer": true, "interval": 5 }] } ] } - name - the name under which the hub is displayed in the Home application.
- pin - pin code, you will need to connect homebridge to the Home application.
Next is a description of the connected platforms and accessories.
As a platform for WiFi devices from Yeelight, we use ReYeelightPlatform.
Device configuration for this platform:
- type - usually on the project page, types are indicated for each supported device.
- ip and token - received in the previous step.
- name - the name to display in the Home application.
Step 7. Connecting Xiaomi Yeelight Bedside Lamp
The device is connected via BLE. That is, you need an installed Bluetooth module with BLE support. To work with such devices, another platform is needed - ReYeelightBLEPlatform
Install libraries to work with the Bluetooth stack:
sudo apt-get install libbluetooth-dev libudev-dev Find the folder with the installed node modules:
npm -g root I found it at / usr / lib / node_modules . Install the necessary rights and perform the installation.
If you do not install the permissions, but perform the installation under sudo, problems may arise in the future:
sudo chown -R $(whoami) /usr/lib/node_modules/ npm install noble sudo apt-get install libcap2-bin sudo setcap cap_net_raw+eip $(eval readlink -f `which node`) sudo hciconfig hci0 up Now install the HomeBridge plugin to support Xiaomi Yeelight Bedside Lamp :
sudo npm install -g homebridge-re-yeelight-ble Be careful when installing other modules that control devices via Bluetooth, compatibility issues may occur. For example, for a long time I could not figure out why my lamp was constantly turning off. It turned out that the problem is in the established homebridge-yeelight . After its removal, normal operation was restored. You may also need this command:
sudo npm uninstall -g homebridge-yeelight We are looking for the device address using:
sudo hcitool -i hci0 lescan The output might look something like this:
LE Scan ... 8C:26:A6:3D:67:40 (unknown) 8C:26:A6:3D:67:40 (unknown) FF:B6:36:78:96:A6 RK-M171S F6:24:41:E8:6B:14 XMCTD_ F6:24:41:E8:6B:14 XMCTD_ 76:79:01:46:86:5A (unknown) 76:79:01:46:86:5A (unknown) D6:64:11:49:E6:8D RK-G200S F6:BC:36:68:96:A3 (unknown) D6:66:11:49:E6:8D (unknown) The desired device is marked as XMCTD_ .
In my case, F6: 24: 41: E8: 6B: 14 XMCTD_
Add a new ReYeelightBLEPlatform platform and the required device with the specified address to config.json .
The final config.json will look something like this:
{ "bridge": { "name": "Yeebridge", "username": "18:00:27:40:BC:1B", "port": 51825, "pin": "031-45-154" }, "platforms": [ { "platform": "ReYeelightBLEPlatform", "defaultValue": { "F6:24:41:E8:6B:14": "Bedside Lamp" } }, { "platform": "ReYeelightPlatform", "deviceCfgs": [{ "type": "ColorLEDStrip", "ip": "192.168.1.253", "token": "560696f676b4672164b6e61d472d424b", "Name": "LED Strip", "updatetimer": true, "interval": 5 }] } ] } Step 8. Start homebridge
Run Homebridge for verification using the homebridge command in the console.
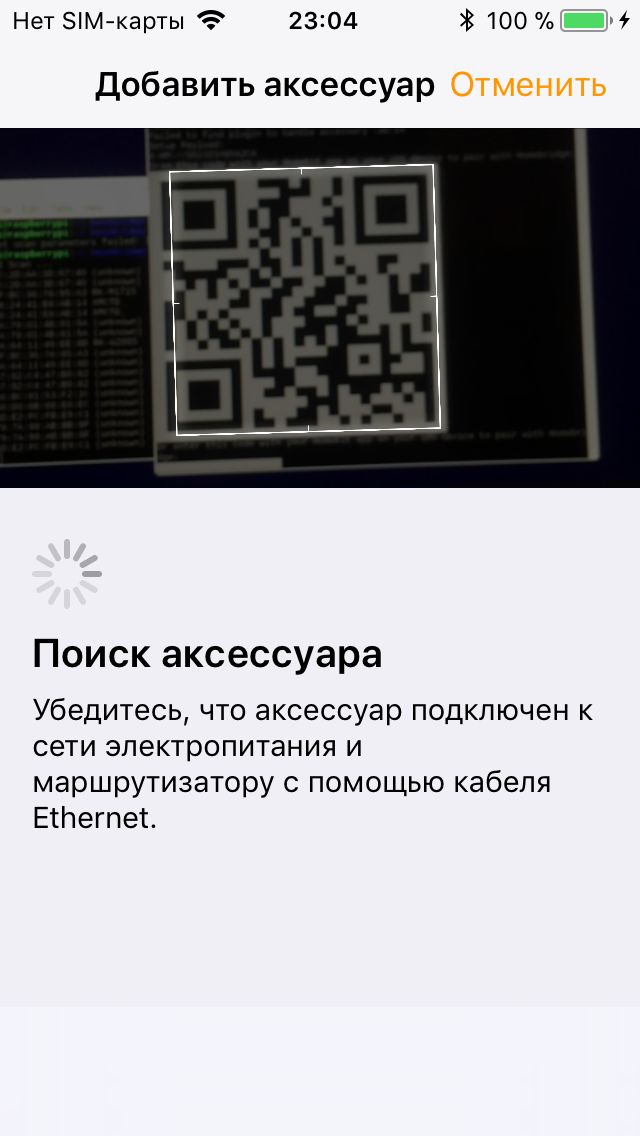
A QR code appears on the screen to add the hub to the Home application. And just below - the PIN code from the config.json file, it is used for manual connection.
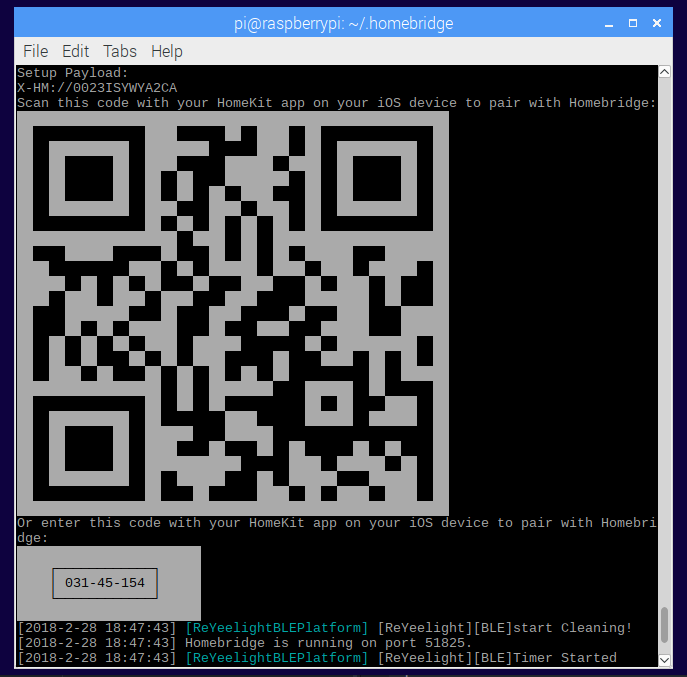
If you see the treasured string [ReYeelight] [BLE] Timer Started , then most likely you have configured the BLE device correctly.
Your Xiaomi Yeelight Bedside Lamp will flash, the connection is established. You must confirm it by pressing the MODE button on the lamp.
At this stage, we have a configured hub and 2 devices connected to it.
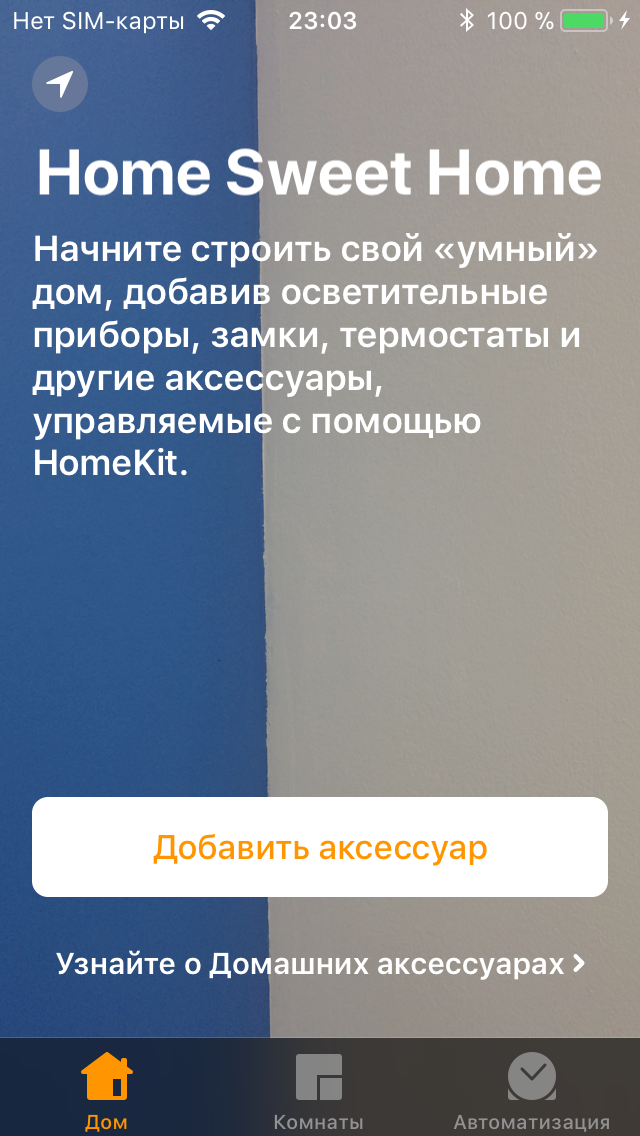
- Run the application Home.
- Click add accessory.
- We scan the QR code and agree to connect a non-certified device.
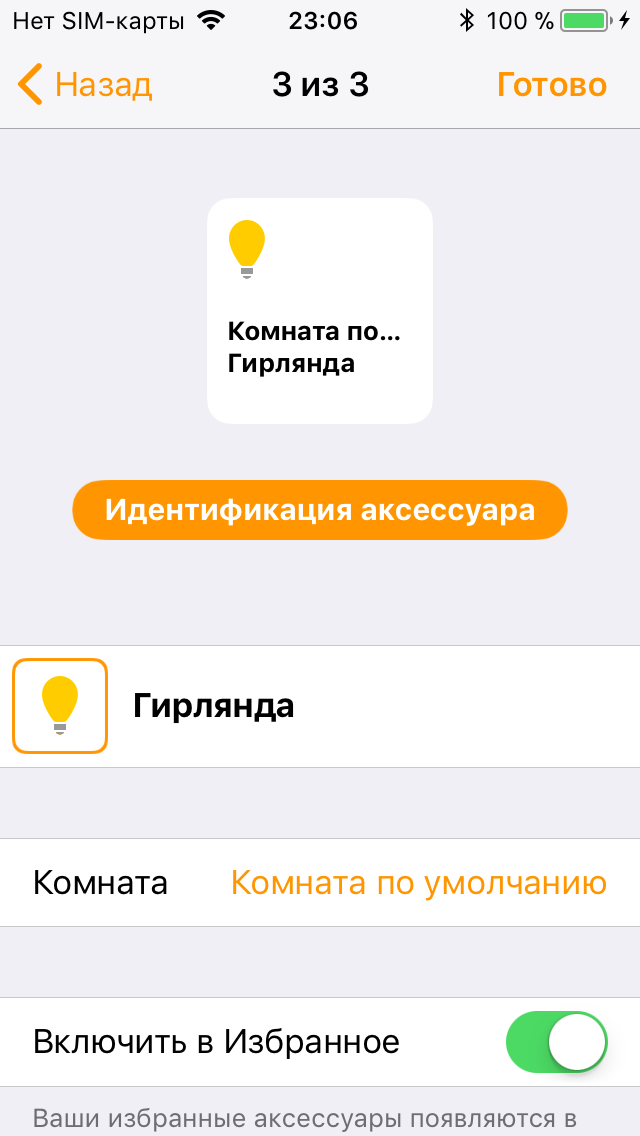
home
For each of the connected devices, you can choose the name by which it can be accessed via Siri, and the room in which the device is located.
When configuring / reconfiguring devices, there may be a problem with the re-addition of homebridge to the Home application. For its elimination we perform the following operations in the folder with homebridge settings.
- Stop working homebridge .
- Delete the accessories and persist catalogs:
rm -r accessories rm -r persist Start homebridge and add the hub to the Home application again.
Read more about customizing accessories, rooms, and scripts on the Apple website.
Step 9. Start Homebridge when booting the Raspberry Pi
After the device reboots, you must automatically resume Homebridge. To do this, run as a service .
We load two files, homebridge and homebridge.service by reference . The homebridge file is placed in / etc / default . The homebridge.service file is placed in / etc / systemd / system .
We make changes to the homebridge.service file. ExecStart = / usr / local / bin / homebridge path $ HOMEBRIDGE_OPTS change to ExecStart = / usr / bin / homebridge $ HOMEBRIDGE_OPTS .
Add a user under which the service will run:
sudo useradd --system homebridge Create a folder to store the homebridge configuration, copy configs and set permissions:
sudo mkdir /var/homebridge sudo cp ~/.homebridge/config.json /var/homebridge/ sudo cp -r ~/.homebridge/persist /var/homebridge sudo cp -r ~/.homebridge/accessories /var/homebridge We start the service:
sudo systemctl daemon-reload sudo systemctl enable homebridge sudo systemctl start homebridge Checking its status:
systemctl status homebridge Step 10. Siri. Translation difficulties
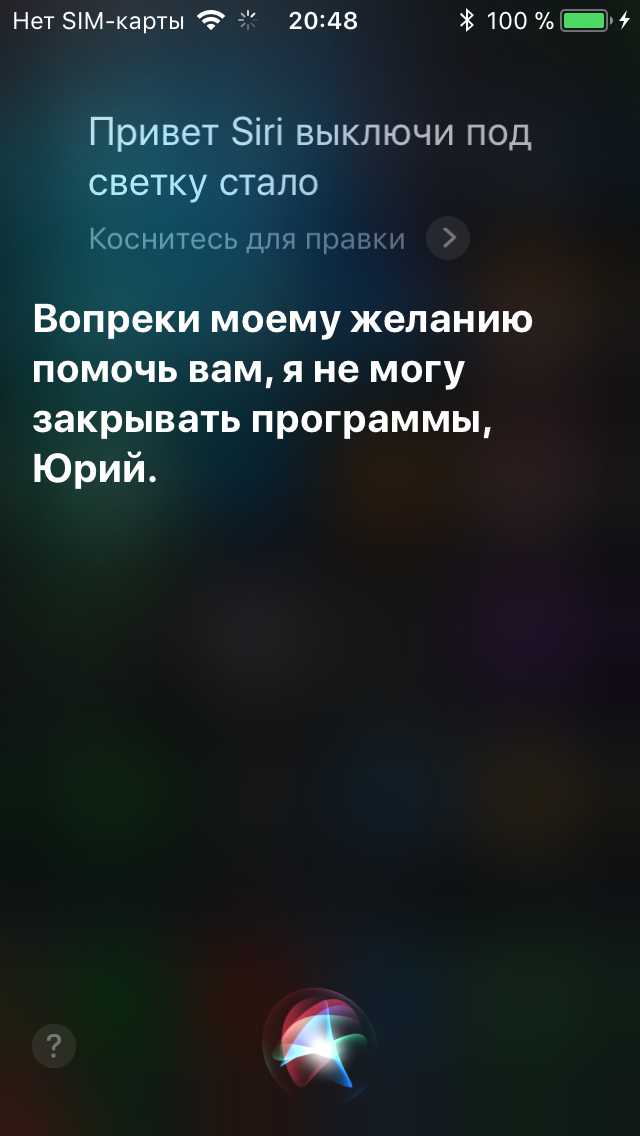
Siri is not the easiest girl to talk to.
For example, LED strip should not be called "Table lighting." Siri is trying to perform "Under the light was," while responding that she can not close the program.
Also, do not call the fixture "table lamp". If you say “Turn on the desk lamp,” all the lights in the room turn on. When executing the “Turn off desk lamp” command, only the desk lamp is turned off. Most likely, this is the name for the group, but the absence of sane Siri documentation doesn’t help in understanding this.
Changing the color of the lighting is also not a trivial task. For example, in English the team sounds and is pronounced very simply: “Change light color to green”. In Russian we get: "Set the color of light to green."
Change or change , instead install does not work. Instead of “color of light”, Siri constantly recognizes a command as “light of light” or “color of color”. It's time for a speech therapist. It’s easier to change the words in this phrase, then Siri will have fewer errors. As a result, the "stop phrase" sounds like "Set the Light Color to Blue." Yes, Light in the request will be with a capital letter!

Small Siri Cheat Sheet:
, Siri, . , Siri, . , Siri, 50%. , Siri, . A small demo for last.
Conclusion
For 2 weeks the server has been working steadily and is pleased with the ability to simply manage devices through the Home application. It is a bit frustrating that work on plug-ins is being abandoned by developers, but the source code is on github, and Homebridge has documentation that describes the process of creating your own plug-in. In the future, I plan to add new devices and sensors to Home, as well as automate the process of starting devices at the entrance to the apartment. If you have any questions or suggestions, please write in the comments, I will be glad to help and answer your questions.
All good and warm spring! ^ _ ^
')
Source: https://habr.com/ru/post/350312/
All Articles