Vue.js + Asp.NETCore + TypeScript application without Webpack

Create a modular application Vue.js + Asp.NETCore + TypeScript on Visual Studio 2017 without using Webpack or Broserify. And first we do a project using Webpack, and then without it. To feel what happiness we refuse.
The material is designed for those able to cope with VS2017 and familiar with the progressive JavaScript framework Vue.js.
The purpose of replacing the build system is to reduce the starting barrier for mastering Vue.js by reducing the number of tools used to create modern web applications.
')
In addition, the process of debugging applications is greatly simplified, the time for reassembling the application is greatly reduced, and for some of the work scenarios, reassembly is not required at all.
Content
Introduction
Project TryVueWebpack
- Creation of a starting pig
- Adding software code
- Adding configuration files
- Build and run the application
Project TryVue
- Creation of a starting pig
- Copying program code
- Adding configuration files and compiling
- Building templates and CSS
- Creating index.html and launching the application
Conclusion
Introduction
Webpack is a very powerful and useful tool that allows you to do almost everything. You, sooner or later, will have to master it, if you are going to engage in web development seriously.
But when you study Vue.js at the same time as TypeScript, you really want to remove unnecessary intermediaries. At least with the development of new technologies and simple tasks. It is difficult to understand with TypeScript, when the resulting output code is the result of digesting a bunch of filters and Webpack converters.
"Before uniting, and in order to unite, we must first decisively and definitely separate from each other." IN AND. LeninIn our TryVue project without a Webpack: most of the work on assembling and establishing relationships between modules will be done by a regular TypeScript compiler, loading modules at runtime - System.js, concatenation of templates and CSS files - Bundler & Minifier (almost regular extension to VS2017).
The functions of each participant in the application's assembly procedure are clearly defined, and the artifacts are easy to see and make sure that what you received meets your expectations.
First we build a modular application using a Webpack. Then we translate the resulting application from the Webpack to the assembly using the standard TypeScript + Bundler & Minifier compiler.
To illustrate how to get rid of Webpack, an Asp.Net Core solution was prepared with two projects: TryVueWebpack, TryVue (gihub sources). The structure of the TryVueWebpack project is shown in the screenshot; you will get something similar after performing the steps described here.
hidden screenshot
Project TryVueWebpack
When writing this tutorial, we used the TypeScript Vue Starter example from Microsoft TypeScript developers. The source code of the example is restructured and turned into an Asp.Net Core project on Visual Studio 2017.
Creating a starting pig
To begin with we create starting preparation for application. As a starting point, we use the ASP.NET Core Web Application project using the “Blank” template.
hidden screenshot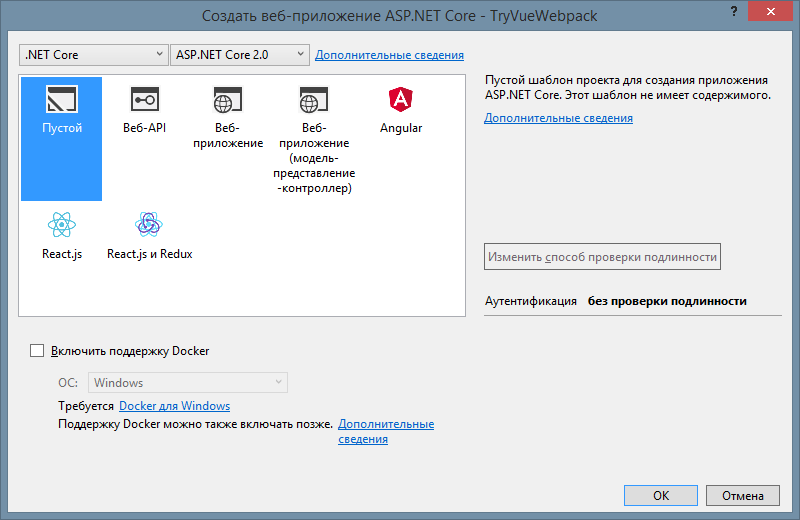
In the new project, we create the wwwroot \ index.html start page, in which we define the place where the Vue.js application will be deployed, as well as the downloadable js file.
hidden text fragment wwwroot / index.html
<!-- wwwroot/index.html--> ... <body> <div id="app-root">loading..</div> <script src="./dist/build.js"></script> </body> Then we open the index.html page when launching the Asp.Net Core application by changing the class text in the Startup.cs file.
hidden text fragment Startup.cs
// Startup.cs ... public class Startup { public void ConfigureServices(IServiceCollection services) { } public void Configure(IApplicationBuilder app, IHostingEnvironment env) { app.UseDefaultFiles(); app.UseStaticFiles(); } } Now you can check that the application is almost running (VS2017 will launch IIS Express, “loading ...” will be displayed in the browser).
Add software code
Now we add to the application vue-components and other necessary code for compiling and running the application.
In the ClientApp \ components directory we create 6 files for two vue components. For each component, we put the CSS styles and TypeScript code into separate files, and in the vue file we leave only the template (plus links to css, ts). Single-file Vue components will not be used in their pure form (so as not to install a plugin for syntax highlighting, etc.).
hidden text ClientApp / components / Hello
<!-- ClientApp/components/Hello.vue --> <template> <div> <div class="greeting">Hello {{name}}{{exclamationMarks}}</div> <button @click="decrement">-</button> <button @click="increment">+</button> </div> </template> <script src="./Hello.ts" lang="ts"></script> <style src="./Hello.css"></style> // ClientApp/components/Hello.ts import Vue from "vue"; export default Vue.extend({ props: ['name', 'initialEnthusiasm'], data() { return { enthusiasm: this.initialEnthusiasm } }, methods: { increment() { this.enthusiasm++; }, decrement() { if (this.enthusiasm > 1) { this.enthusiasm--; } }, }, computed: { exclamationMarks(): string { return Array(this.enthusiasm + 1).join('!'); } } }); /* ClientApp/components/Hello.css */ .greeting { font-size: 20px; } hidden text ClientApp / components / AppHello
<!-- ClientApp/components/AppHello.vue --> <template> <div> Name: <input v-model="name" type="text" /> <HelloComponent :name="name" :initialEnthusiasm="5" /> </div> </template> <script src="./AppHello.ts" lang="ts"></script> <style src="./AppHello.css"></style> // ClientApp/components/AppHello.ts import Vue from "vue"; import HelloComponent from "./Hello.vue"; export default Vue.extend({ data() { return { name: "World" } }, components: { HelloComponent } }); /* ClientApp/components/AppHello.css */ body { background-color: aliceblue; } In the ClientApp directory, we create an index.ts file that is used as an entry point into the application, as well as a vue-stub.ts stub, which will allow the TypeScript compiler to understand what to do with vue modules.
hidden text ClientApp \ index.ts, ClientApp \ vue-stub.ts
// ClientApp/index.ts import Vue from "vue"; import AppHelloComponent from "./components/AppHello.vue"; let v = new Vue({ el: "#app-root", template: '<AppHelloComponent />', //render: h => h(AppHelloComponent), components: { AppHelloComponent } }); // vue-stub.ts declare module "*.vue" { import Vue from "vue"; export default Vue; } Adding configuration files
We define the configuration of NPM (Node.js package manager), TypeScript compiler, and Webpack.
Add the NPM configuration file to the project under the name package.json. If you have enabled the automatic update of NPM packages, please note that the update may take a long time. In addition, there may be a failure when updating. In the event of a failure, you will have to repeat the recovery of the packages, and it is better to close VS2017 and install NPM packages from the command line.
hidden text package.json
{ "version": "1.0.0", "name": "asp.net", "private": true, "scripts": { "build": "webpack" }, "dependencies": { "vue": "^2.5.13" }, "devDependencies": { "css-loader": "^0.28.9", "ts-loader": "^3.5.0", "typescript": "^2.7.2", "vue-loader": "^14.1.1", "vue-template-compiler": "^2.5.13", "webpack": "^3.11.0" } } Add a TypeScript configuration file to the project under the name tsconfig.json, in which the compiler options (compilerOptions) and the directory in which the compiler will look for “its” files (include) are defined.
hidden text tsconfig.json
{ "compilerOptions": { "outDir": "./built/", "sourceMap": true, "strict": true, "module": "es2015", "moduleResolution": "node", "target": "es5" }, "include": [ "./ClientApp/**/*" ] } Add a JavaScript file to the project under the name webpack.config.js, which defines the input / output files and how they are processed.
hidden text webpack.config.js
// webpack.config.js var path = require('path') var webpack = require('webpack') module.exports = { entry: './ClientApp/index.ts', output: { path: path.resolve(__dirname, 'wwwroot/dist'), publicPath: 'wwwroot/dist/', filename: 'build.js' }, module: { rules: [ { test: /\.vue$/, loader: 'vue-loader', options: { loaders: { // Since sass-loader (weirdly) has SCSS as its default parse mode, we map // the "scss" and "sass" values for the lang attribute to the right configs here. // other preprocessors should work out of the box, no loader config like this necessary. 'scss': 'vue-style-loader!css-loader!sass-loader', 'sass': 'vue-style-loader!css-loader!sass-loader?indentedSyntax', } // other vue-loader options go here } }, { test: /\.tsx?$/, loader: 'ts-loader', exclude: /node_modules/, options: { appendTsSuffixTo: [/\.vue$/] } }, { test: /\.(png|jpg|gif|svg)$/, loader: 'file-loader', options: { name: '[name].[ext]?[hash]' } } ] }, resolve: { extensions: ['.ts', '.js', '.vue', '.json'], alias: { 'vue$': 'vue/dist/vue.esm.js' } }, devServer: { historyApiFallback: true, noInfo: true }, performance: { hints: false }, devtool: '#eval-source-map' } if (process.env.NODE_ENV === 'production') { module.exports.devtool = '#source-map' // http://vue-loader.vuejs.org/en/workflow/production.html module.exports.plugins = (module.exports.plugins || []).concat([ new webpack.DefinePlugin({ 'process.env': { NODE_ENV: '"production"' } }), new webpack.optimize.UglifyJsPlugin({ sourceMap: true, compress: { warnings: false } }), new webpack.LoaderOptionsPlugin({ minimize: true }) ]) } Building and running the application
It remains to check the performance of what has been done. Close Visual Studio and use the command line in the project directory to do the following:
npm install npm run build dotnet run In the browser, go to the specified address, for example, localhost : 52643. In your case, the port will probably be different. Should get something like the one shown in the screenshot.

This method of building and running an application is far from the most convenient, but it was easier to describe. You can launch the received application directly from VS2017 (Ctrl + F5) or simply open the wwwroot \ index.html file in the browser.
With the assembly a little more difficult. If you need to frequently run build scripts from package.json, try NPM Task Runner - a fairly popular extension to VS2017.
Those interested can look closely at the file wwwroot \ dist \ build.js. This file I have has a size of 893kB, where the code of our application is assembled together with the code vue.esm.js. And the builder there was buried not only our JavaScript code, but also CSS. If you put a breakpoint in the right place and look like a debugger, you can see that Webpack does a lot of useful work. Provides component initialization based on dependencies, caches calls, etc.
The VS2017 built-in debugger on ts-files will not work if you leave webpack.config.js unchanged. After some research, I found that the debugger starts working if you set the {devtool: '# source-map' option instead of {devtool: '# eval-source-map'}. Since I took this config from a big guru, and I don’t want to figure out what else this option affects, I left the original version.
Project TryVue
Now we are starting to create the Vue.js + Asp.NETCore + TypeScript project without a Webpack.
Creating a starting pig
The procedure for creating a starting stock for the TryVue project is identical to the previously described procedure for the TryVueWebpack project. The start page wwwroot \ index.html will fix later.
Copy code
Completely copy the ClientApp folder from the one made in the previous section of the project. Remove the ClientApp / vue-stub.ts file.
Change the file name extension * .vue -> * .html. Then we delete the <script /> and <style /> tags in these files, set the id values for <template /> (leave the insides of the templates unchanged). As a result, we get the following:
<!-- ClientApp/components/AppHello.html --> <template id="app-hello-template"> .. .. </template> <!-- ClientApp/components/Hello.html --> <template id="hello-template"> .. .. </template> Now we have “flies - separately, cutlets - separately”, in the sense: the templates are separate from the ts-code component. Therefore, in the ts-code of the components themselves, it is necessary to register the identifiers of their templates in the “template” property.
// ClientApp/components/AppHello.ts ... export default Vue.extend({ template: "#app-hello-template", ... }); // ClientApp/Hello.ts ... export default Vue.extend({ template:"#hello-template", ... }); Finally, we remove the traces of single-file vue components by correcting the links in the import directives of the ClientApp / AppHello.ts, ClientApp / index.ts files.
// ClientApp/components/AppHello.ts import Vue from "vue"; import HelloComponent from "./Hello"; // "./Hello.vue" ... // ClientApp/index.ts import Vue from "vue"; import AppHelloComponent from "./components/AppHello"; // "./AppHello.vue" ... Adding configuration files and compiling
Add the NPM configuration file to the project under the name package.json. This time, we only need to specify the Vue package. Usually, new NPM packages are automatically installed after changes to package.json. Otherwise, force the command to restore the packages.
{ "version": "1.0.0", "name": "asp.net", "private": true, "devDependencies": { "vue": "^2.5.13" } } Add a TypeScript configuration file to the project named tsconfig.json and set the necessary parameters.
{ "compilerOptions": { "sourceMap": true, "target": "es5", "strict": true, "module": "system", "outFile": "wwwroot/dist/main.js", "moduleResolution": "node" }, "include": [ "./ClientApp/**/*.ts" ] } Pay attention to the options of the TypeScript compiler {“module”: “system”, “outFile”: “wwwroot / dist / main.js”}. With such settings, the compiler itself will assemble the resulting js-code of all modules into a single file. Moreover, the special wrappers of these modules and the System.js library provide initialization of the modules in the correct order, taking into account mutual dependencies.
It is the “module” option of the TypeScript compiler (with the value of “amd” or “system”) that allow us to abandon the Webpack. Look at the wwwroot / dist / main.js file after compiling the project with the values of {“module”: “amd”}, then {“module”: “system”}.
The file with the TypeScript compiler's output contains a sequence of calls to the define () or System.register () function. In the parameters of the function call you can see the definition of the dependence of the modules from each other.
// wwwroot/dist/main.js {"module": "amd"} define("components/Hello", ["require", "exports", "vue"], function (require, exports, vue_1) { ... }); define("components/AppHello", ["require", "exports", "vue", "components/Hello"], function (require, exports, vue_2, Hello_1) { ... }); define("index", ["require", "exports", "vue", "components/AppHello"], function (require, exports, vue_3, AppHello_1) { ... }); // wwwroot/dist/main.js {"module": "system"} System.register("components/Hello", ["vue"], function (exports_1, context_1) { ... }); System.register("components/AppHello", ["vue", "components/Hello"], function (exports_2, context_2) { ... }); System.register("index", ["vue", "components/AppHello"], function (exports_3, context_3) { ... }); If the TypeScript compiler itself is able to do most of the work, then “what for goat bayan”? After analyzing the compilation results, it should be clear which way to dig to get rid of third-party heavy collectors.
Building templates and CSS
With the assembly of JavaScript in the bandle sorted out. Now we need to make bundles of vue-templates and CSS. To do this, you can act quite stupidly - use the copy command (concatenation is also concatenation in Africa):
copy ClientApp\components\*.css wwwroot\dist\main.css copy ClientApp\components\*.html wwwroot\dist\app-templates.html But, I'm afraid, they will misunderstand me here. It is usually accepted to do such things with the help of Gulp or Grunt. Also a special extension for Visual Studio - Bundler & Minifier. I hope you can handle the installation and use of this extension. Here is the bundleconfig.json for our case:
[ { "outputFileName": "wwwroot/dist/main.css", "inputFiles": [ "ClientApp/**/*.css" ] }, { "outputFileName": "wwwroot/dist/app-templates.html", "inputFiles": [ "ClientApp/**/*.html" ], "minify": { "enabled": false, "renameLocals": false } } ] Creating index.html and launching the application
After doing the above, in the wwwroot \ dist directory you should get three bundles: main.js, main.css, app-templates.html. It remains only to make index.html, which will ensure their use.
We connect the styles by adding a link to main.css in the <head />:
<link rel="stylesheet" href="dist/main.css" type="text/css" /> We load the file with the vue templates from the very beginning of <body />, then we define the point of application of the Vue.js application:
<section id="app-templates"></section> <script src="https://code.jquery.com/jquery-3.2.1.min.js"></script> <script> $.get("dist/app-templates.html").done(function (data) { $('#app-templates').append(data); }); </script> <div id="app-root">loading..</div> We load System.js, which, in turn, loads all the necessary and starts the application.
<script src="https://cdnjs.cloudflare.com/ajax/libs/systemjs/0.20.19/system.src.js"></script> <script> System.config({ map: { "vue": "https://cdn.jsdelivr.net/npm/vue@2.5.13/dist/vue.js" } }); SystemJS.import('dist/main.js').then(function (m) { SystemJS.import('index'); }); </script> Running the resulting application in the Visaul Studio environment is normal (for example: F5). The built-in VS2017 debugger works normally, and you can also set breakpoints in the code of ts-modules.
Conclusion
The refusal of Webpack in the development of Vue.js-applications allowed to develop and debug exclusively in the familiar VS2017 environment. Only TypeScript and a concatenator are involved in getting the bundles.
For comparison, in the case of using Webpack, at least the following are involved in the build procedure: webpack, typescript, ts-loader, css-loader, sass-loader, vue-loader, vue-style-loader, vue-template-compiler, vue- template-es2015-compiler, vue-hot-reload-api. Total node_modules directory: more than 400 packages of about 80 MB.
True, for a production version, it is useful to compile vue templates into render functions, so intermediaries are also required in our case. But, anyway, without a Webpack, they will be much smaller.
When you collect bundles (main.js, main.css, app-temlates.html) without a Webpack, there is an understanding of what and how they are obtained. Therefore, minor edits can be made to the bundles directly (then do not forget to transfer them to the source). Saving time and nerves is very large, especially when prototyping individual components, for experiments and testing ideas.
I hope that you, described here, will benefit.
References:
- Partially used when writing this article: TypeScript Vue Starter .
- When creating KDPV (pictures for attracting attention), the logos of the official sites of the products are used: vuejs.org , docs.microsoft.com , typescriptlang.org , webpack.js.org .
- My example on github .
Update 03/21/2018:
Other articles on this topic:
Source: https://habr.com/ru/post/349880/
All Articles